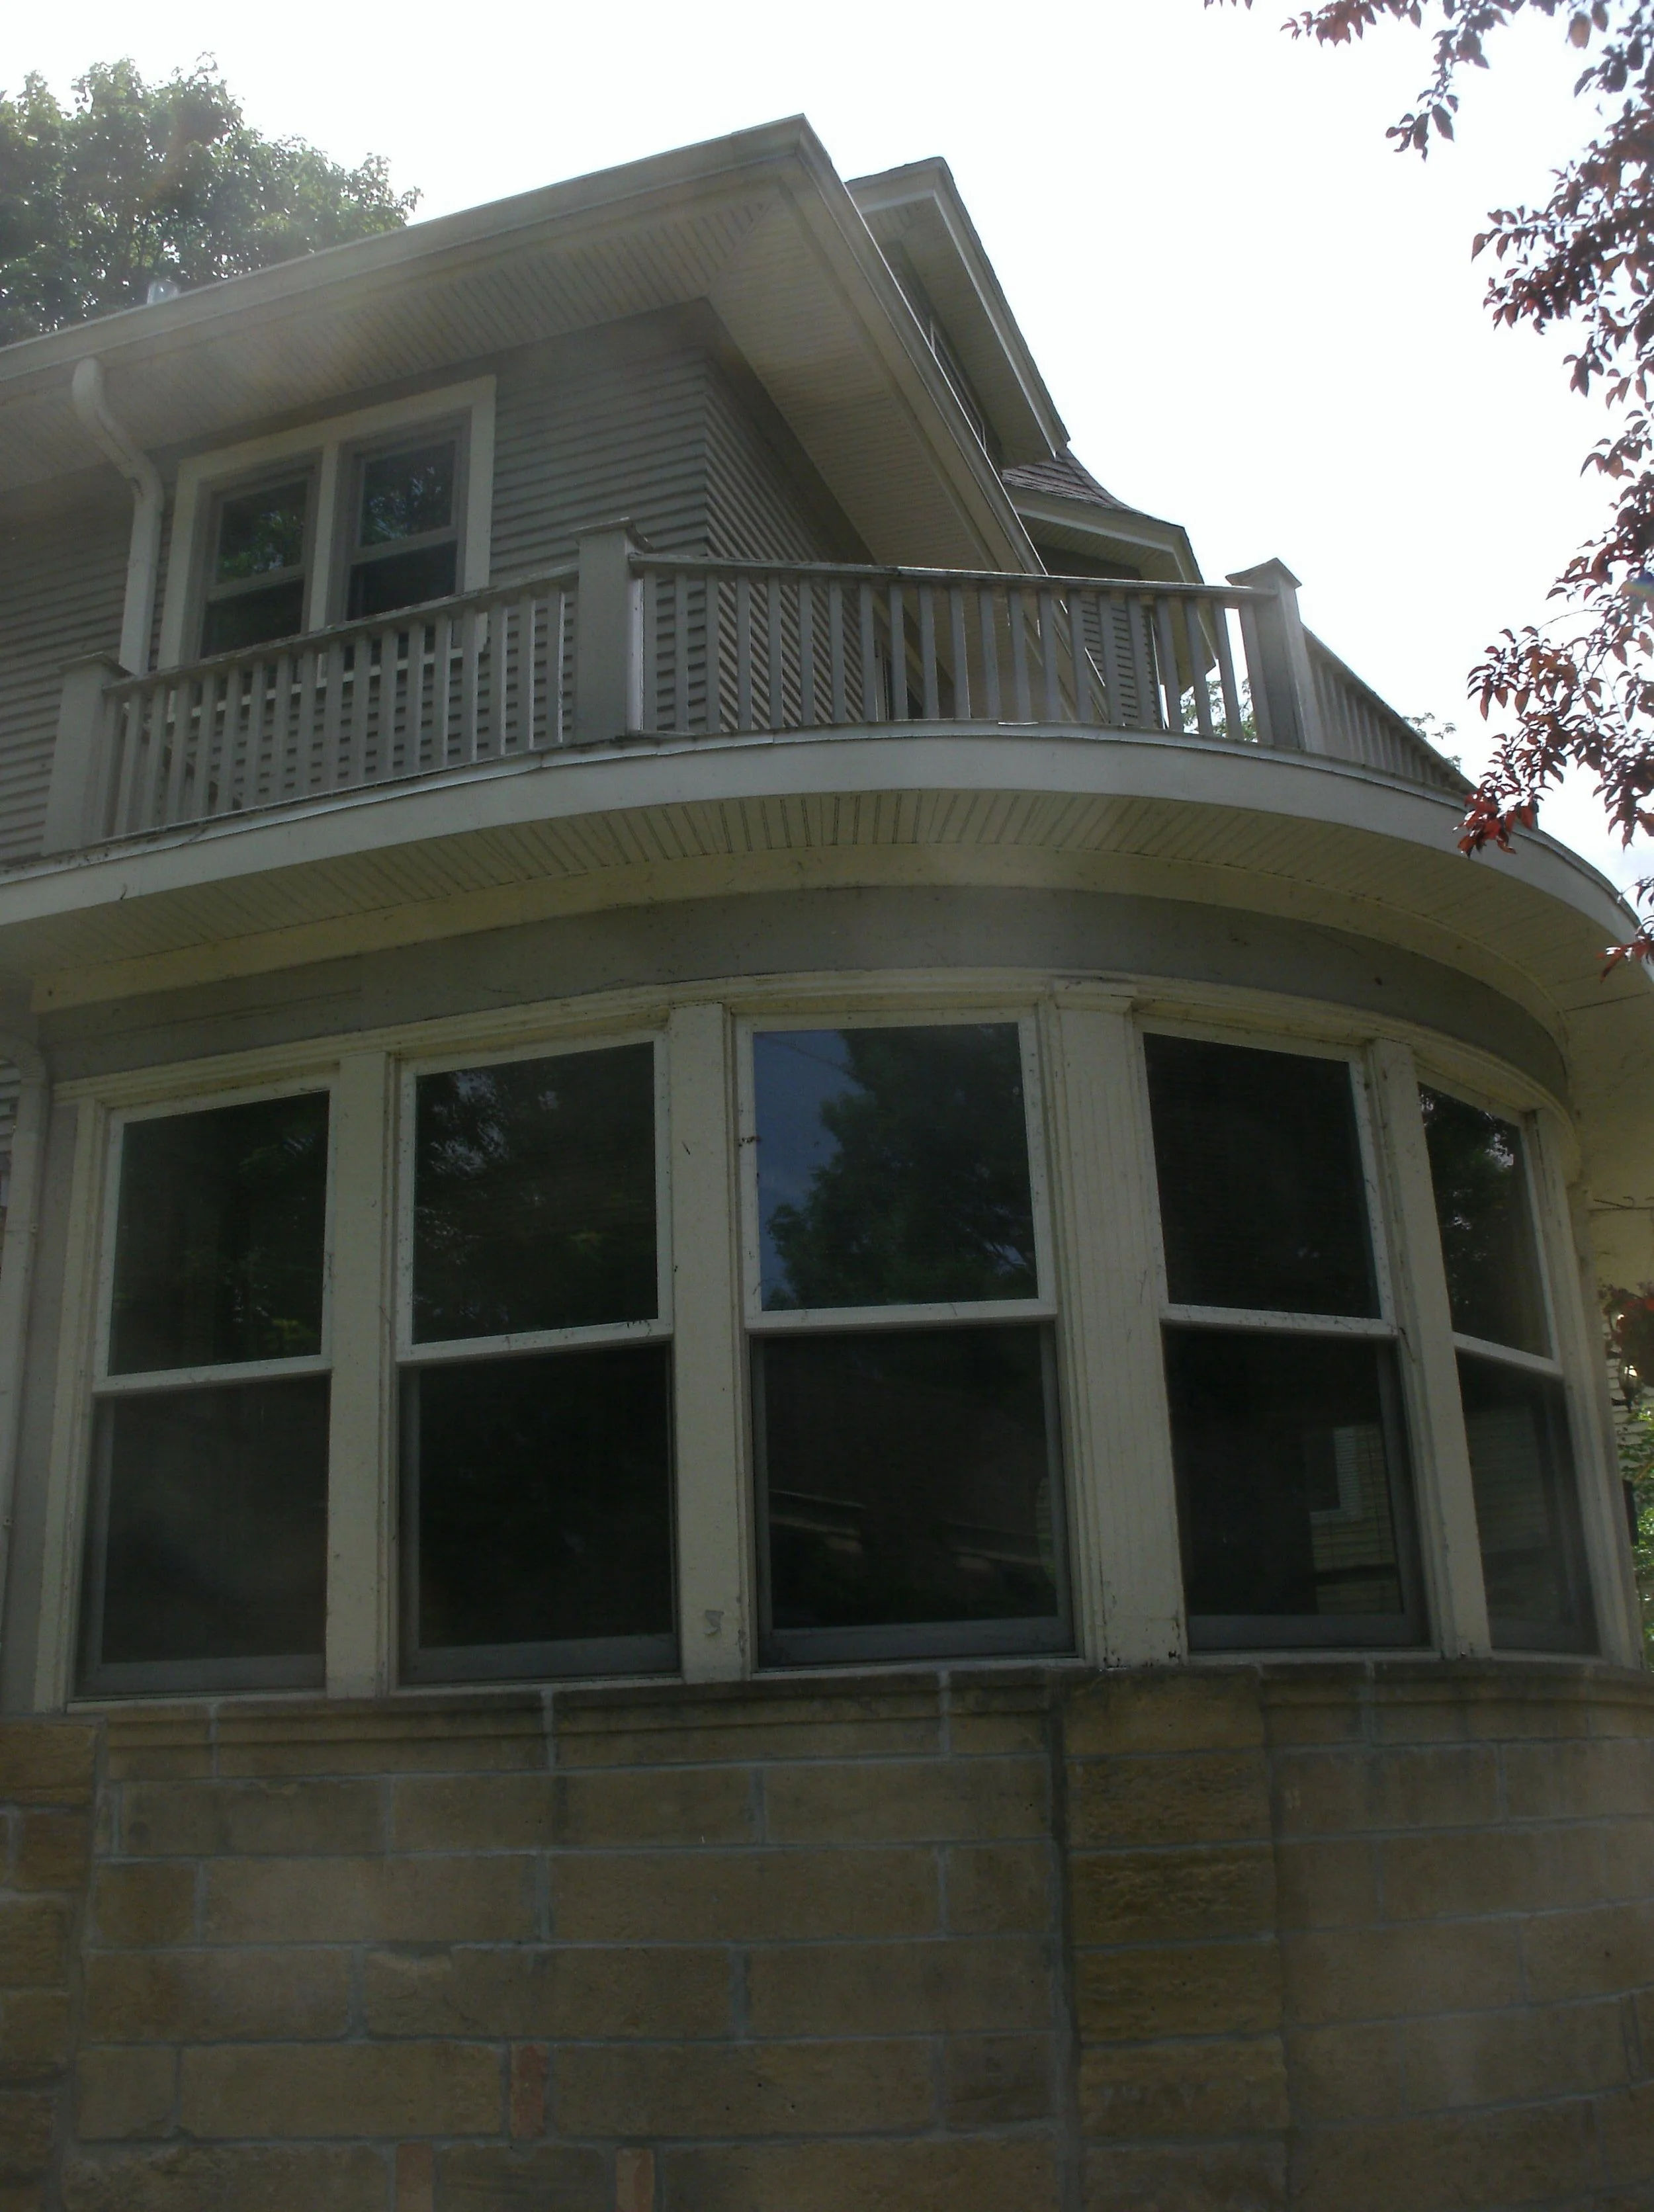
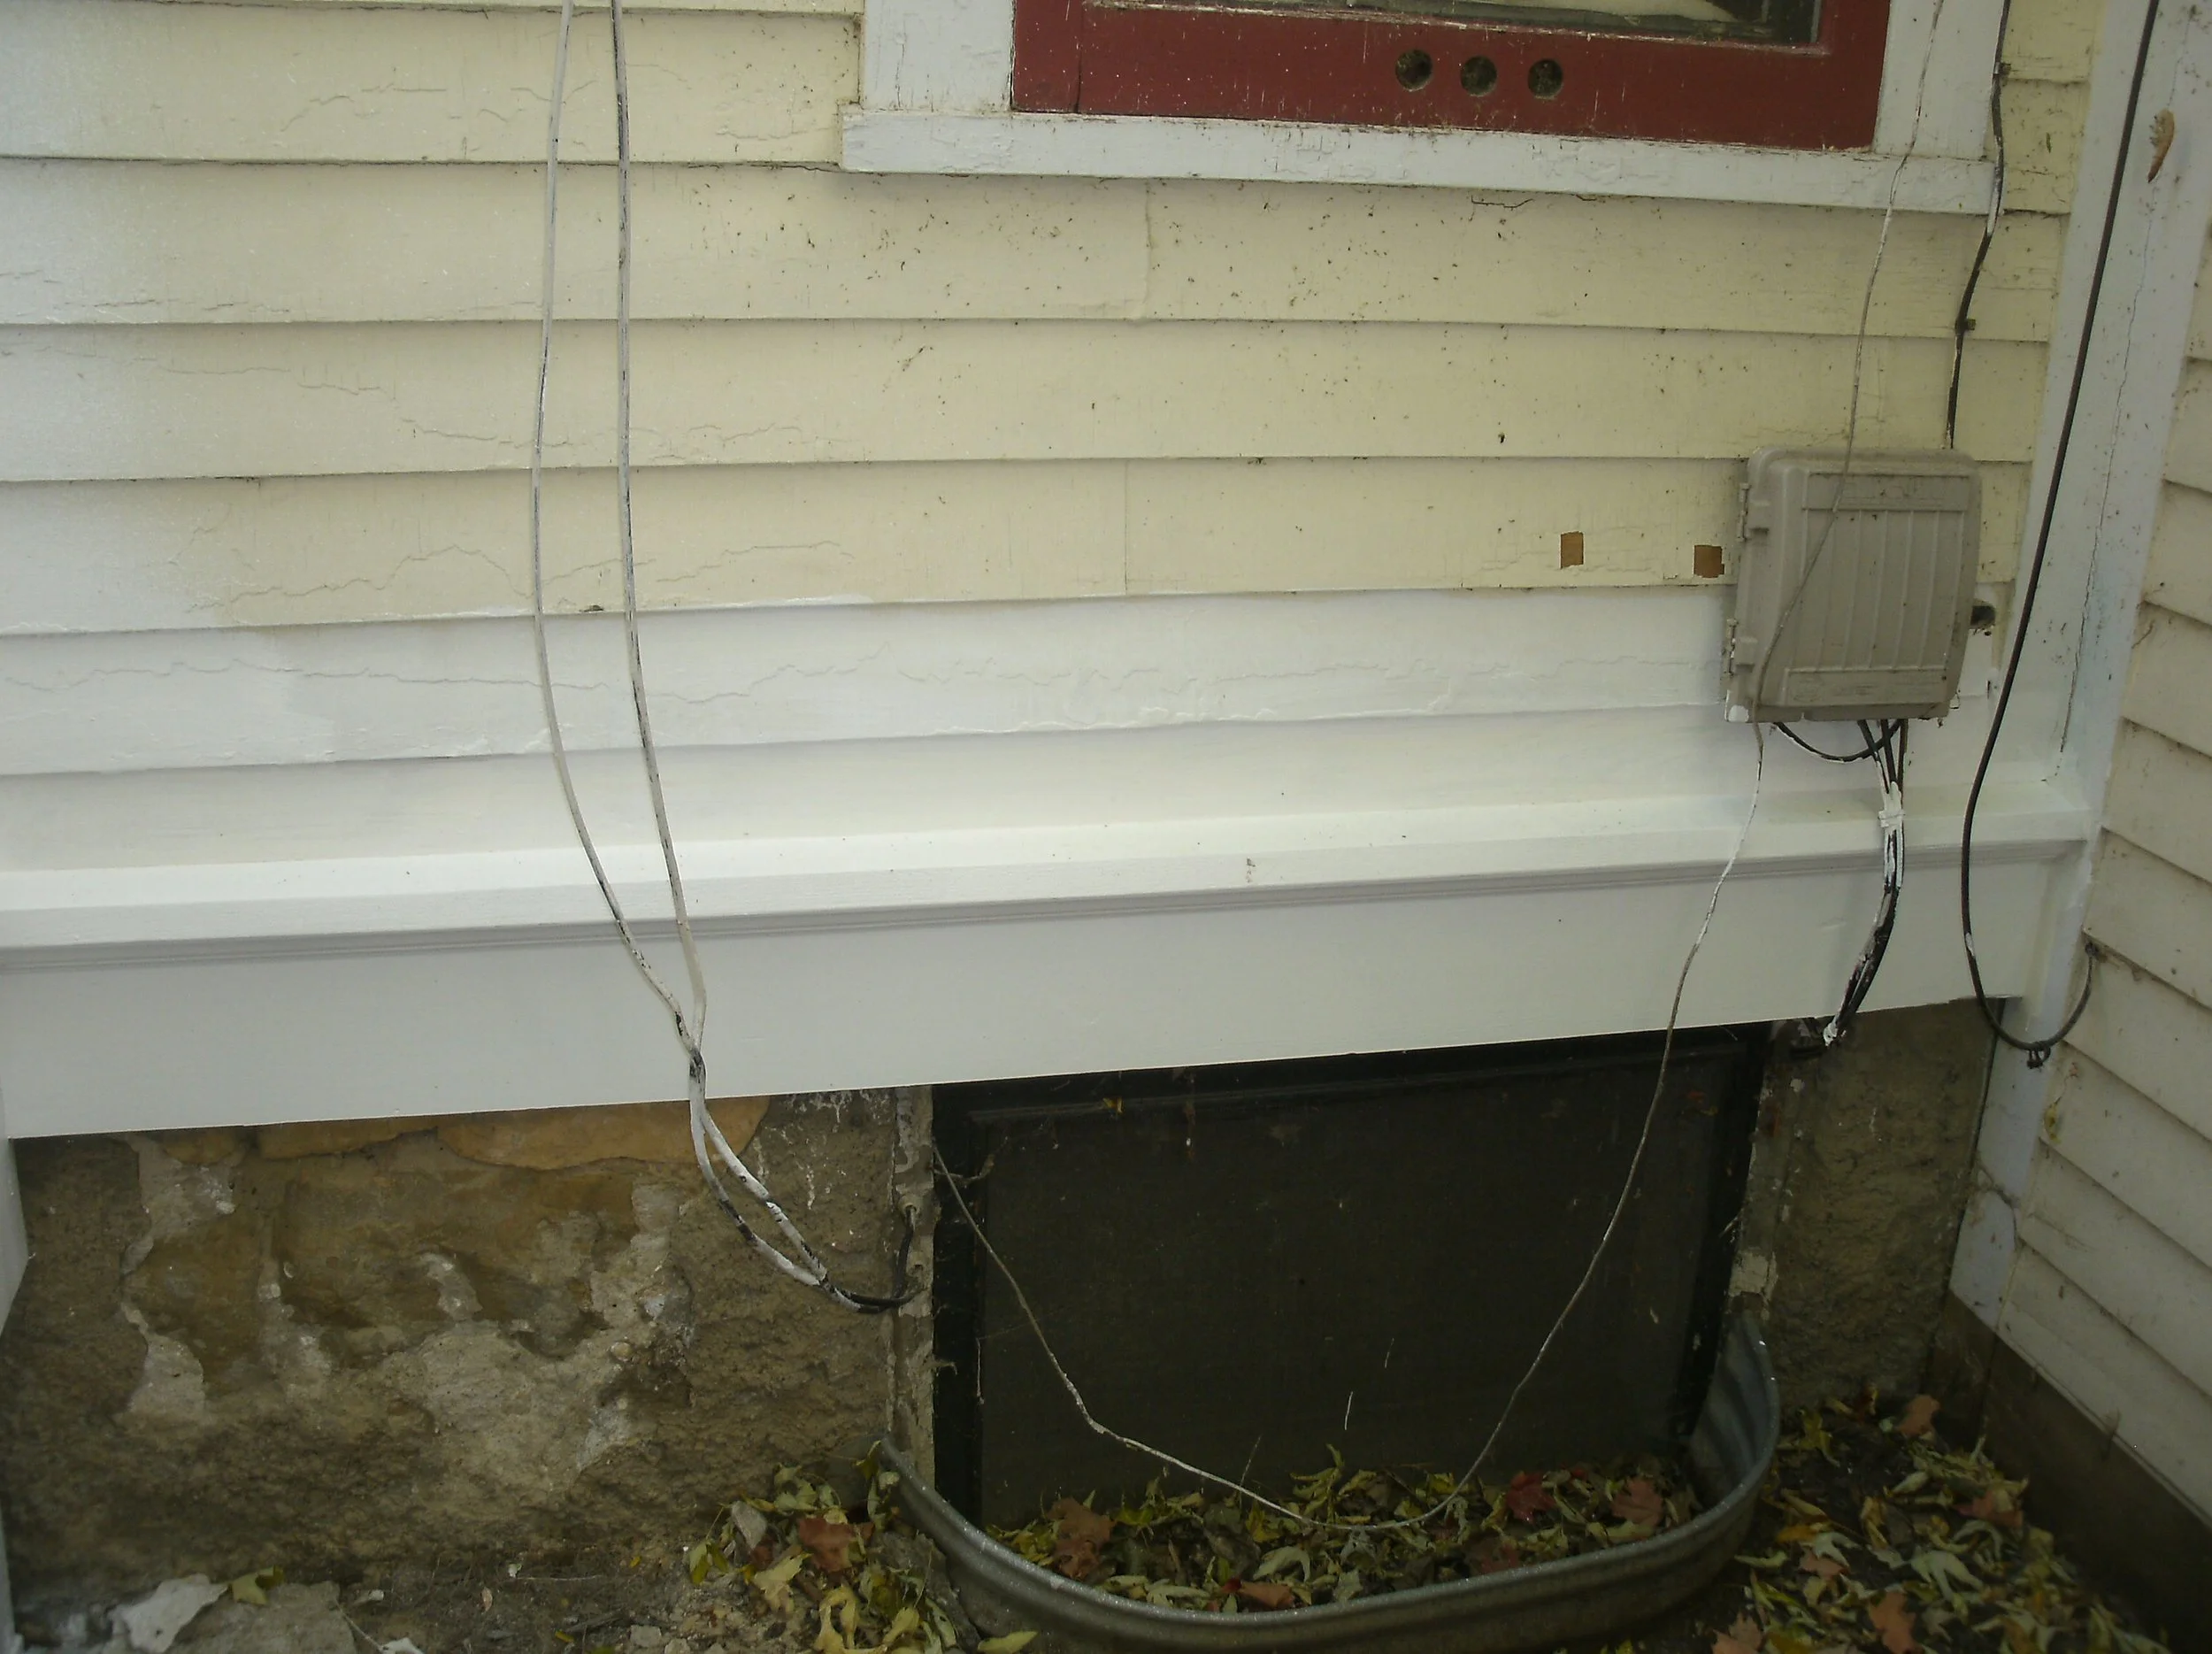
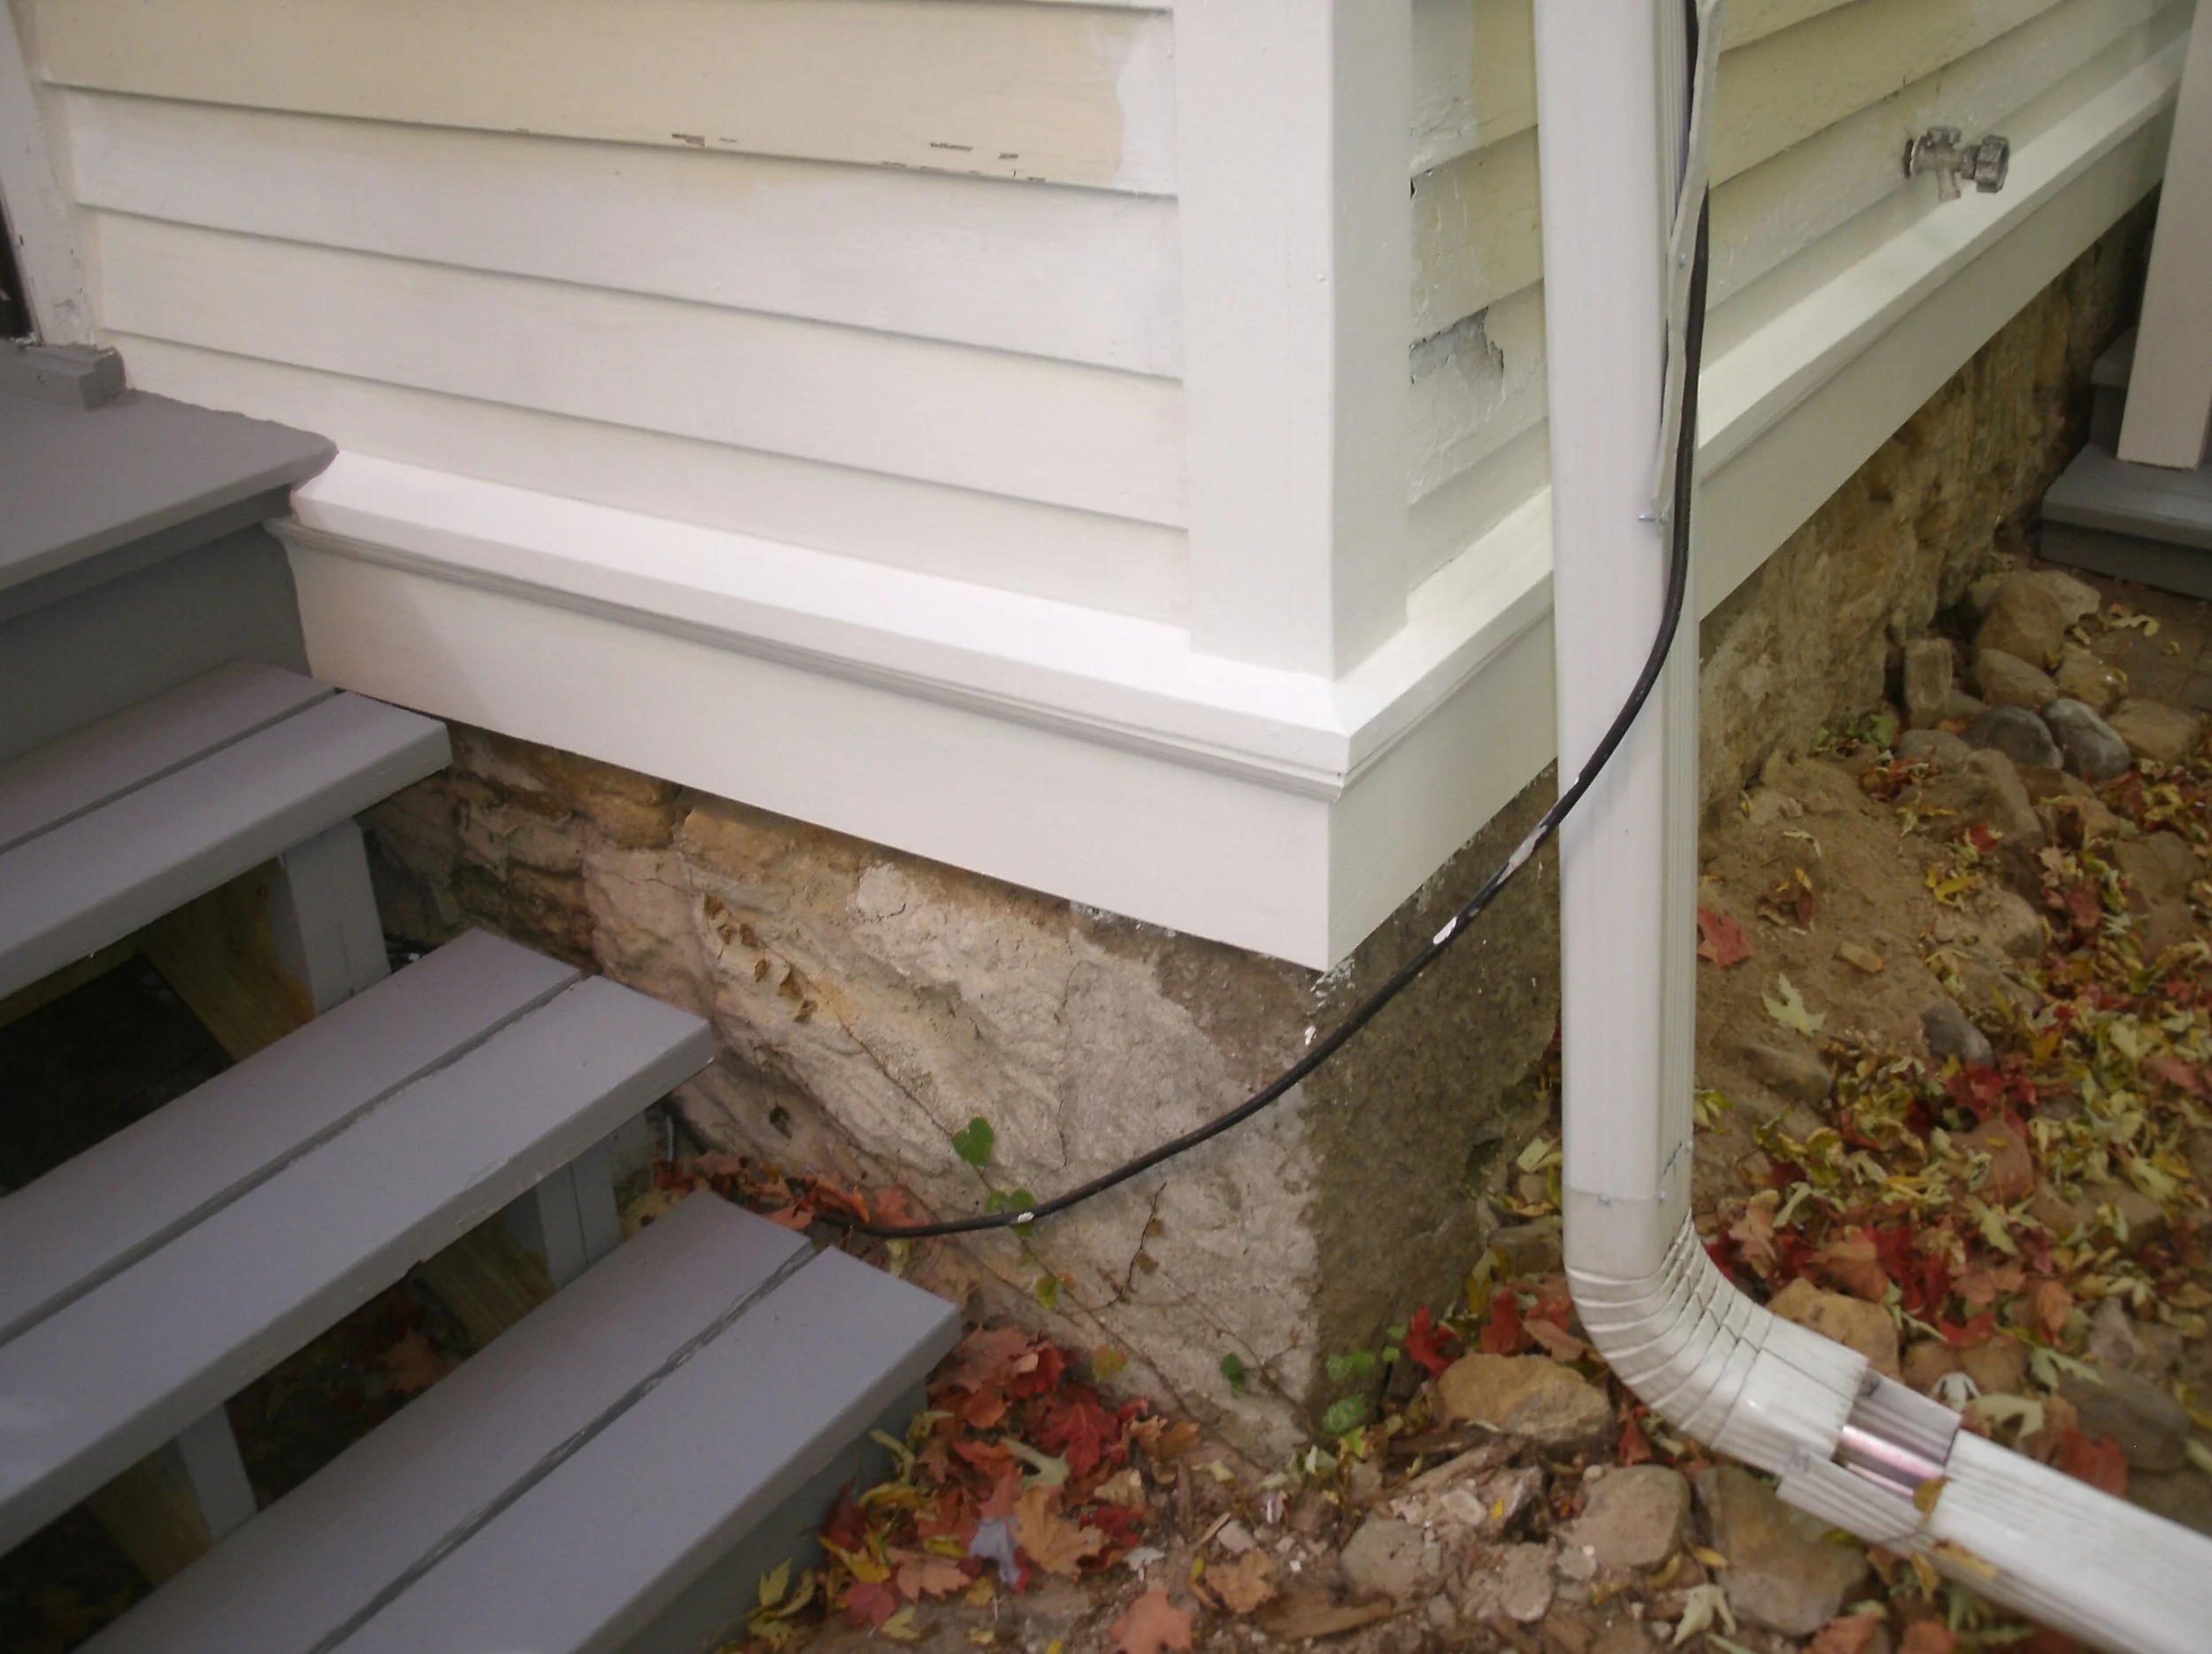
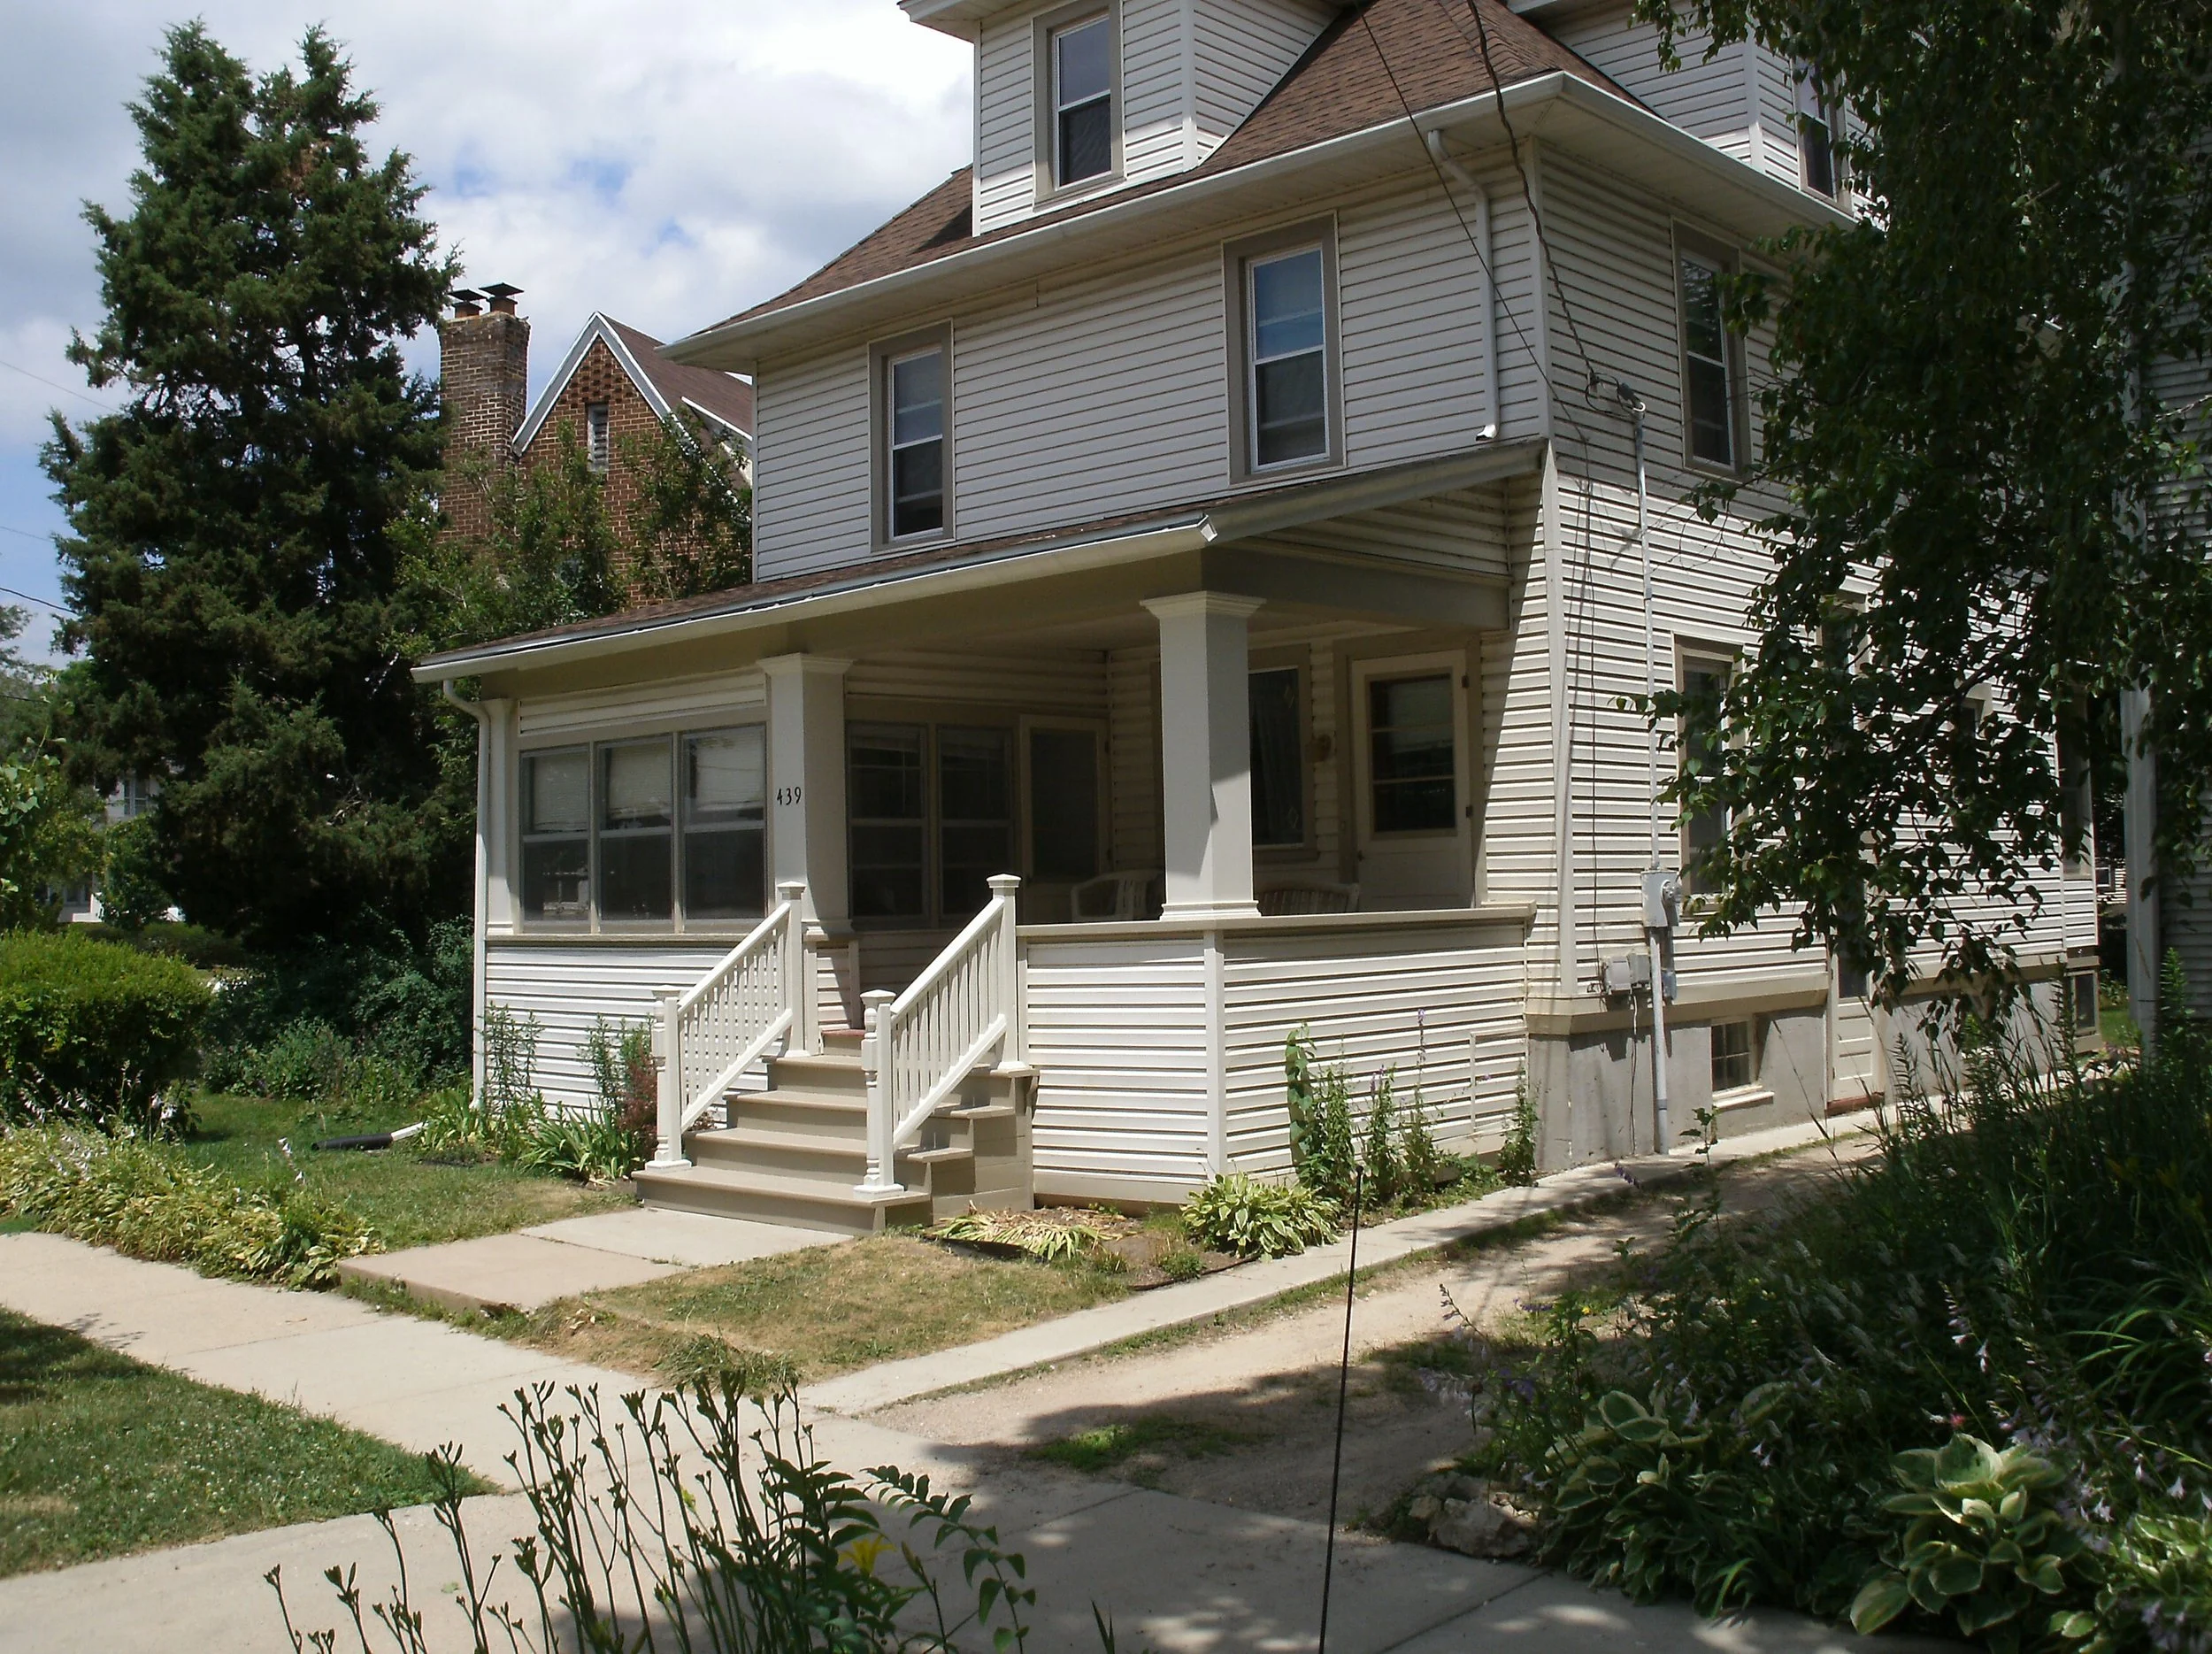
Porches, Stairs, and Ramps
5th Street
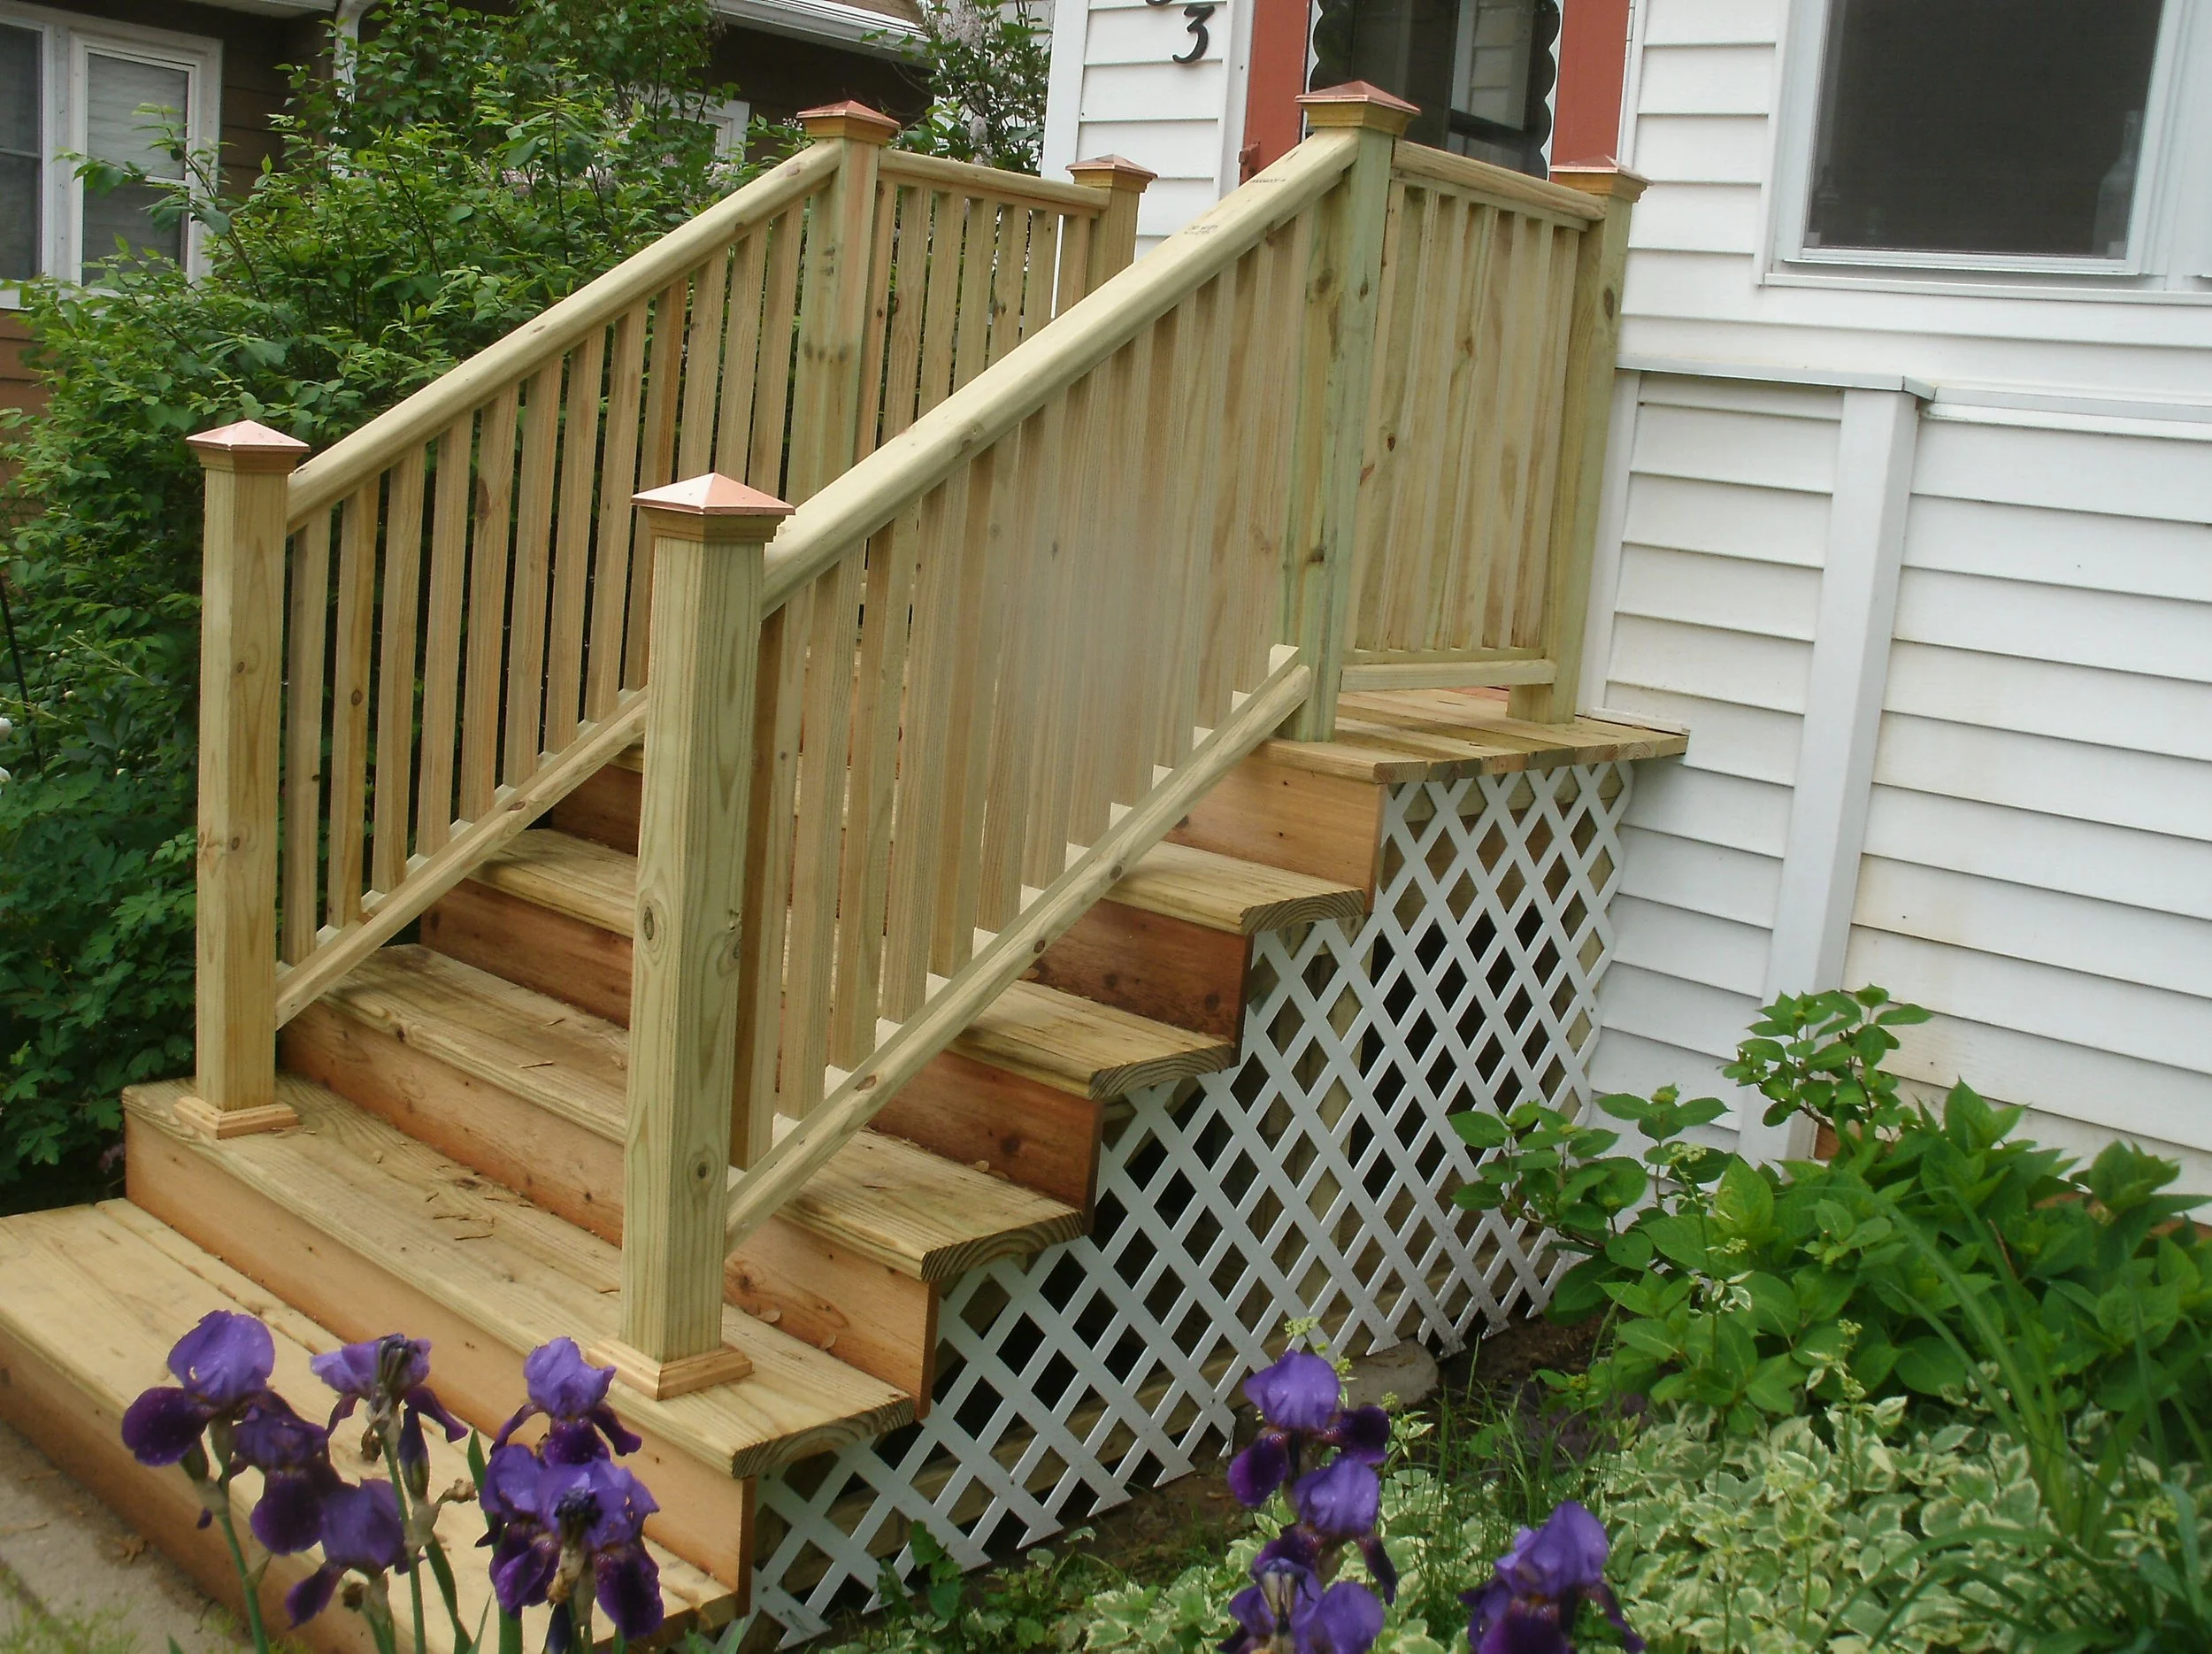
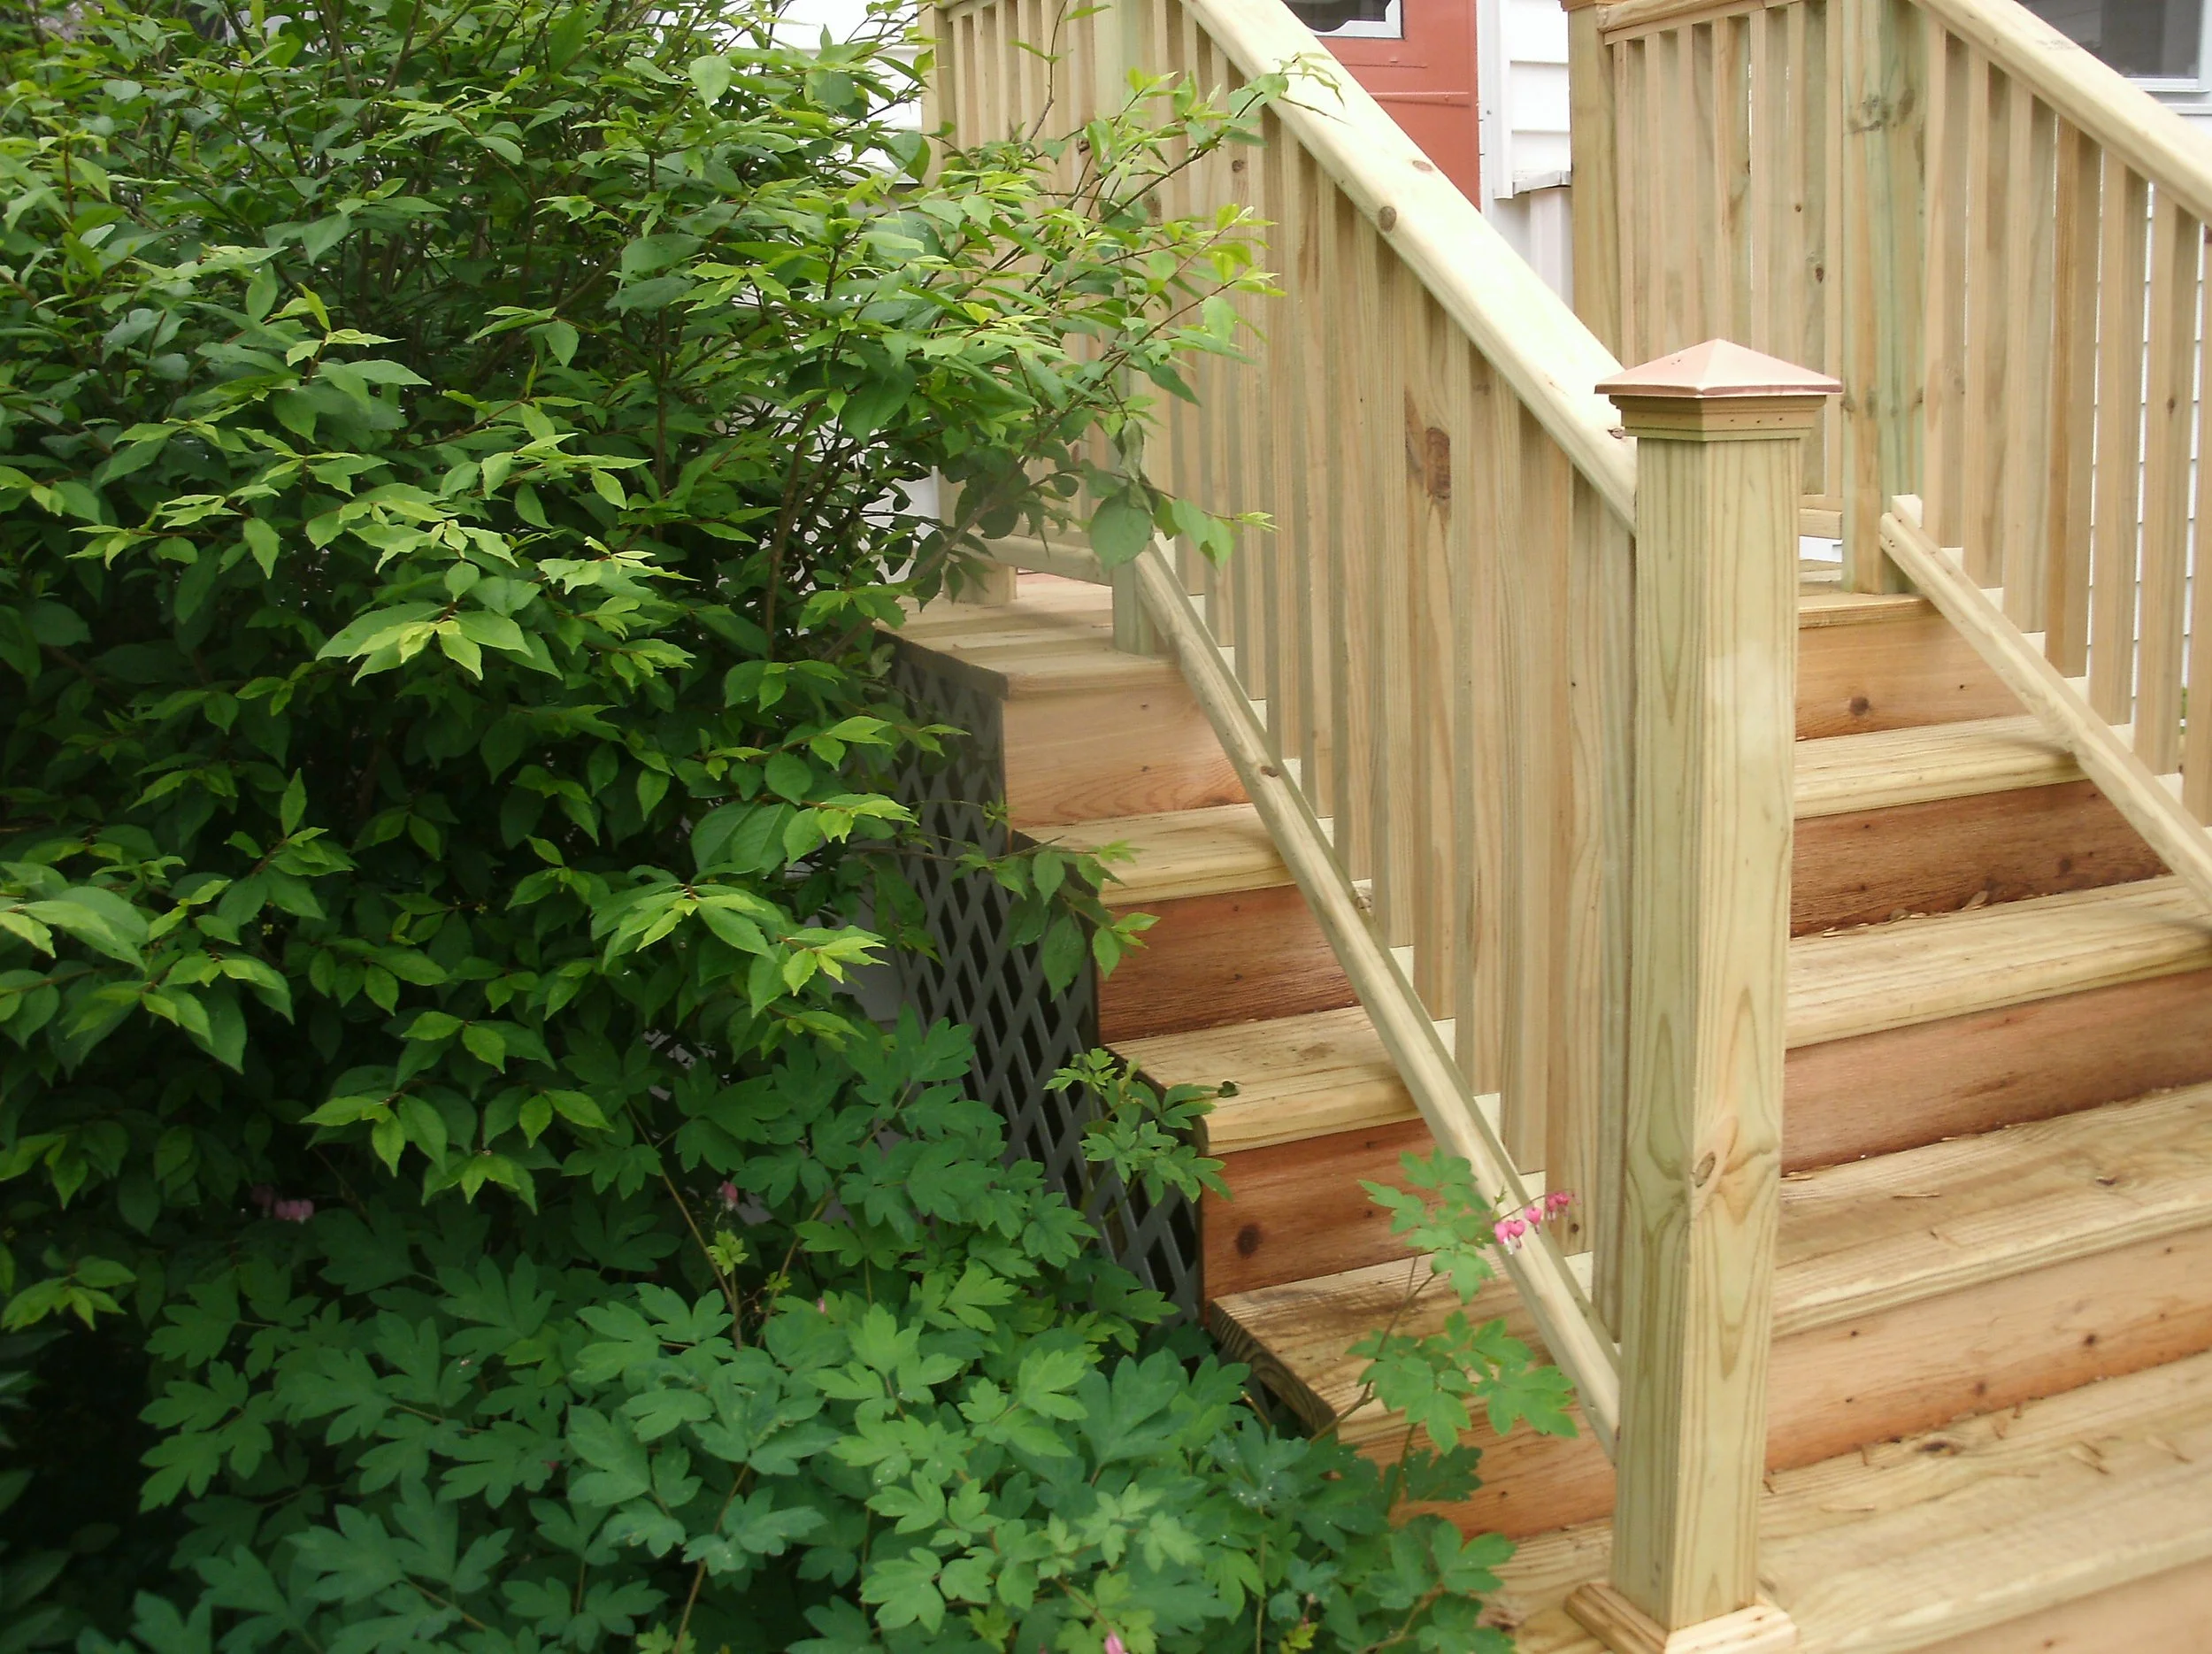
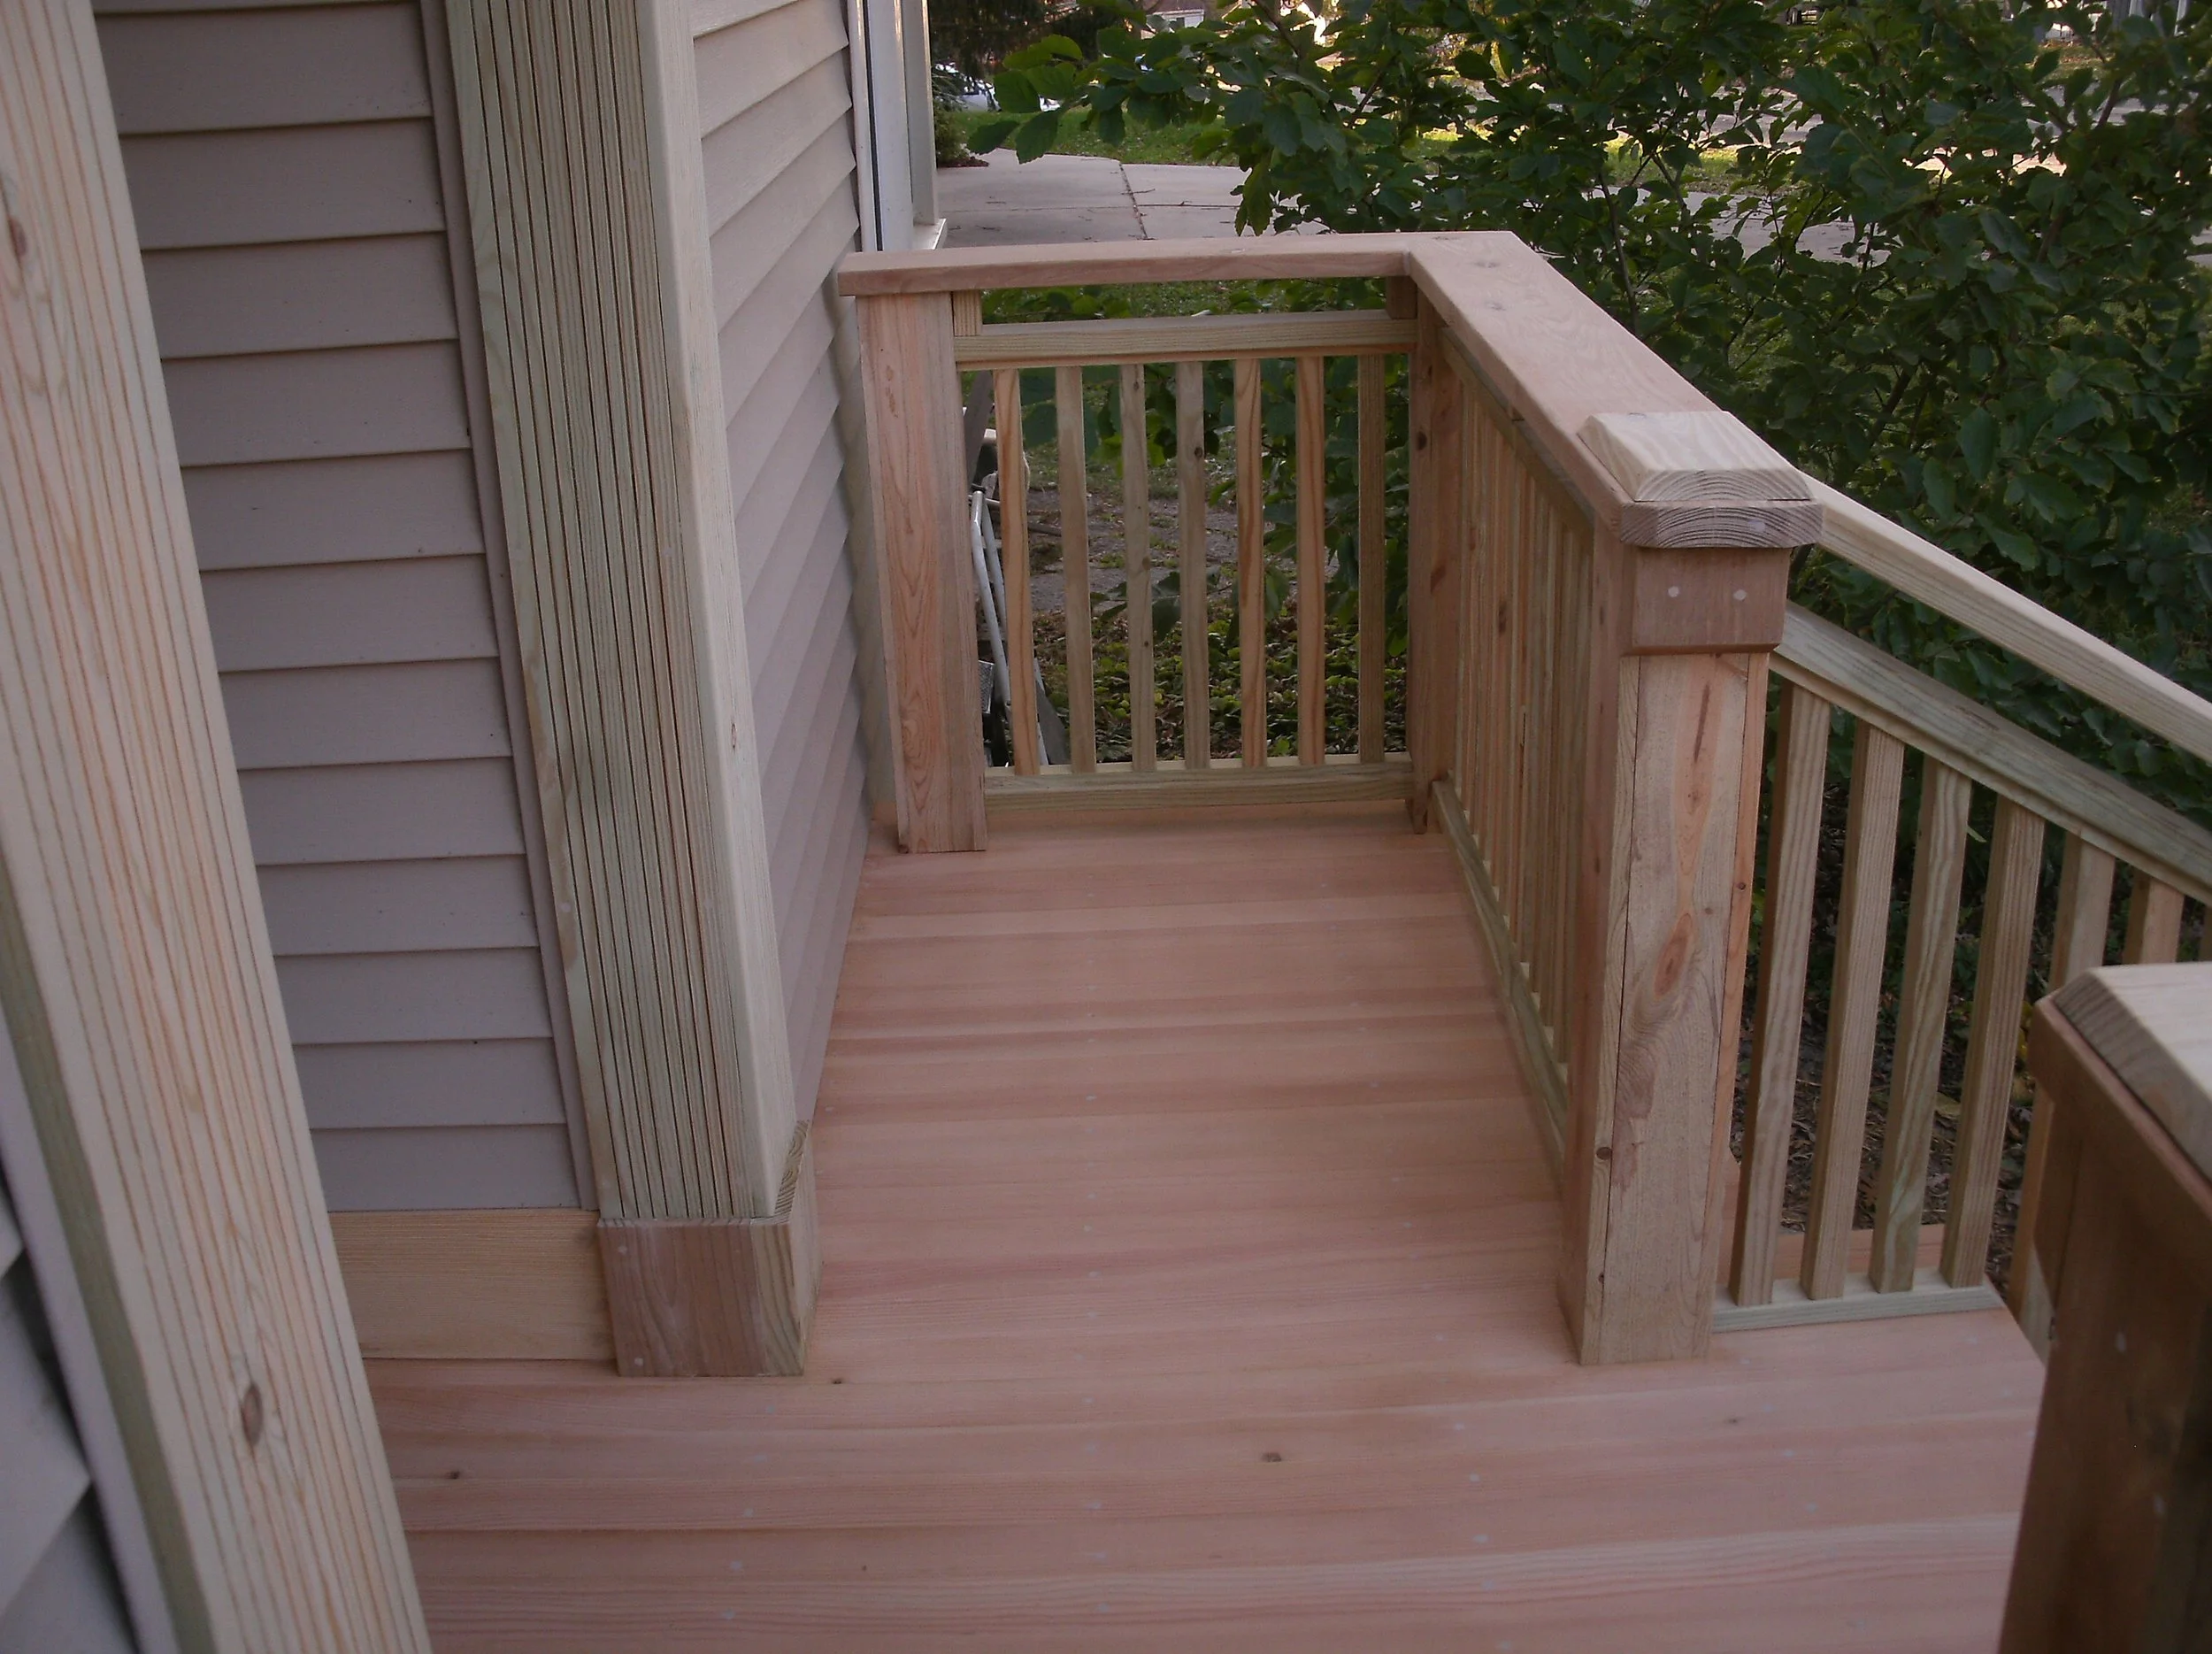
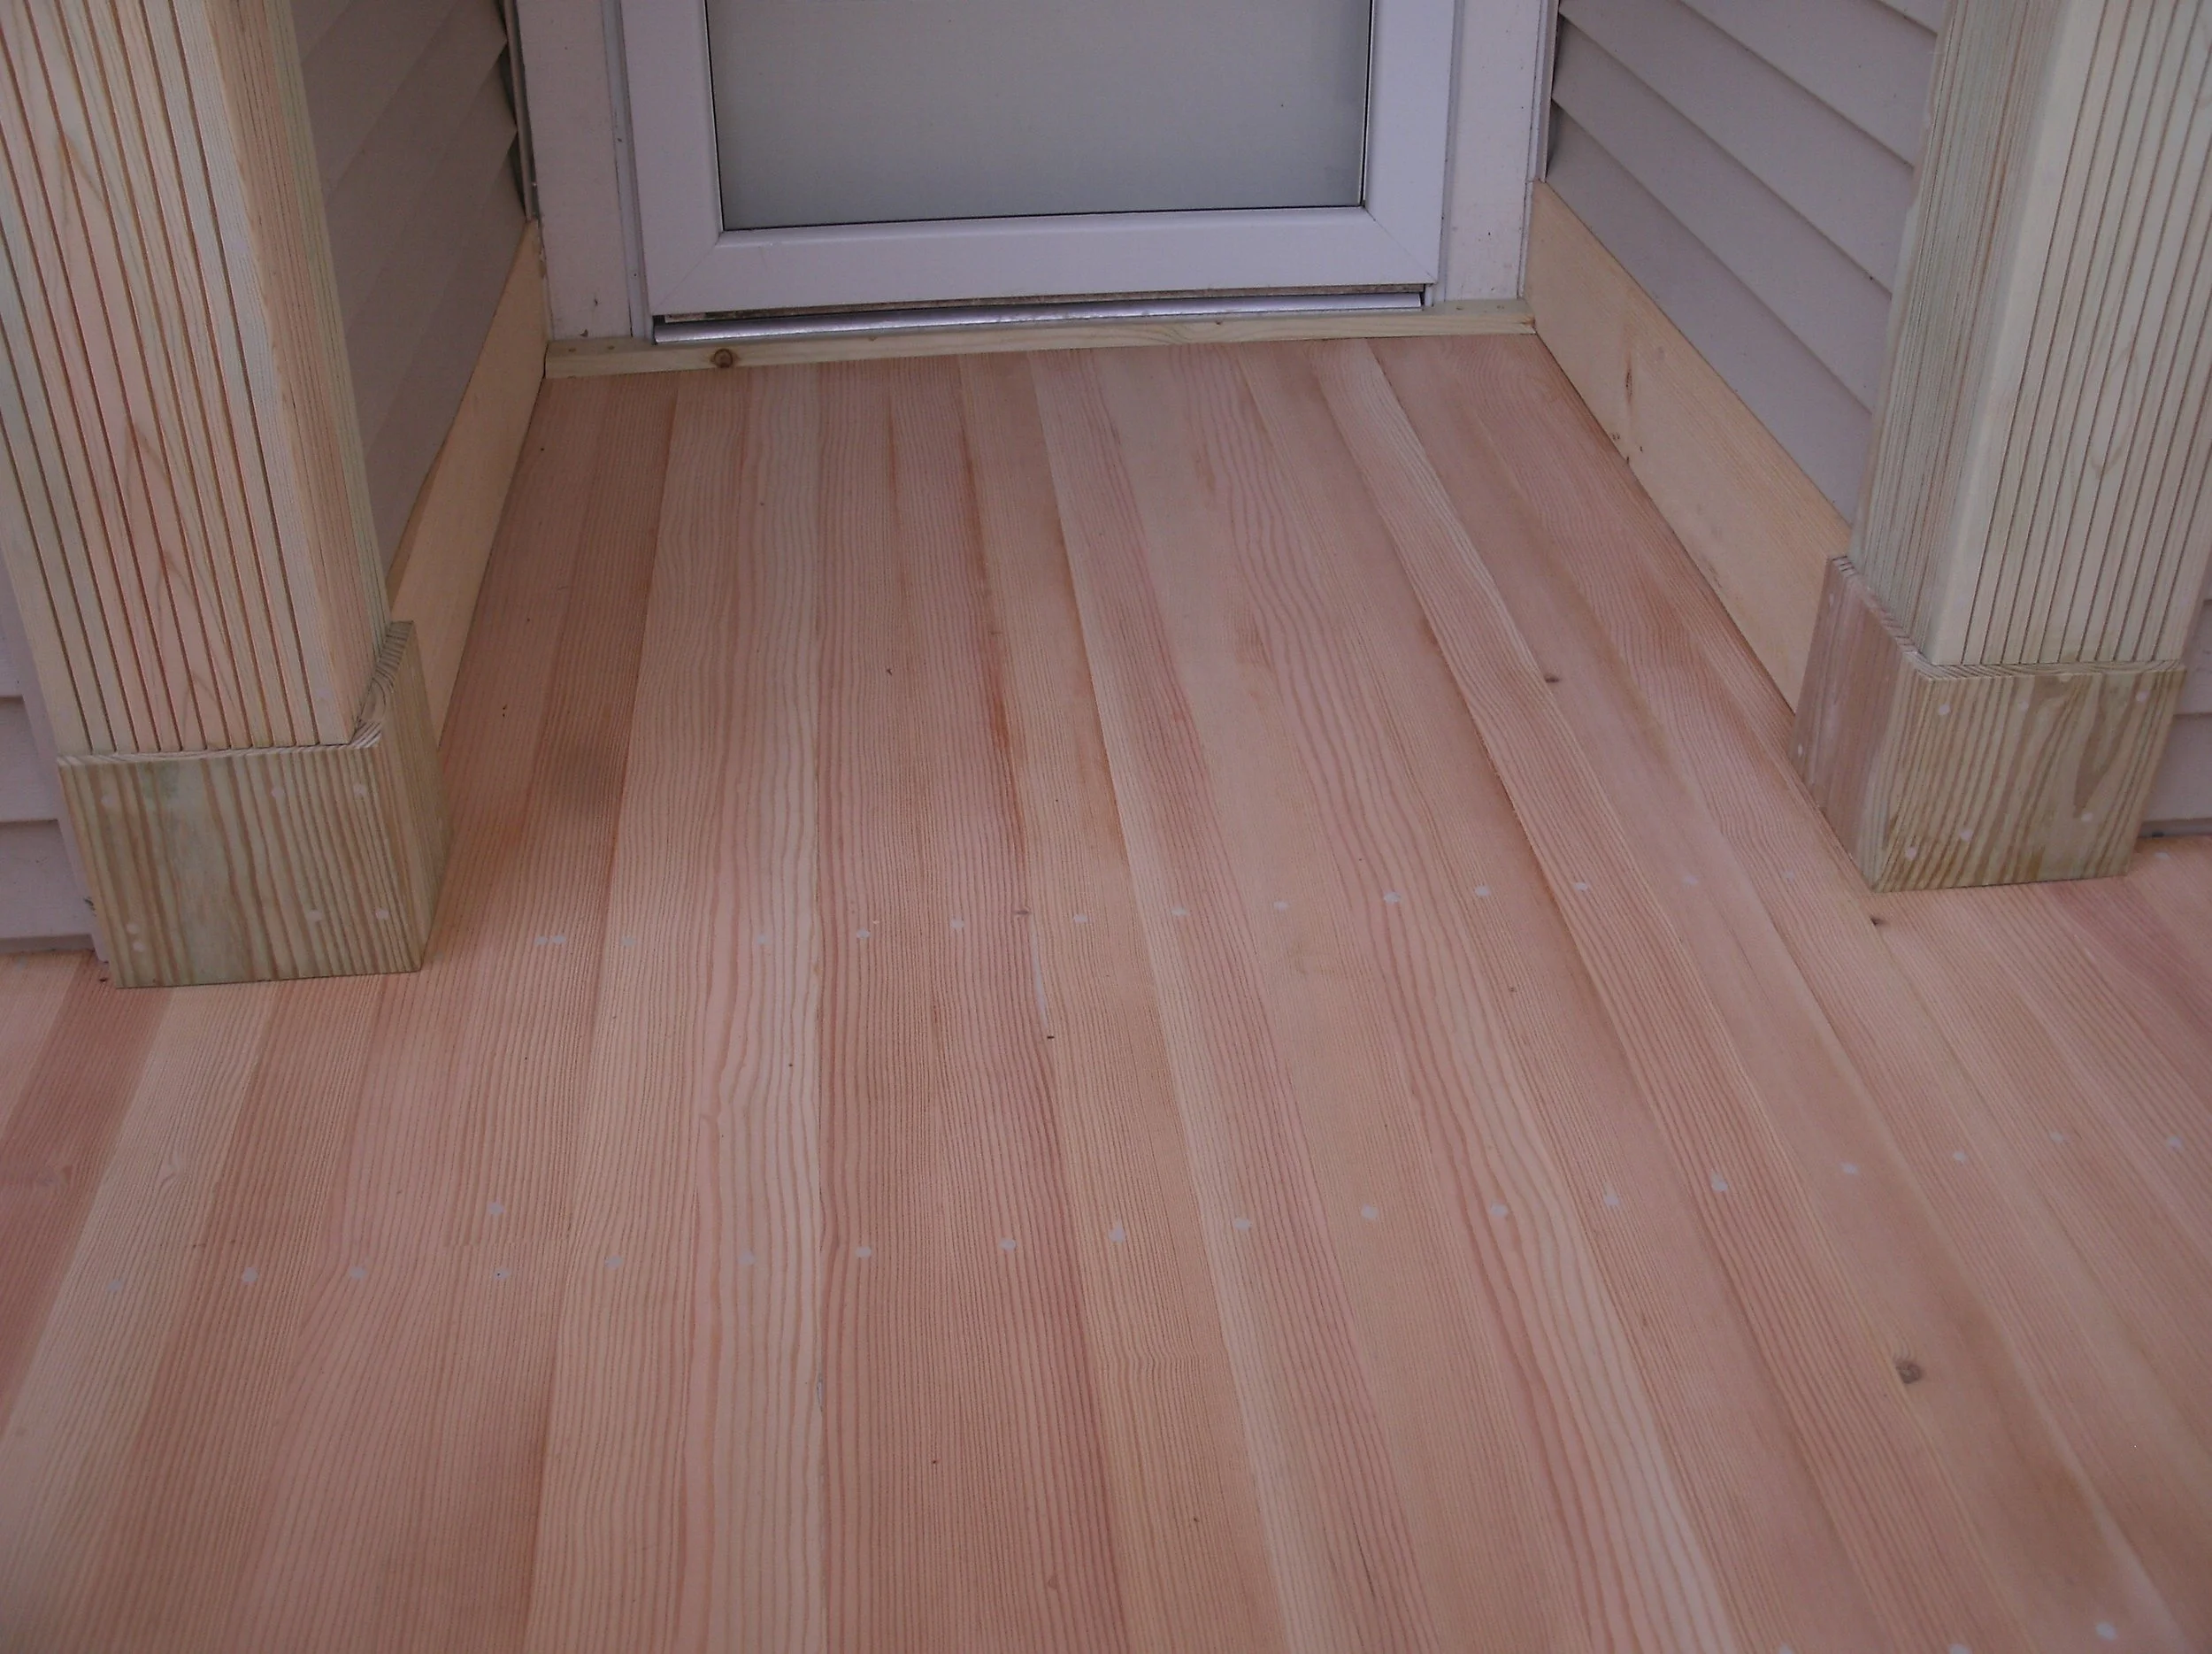
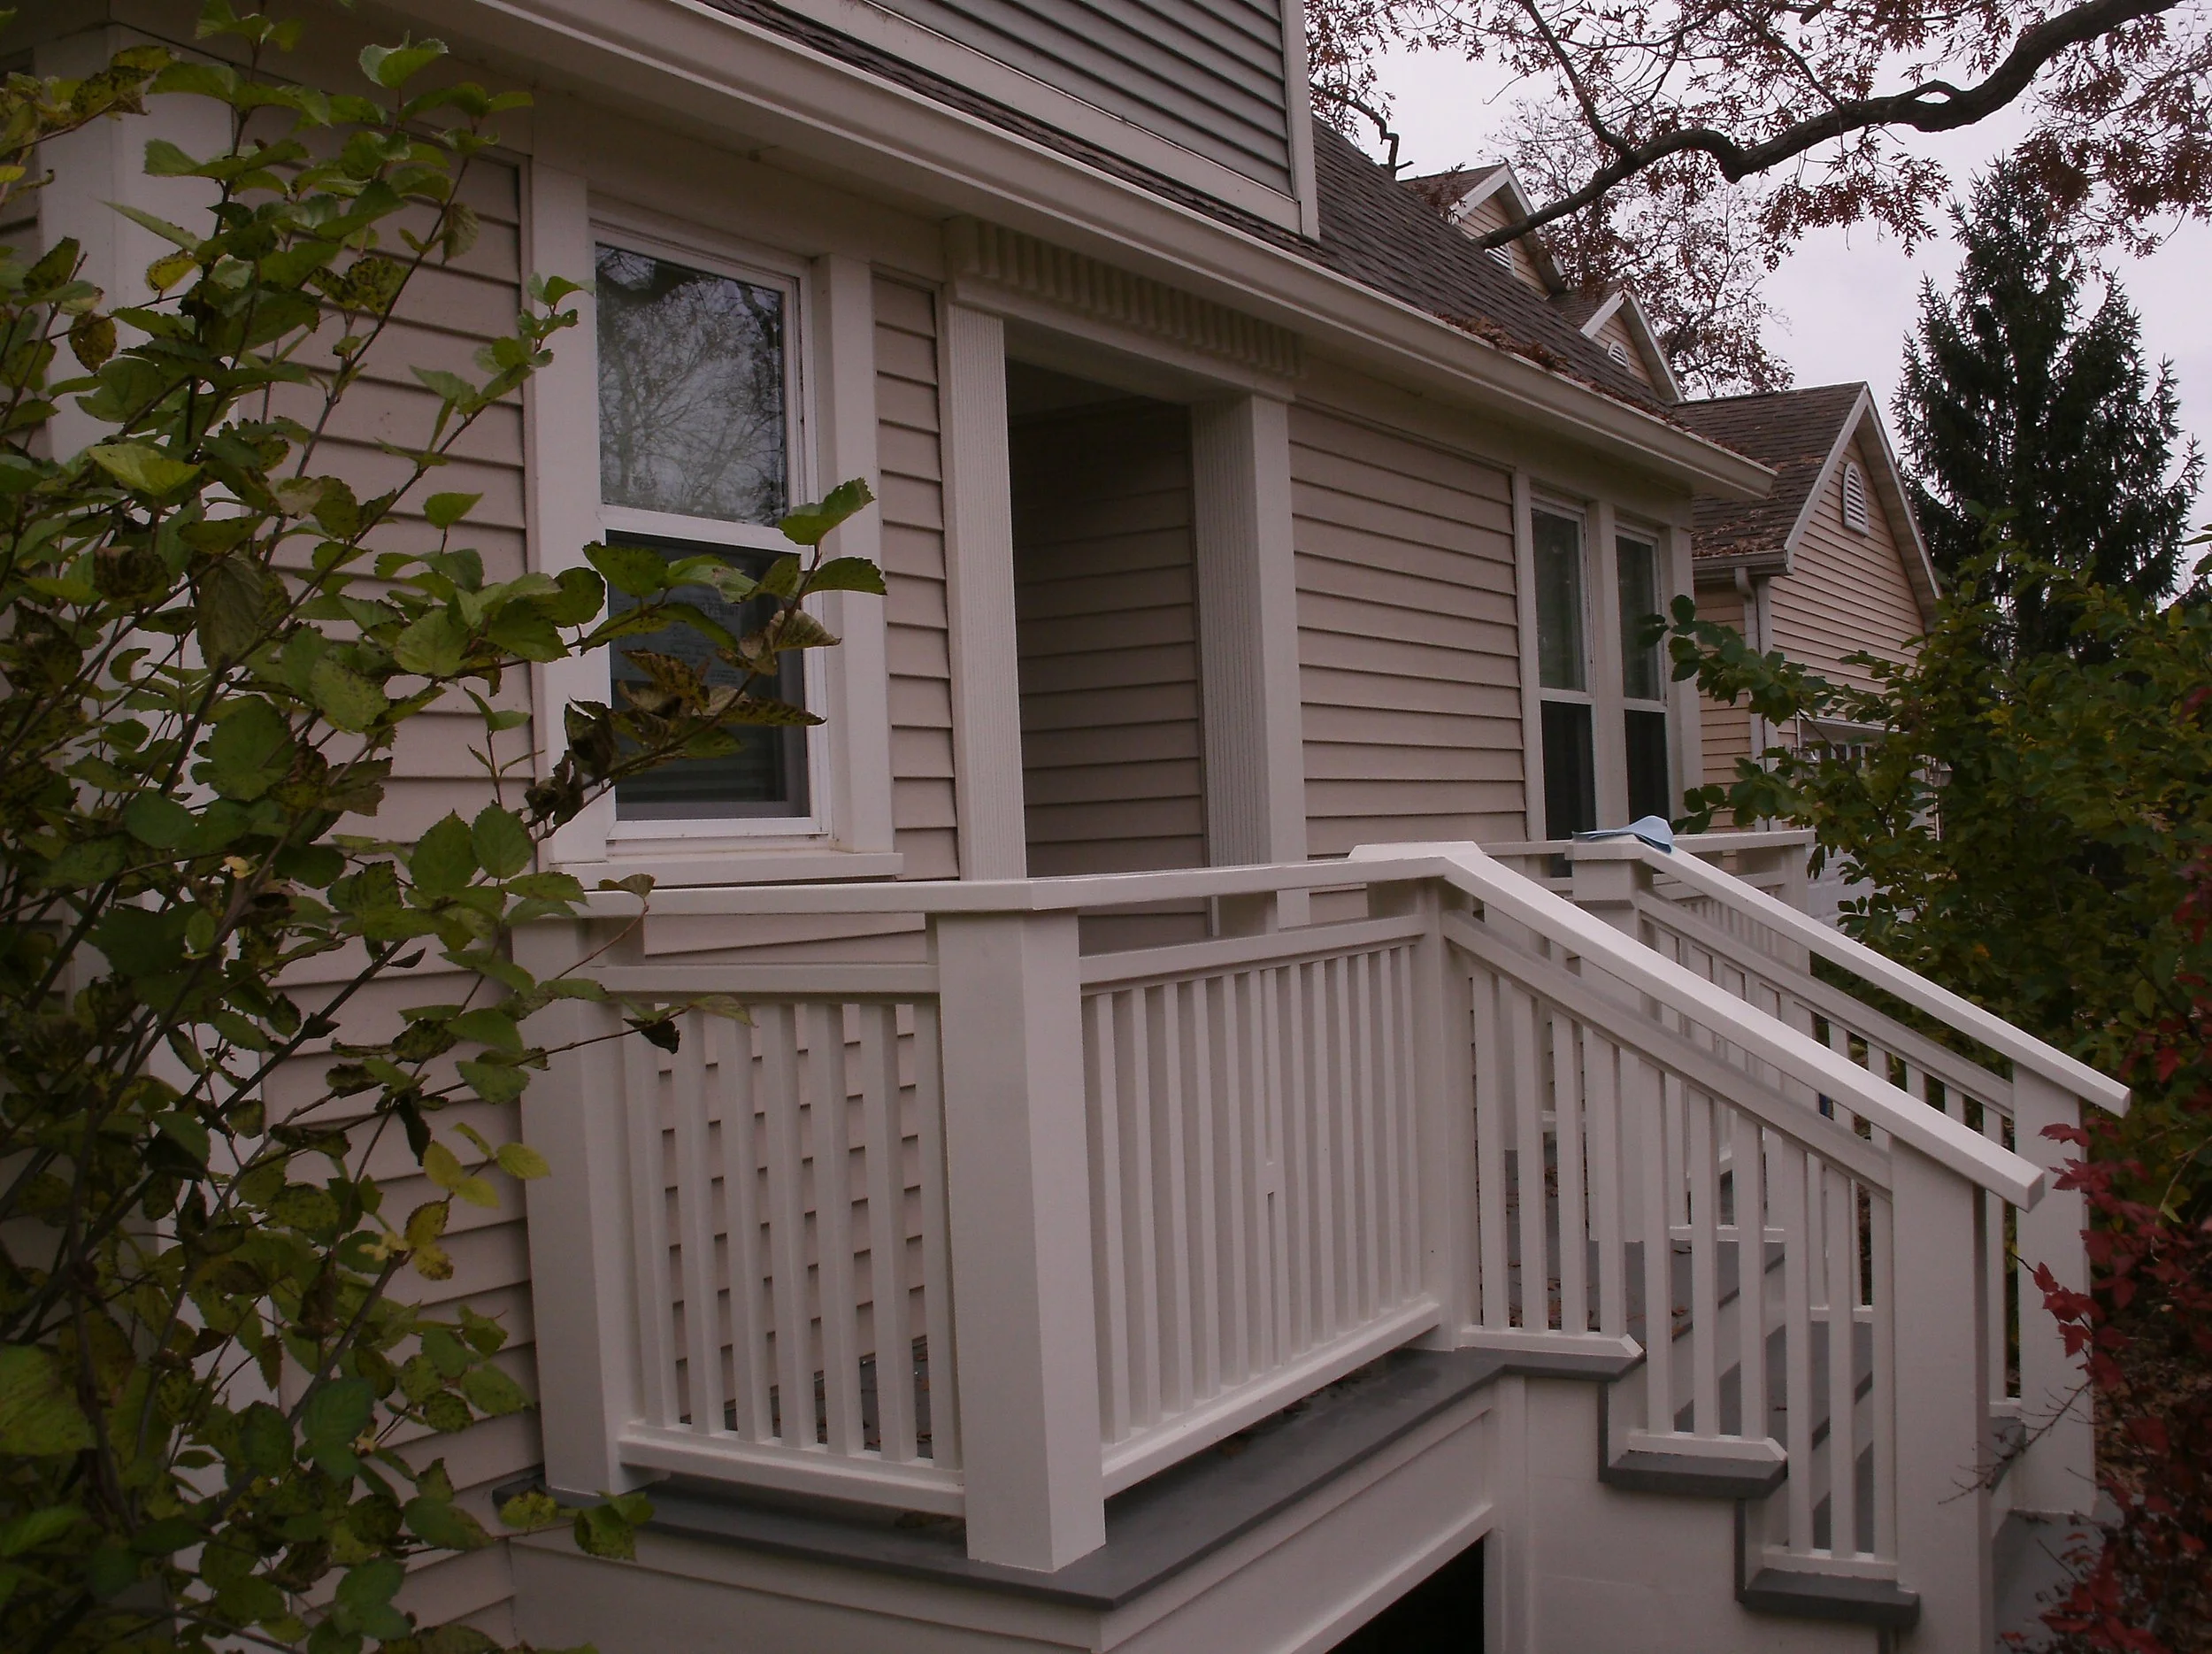
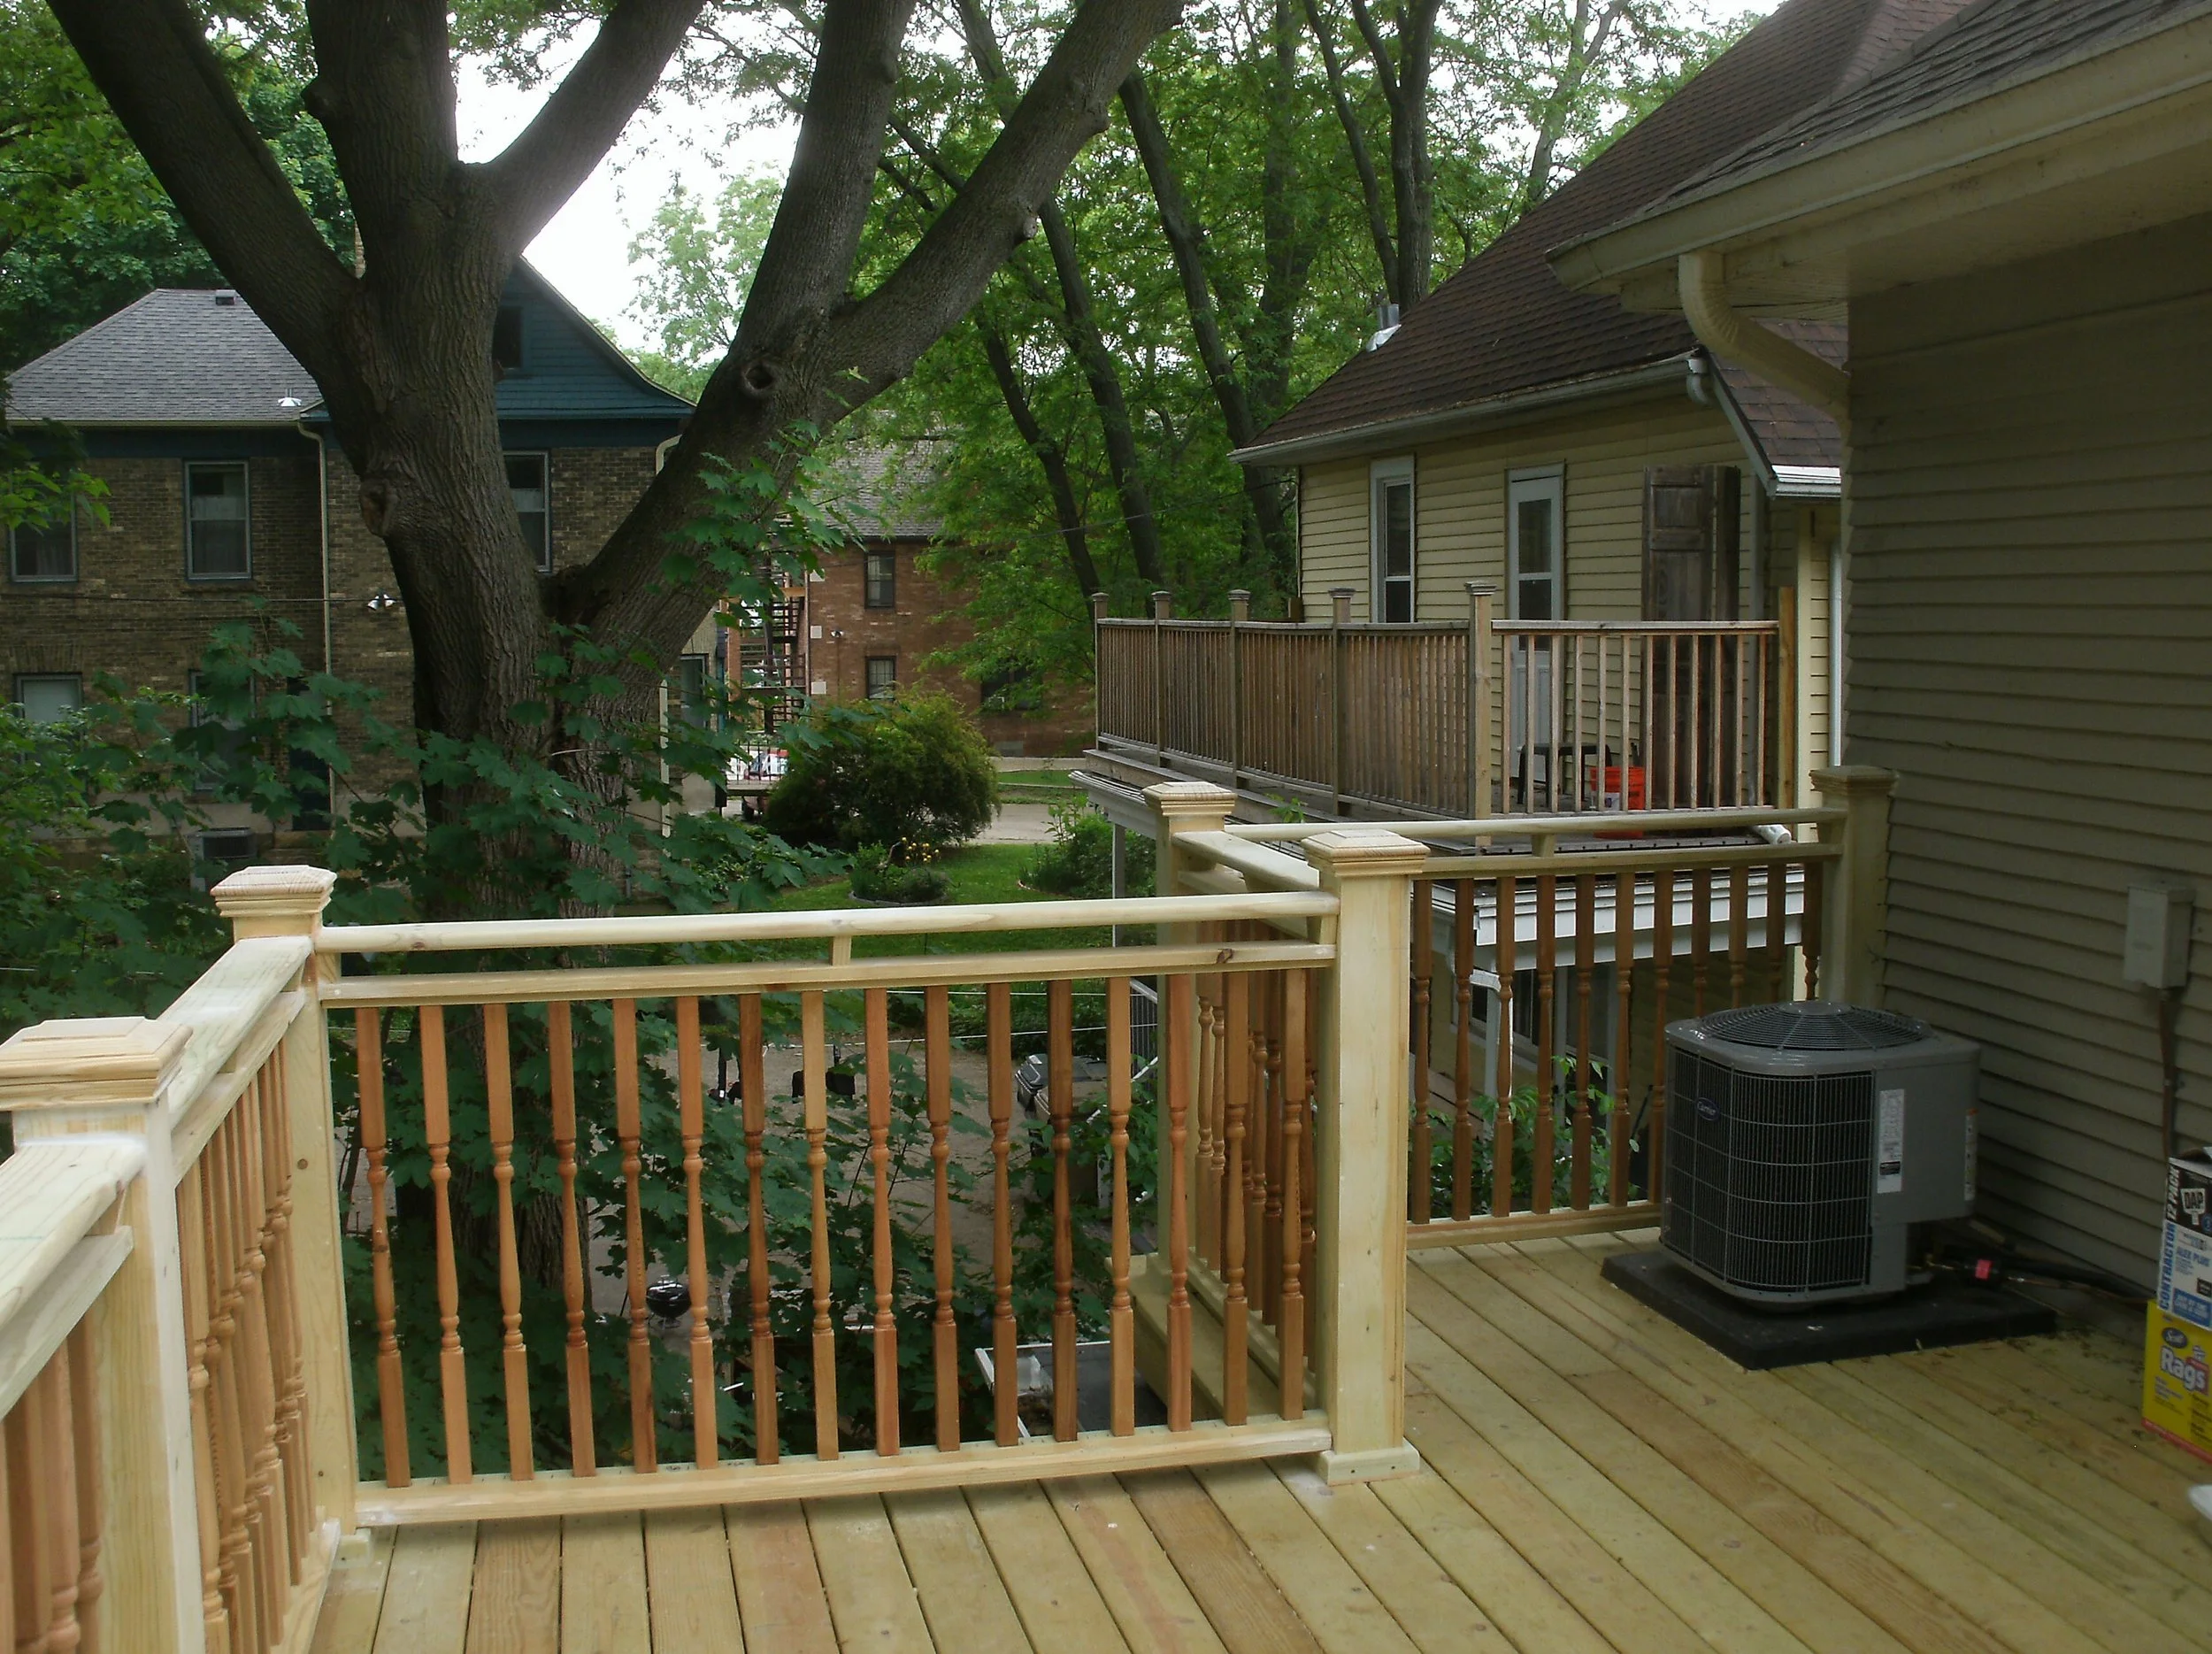
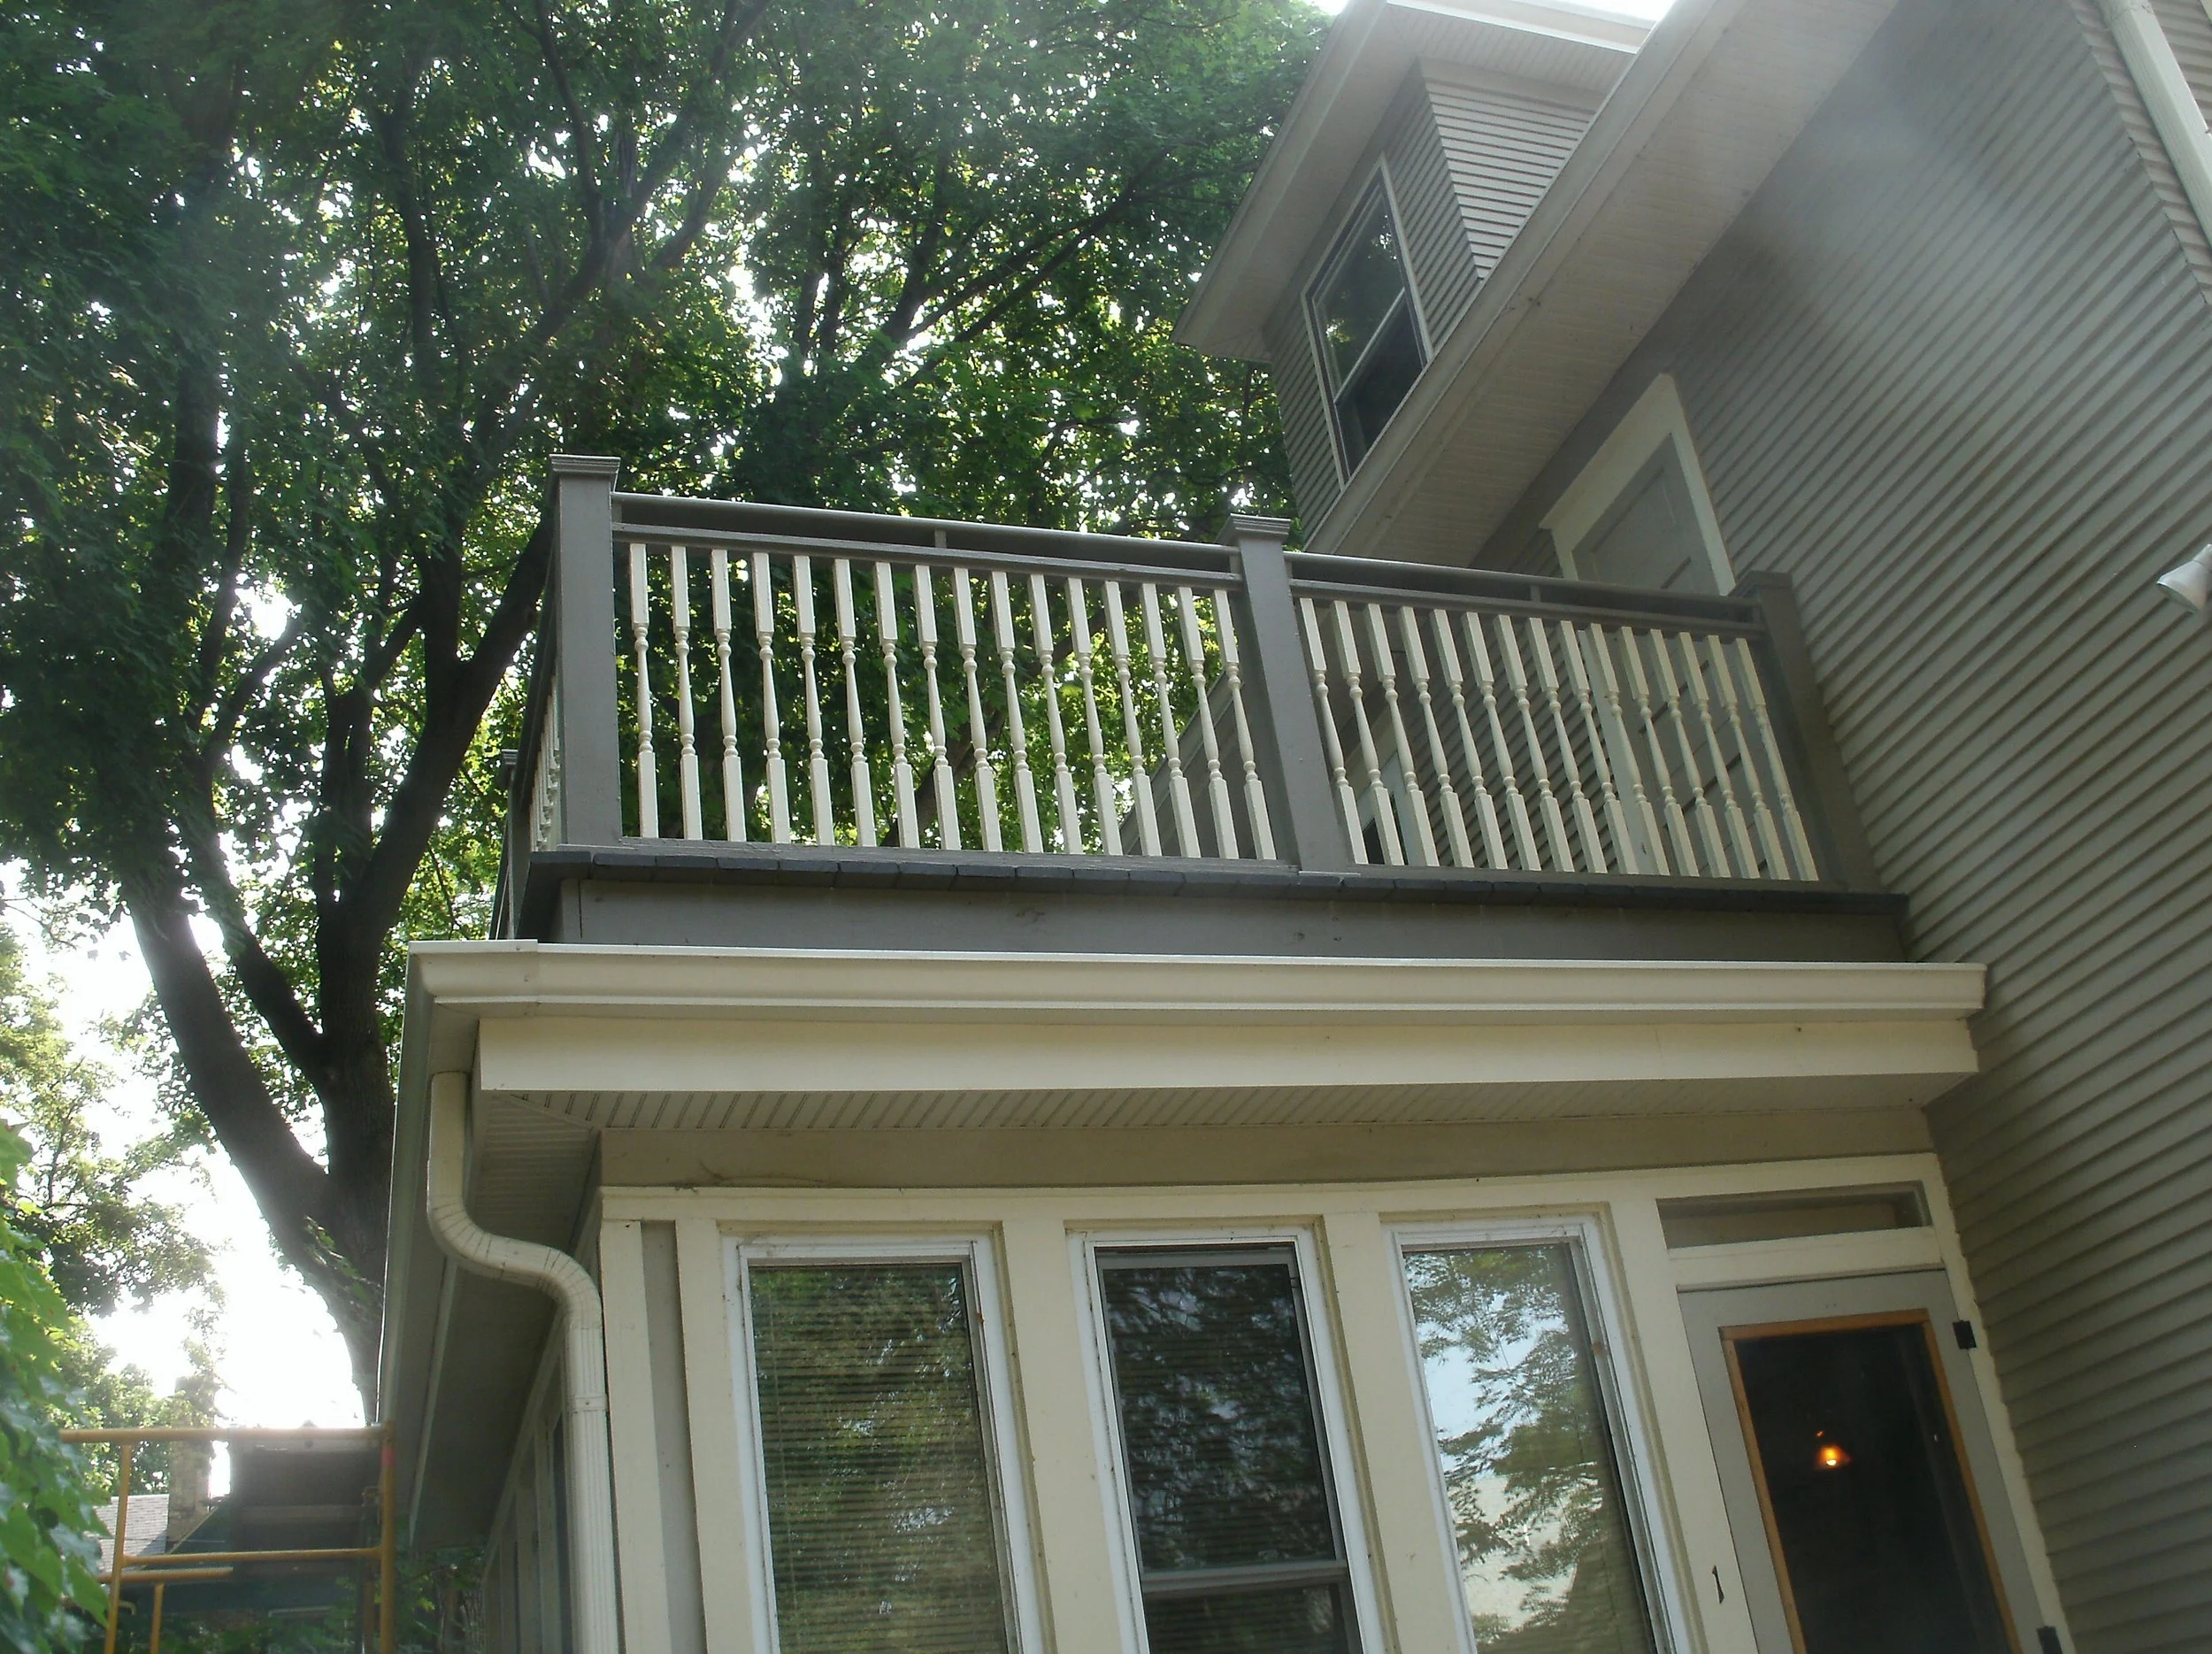
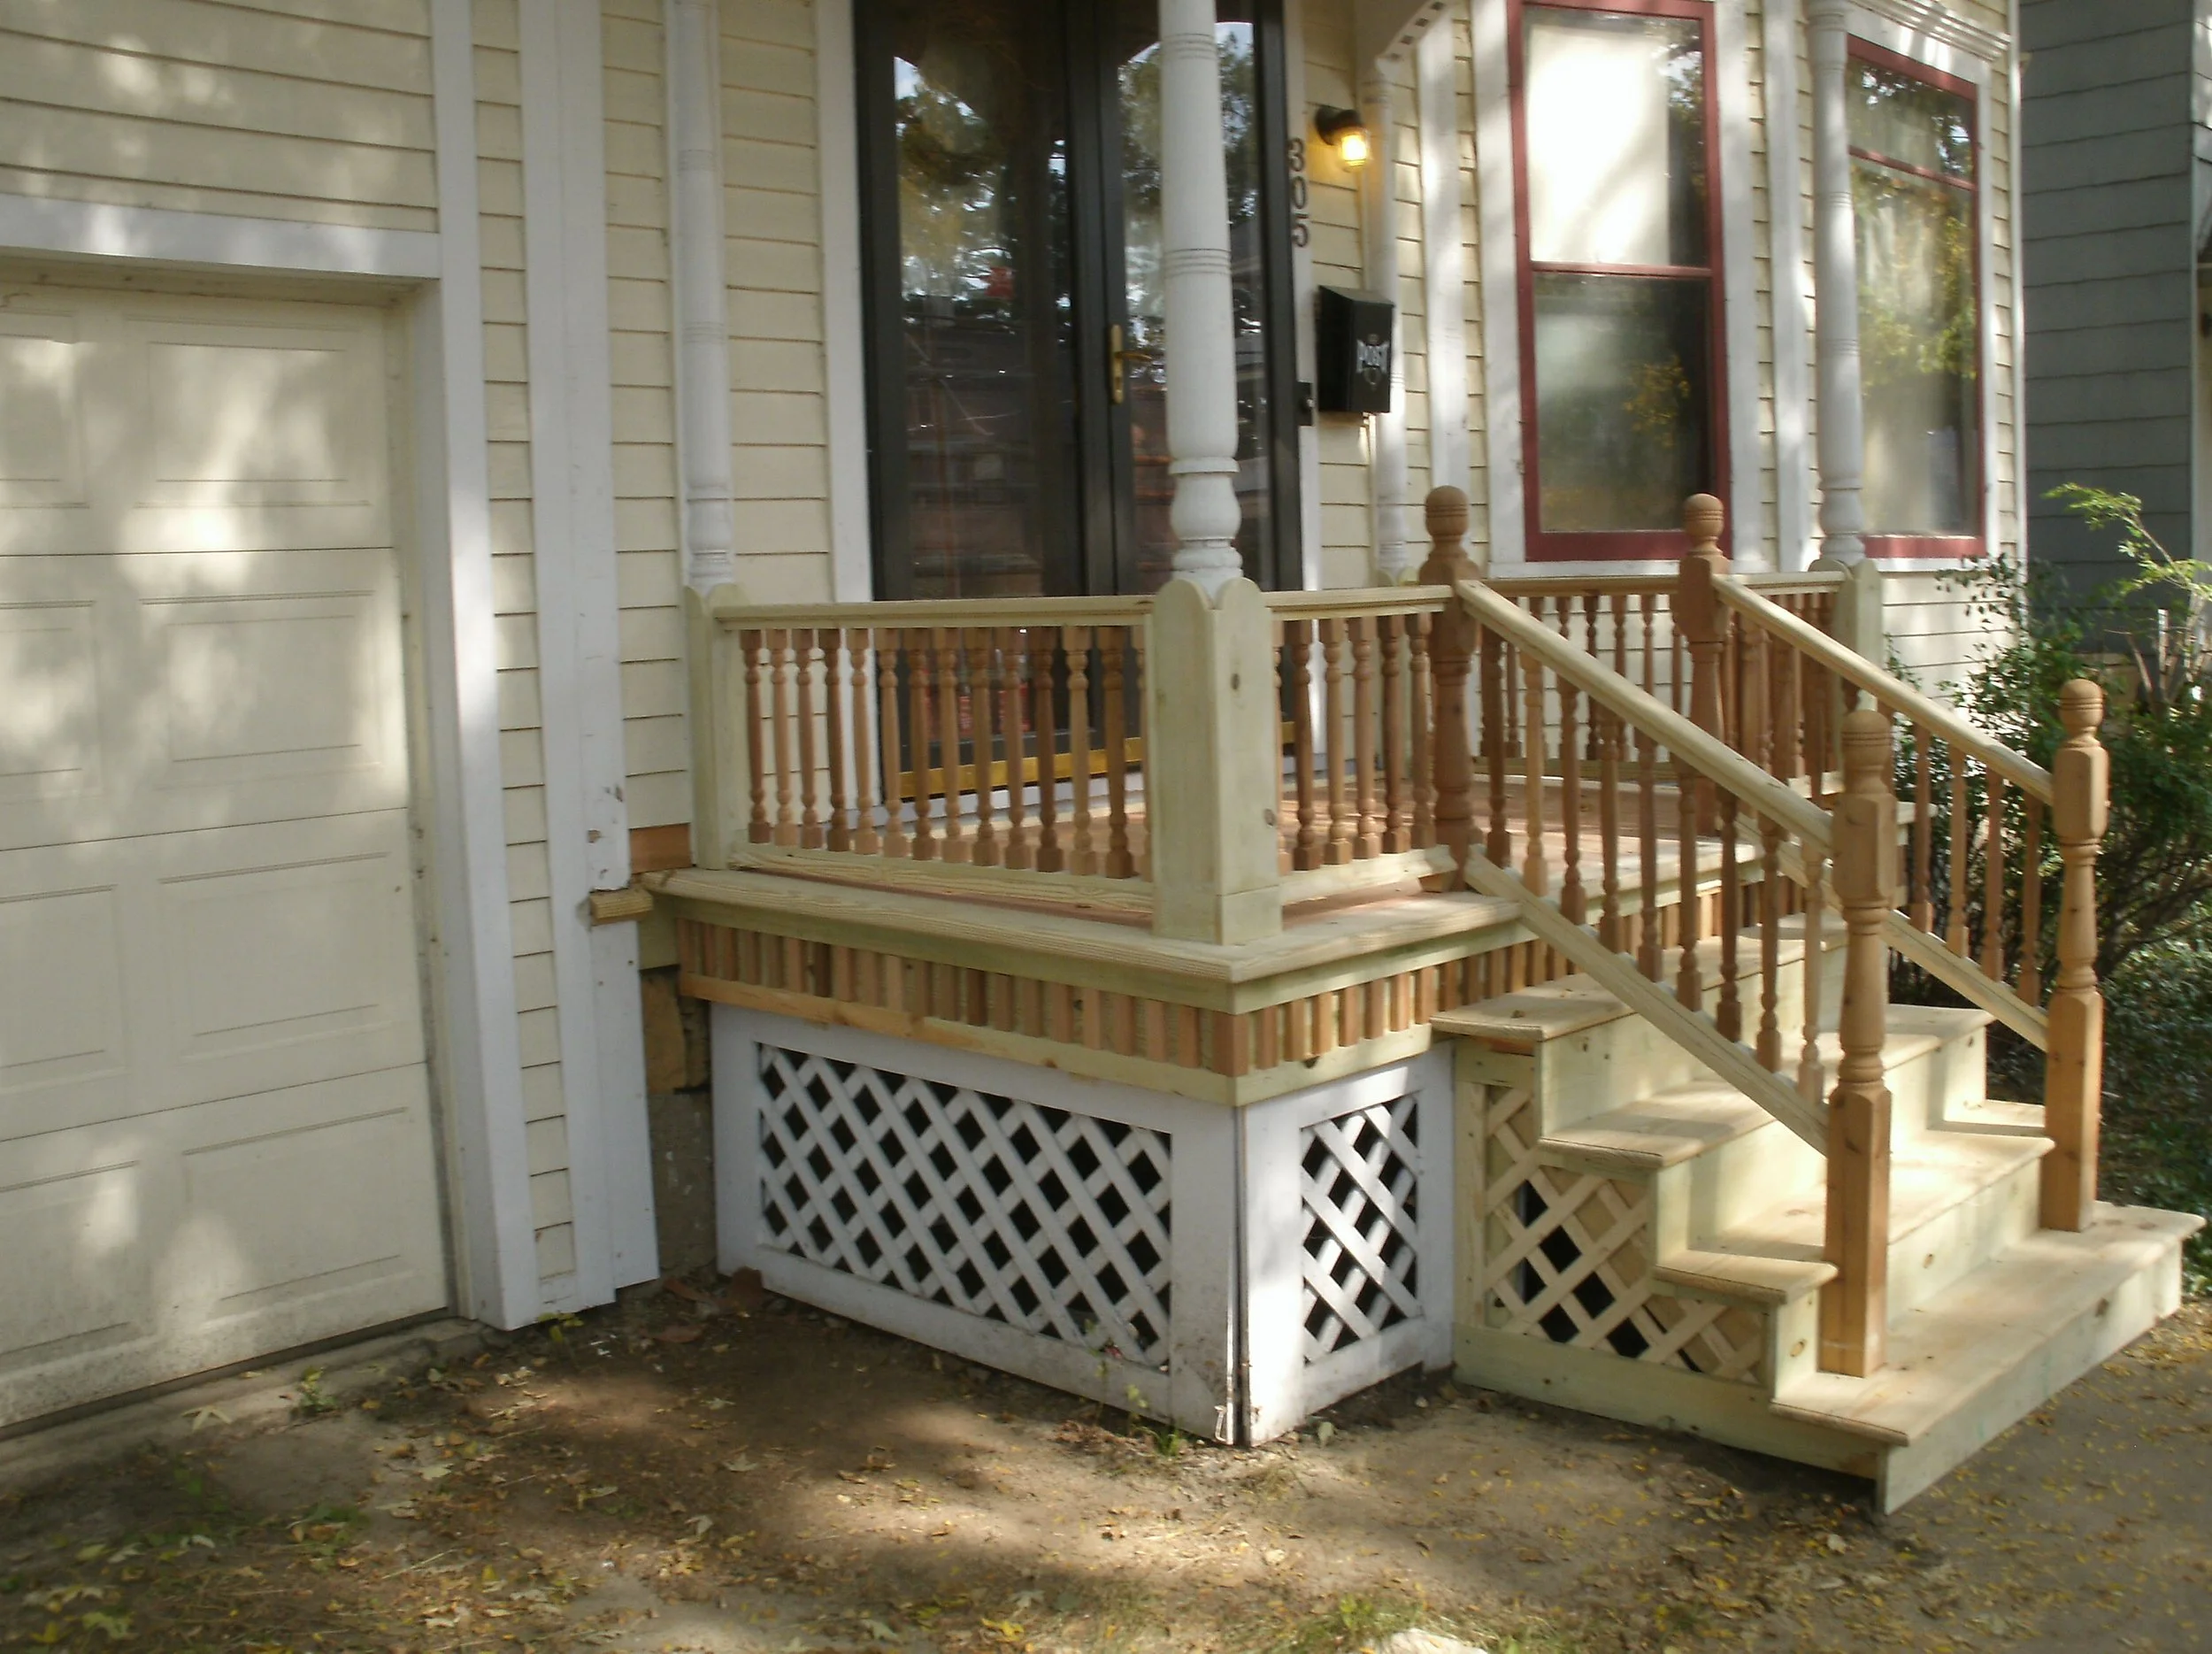
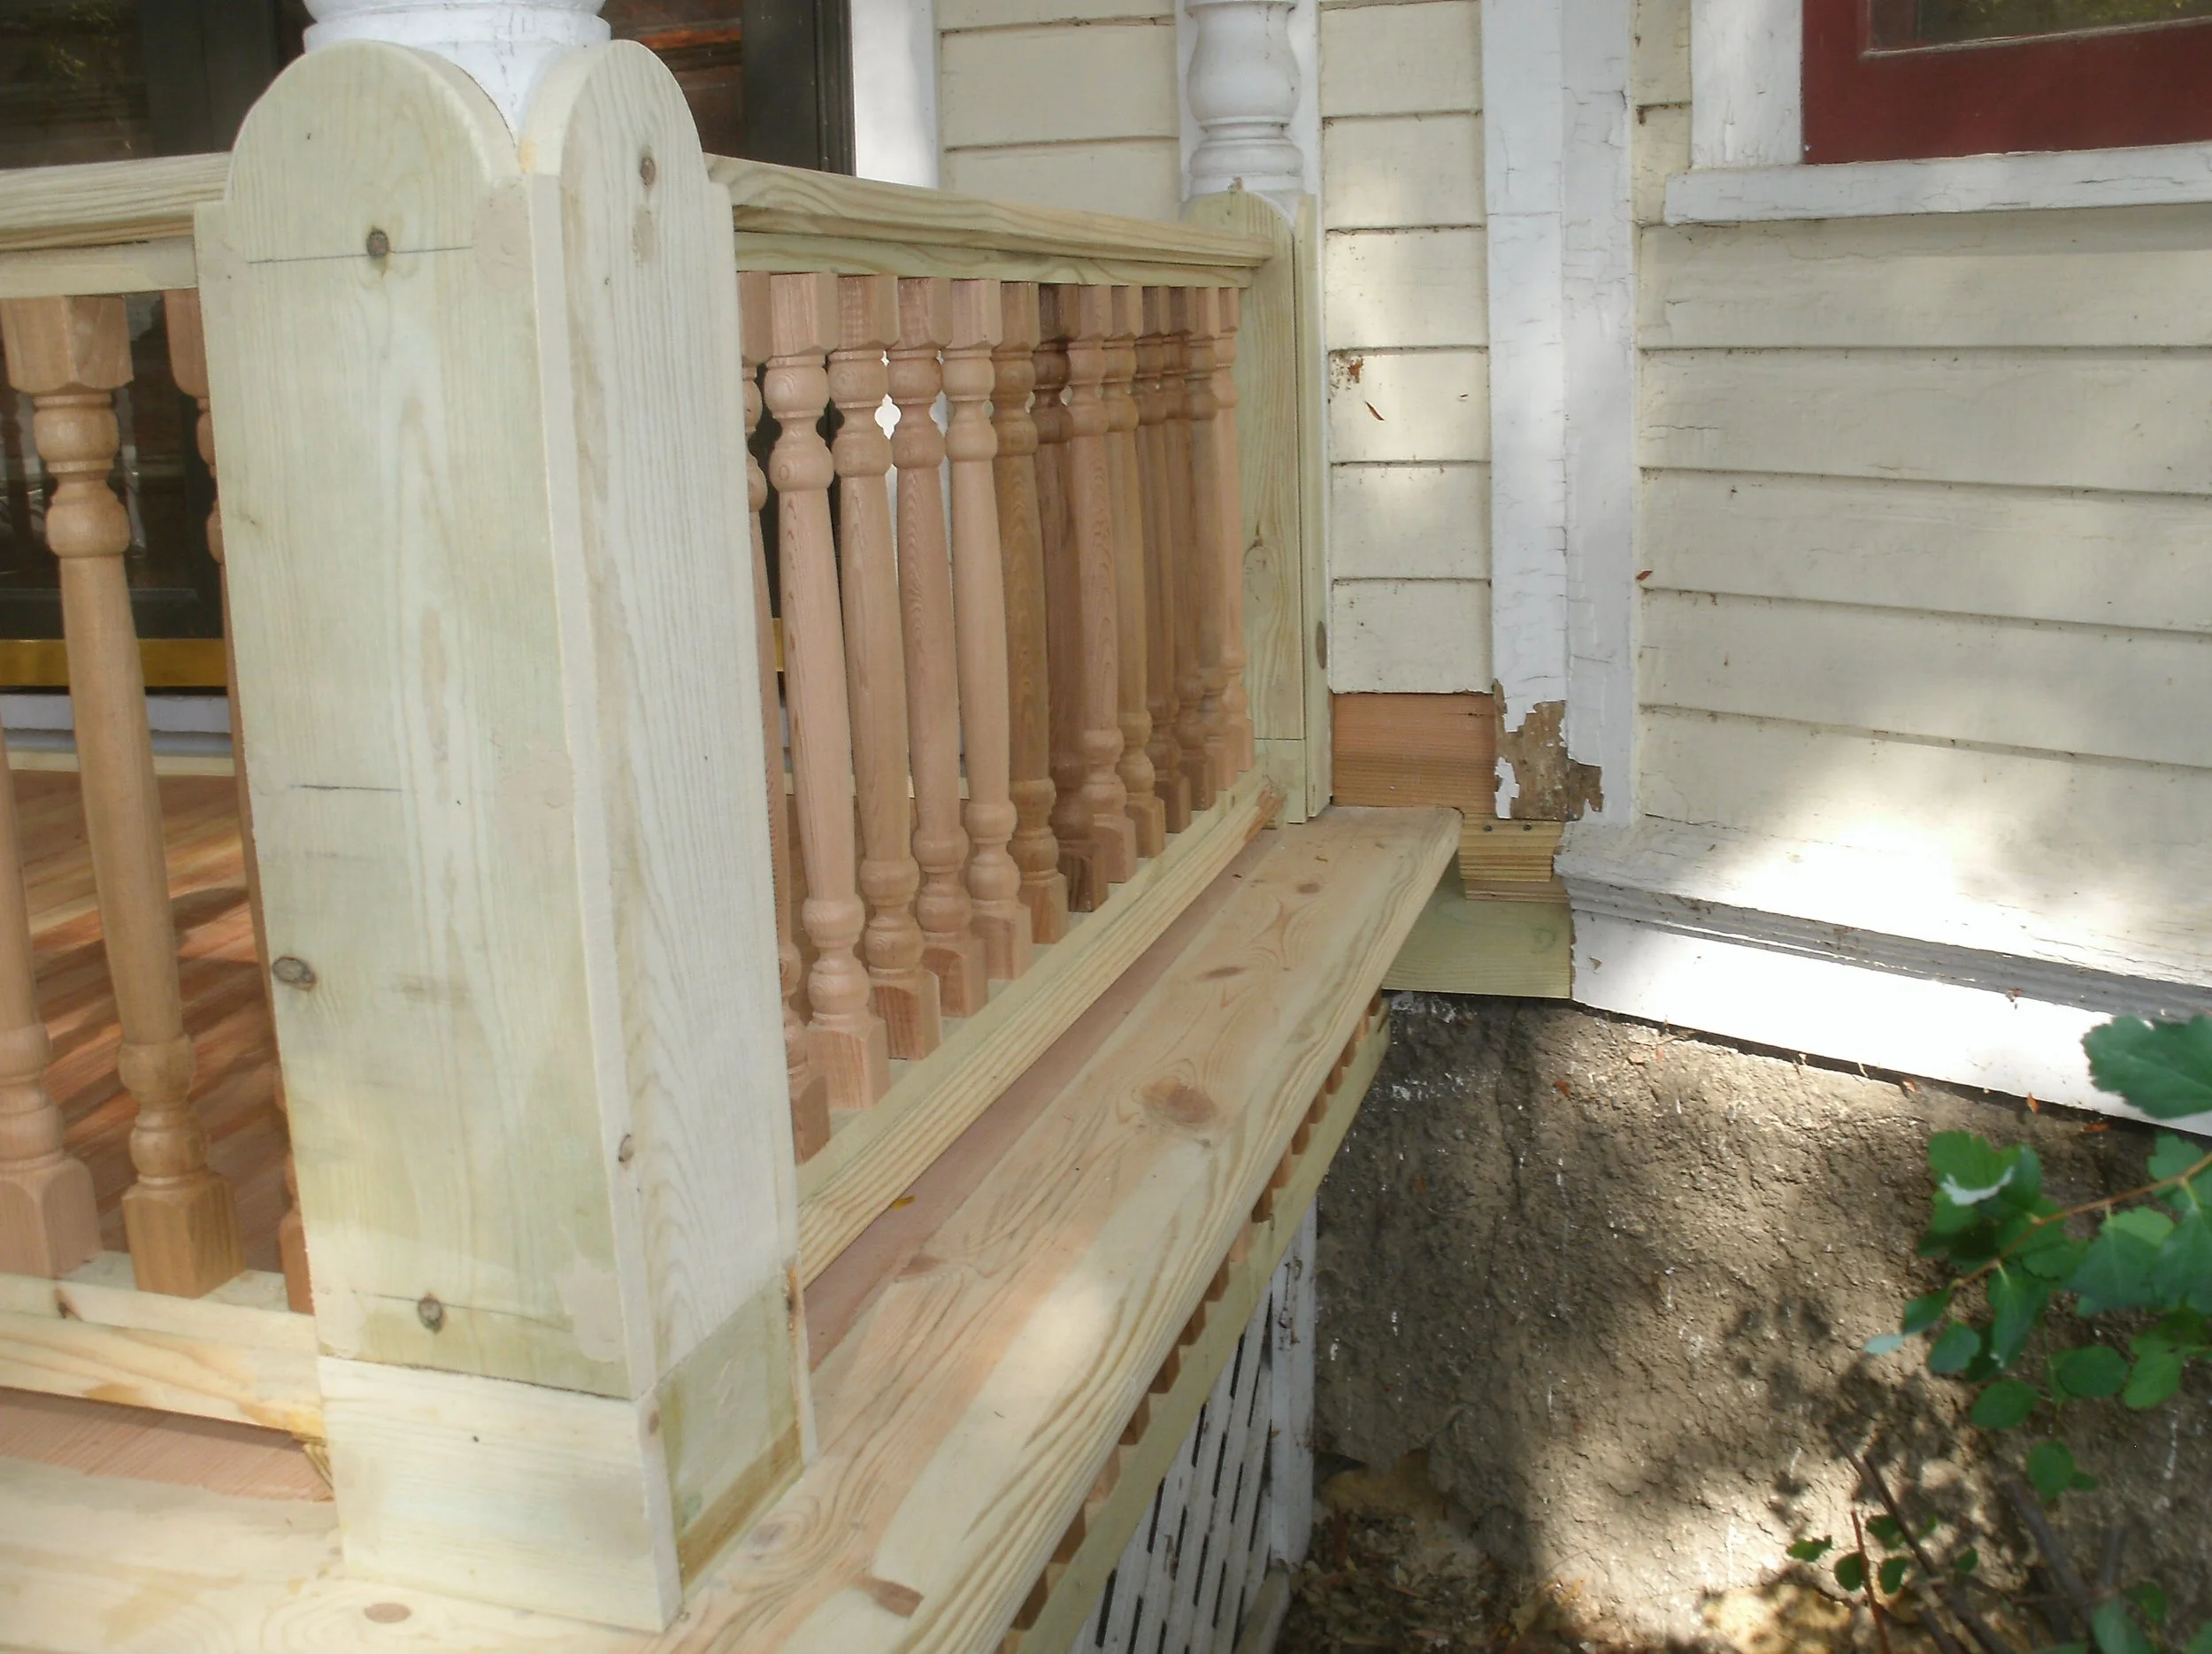
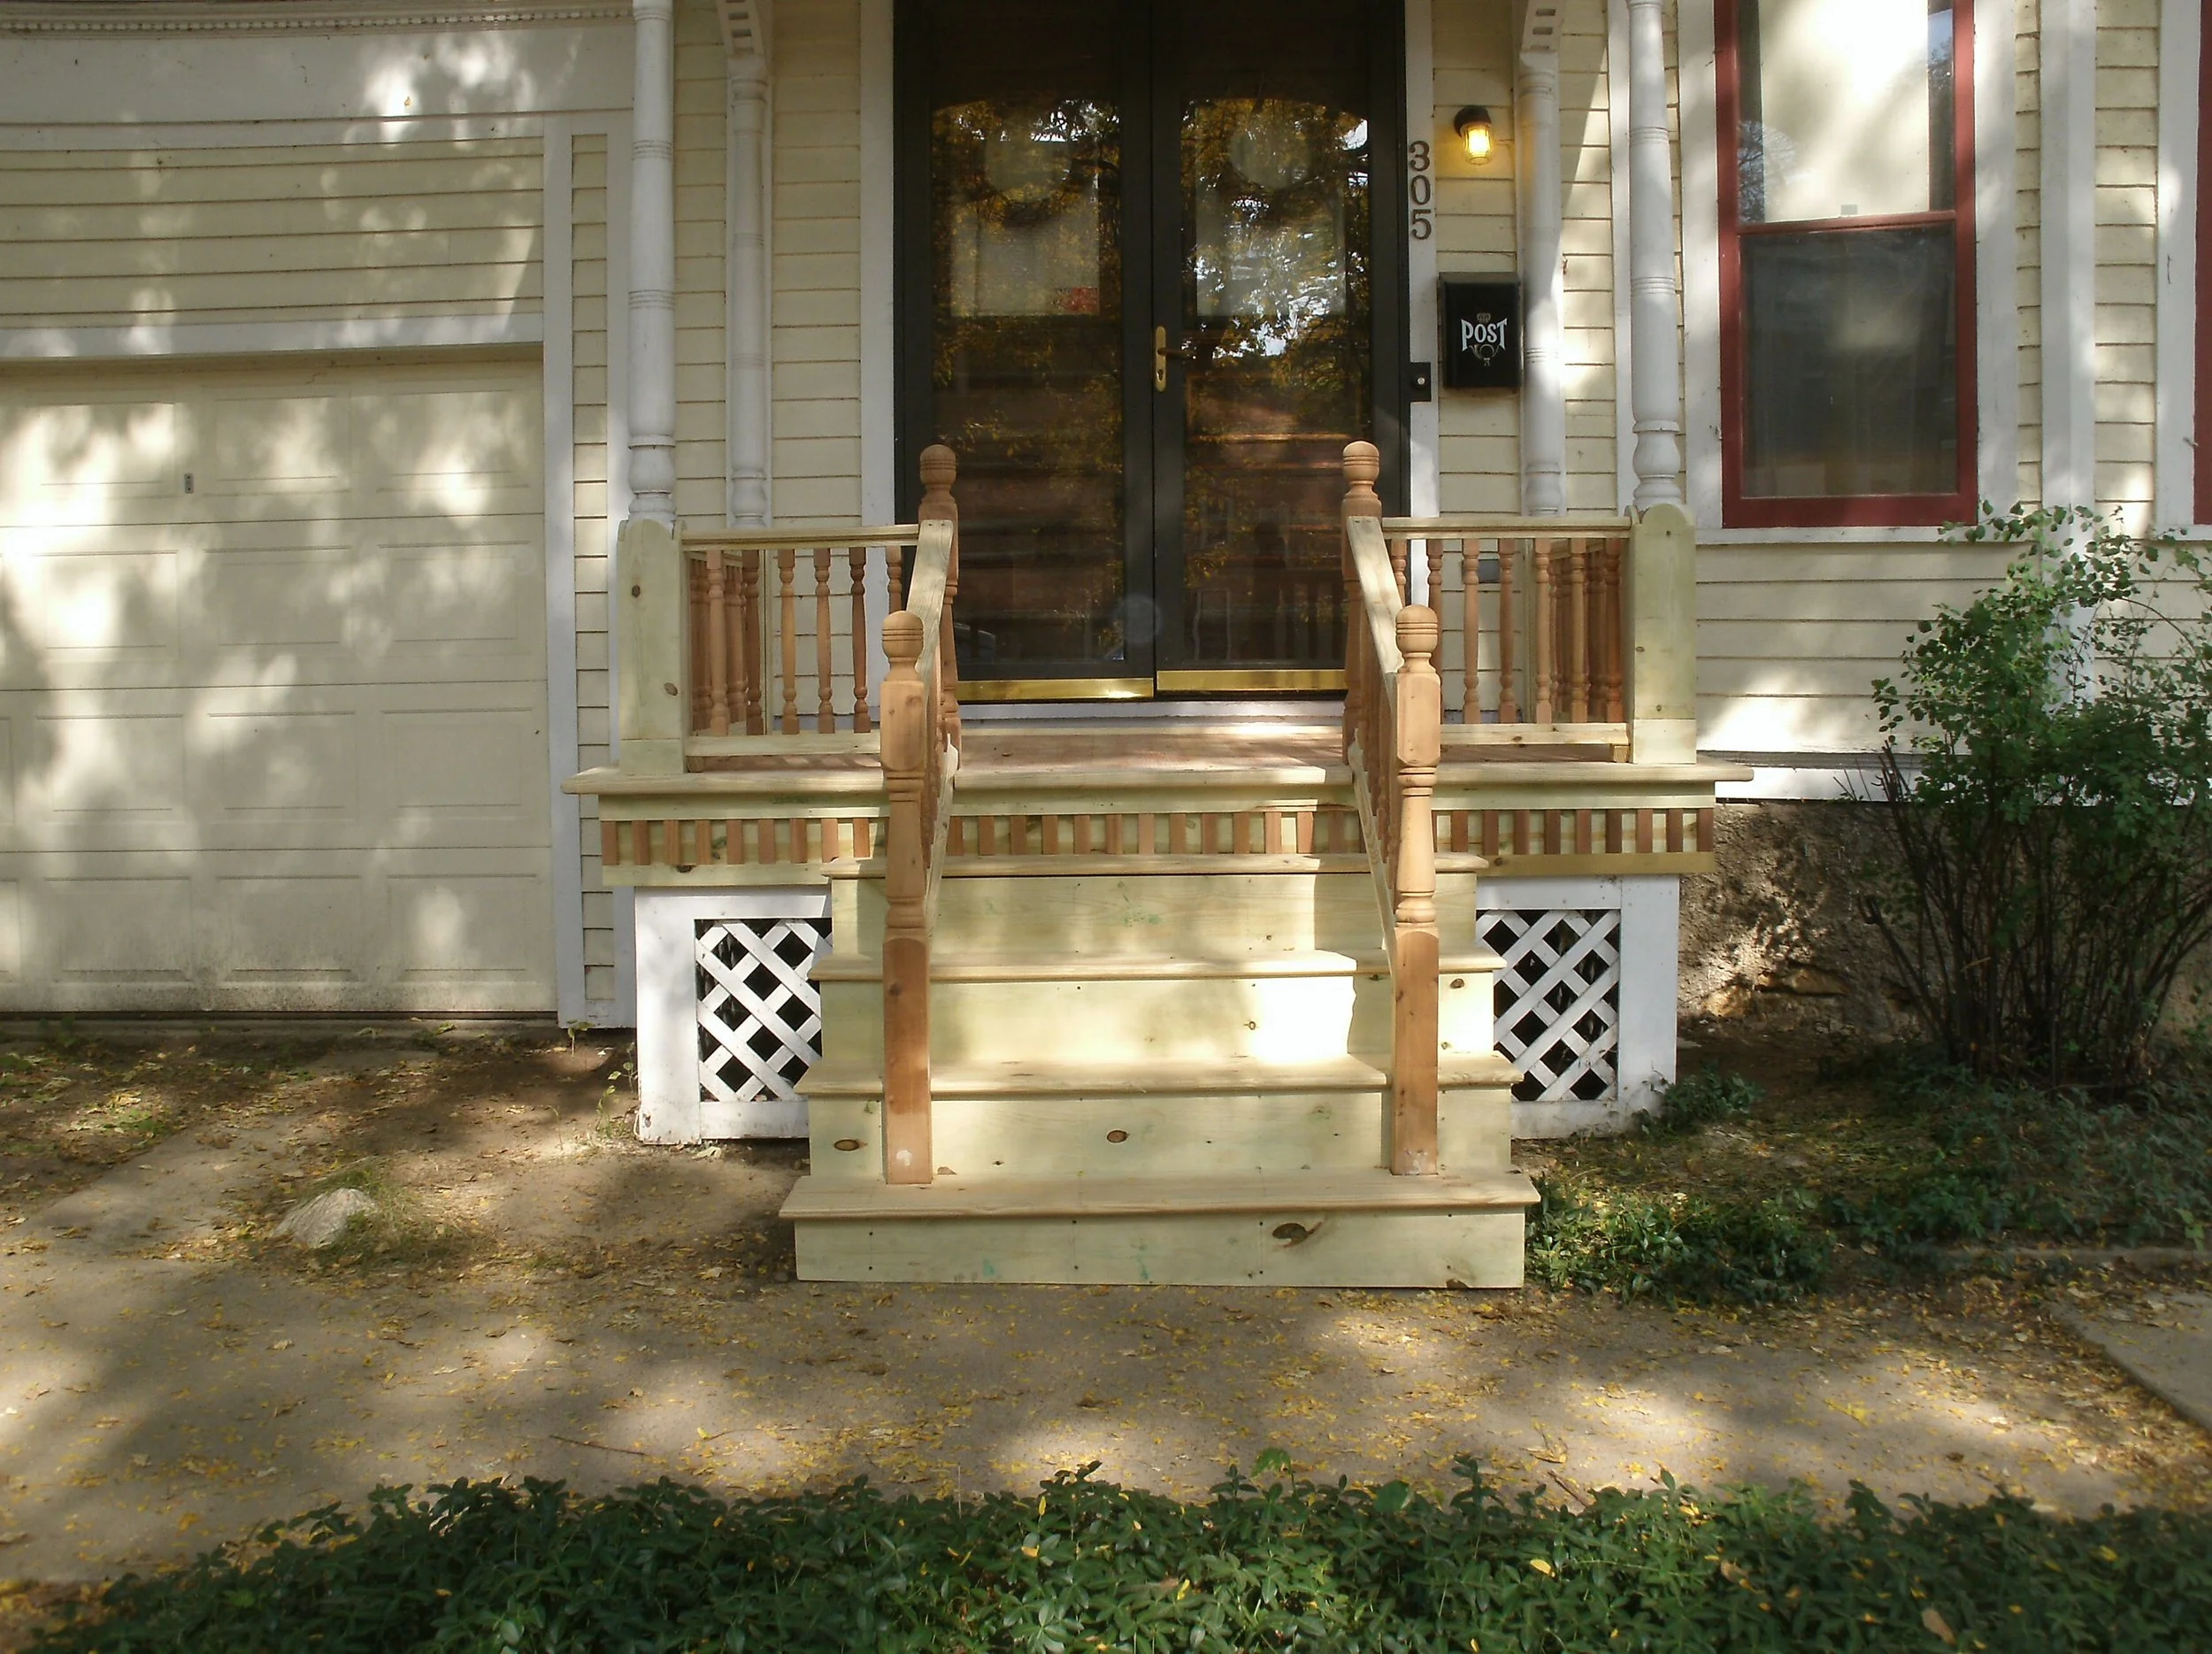
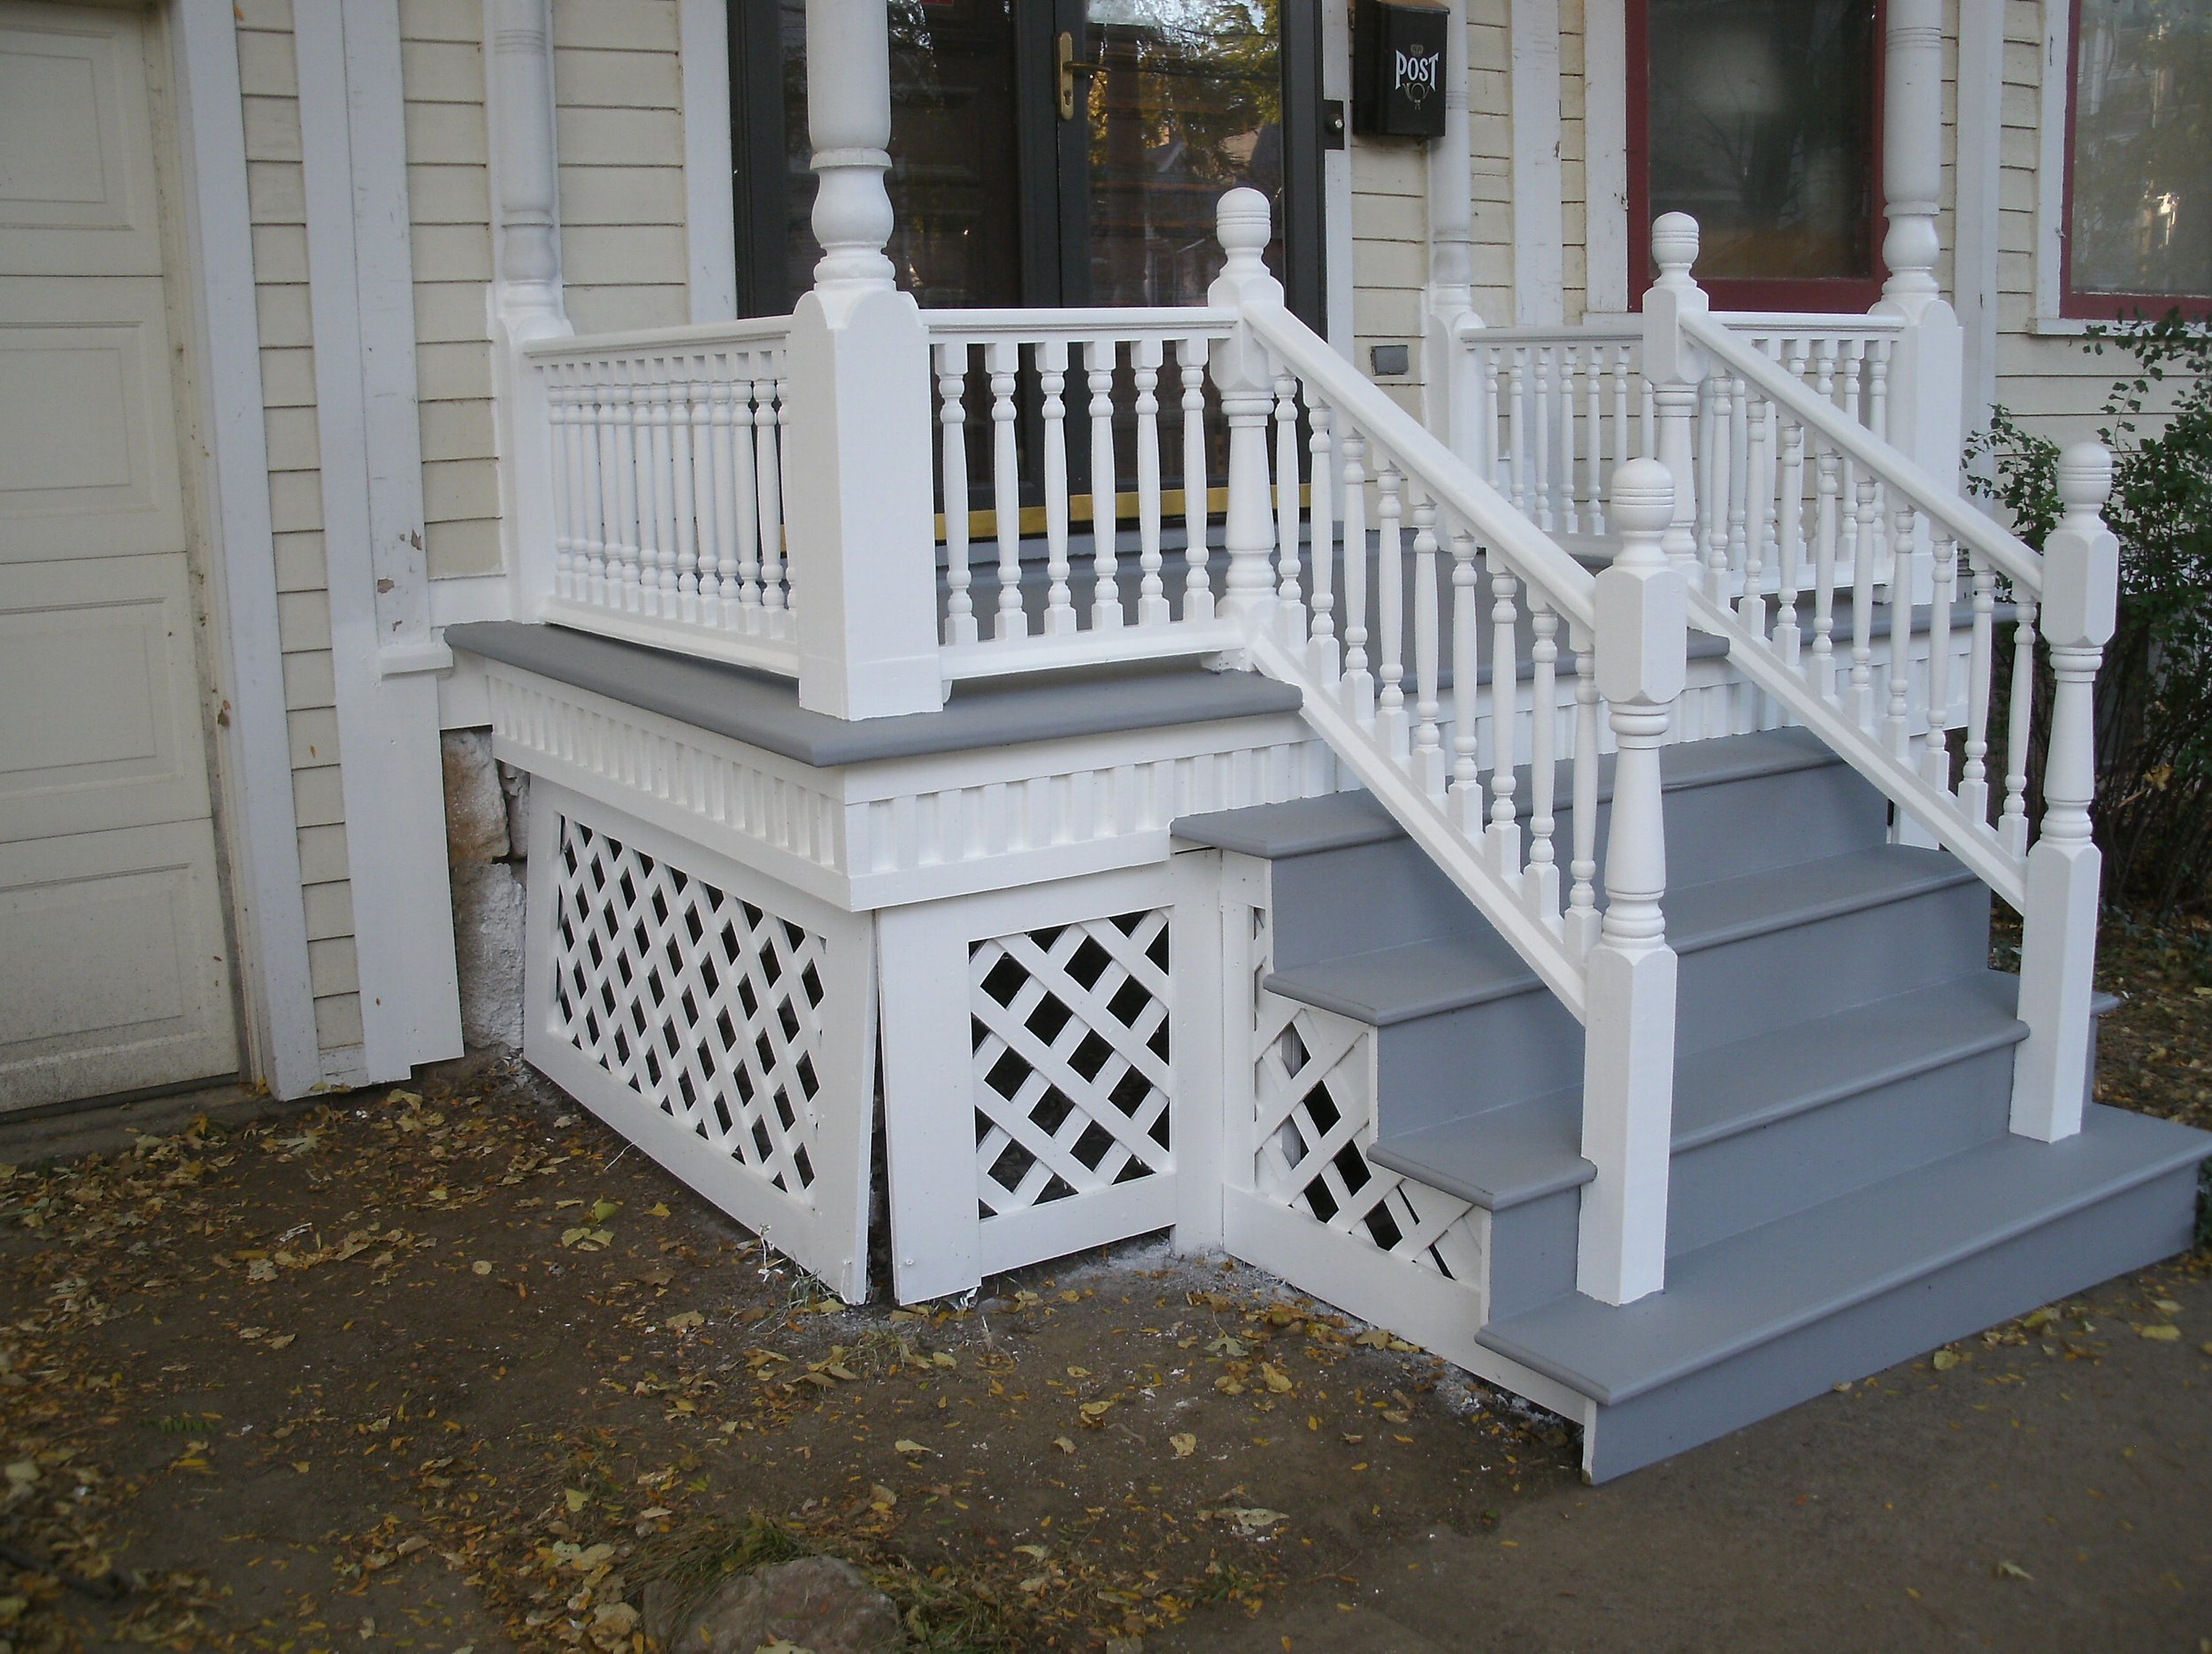
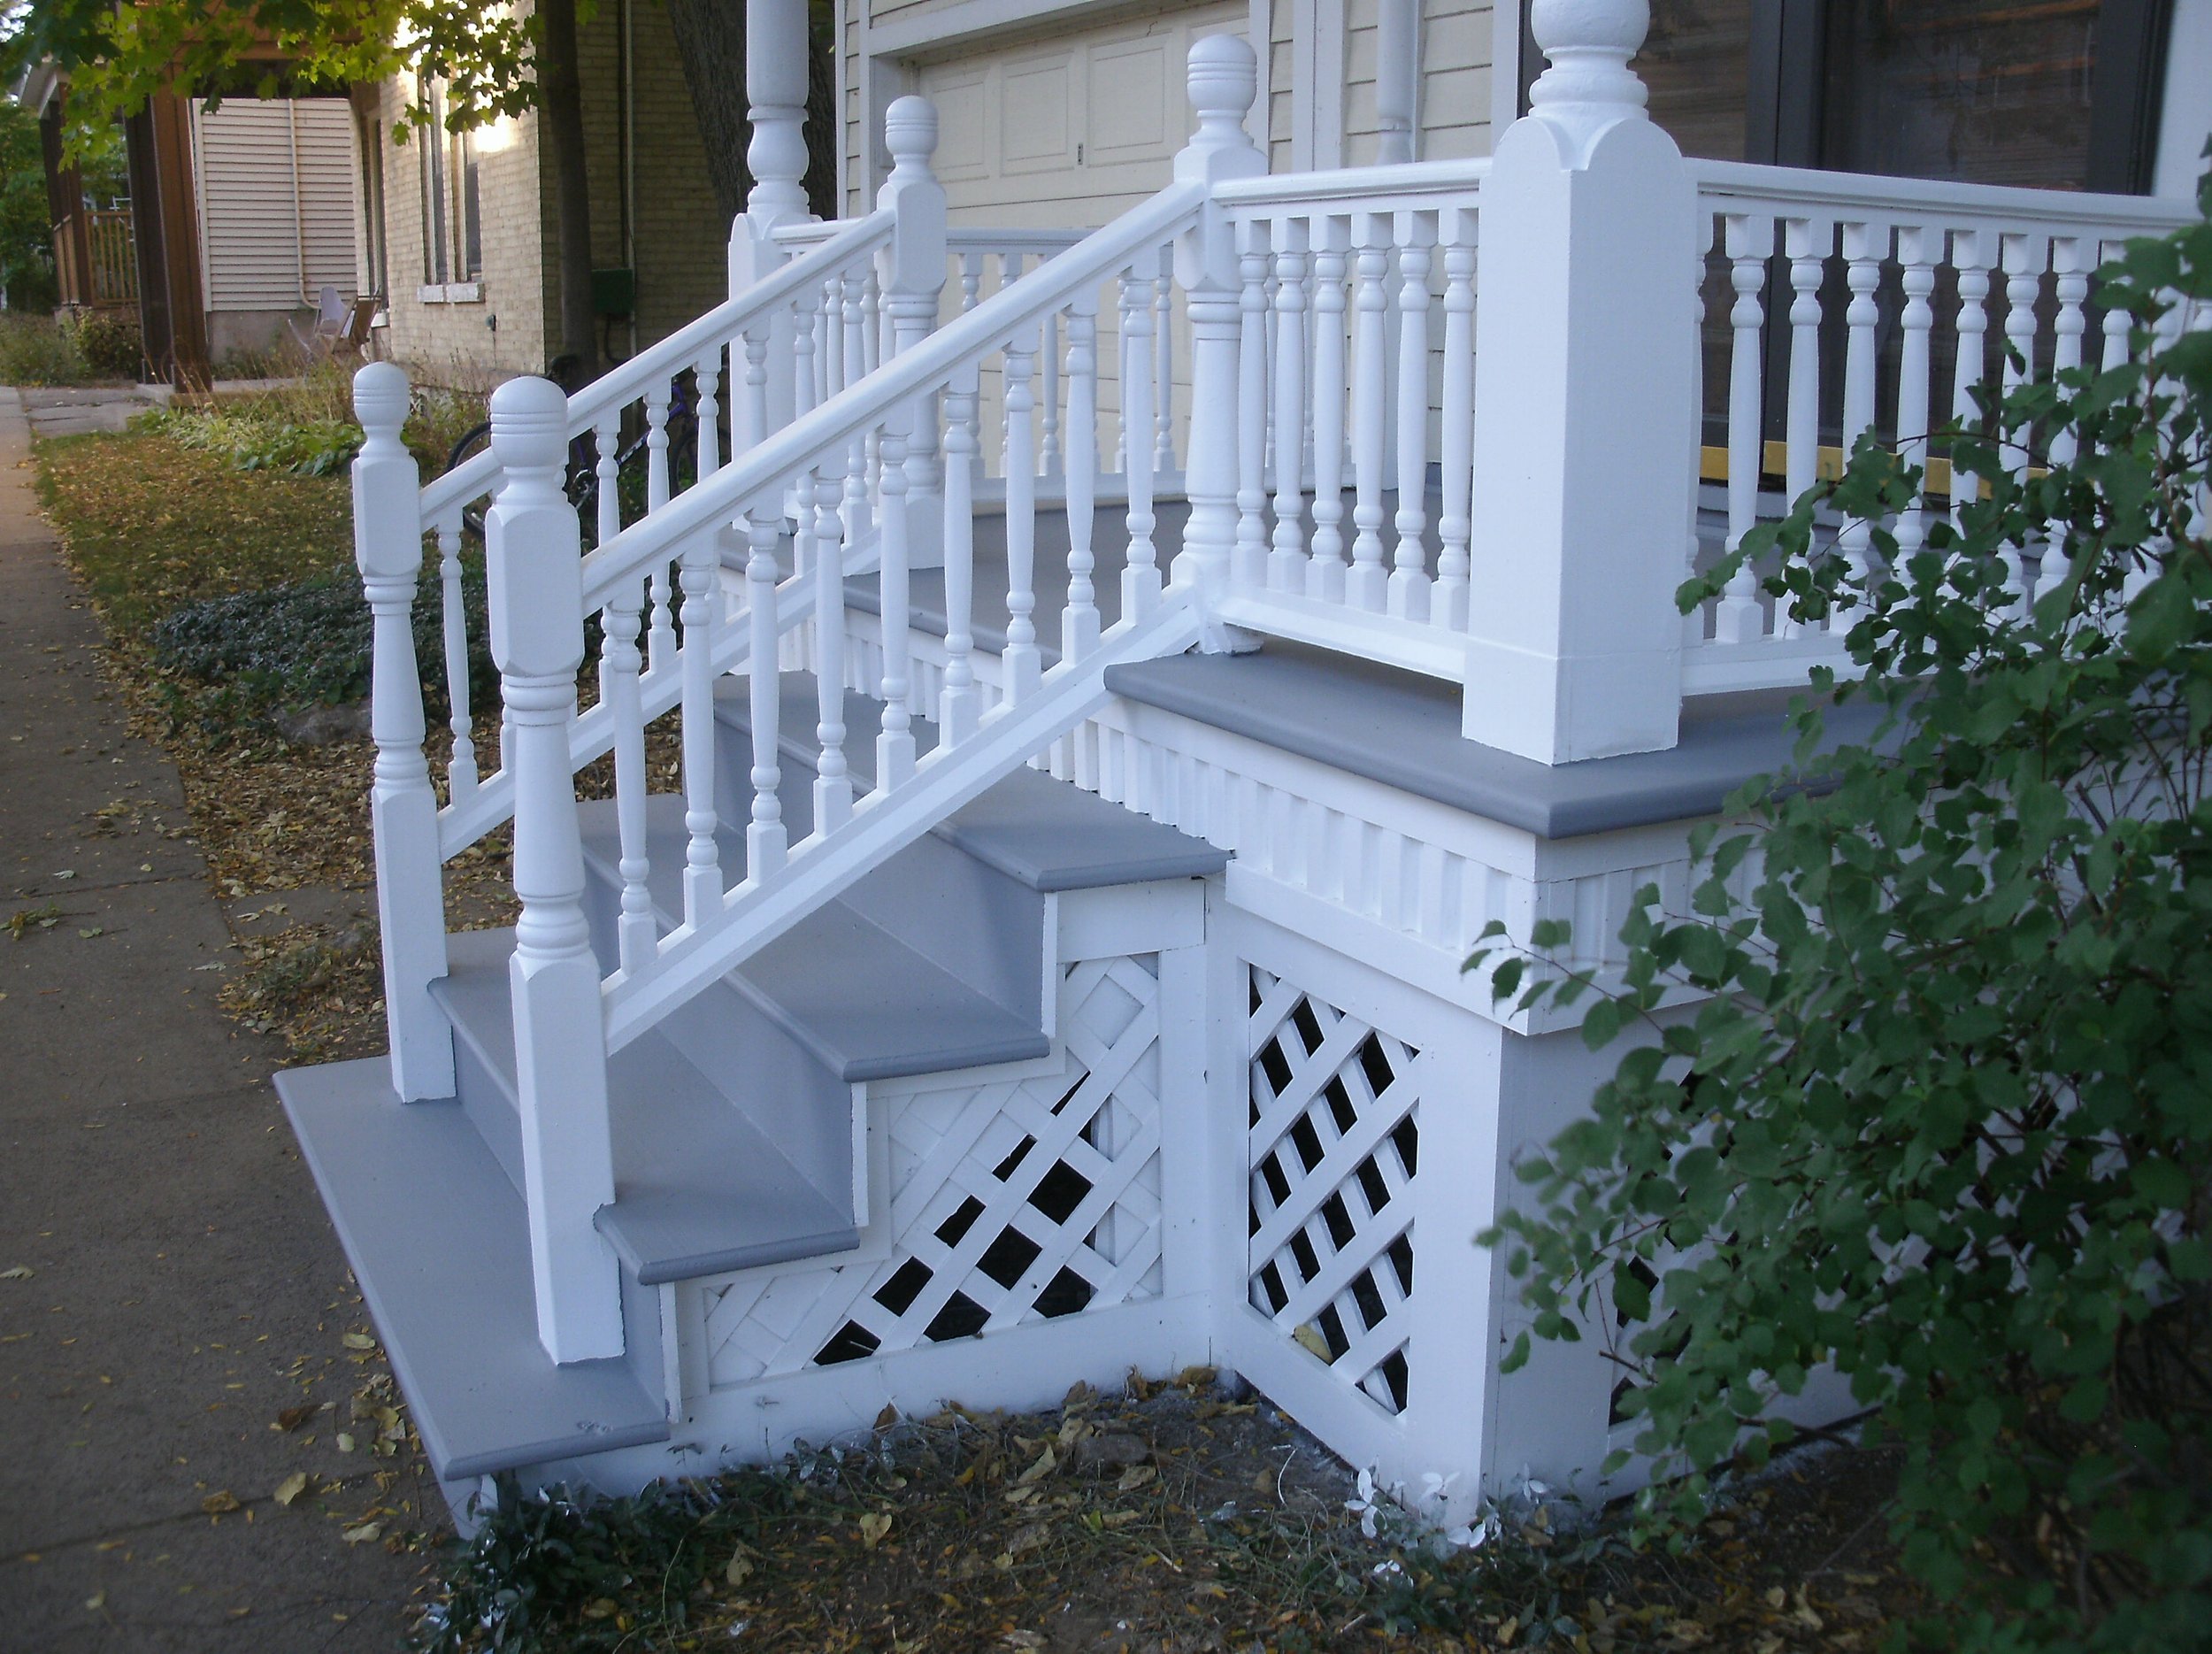
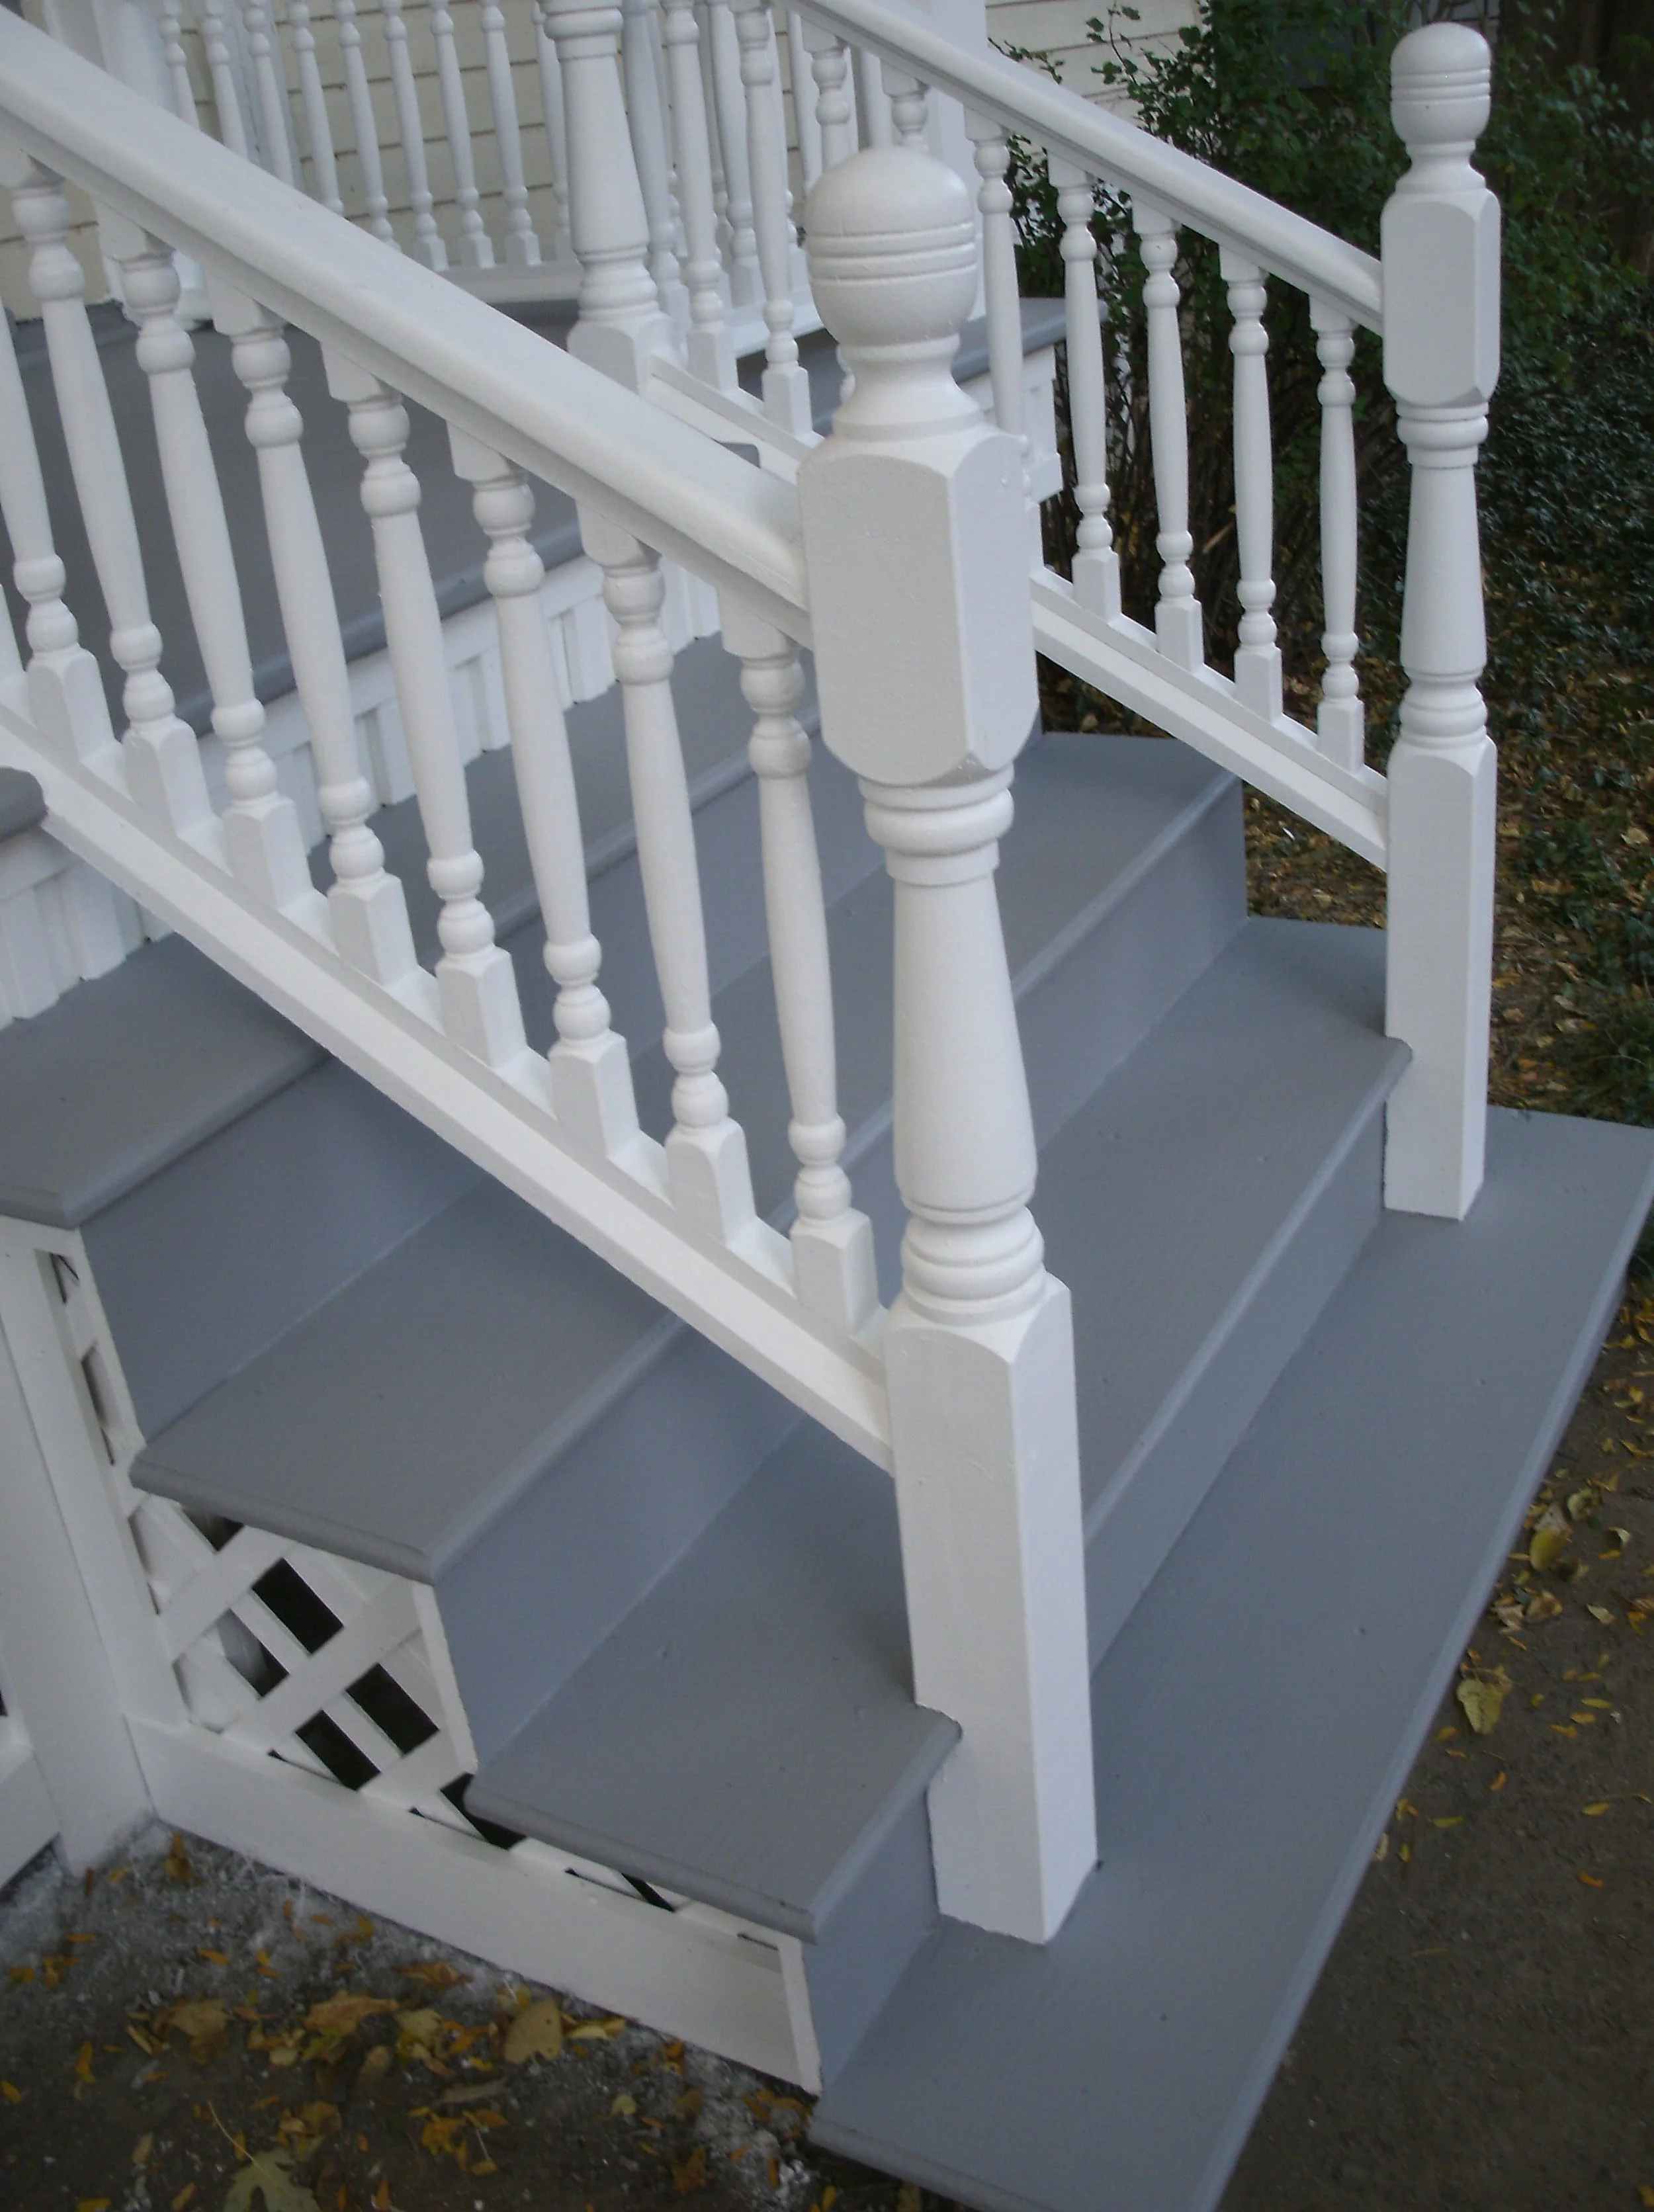
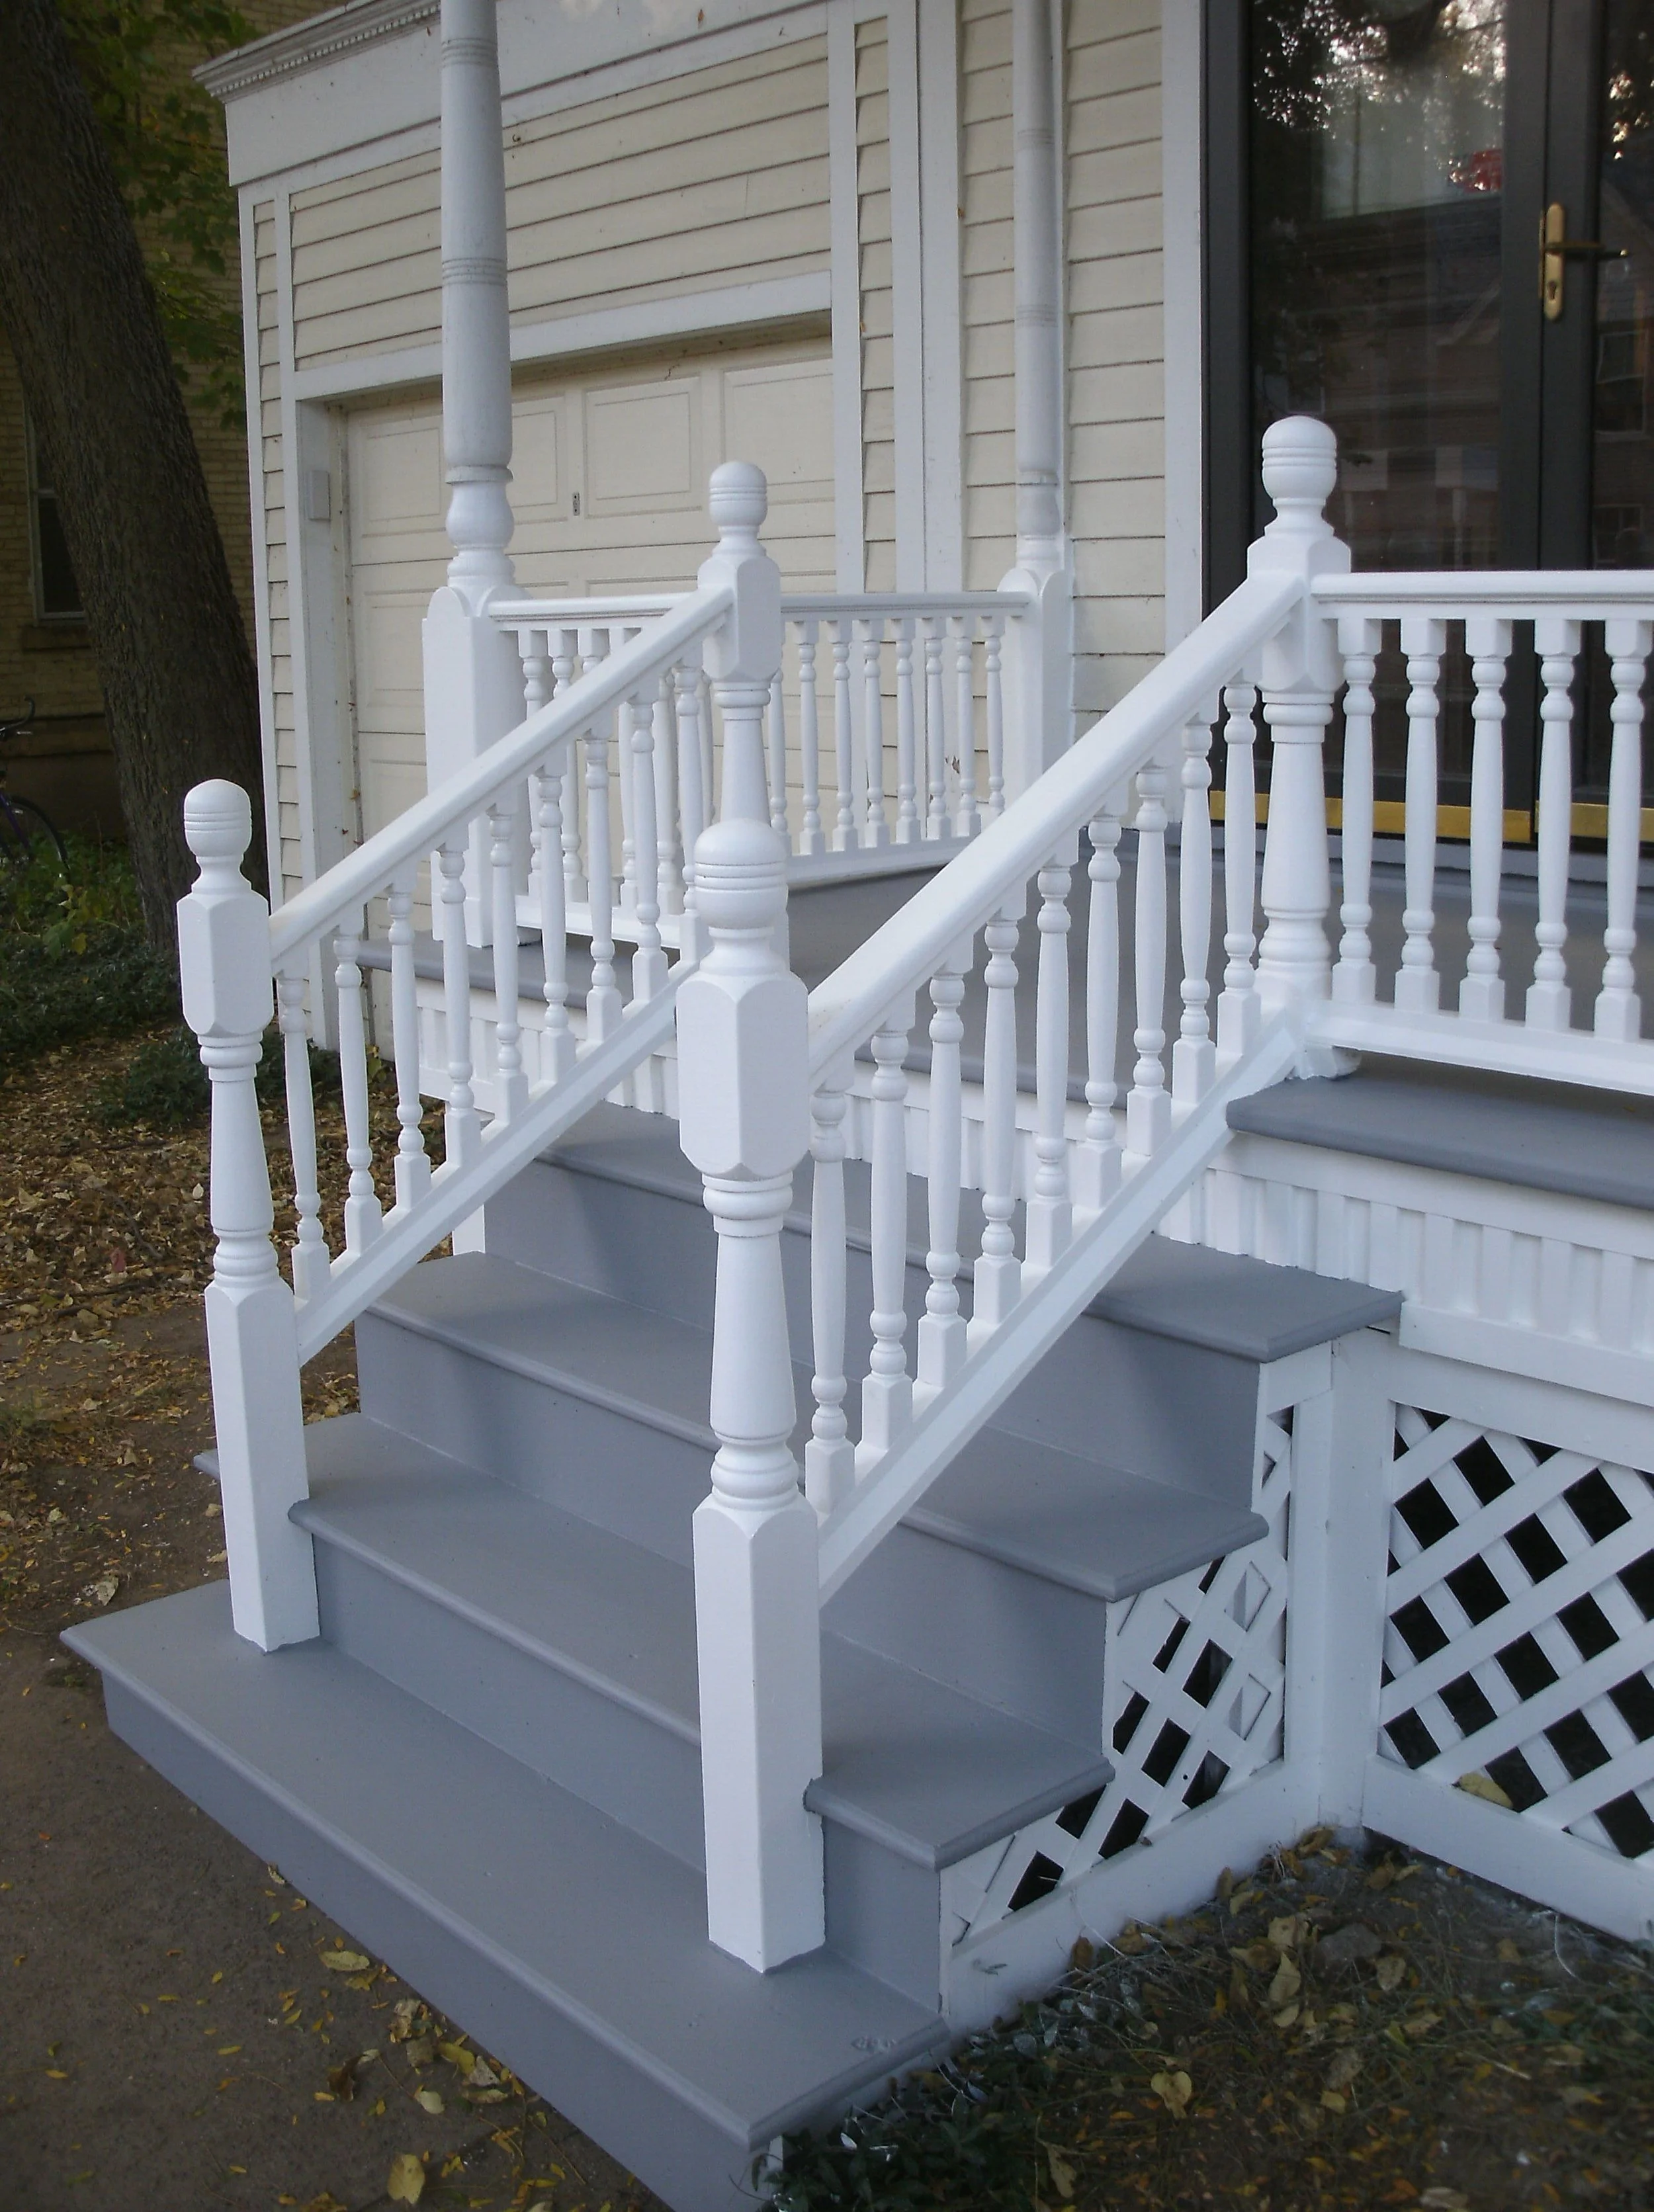
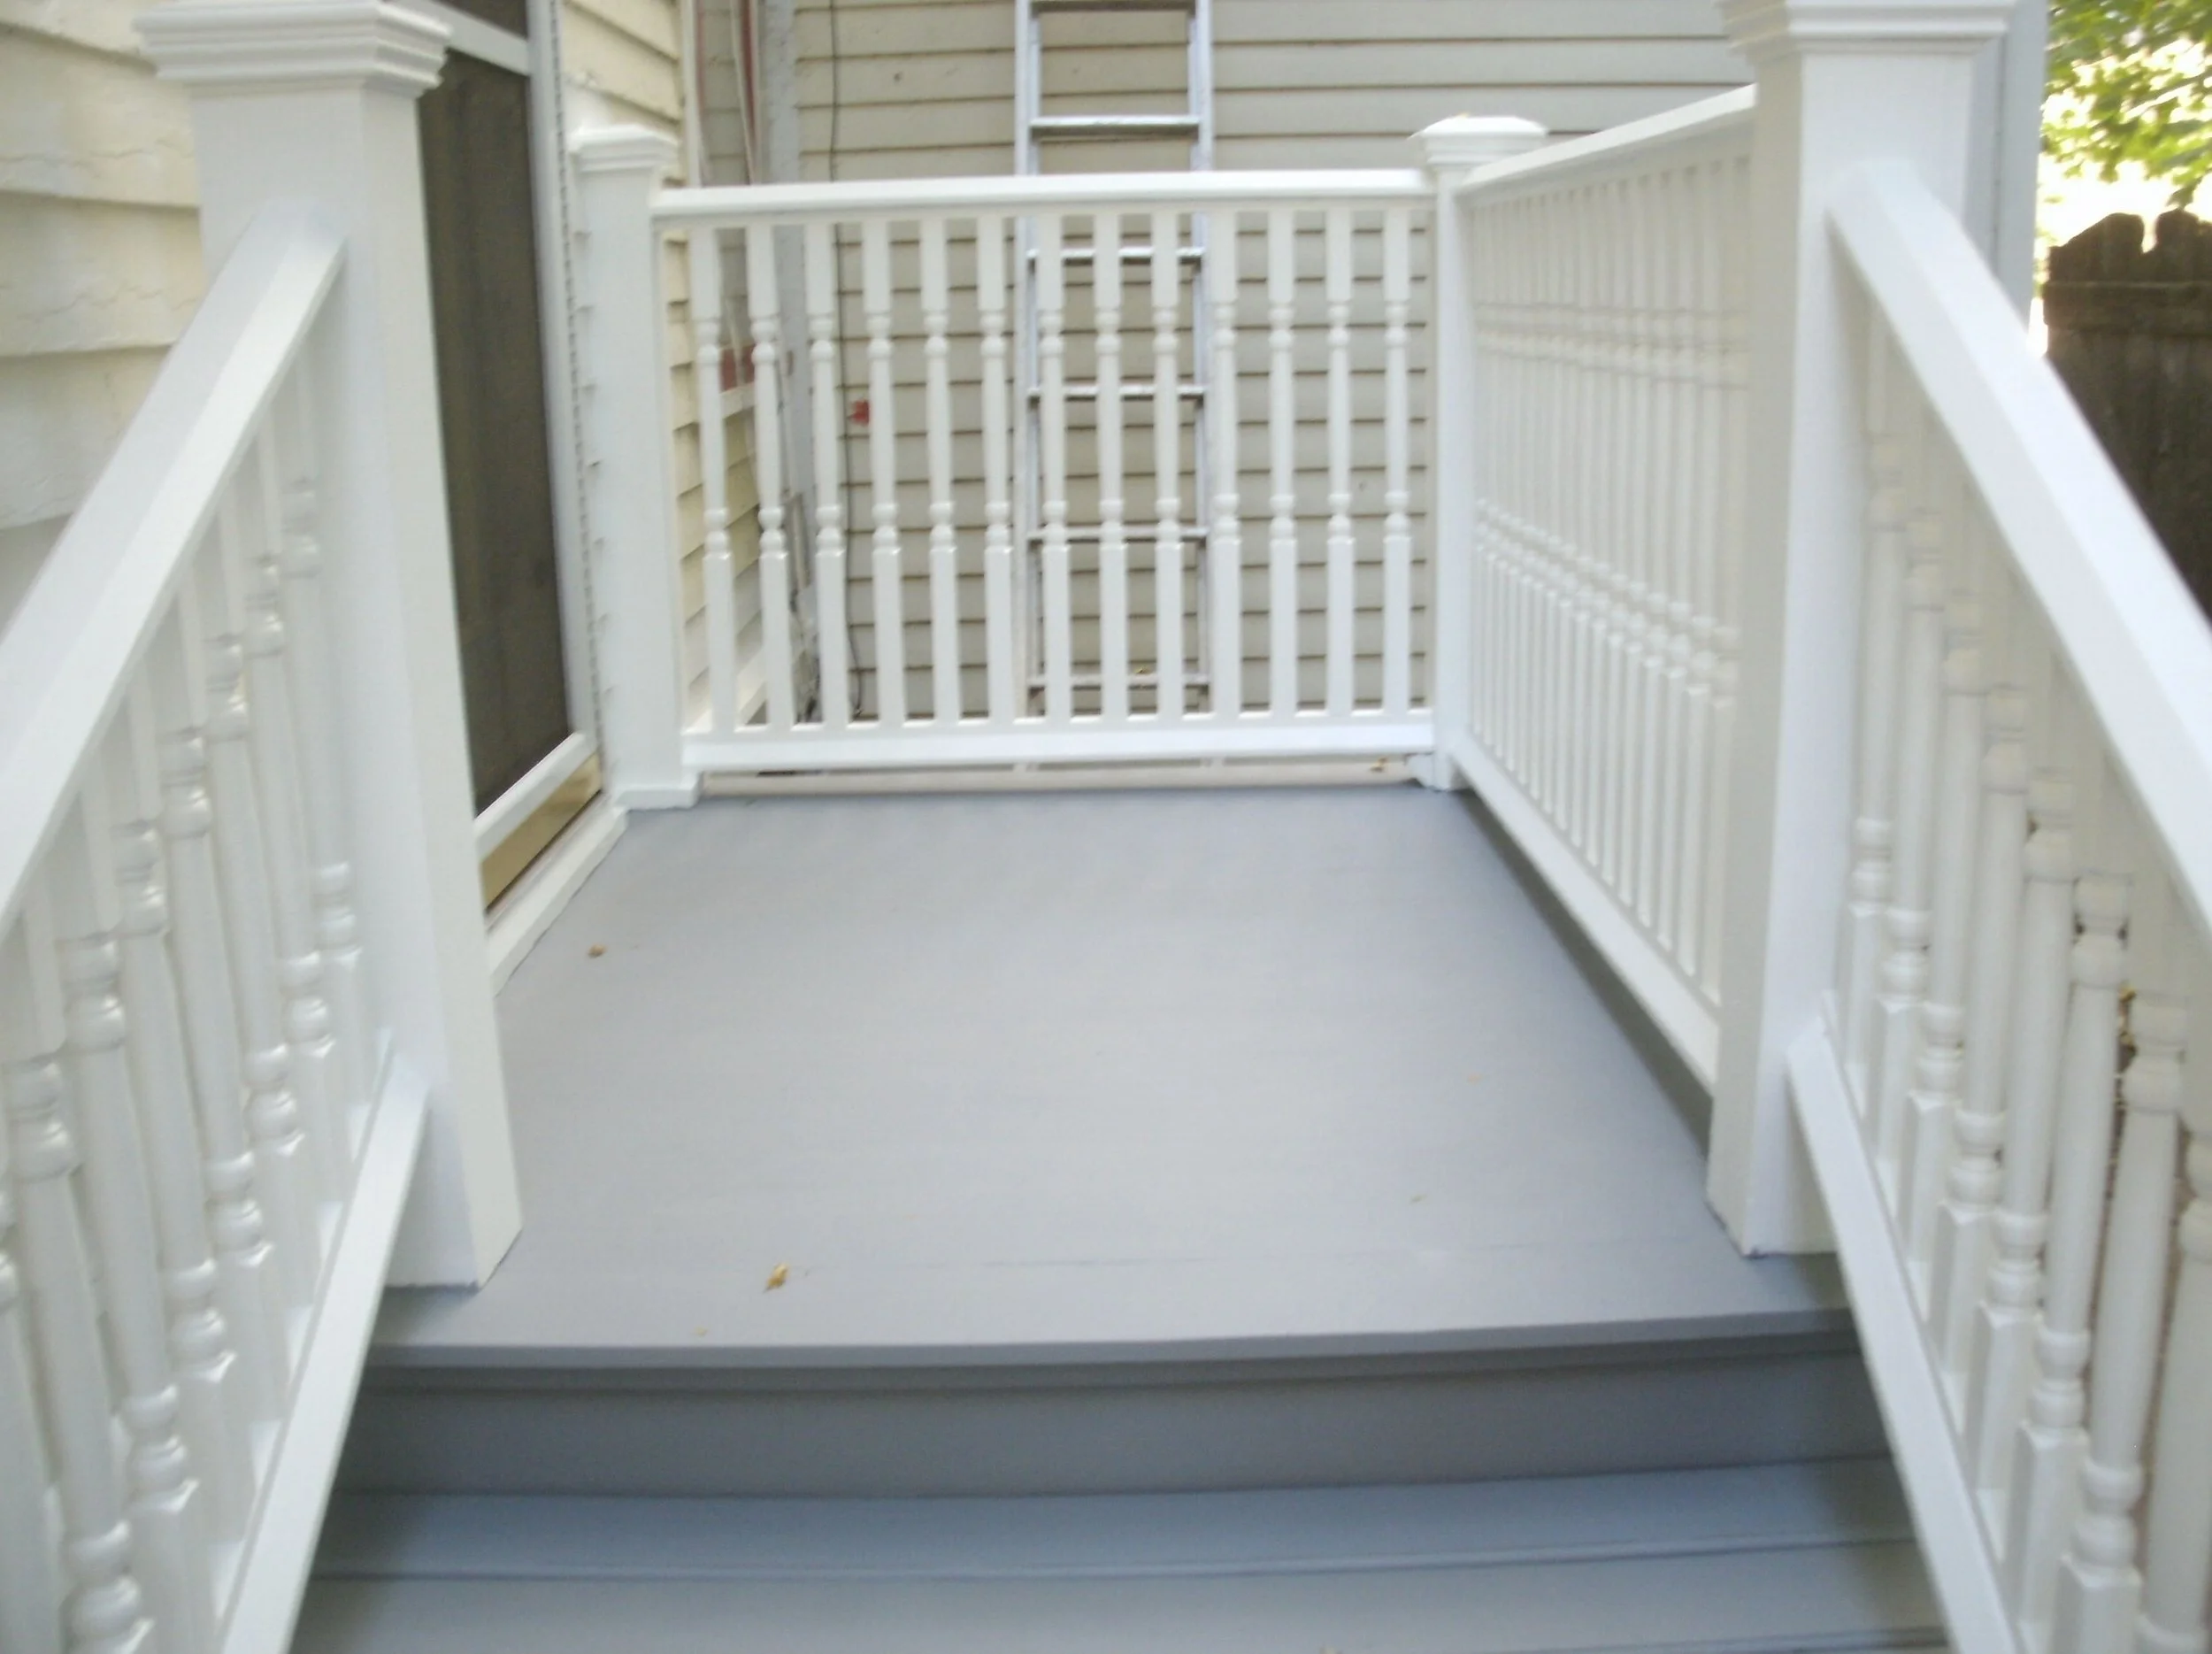
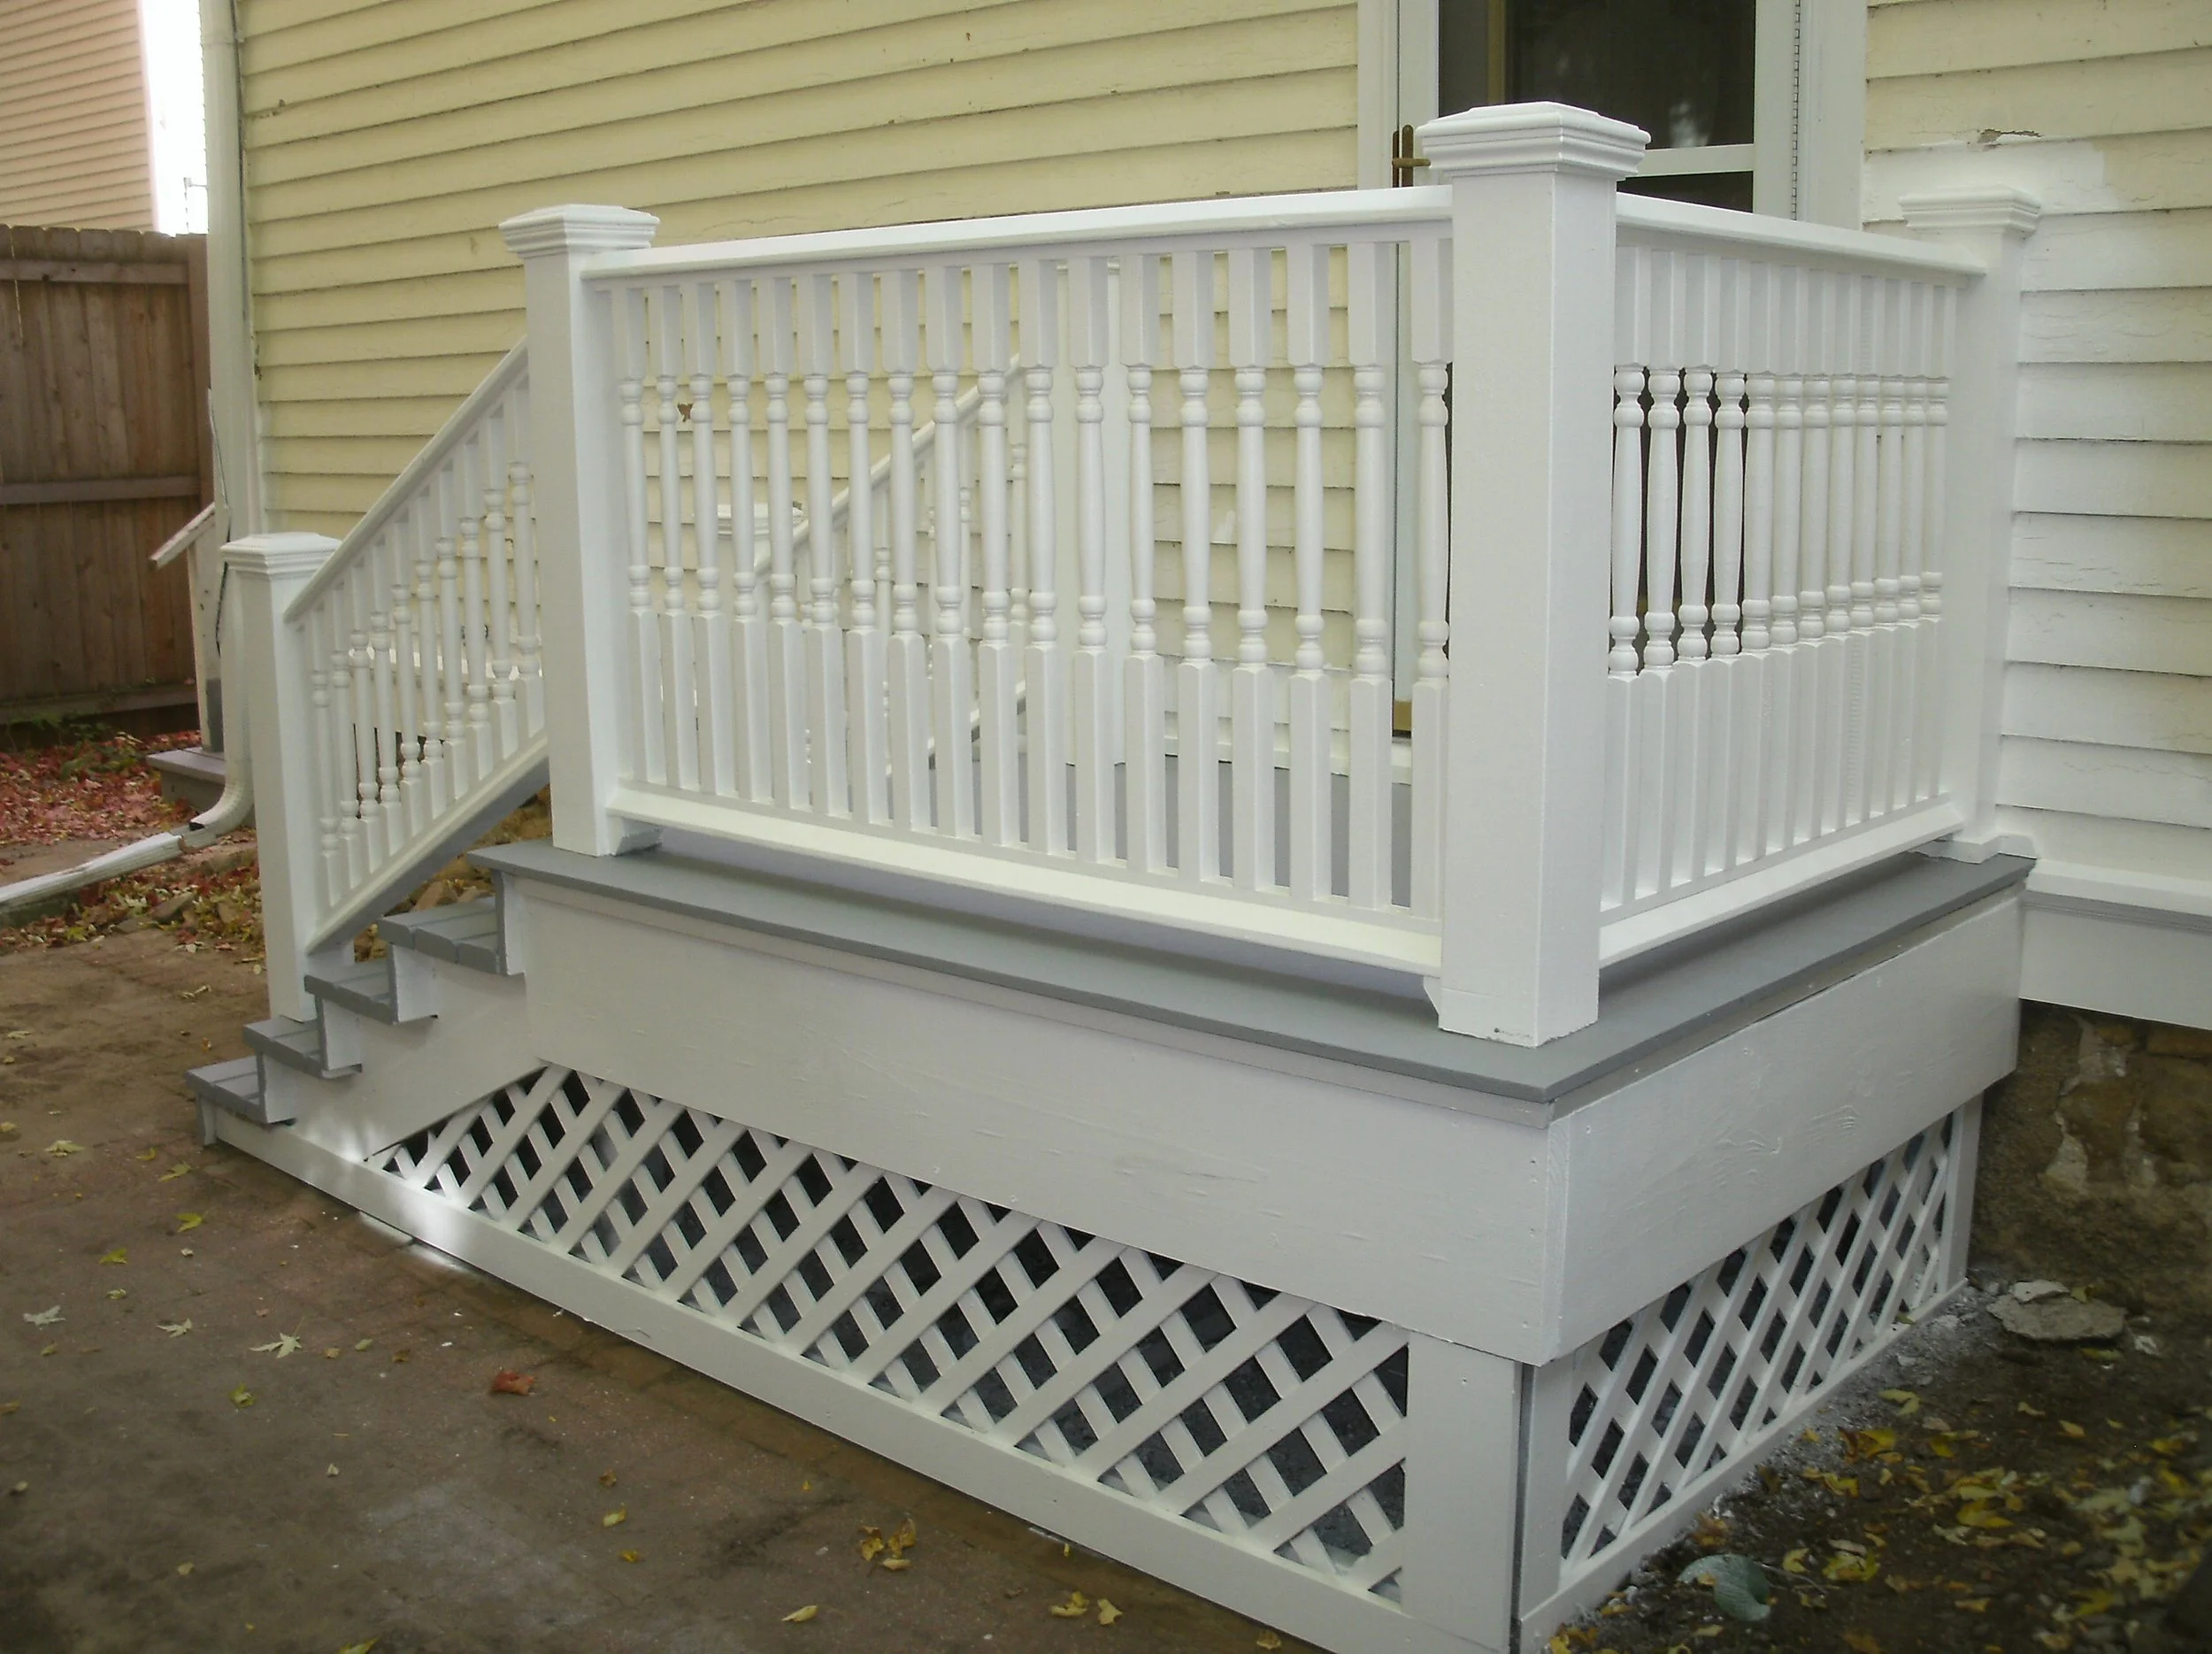
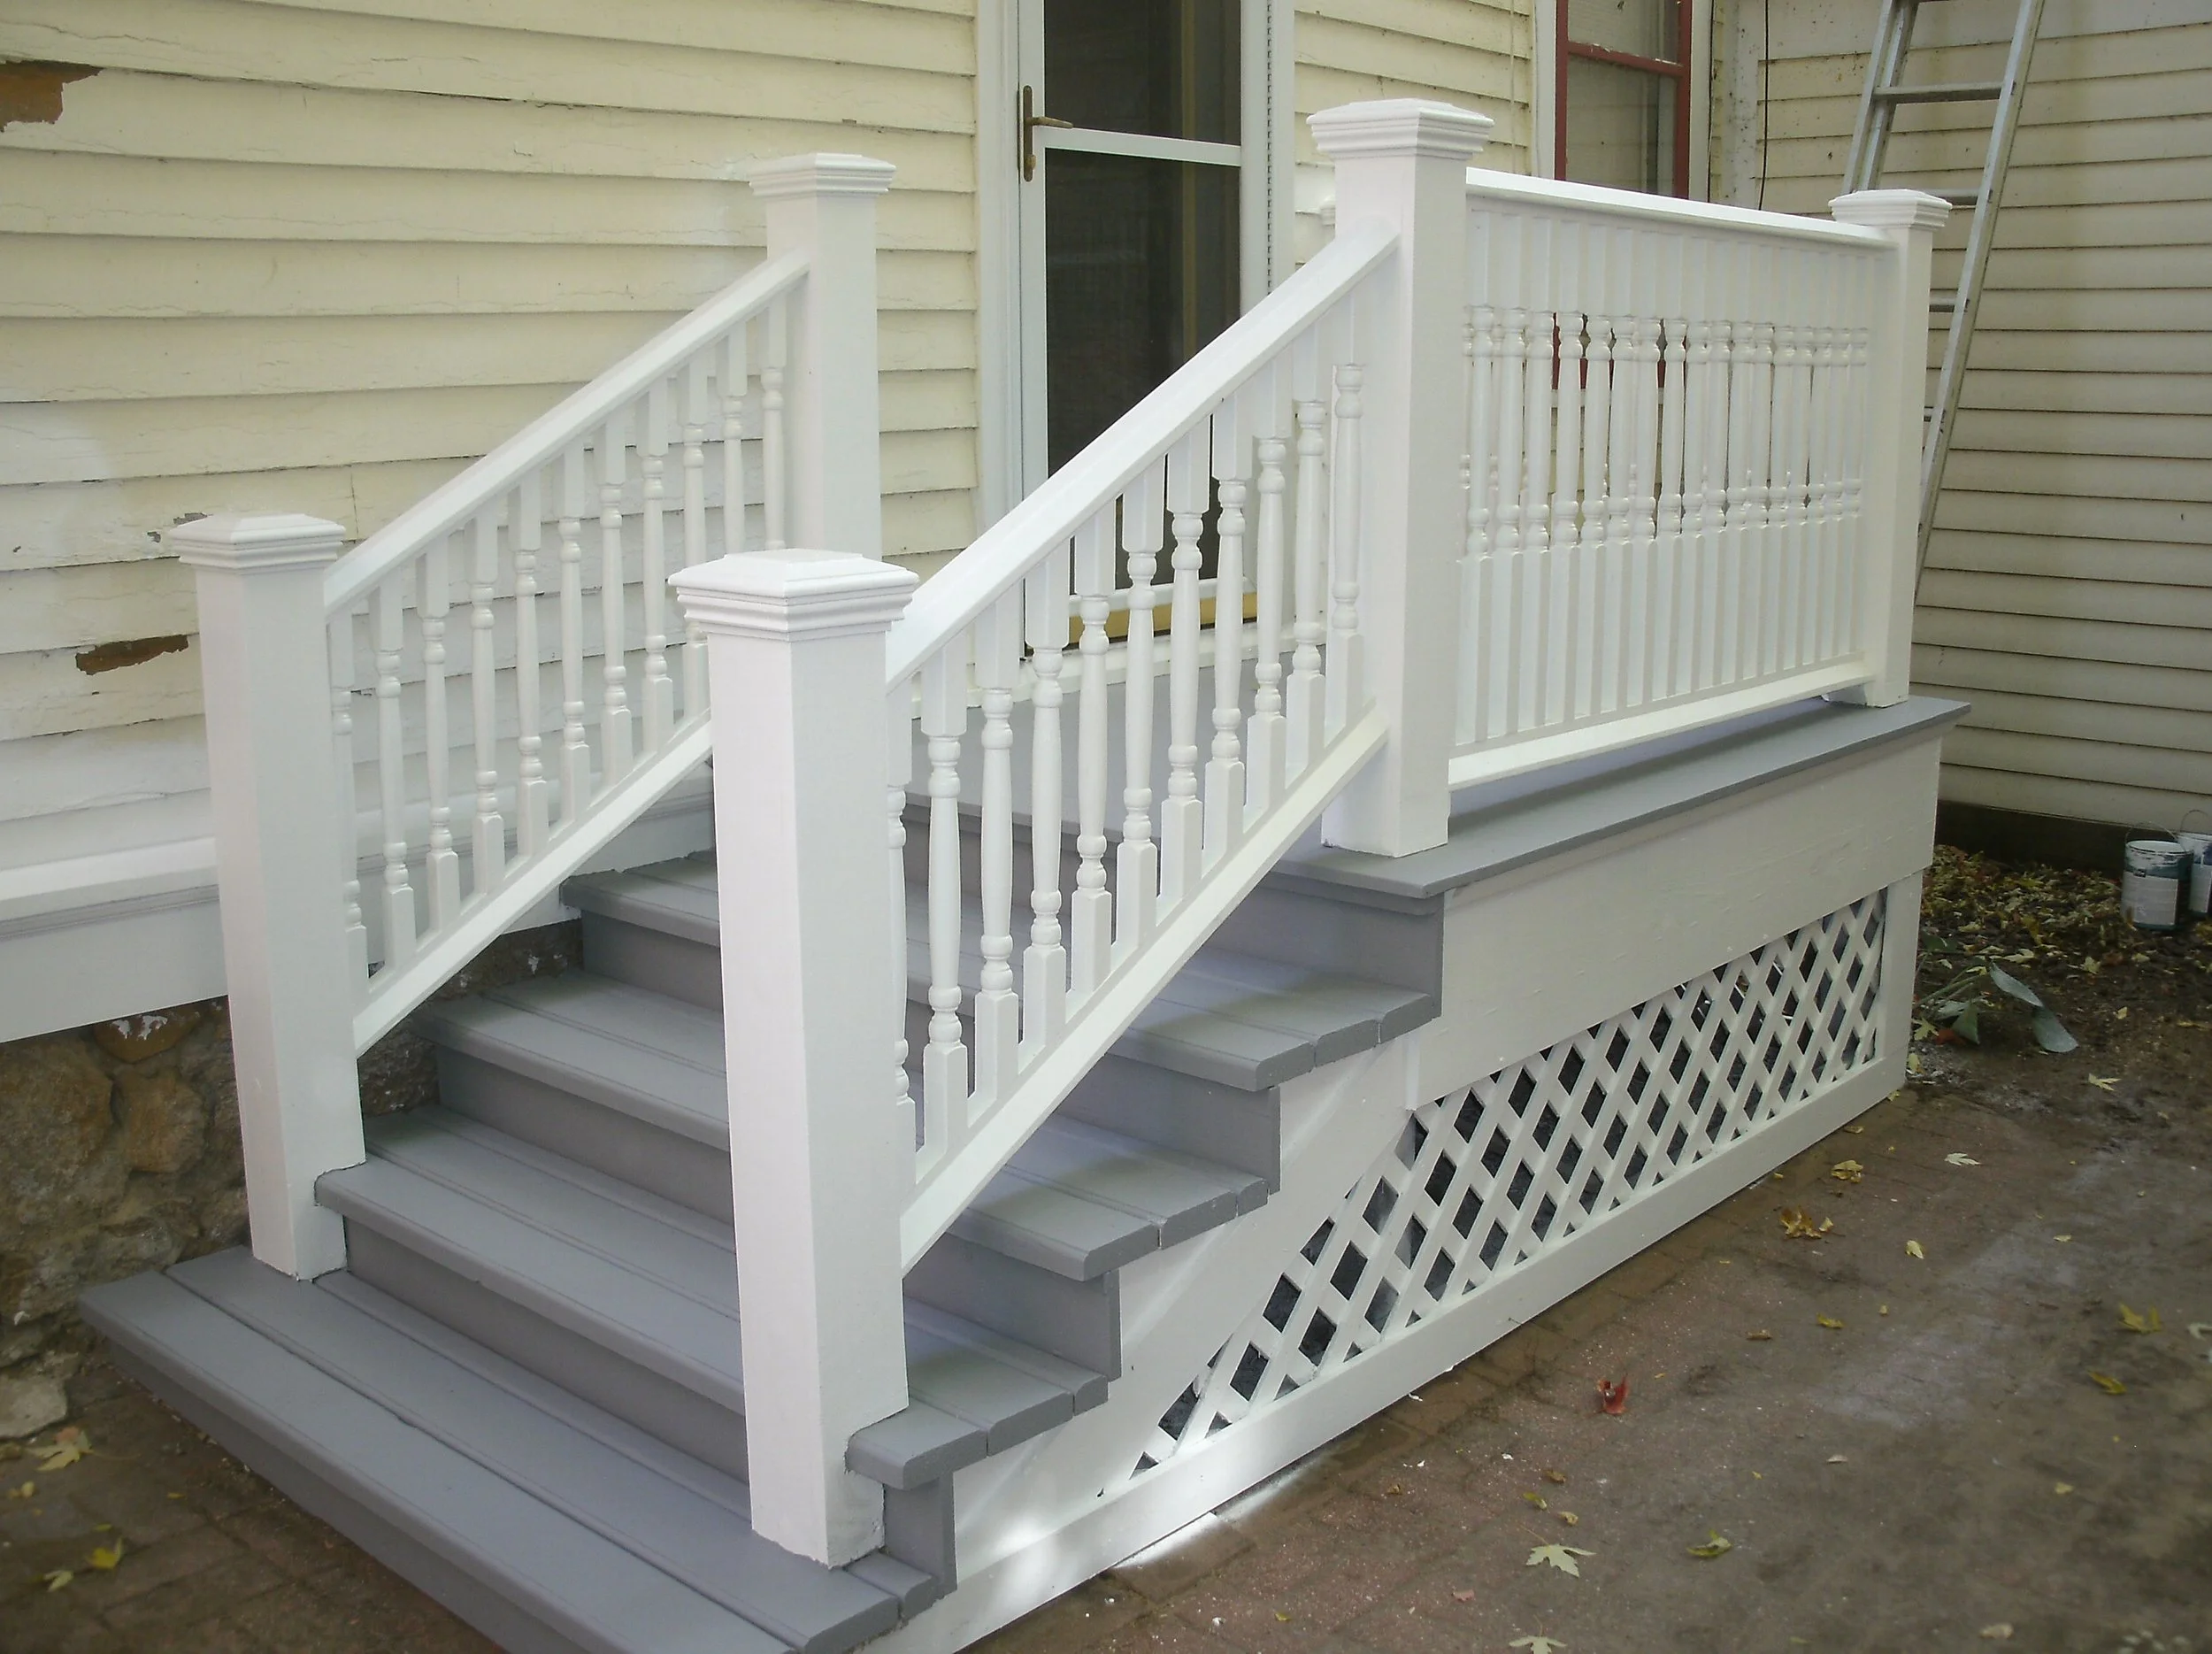
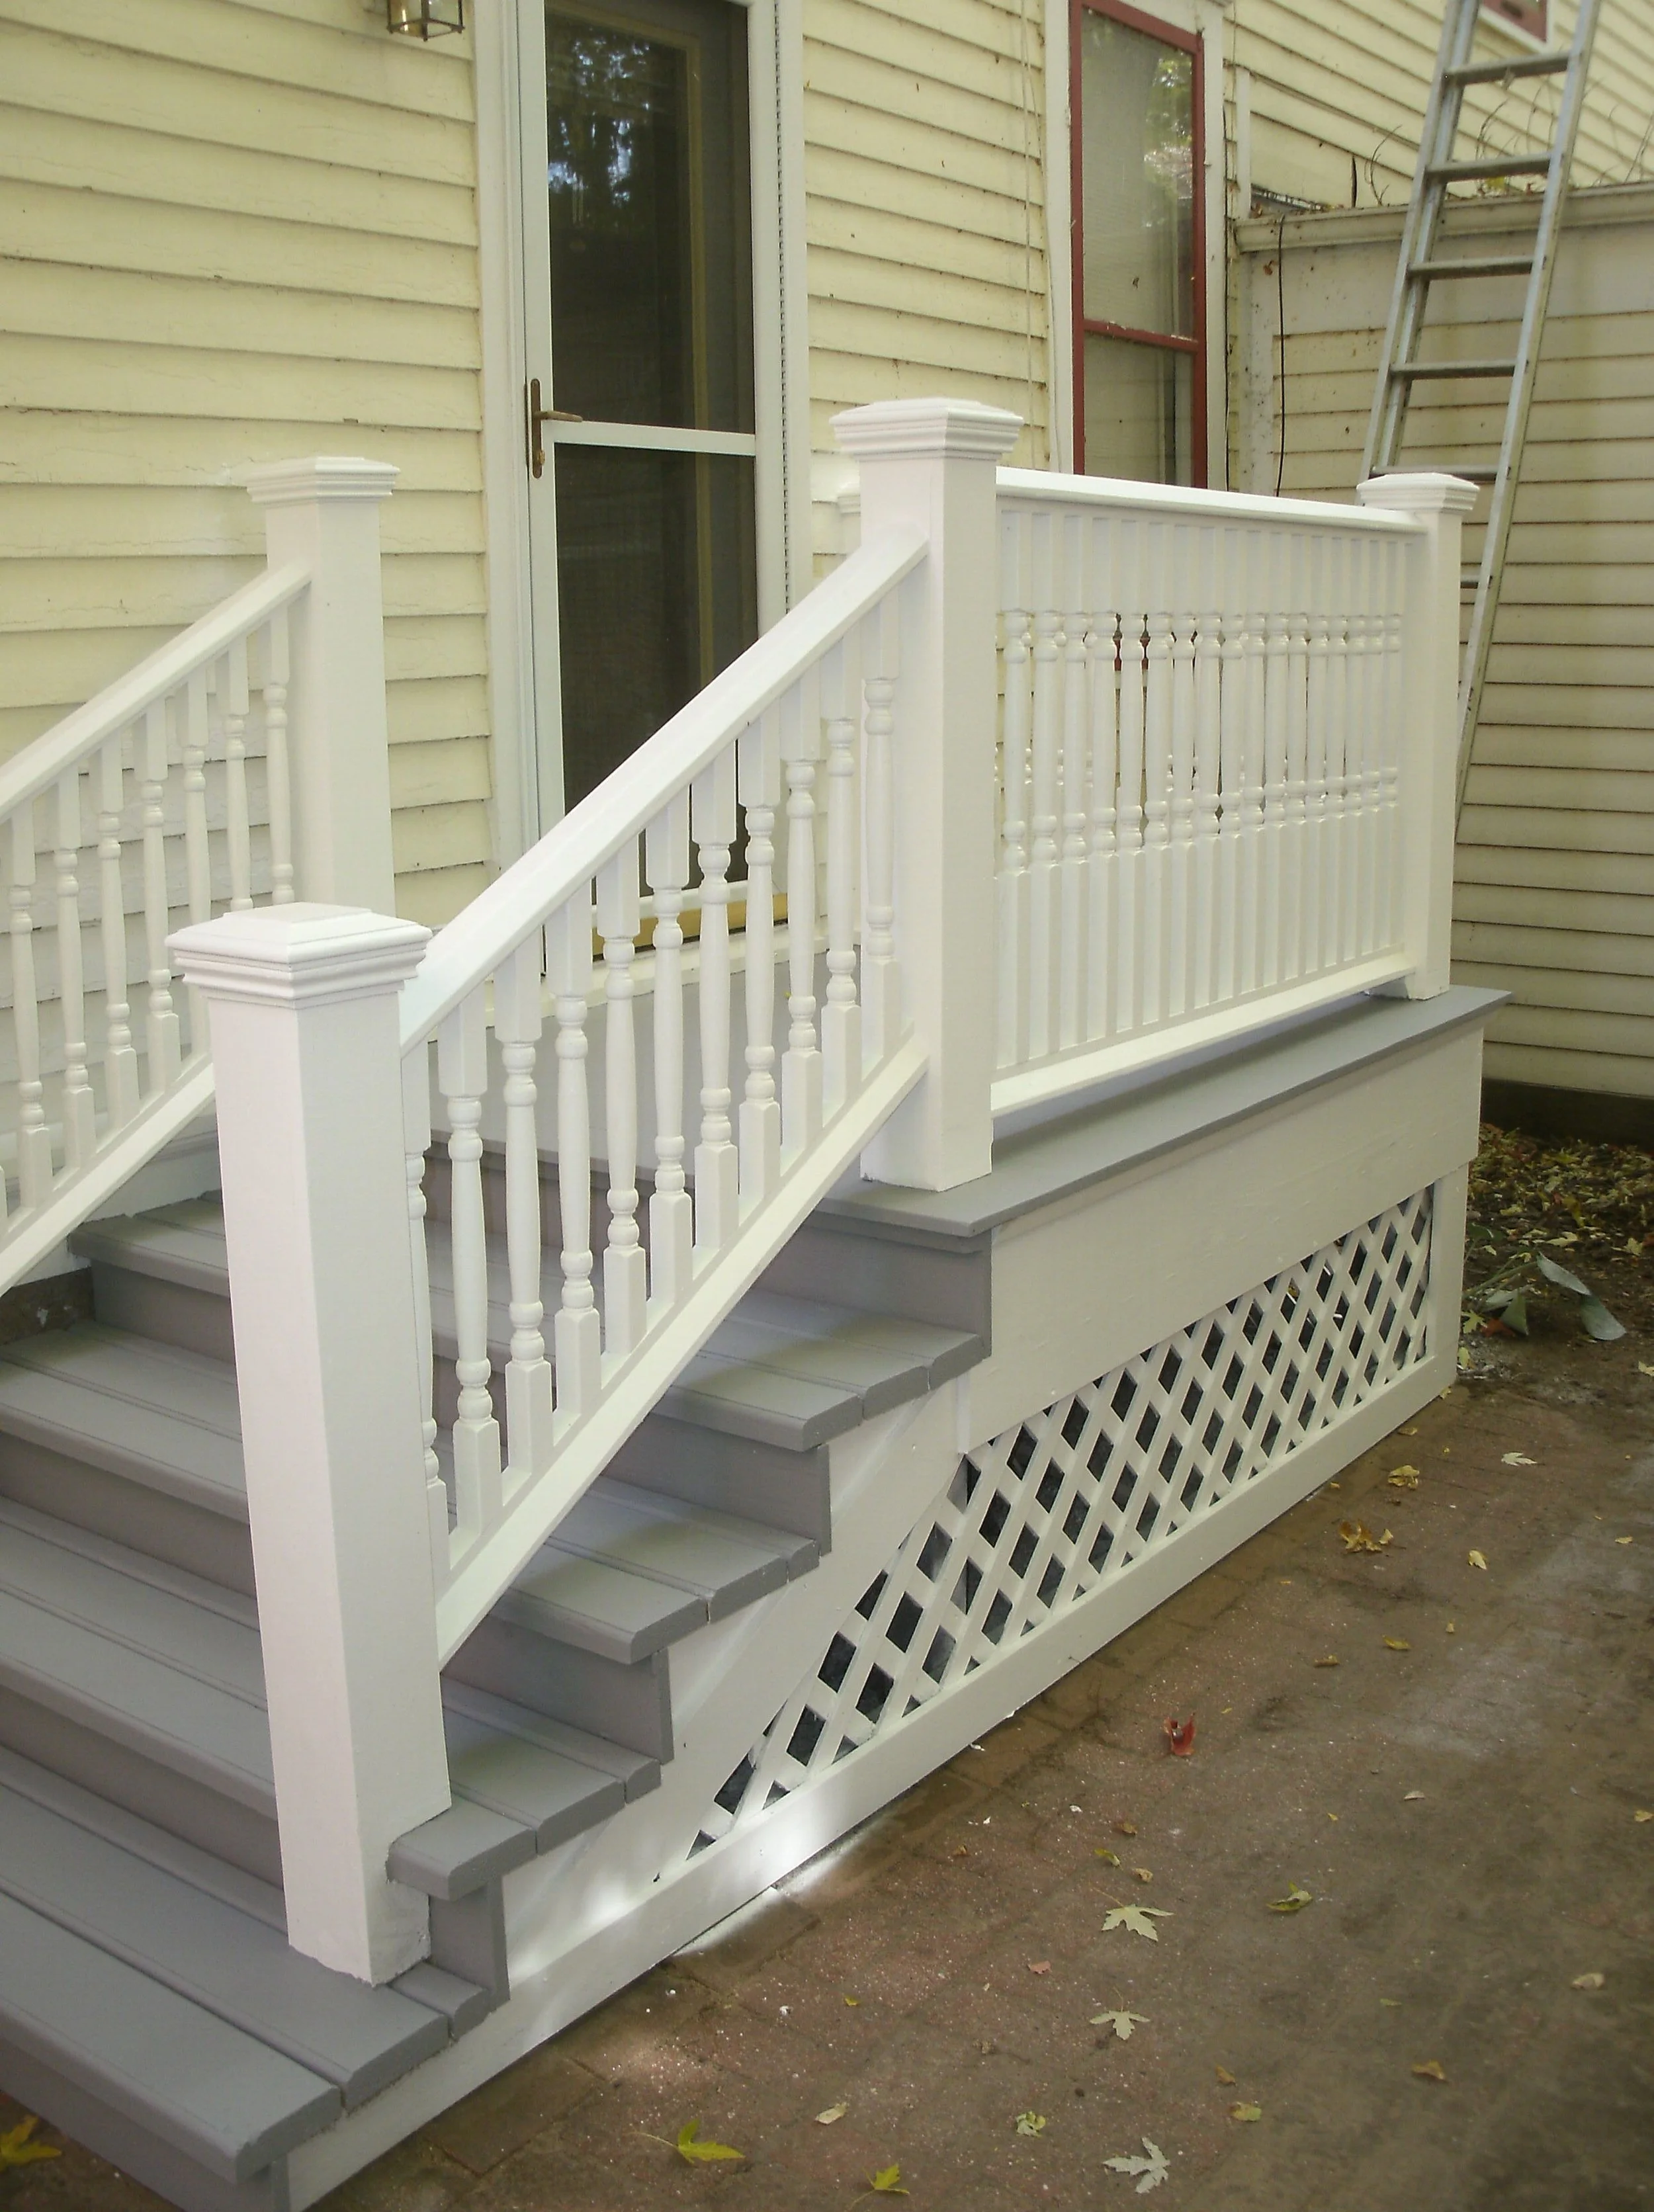
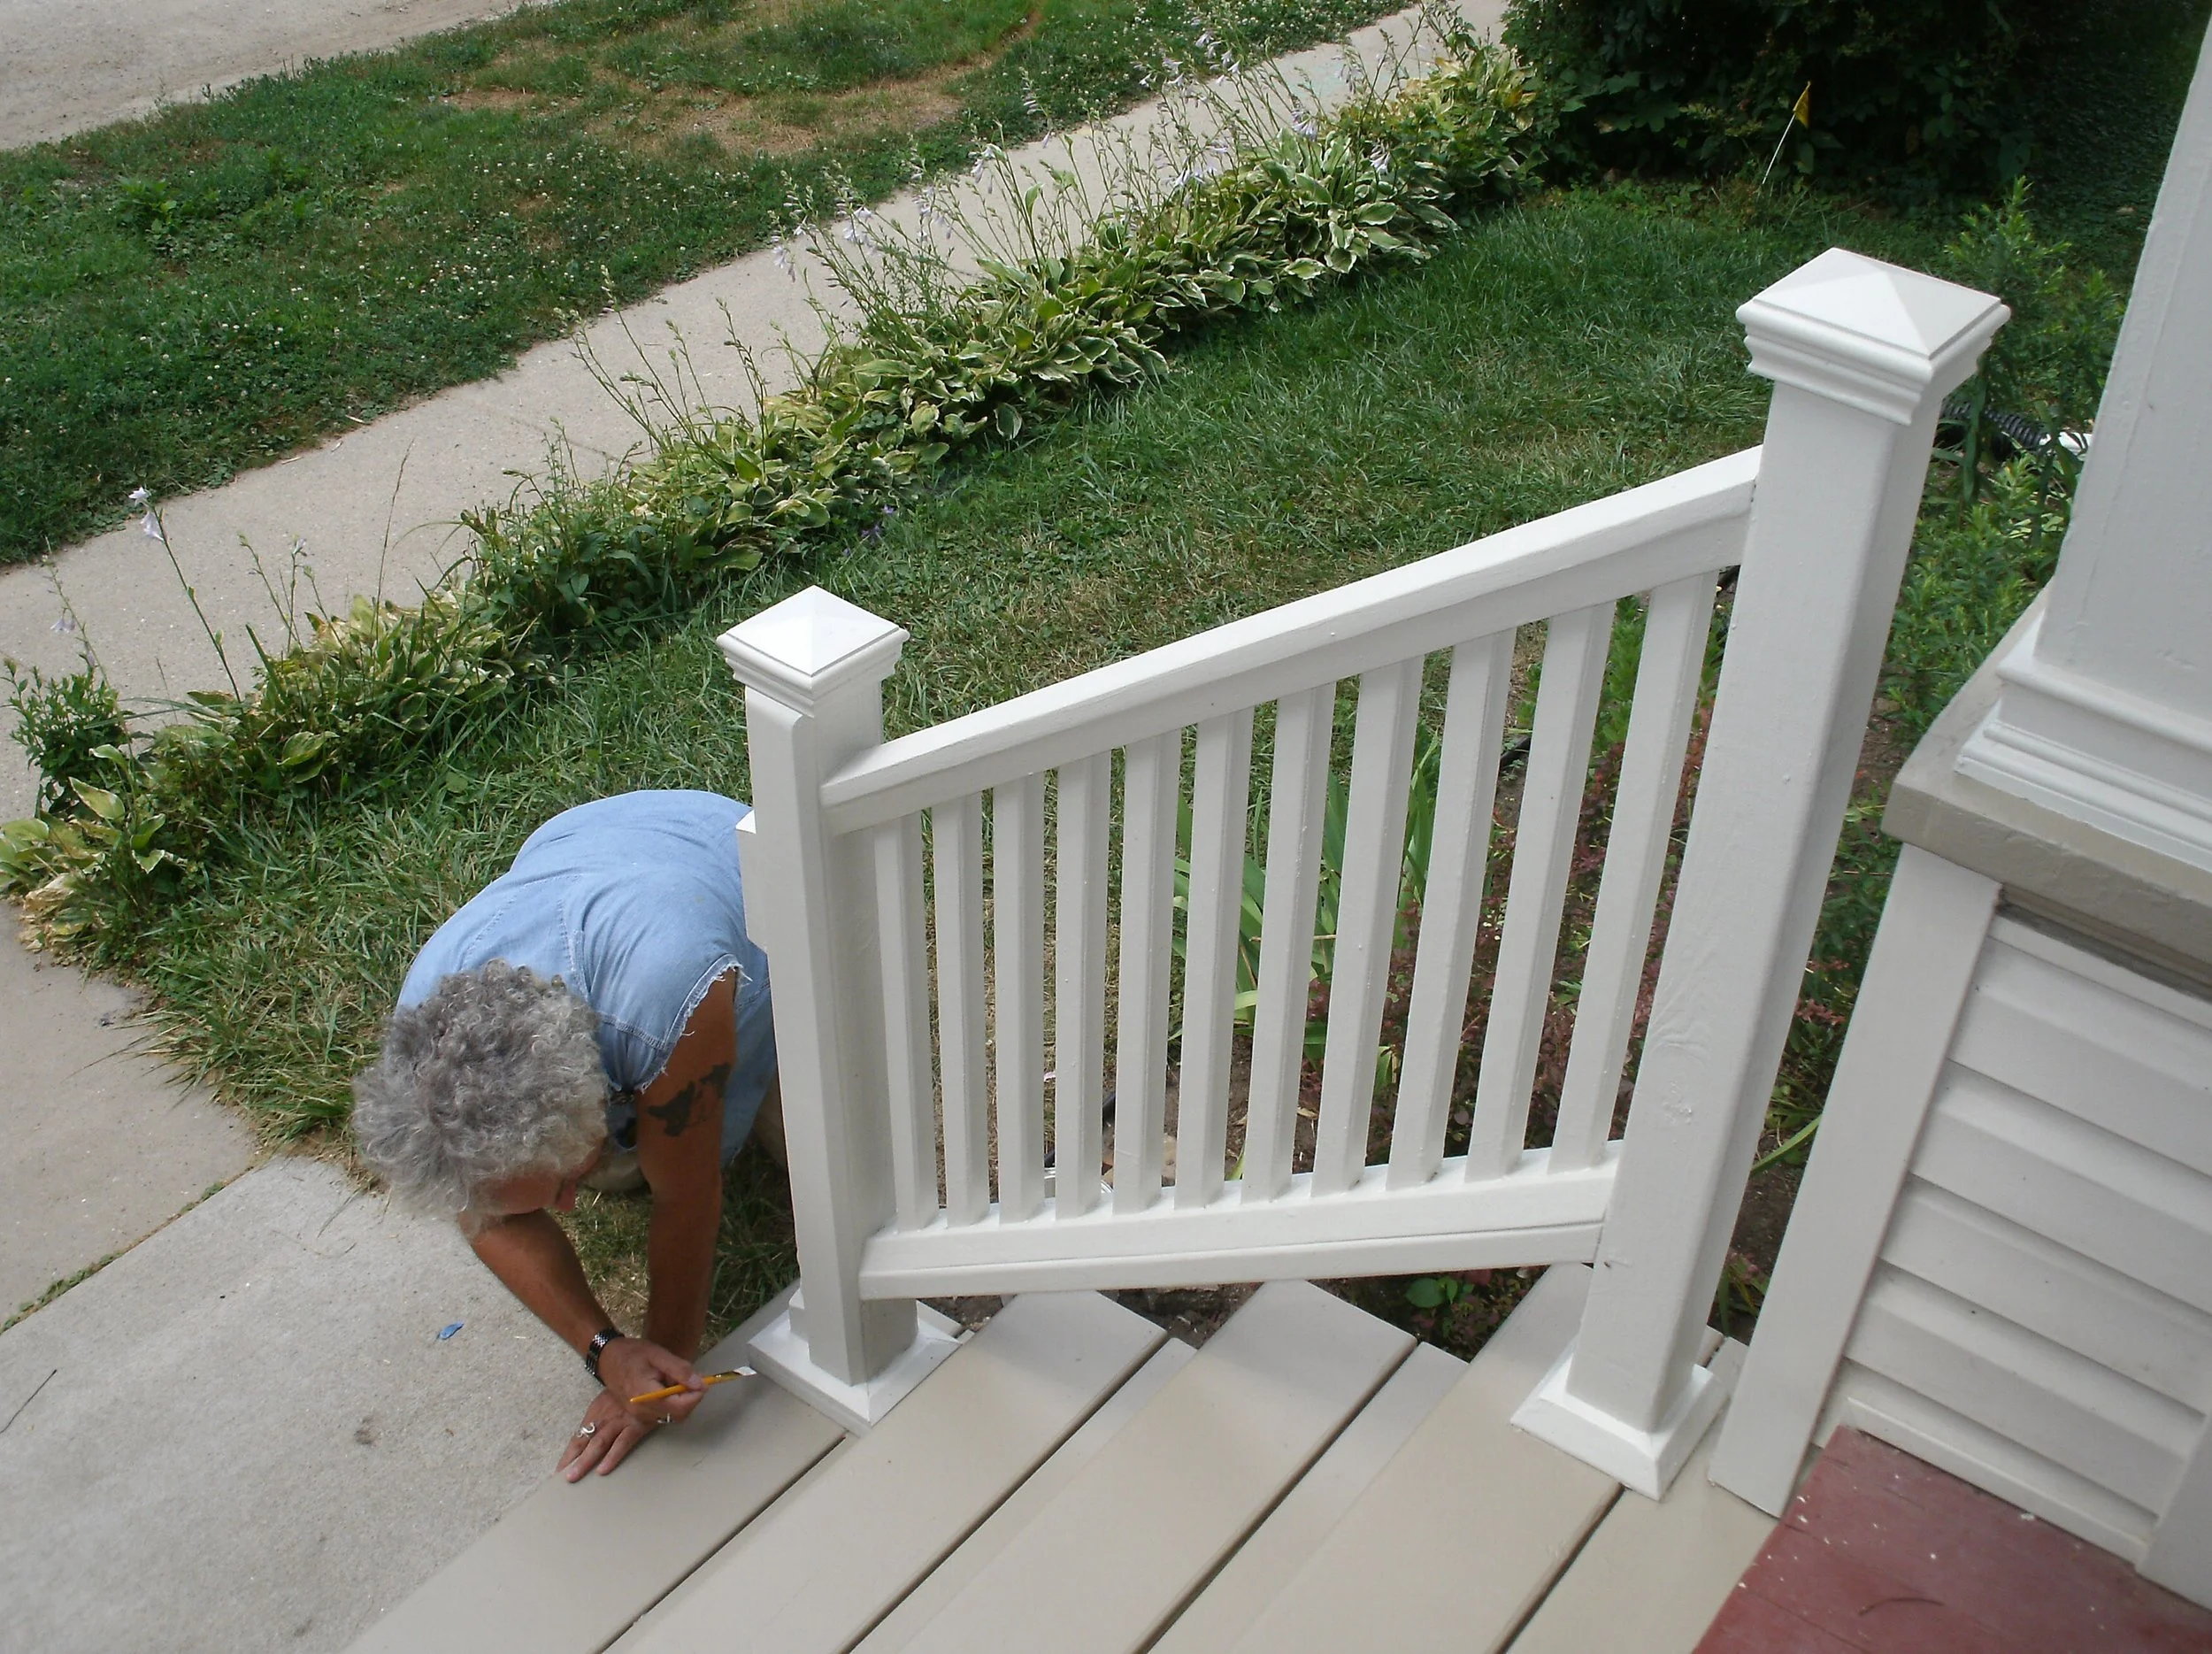
This project involved rebuilding everything below the roof. After demolition, this involved, new foundation, joists, decking, stairs, new support posts, rails, and lattice, skirting. I also had to rebuild the vine lattice on one side of the porch. I also replaced the rear porch and painted the whole house.
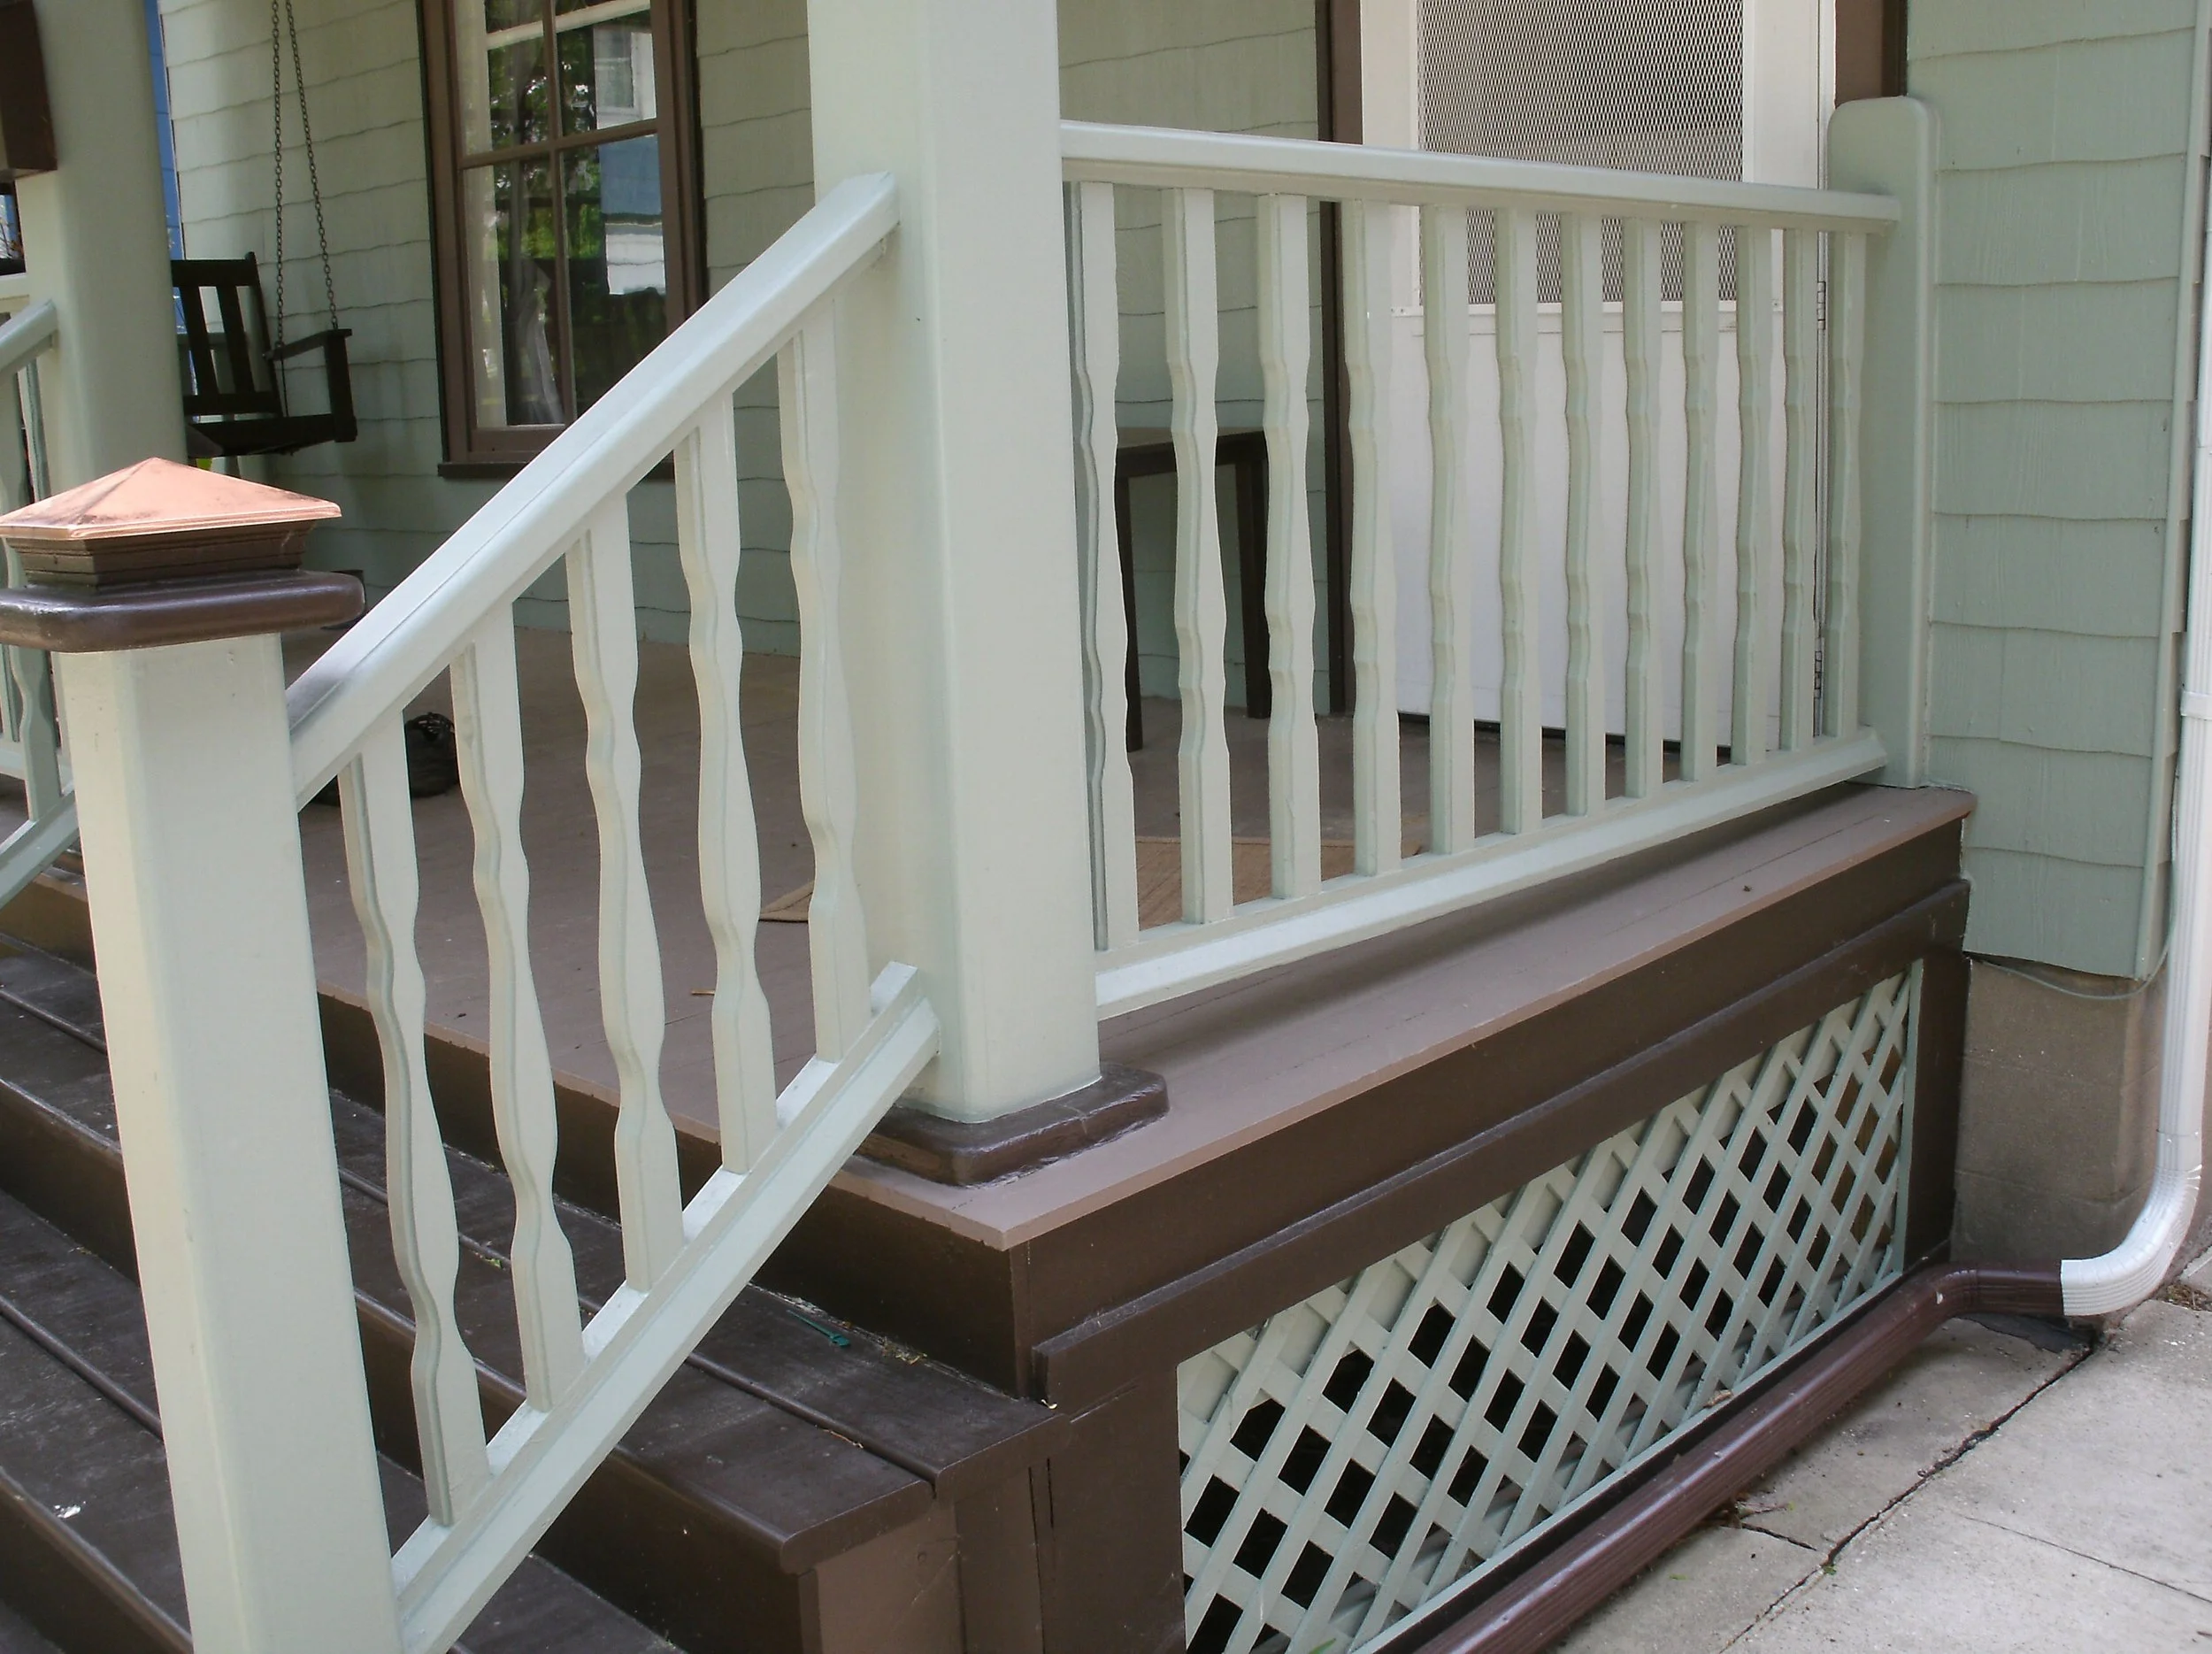
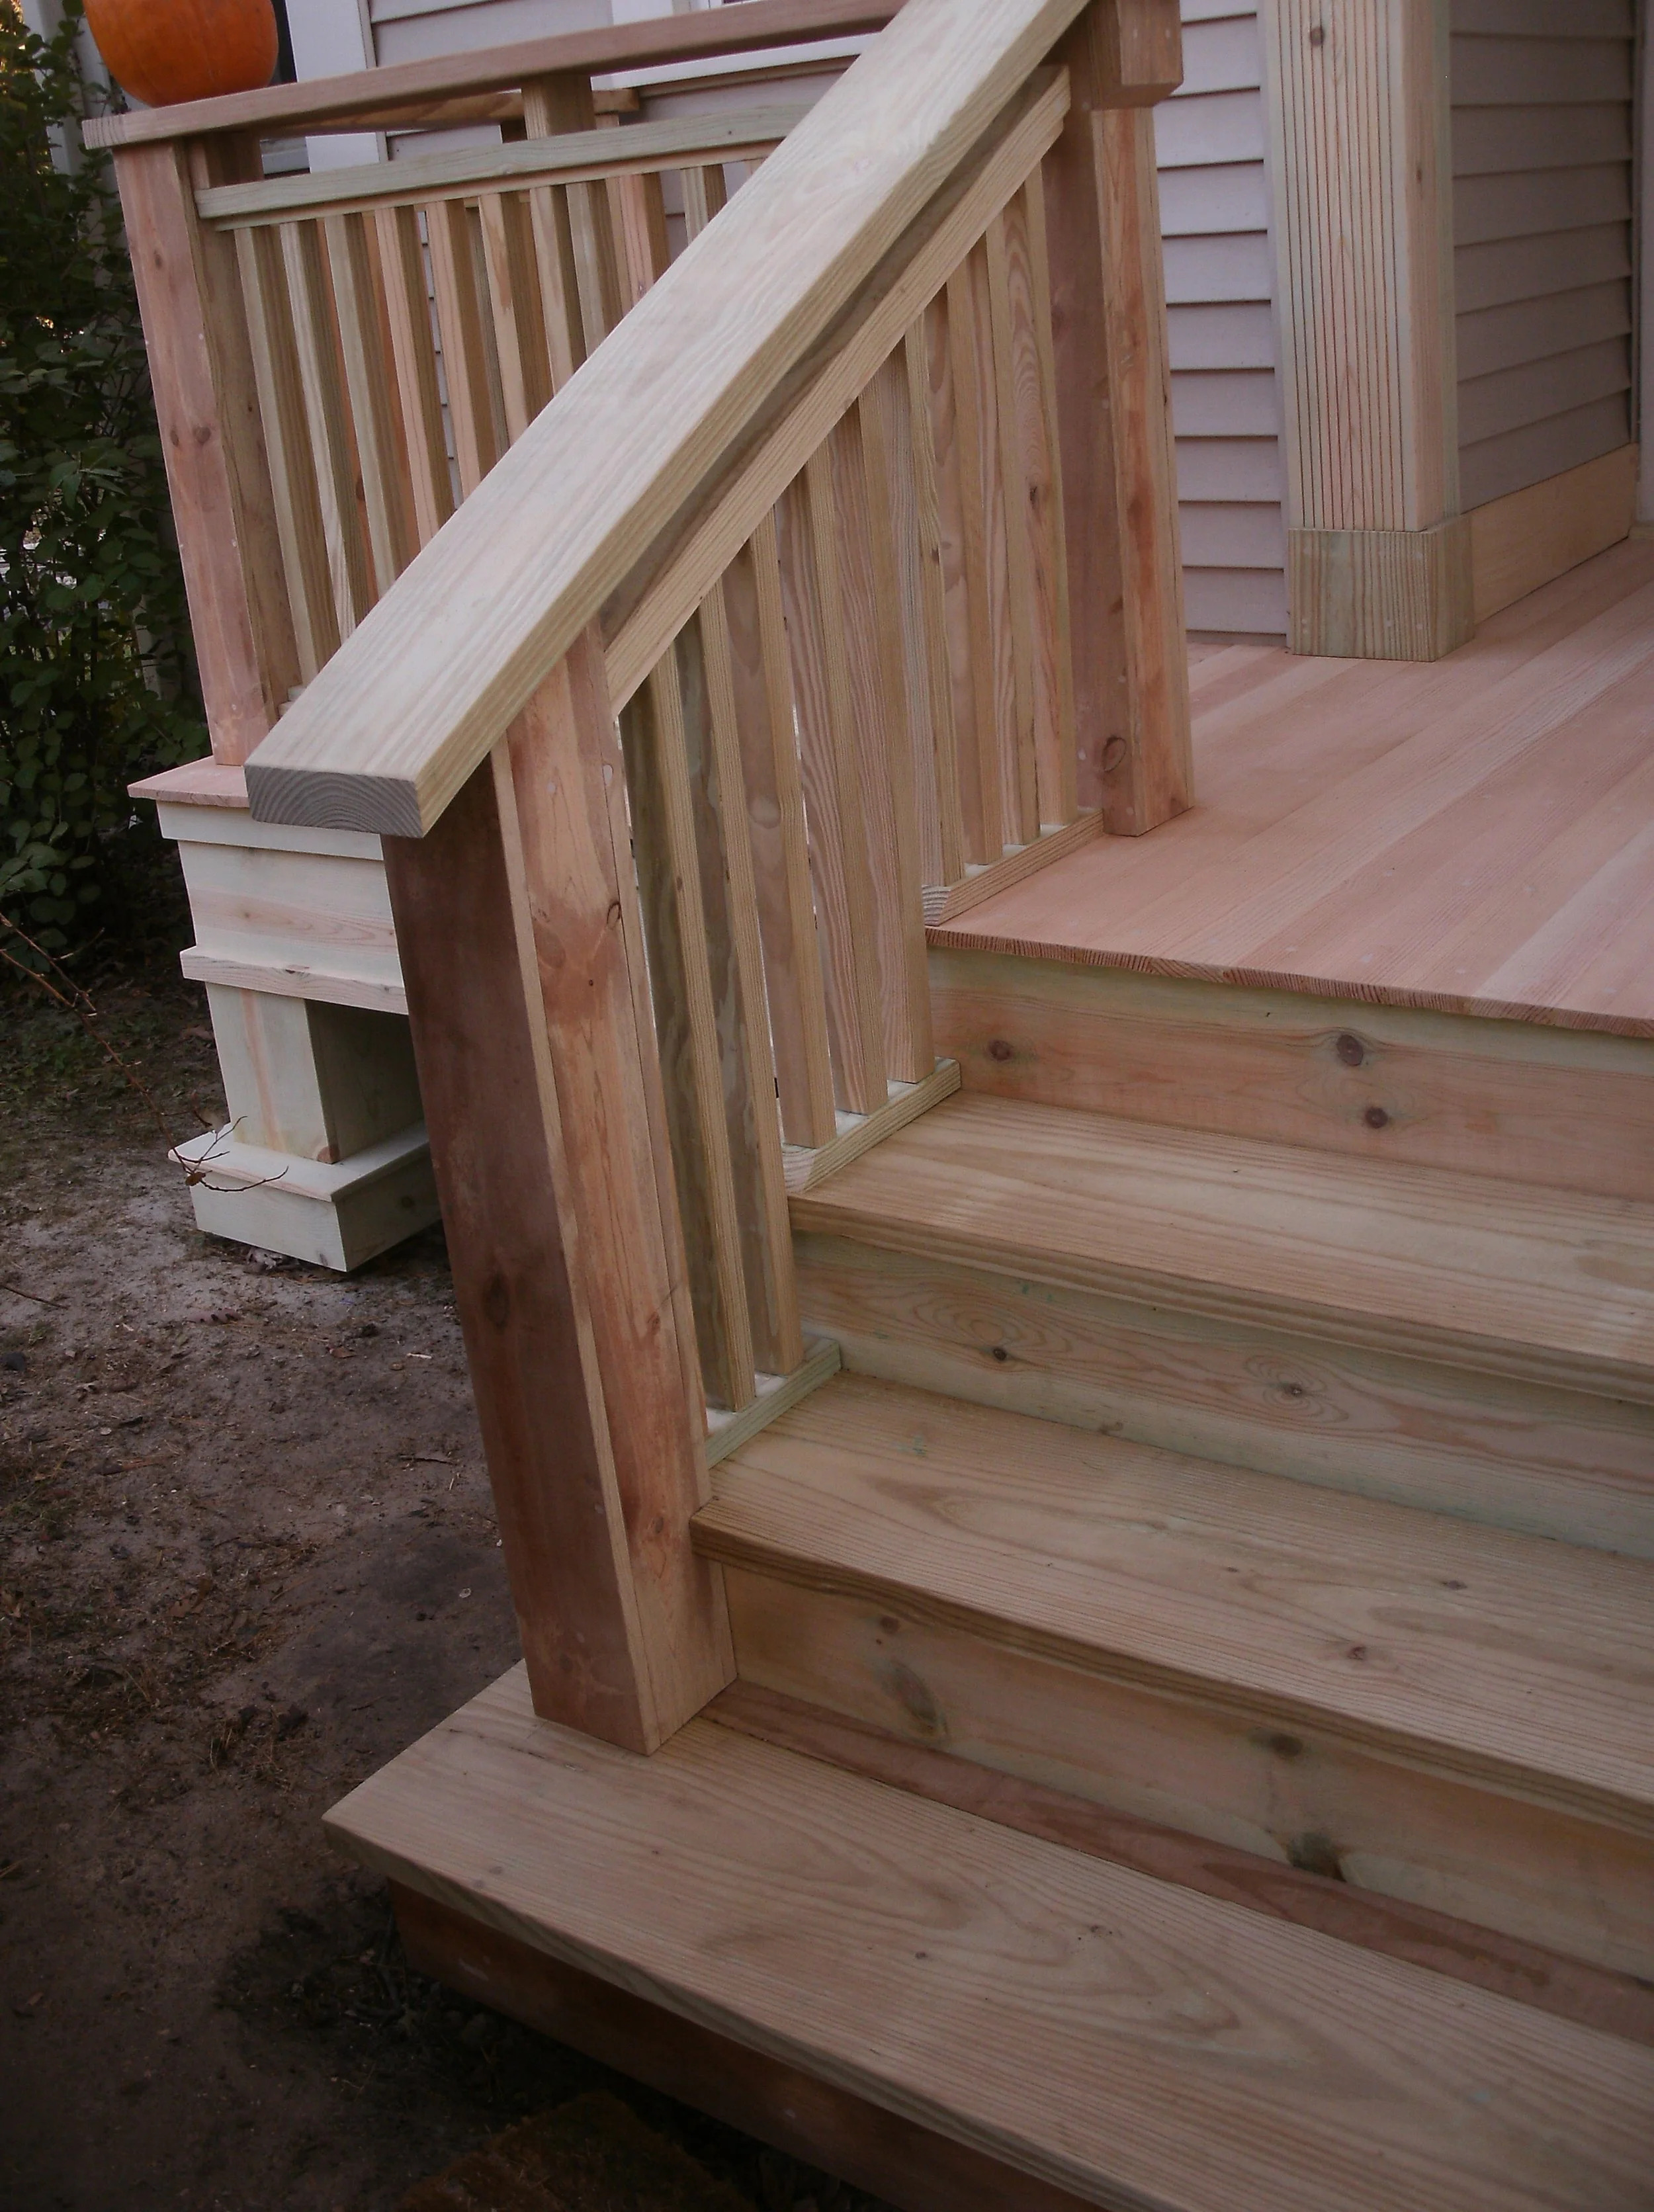
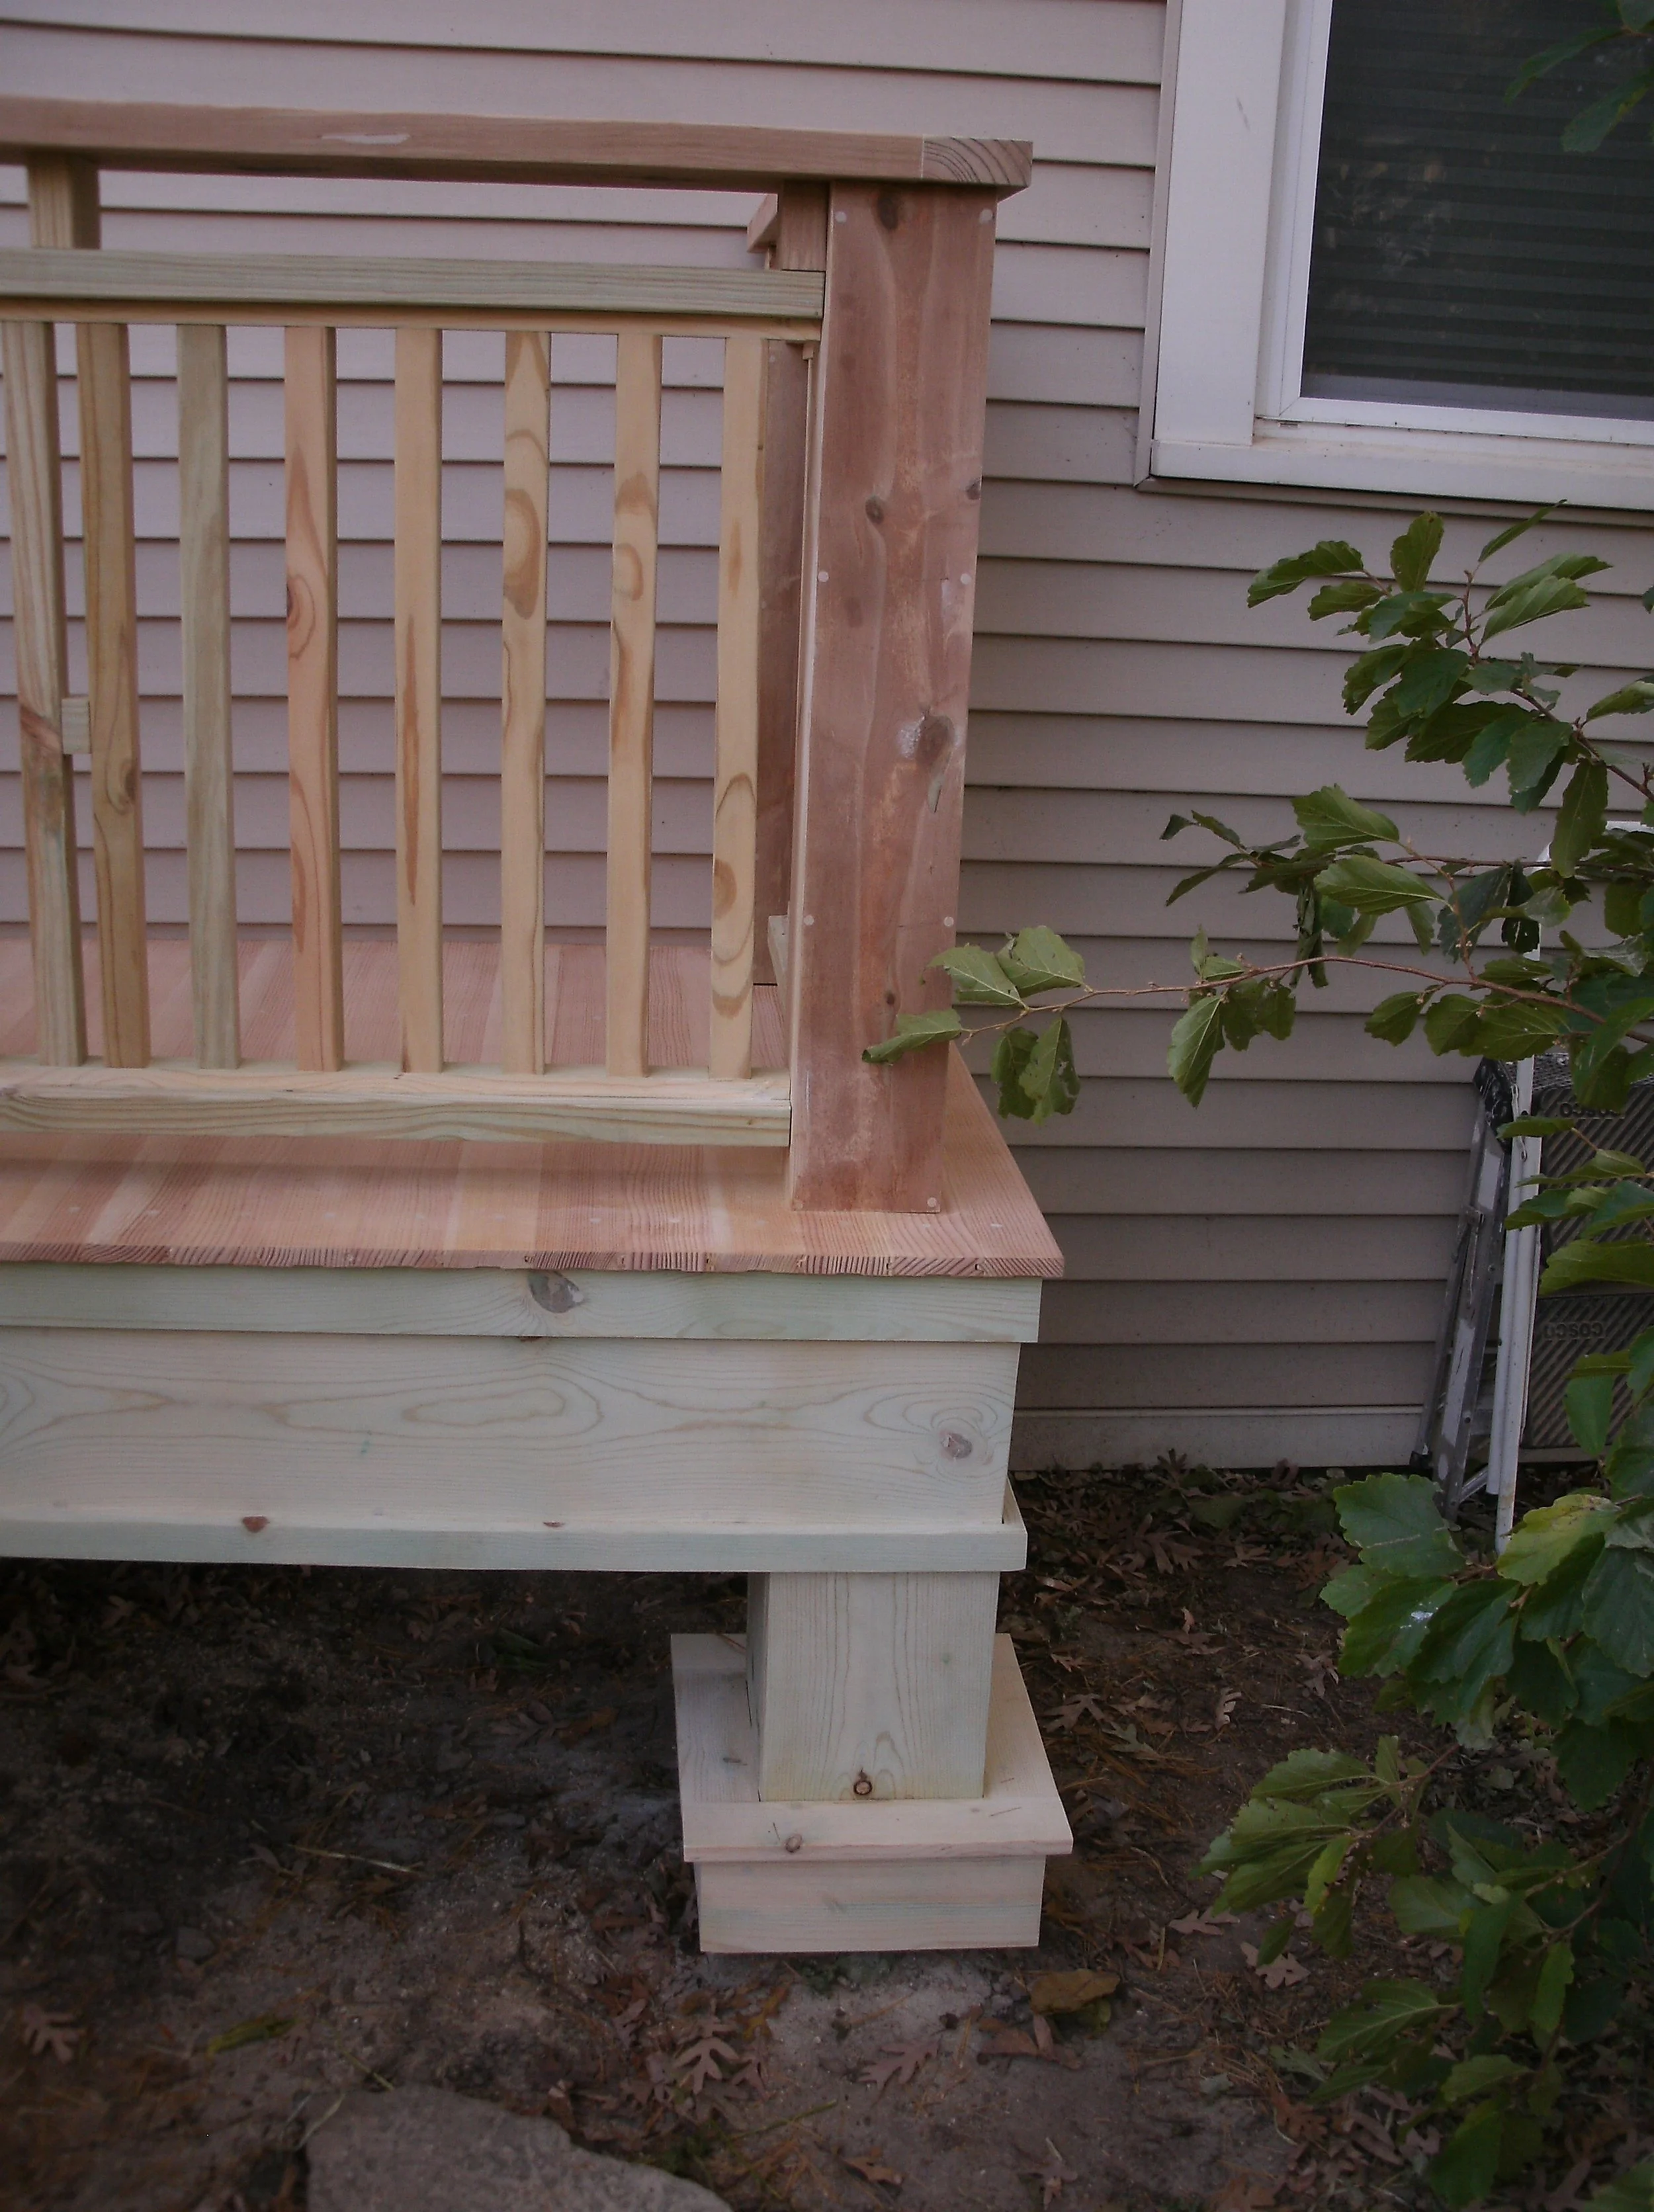
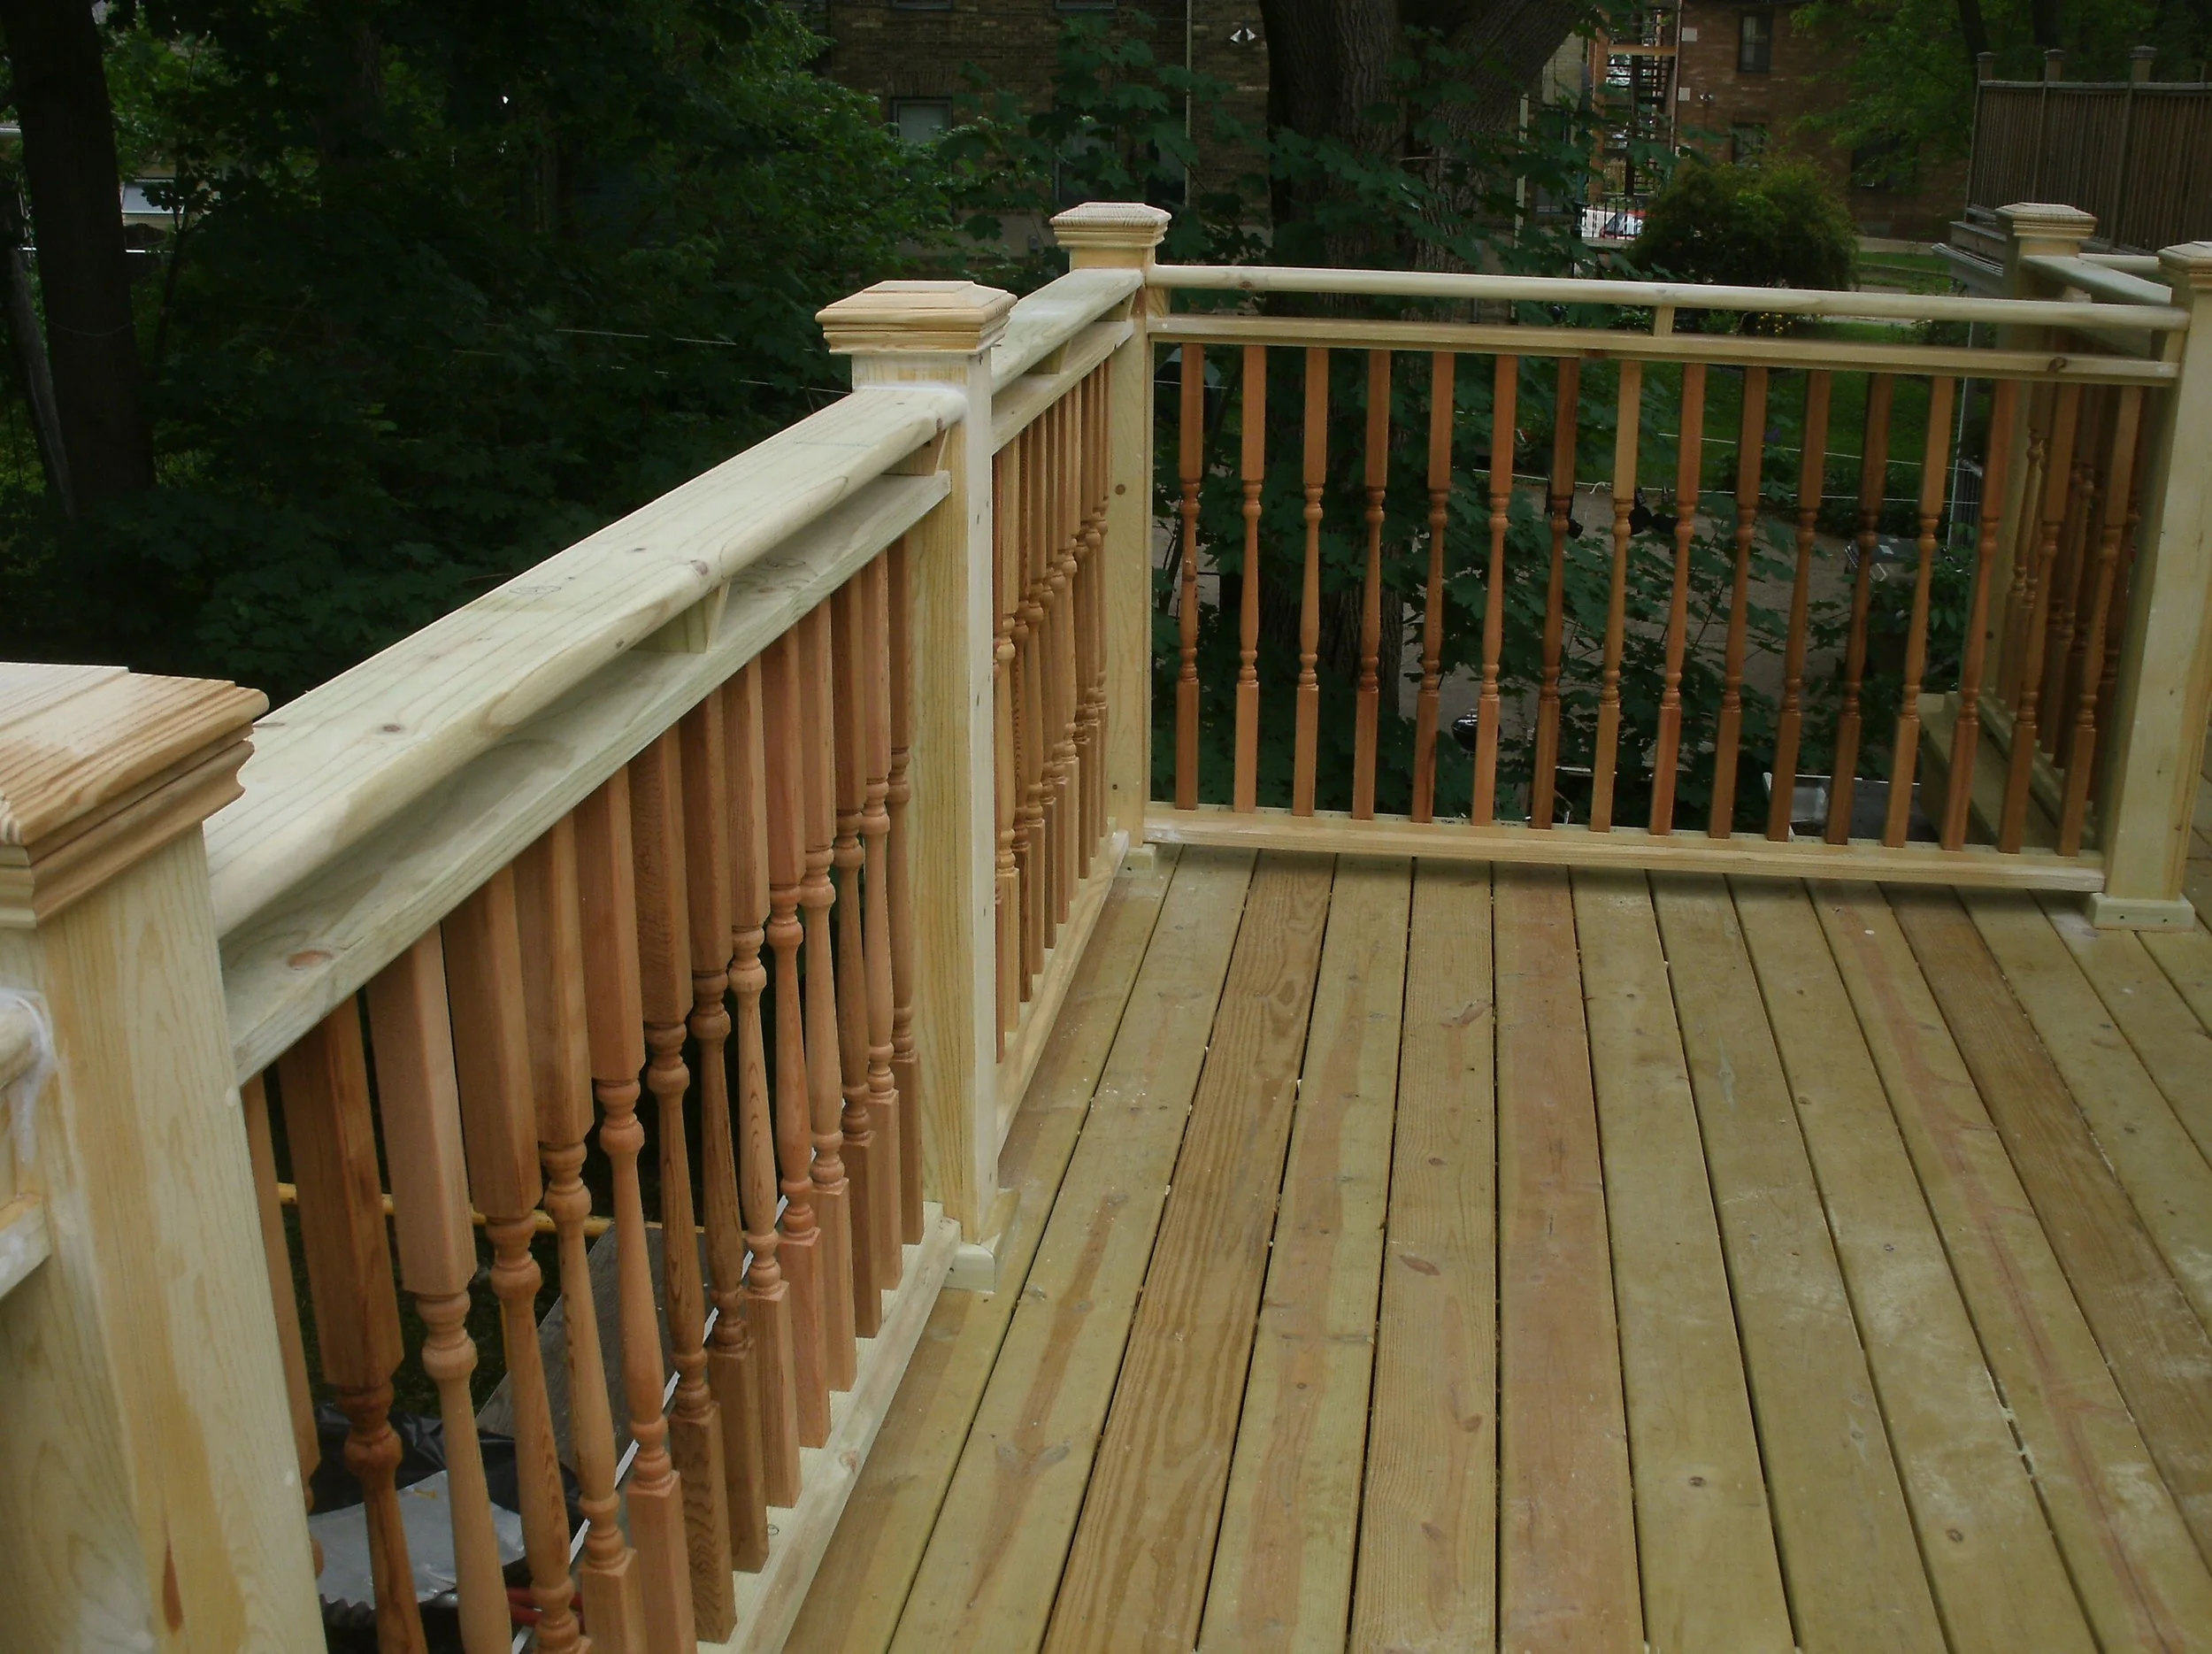
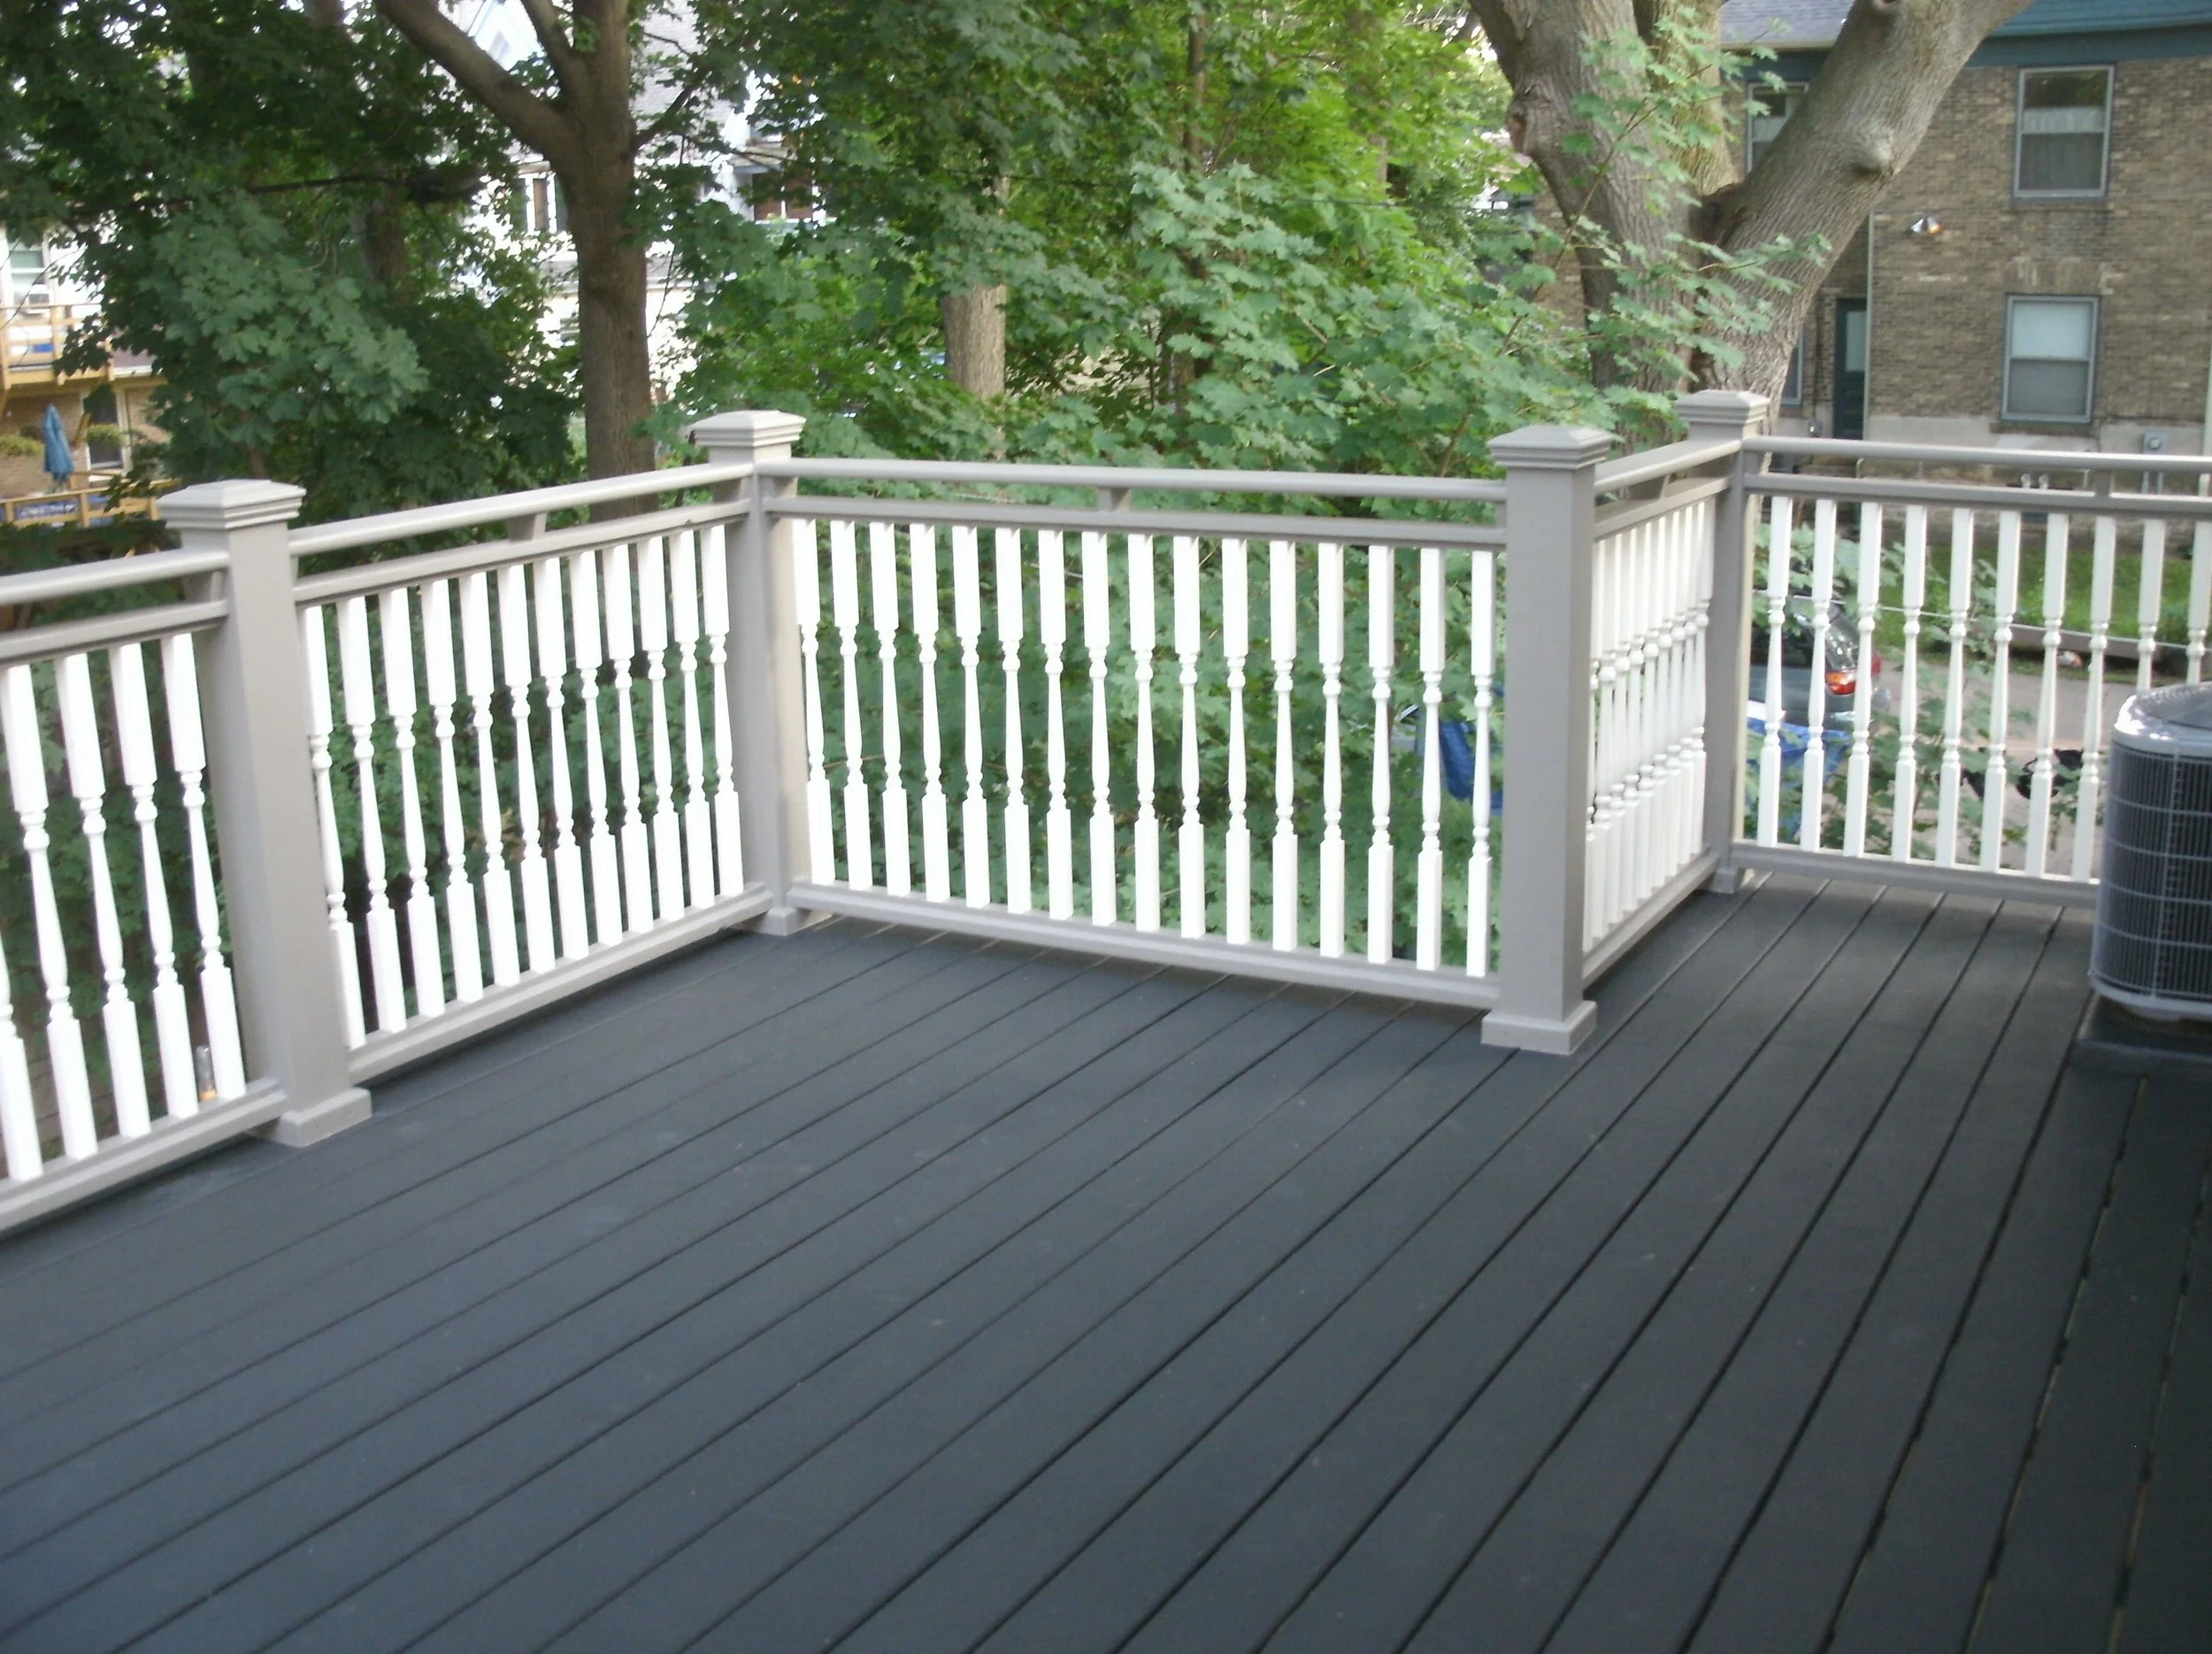
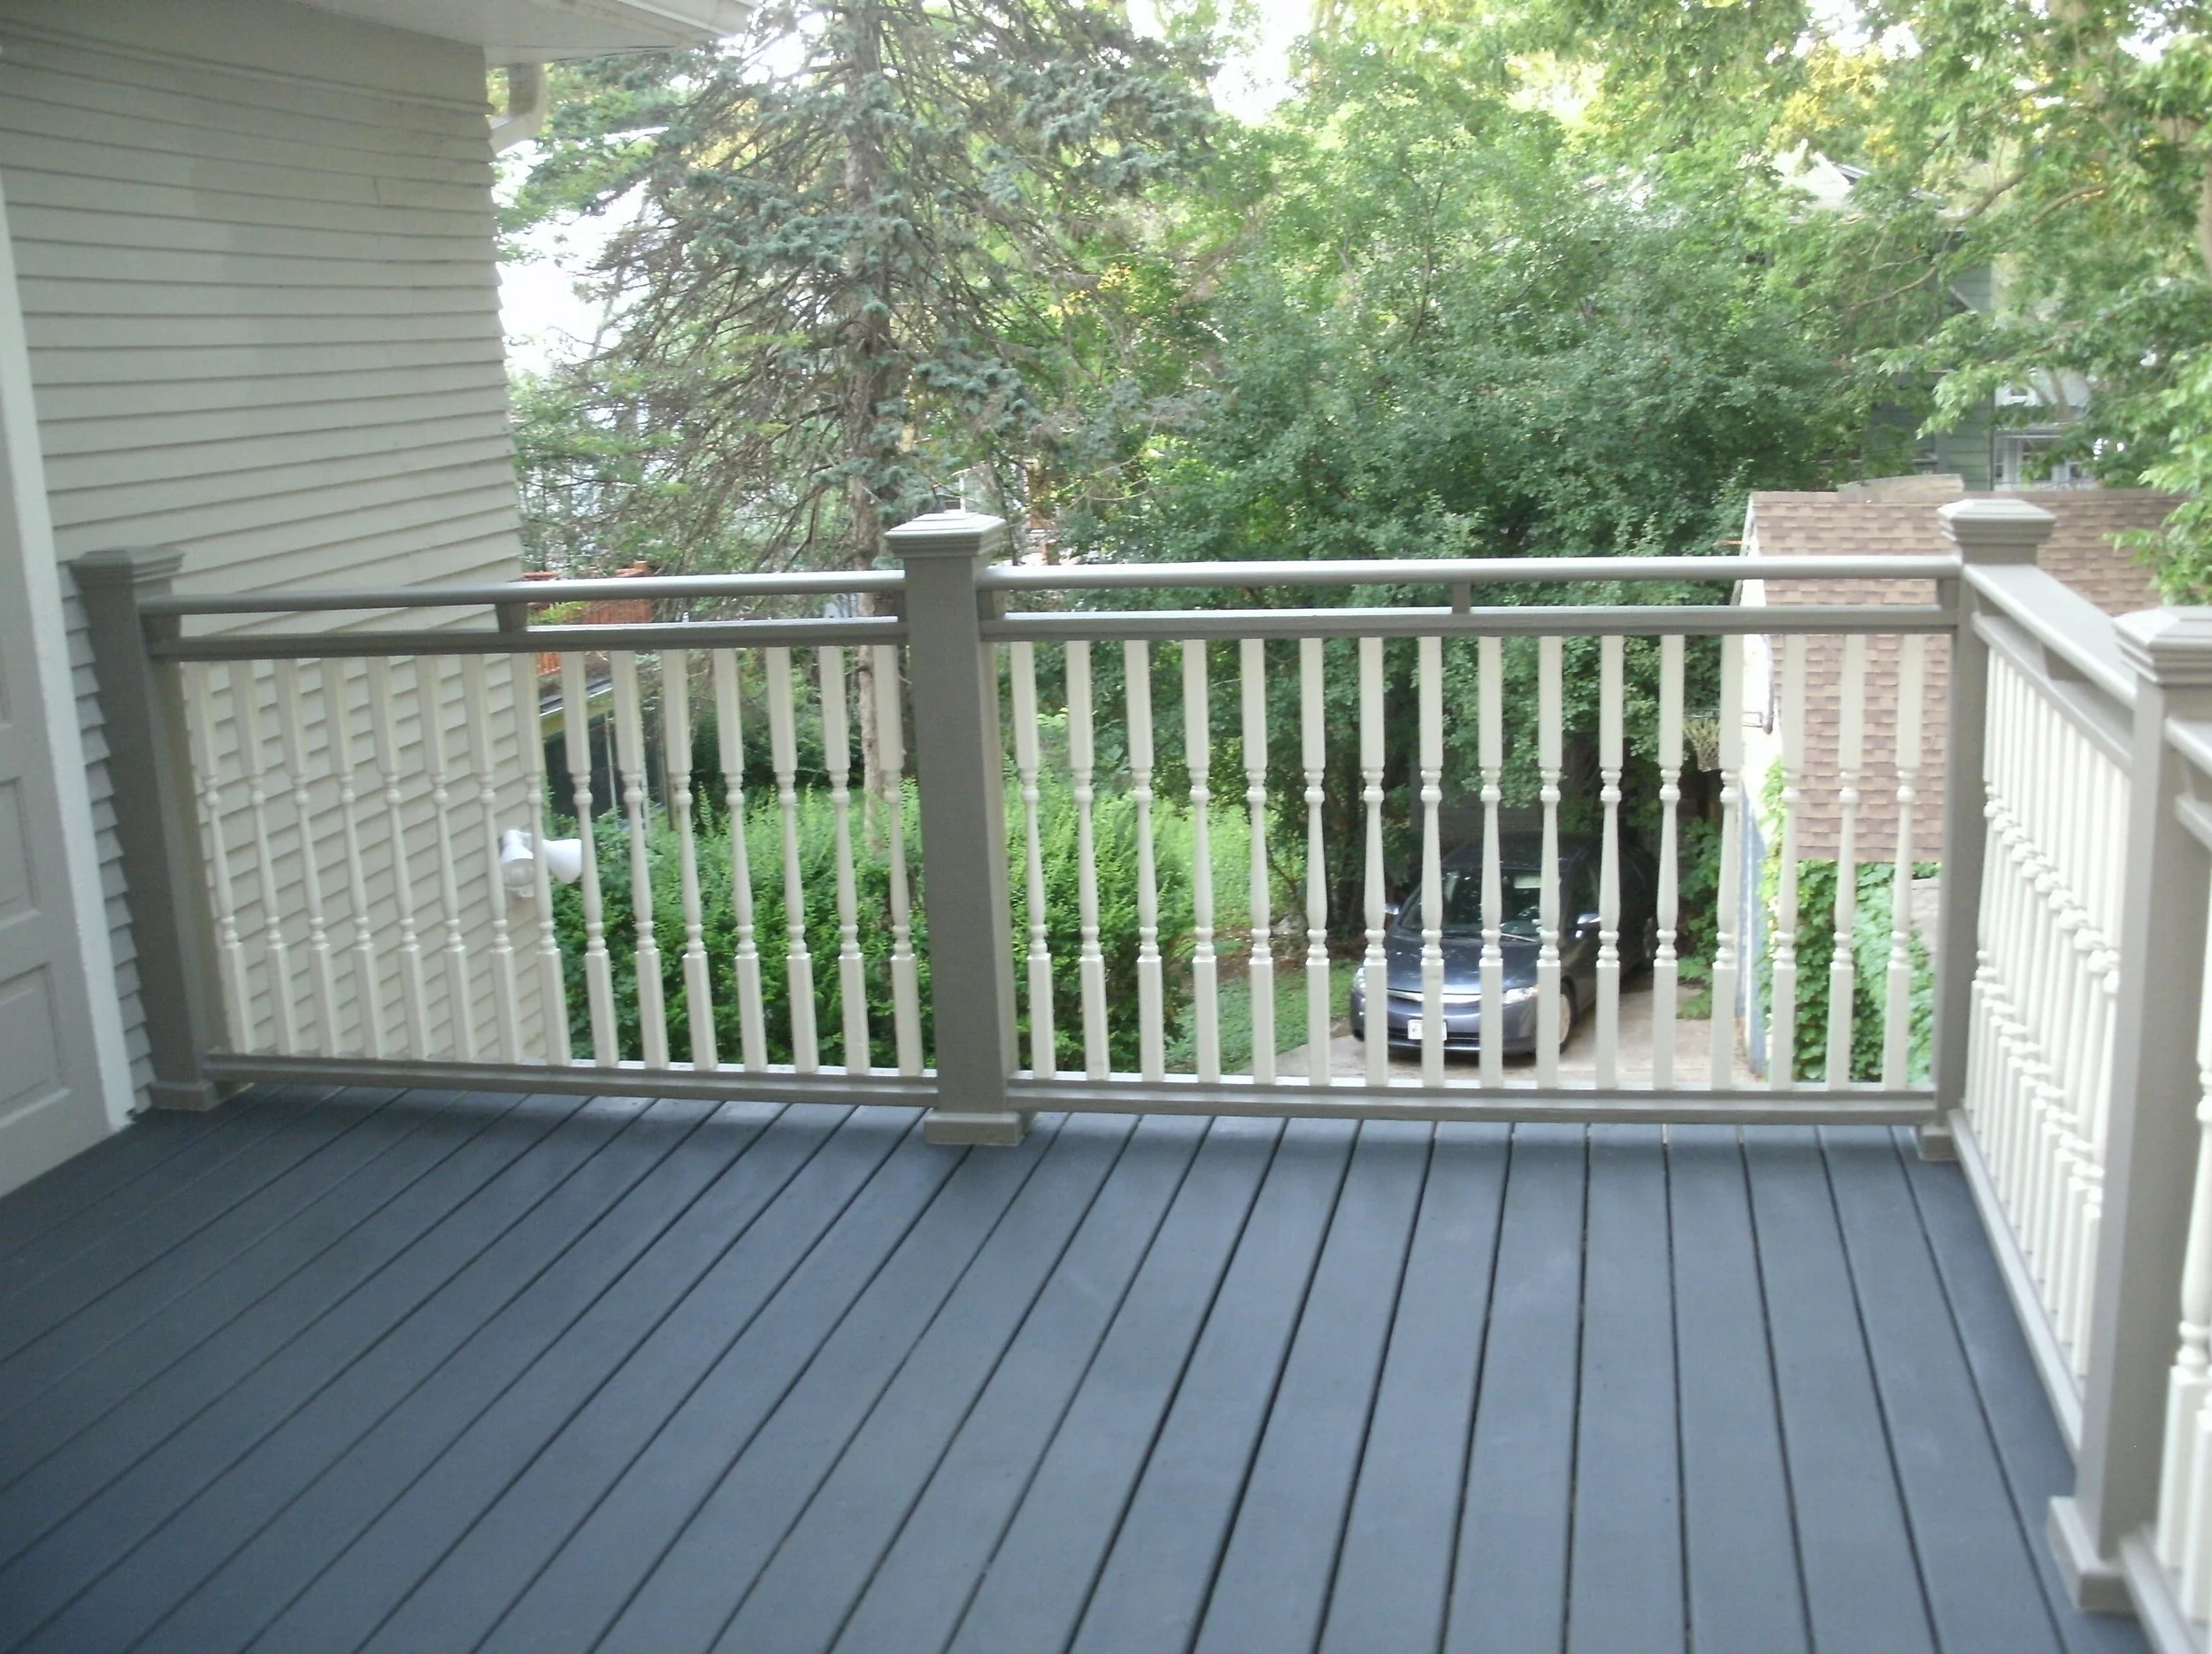
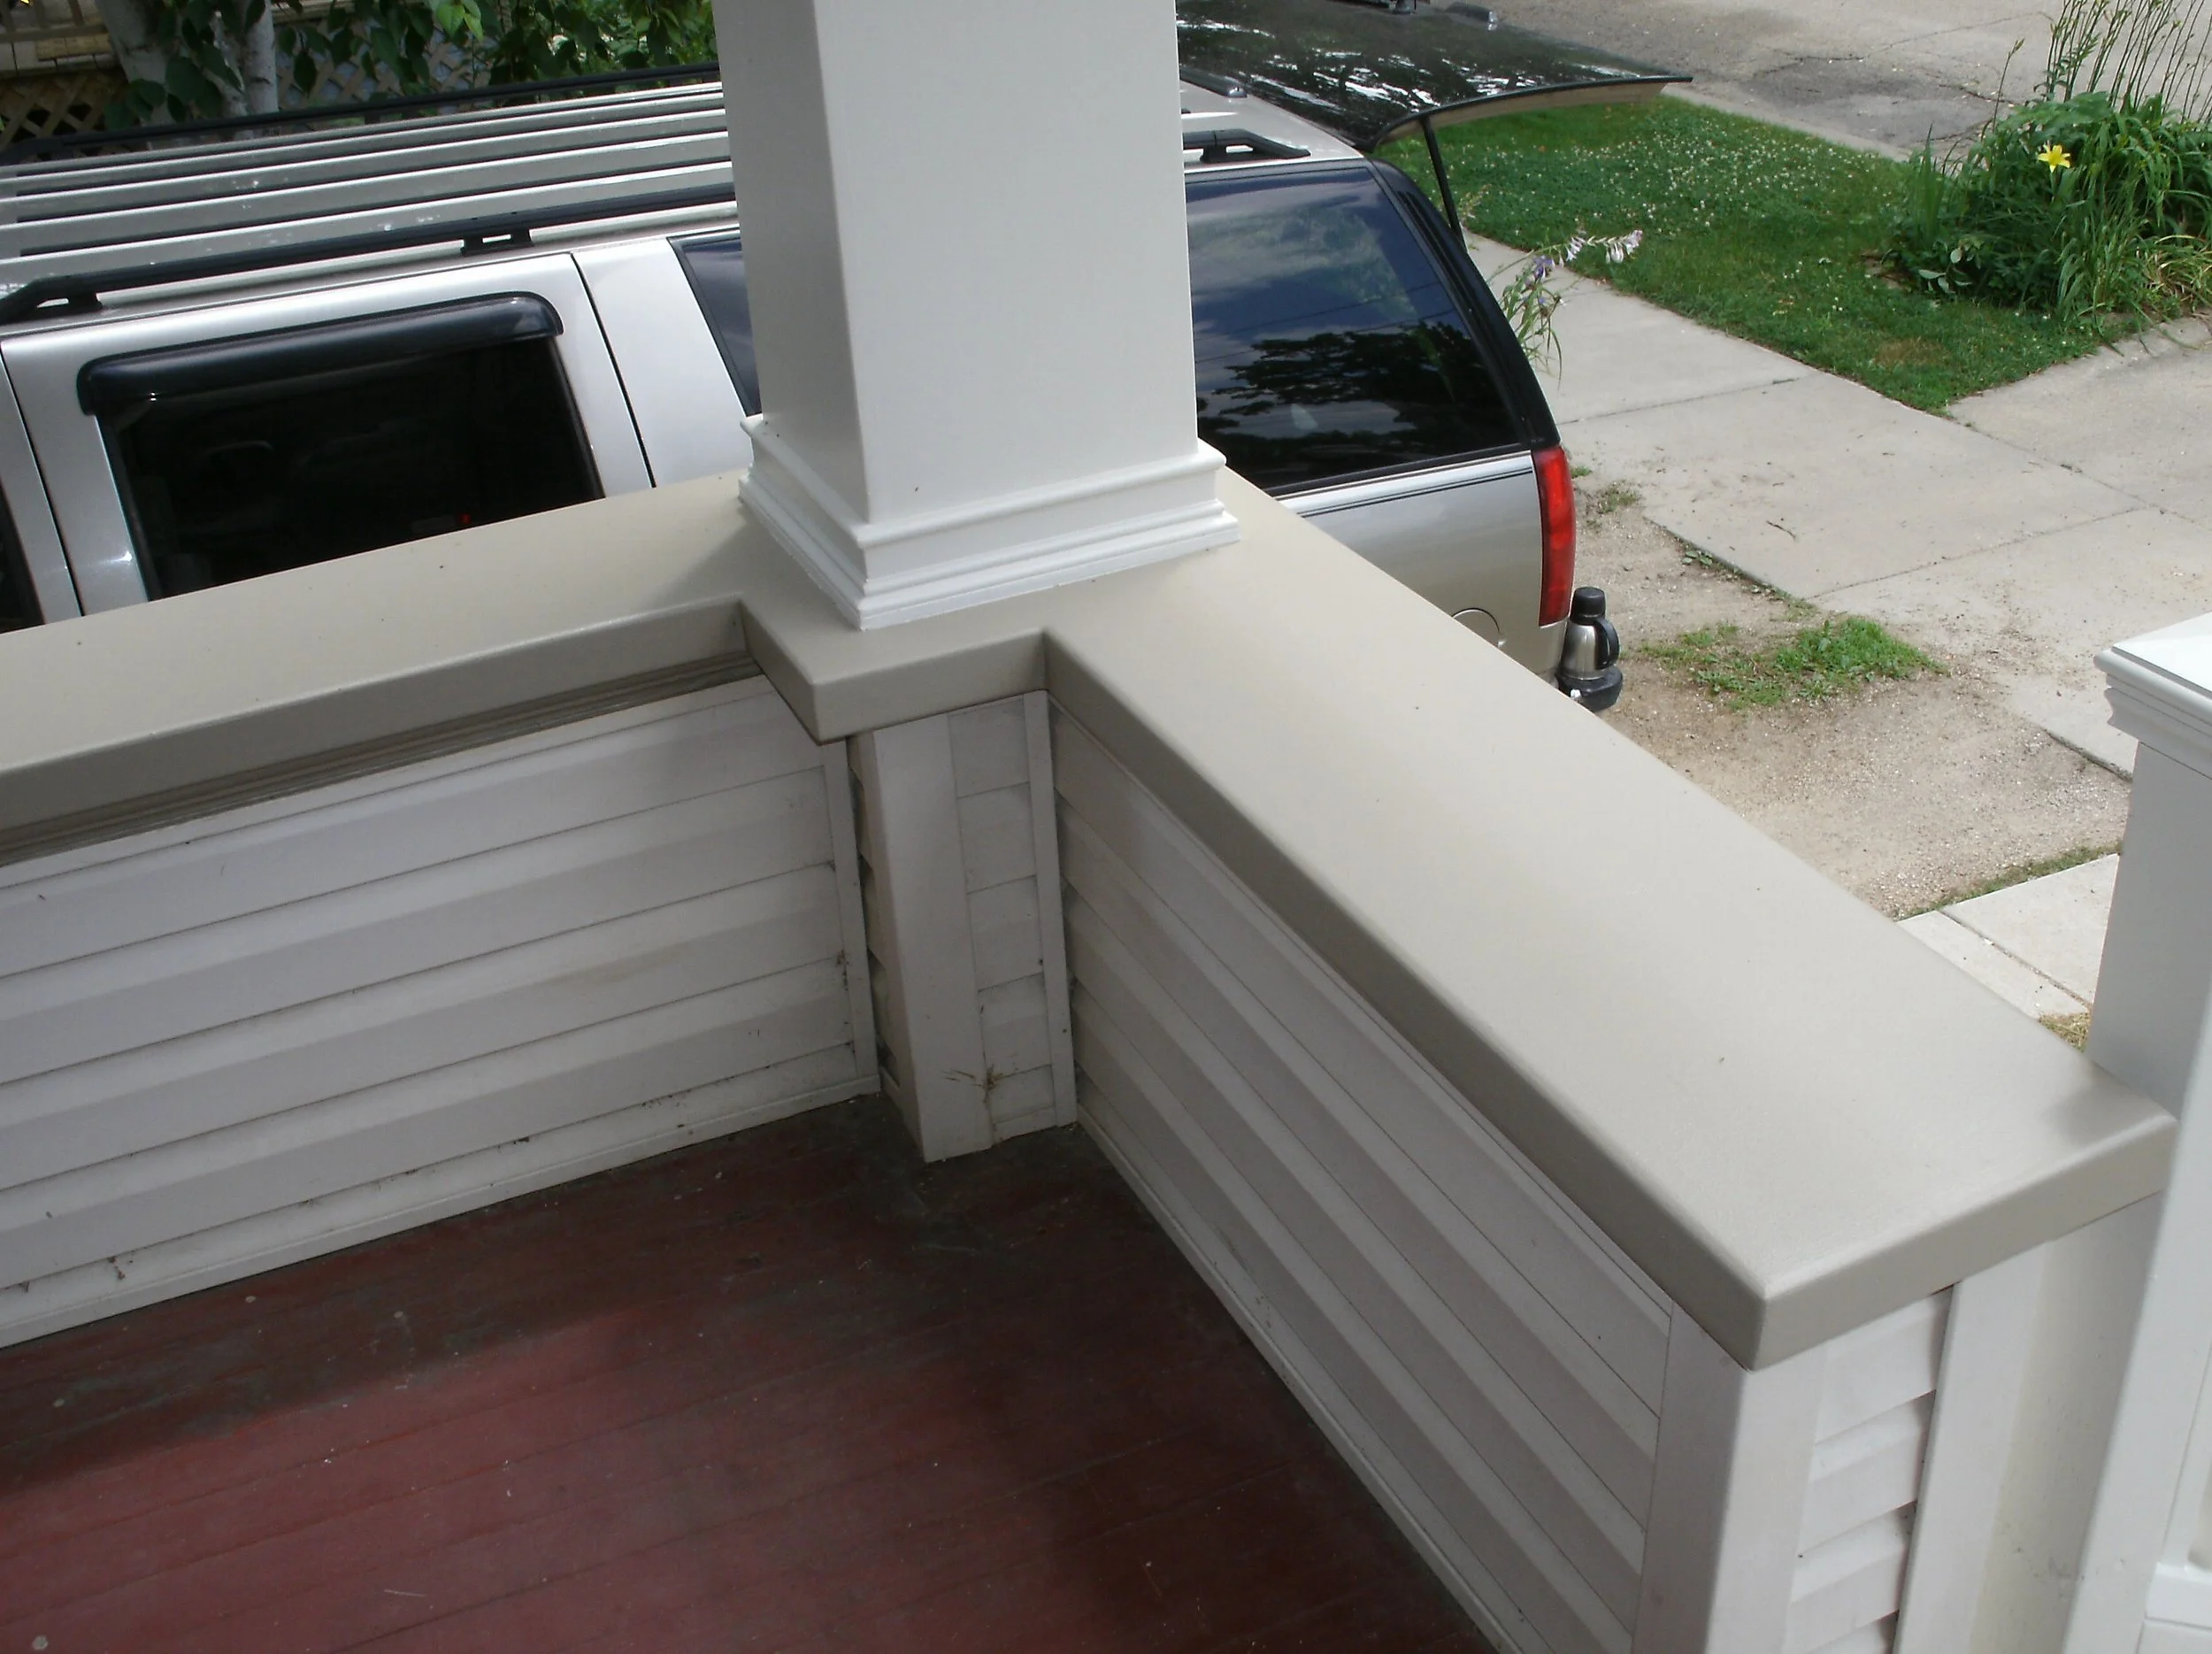
Side view: new rails, decking, post, stairs, lower lattice
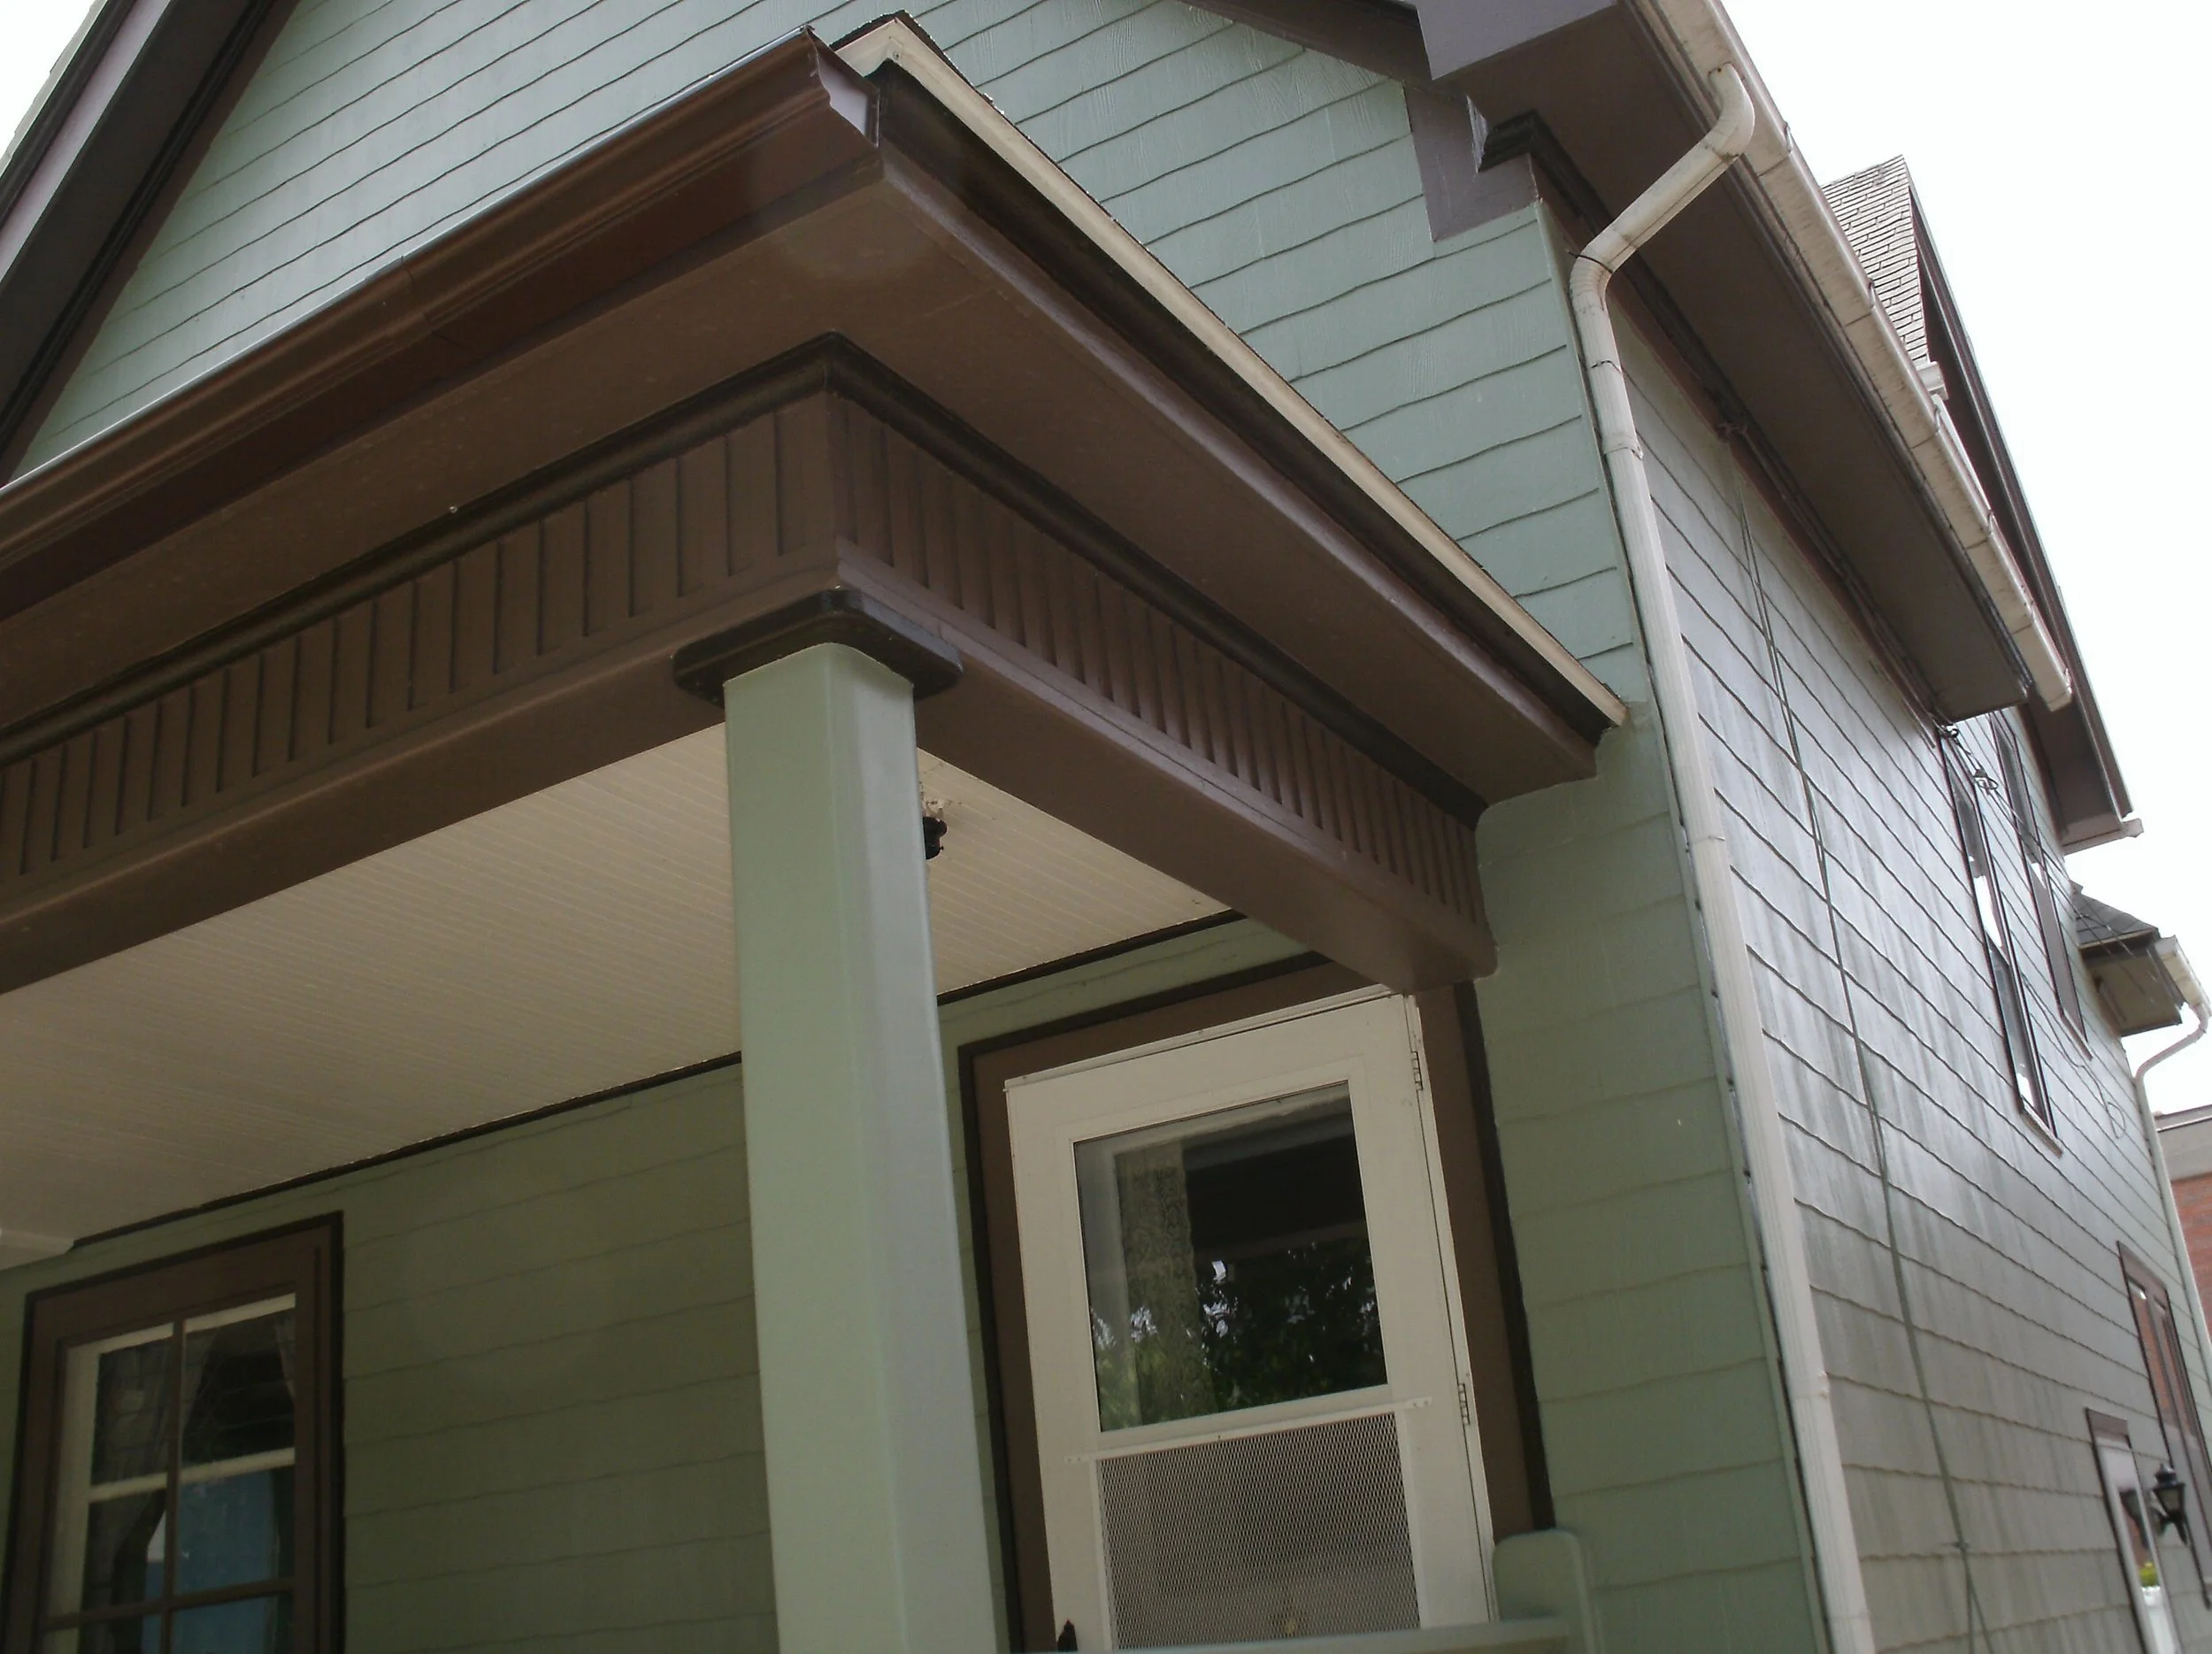
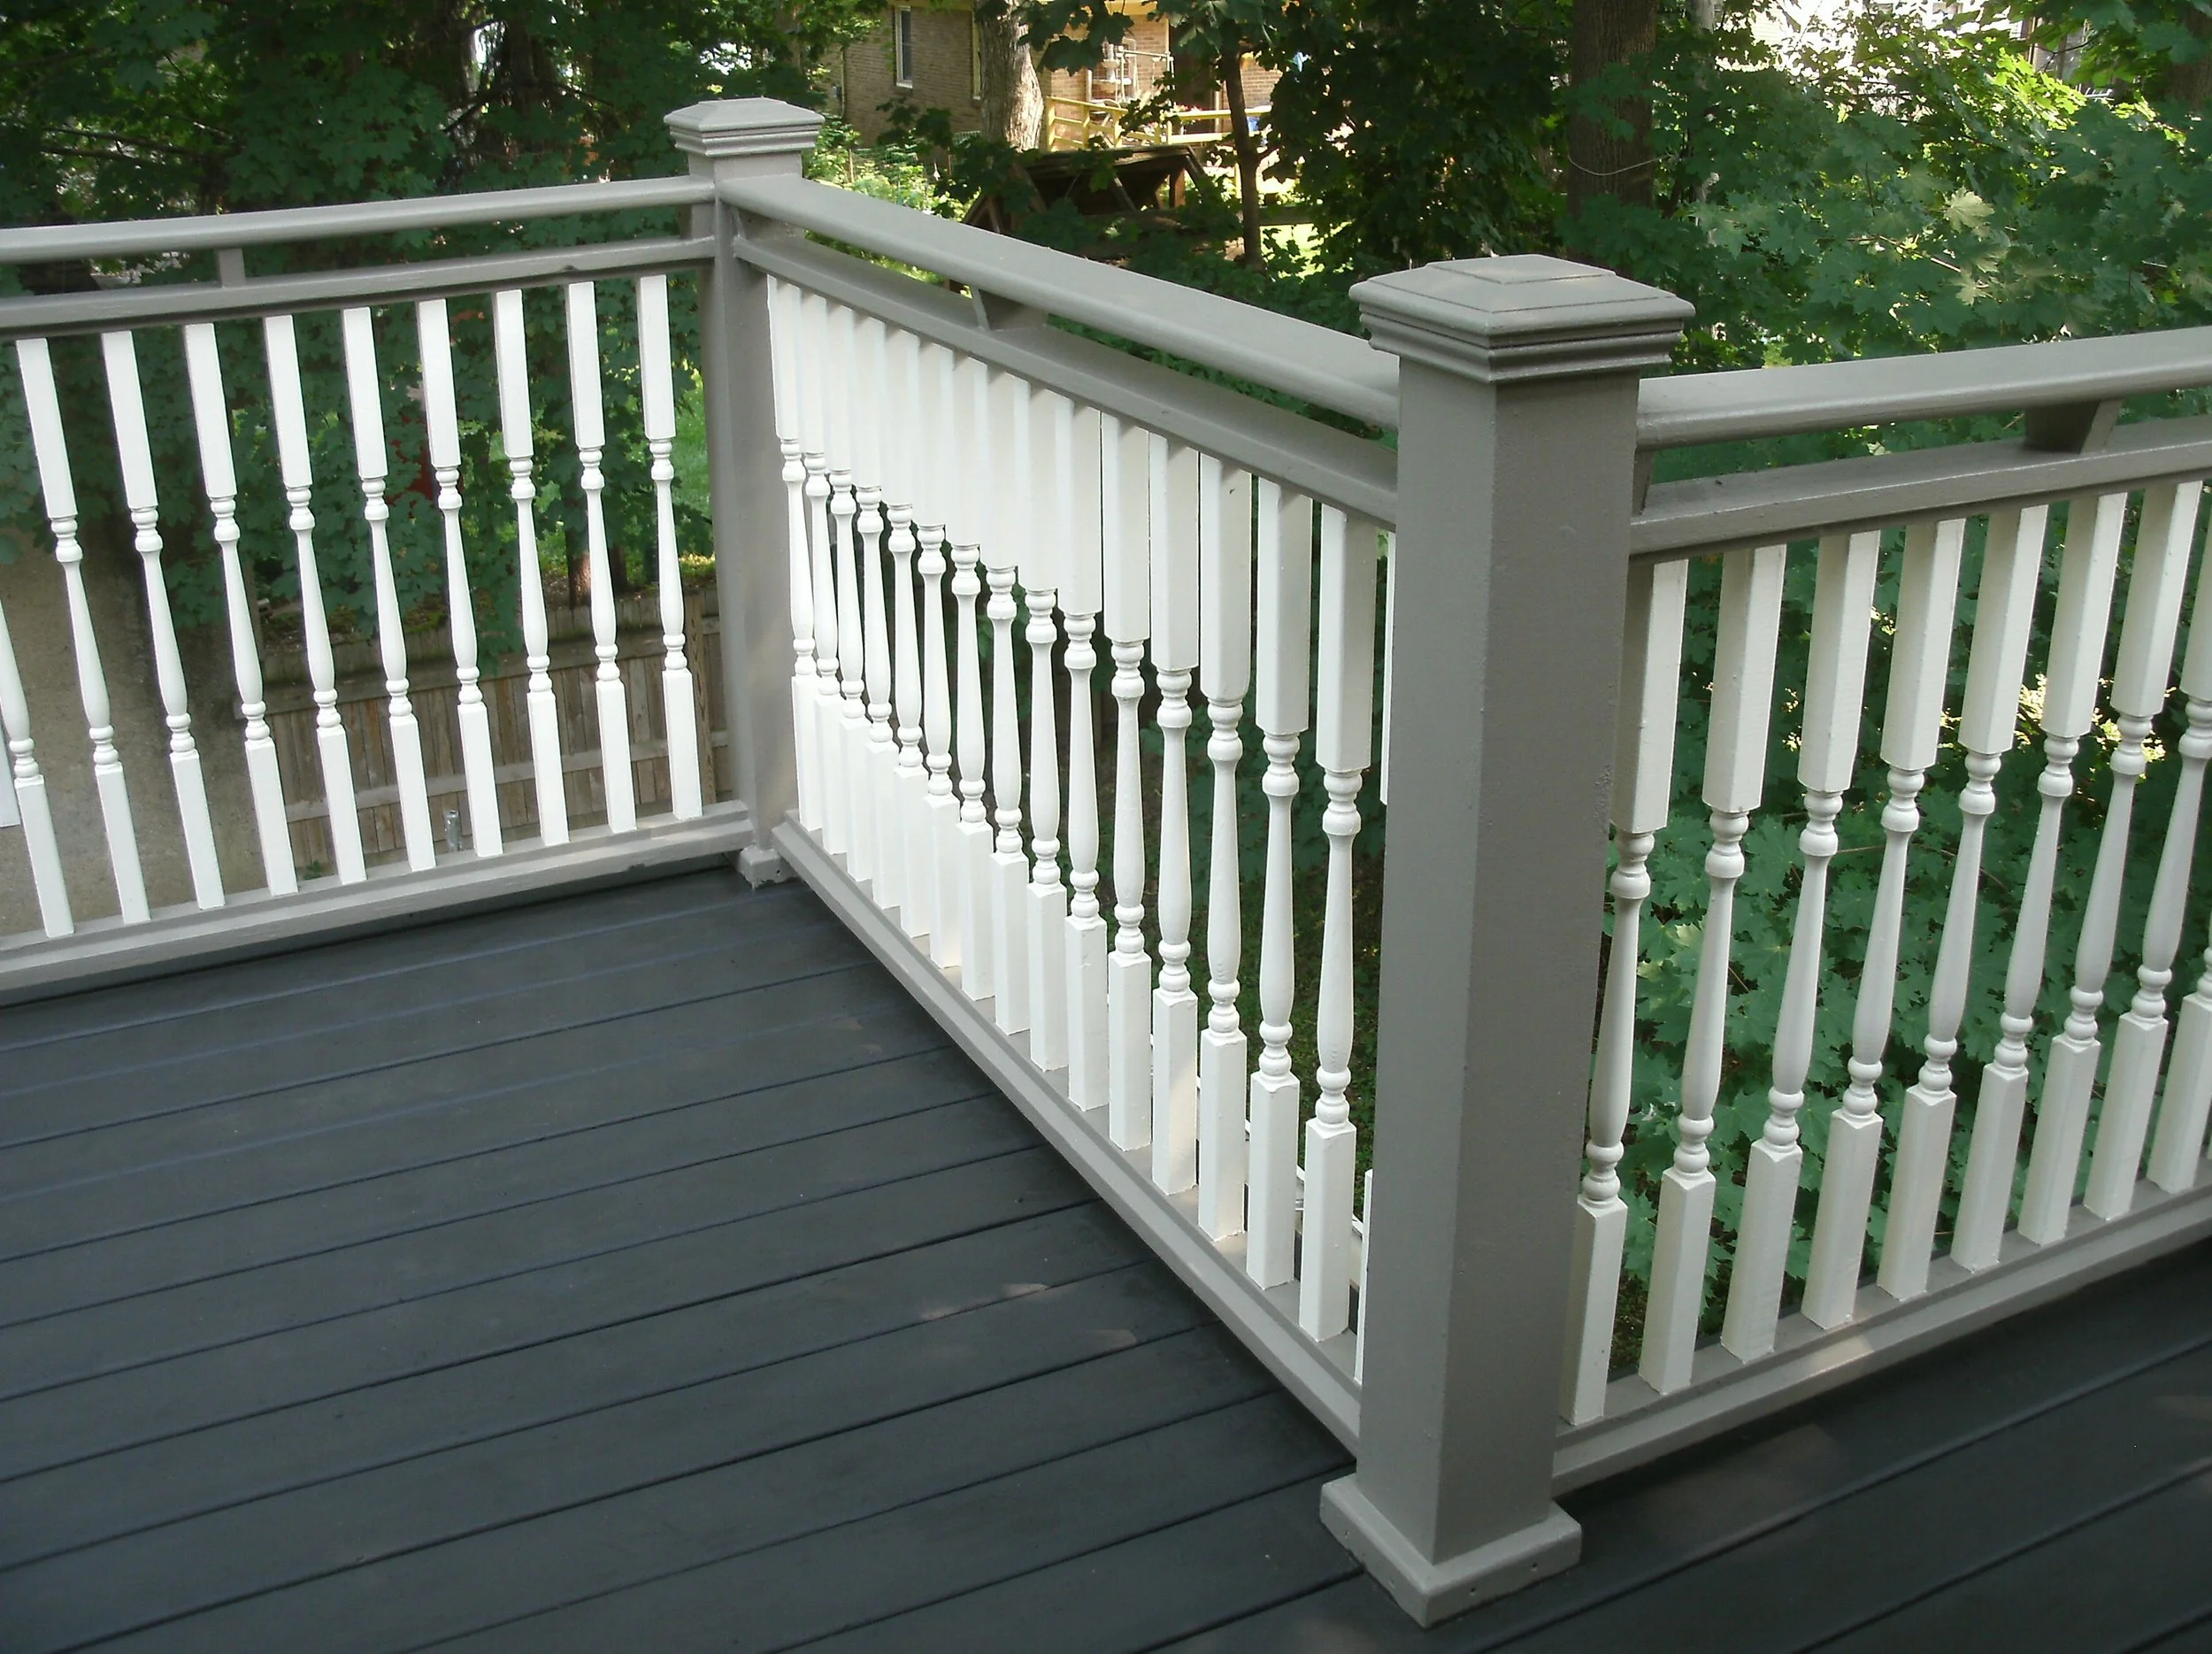
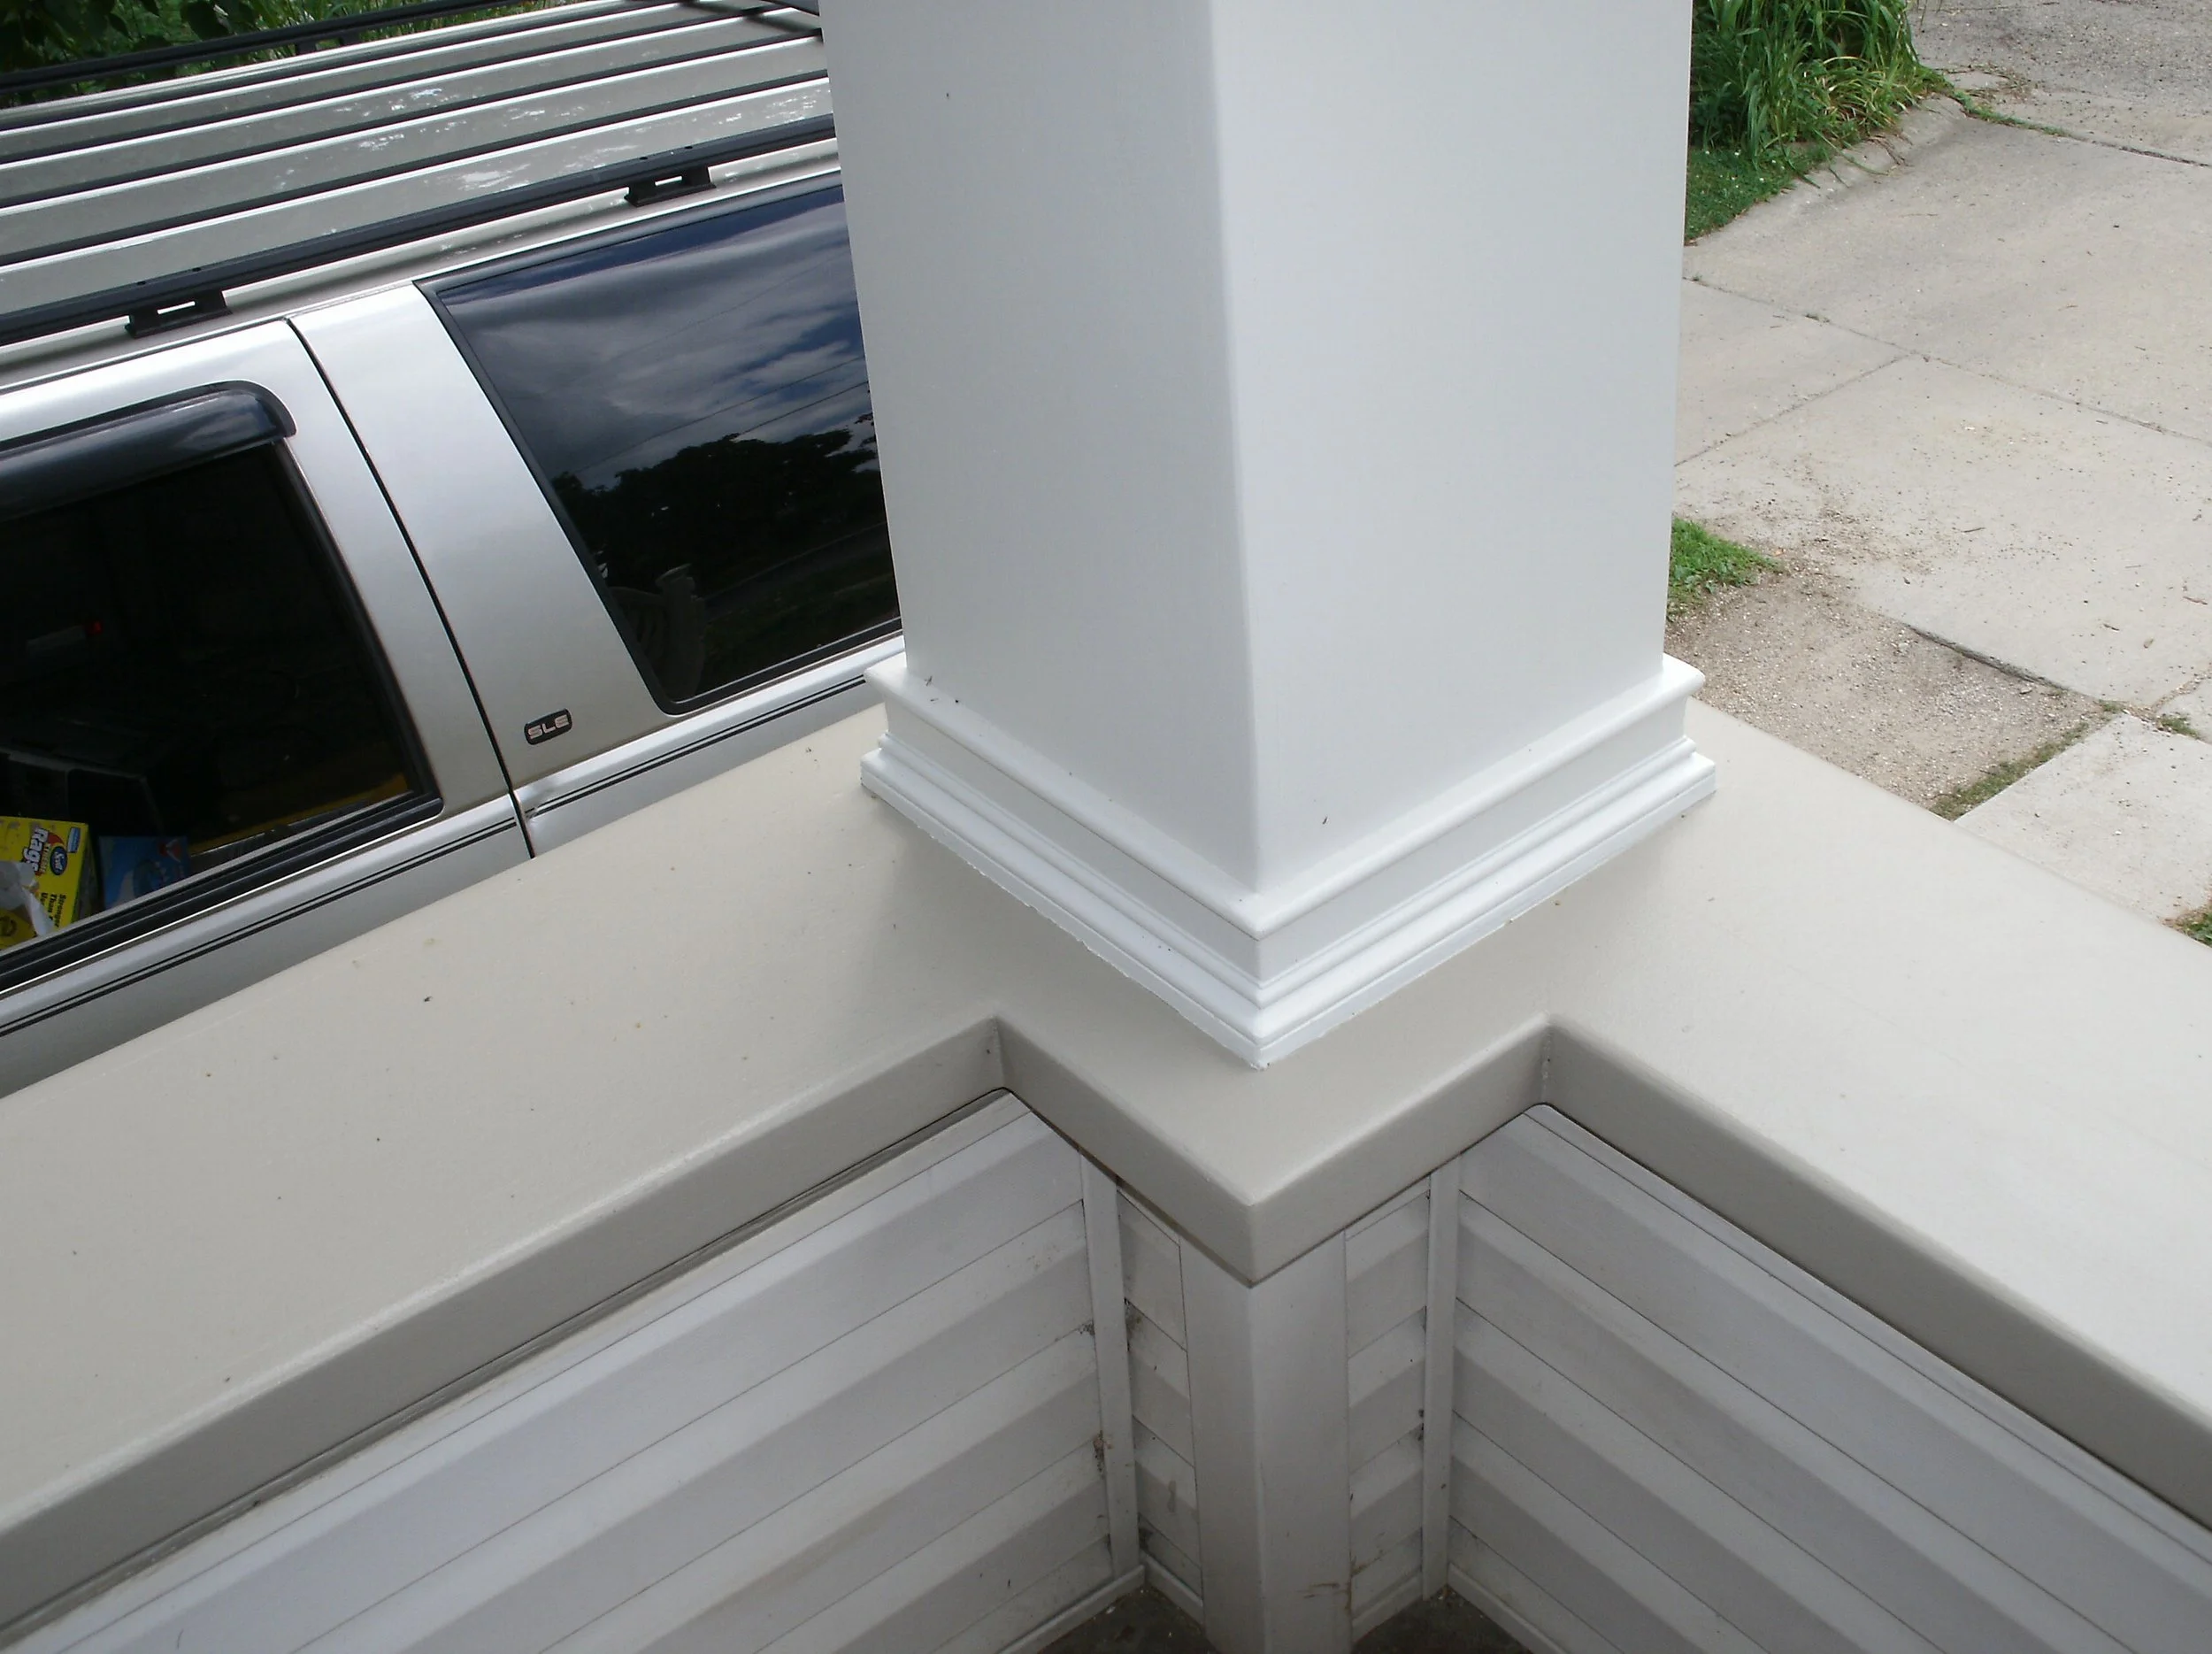
View of corner post cladded, and upper trim “dentils”
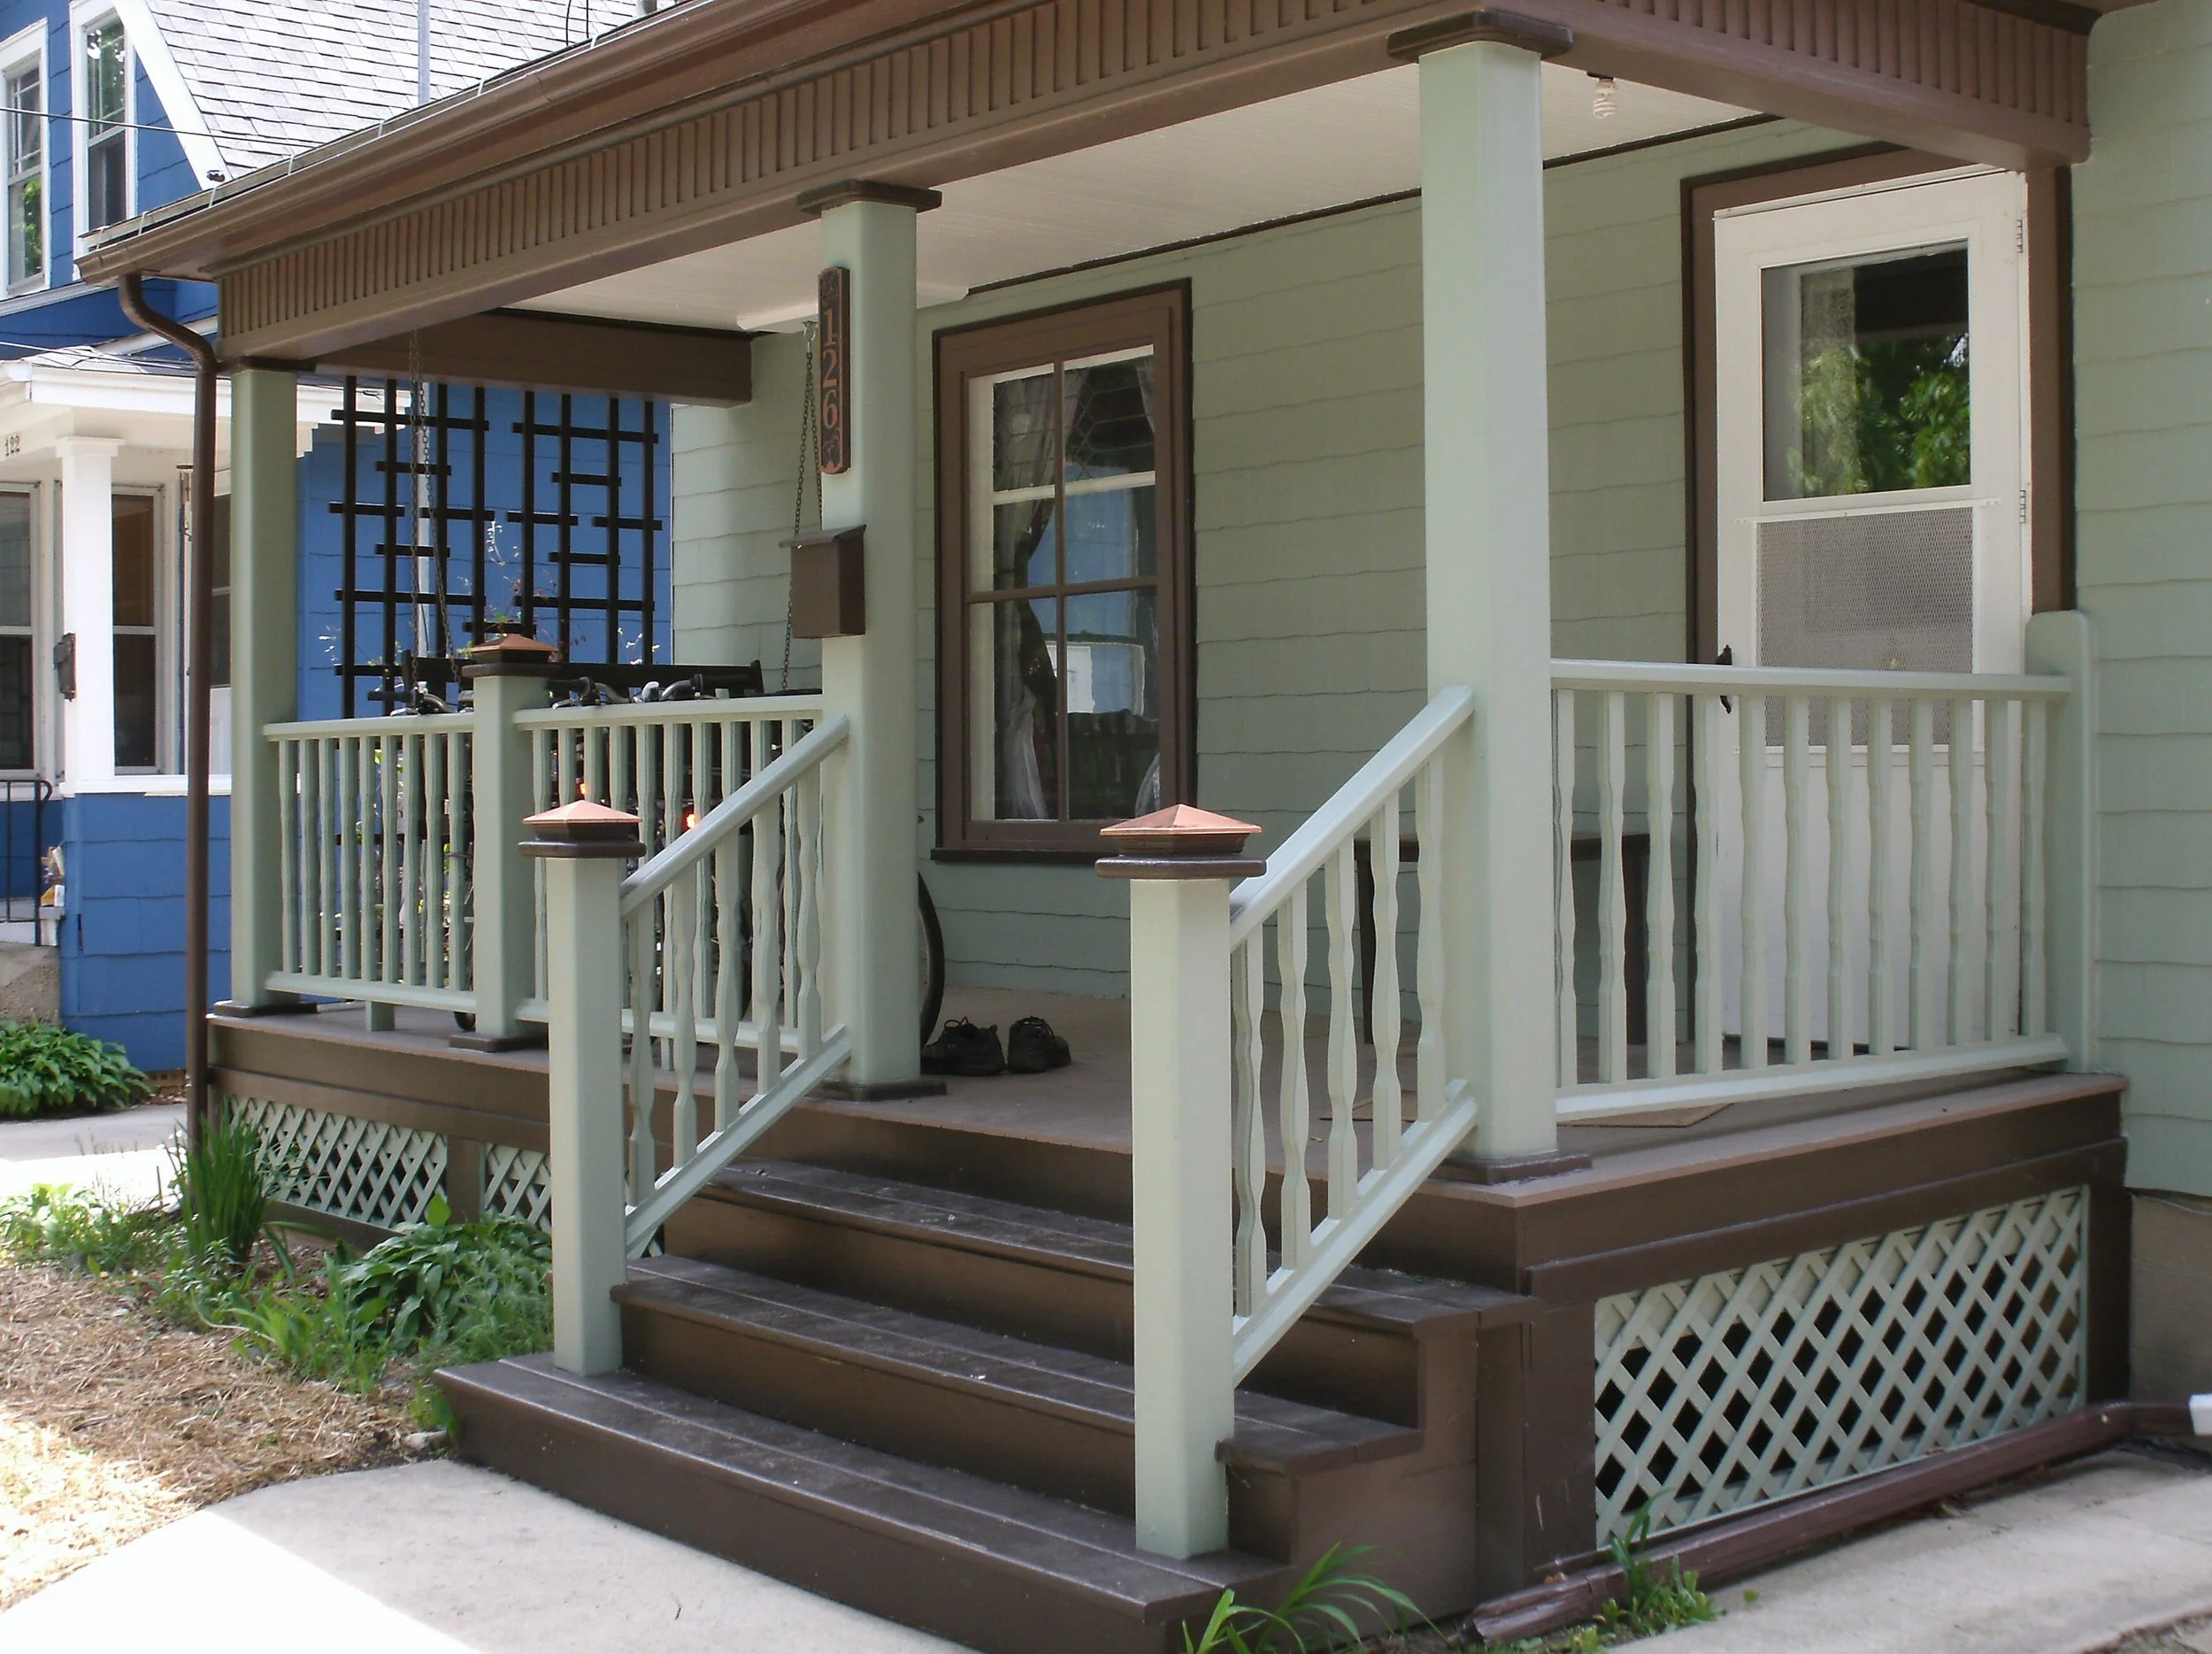
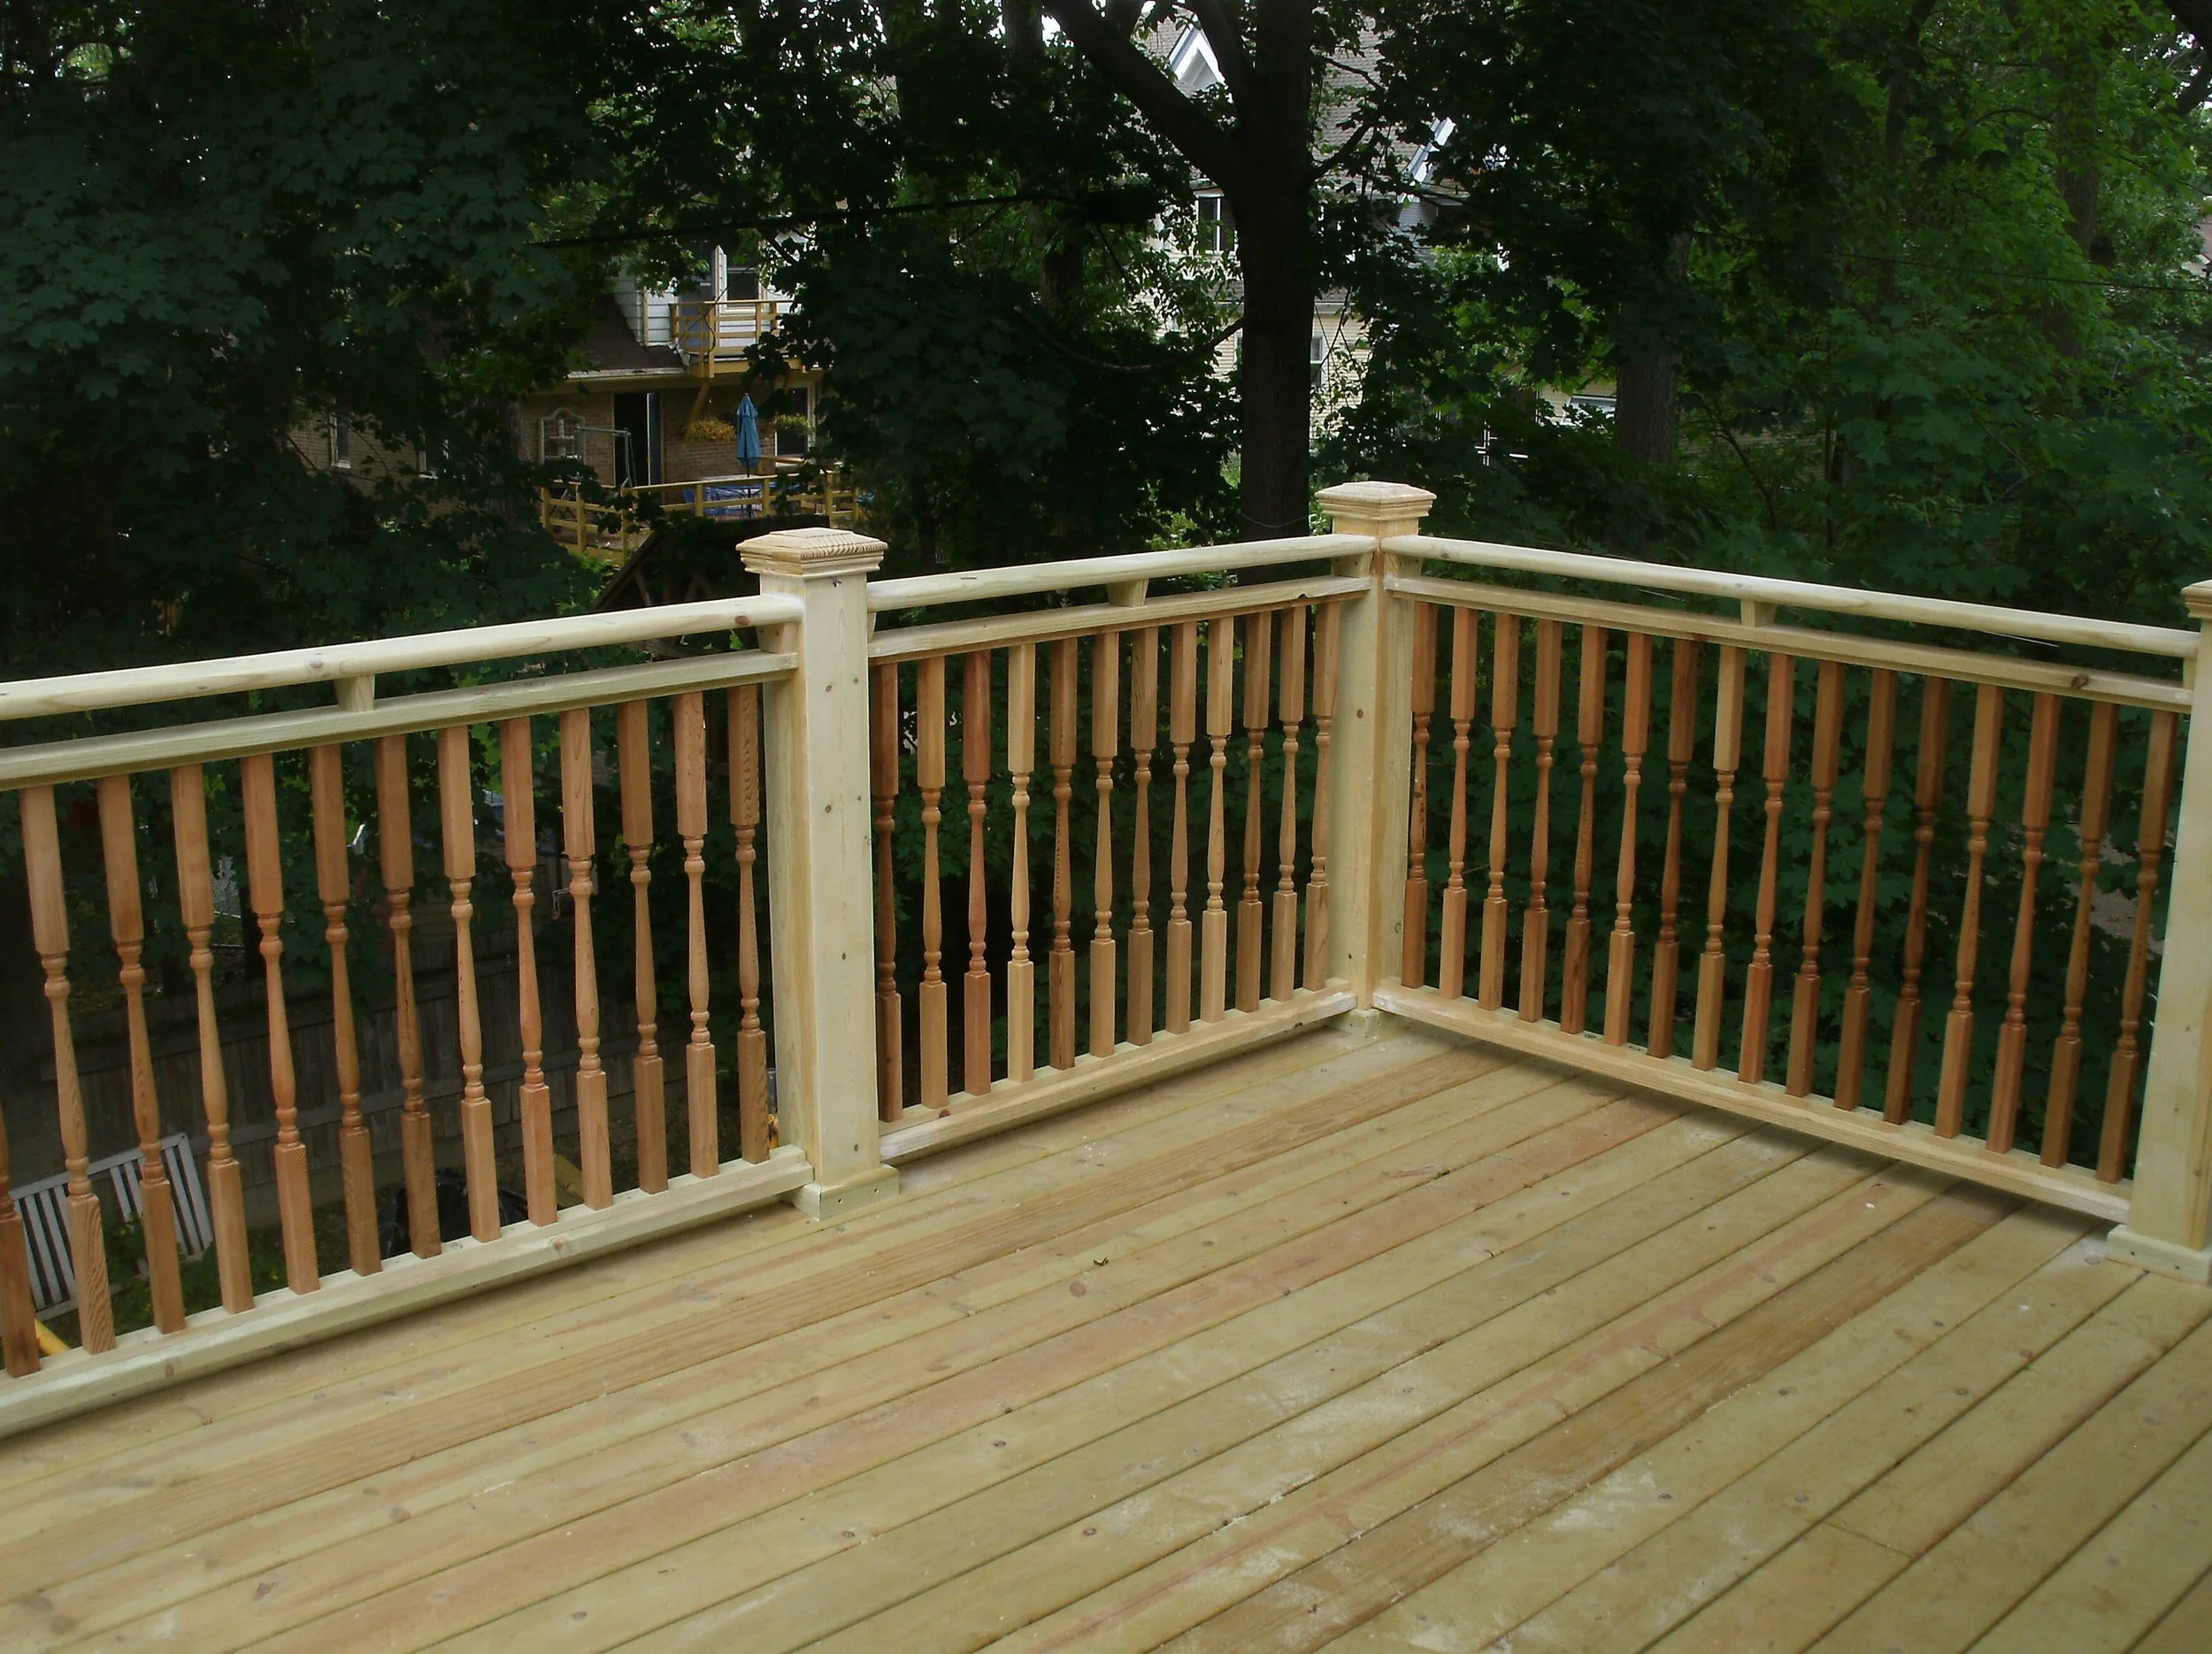
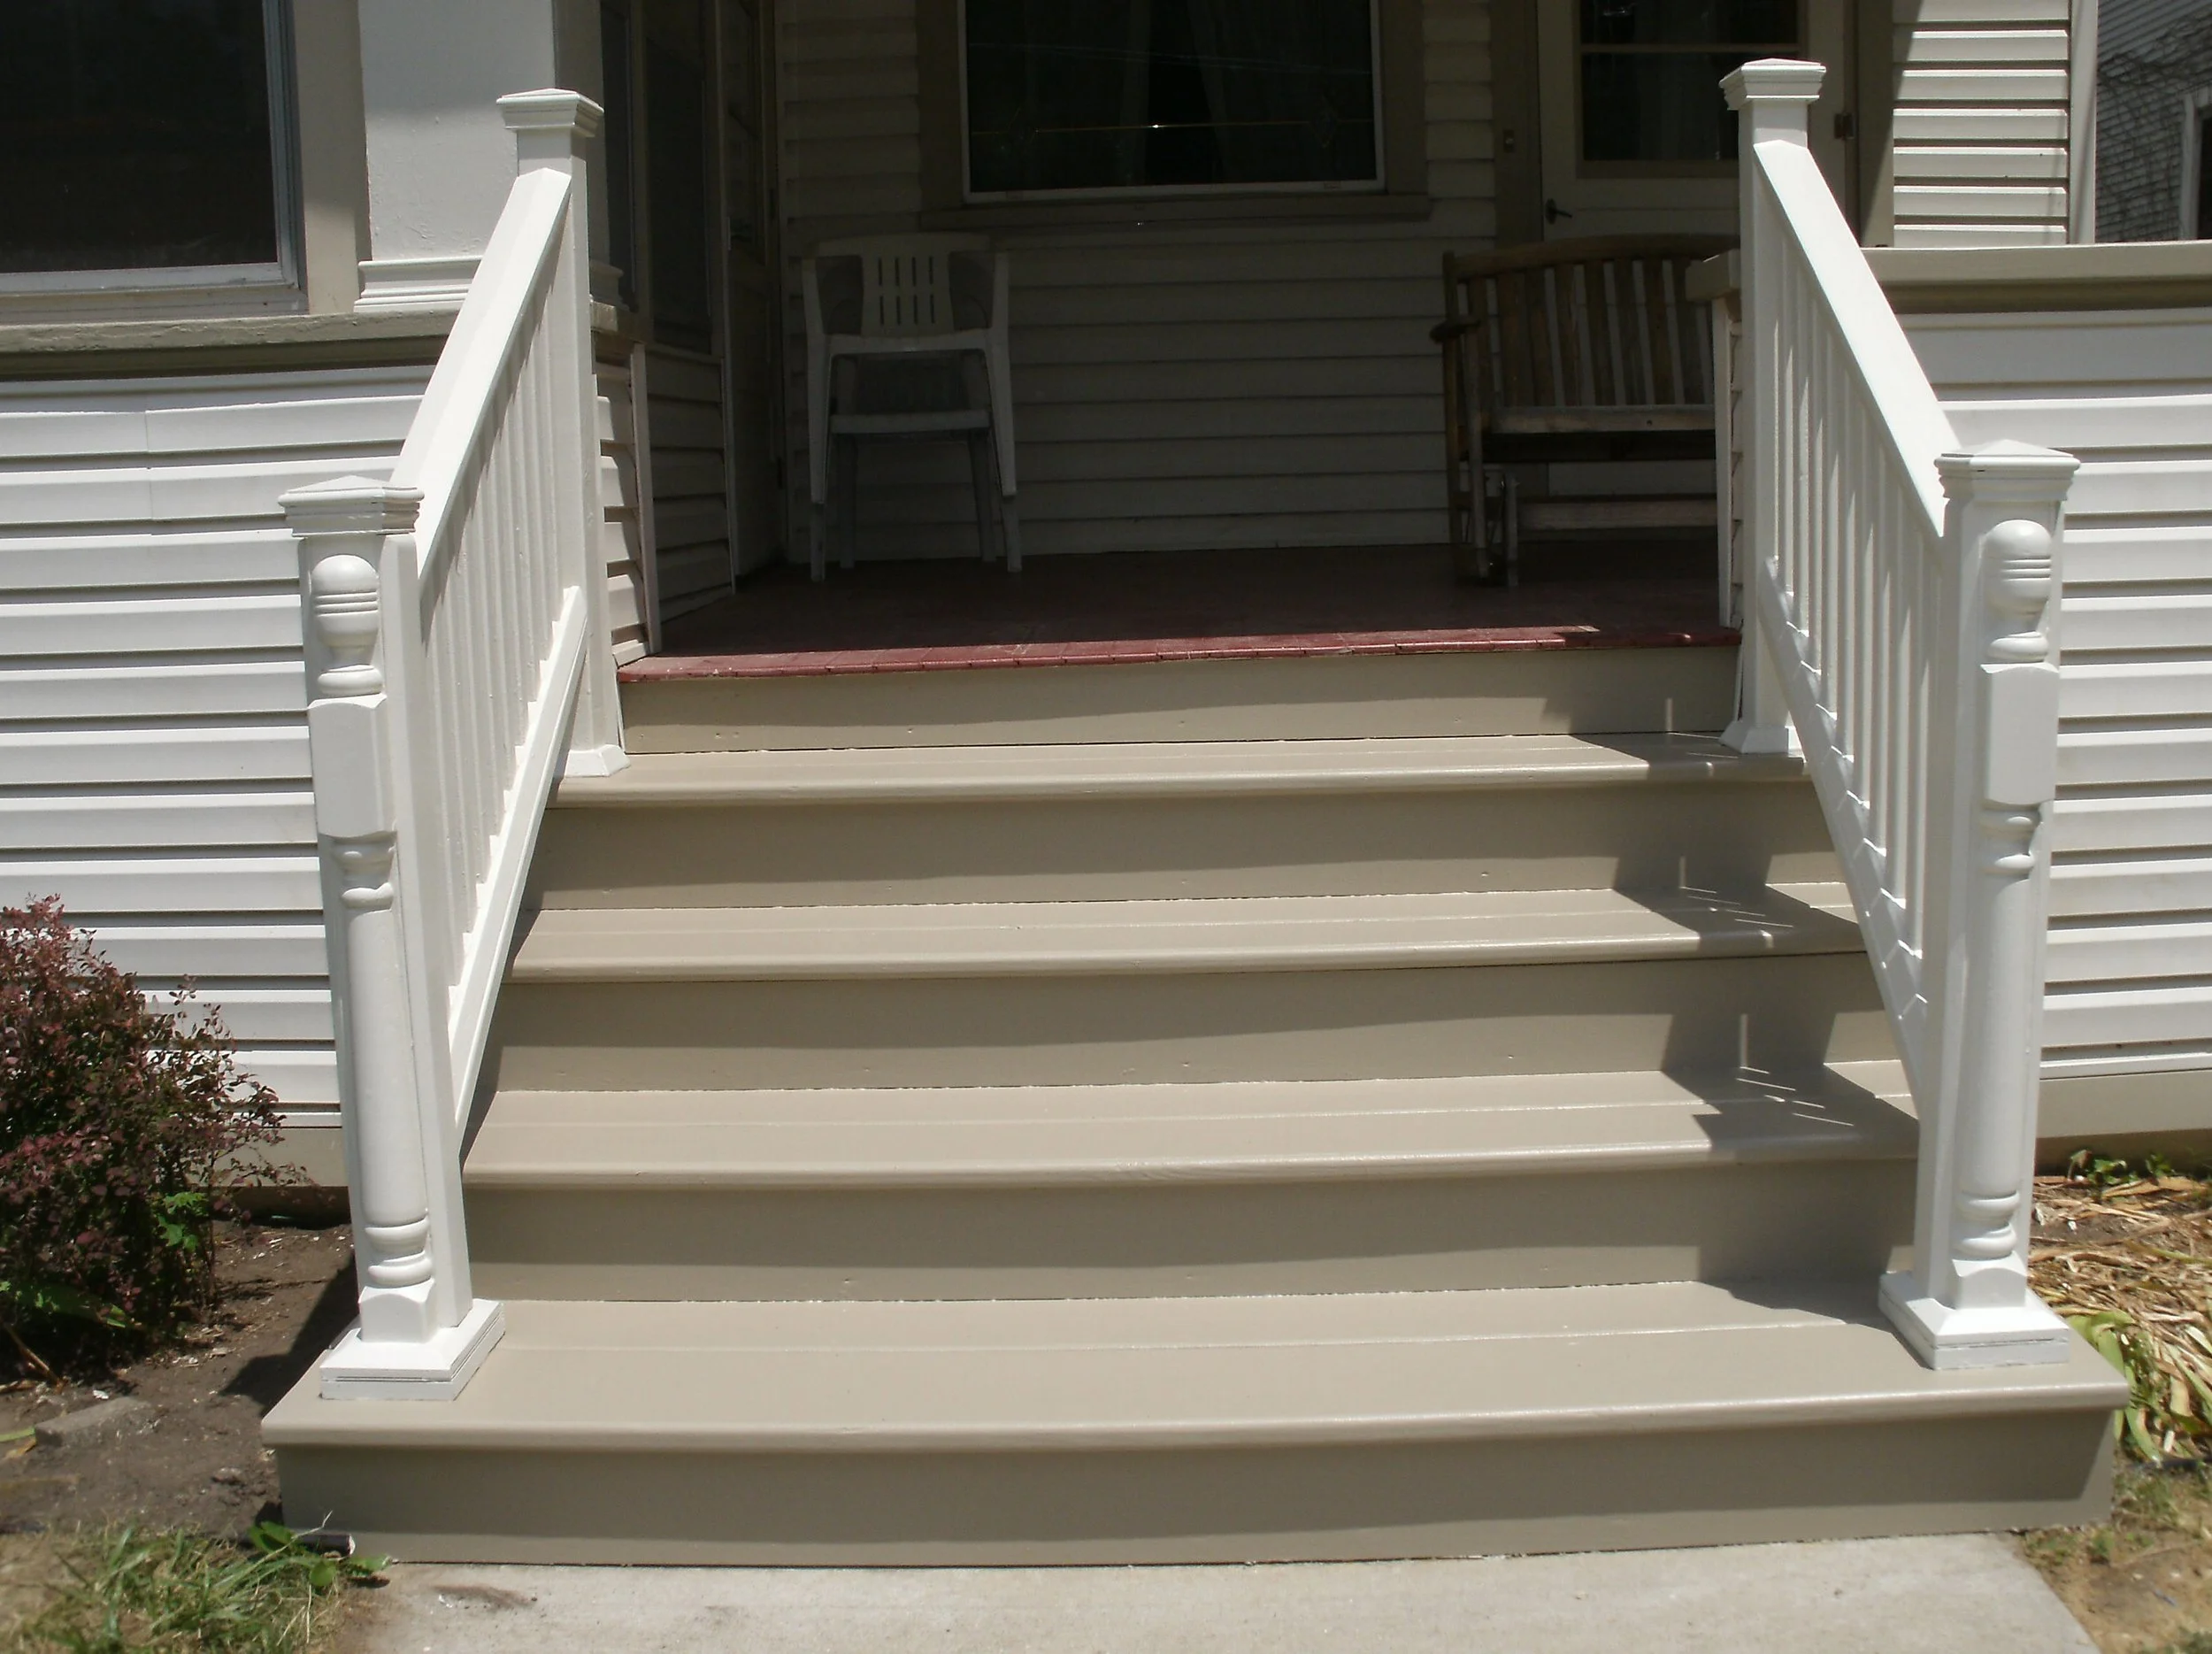
View of new posts, rails, decking, stairs, upper trim, all painted
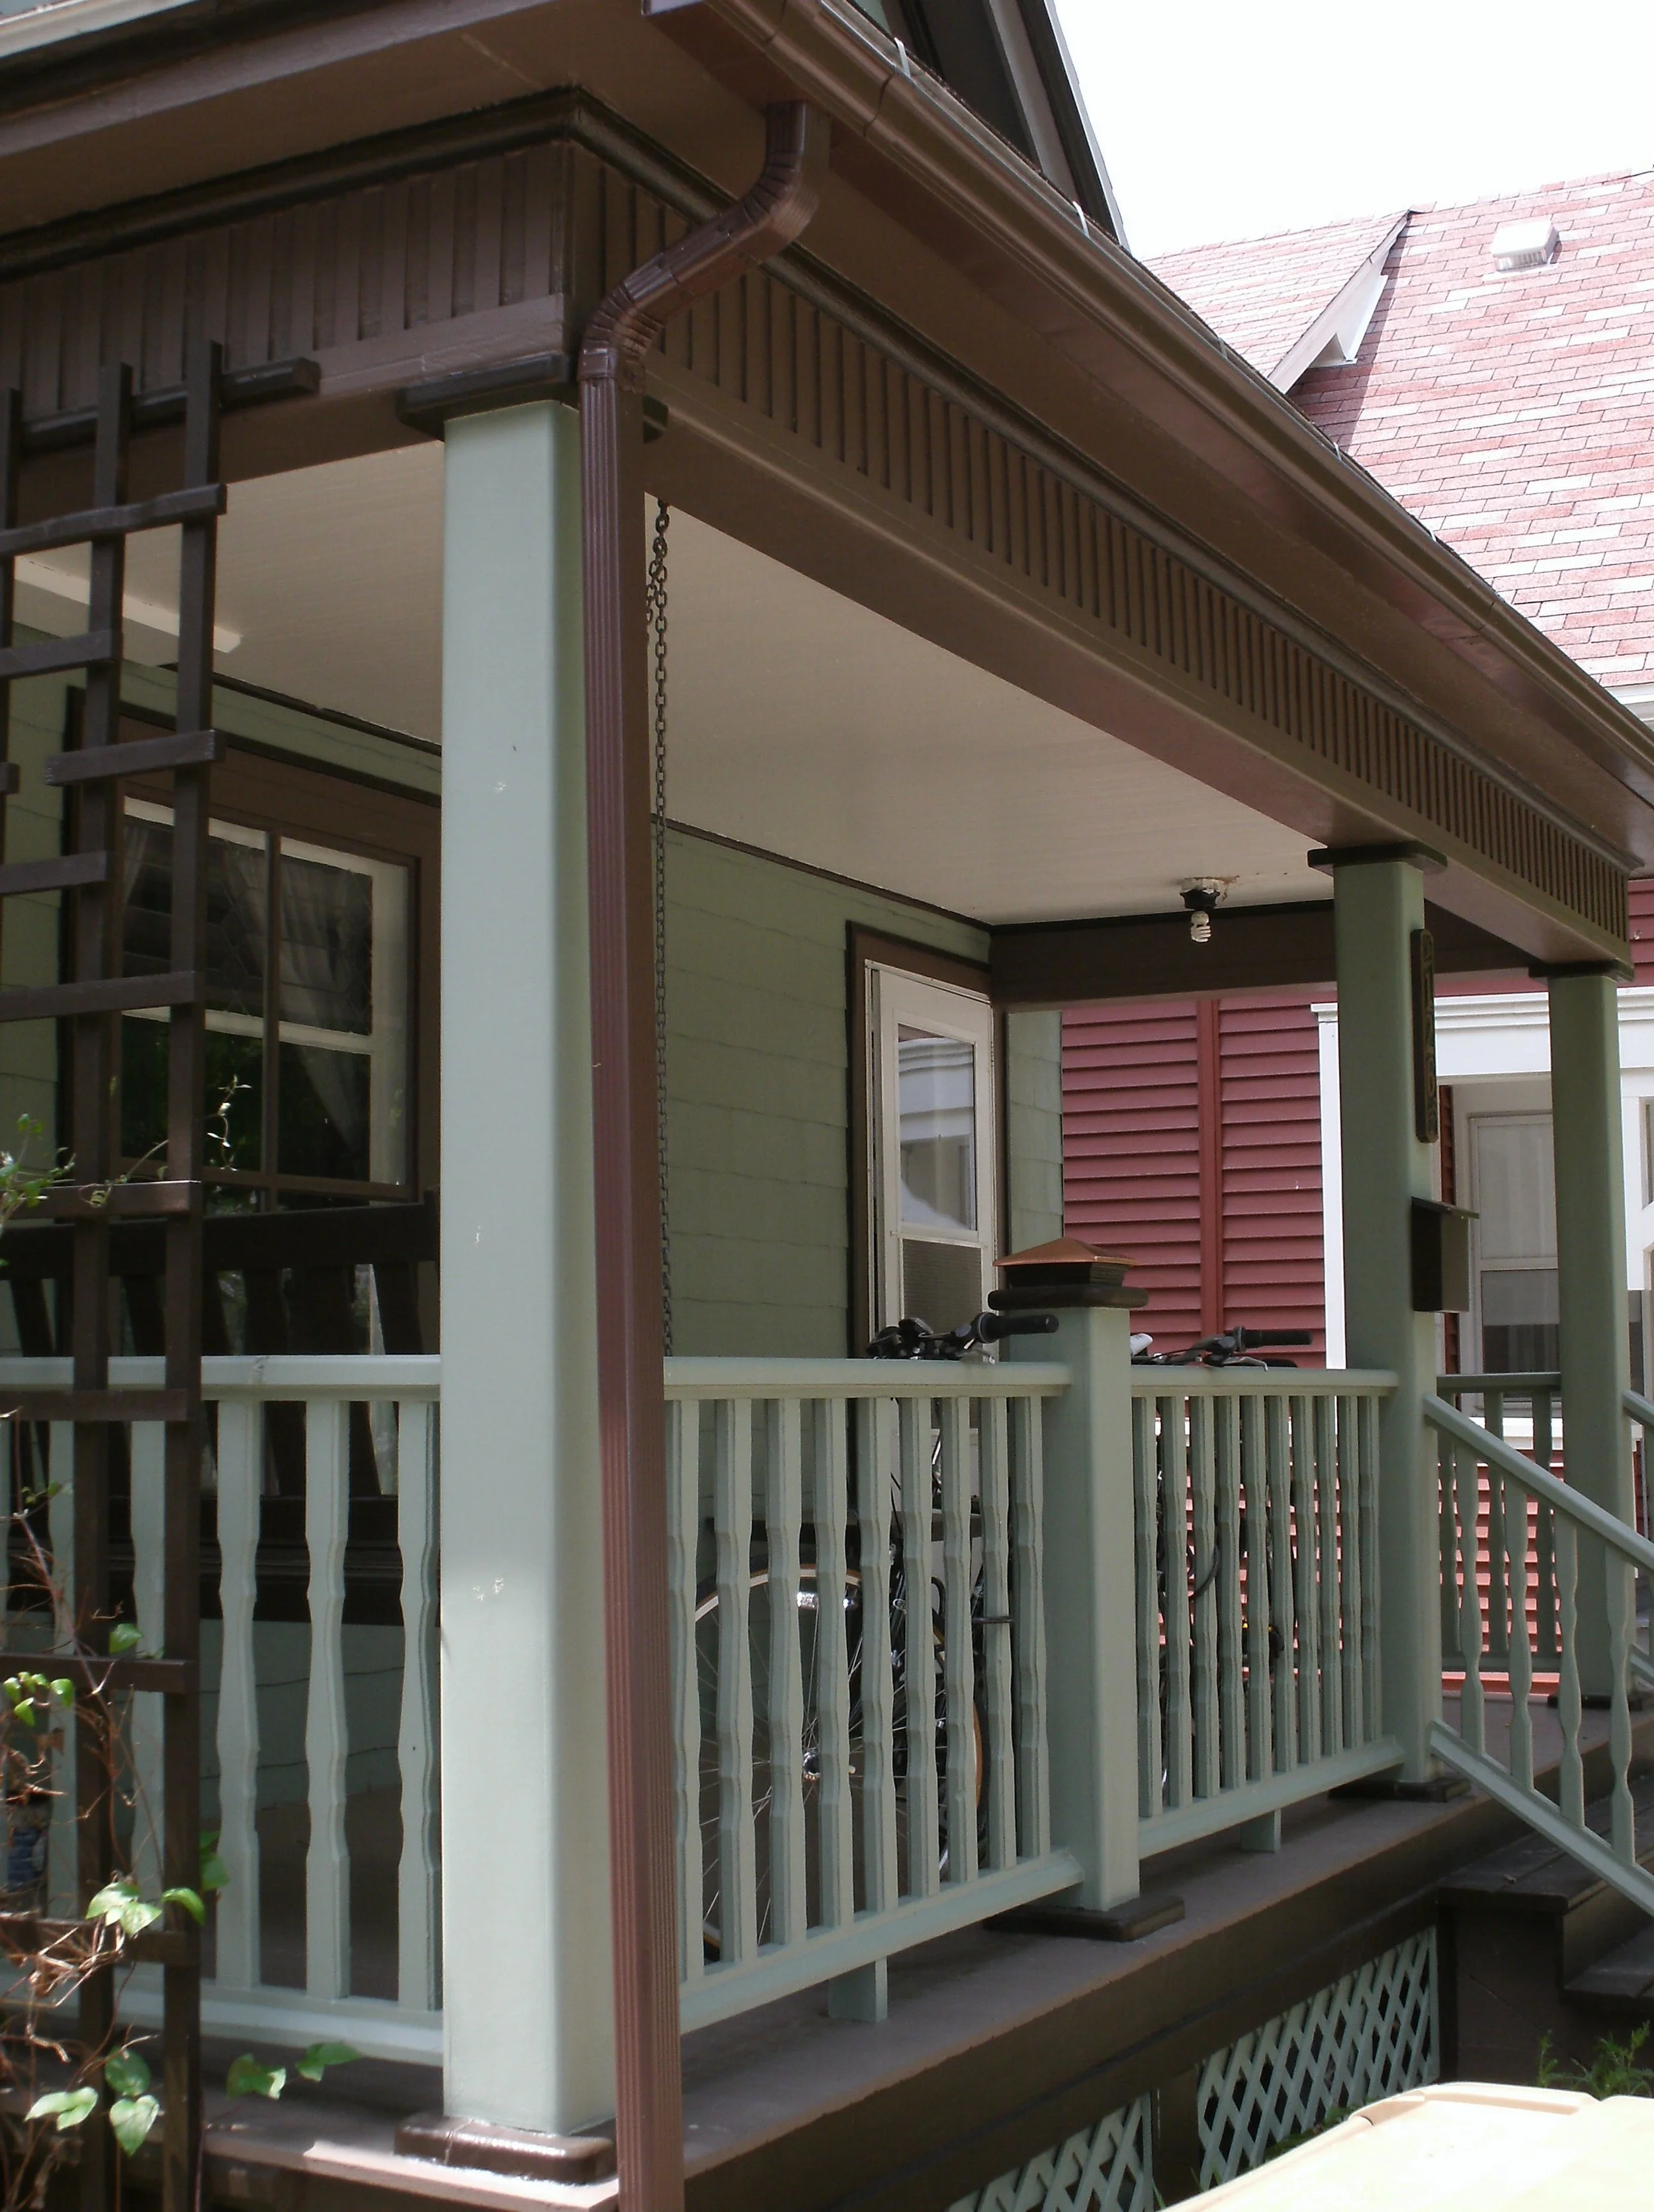
View from the other side

Full view of the replicated period appropriate flower vine lattice
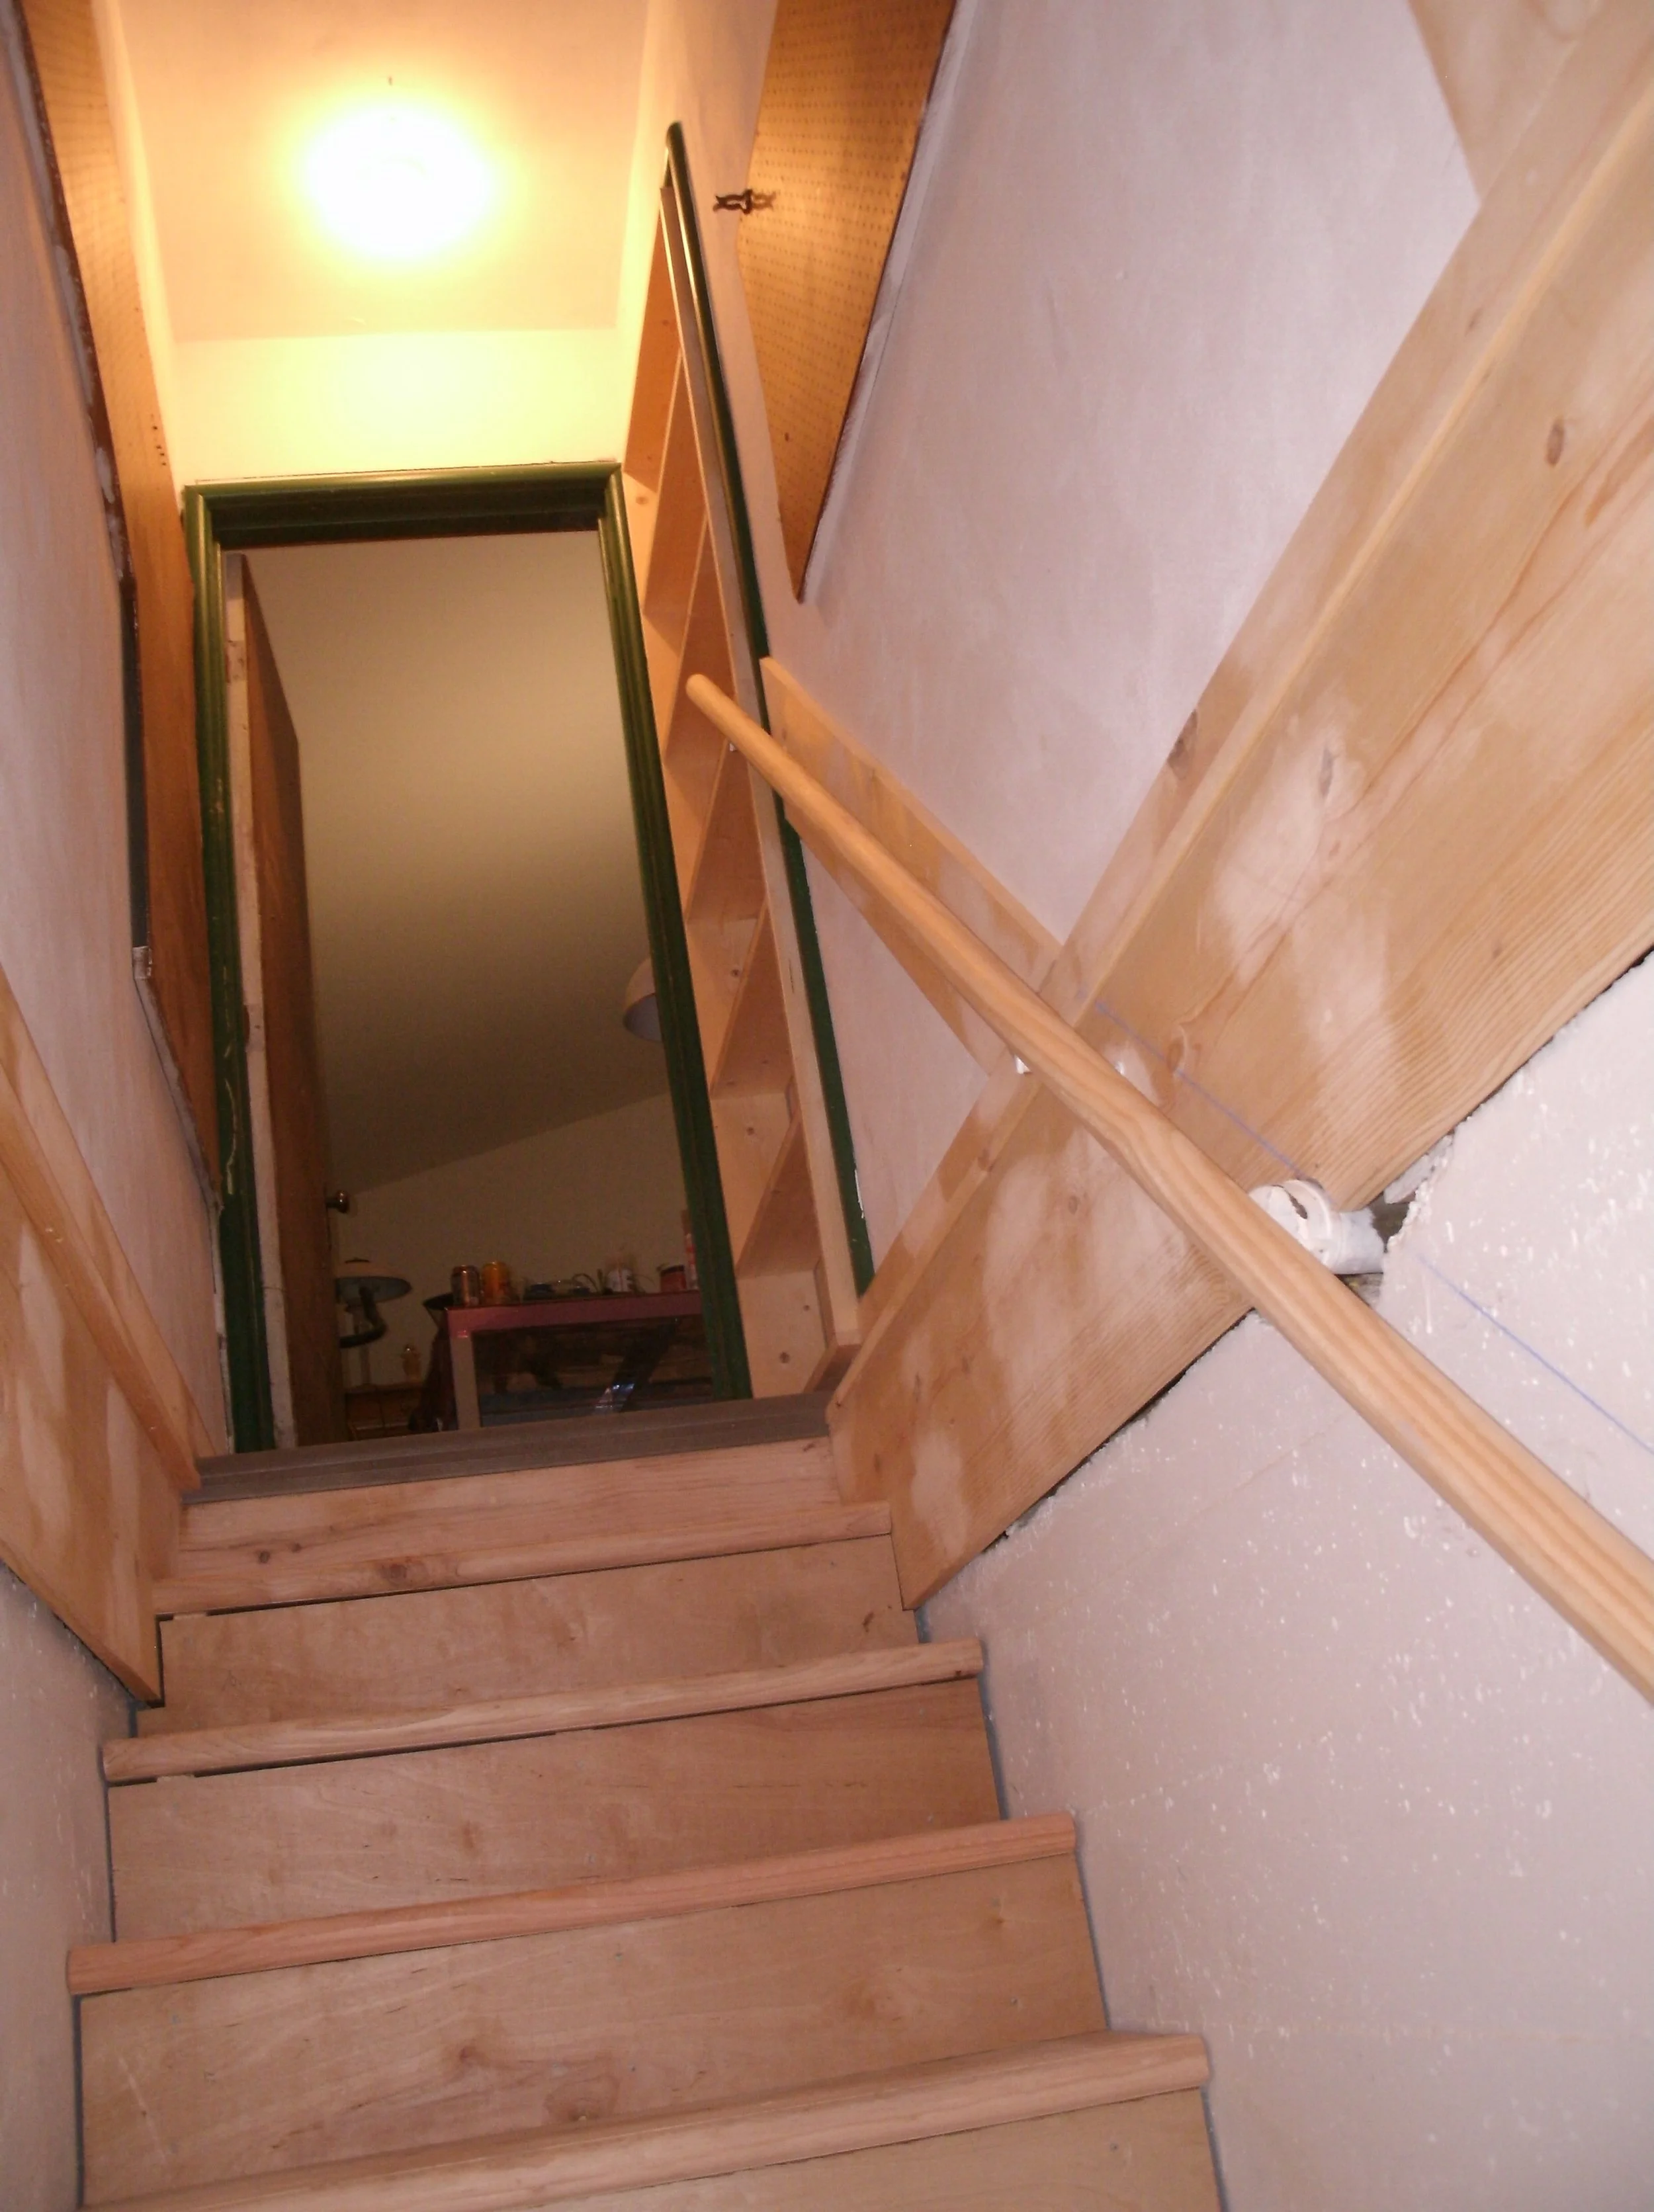
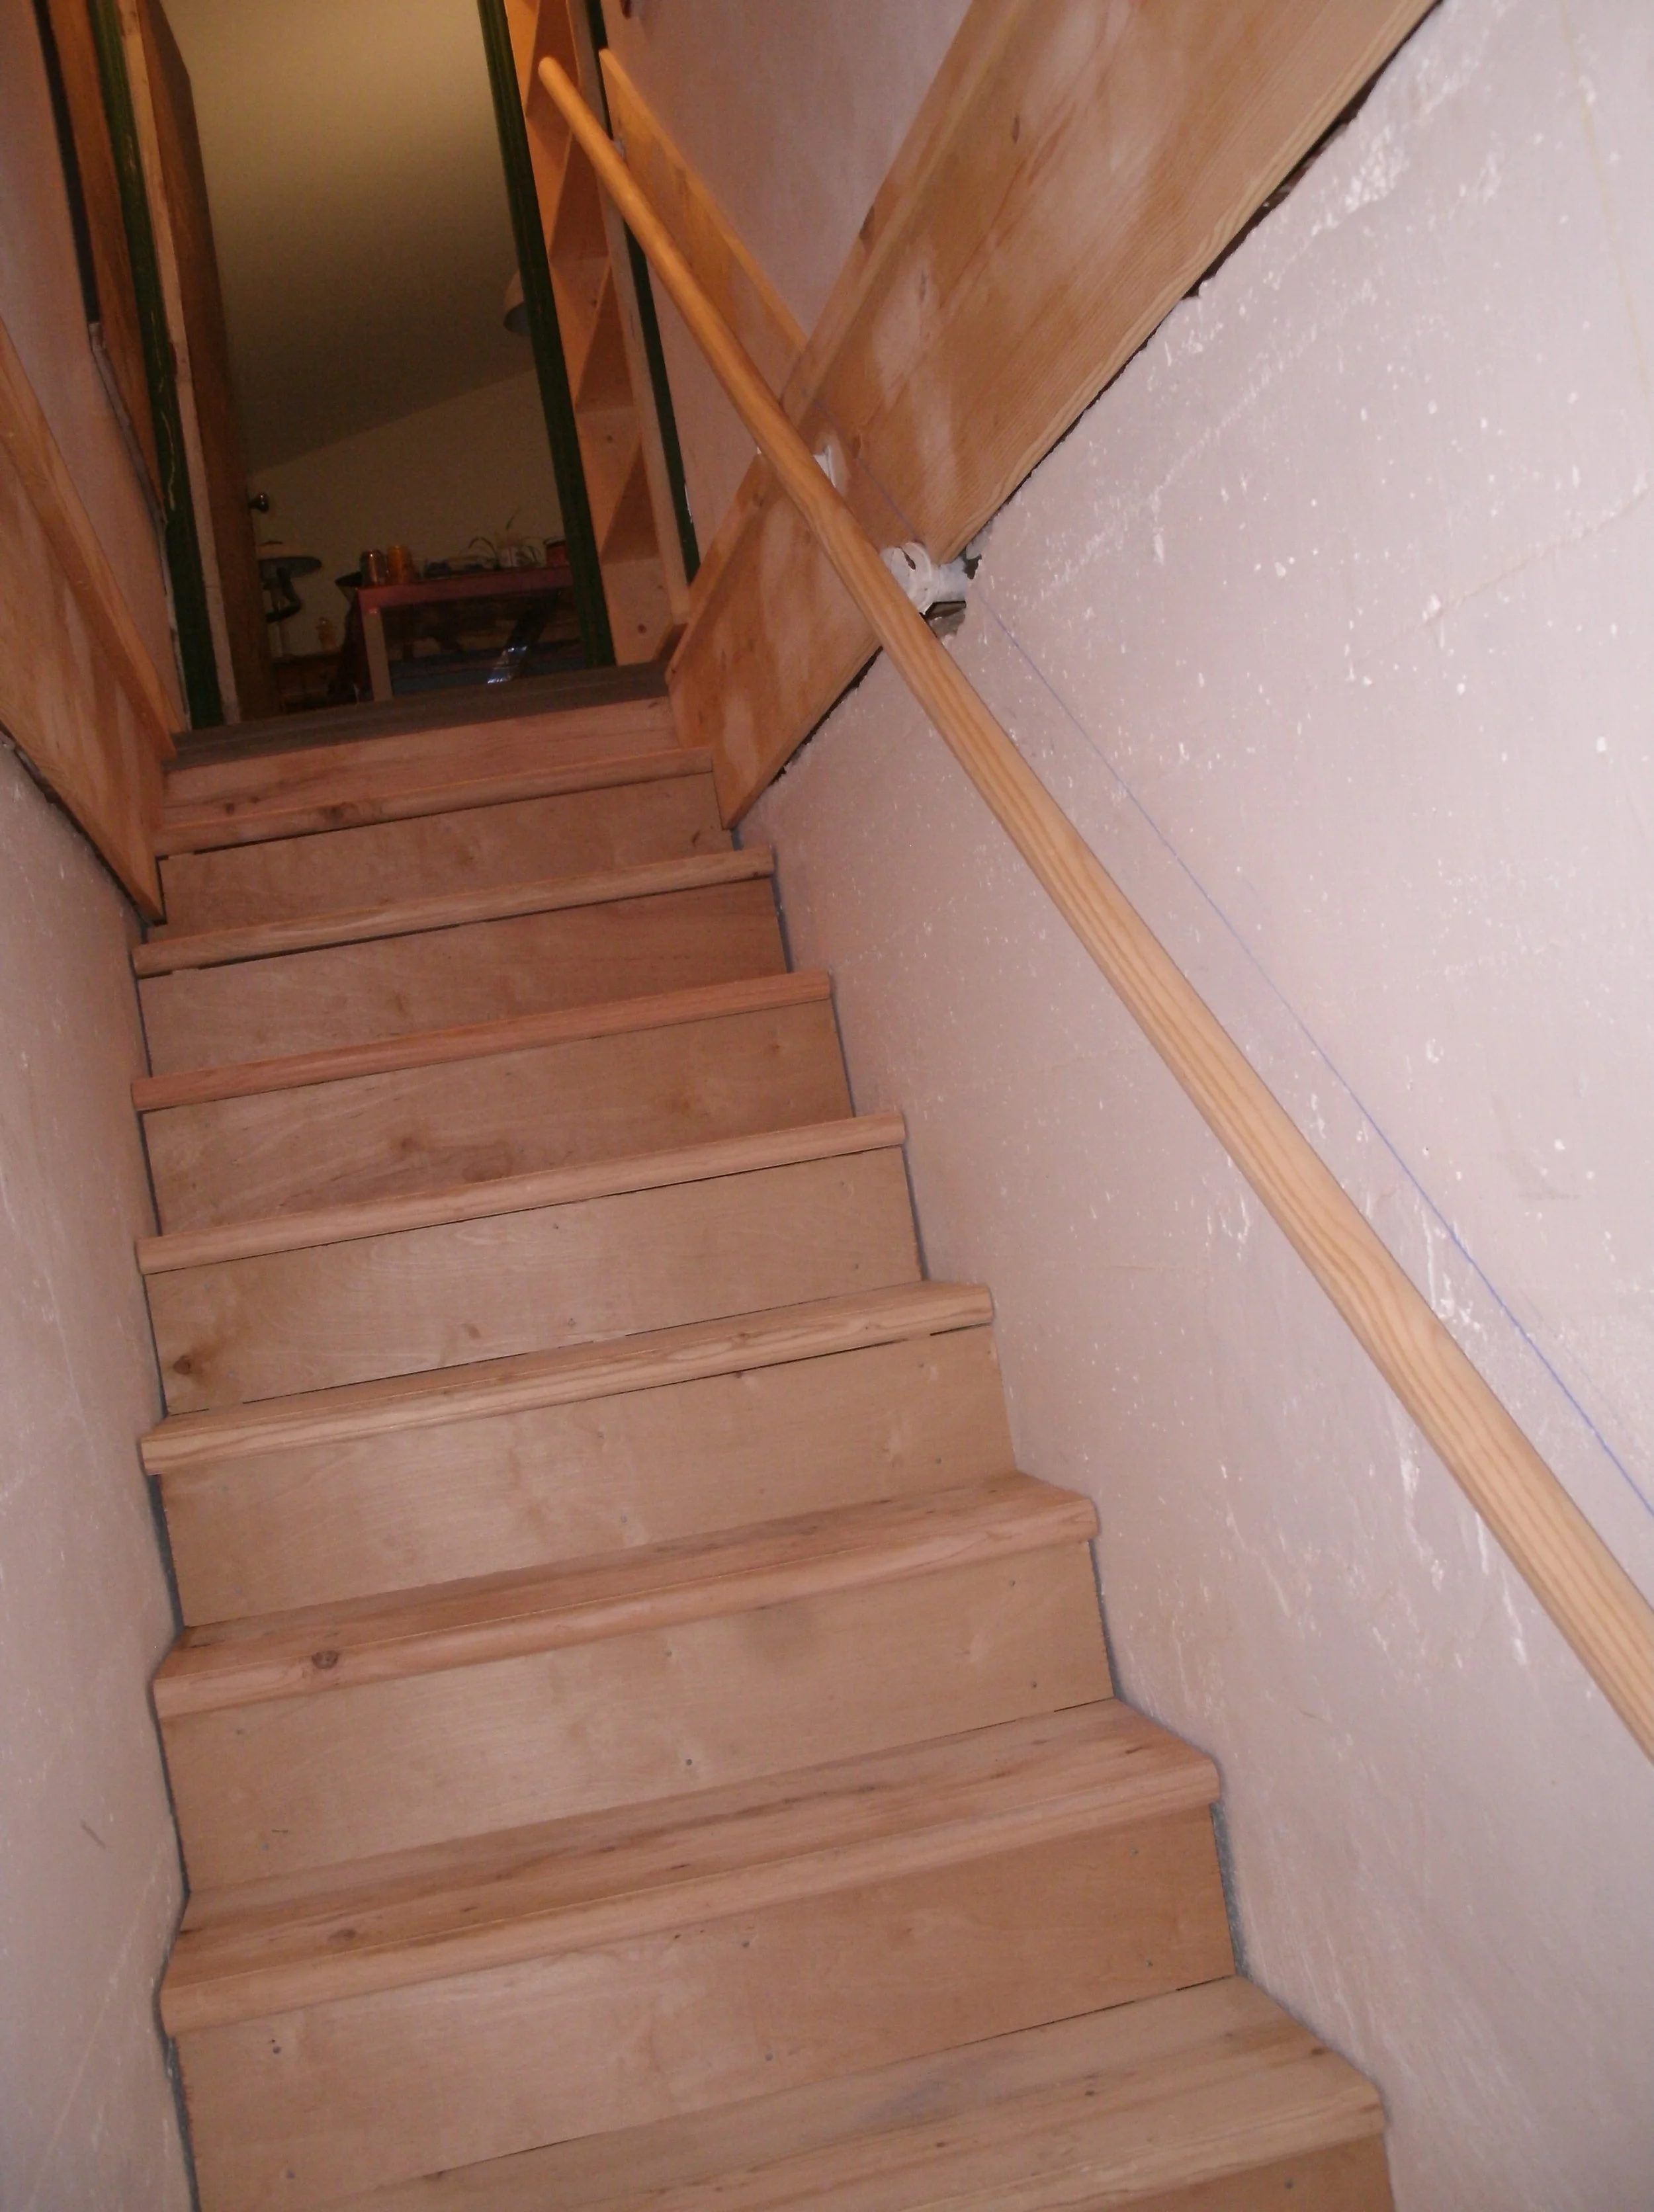
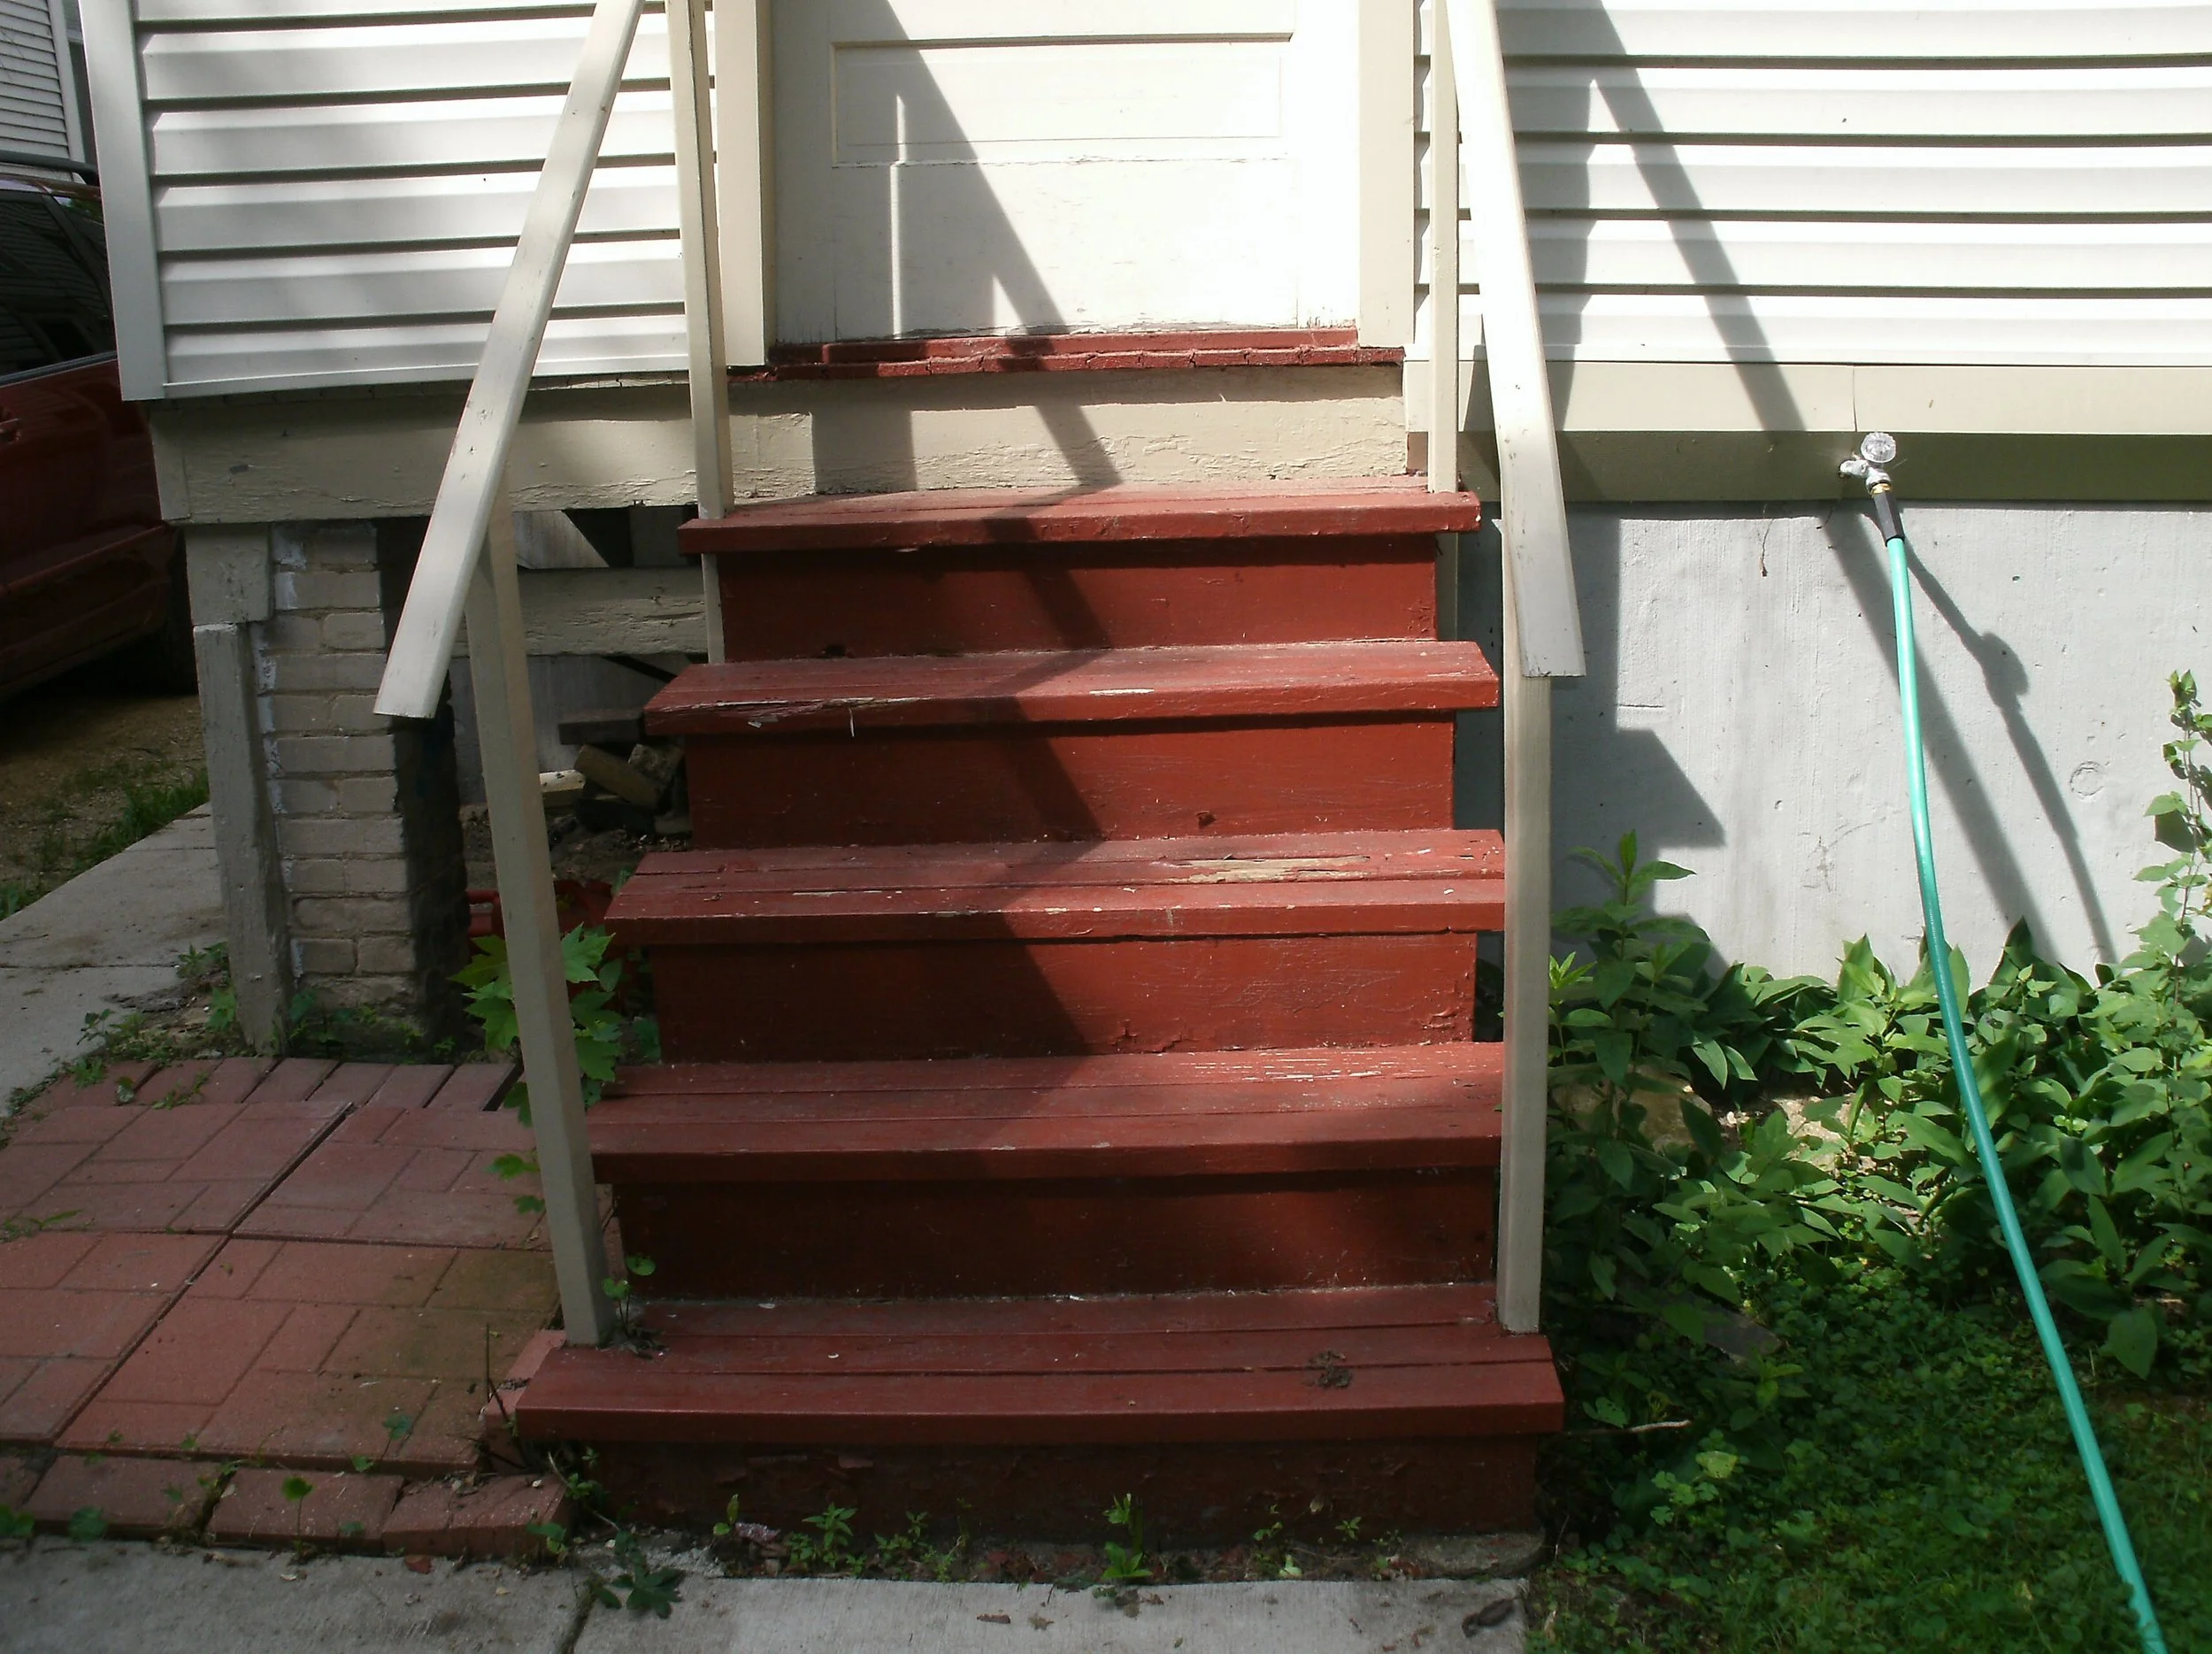
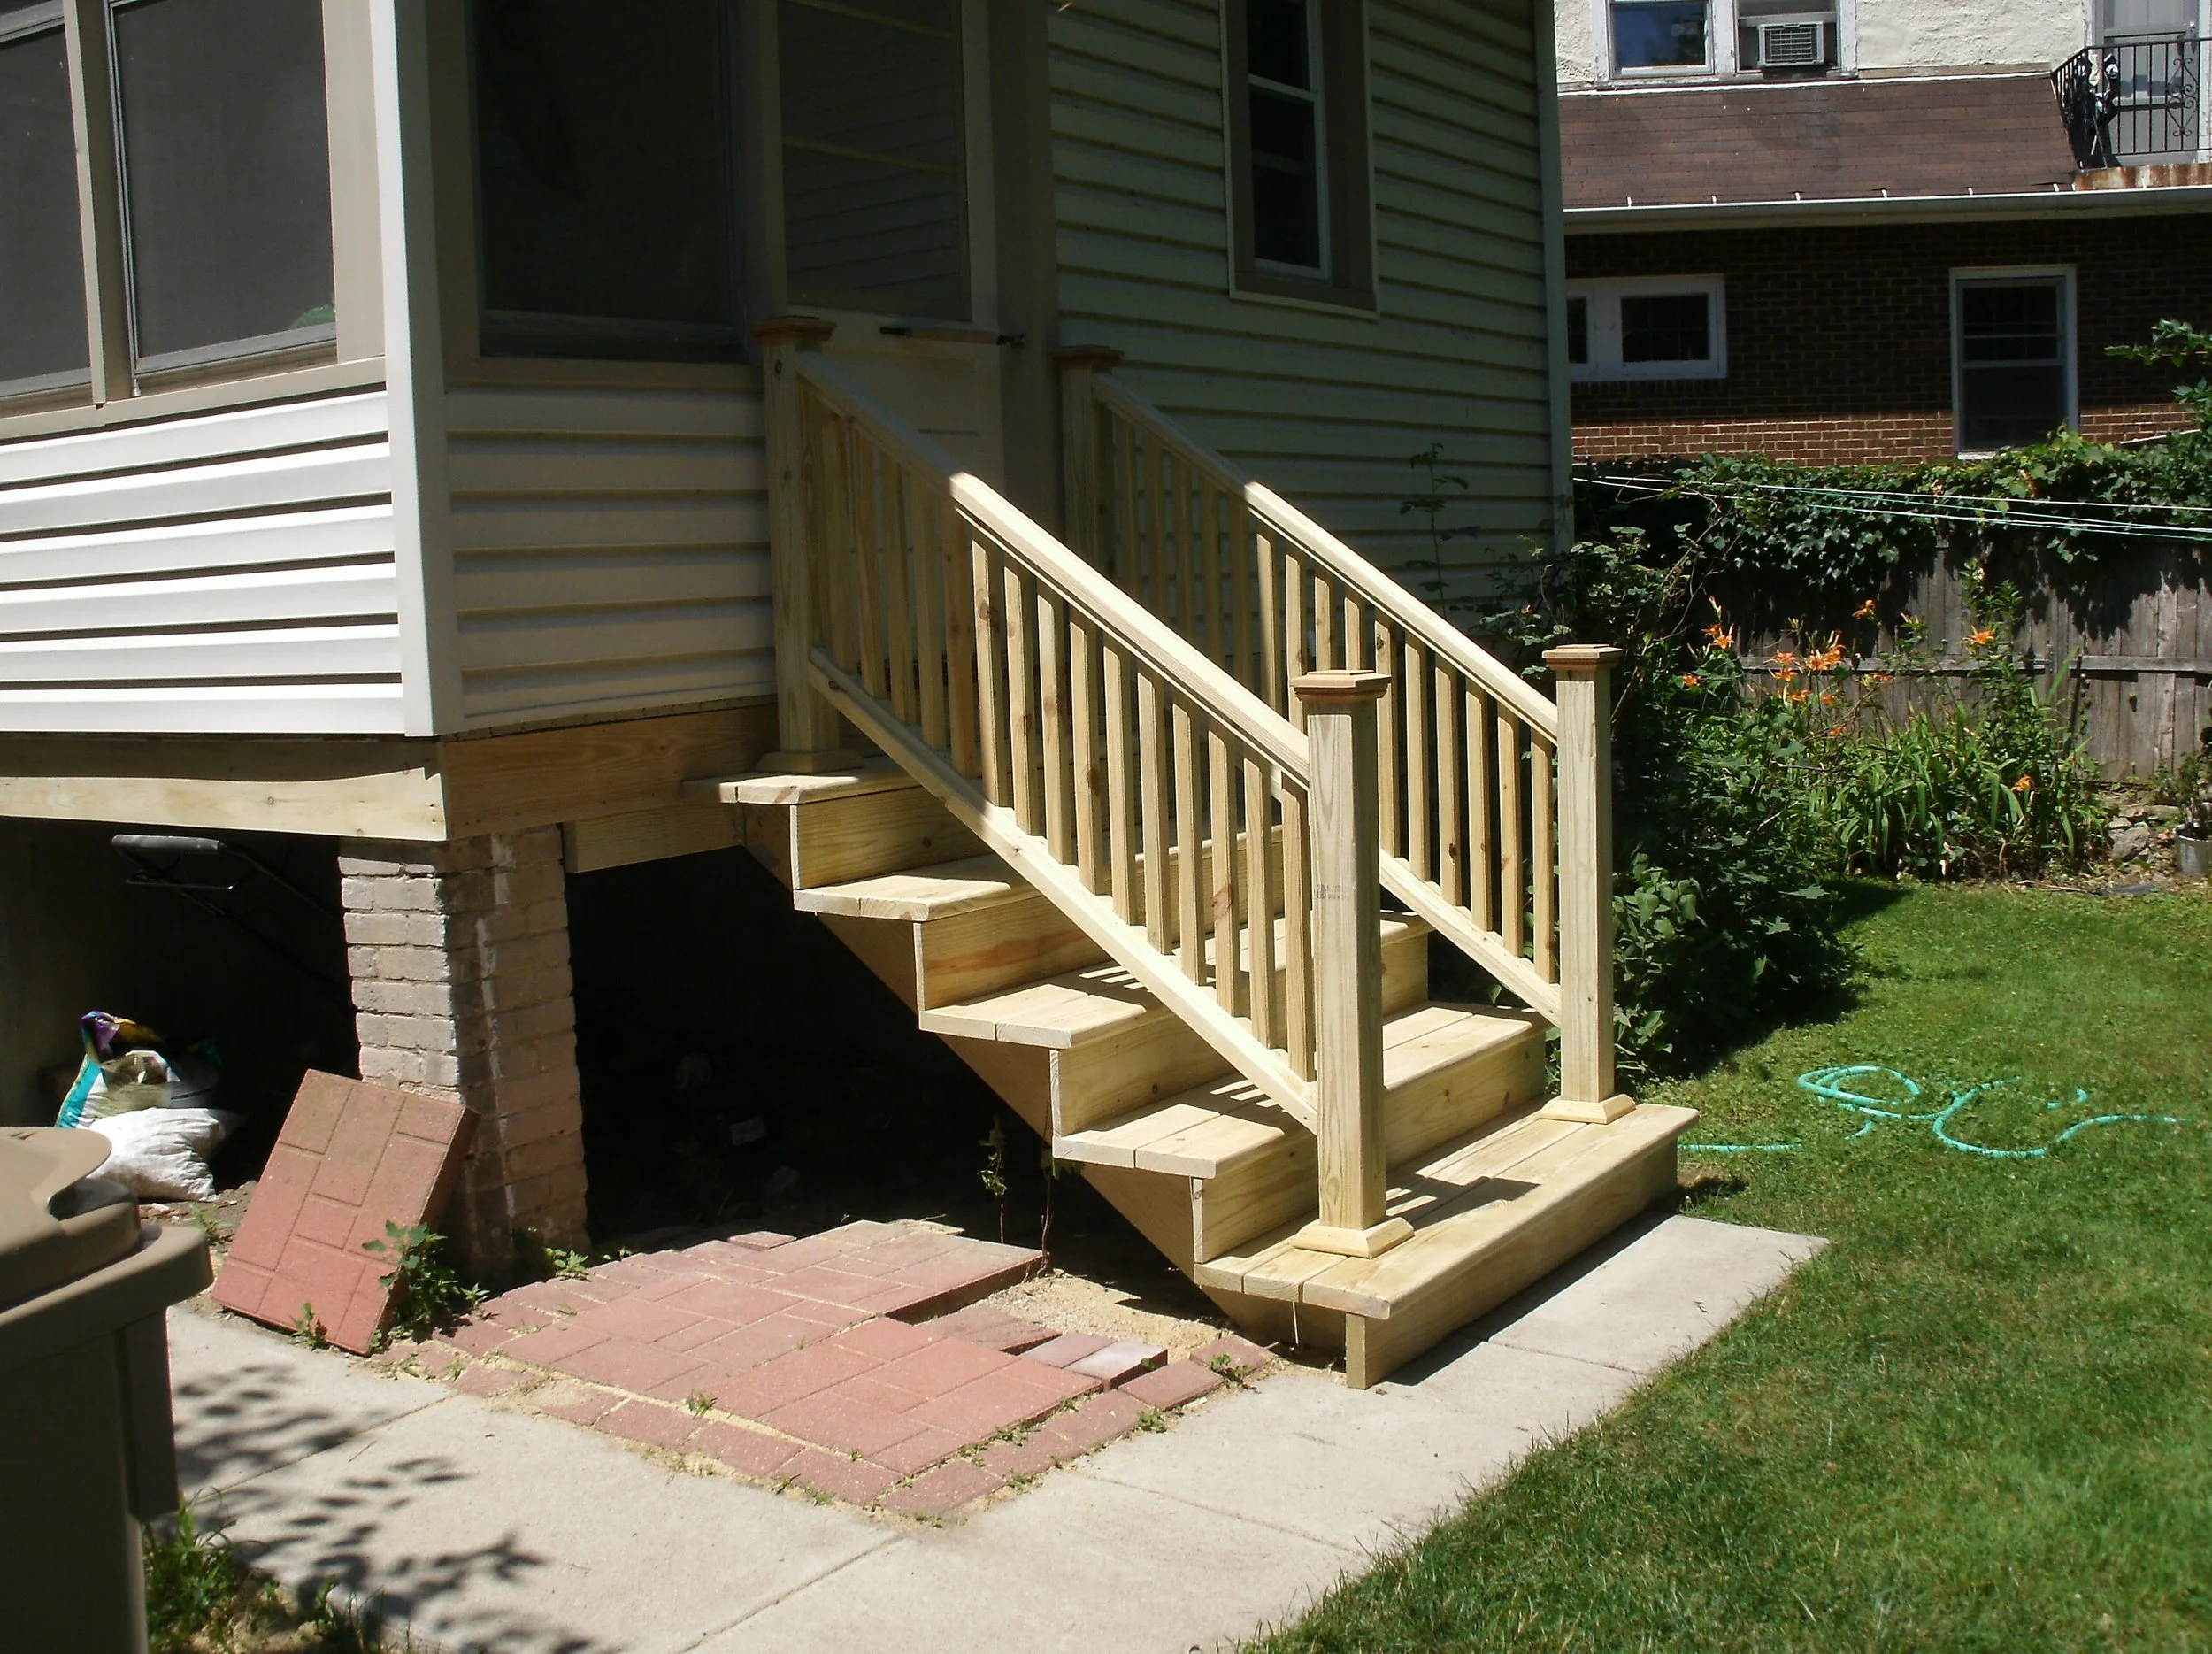
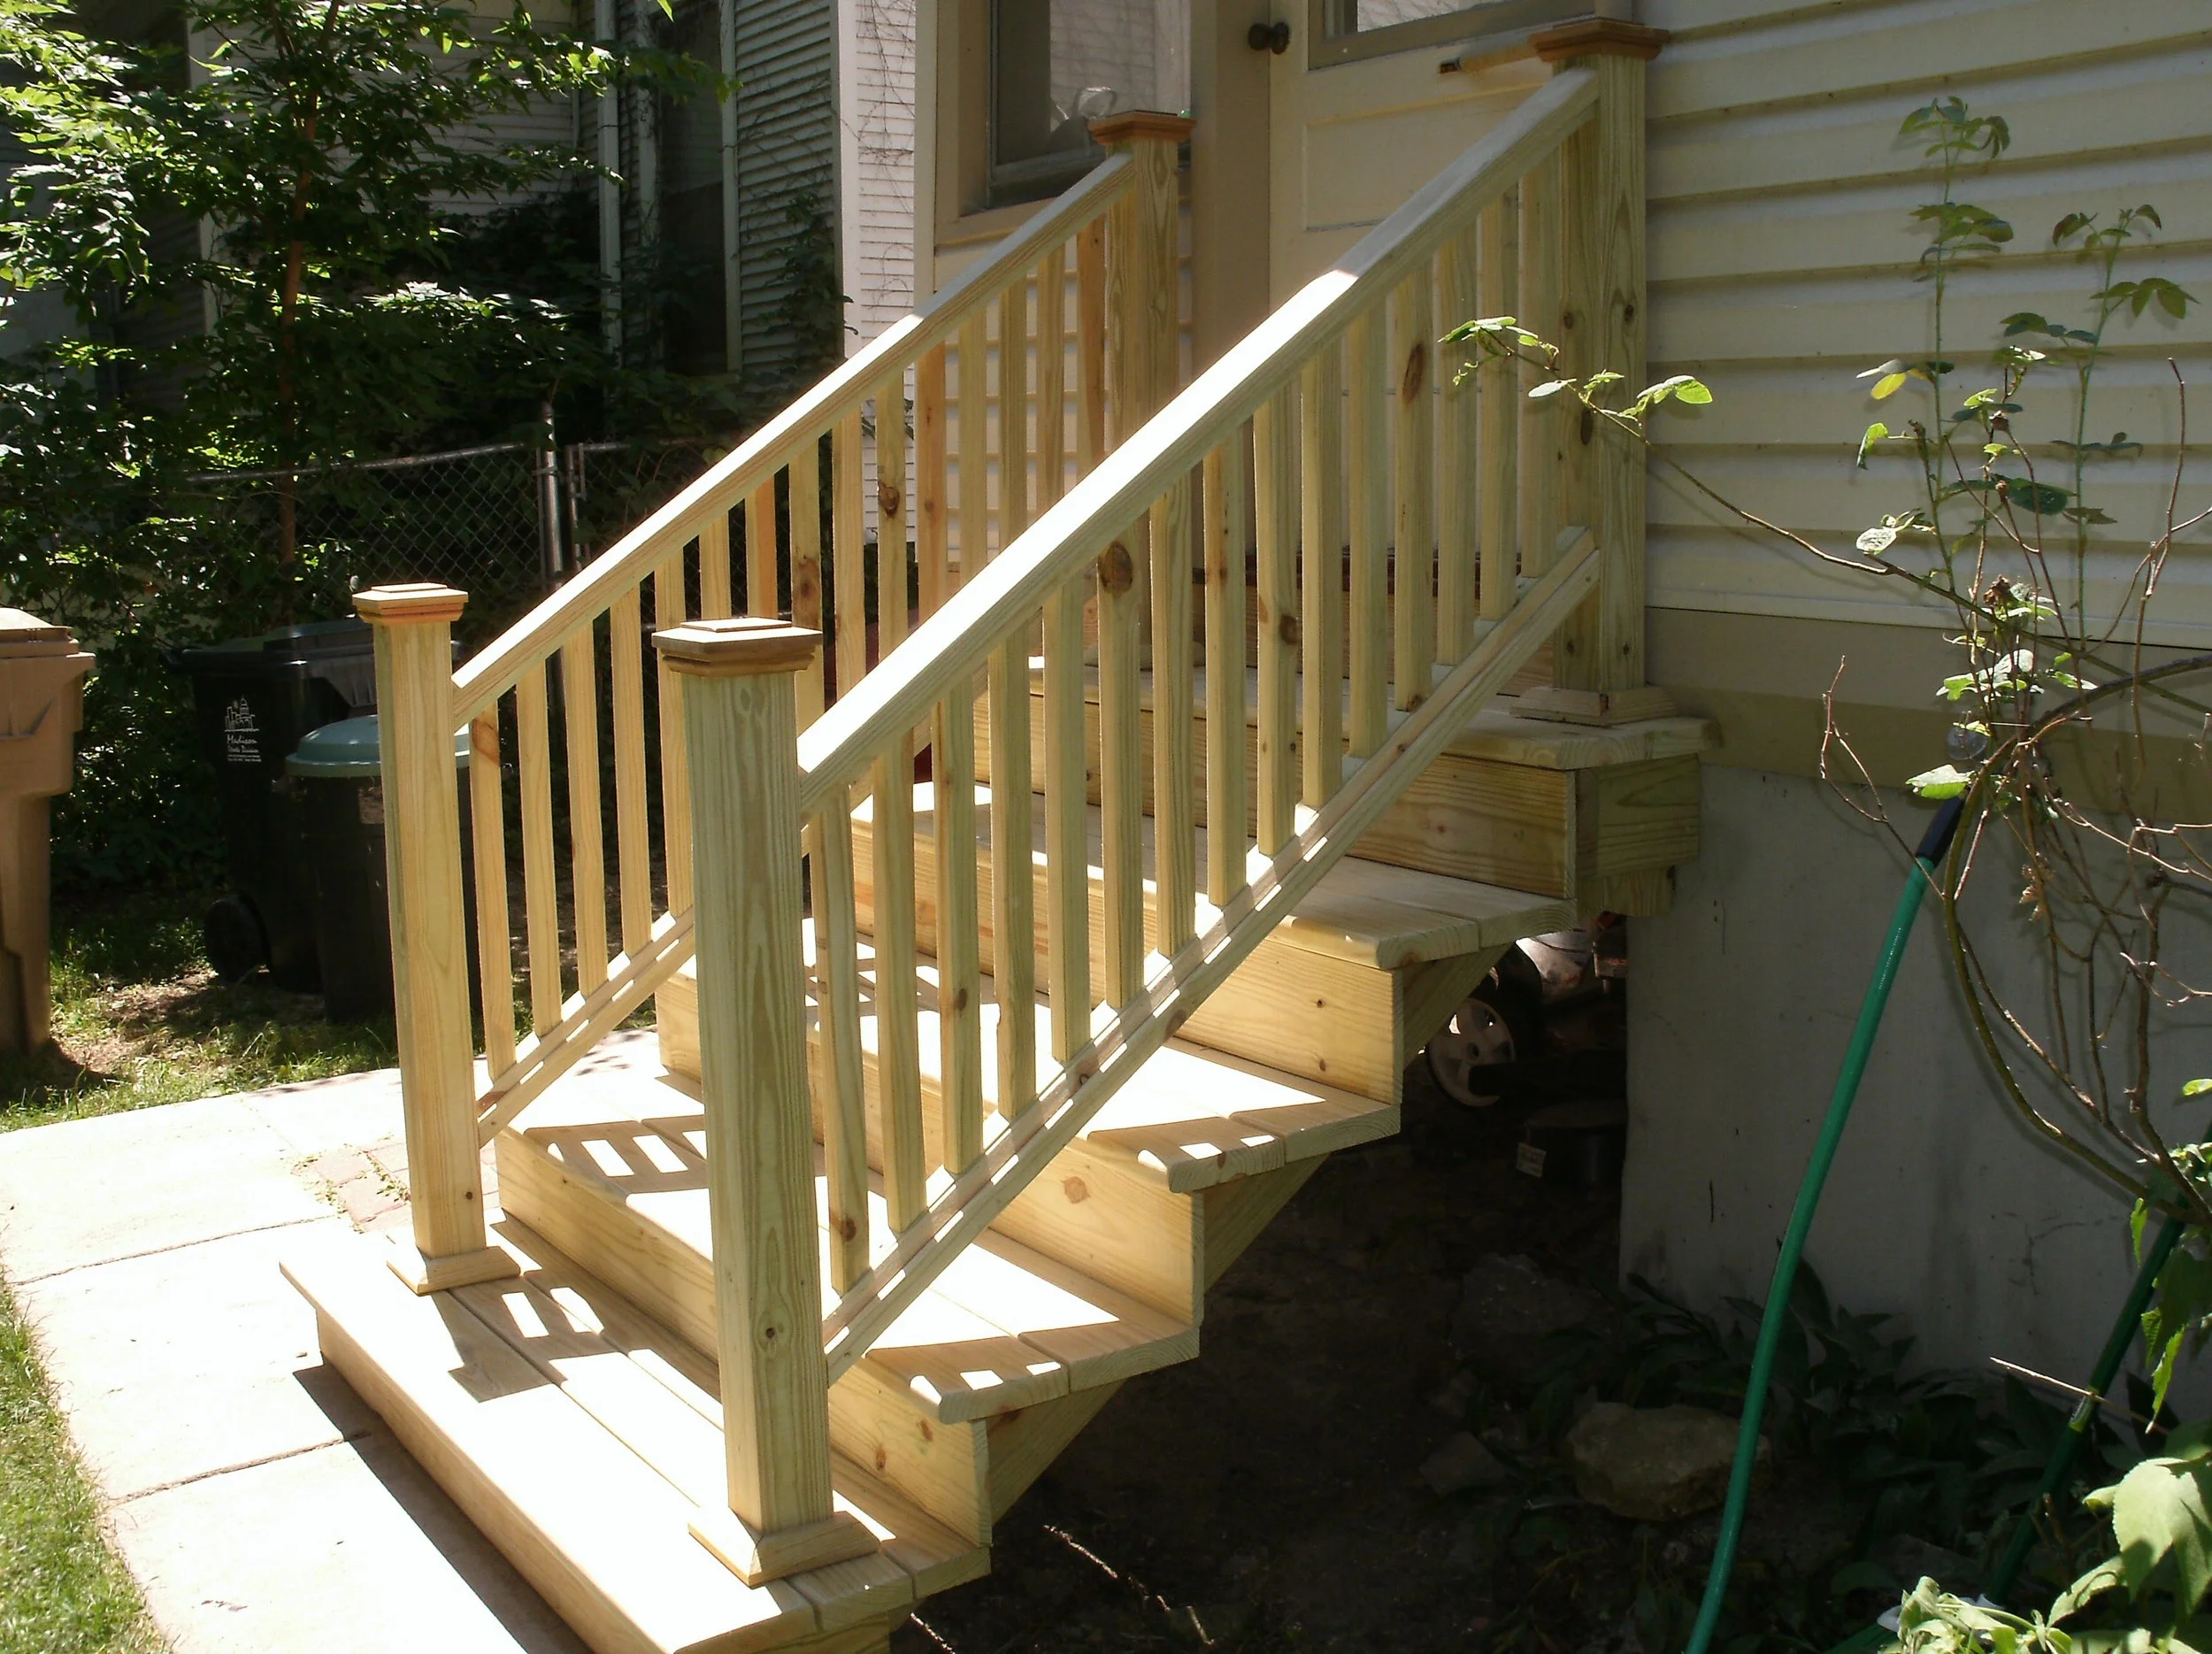
Basement Stairs
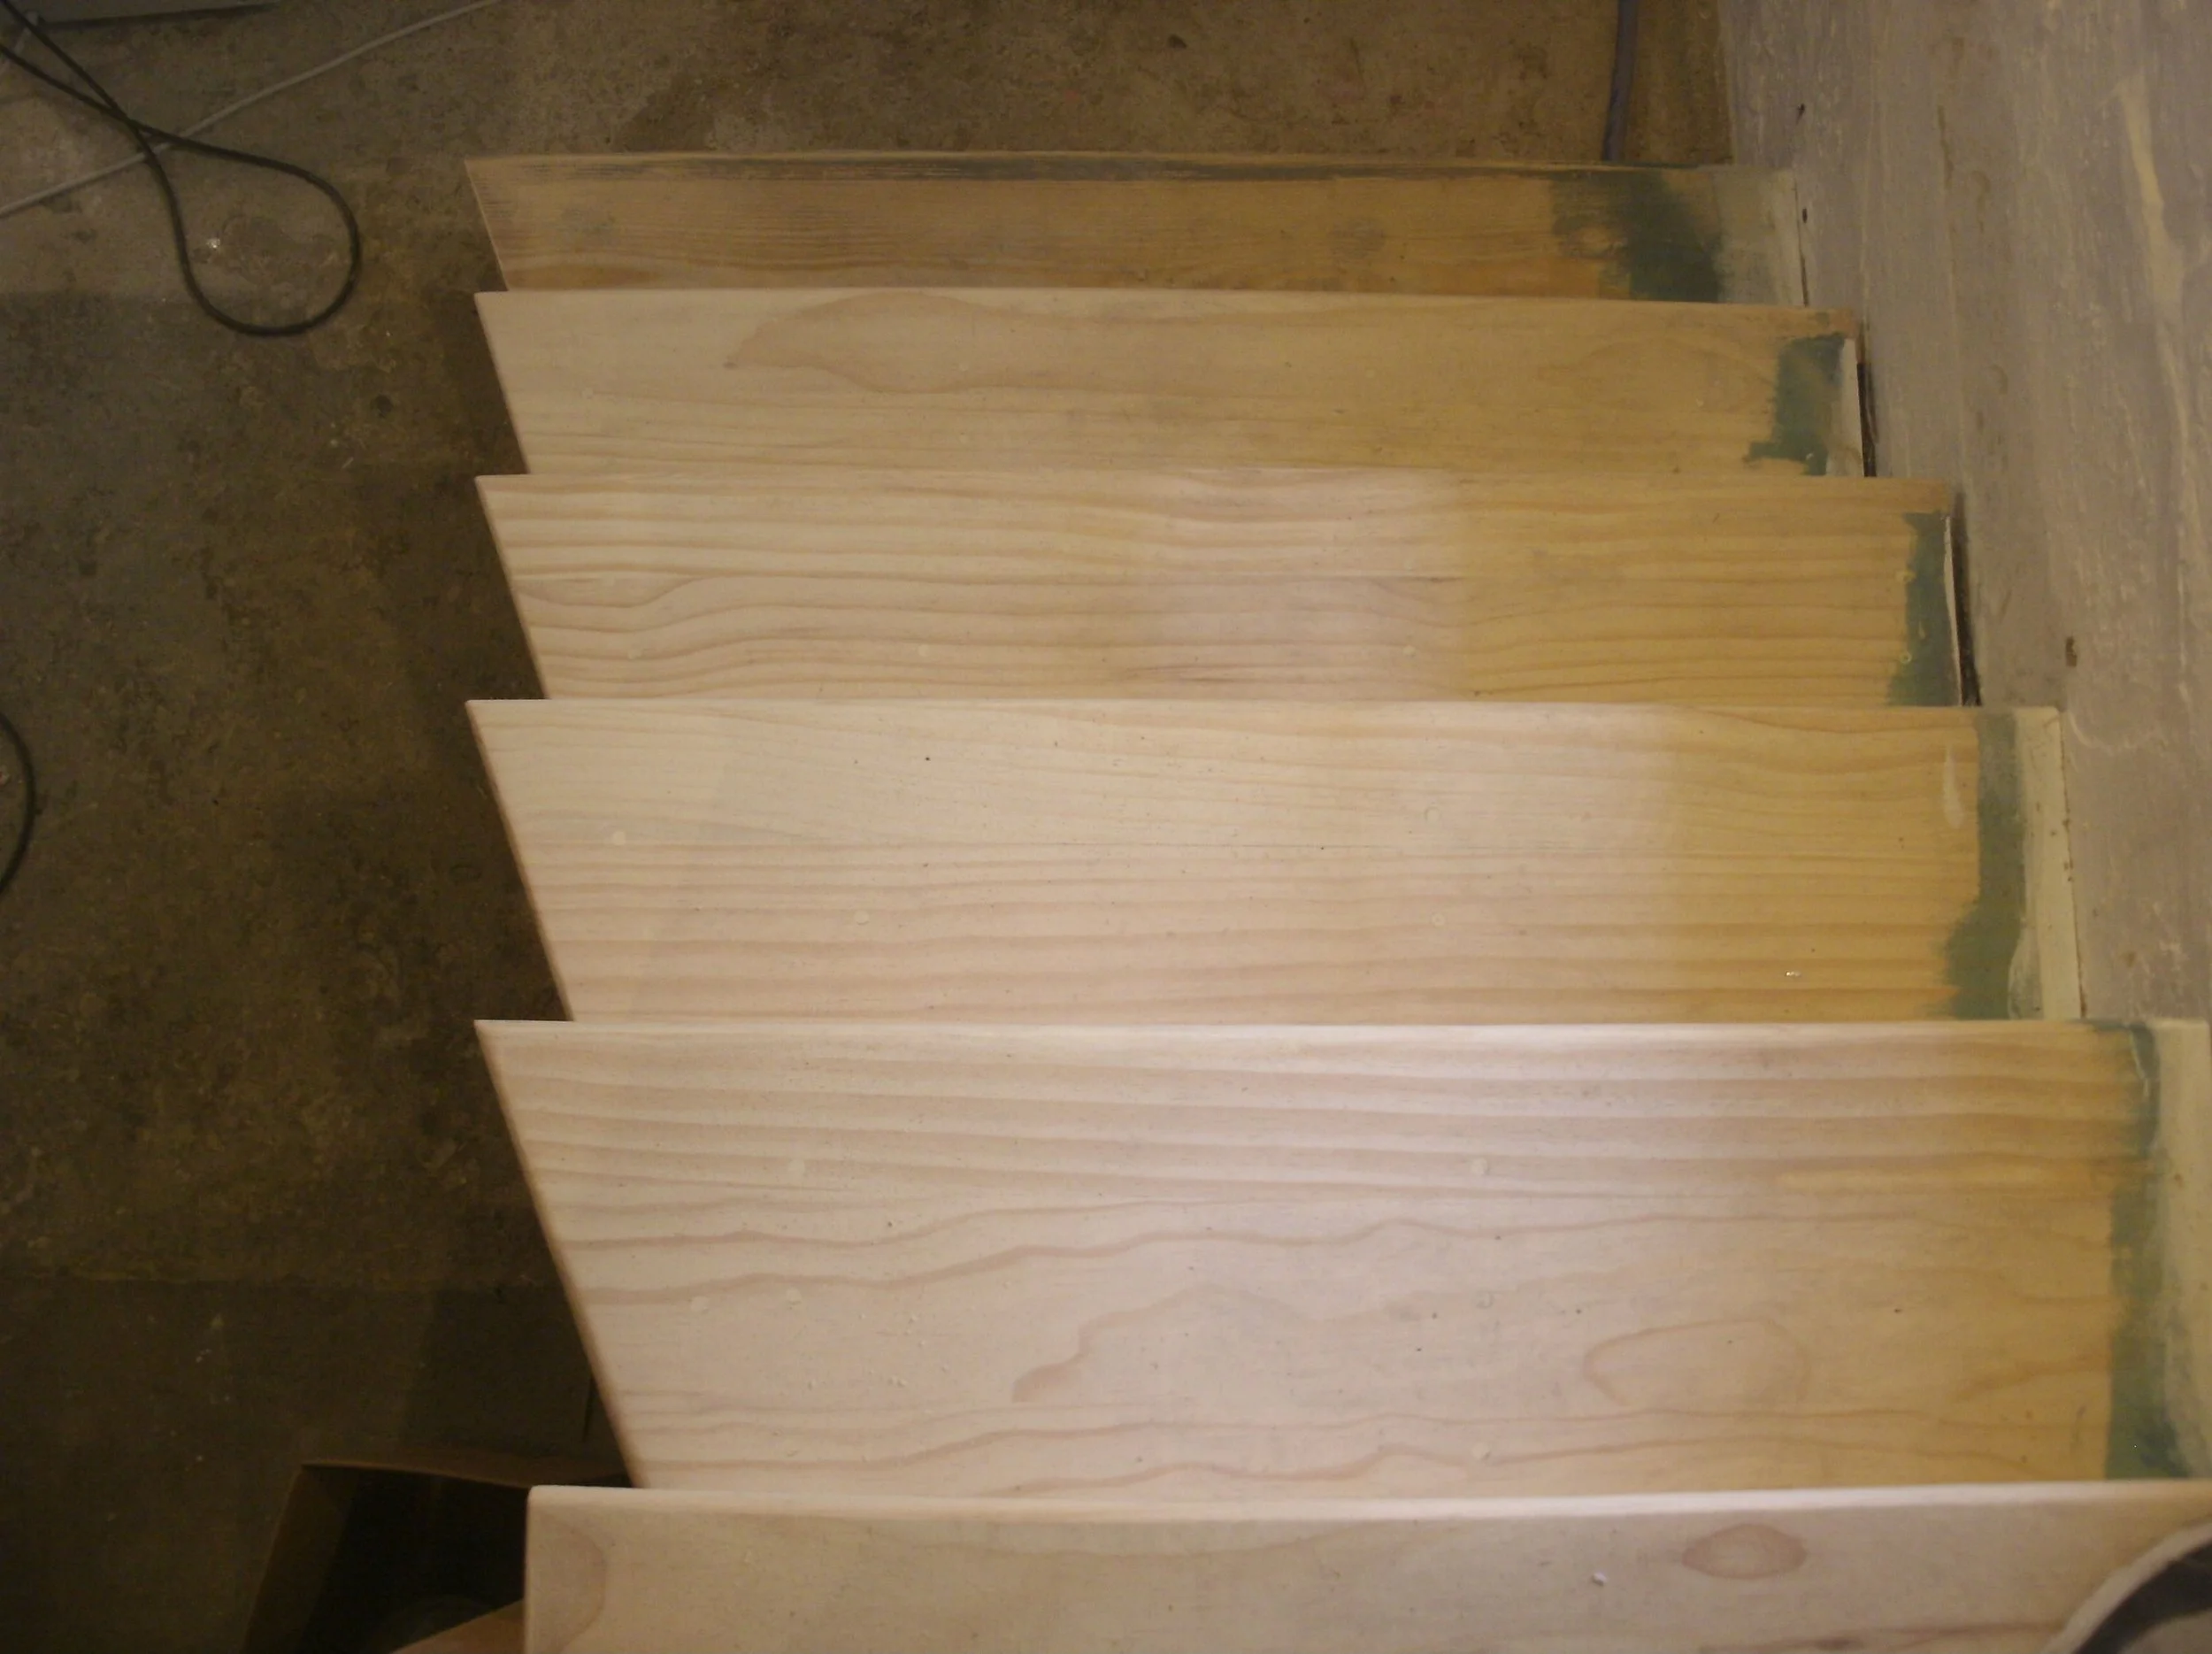
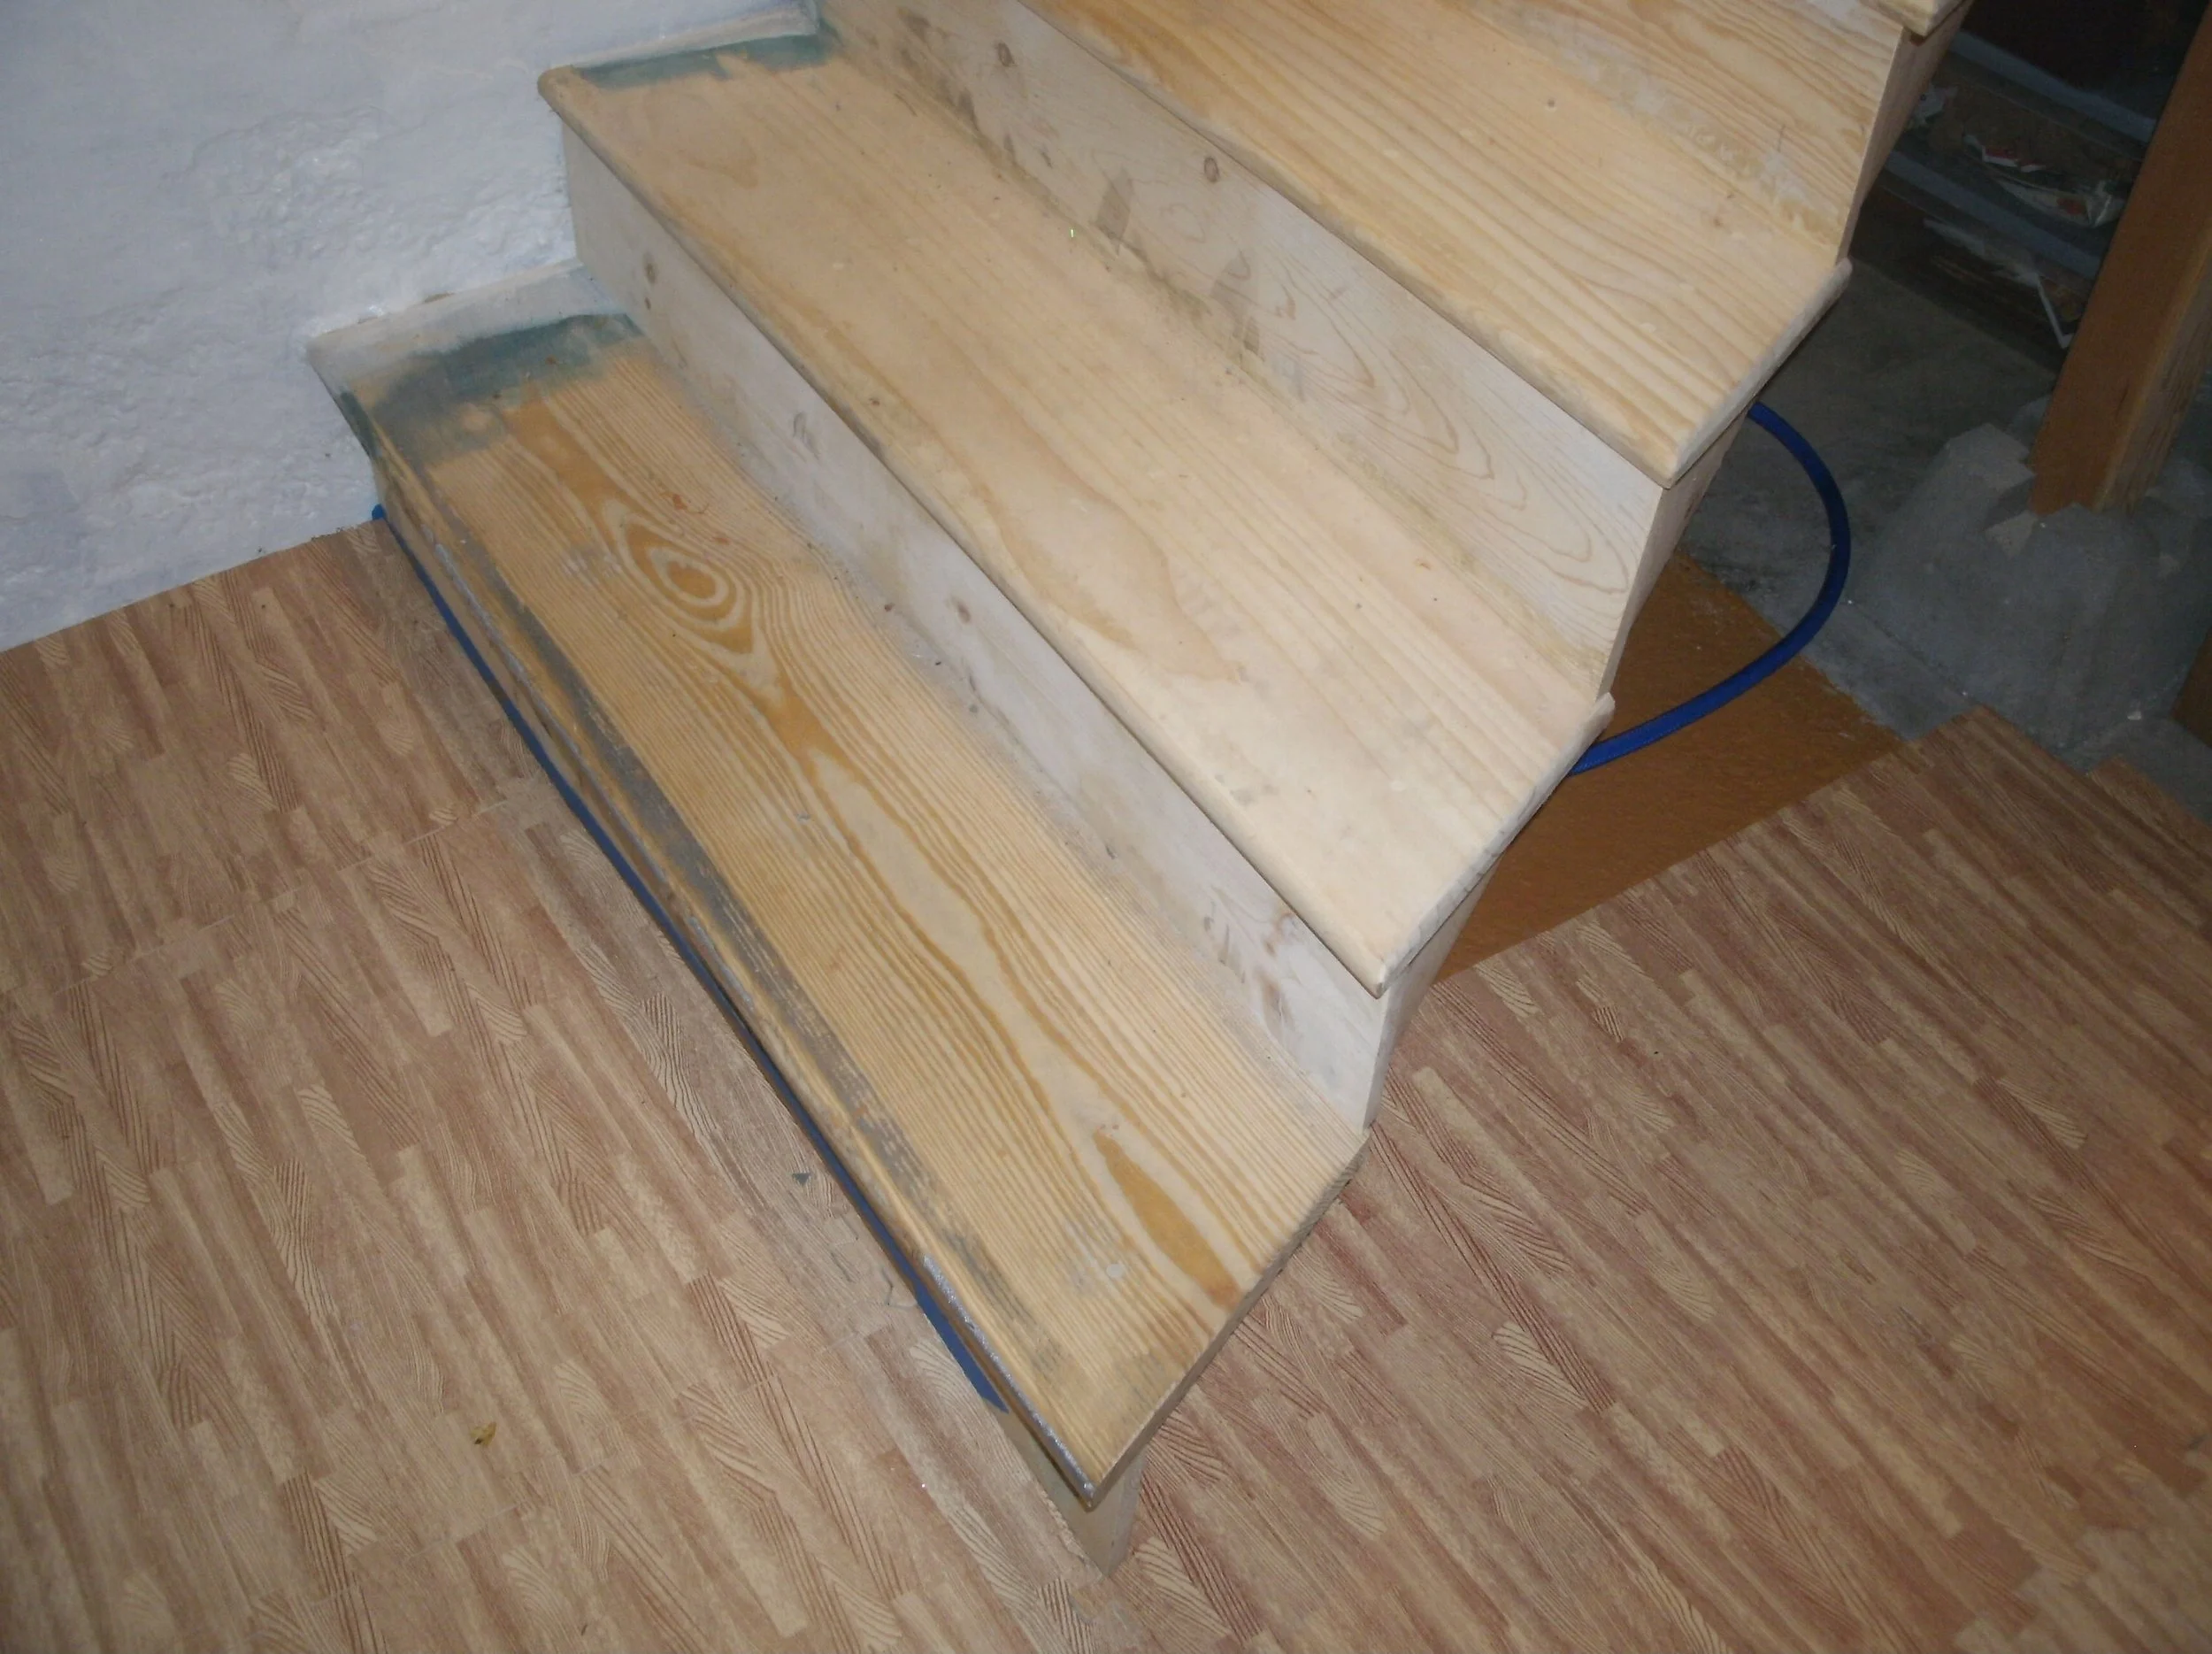
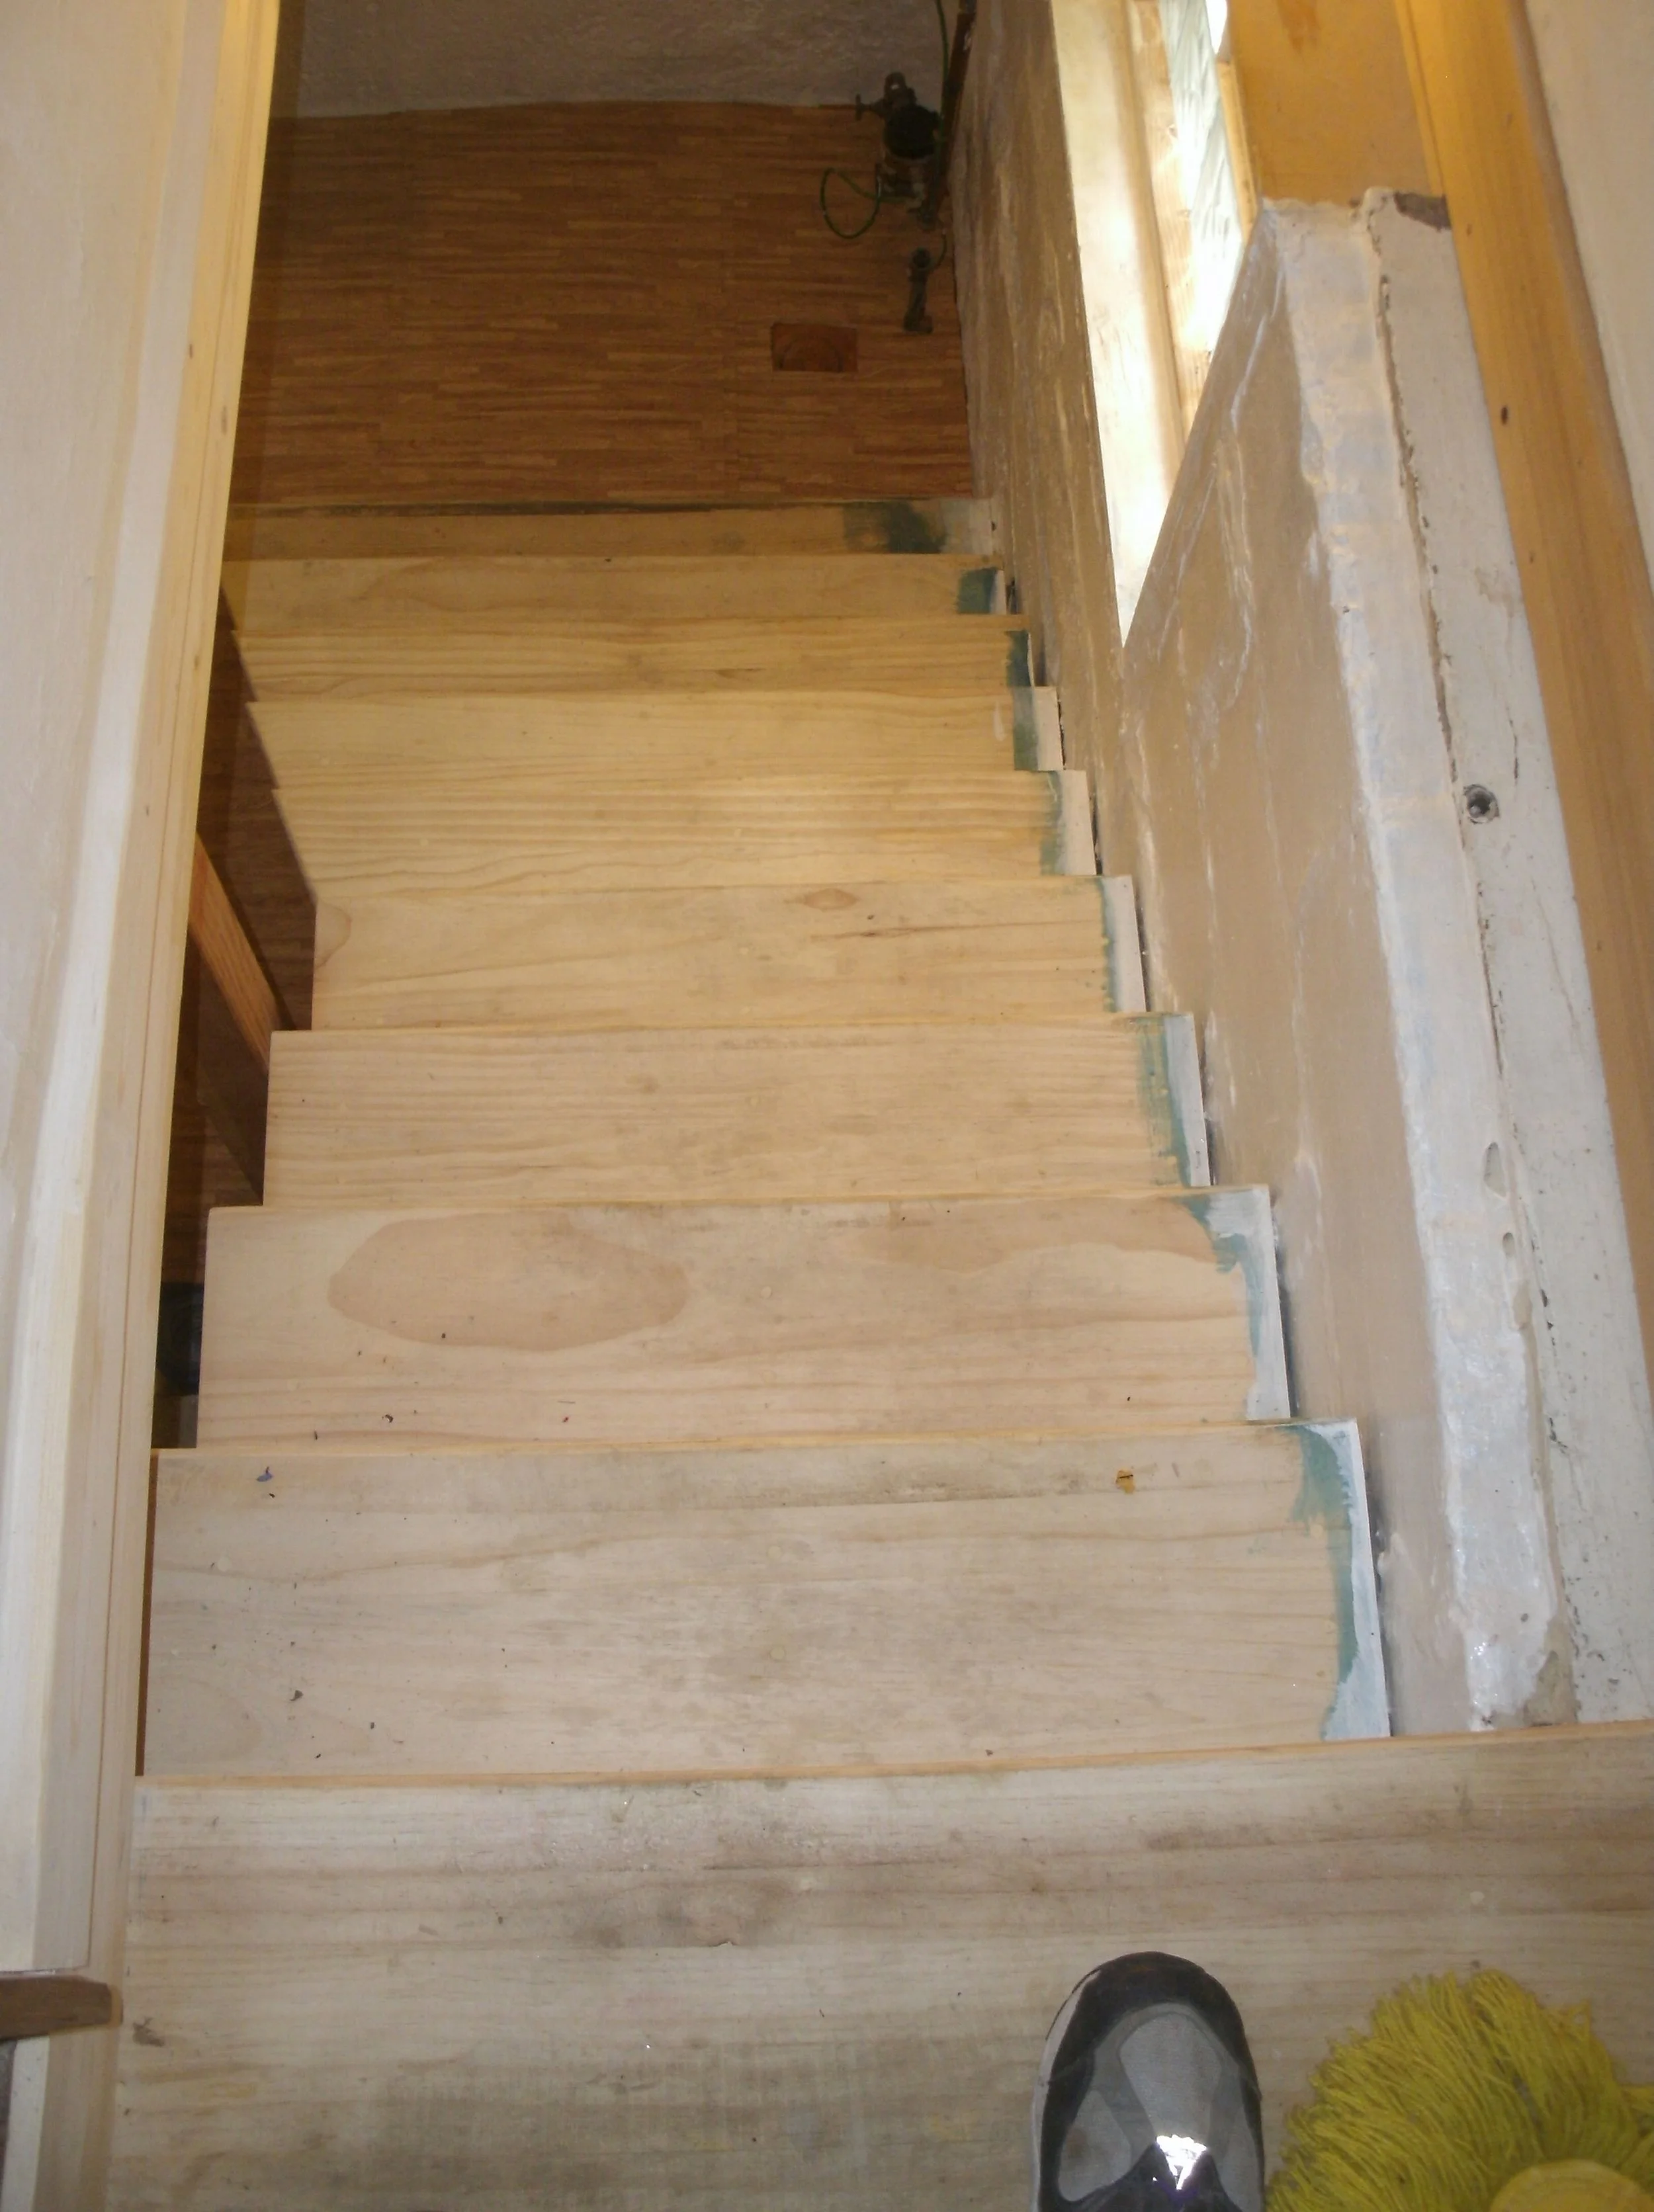
This project replaced old, unsafe basement stairs. I demolished the old stairs and replaced replaced it with new stringers, treads, risers, trim at the top of the foundation walls, new storage over the stairs, and rebuilt the pantry shelves at the top of the stairs. i also installed a new handrail that was anchored to the wall properly. I painted the foundation walls underneath the stairs before building. After building the new stairs, I painted all the new wood. I just never got pictures after painting.
View of the top of the new stairs, cap trim, pantry shelves, and handrail
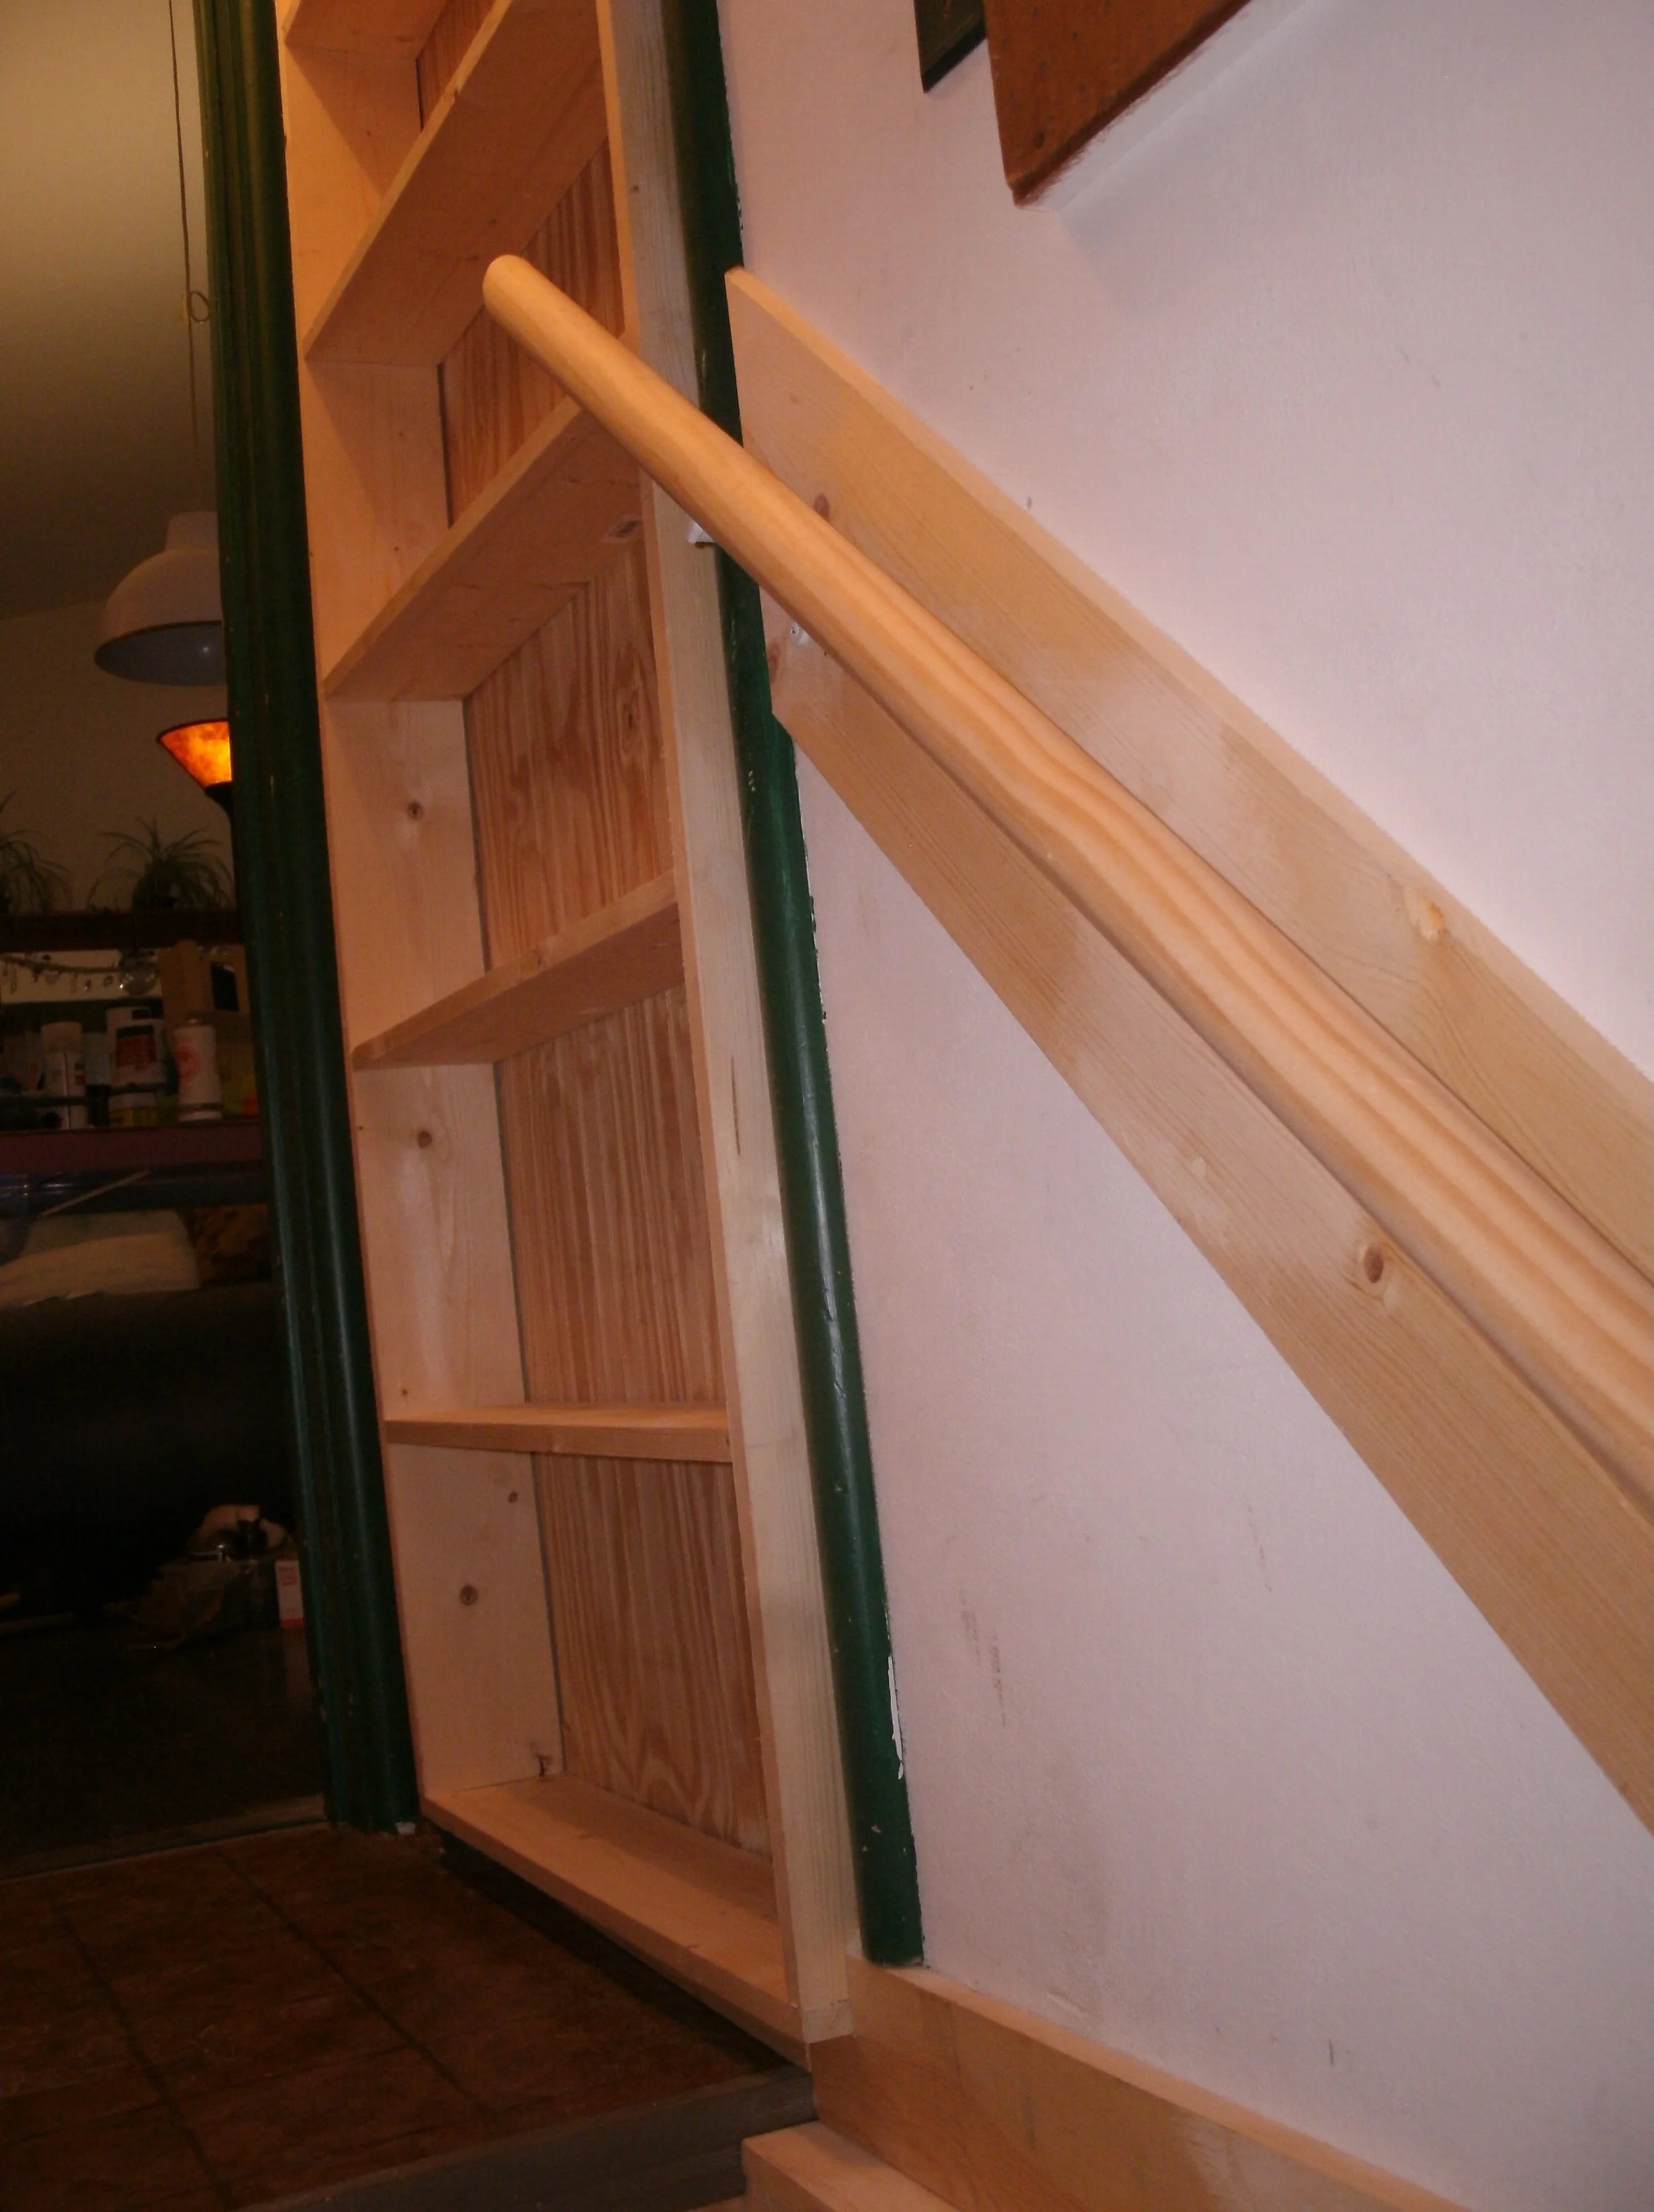
Detailed view of the pantry shelves and top of handrail
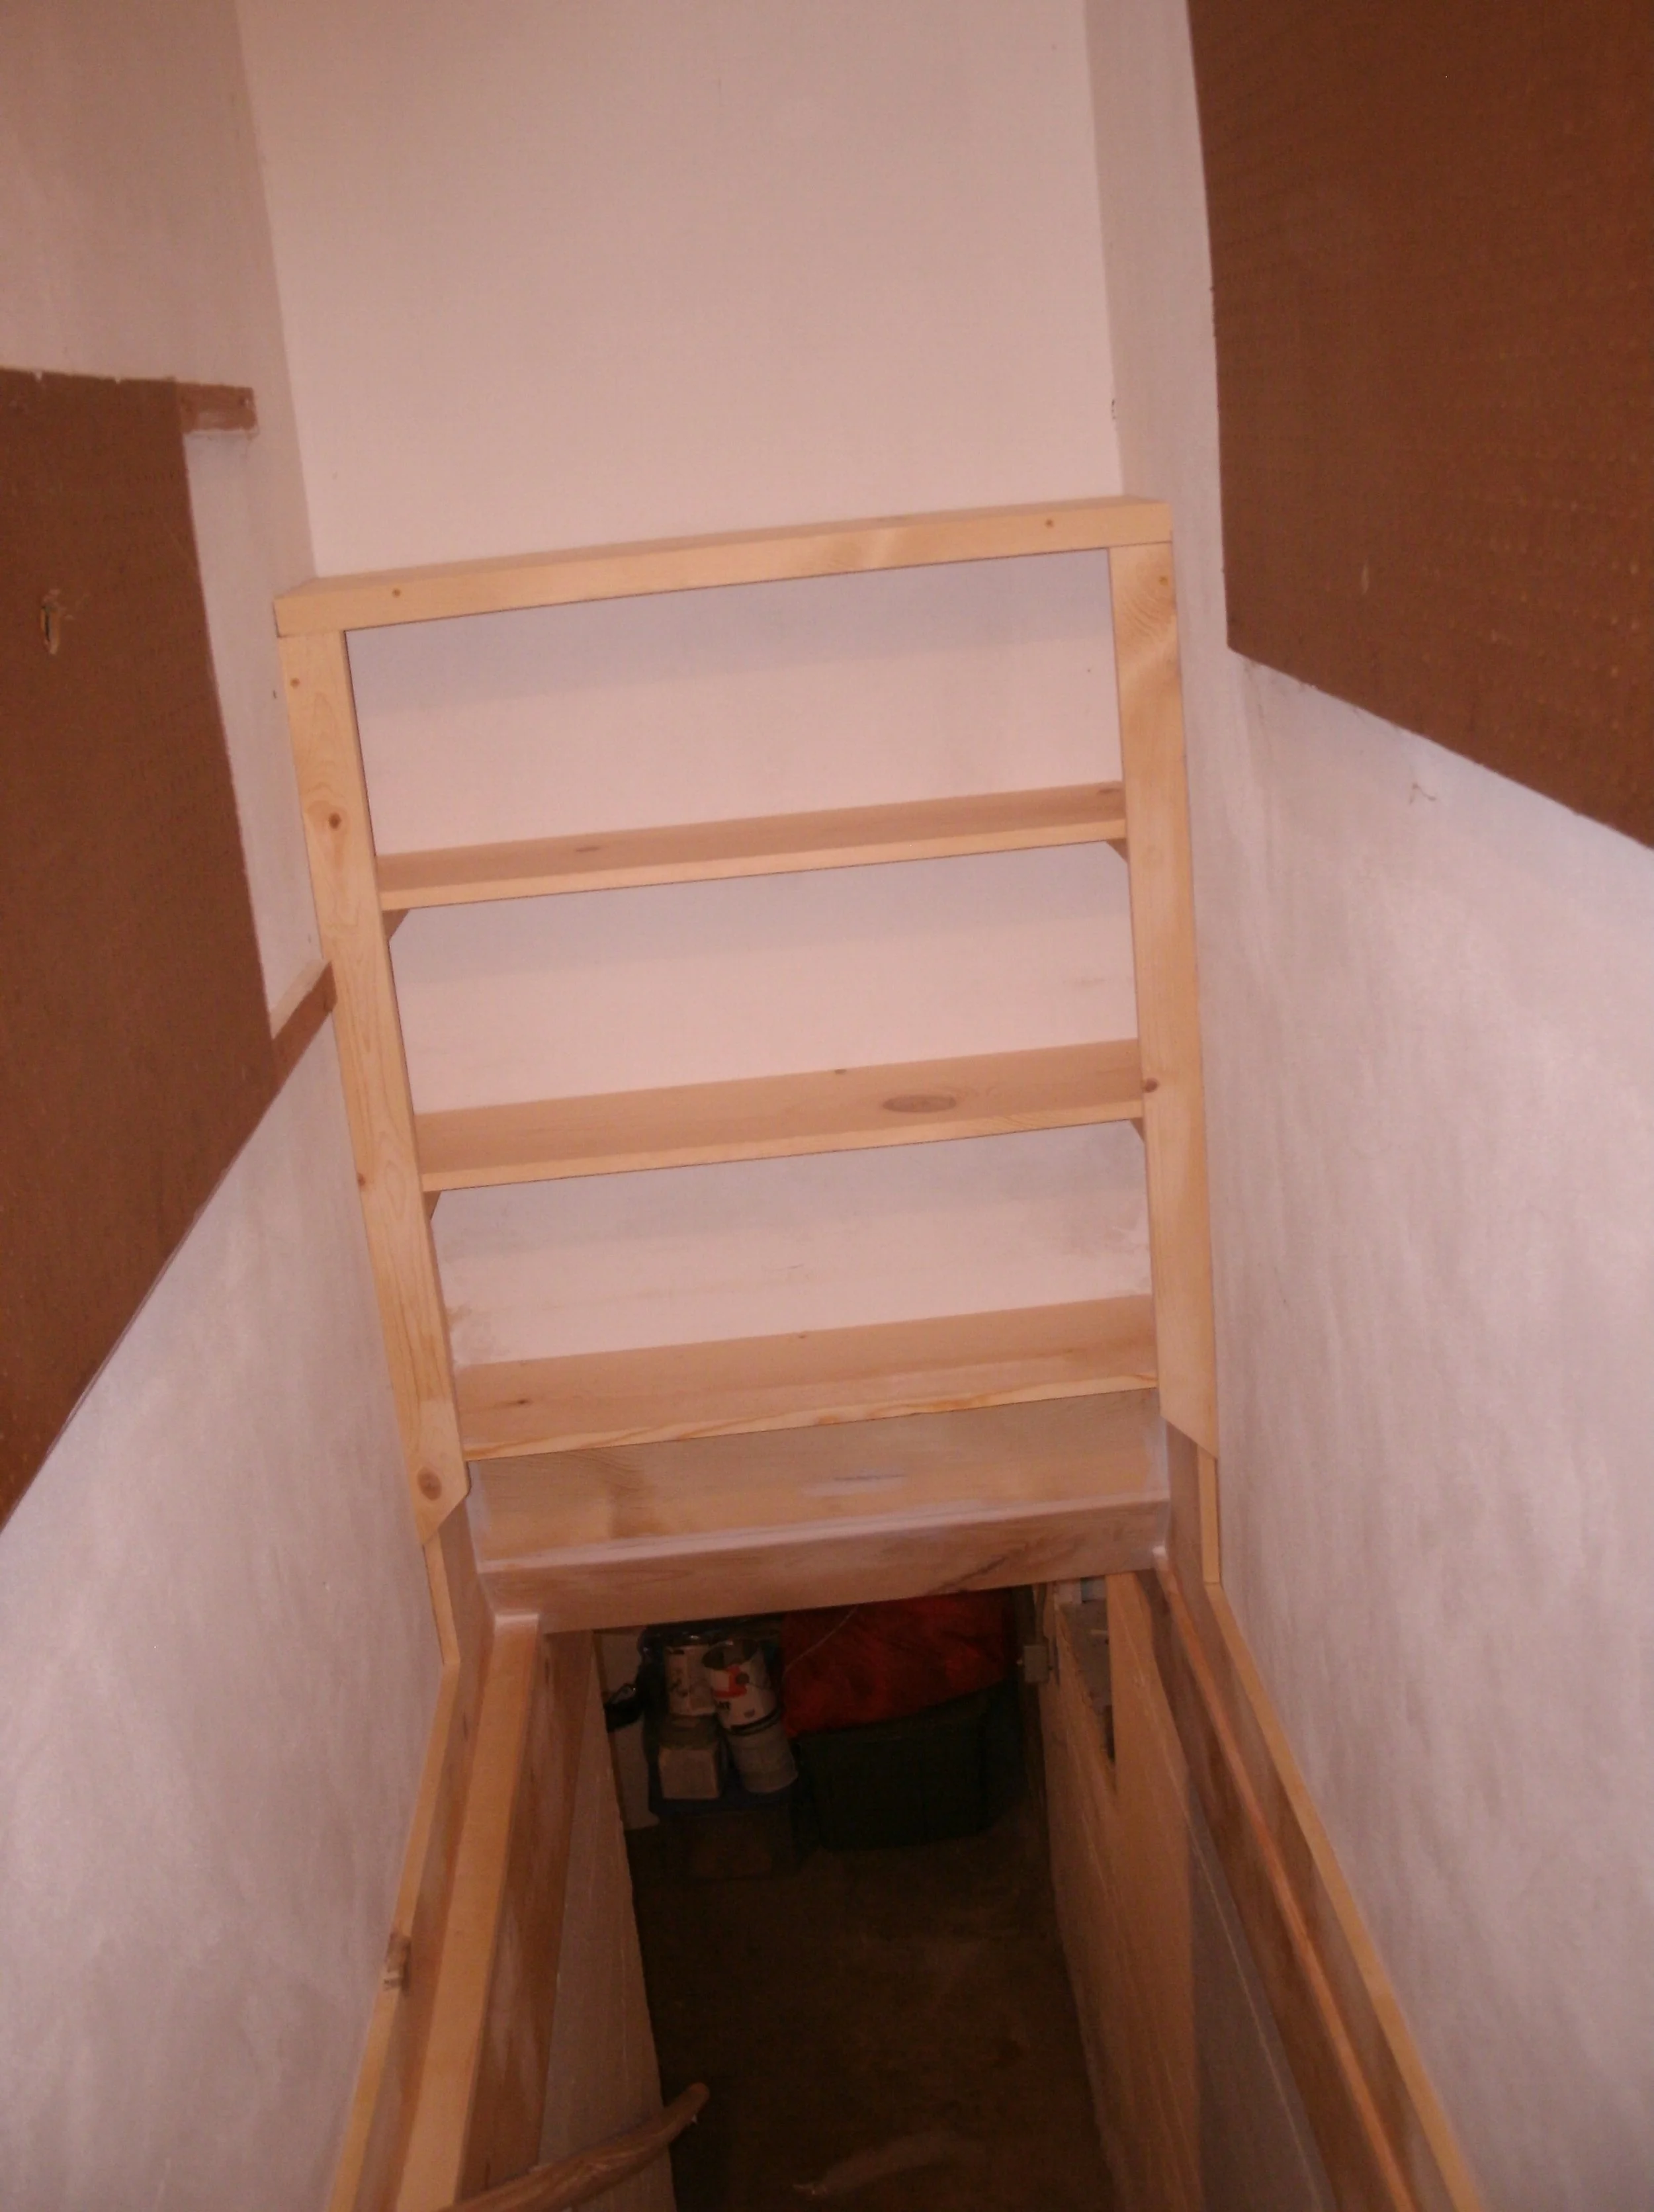
These are the new shelves over the stairs
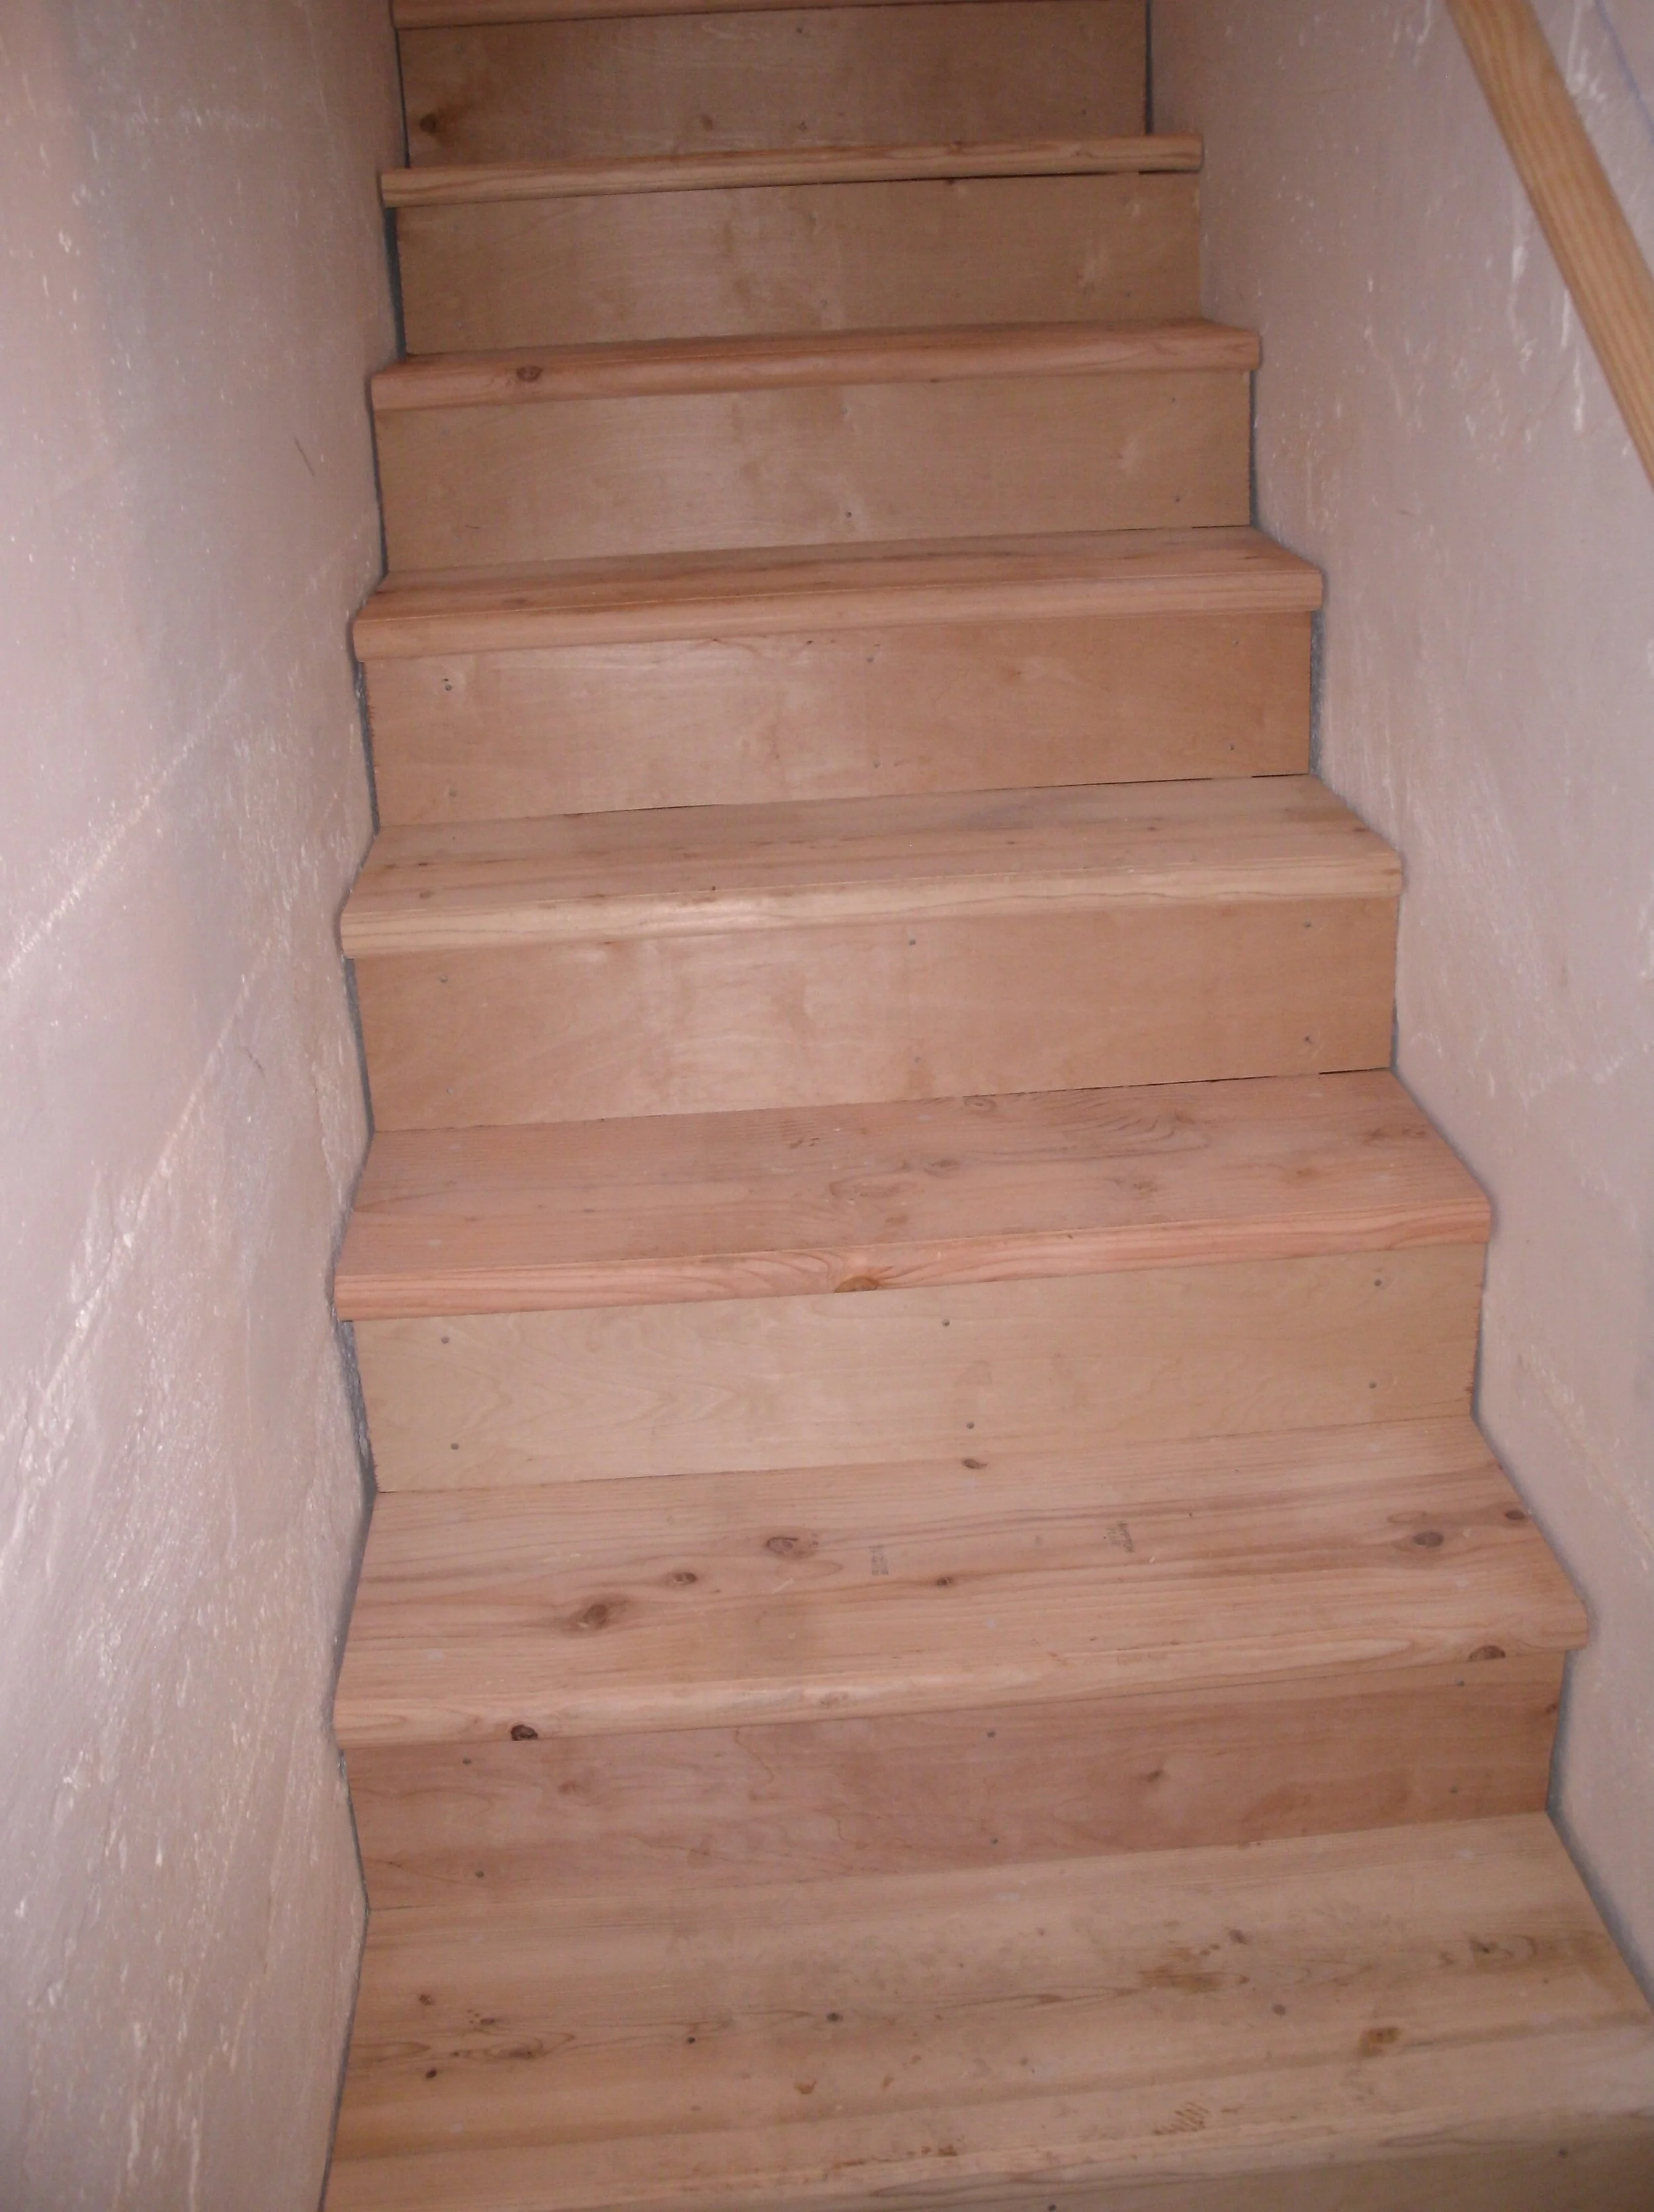
Another view of the new stairs
A more full view of the new stairs and handrail
East Basement Stairs
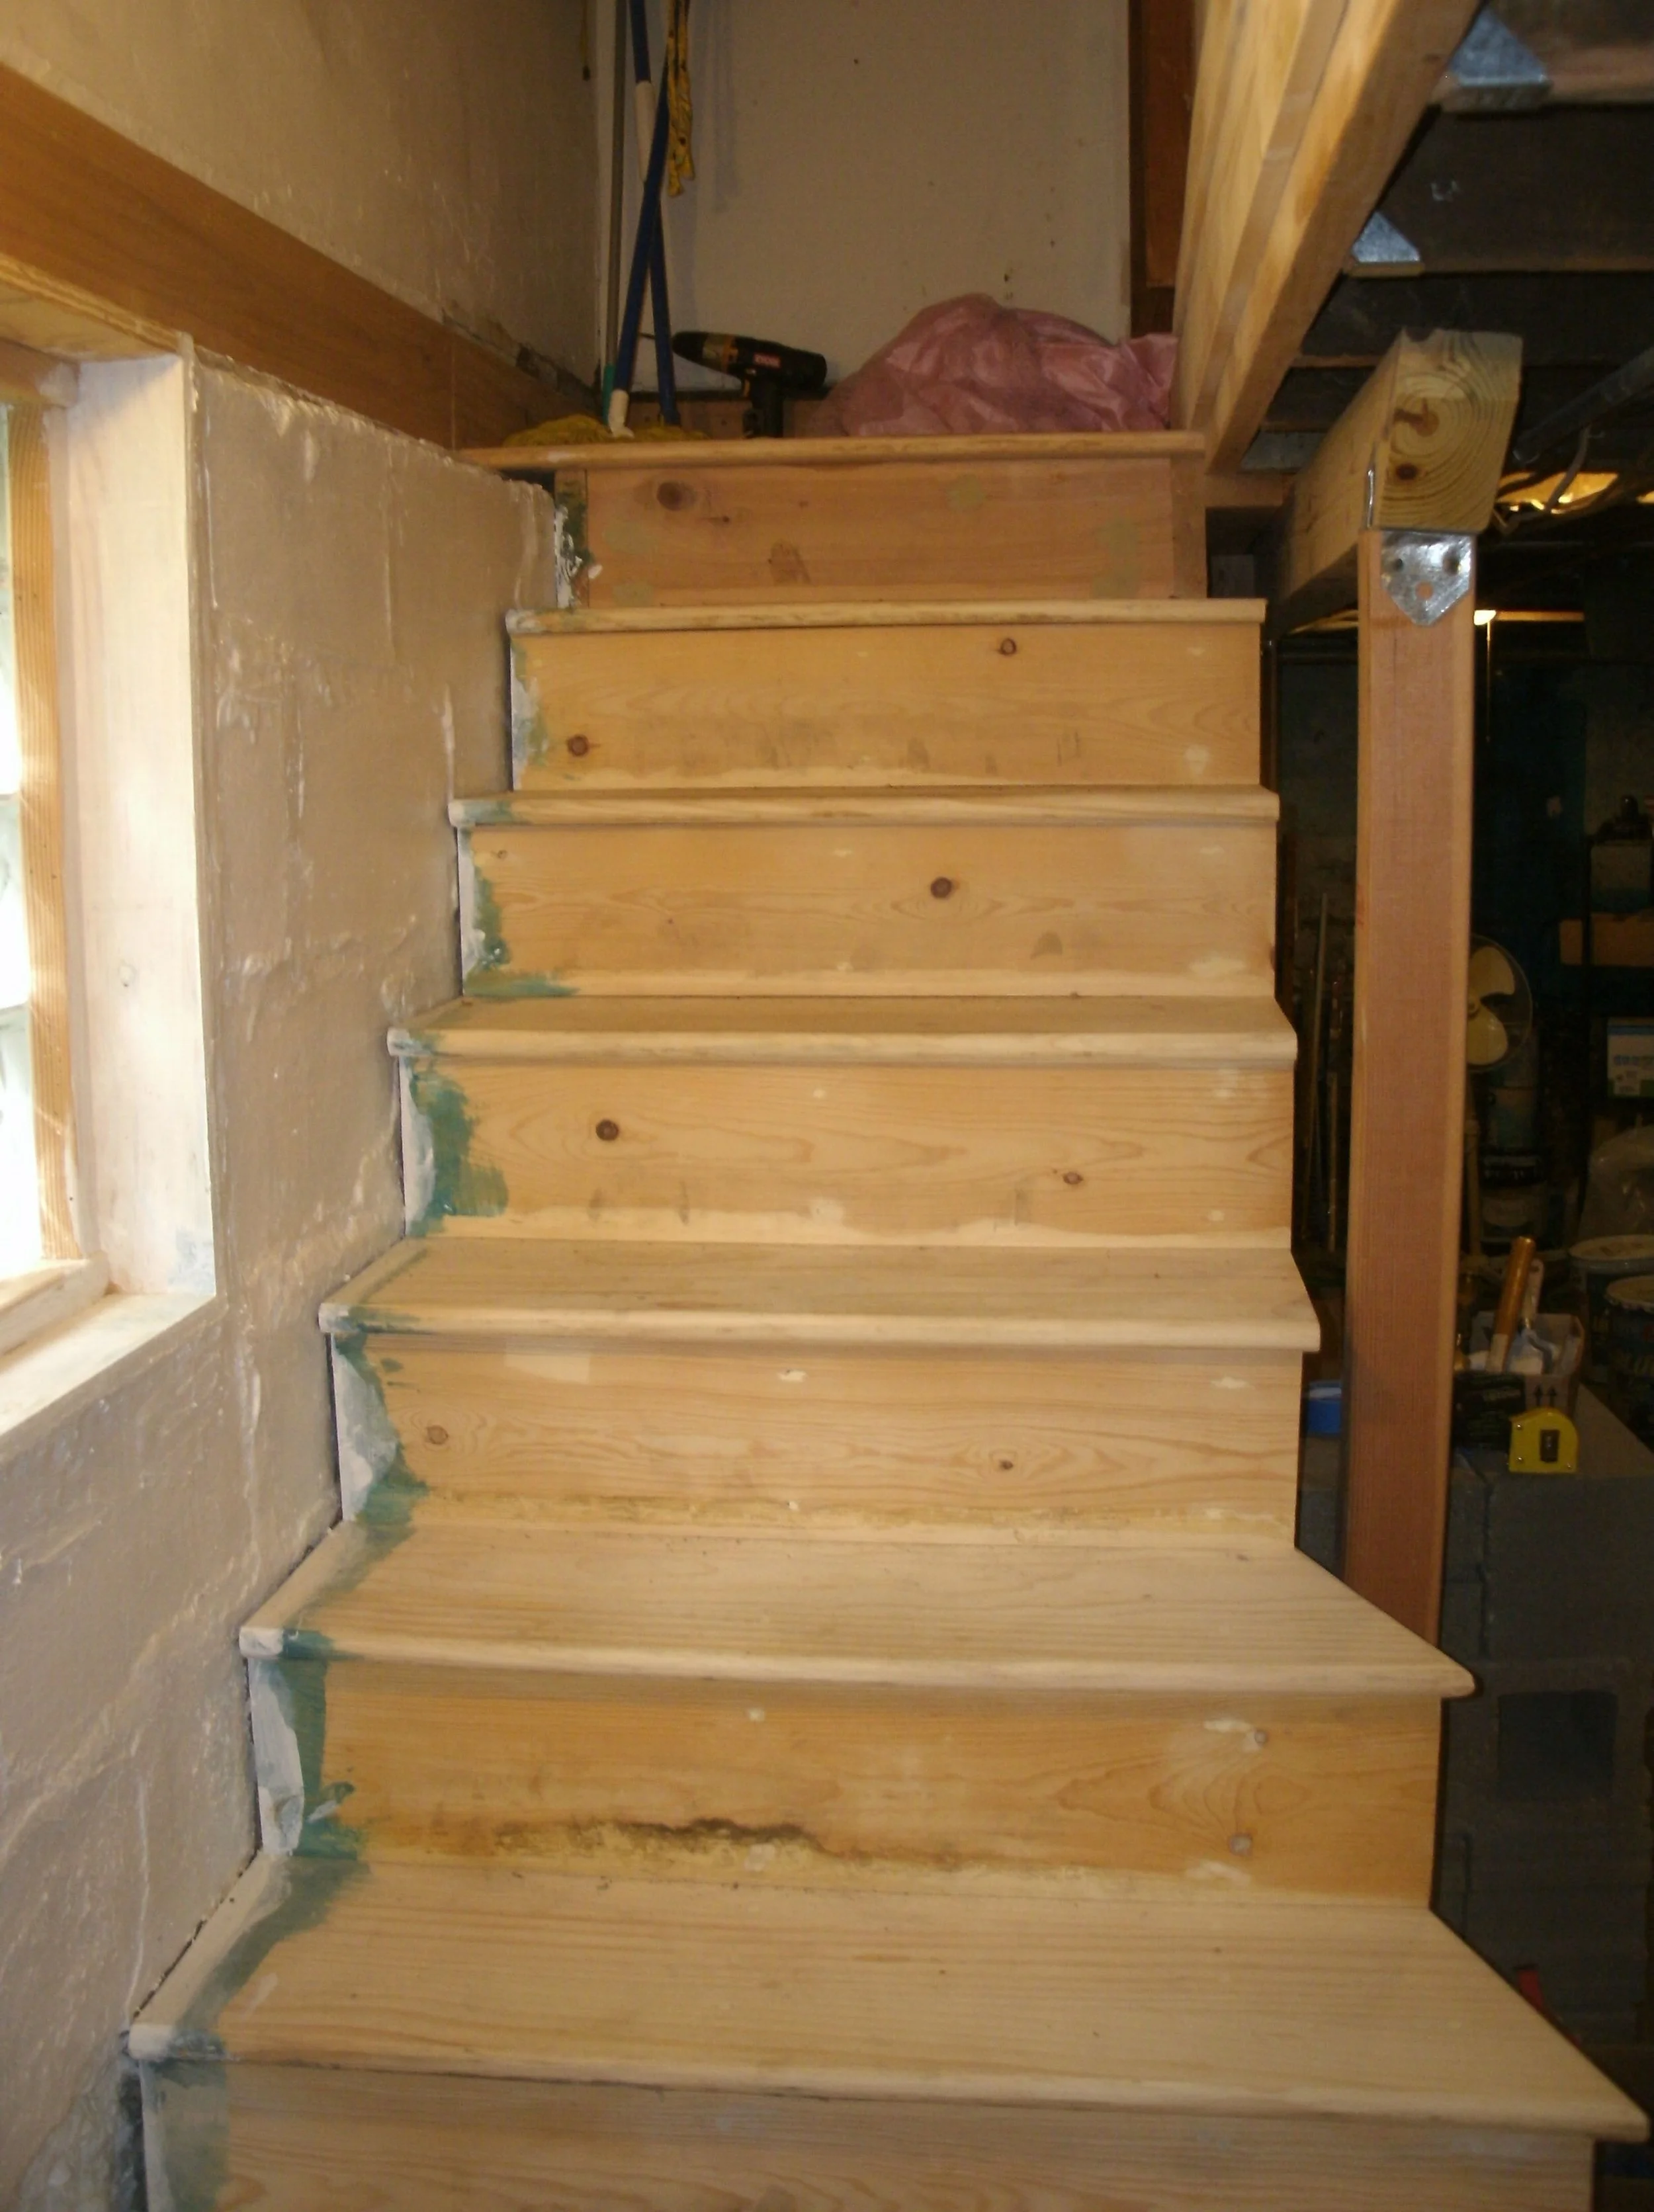
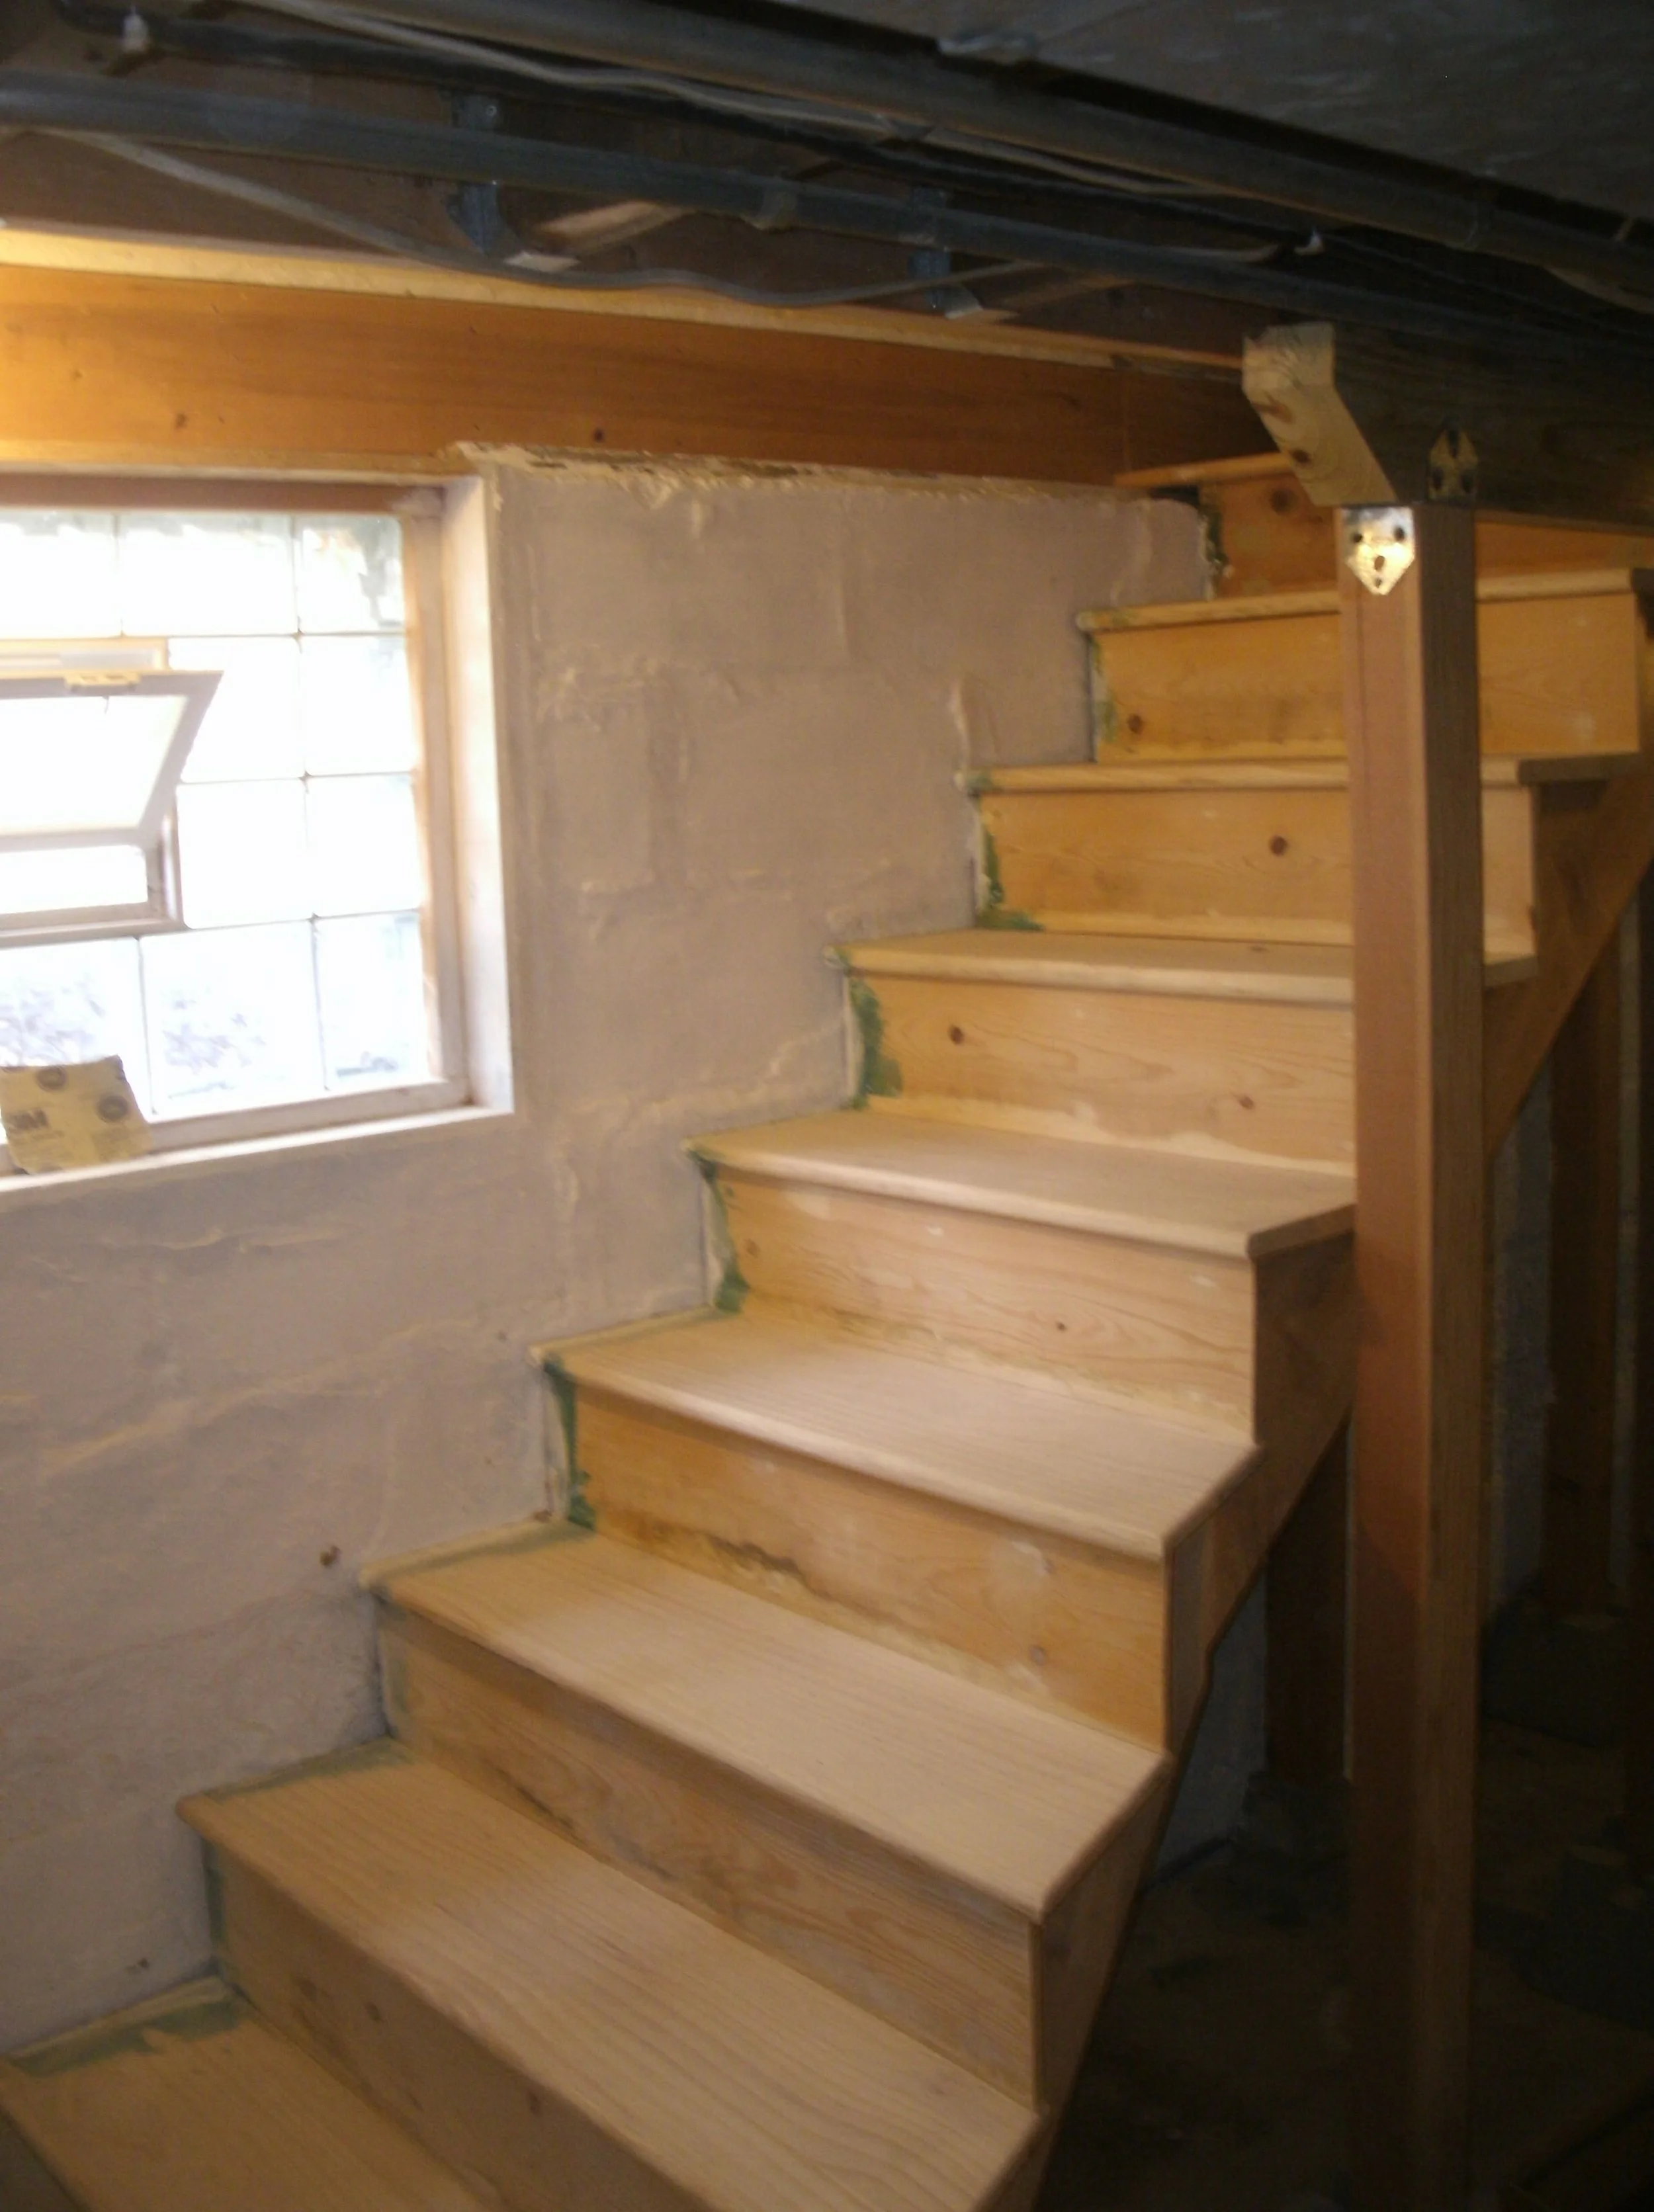
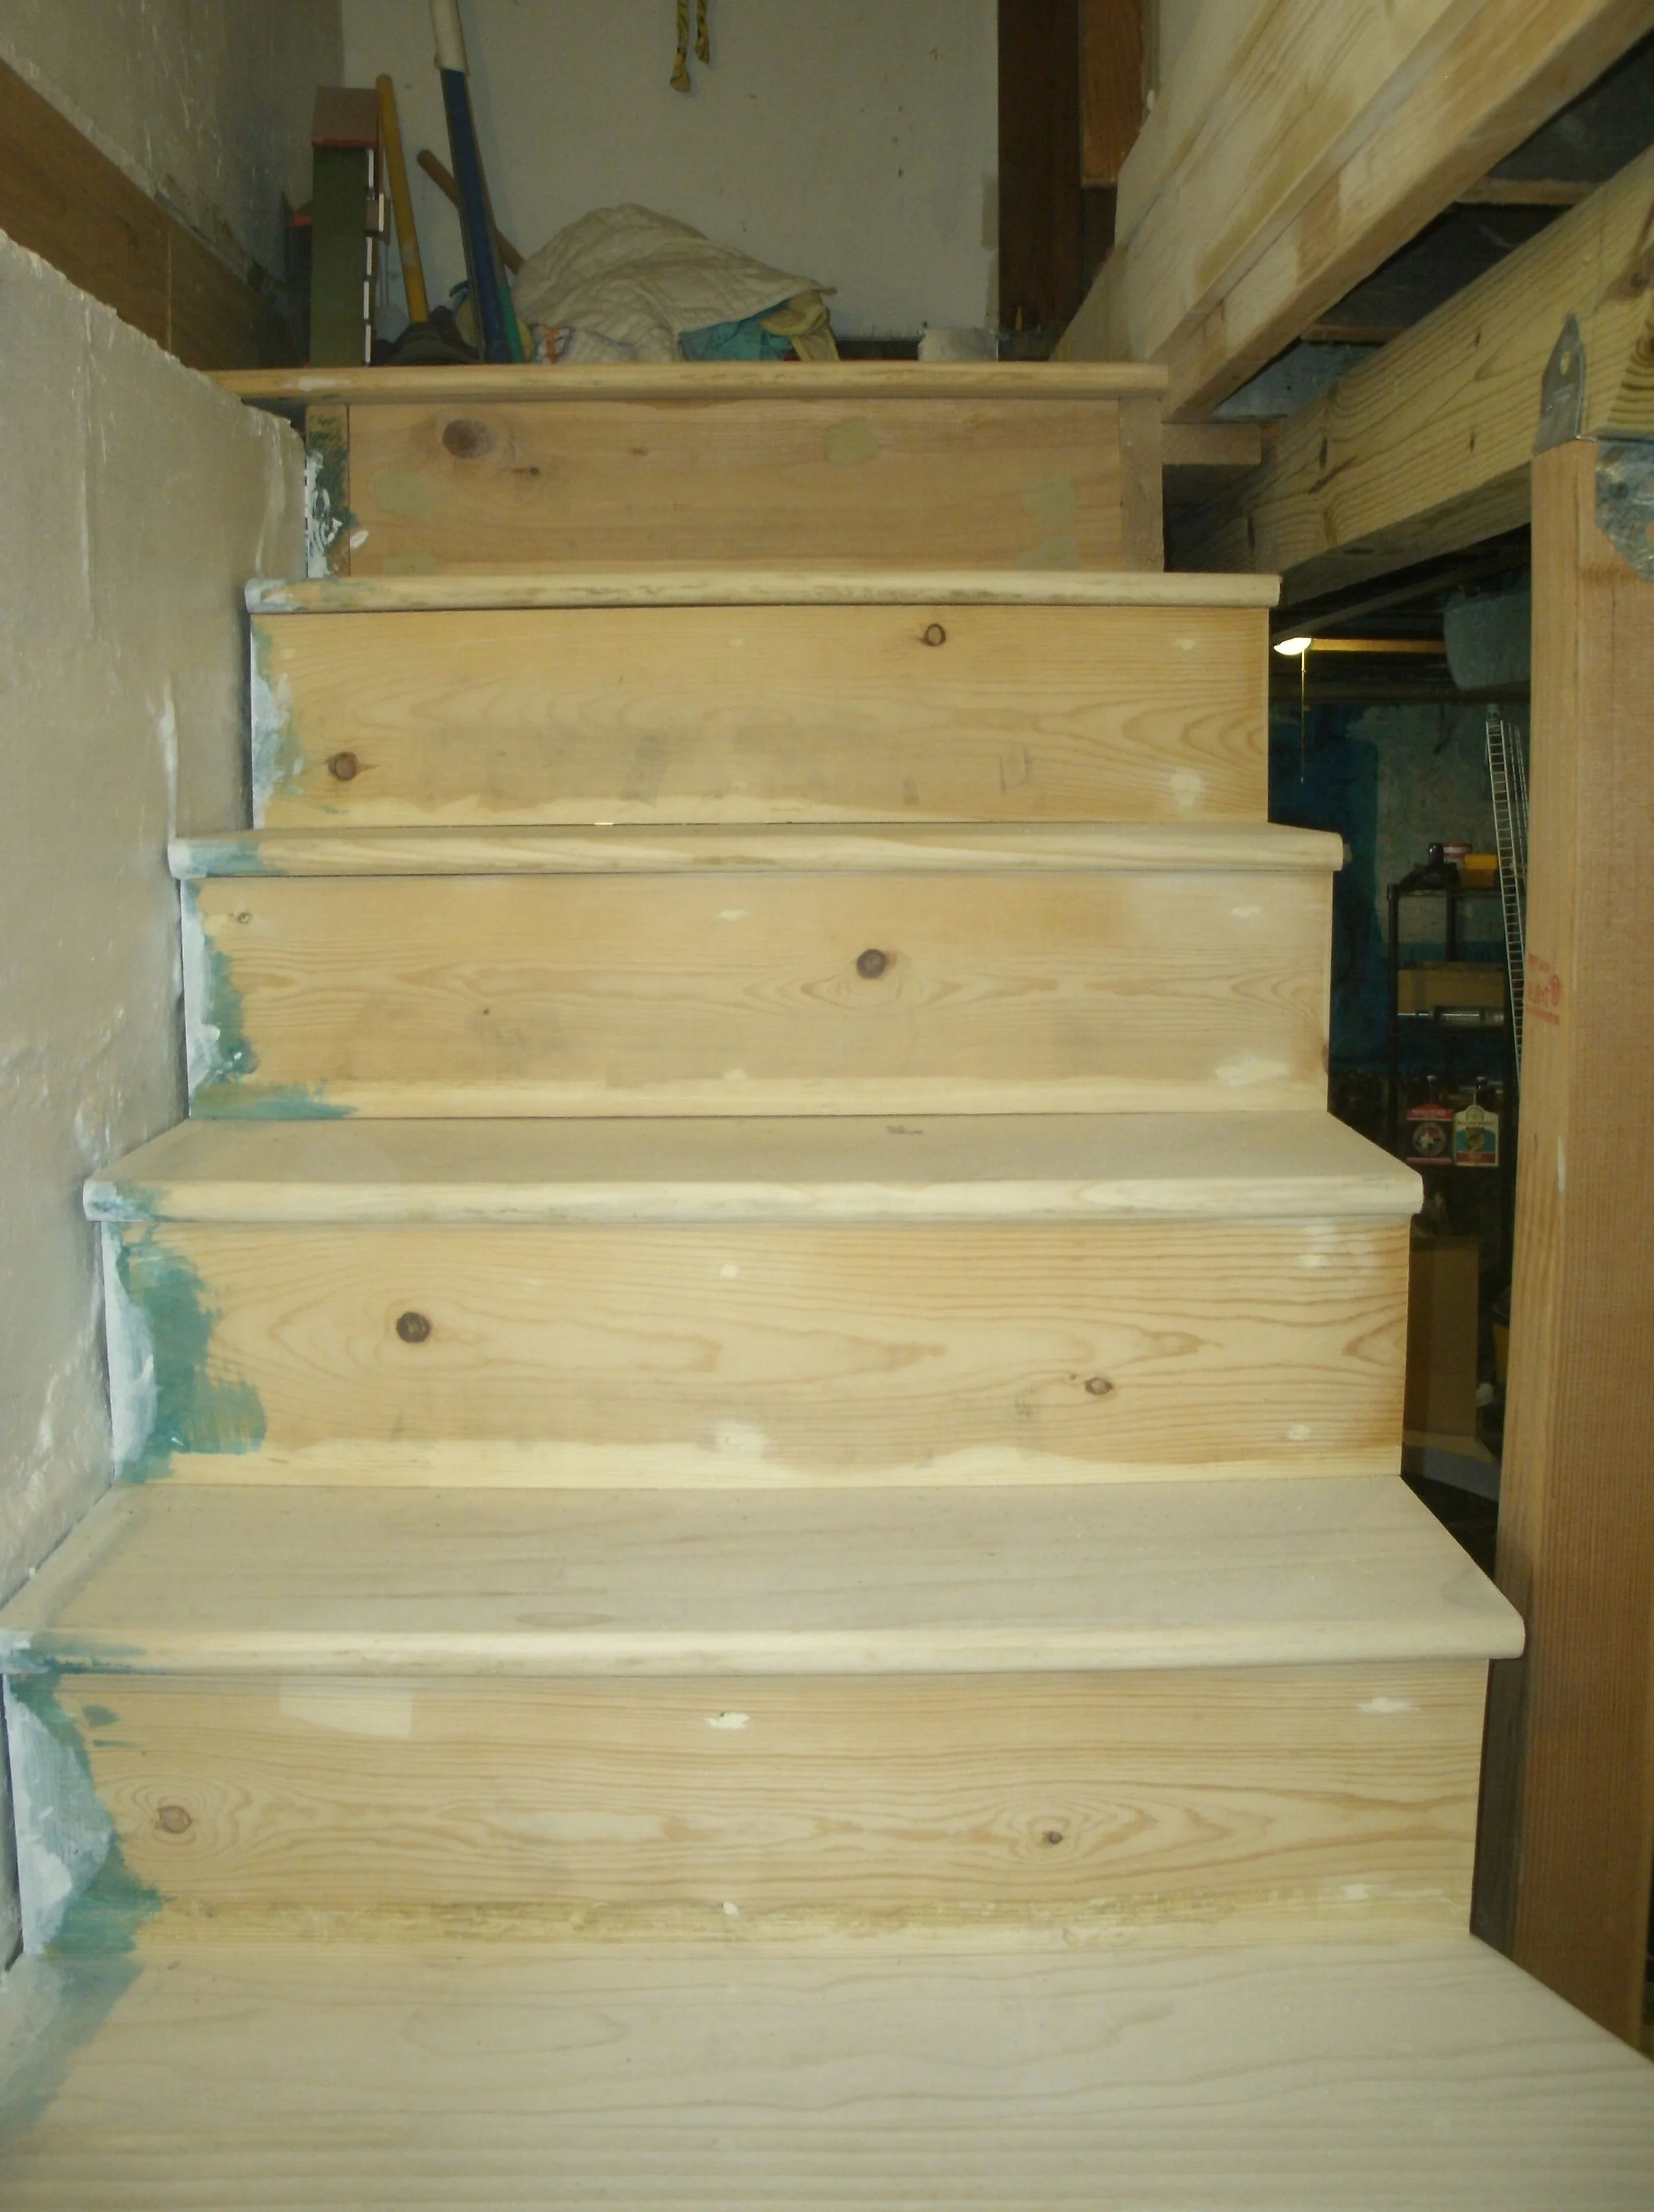
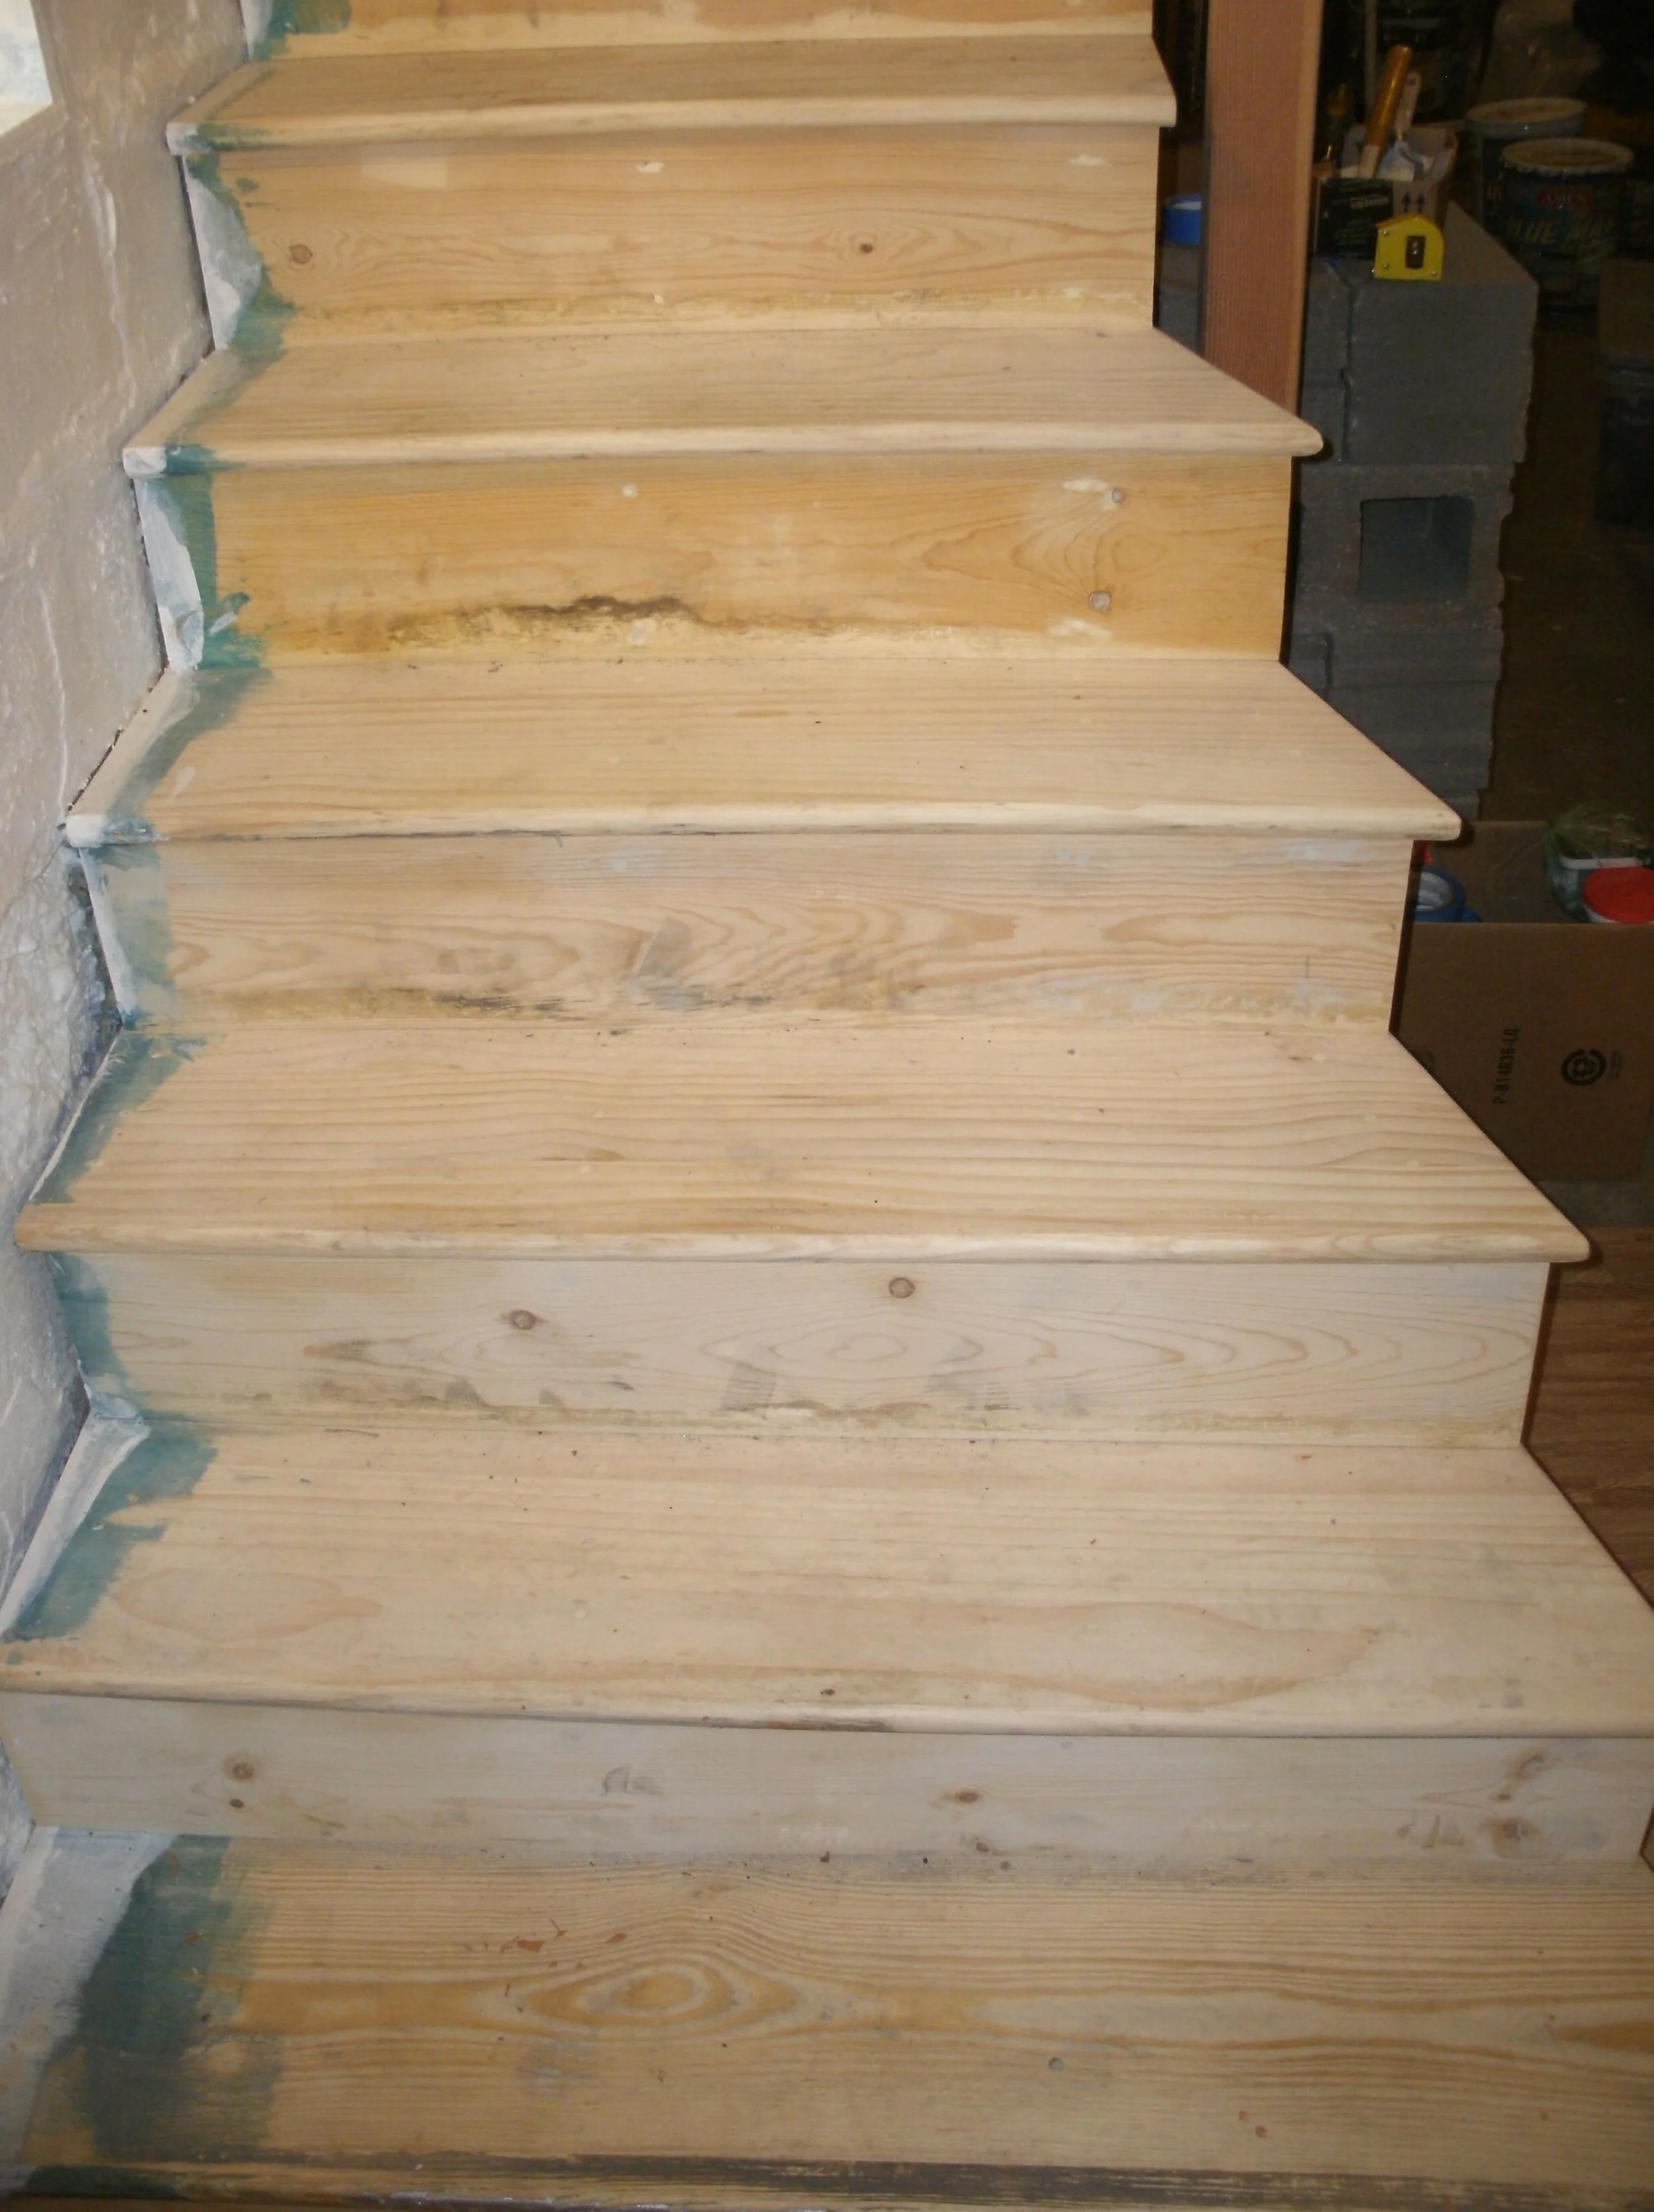
This was one of several projects I did for a very nice couple. The main project in the basement was to carve out a media room/office. Since there was going to be much more use of the basement stairs than the previous storage and laundry usage rebuilding the stairs was in order. The basement stairs were typical. Underbuilt, a typical afterthought of the 1880s. There wasn’t room to make the stairs more generously sized without rebuilding and slightly shrinking the landing at the top. Luckily there was decent headroom, which frequently there is not in similar basement stair installations. Completely demoed the stairs and landing. Rebuilt the upper landing and much better support posts, joists and stringers. As I was starting to put in treads and risers, they consulted a feng shui practitioner who suggested I widen the lower five stair treads to welcome the users to the basement. That was fun for me since I concurred, and it provided a moderate redesign and execution challenge. I replaced the rotting basement window with the glass block unit.
New stairs with partial view of improved support for first floor hallway
New stairs with view of new glass block window unit
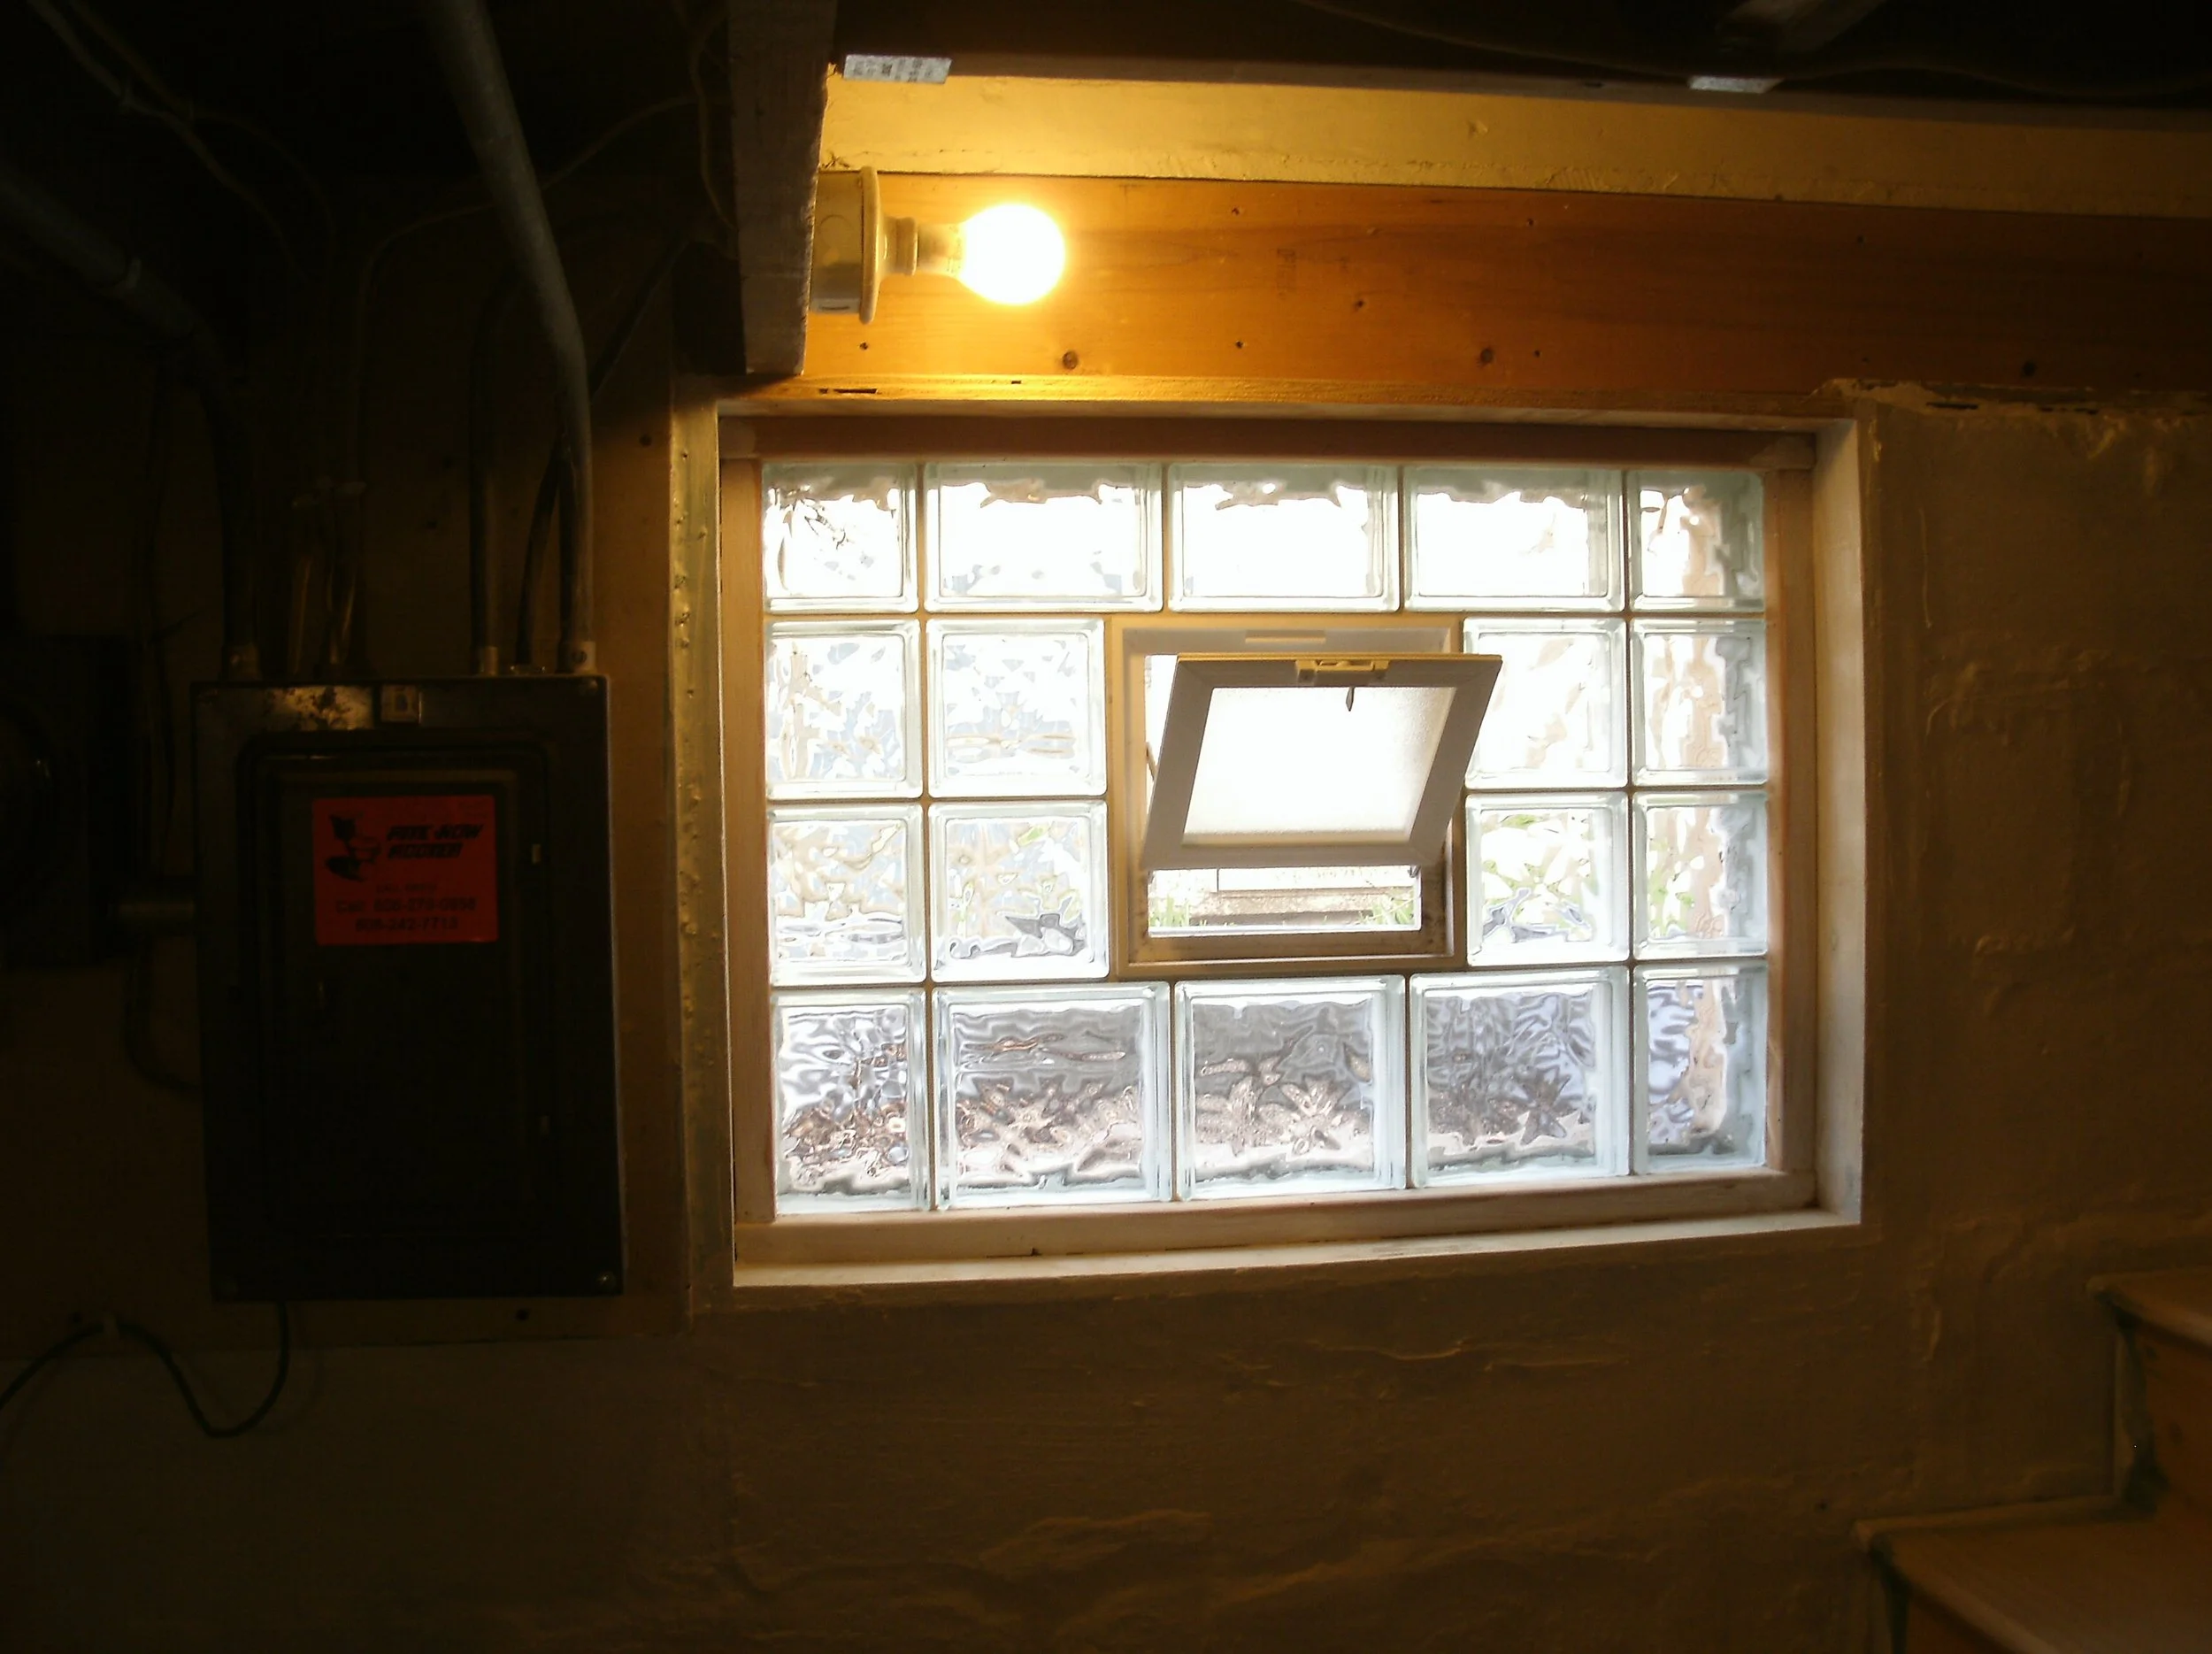
Glass block window unit with mood lighting
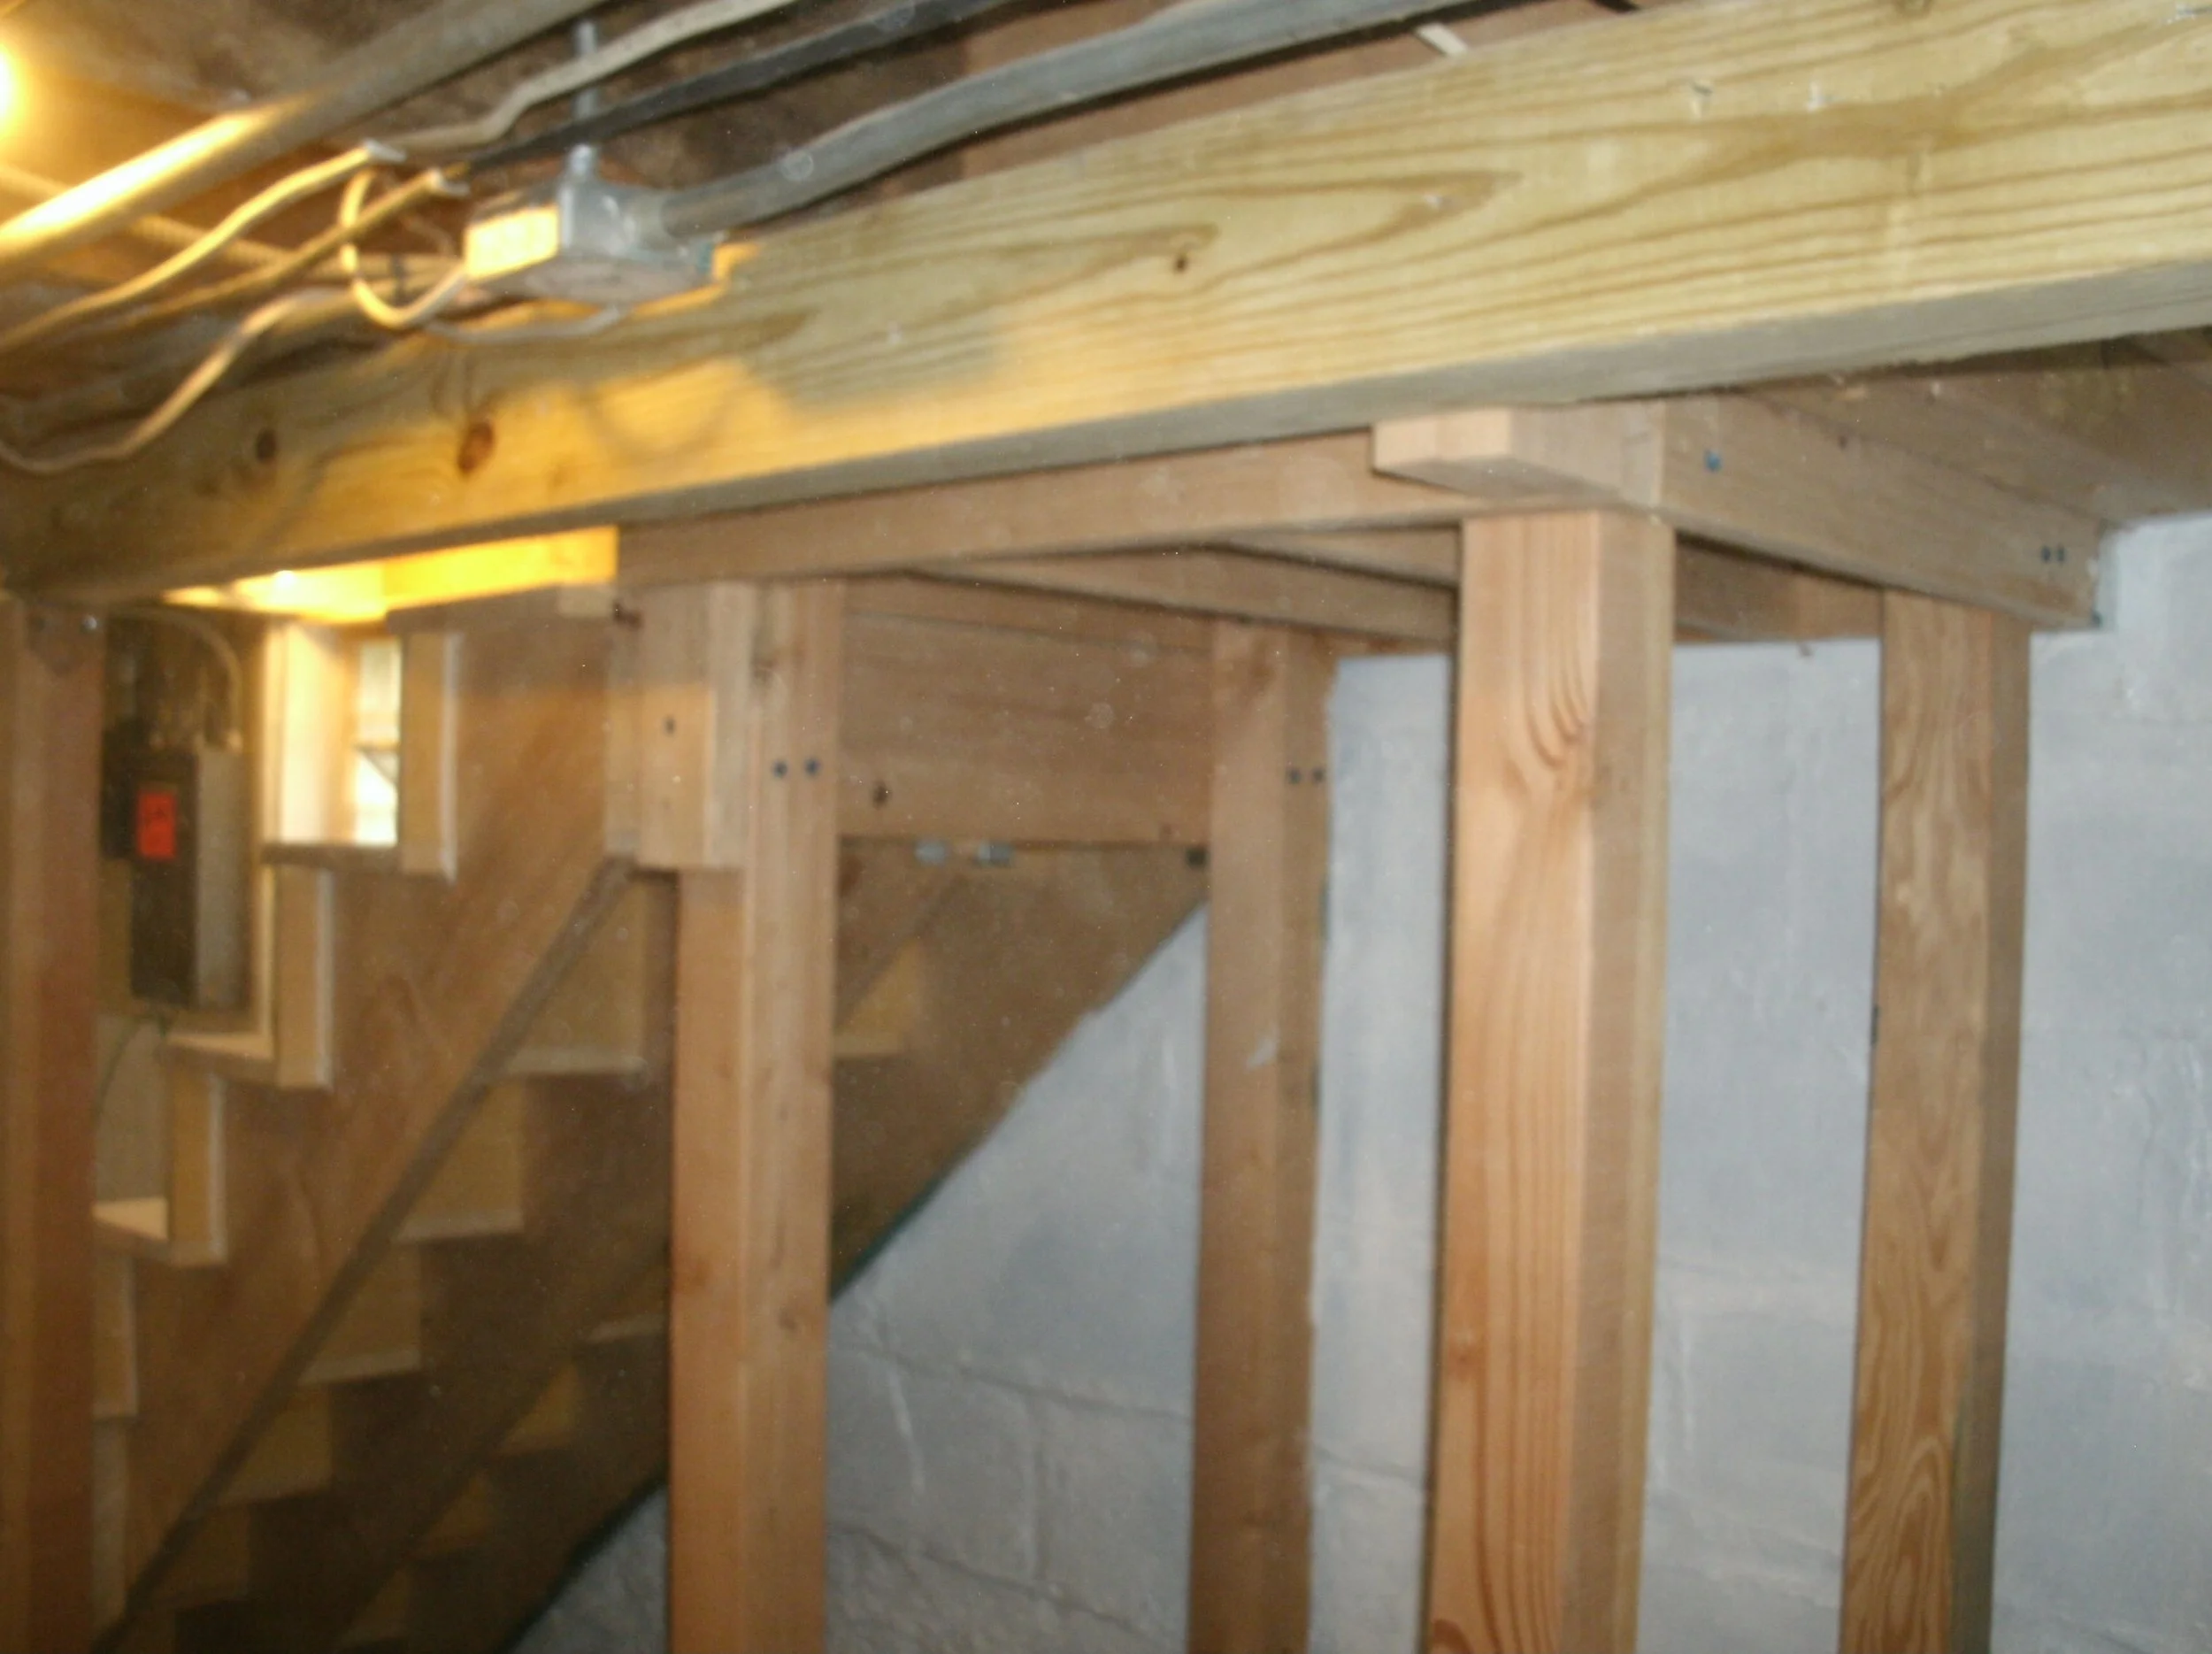
View of new double top 2 x 10 joist and some of the new support posts
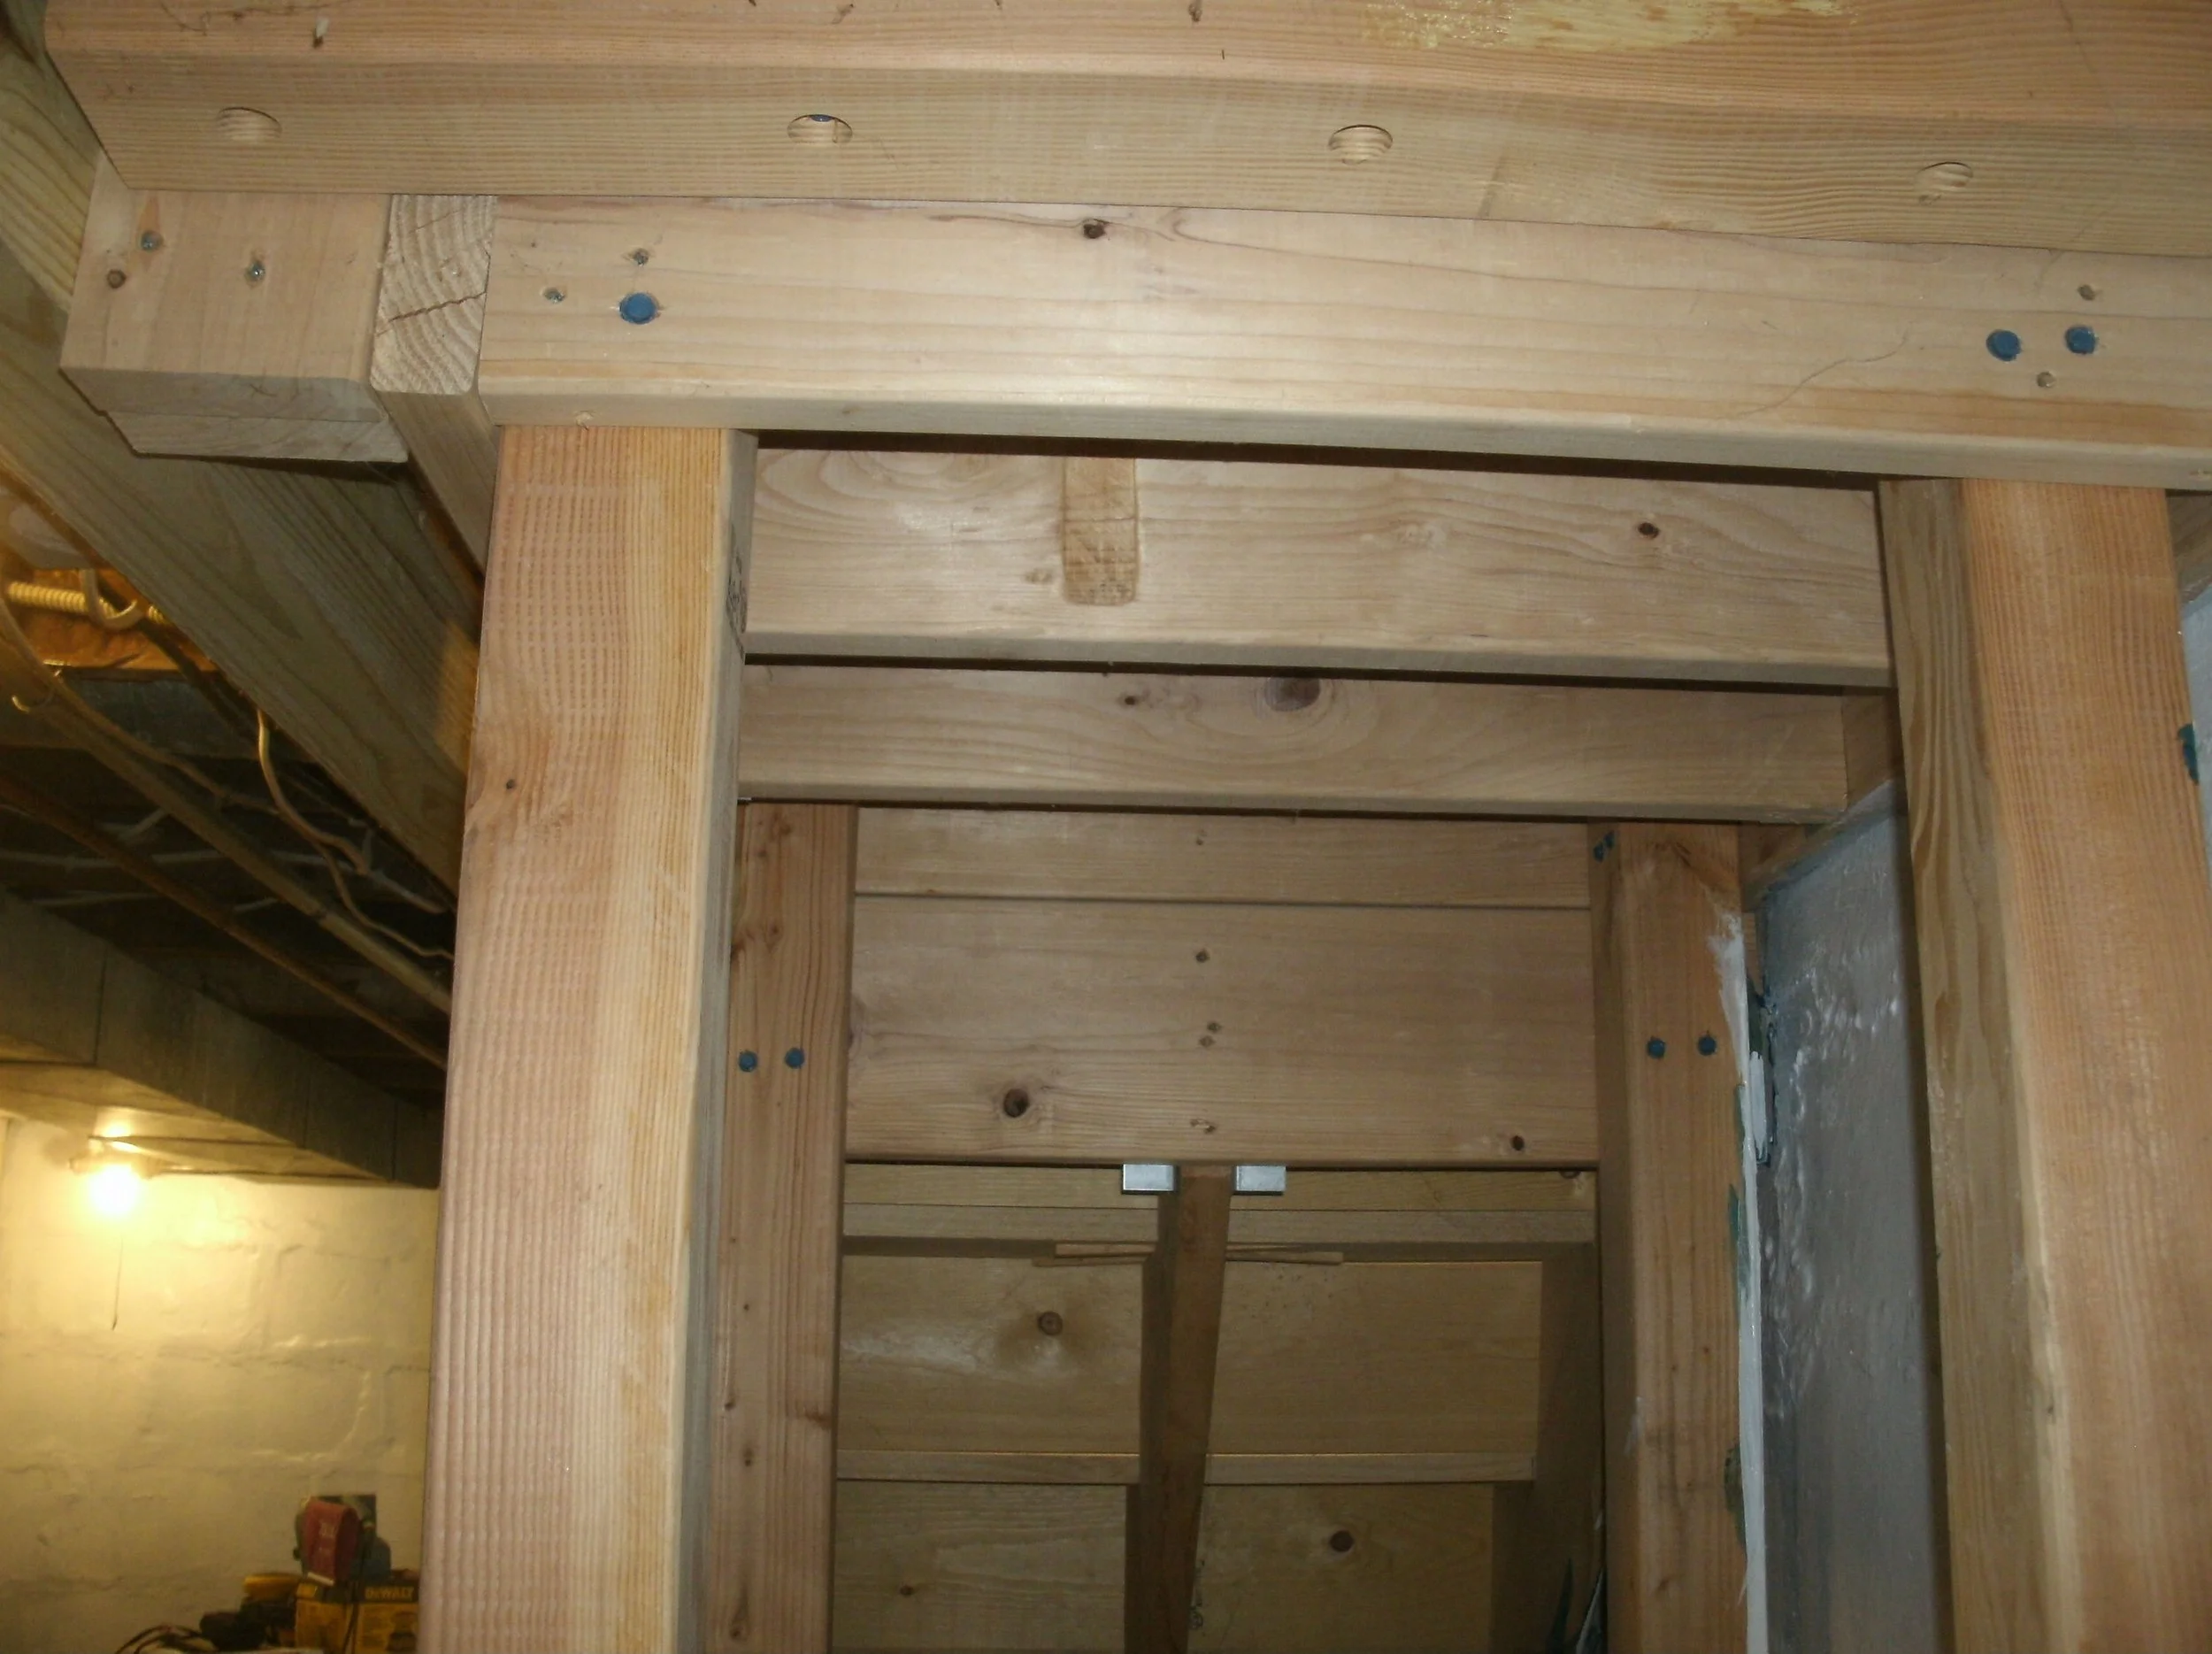
Underside of new support for stairs and landing. I proudly overbuild.

New required 4x6 support beam
New stairs, all ends of risers and treads sealed as they are against the foundation
Another view of the new stairs
A good view of the treads widened to welcome basement goers
Another view of the widened treads
New stairs from new landing
East Porch
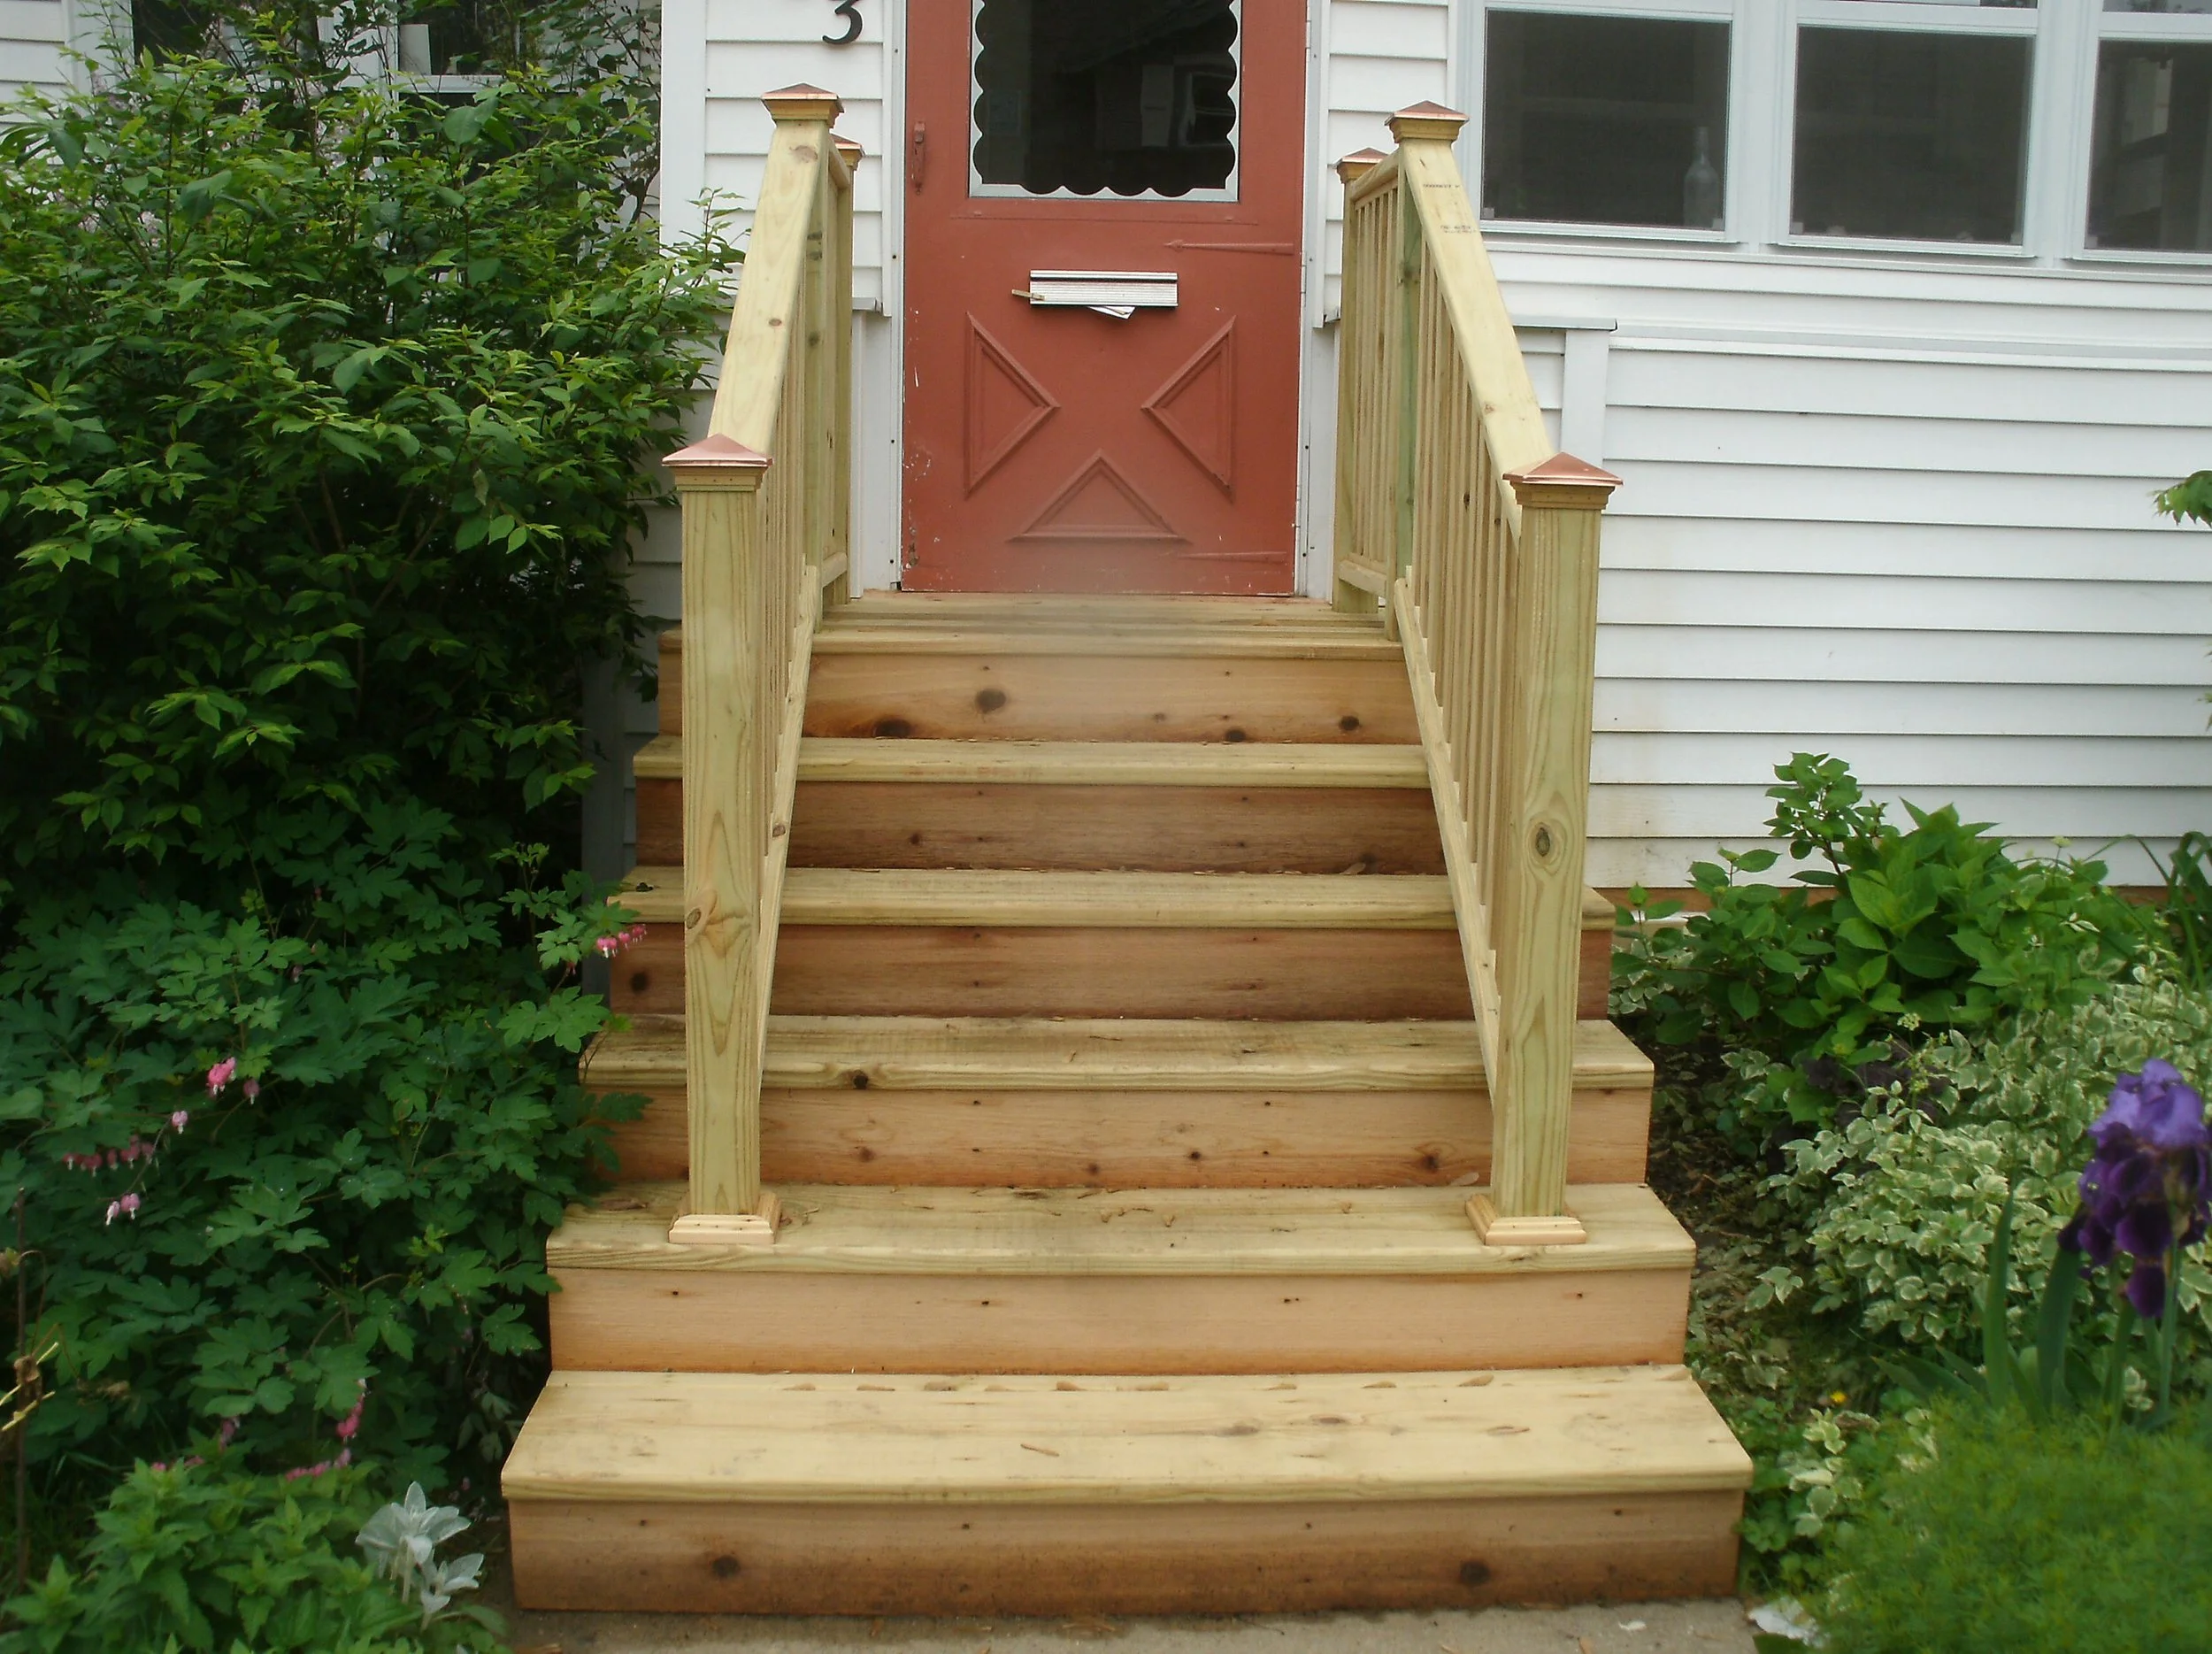
This was a fun little porch. I tore down the old failing porch. I dug and poured footings. Set support posts, joists, stringers, treads, risers, posts, lattice panels, and rails. The little house deserved this lovely entry. You could almost hear the house sigh in relief.
Full view of the new structure
Side view with lattice installed
View of the other side
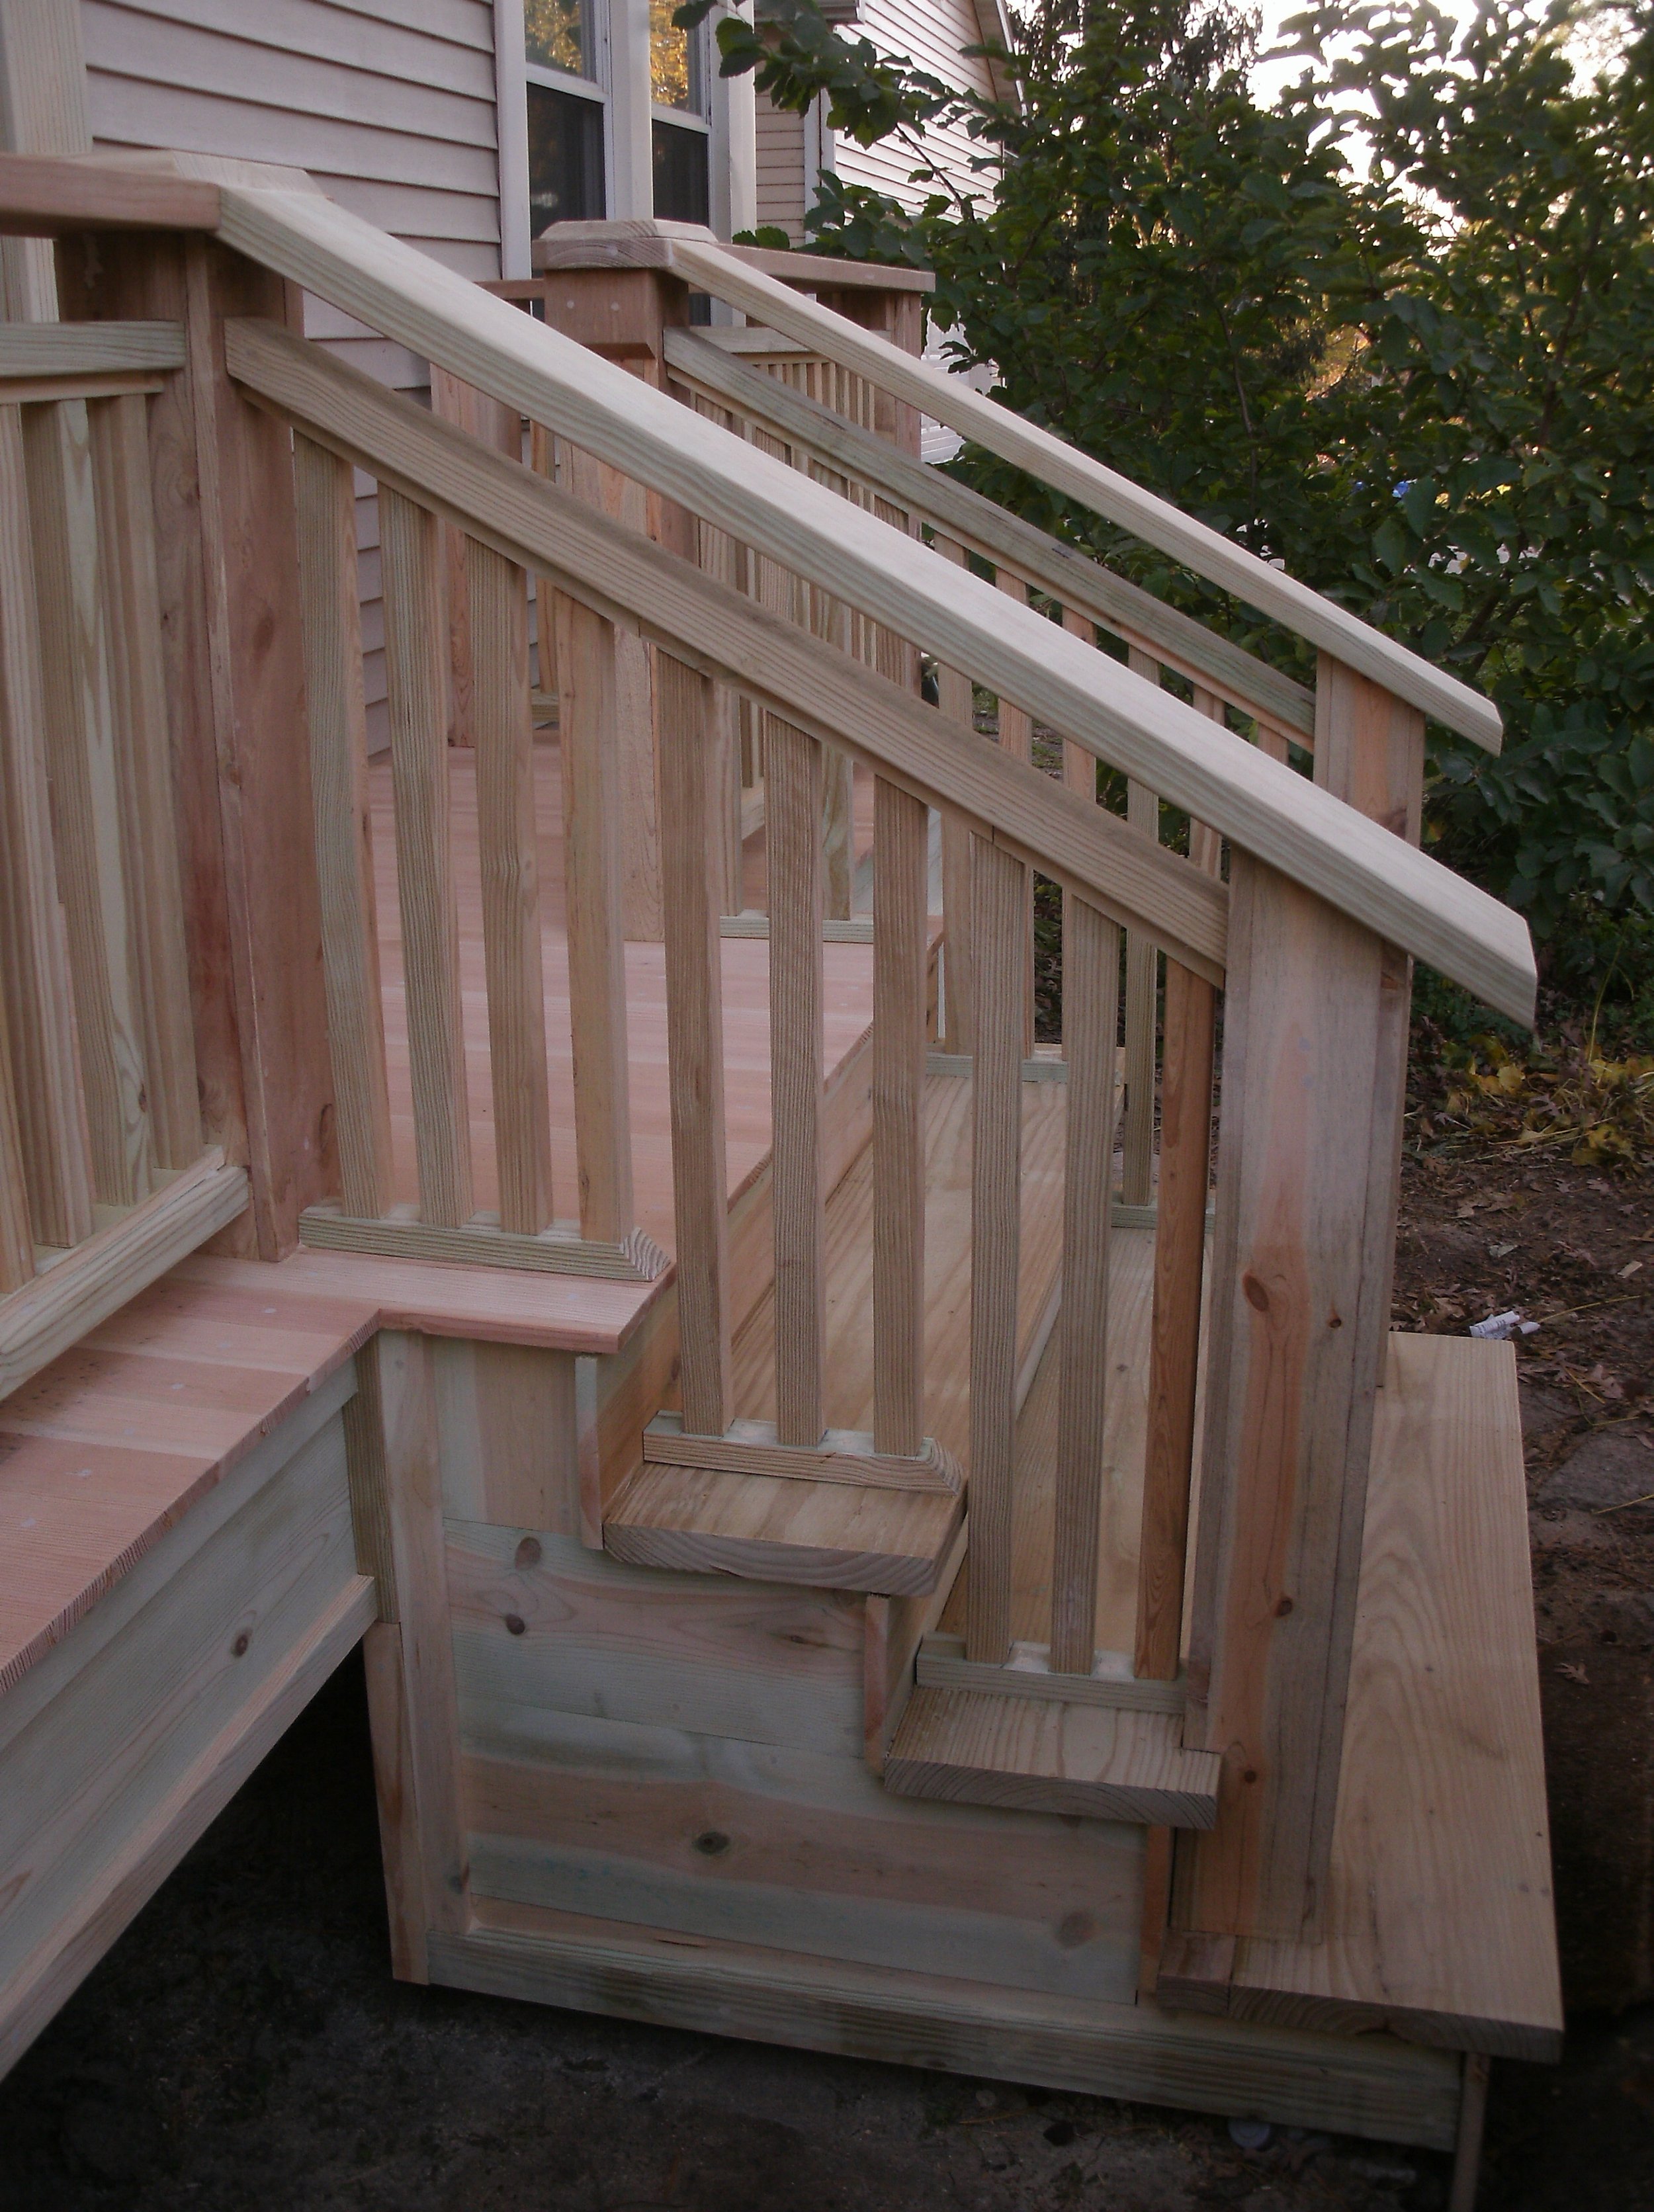
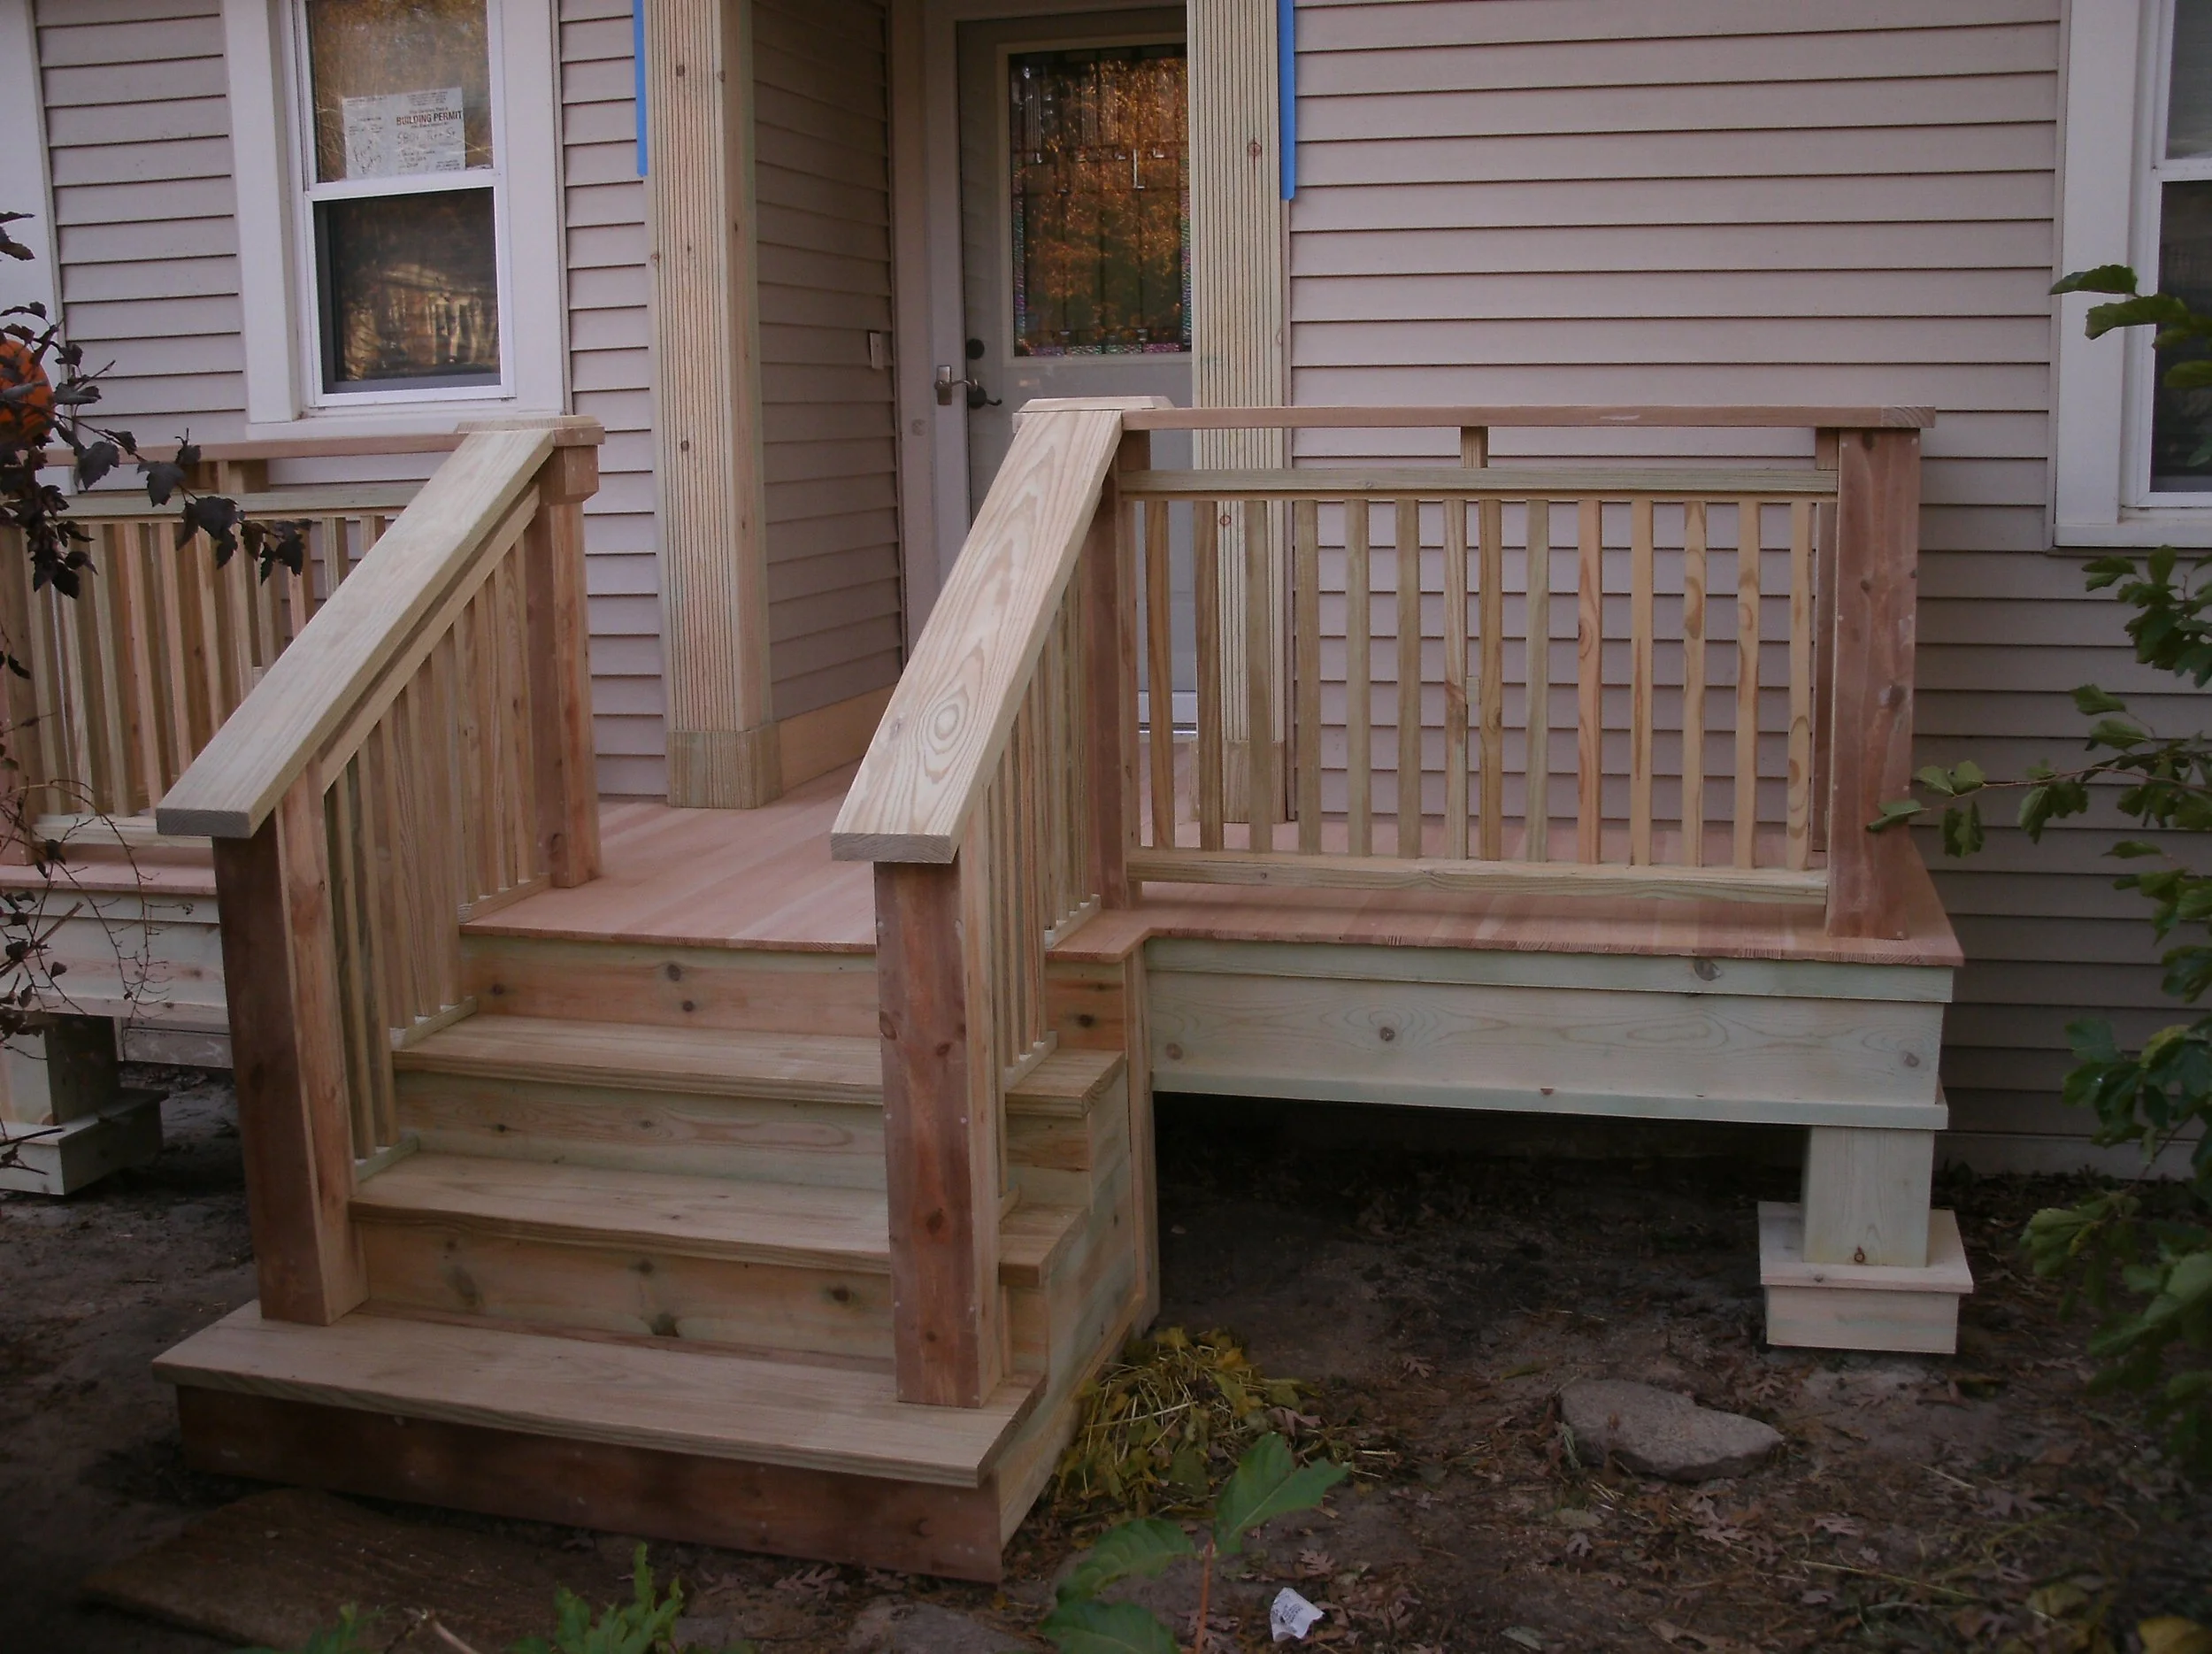
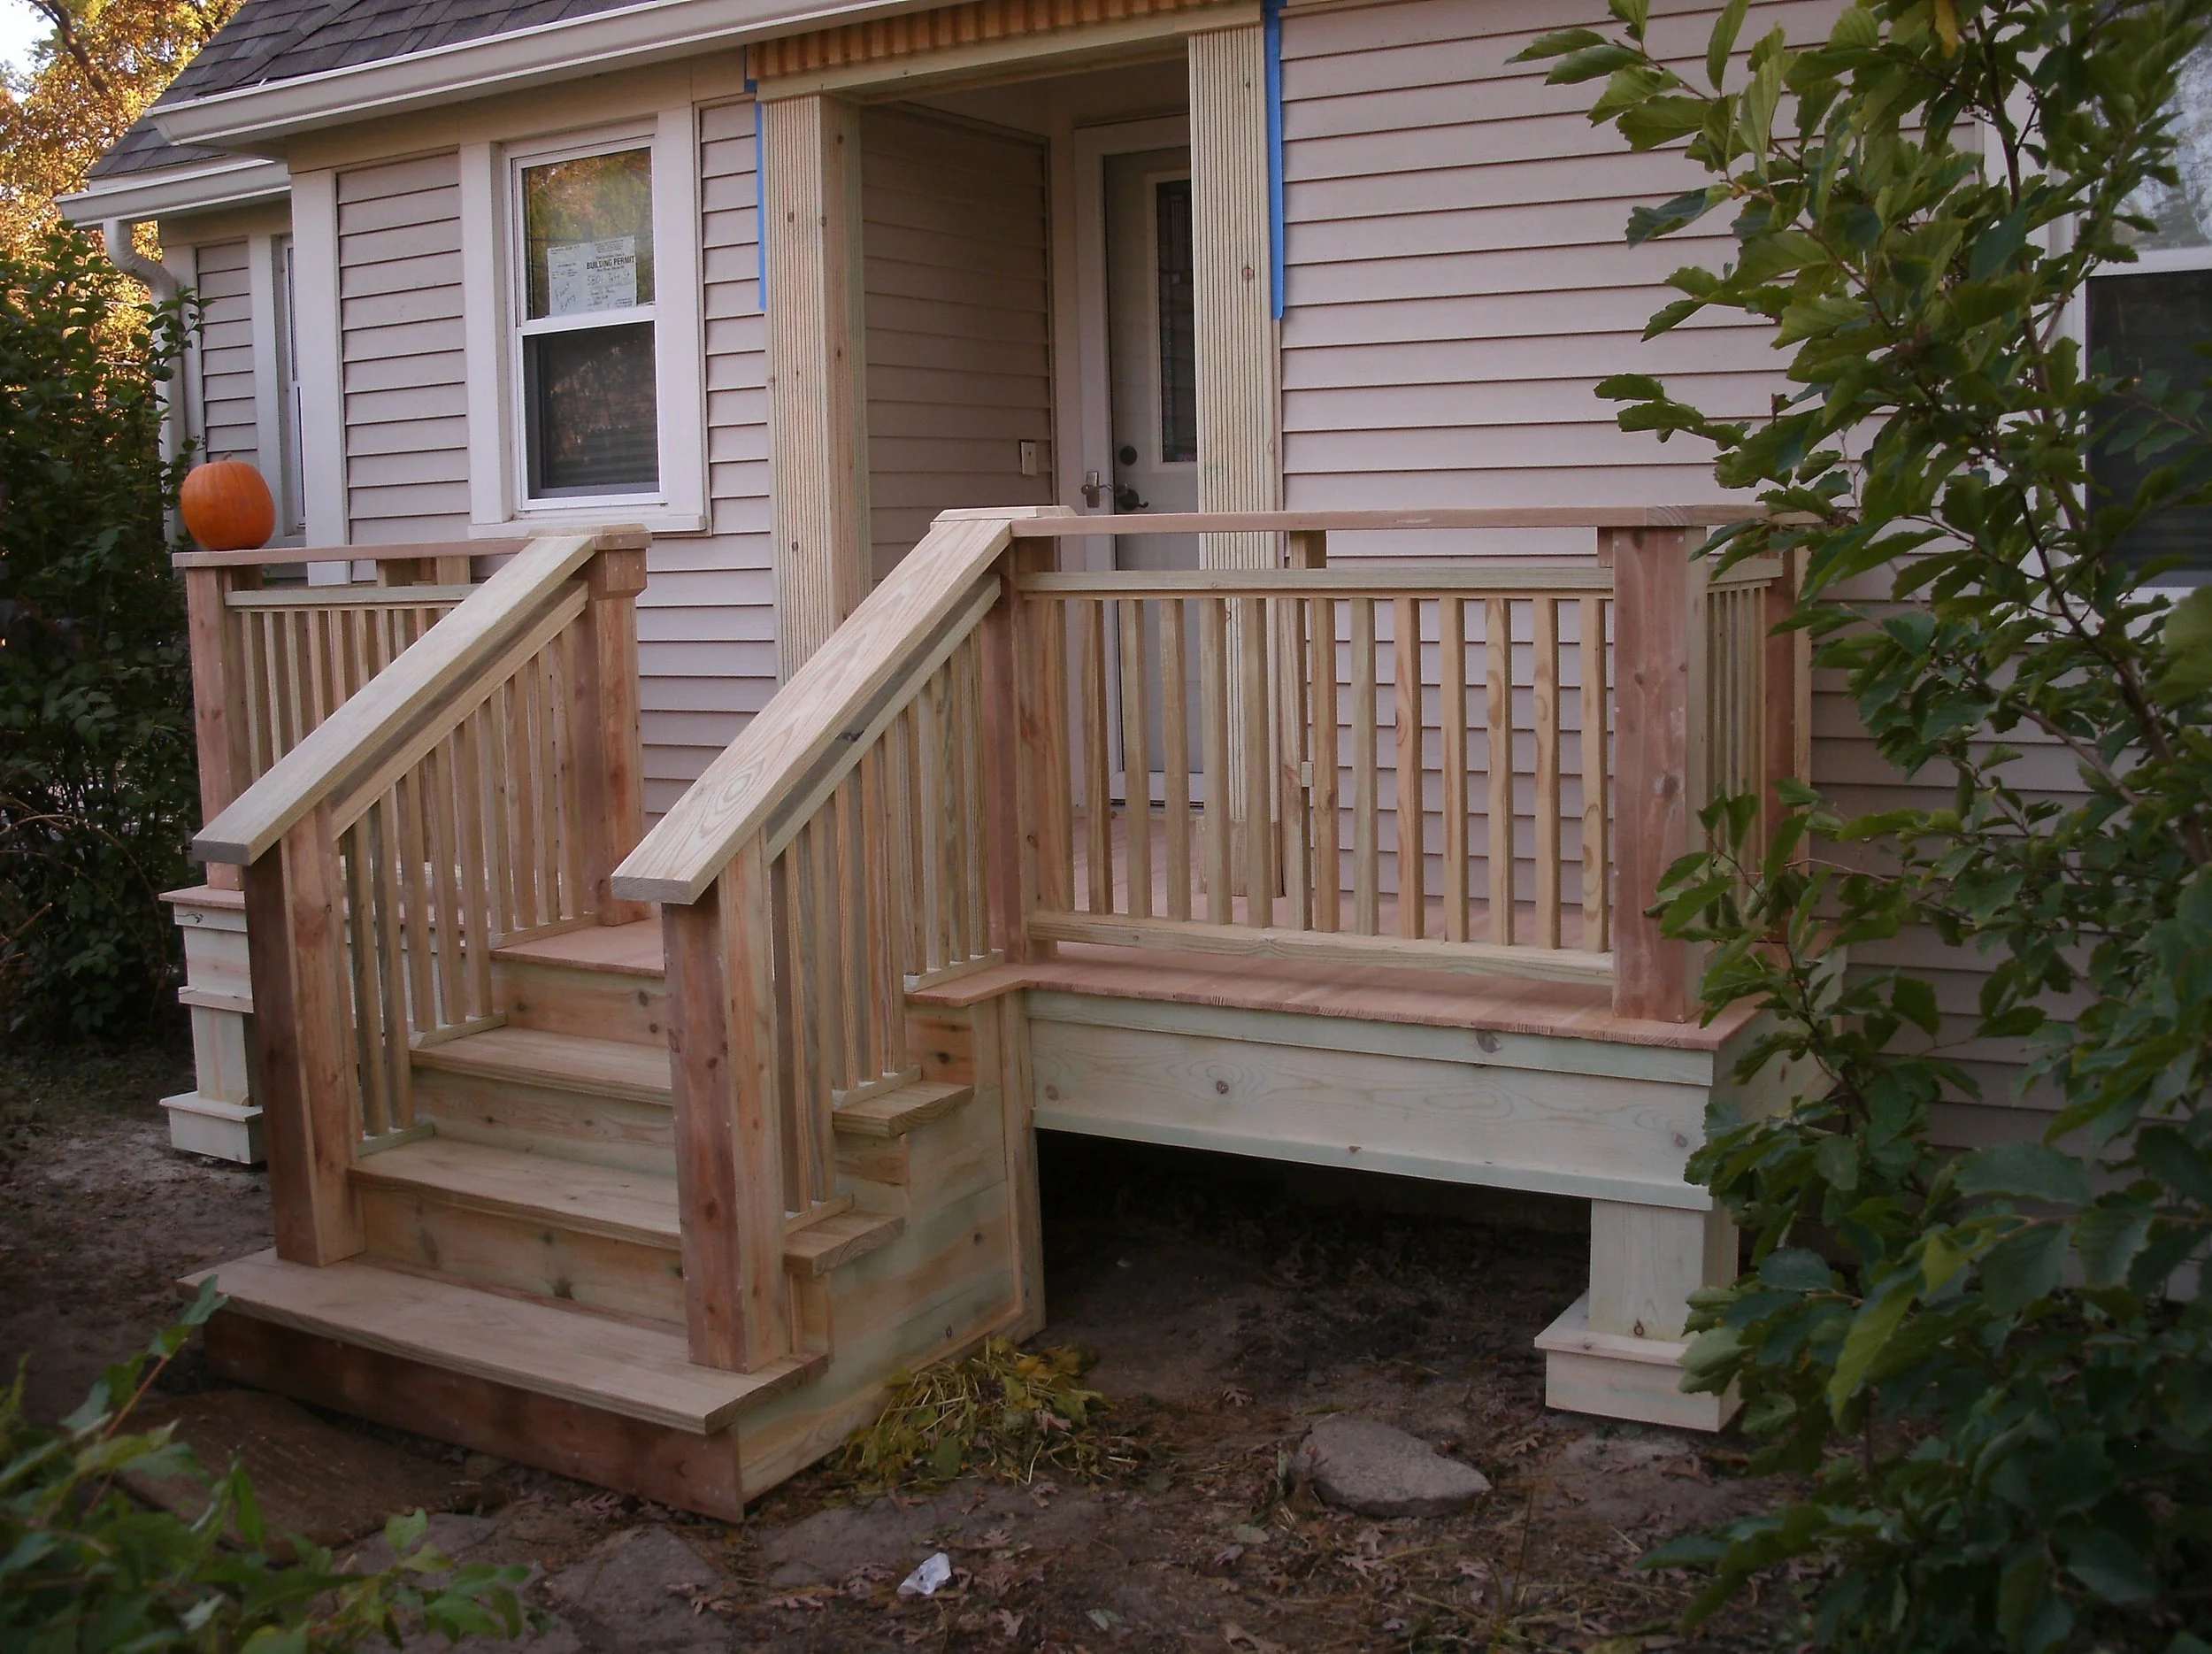
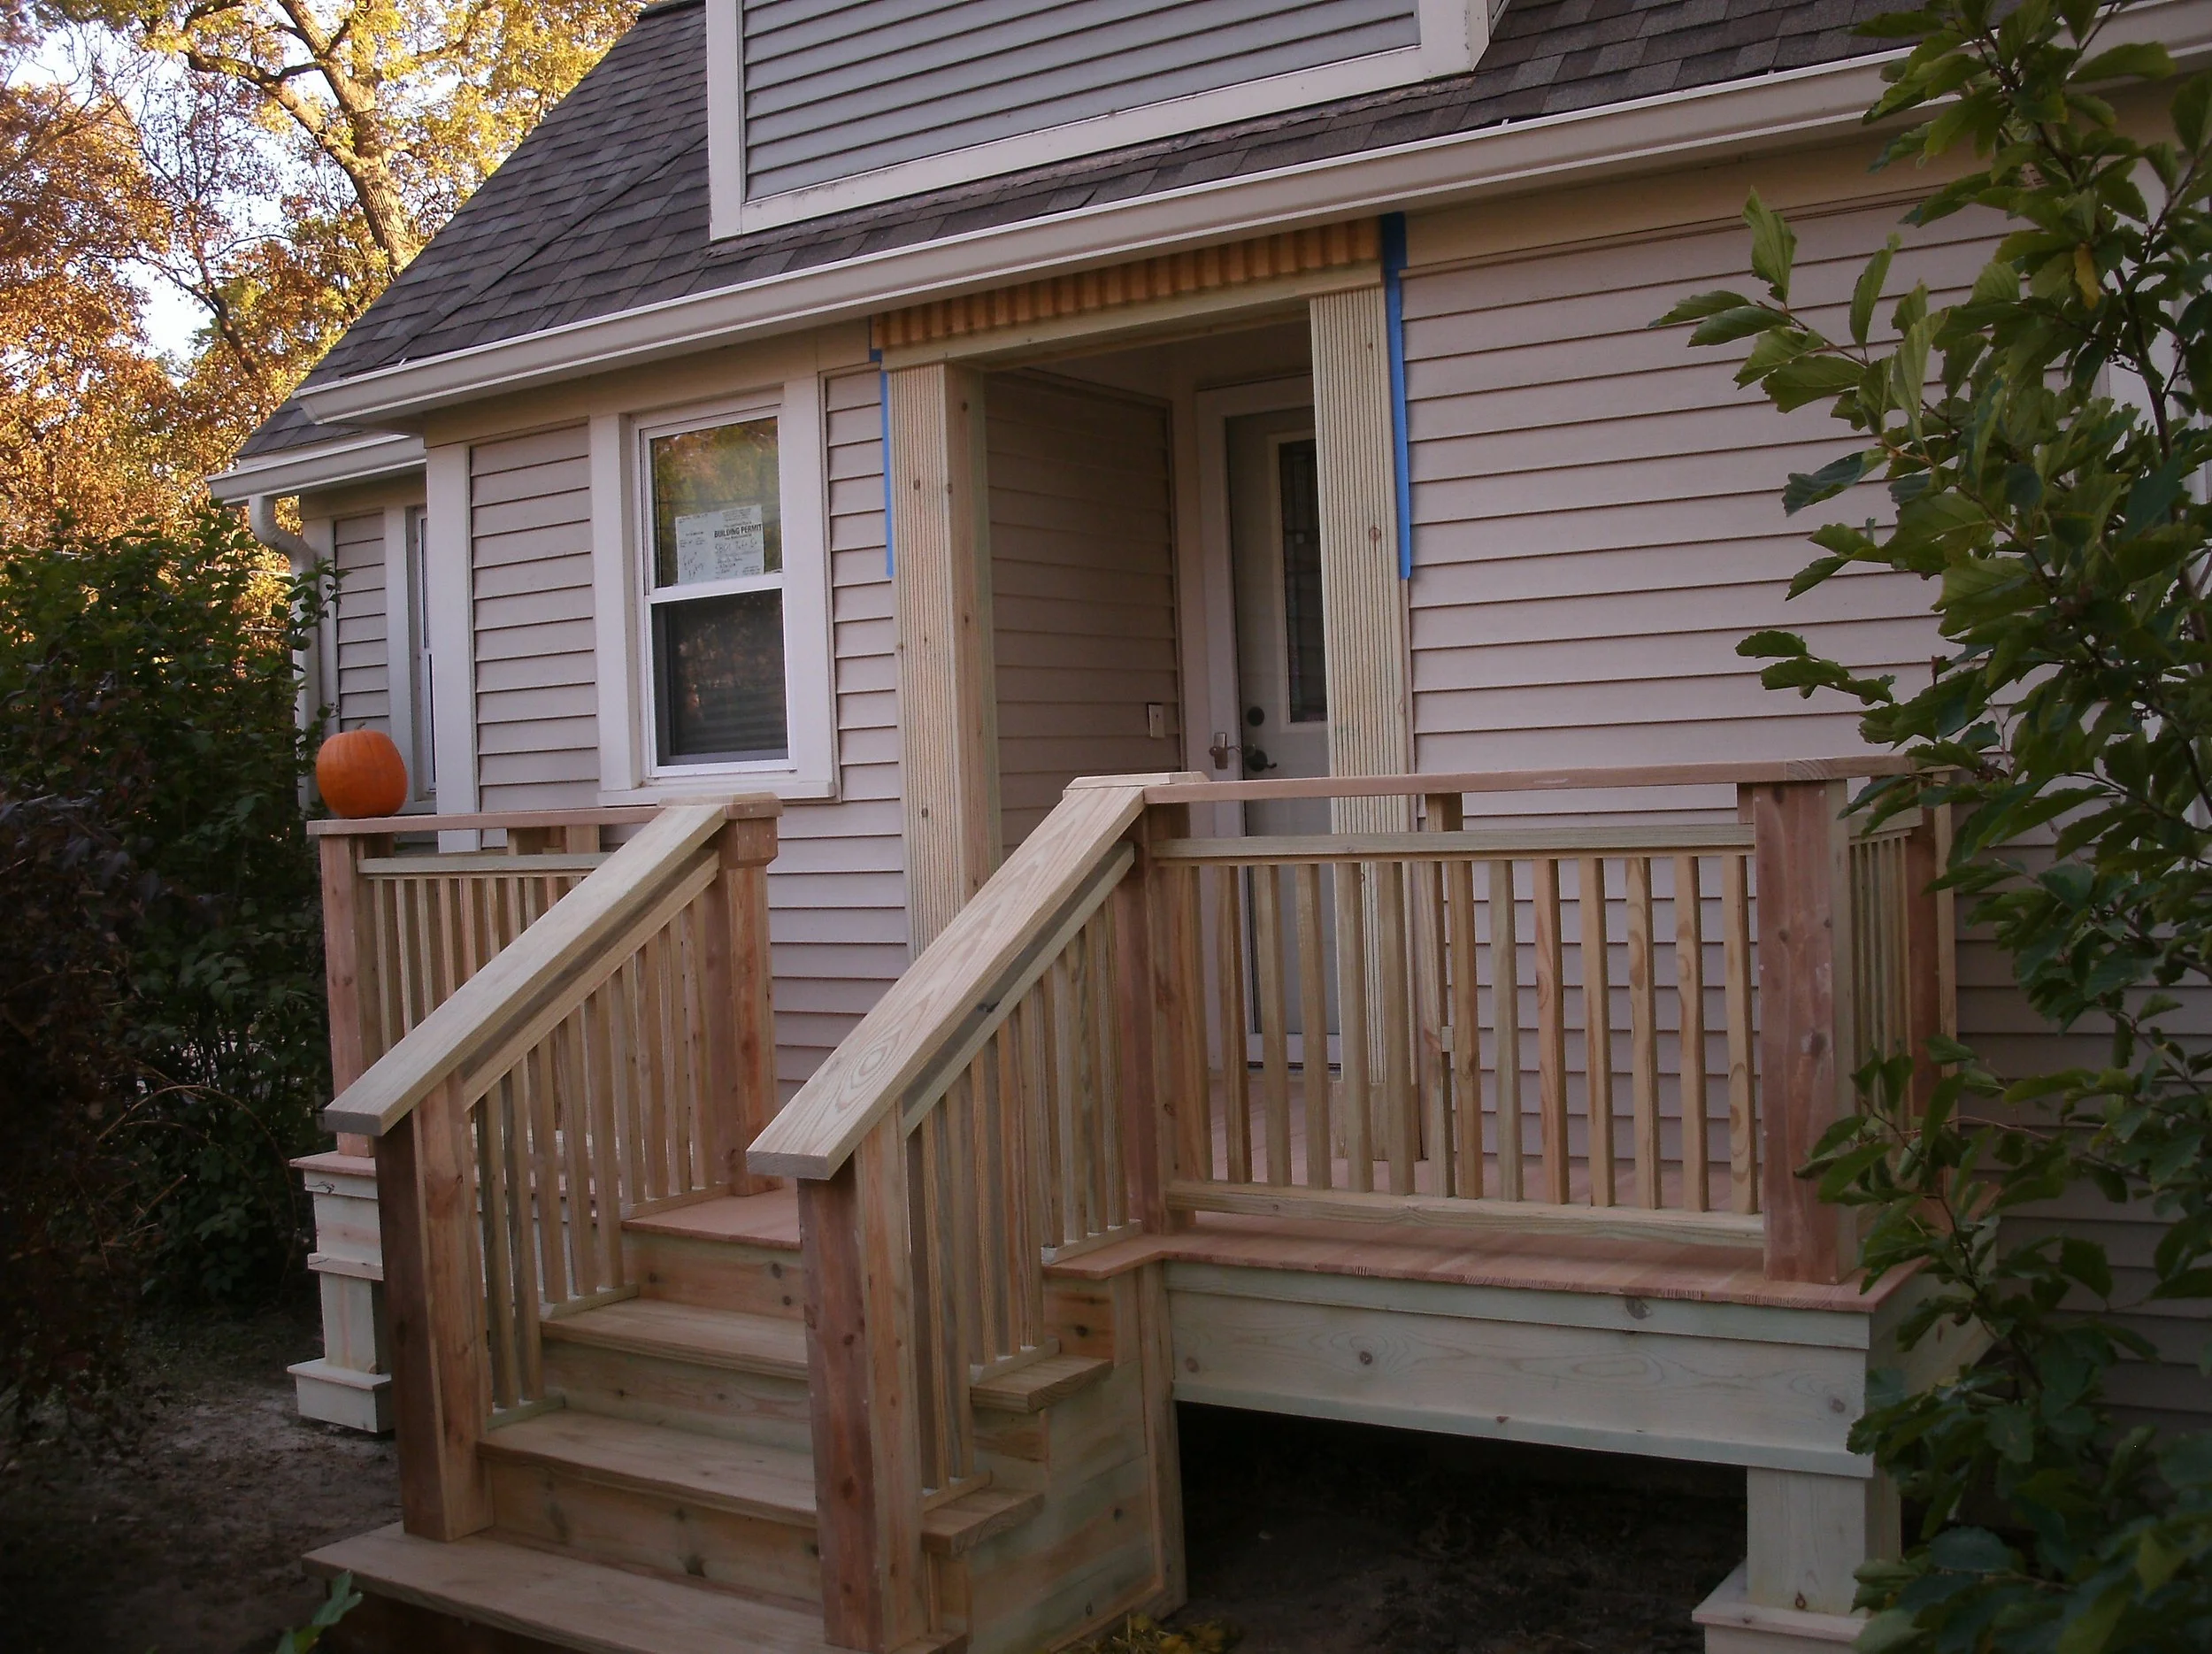
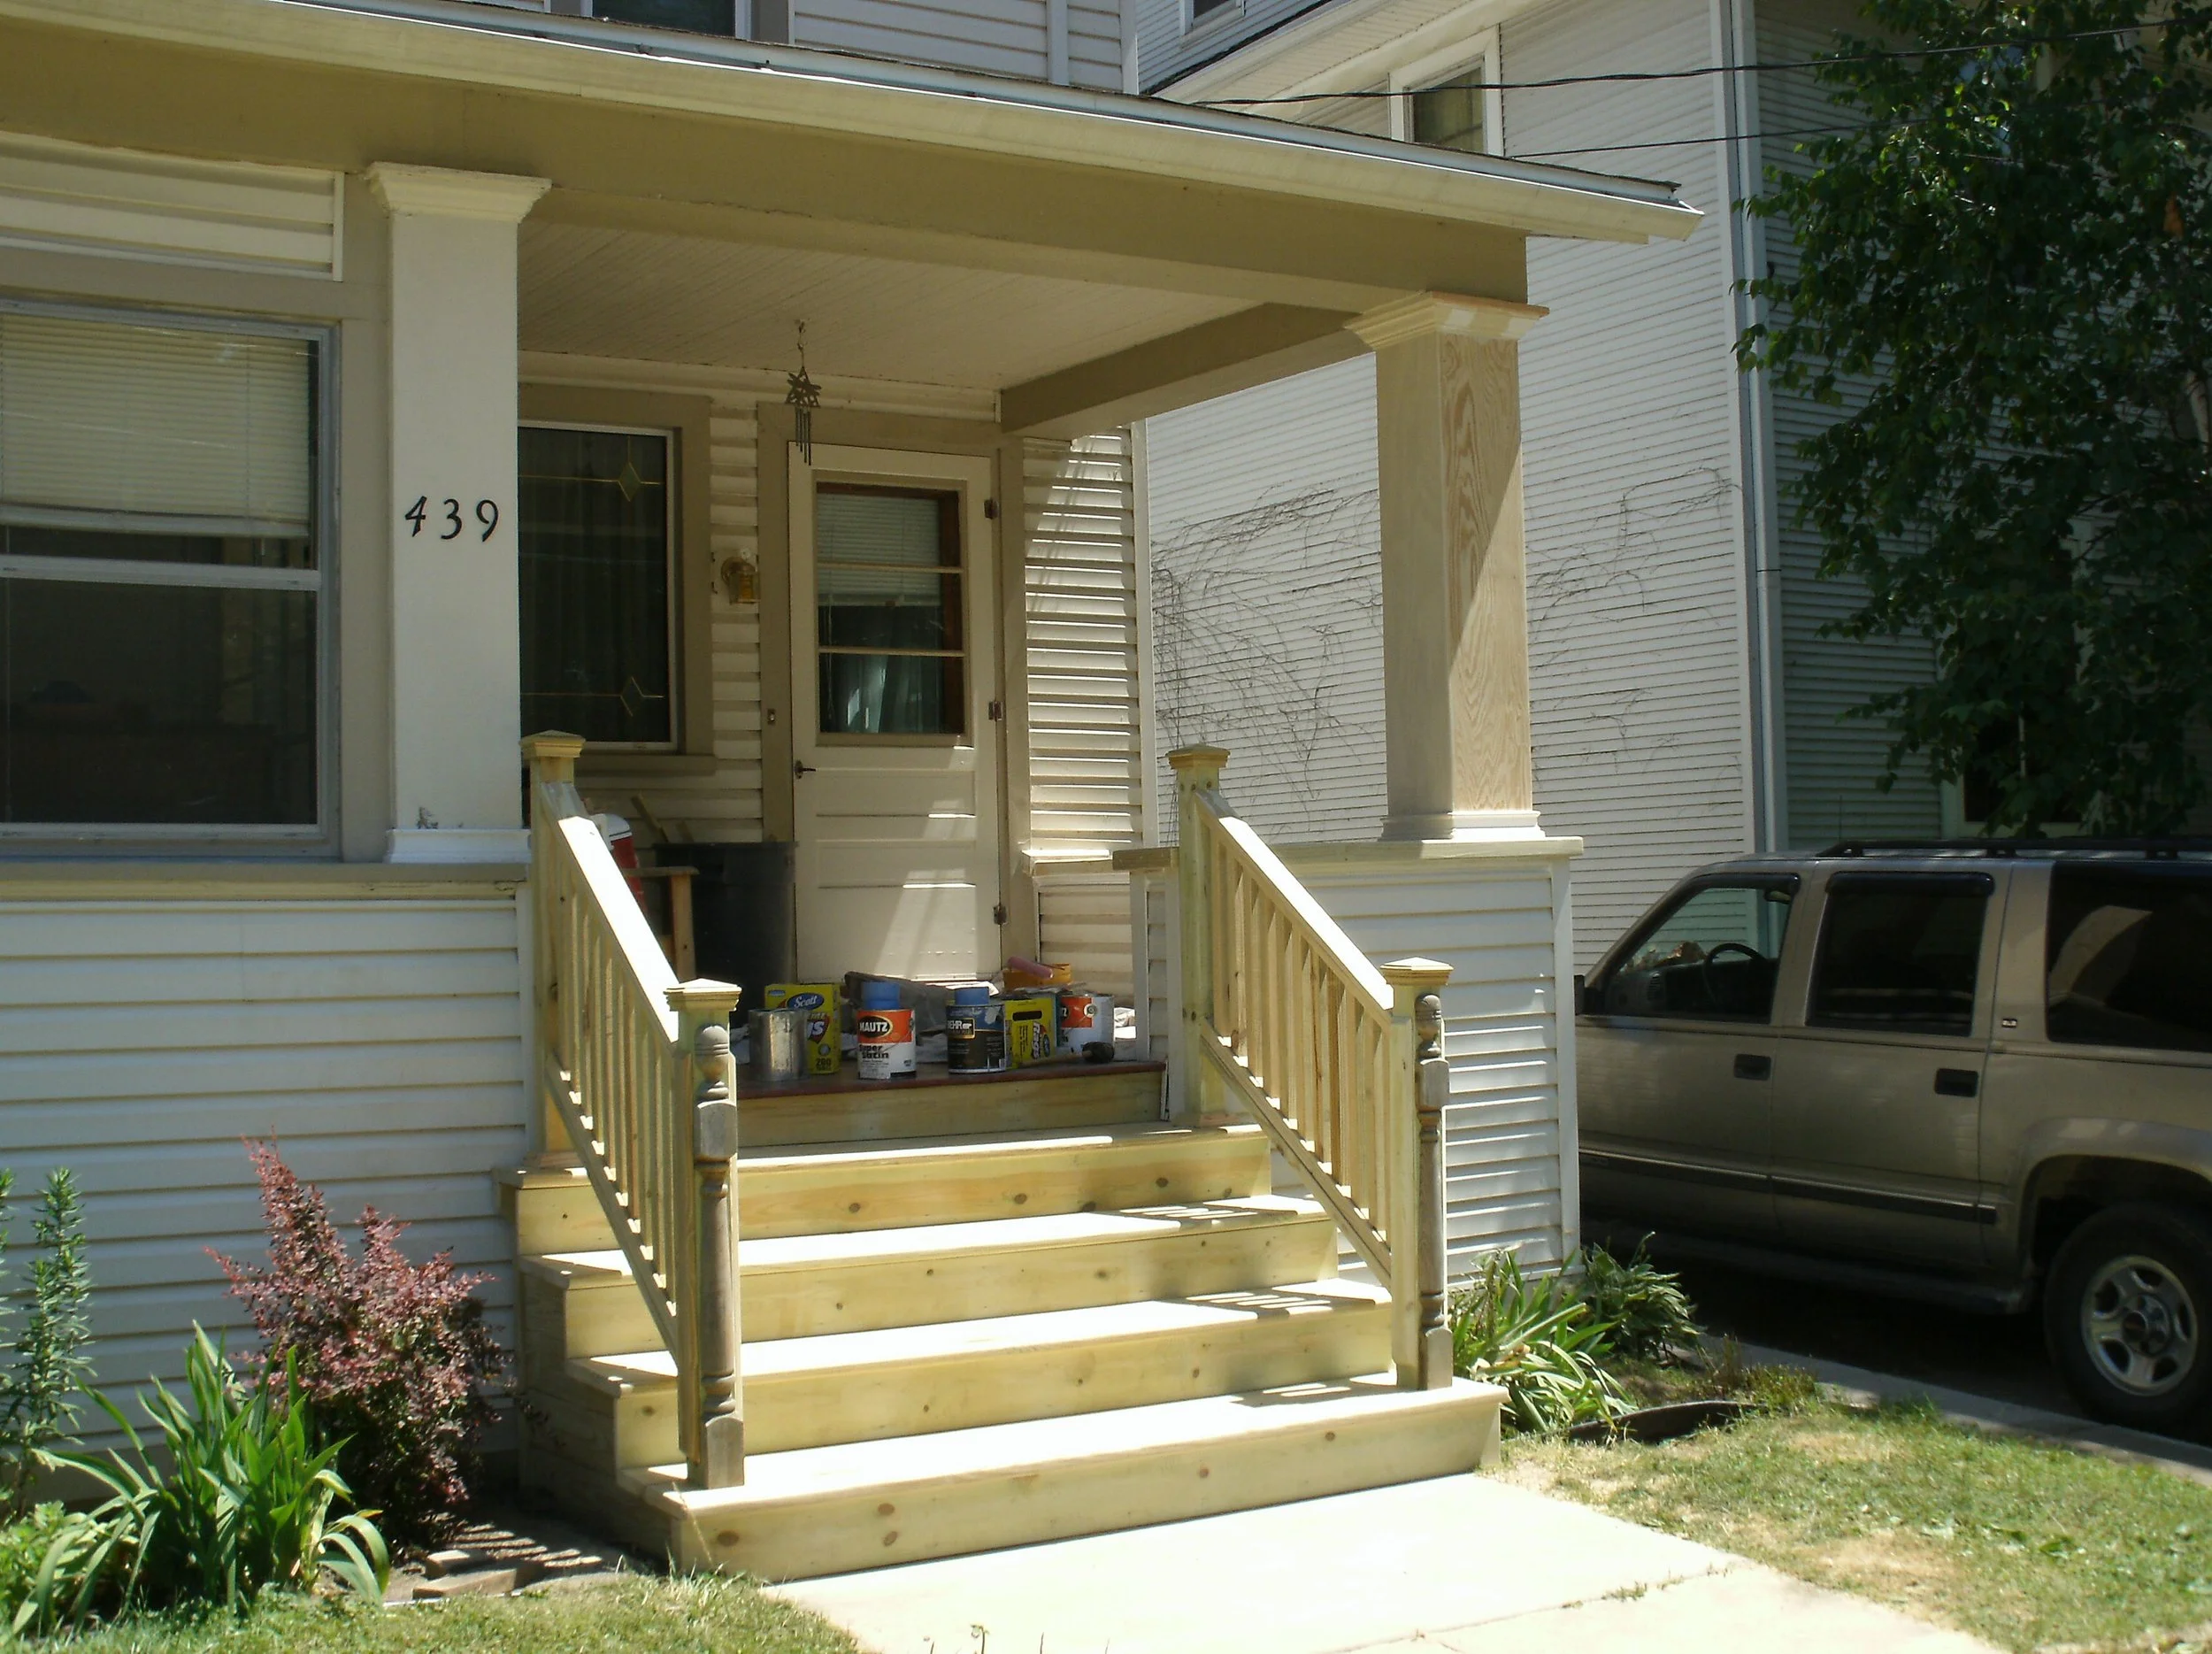
Middleton Porch
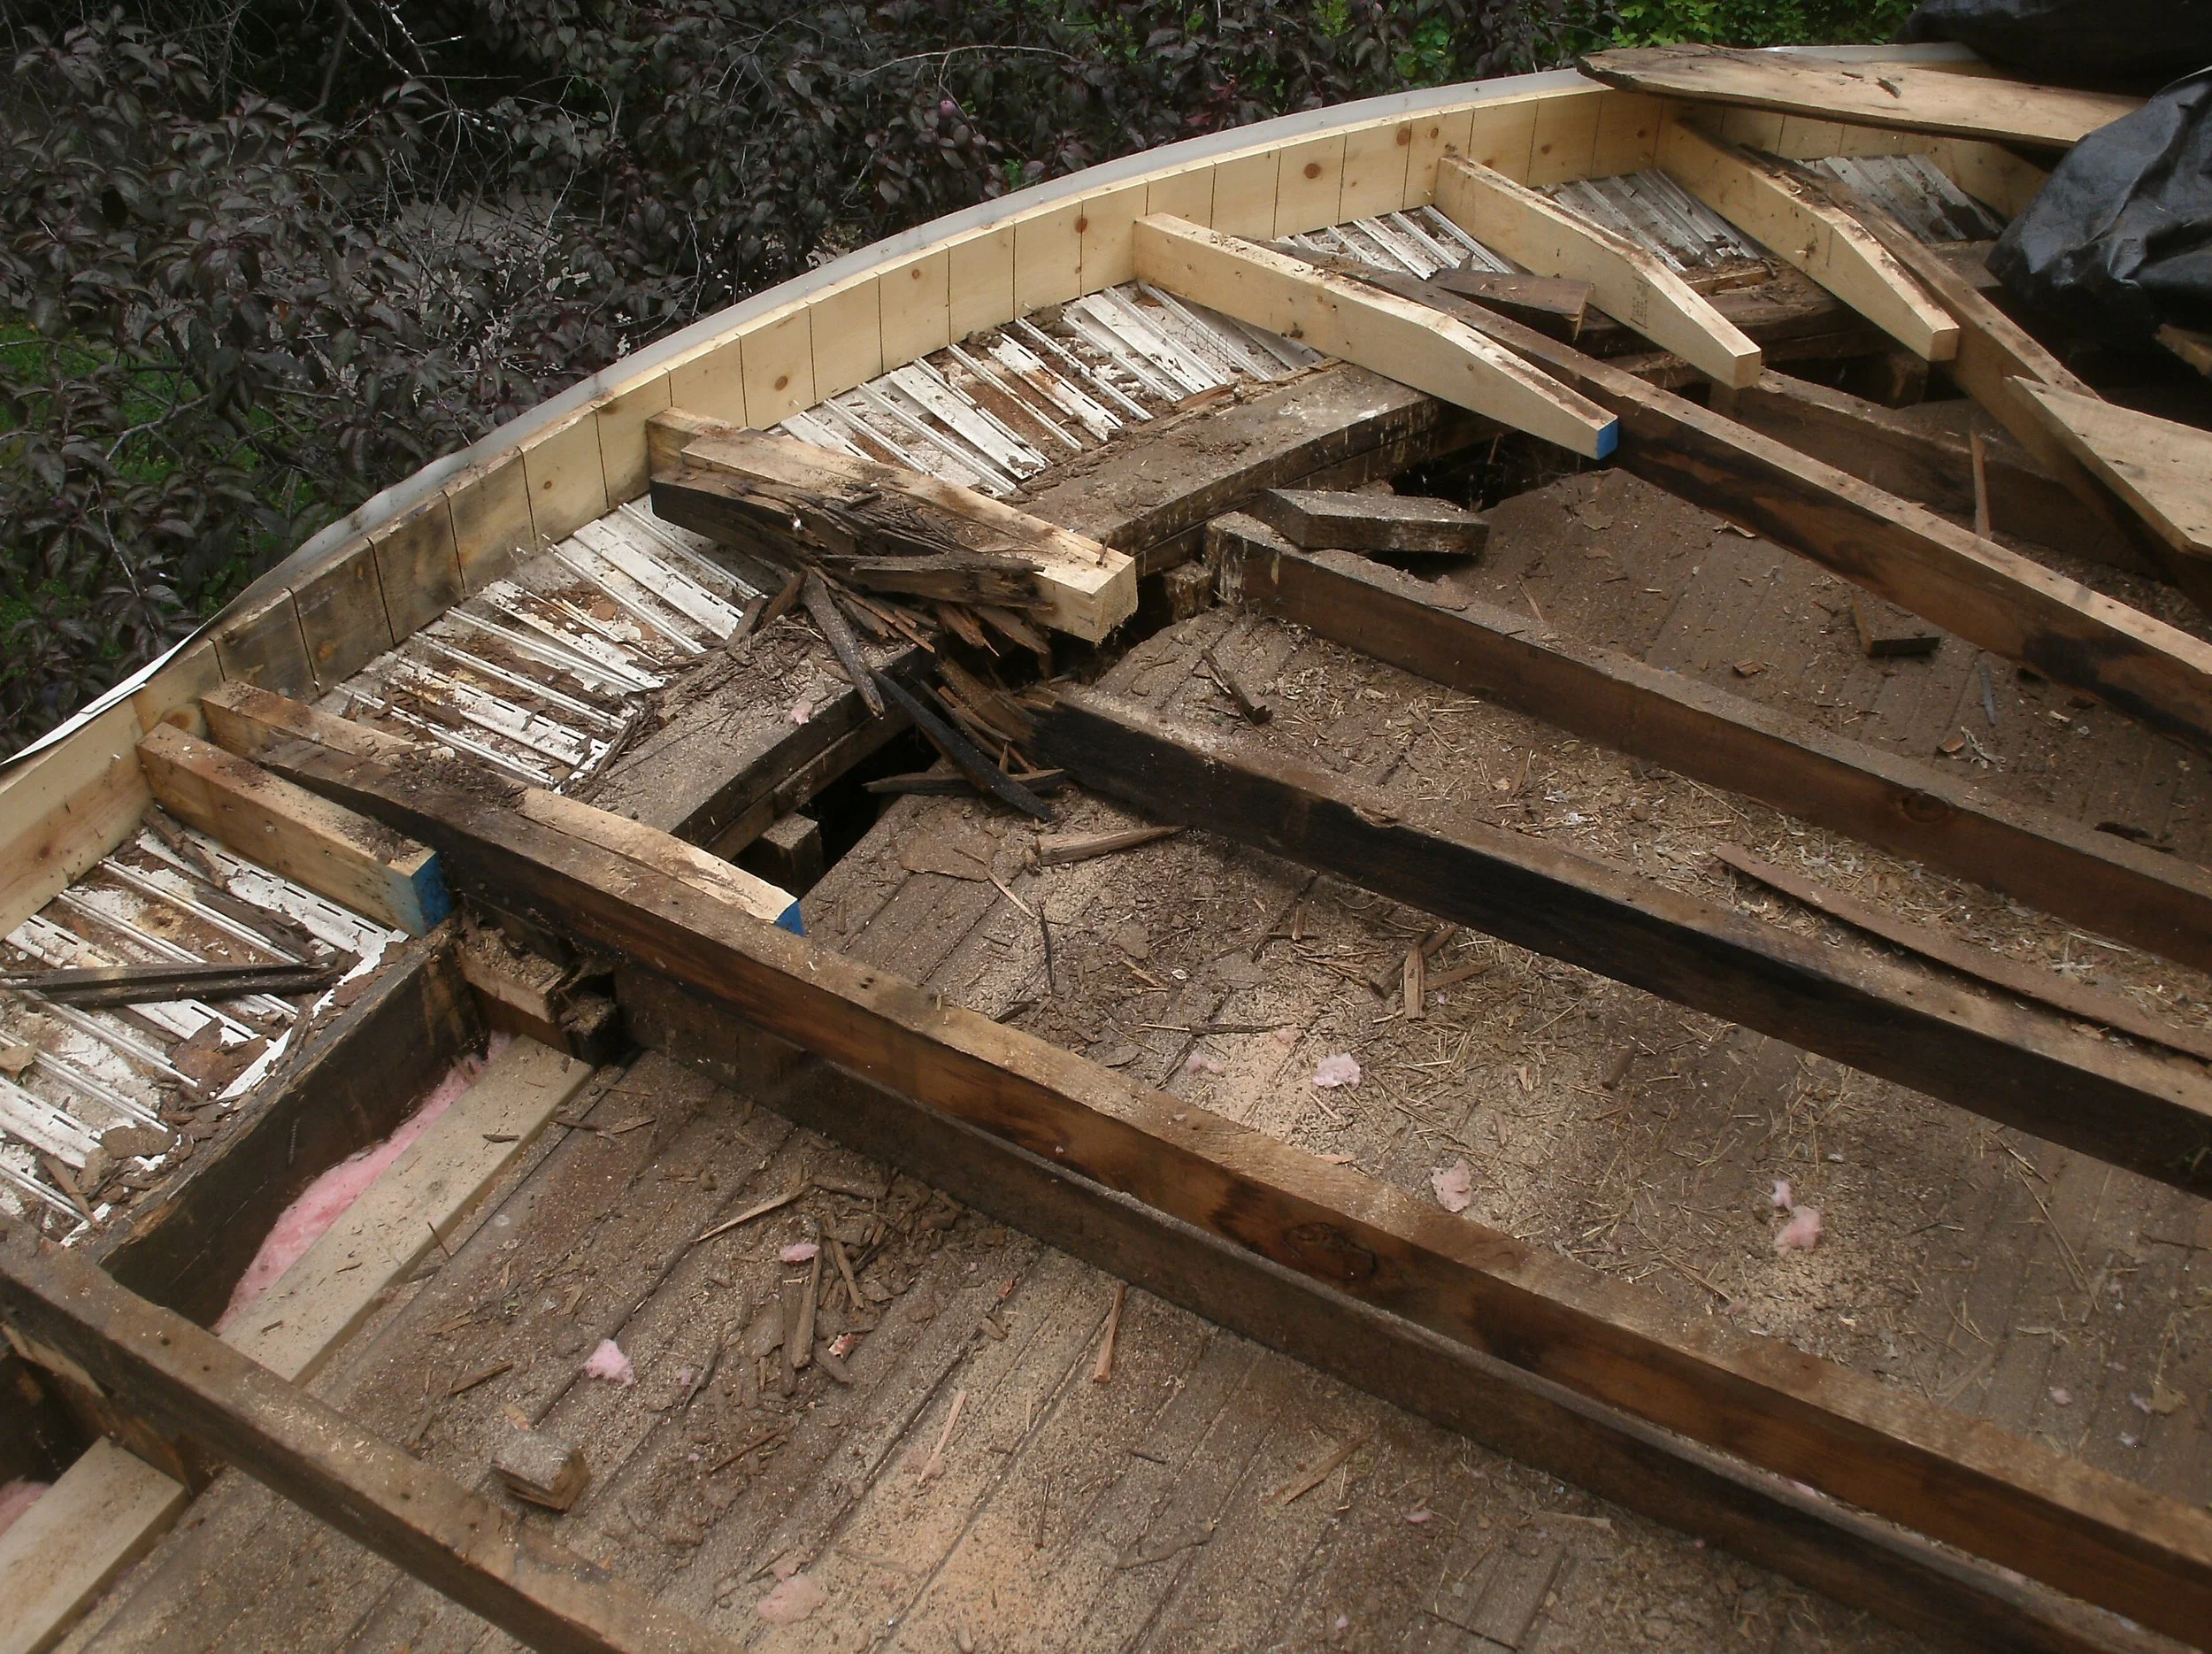
This project was a lot of fun. The original entry and stairs were a visual eyesore which also leaked into the basement. The idiocy of this installation should show that automatic presumption that they did everything right in the "old days" can be ridiculous. We tore out the stairs and the decking. Augmented the floor joists and created a wall to finish the foundation wall, which was missing. We insulated that wall. To provide support for the new deck we installed four Diamond Piers. As one who has hand dug and filled hundreds of foundations with concrete, the Diamond Piers are a wonderful invention. We set support posts and joists. We cut stringers for the stairs and installed those, the treads and the risers. We installed the Doug (Douglas fir) decking. We fabricated and installed the rails. I like how we trimmed the two main support posts. I also enjoyed adding a bit of elegance to the outer archway. We created the vertical trim pieces to look as if they were columns and added the dentil course over the door way. We painted all new wood.
A view of the original entry situation
The original framing and lack of foundation exposed
The view of the column trim with rails and decking installed
A view of the beautiful Doug fir decking
A view of the stairs, decking, and column trim
A view of one end of the deck and a clear shot of the column trim
A view of the stairs, rails, and trim under stairs
A nearly full front view
Another front view
Another front view. Happy Halloween.
The new welcoming porch and stairs painted a nice cream color
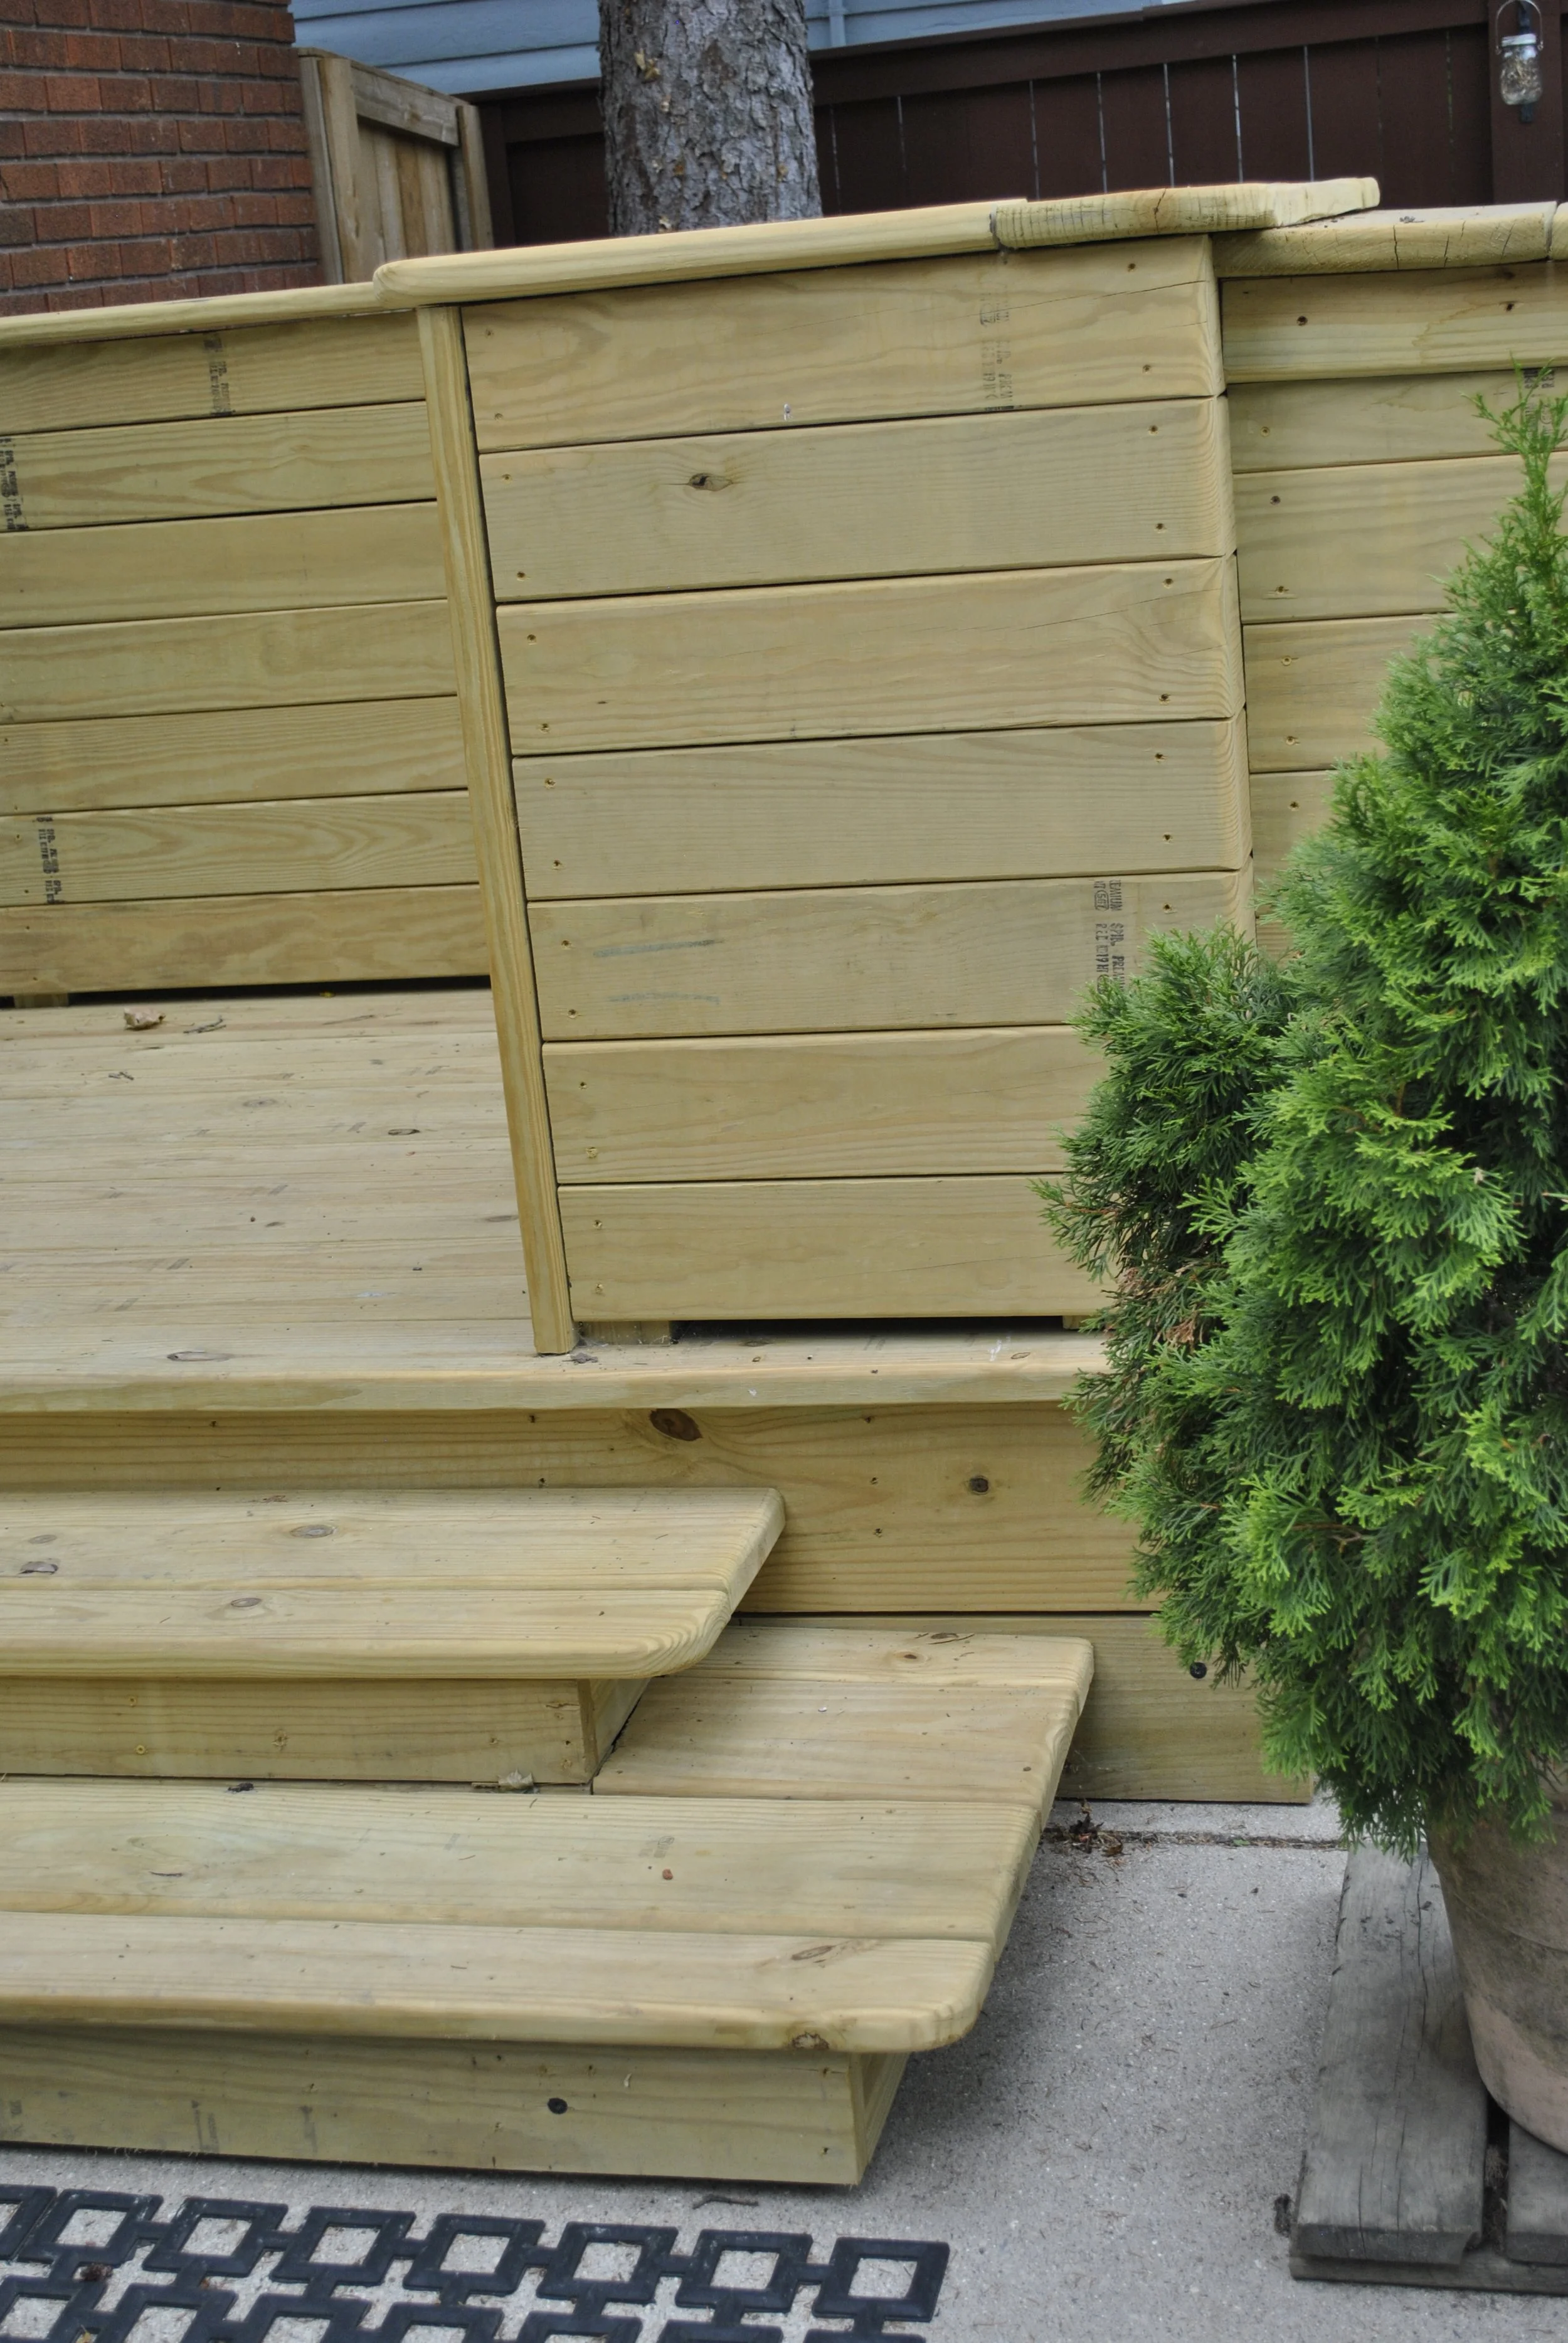
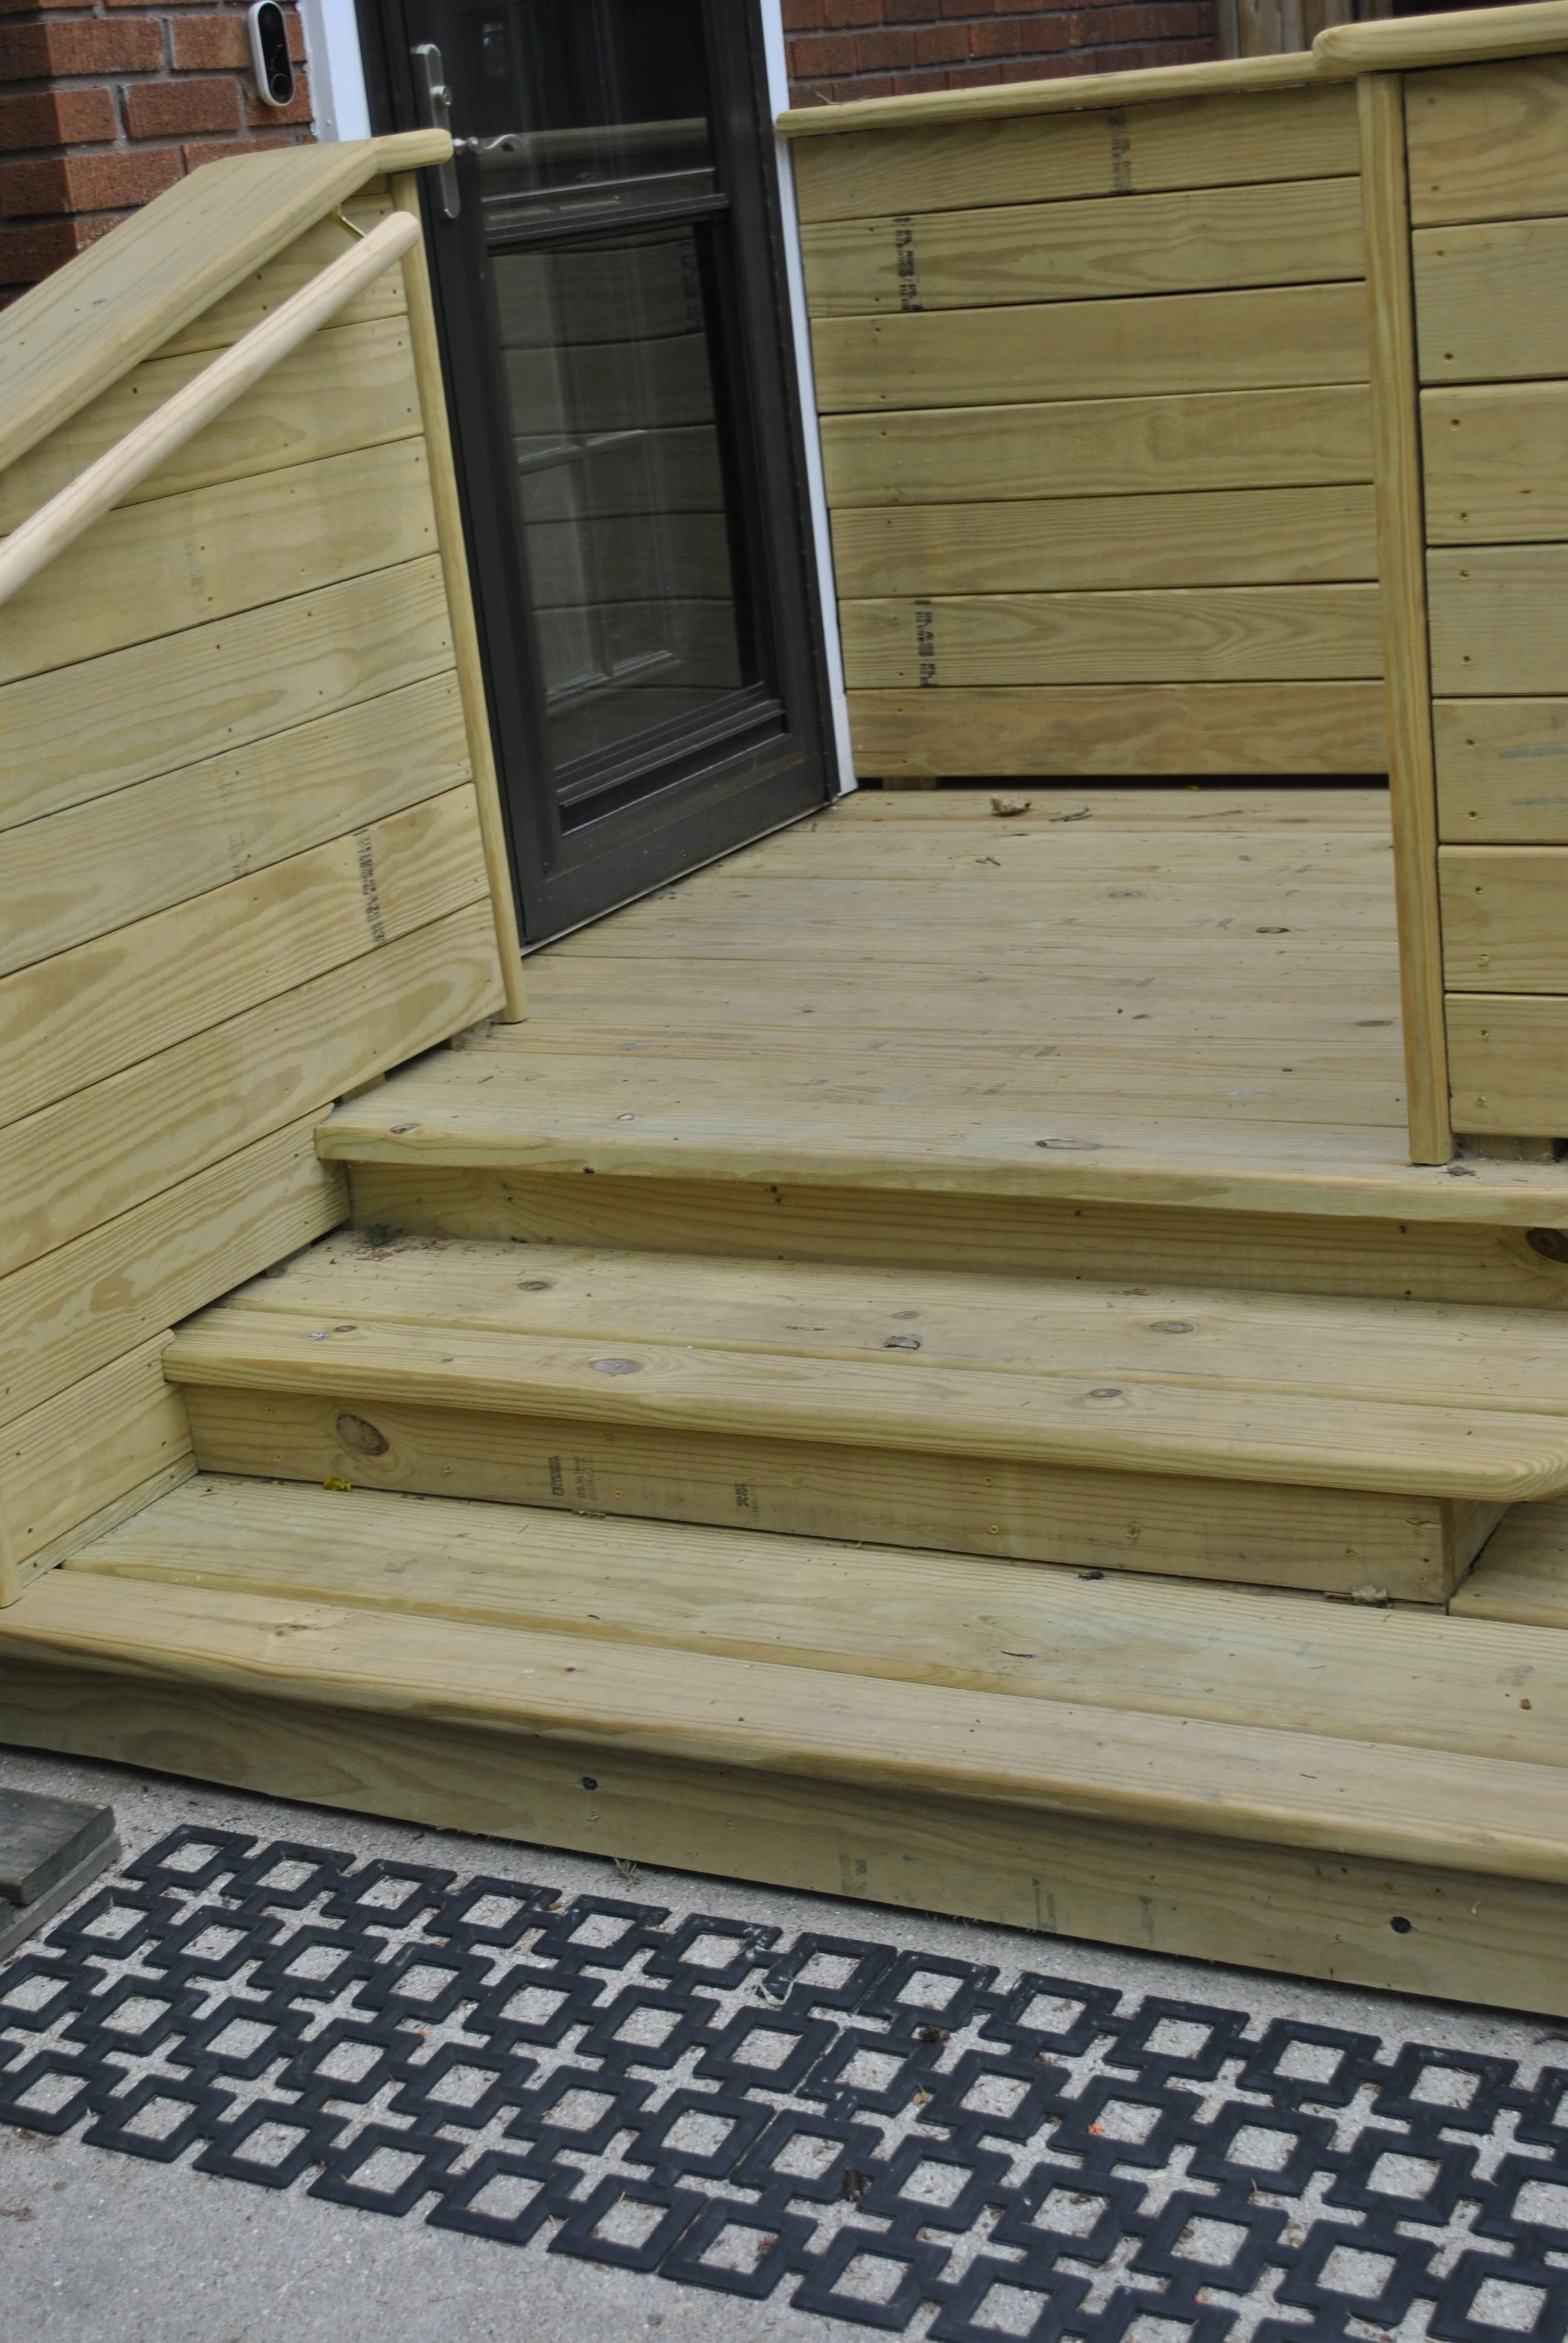
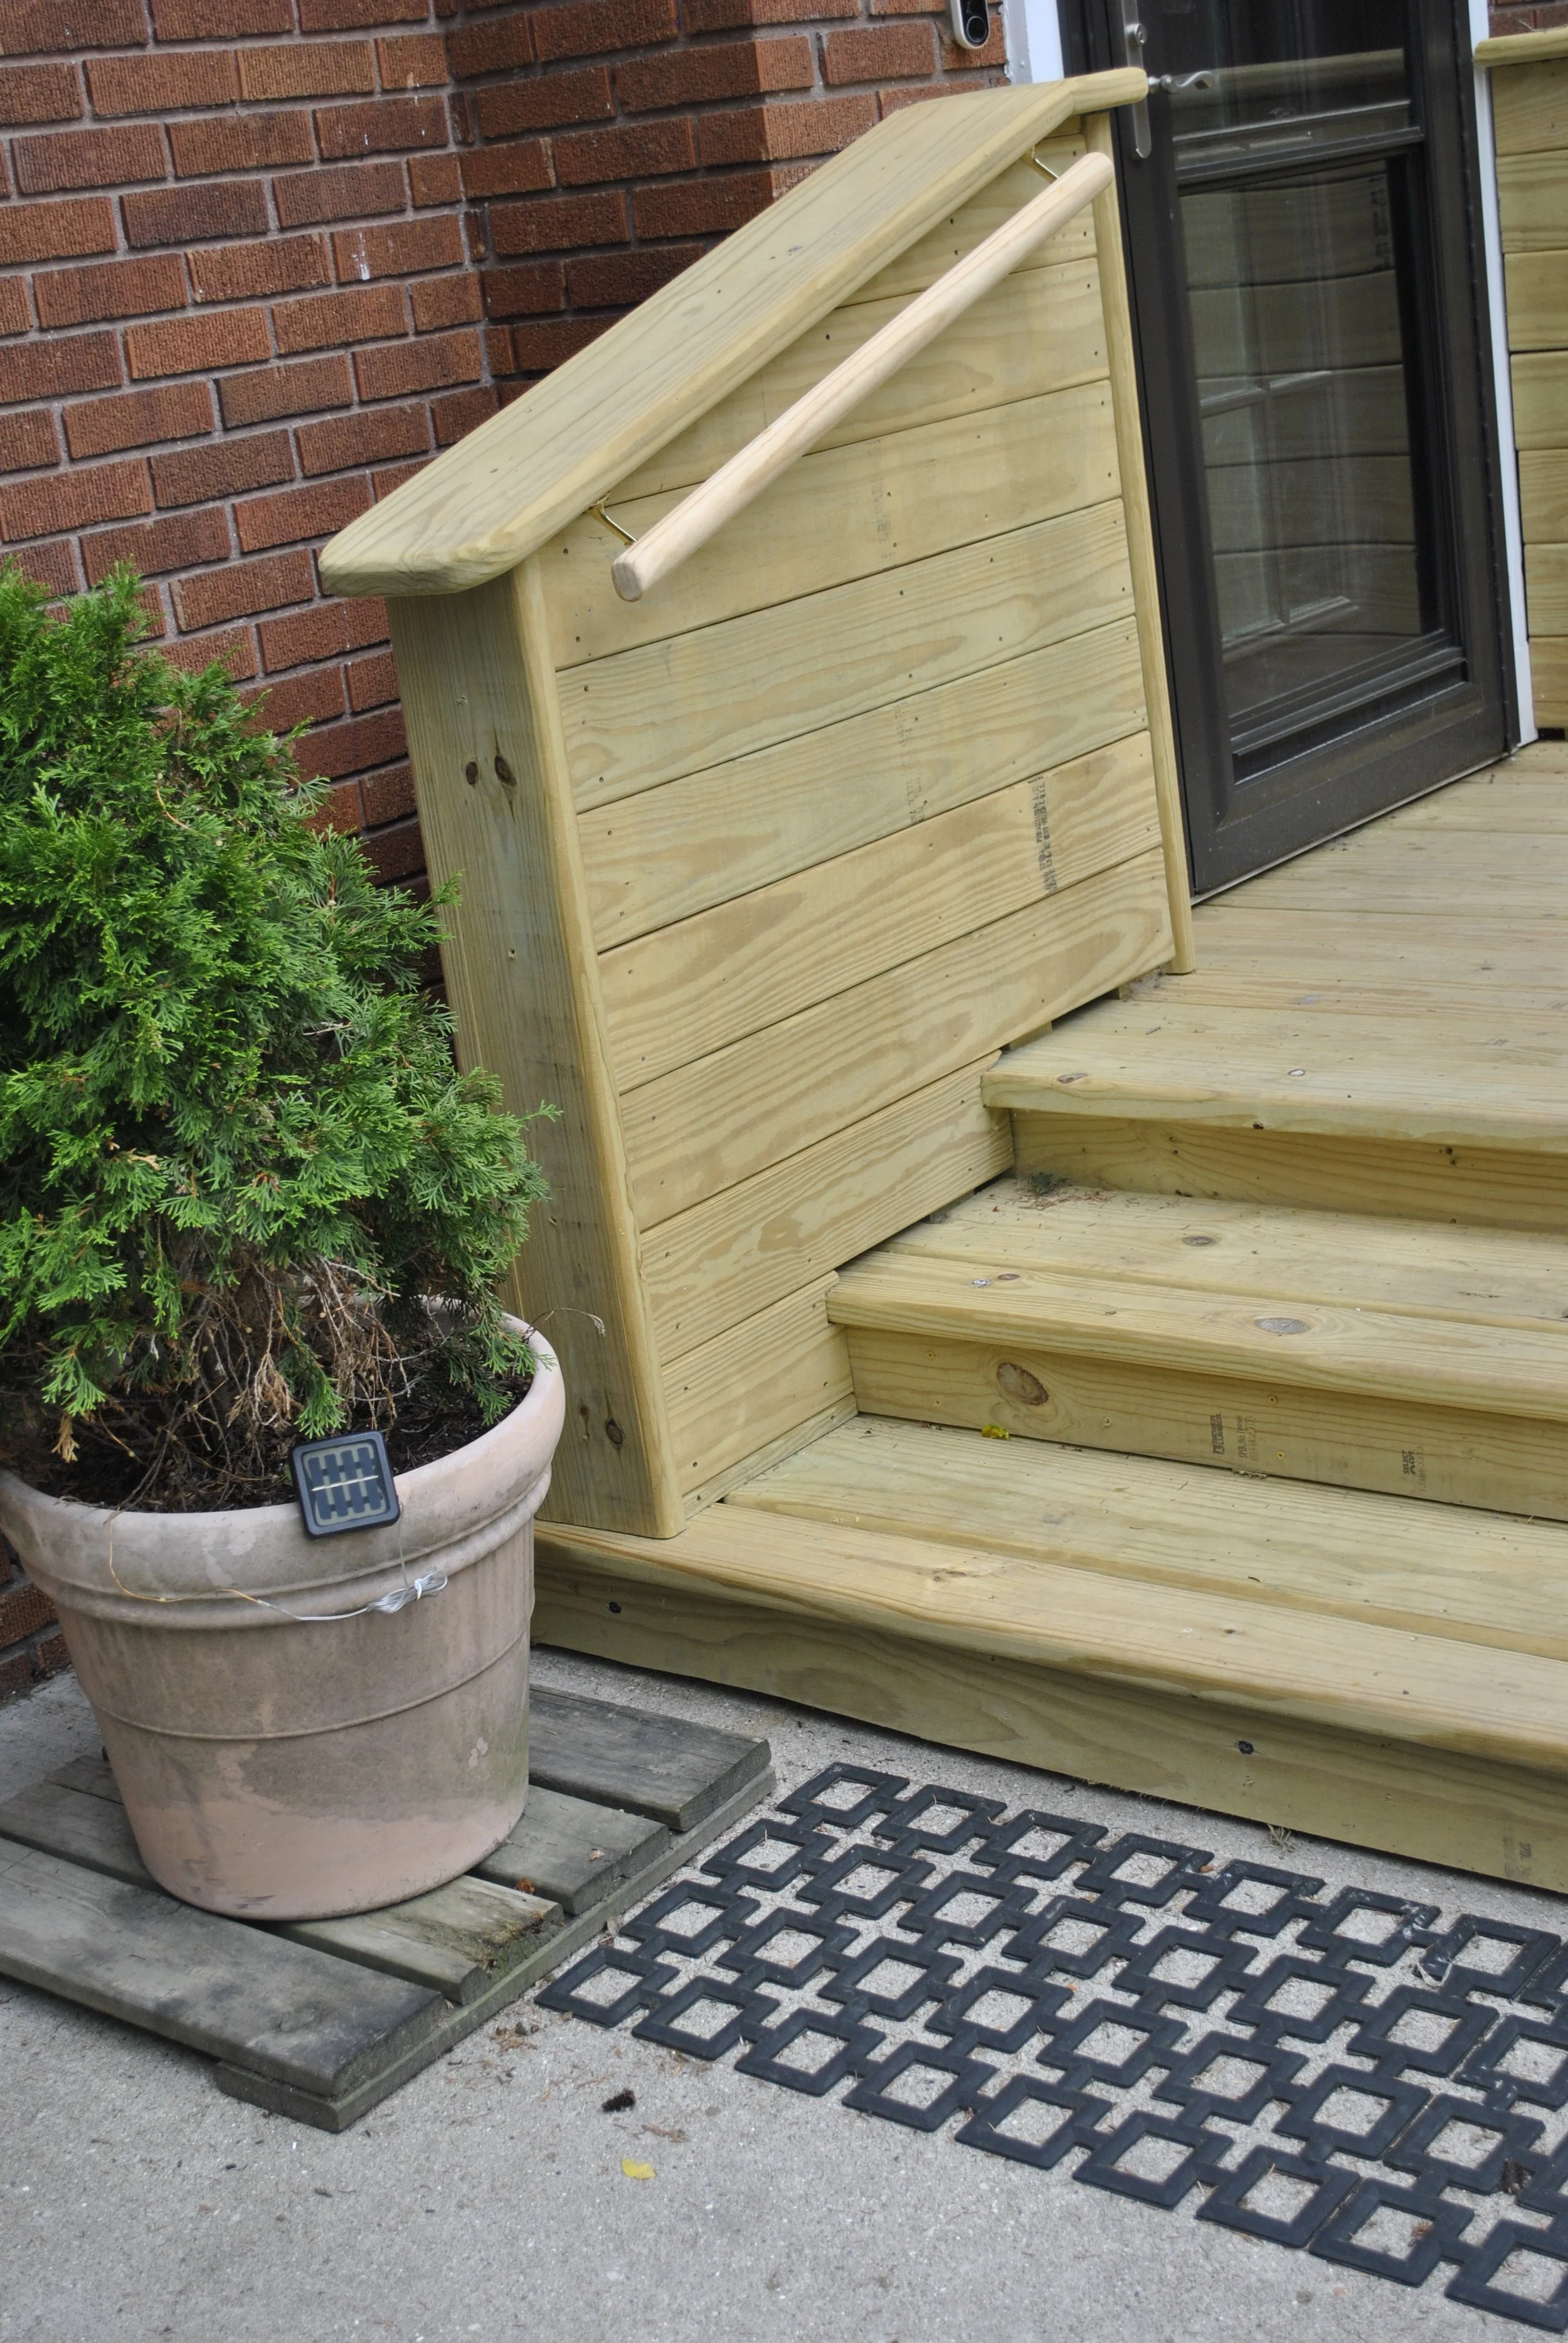
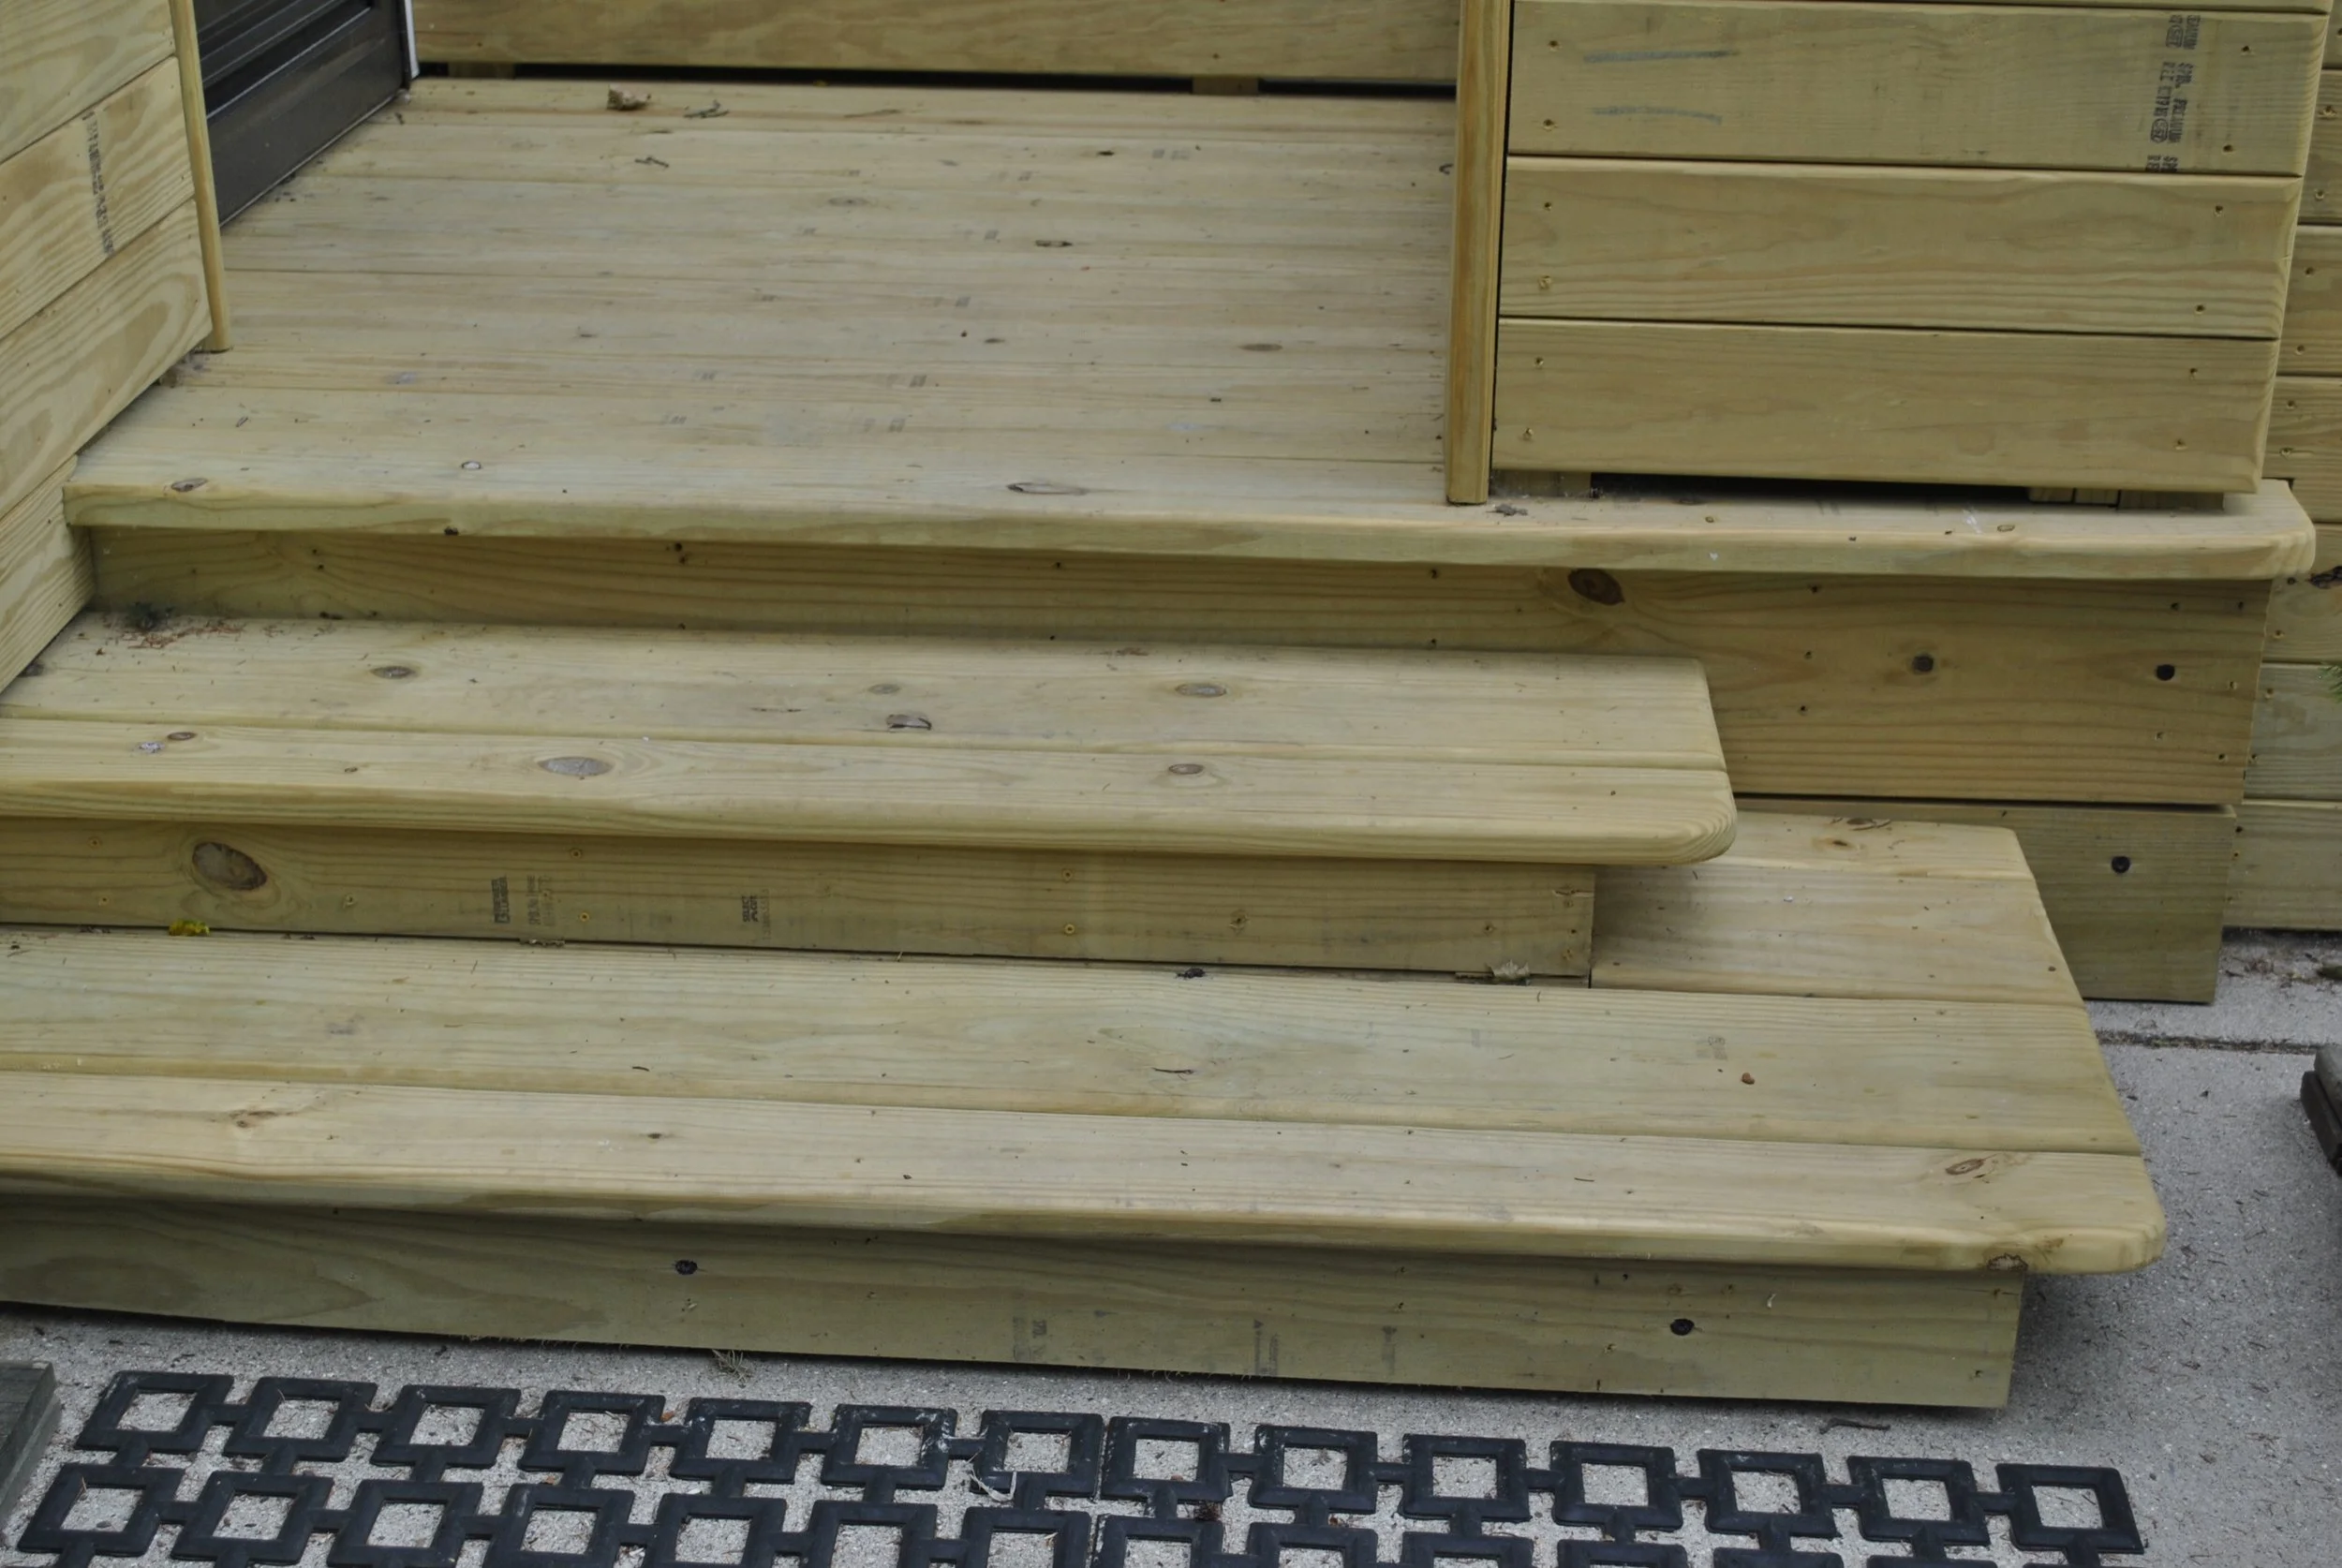
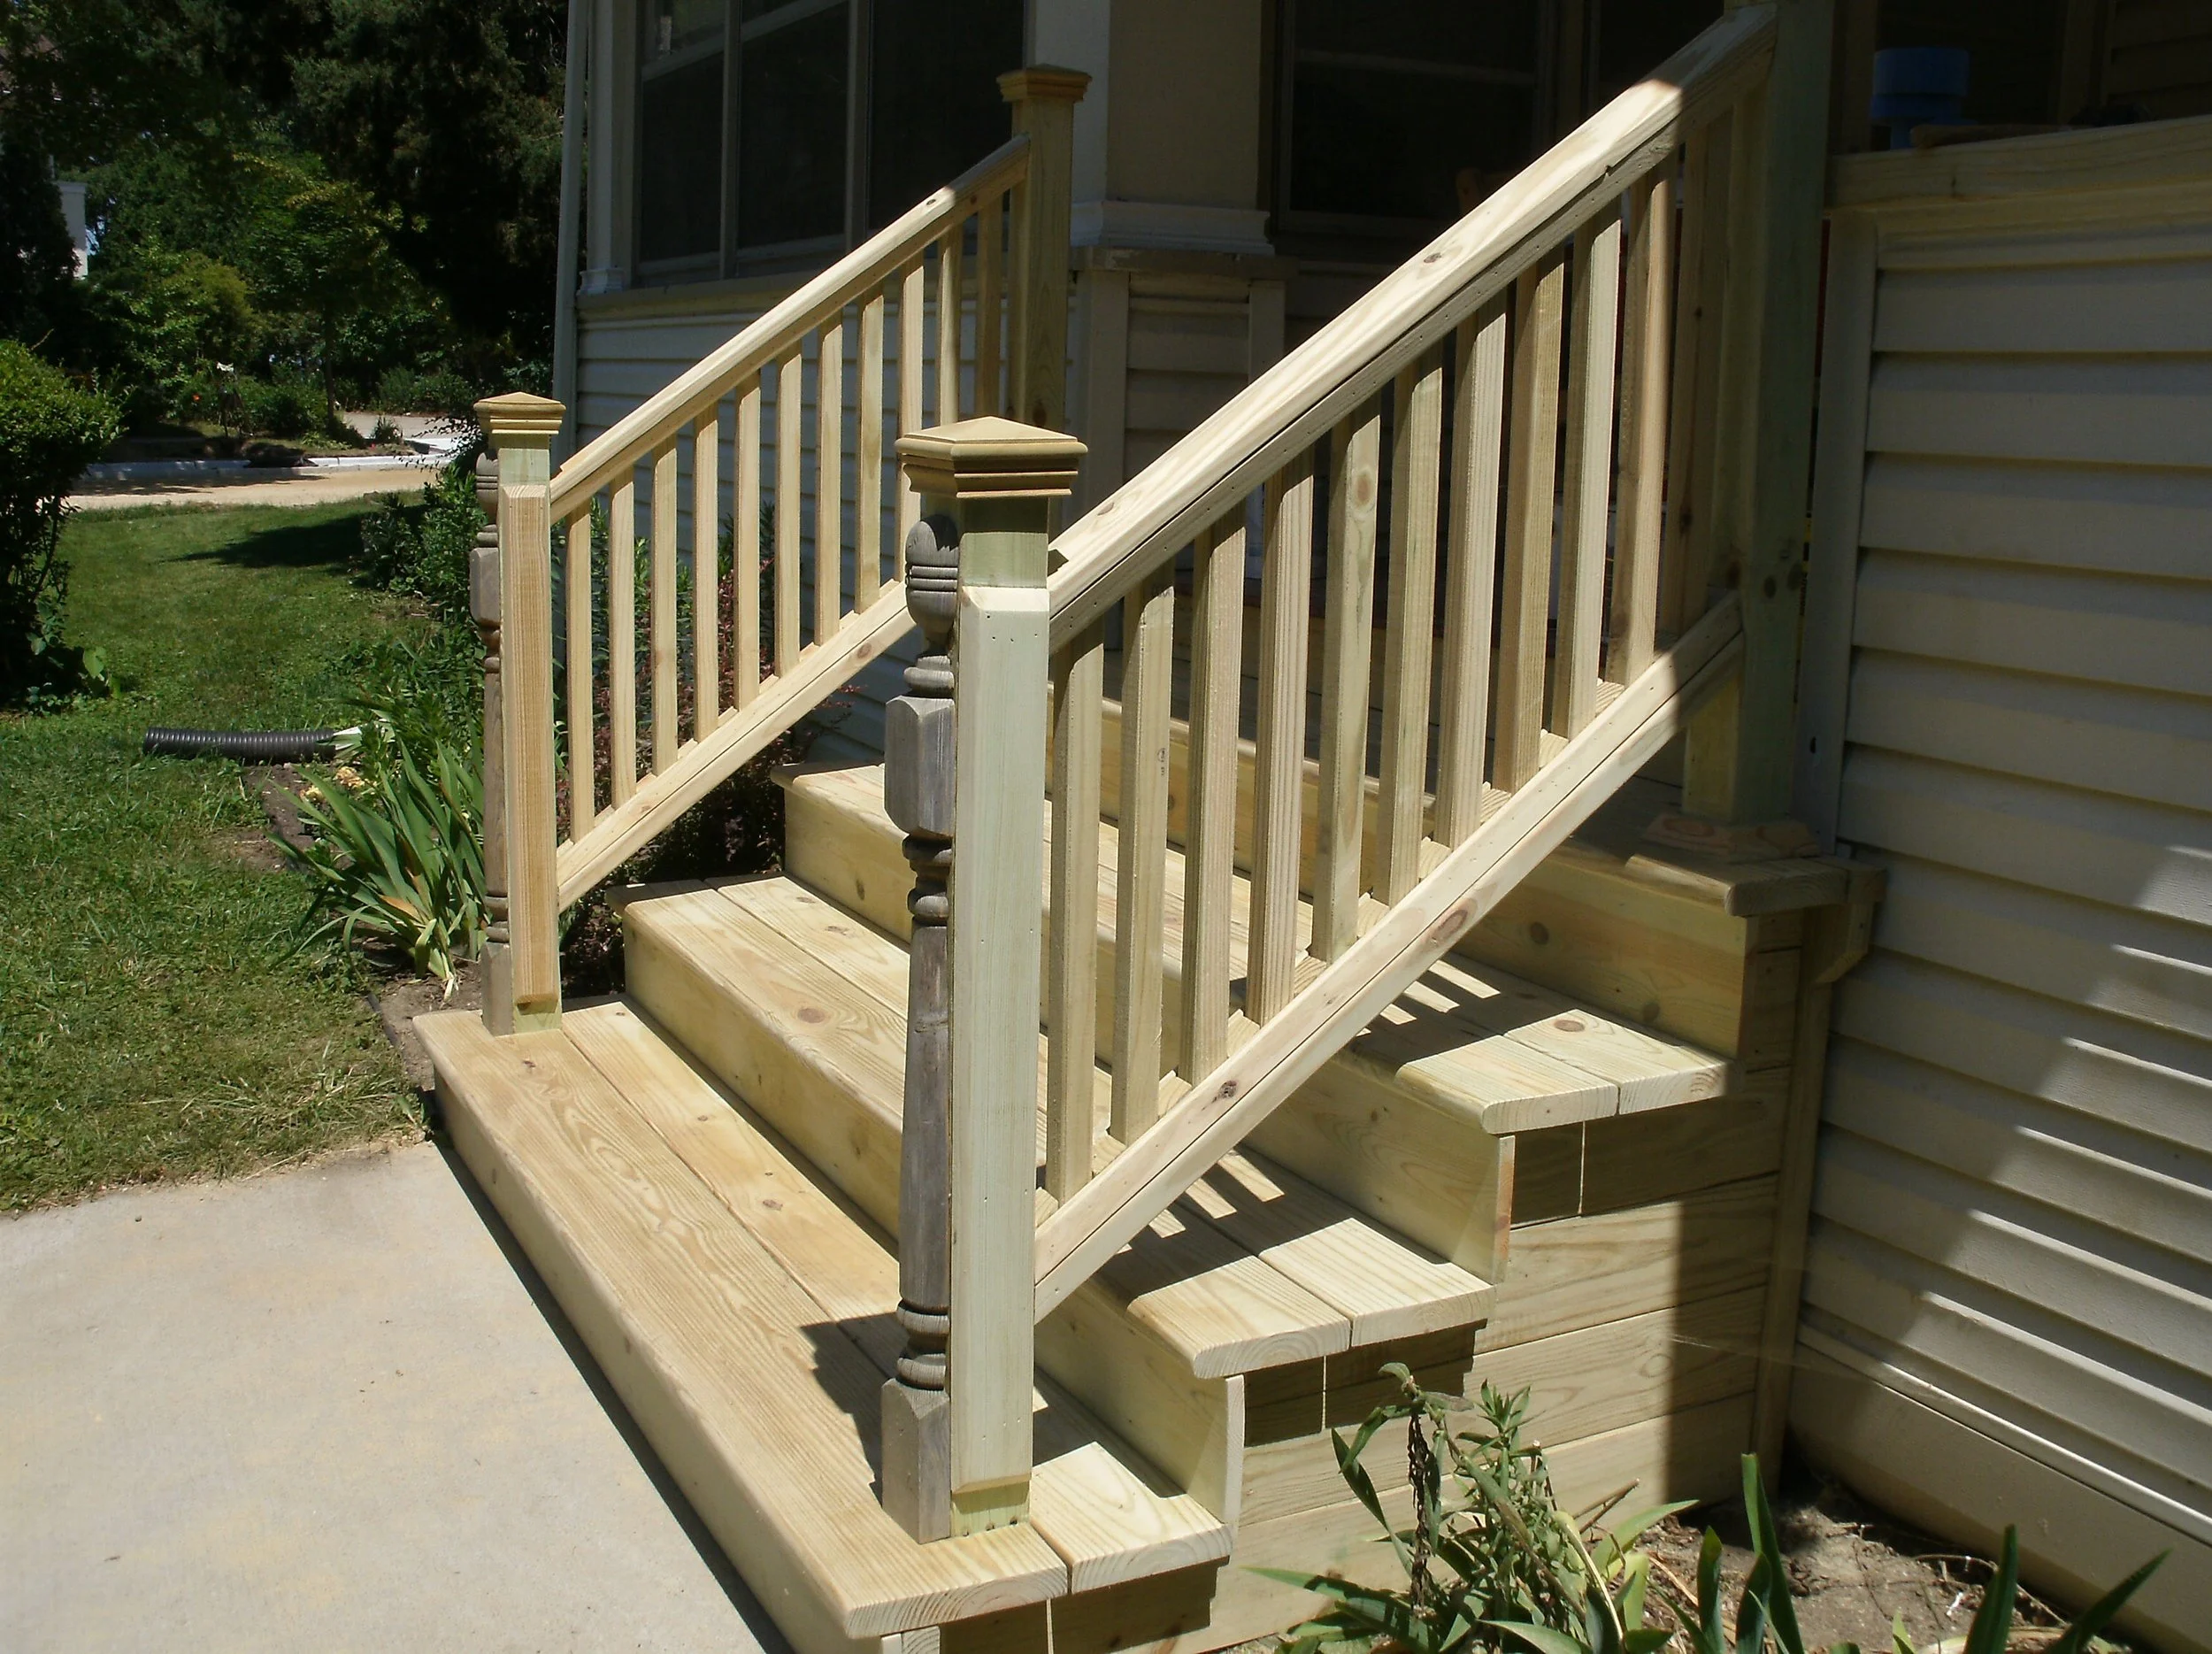
Rugby Row Porch
This replaced a decomposing plywood covered porch. It needed to be replaced. As we first discussed this, it was just to be a simple porch with rails and then adding the firewood storage function became obvious. Additionally, the porch grew to add a built-in bench. I put in the support posts and joists, set the corner posts and used 2x6s to sheathe and strengthen the structure. I built in the bench and the firewood storage rack. I stained it months later.
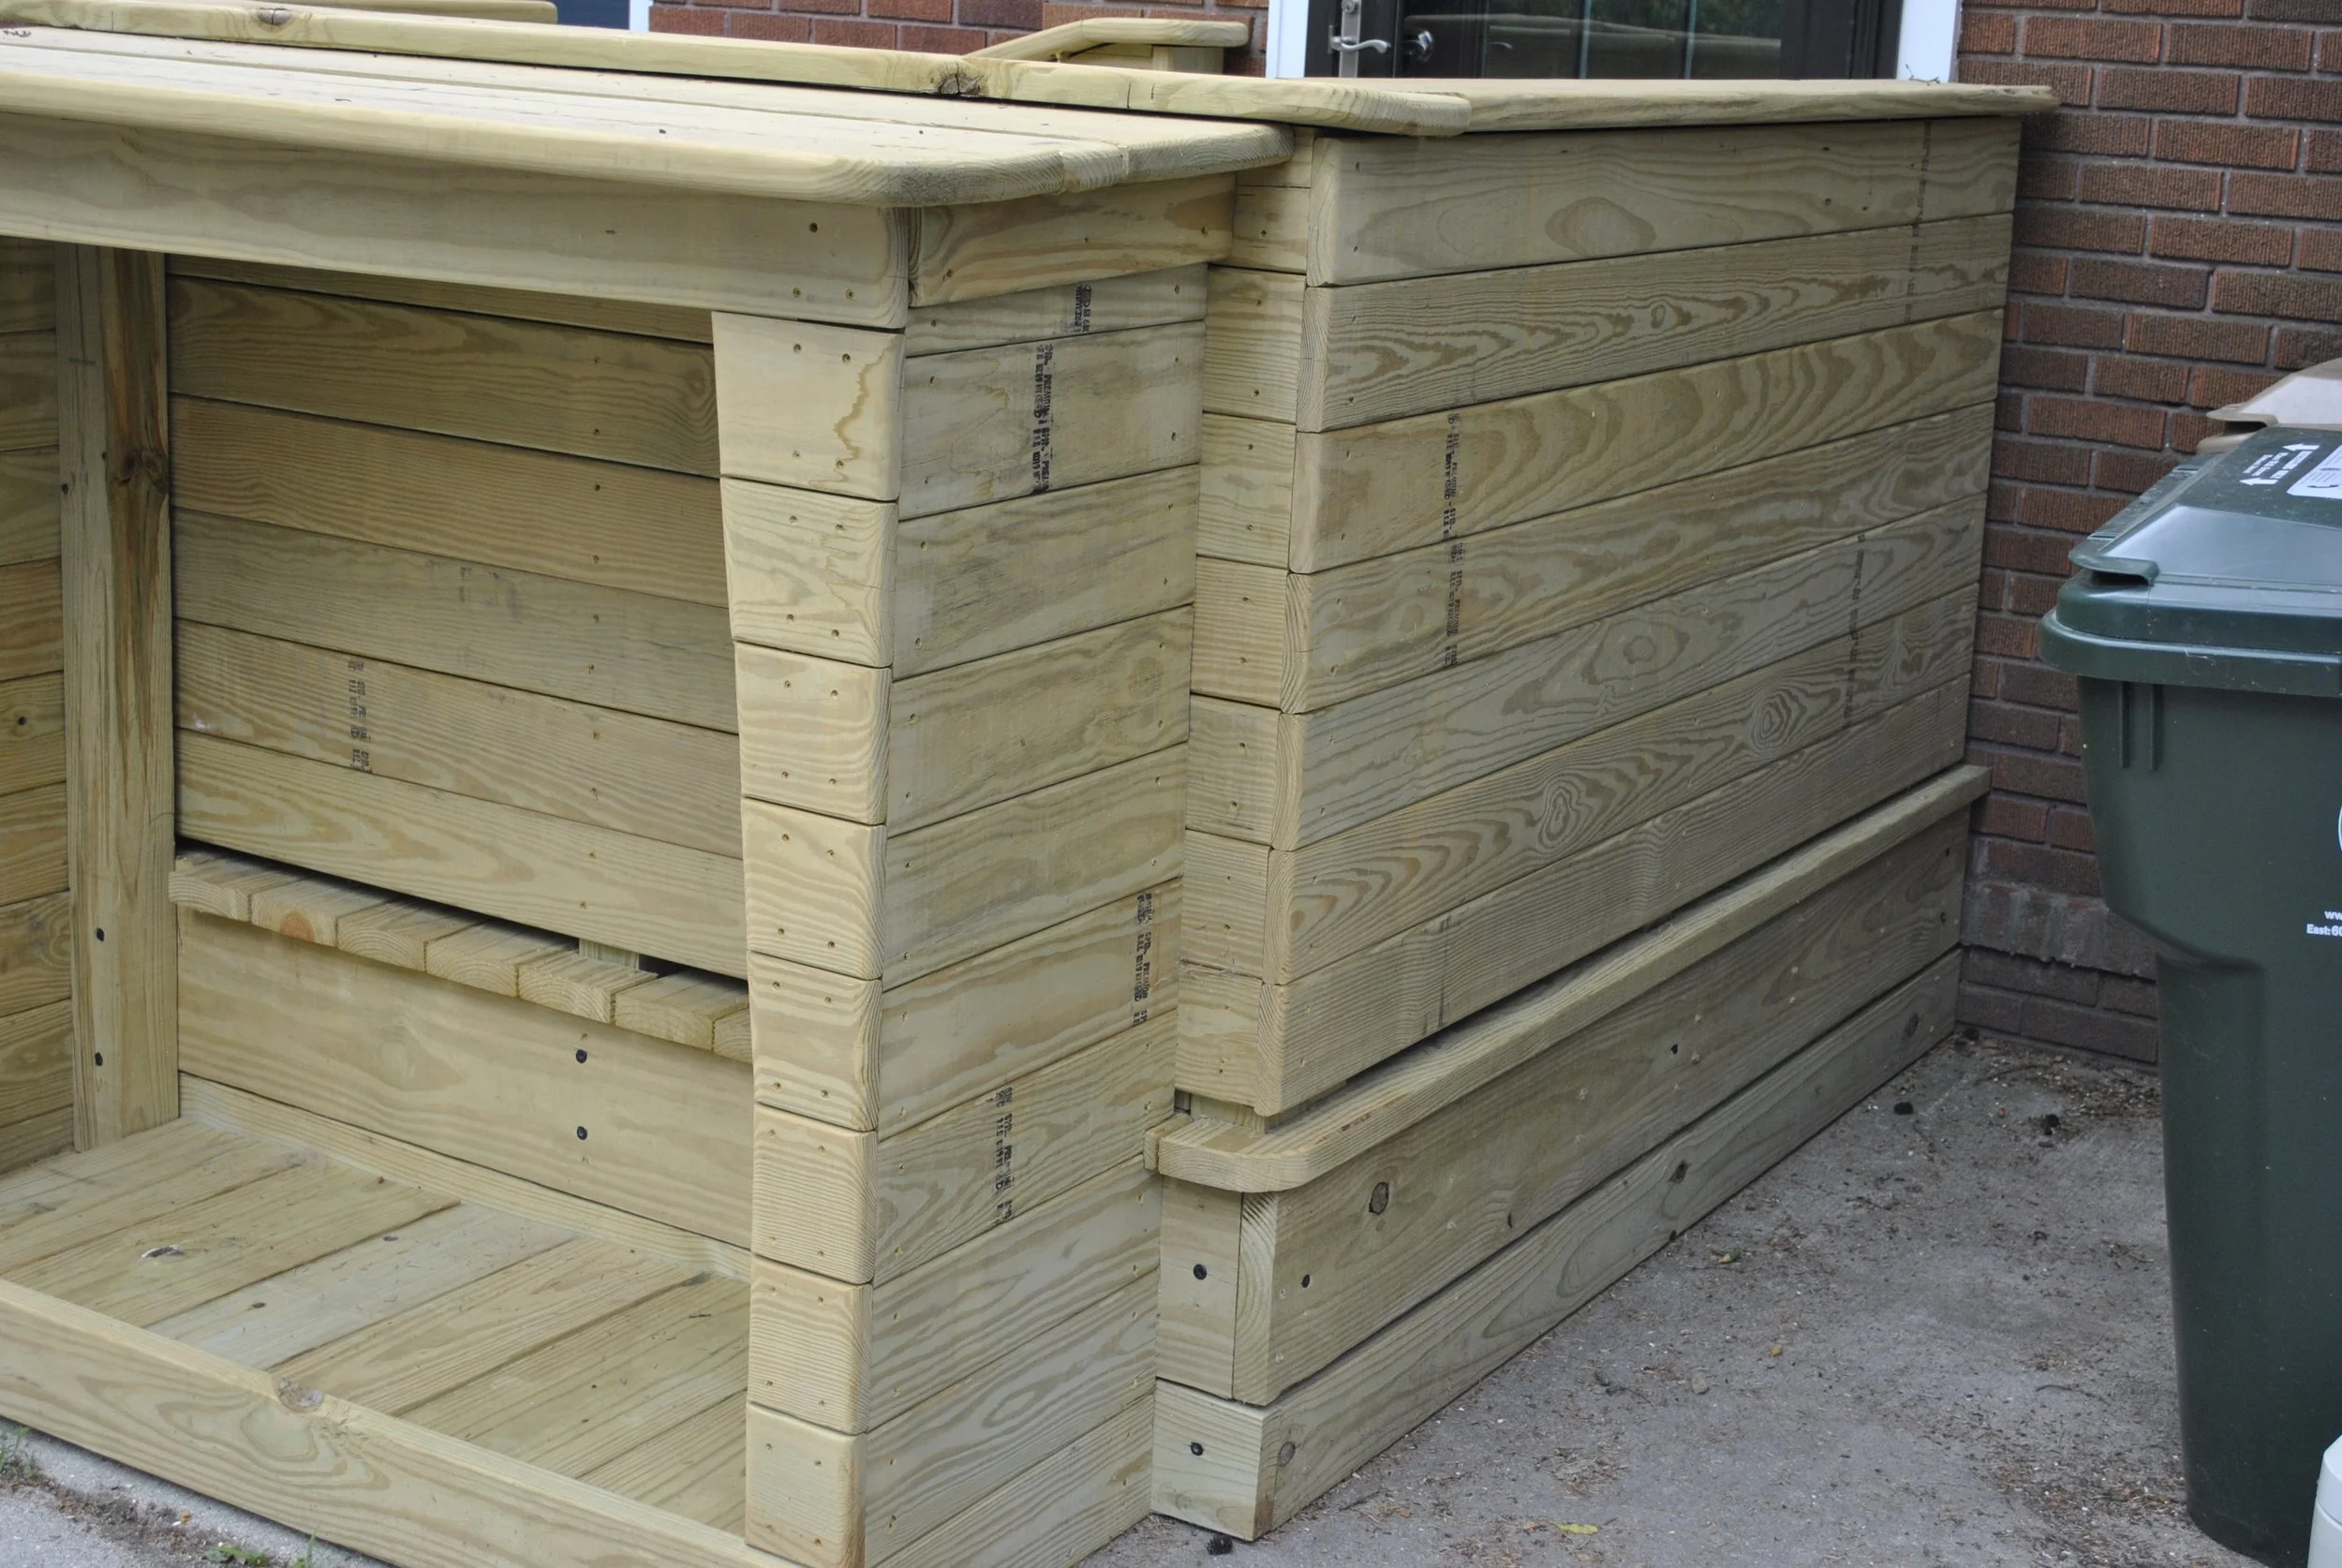
View of the wood storage and the structure and decking details
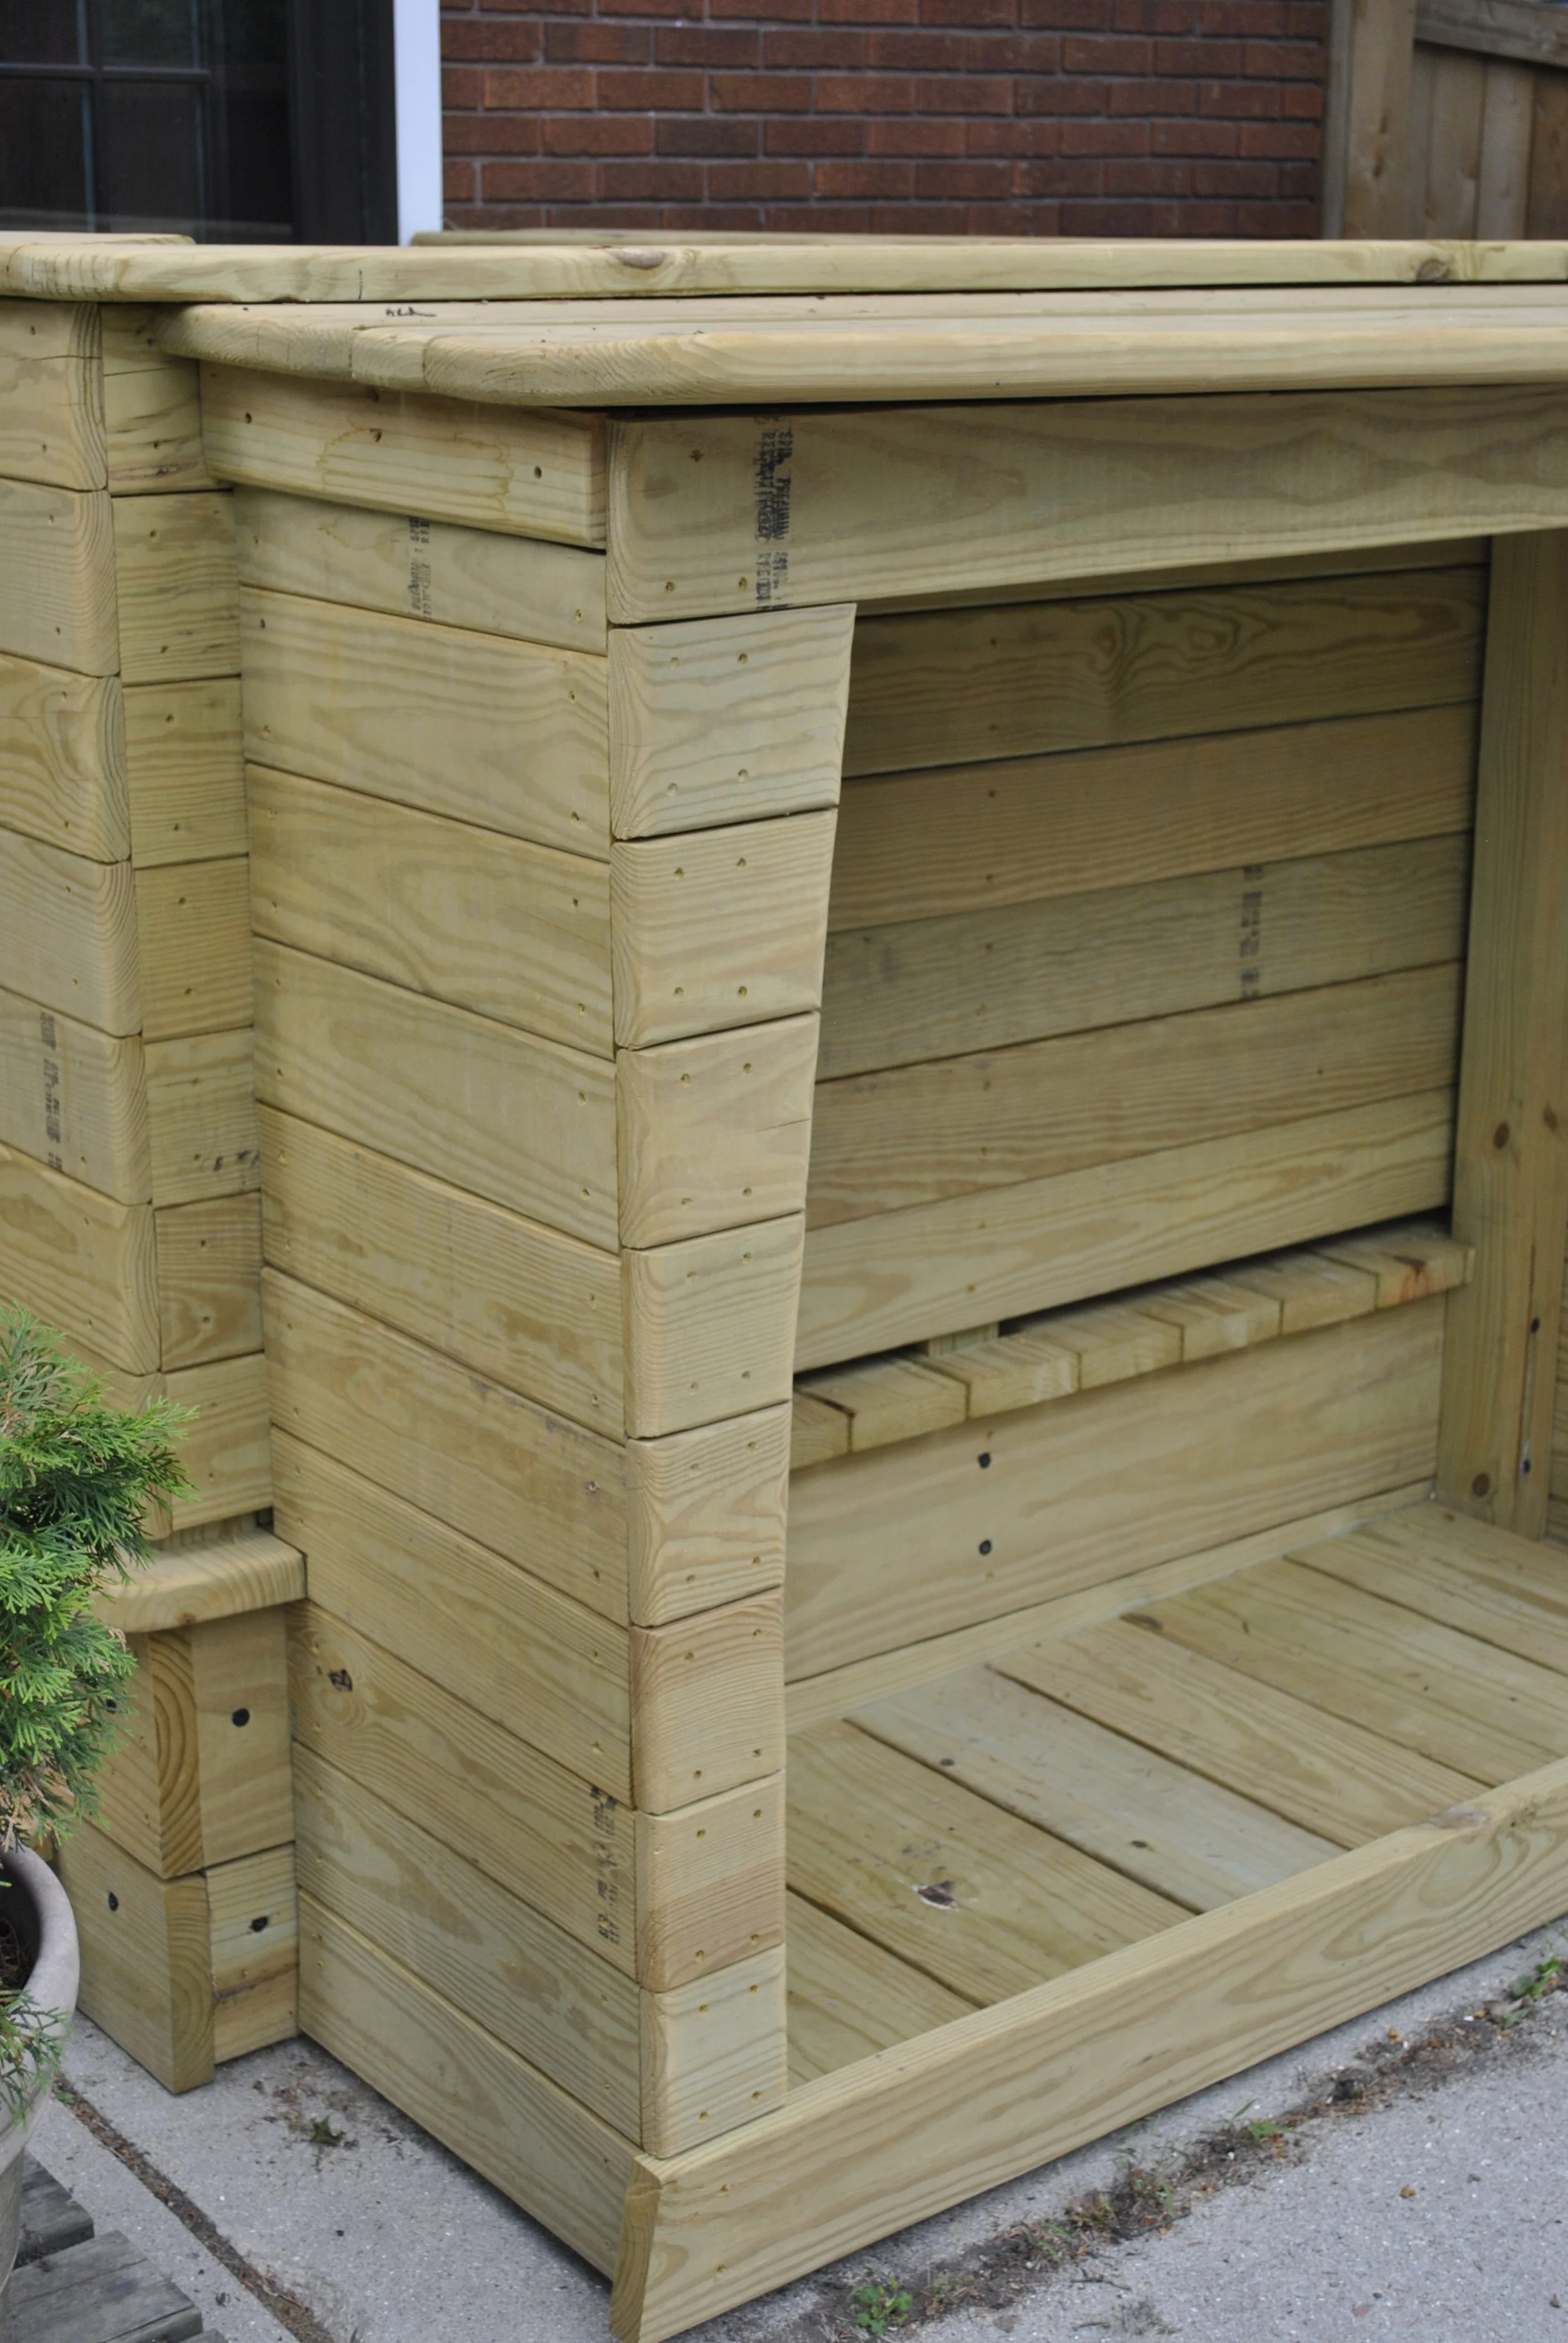
View from the other side
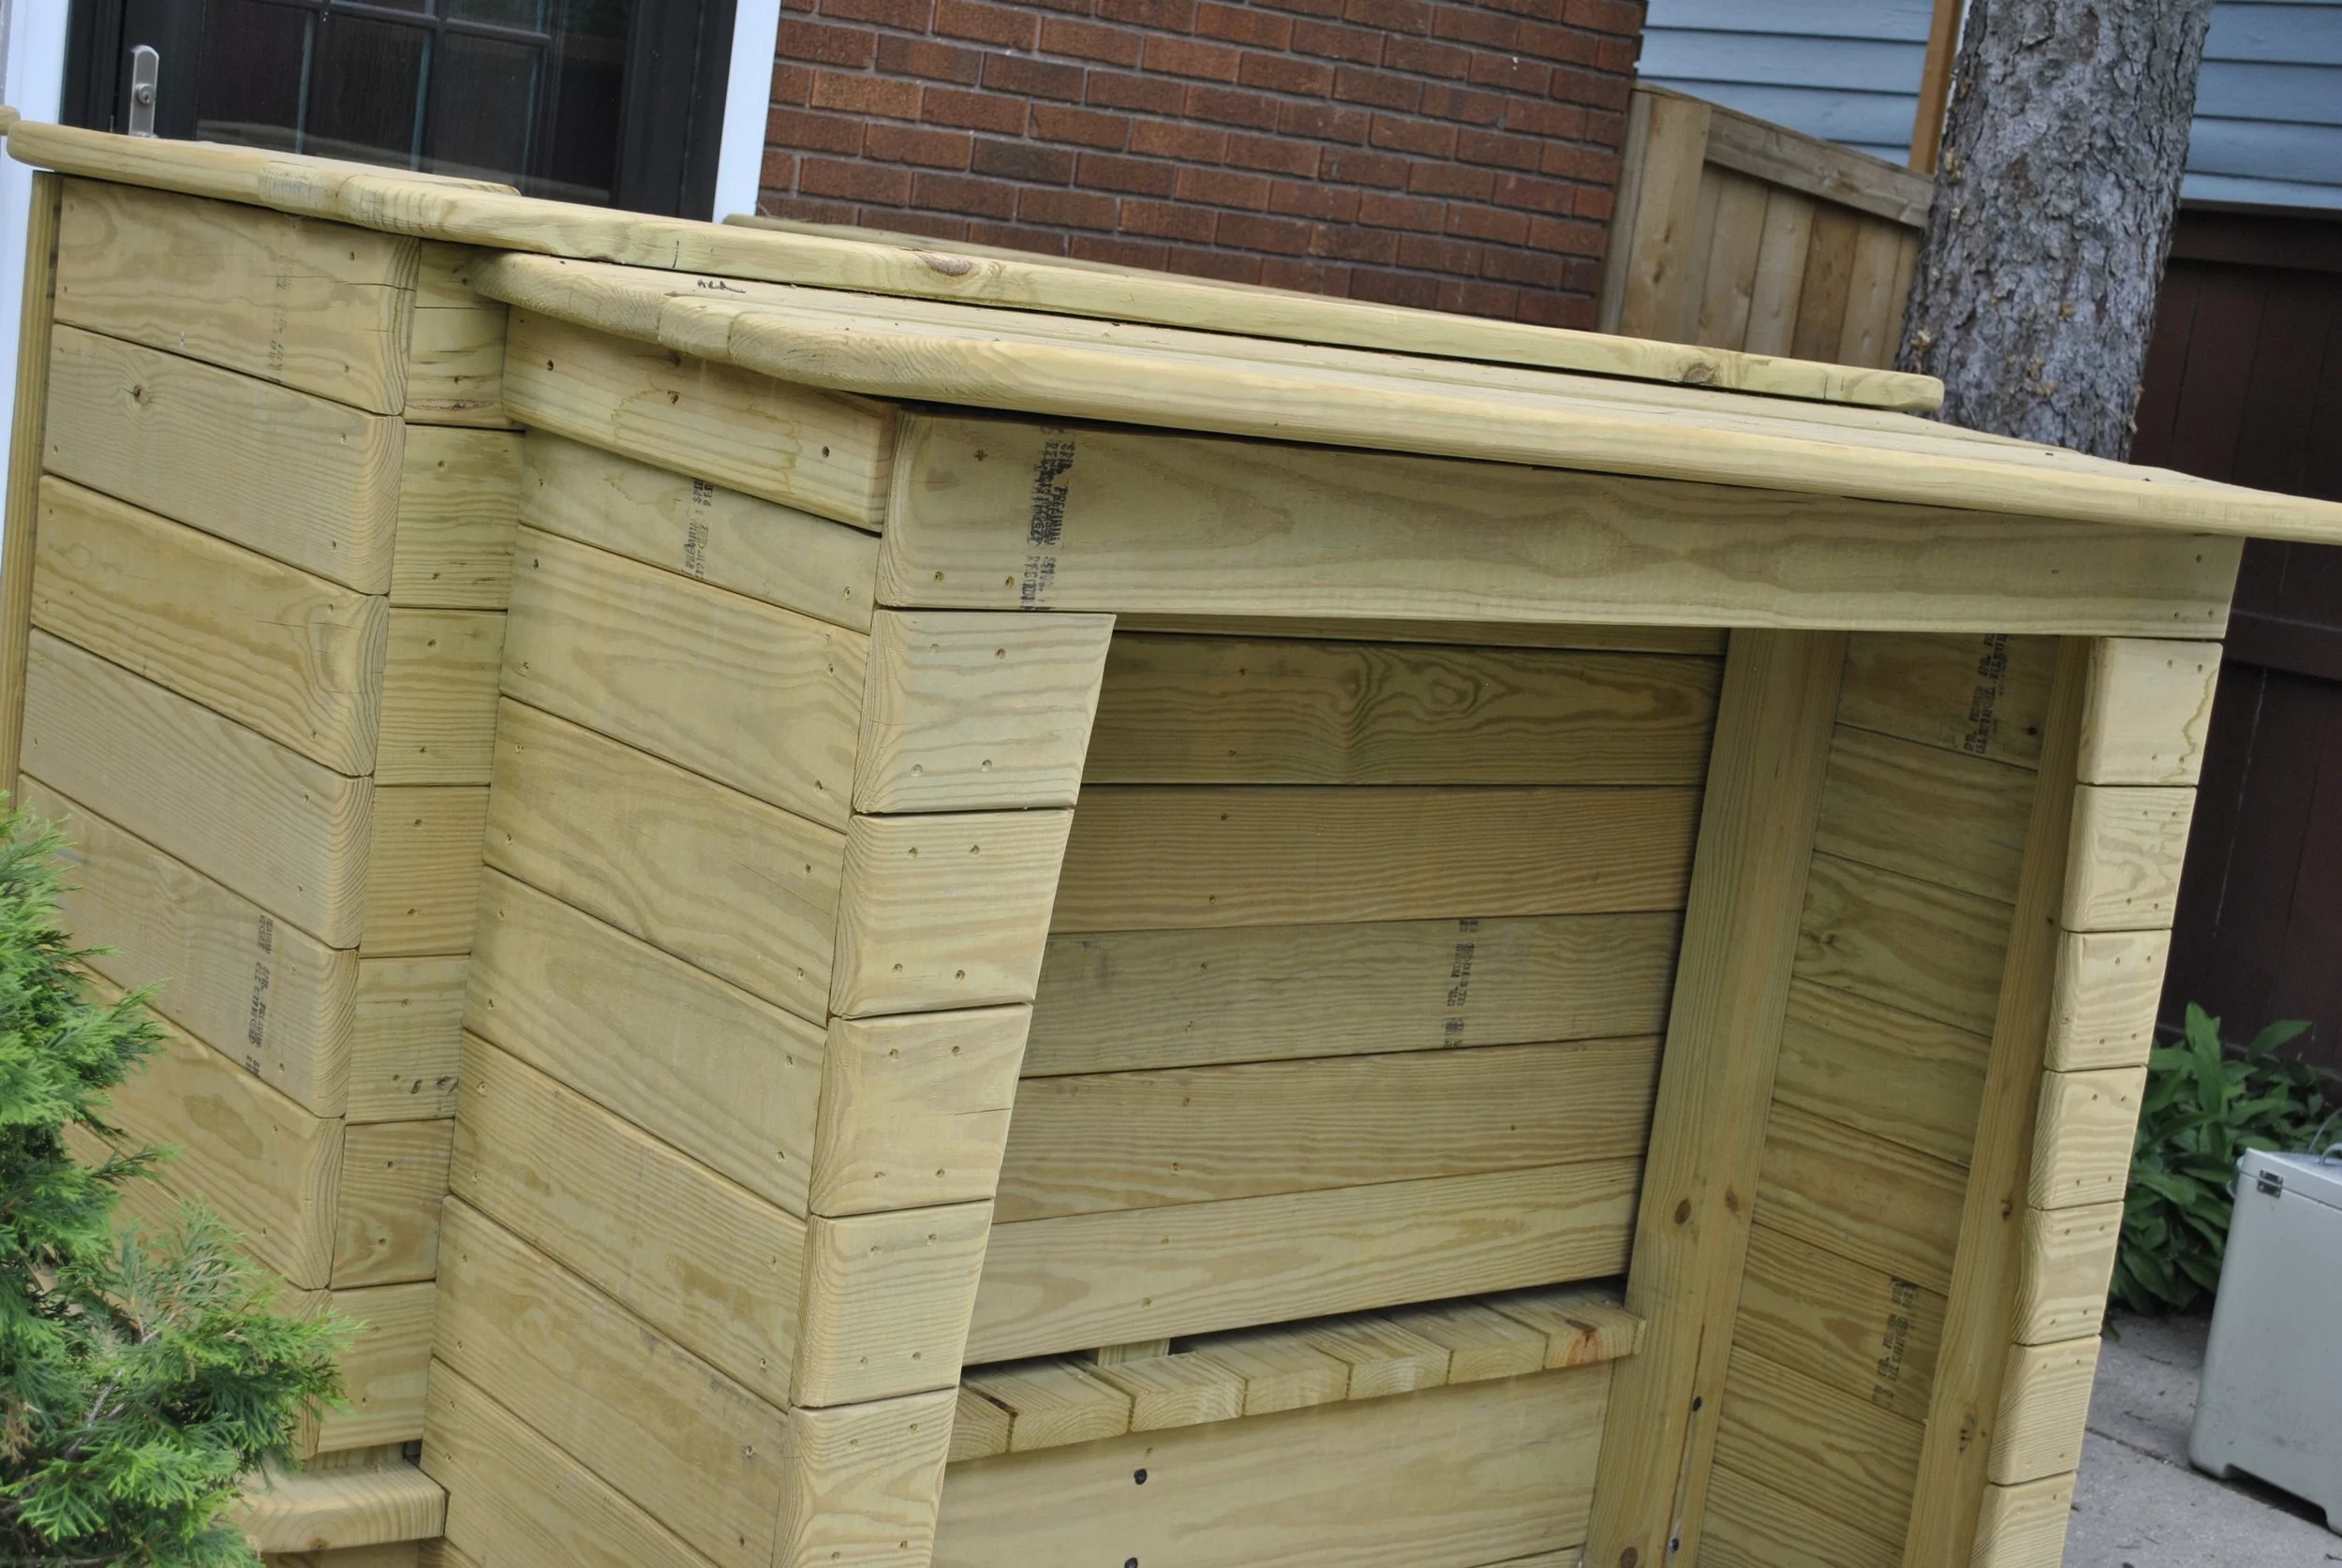
Another view. I like to shape wood to add design aspects to the plain structure
Side wall and stairs
Full stairs and entry to house
Wall with grippable hand rail

Another view
Details of stairs
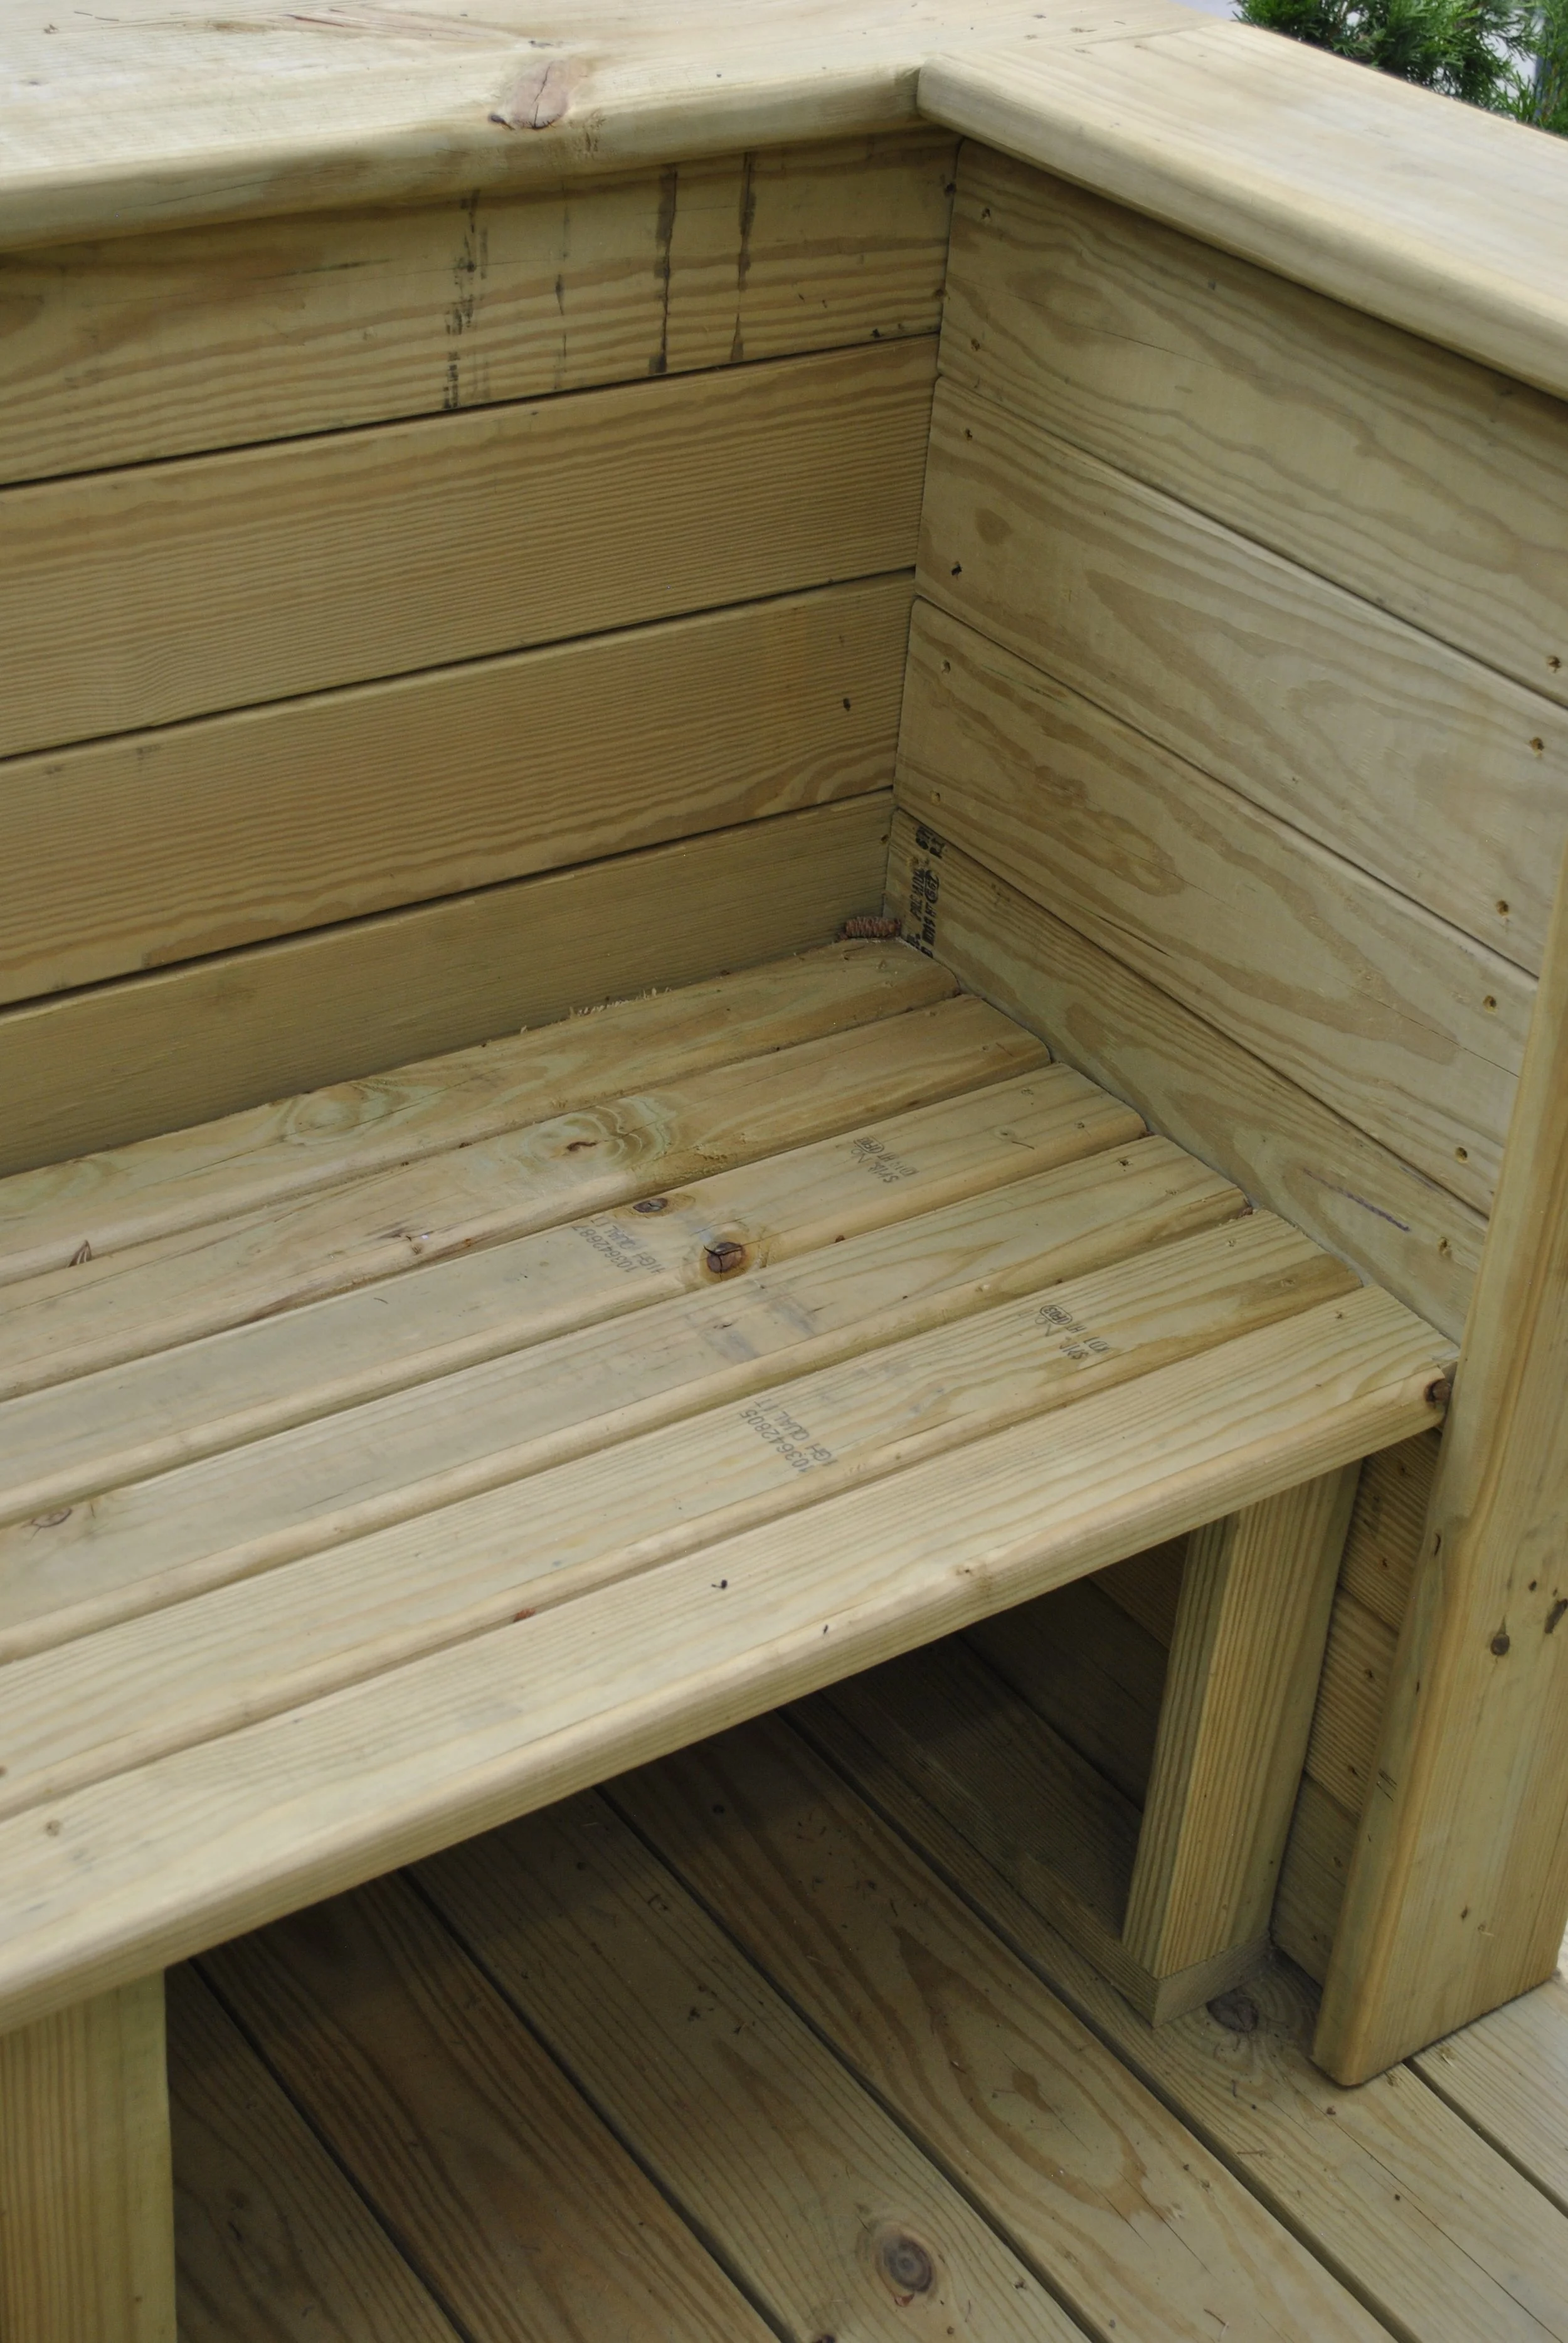
Deck built-in bench
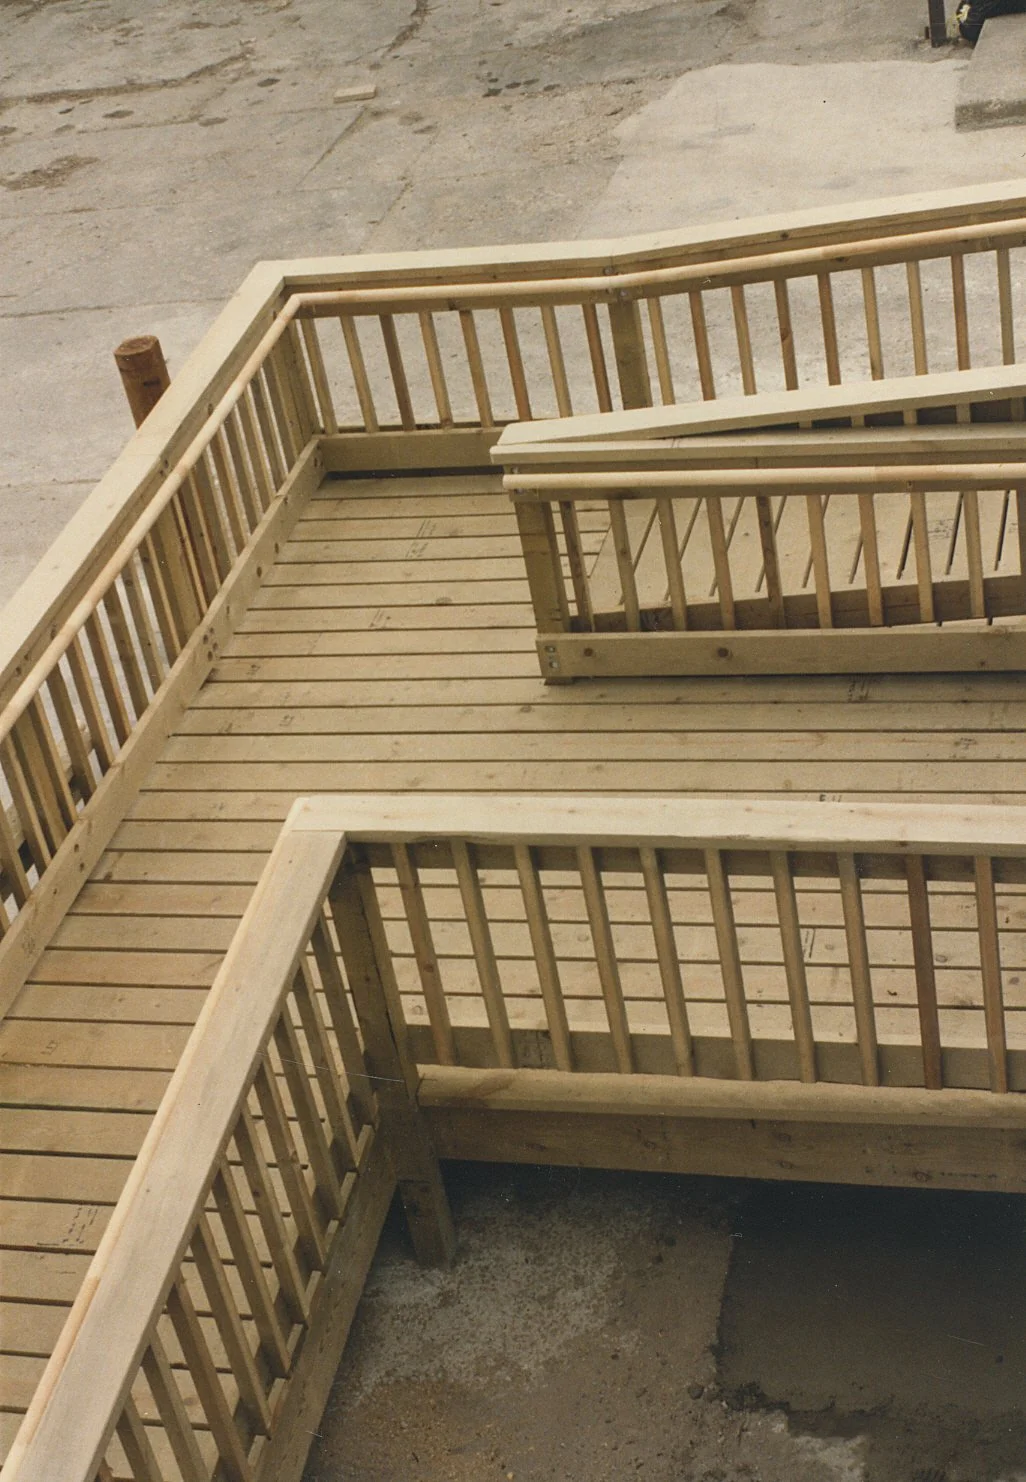
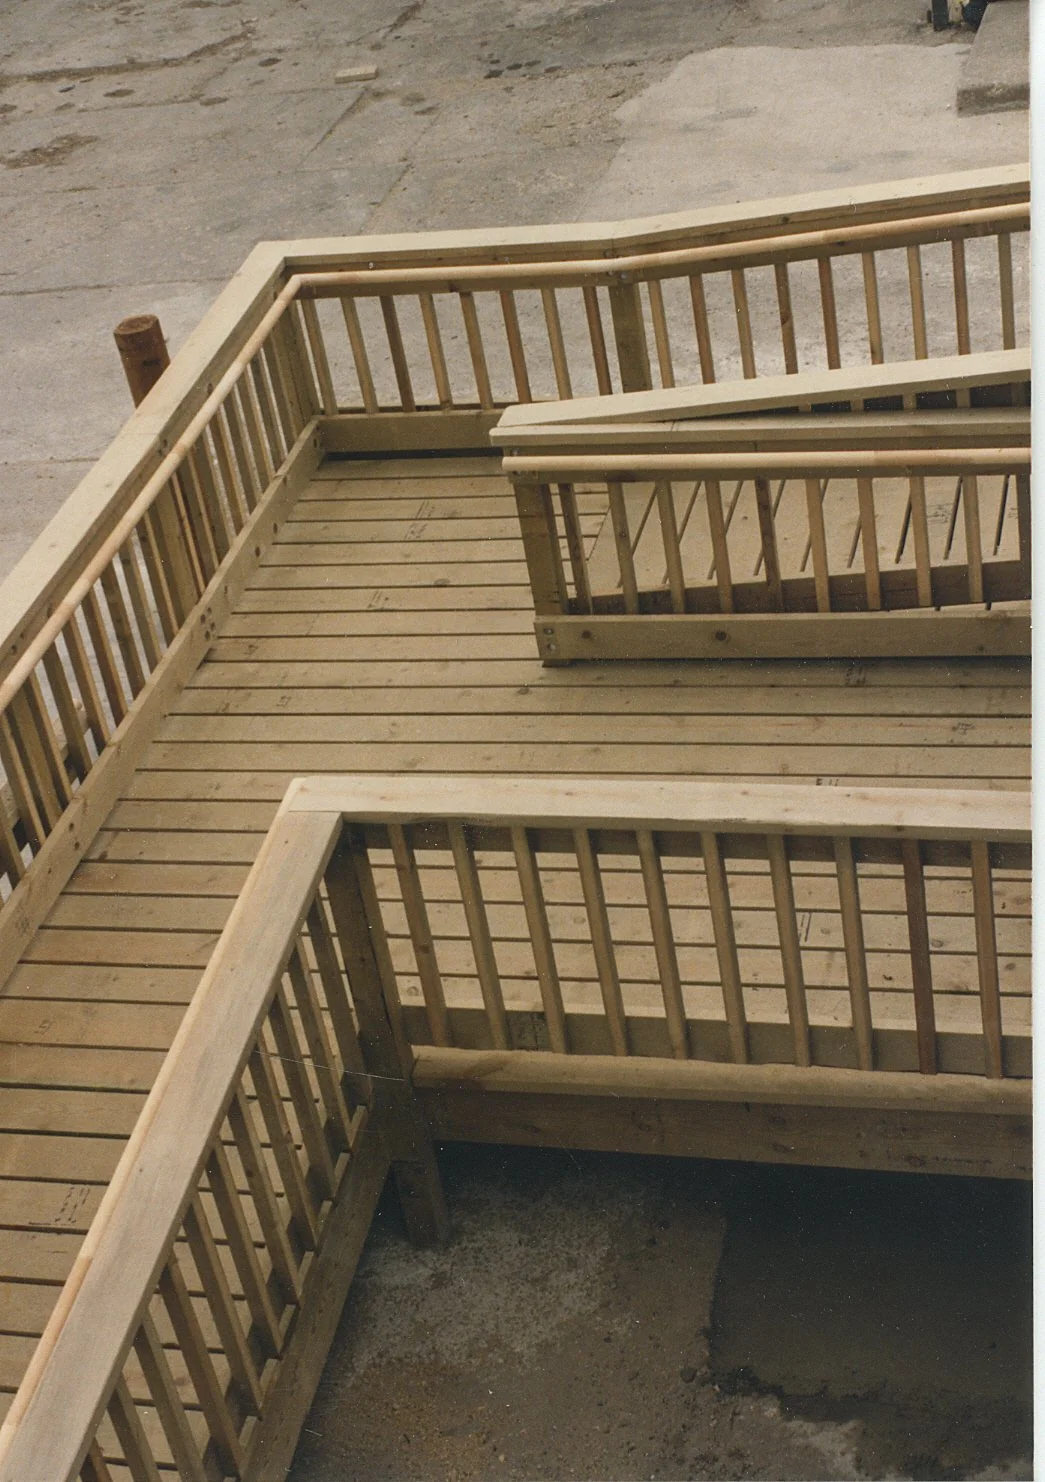
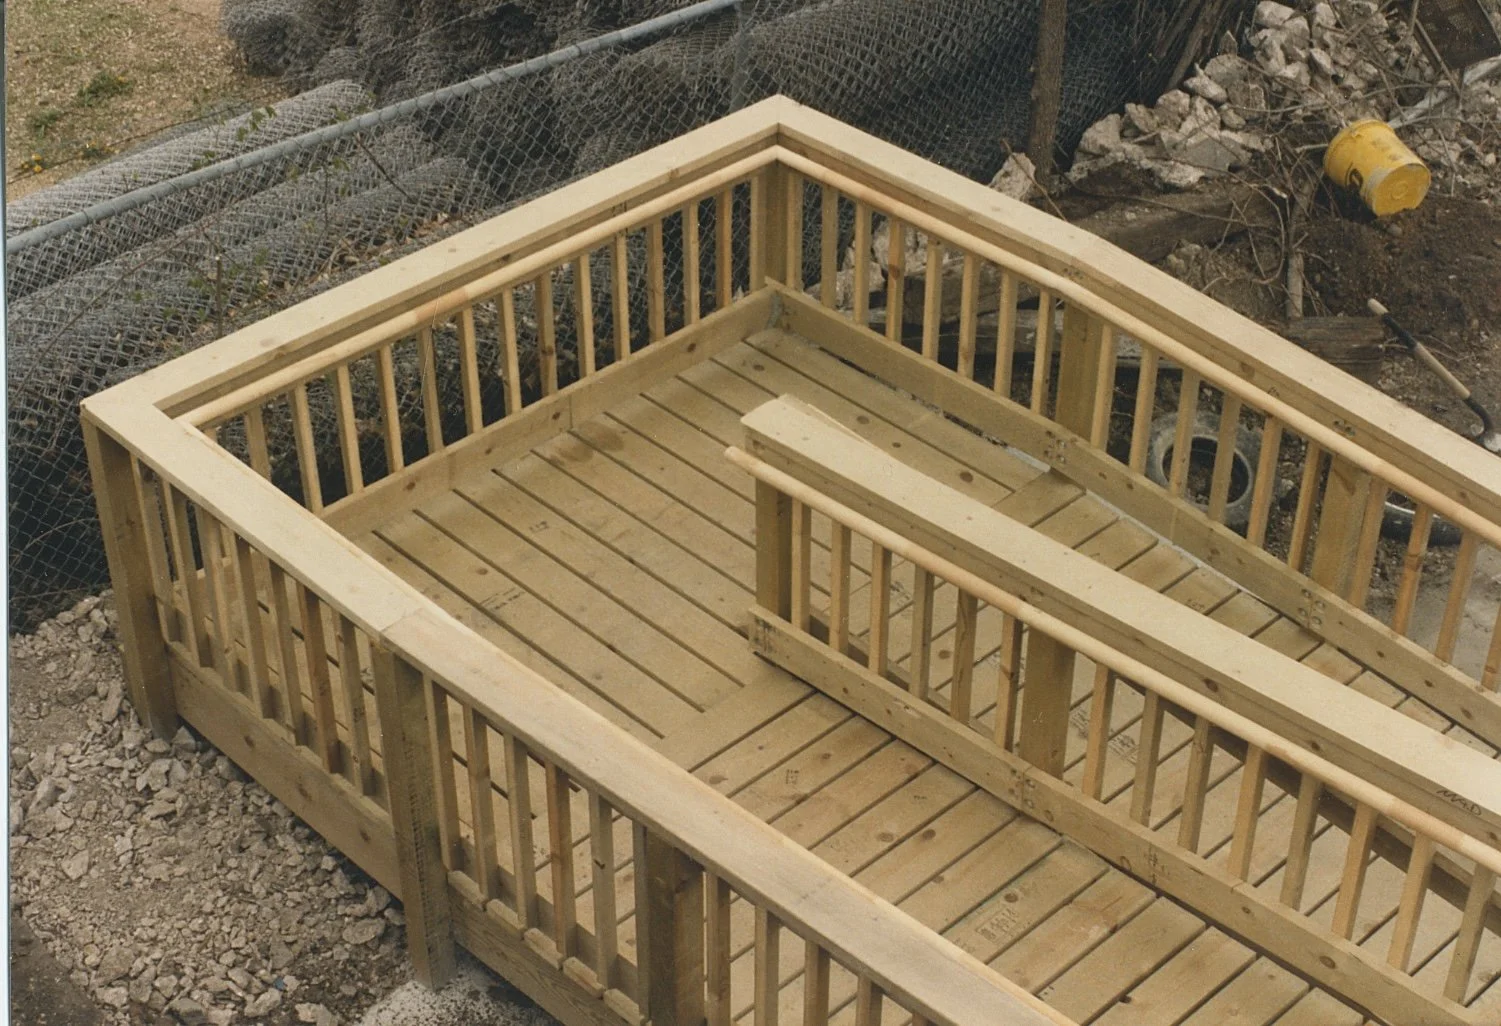
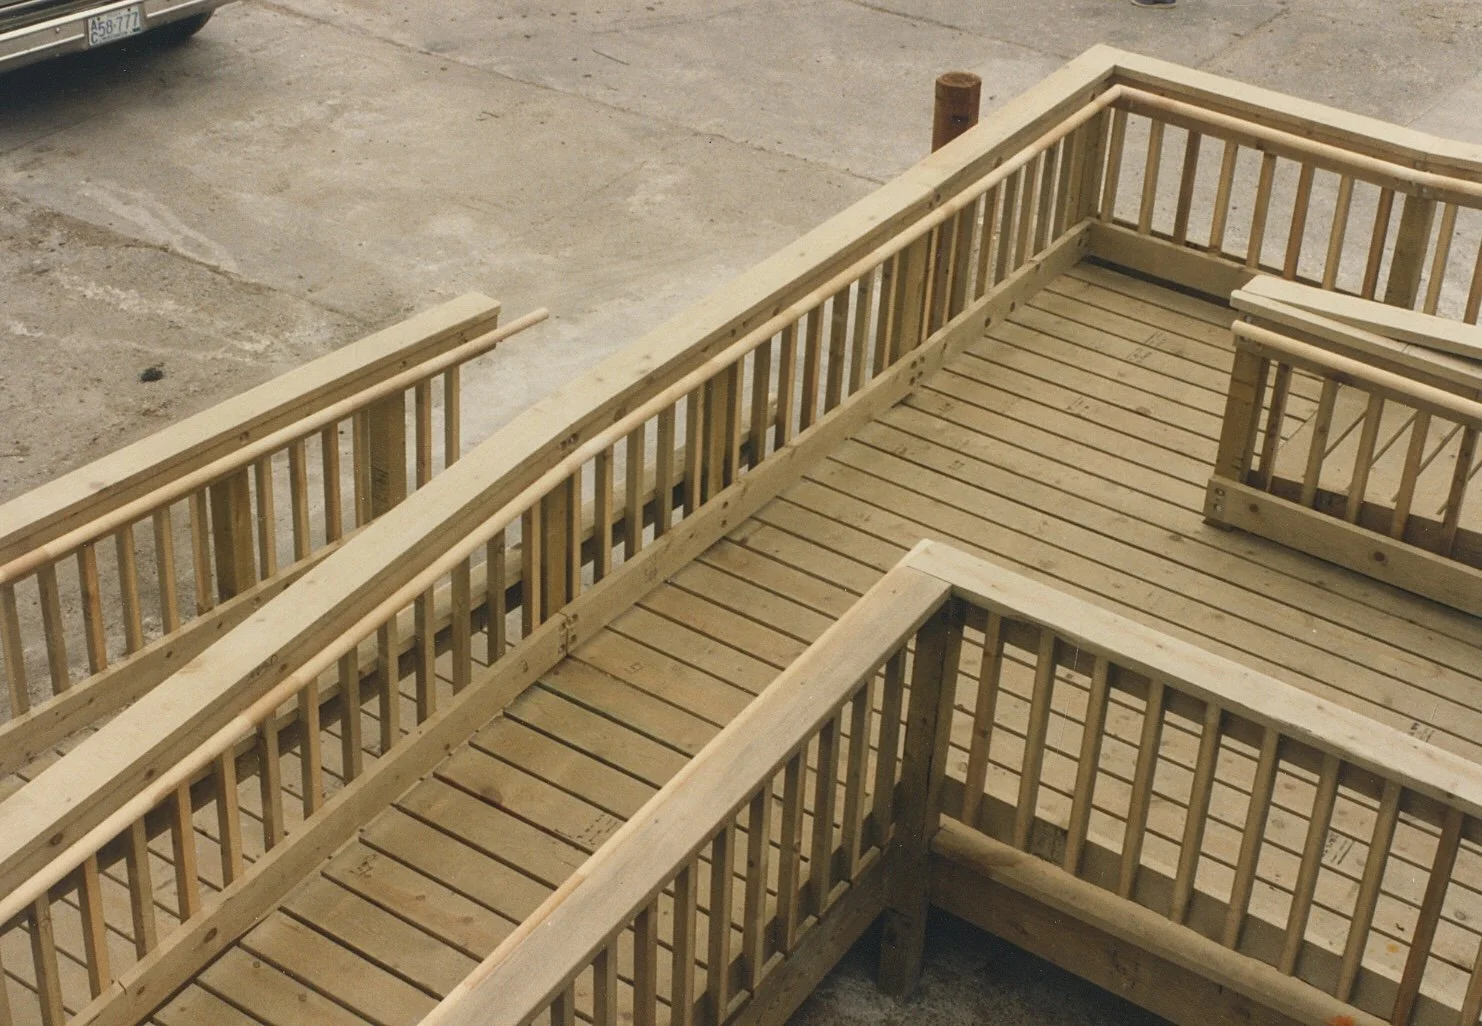
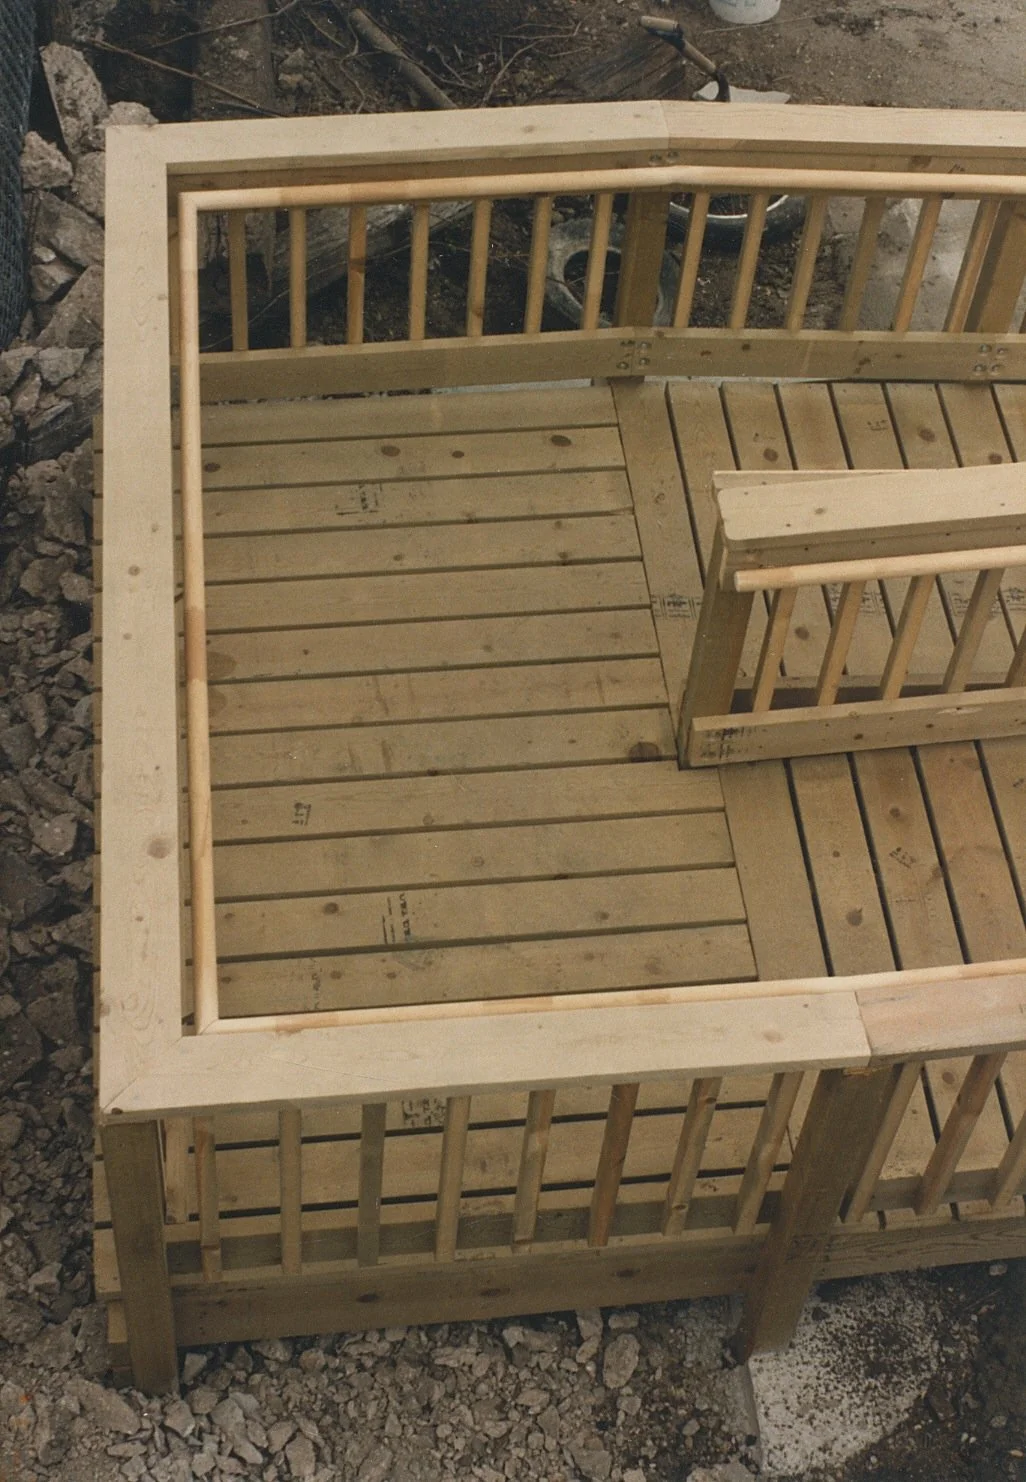
Chrysalis Ramp
This was one of the first projects I did when I moved to the Madison area in 1980. A social service organization bought a house which was to be the site of their day program for developmentally-challenged adults. They needed a accessibility ramp. By code, they needed the amount of ramp you see, to get from the ground 3’ to the first floor. When I look at this massive ramp, I appreciate the sculptural aspect of it as well as the practicality. An old carpenter once gave me some valuable advice: always overdo each aspect you can. It is rare that a customer will complain that you were “too thorough.” That has been a practice of mine for over 40 years.
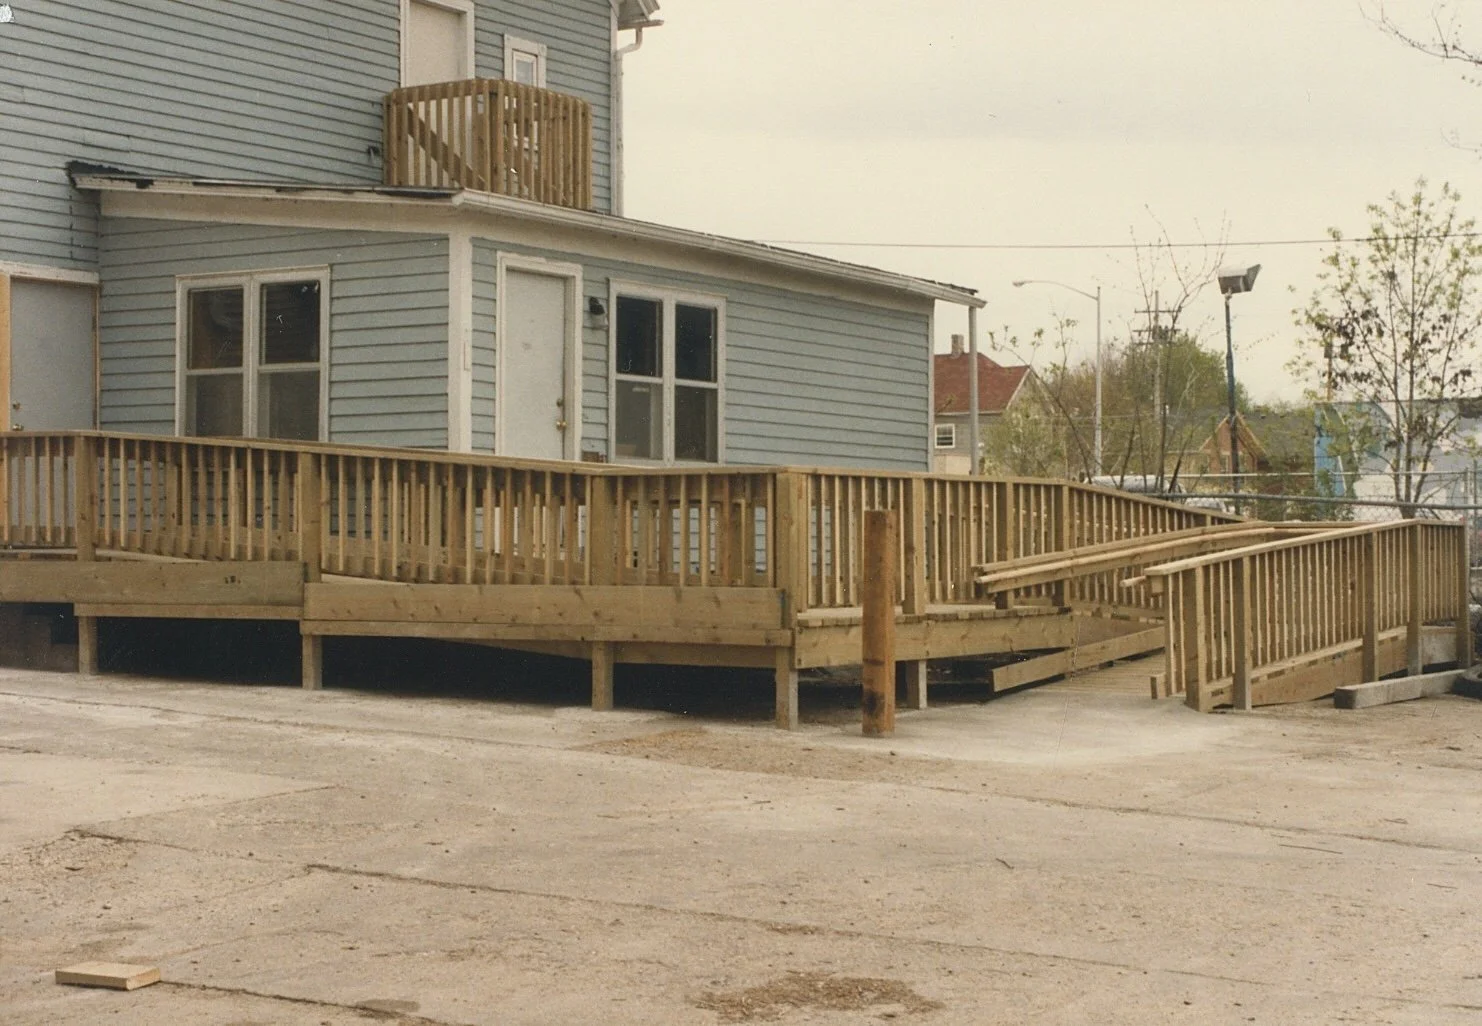
Full view of this beautiful ramp and the rooftop jump box.
View of the first turn

Another view of that turn in the ramp
Another view of that turn
View of the “switchback” turn
Another view with bit of lowest ramp length
Another view of the “switchback”
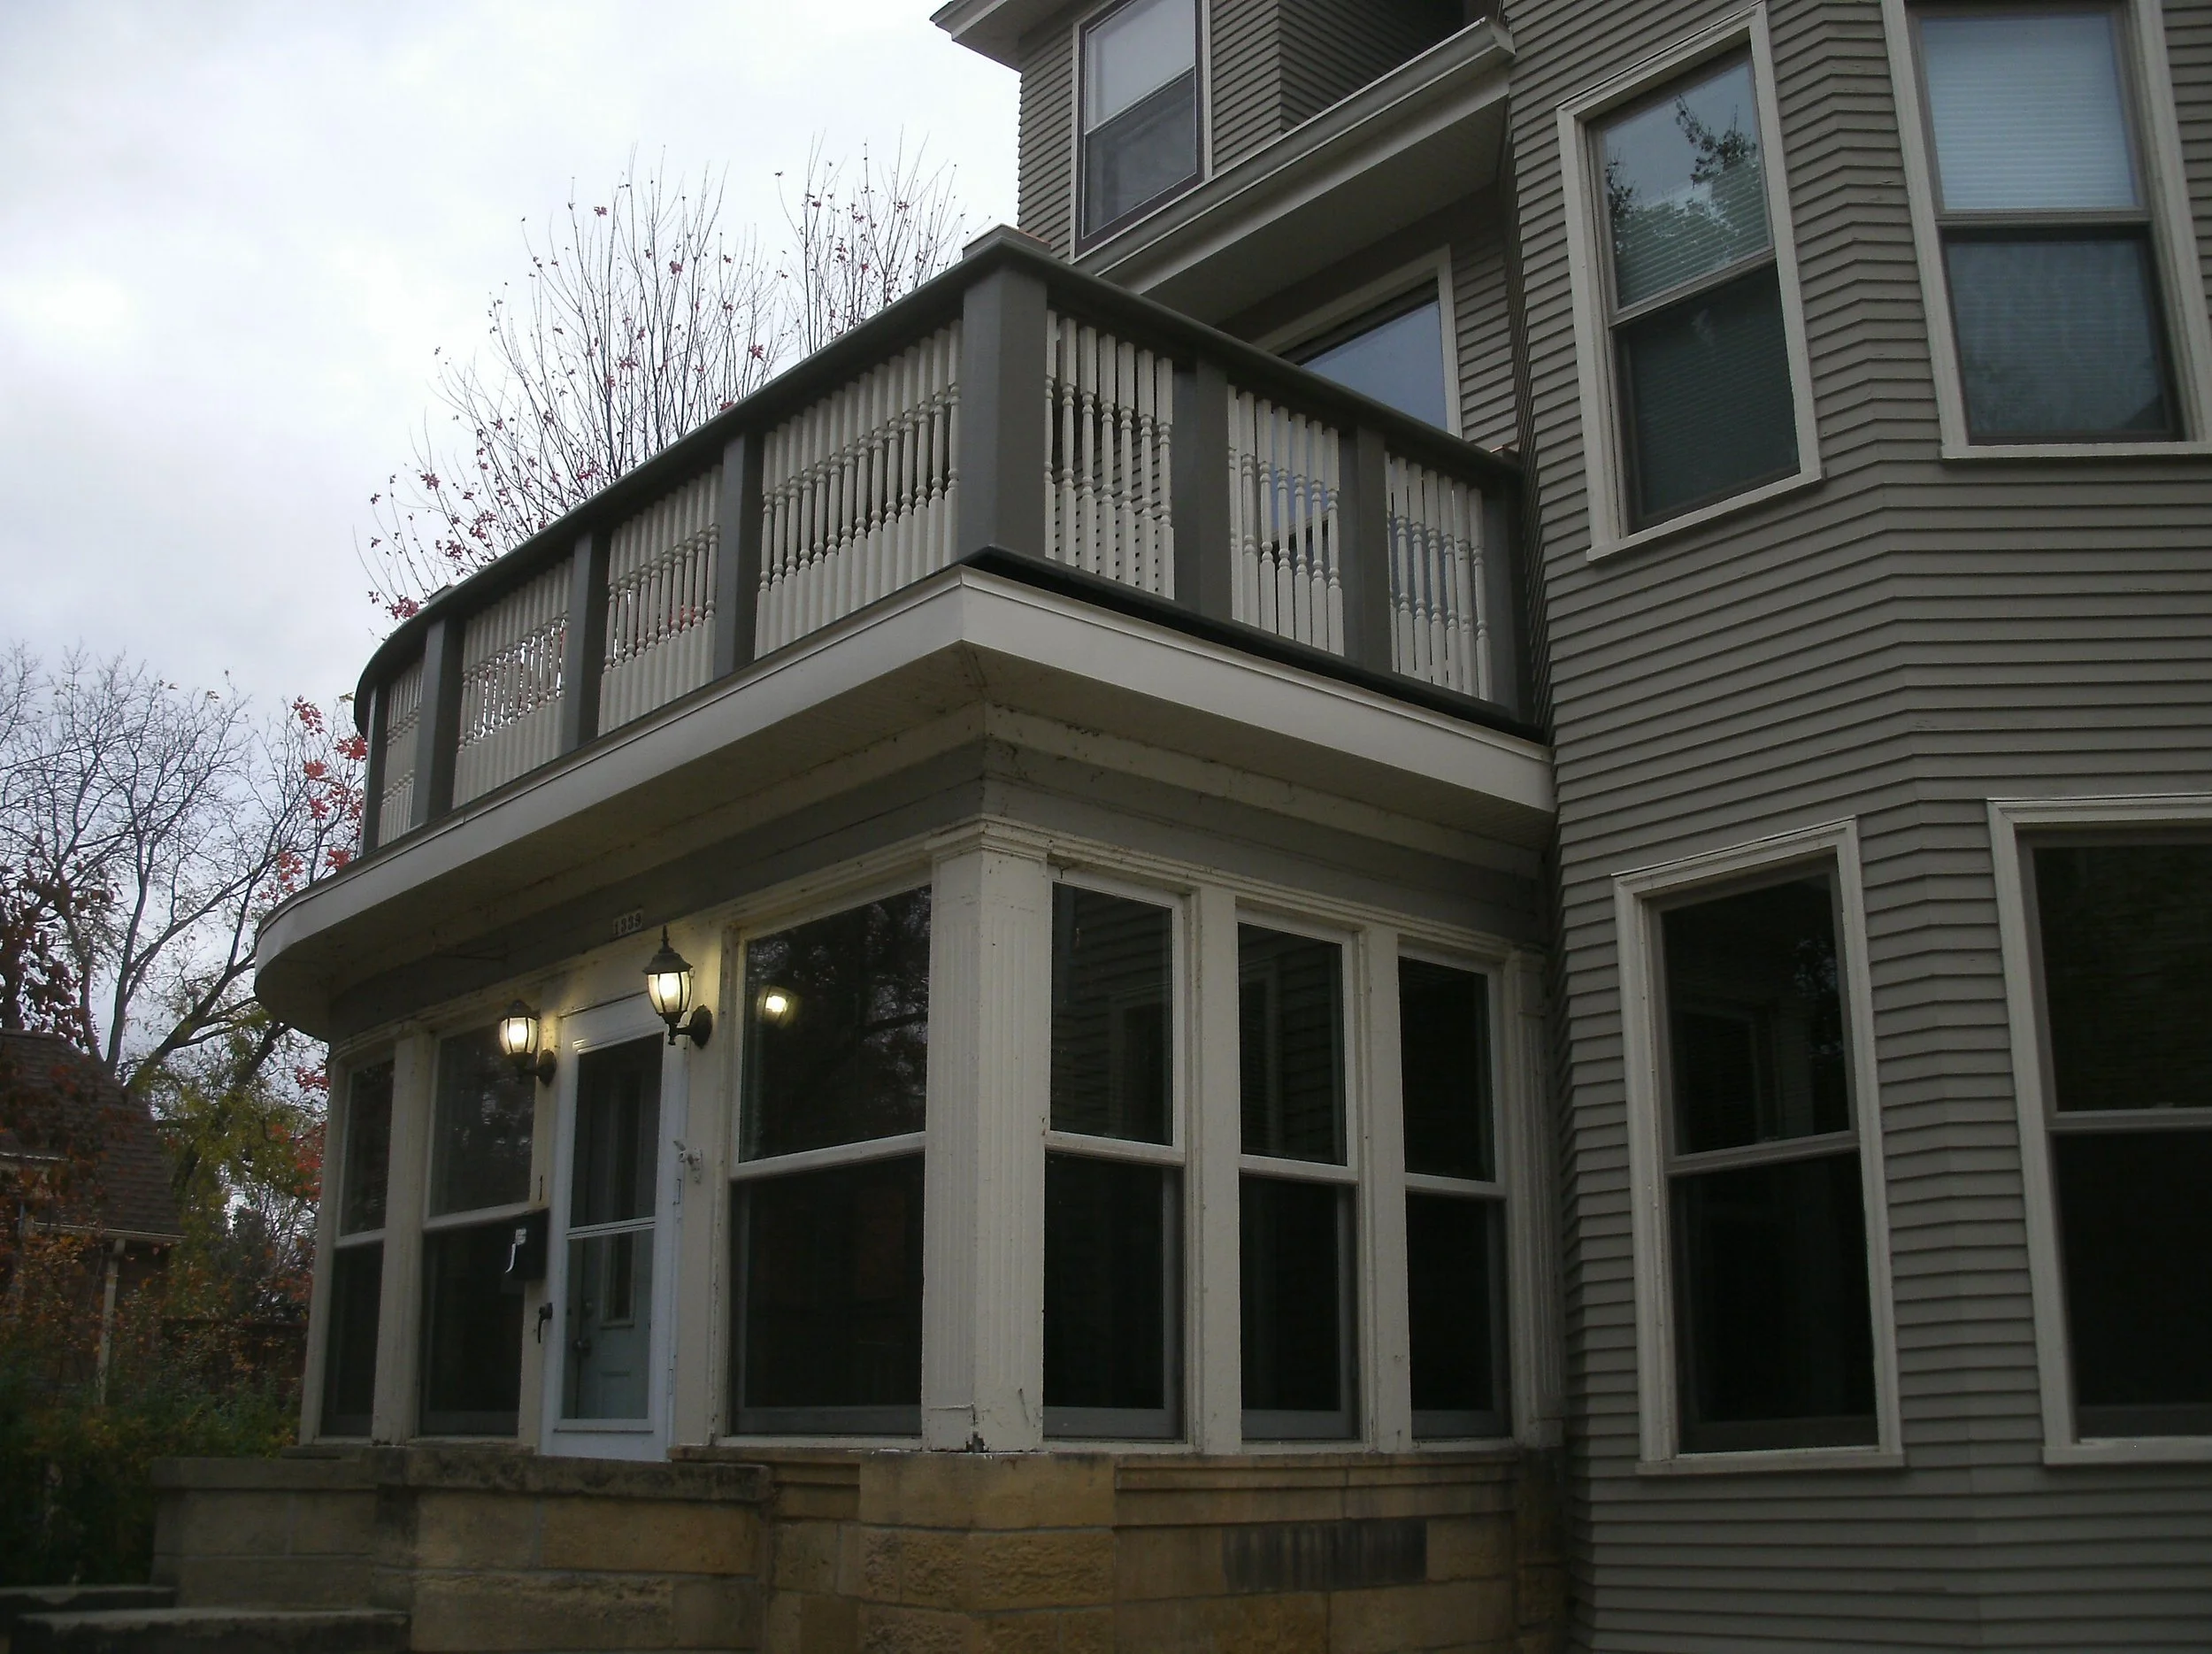
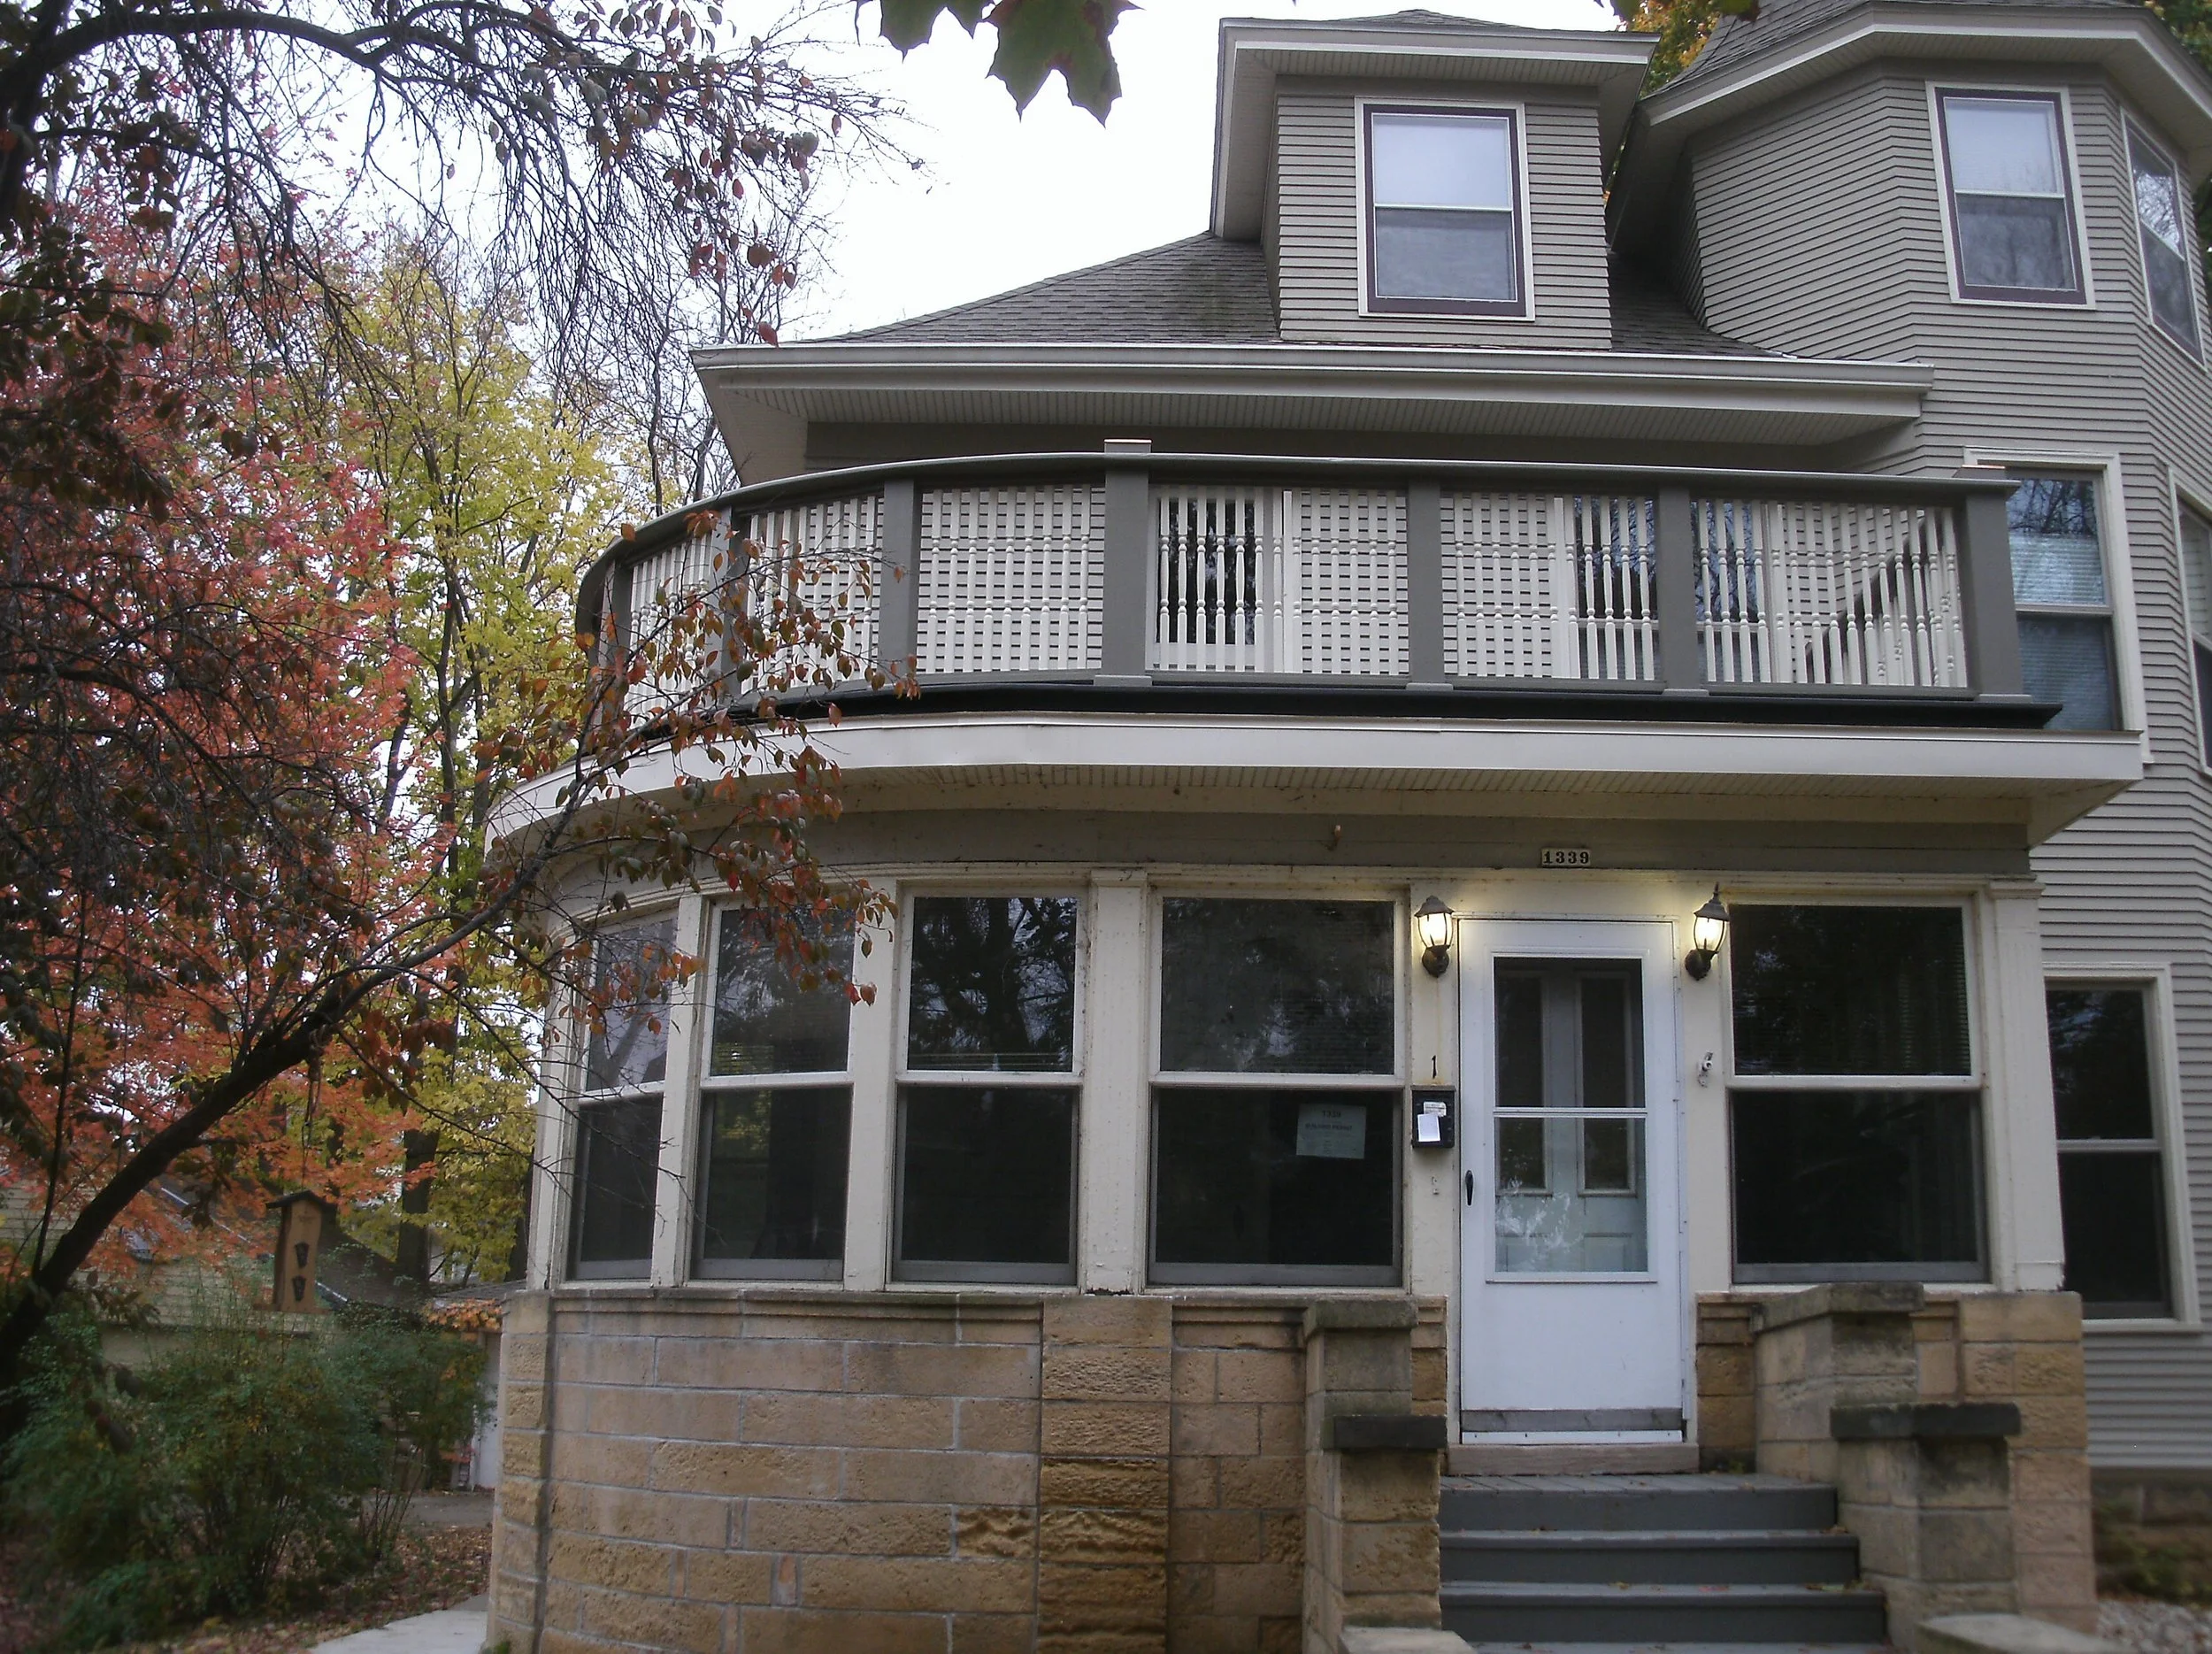
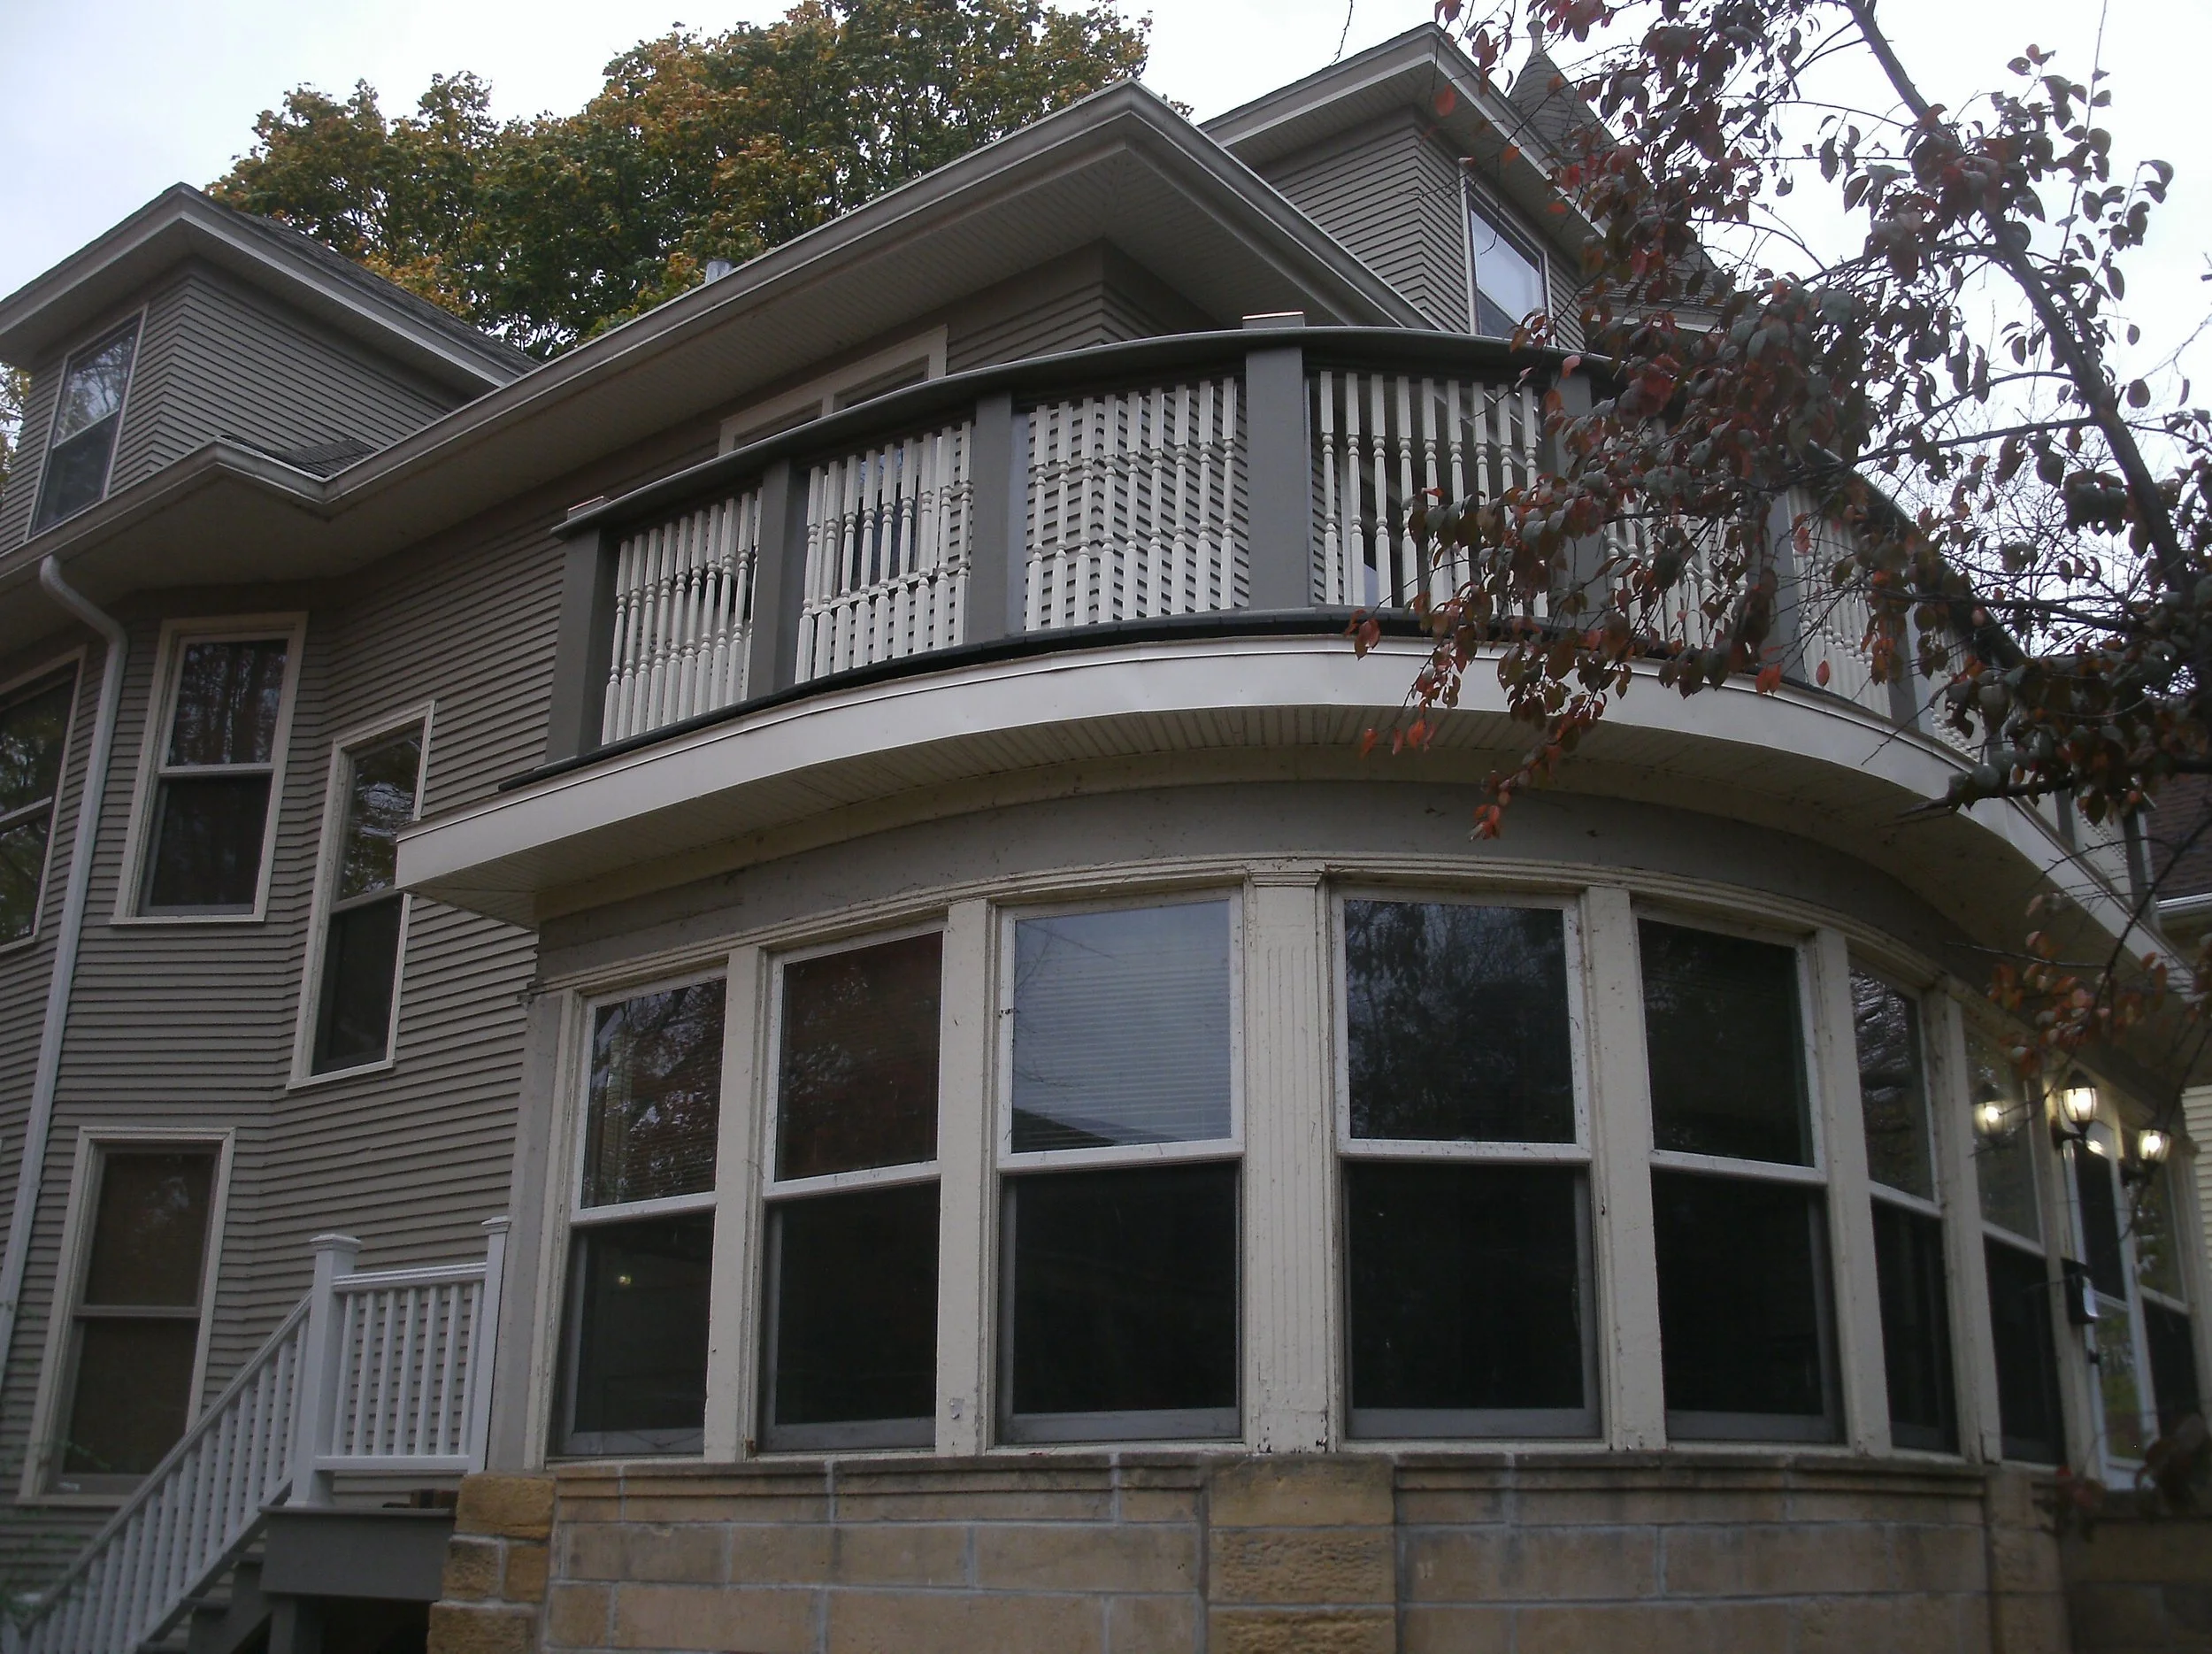
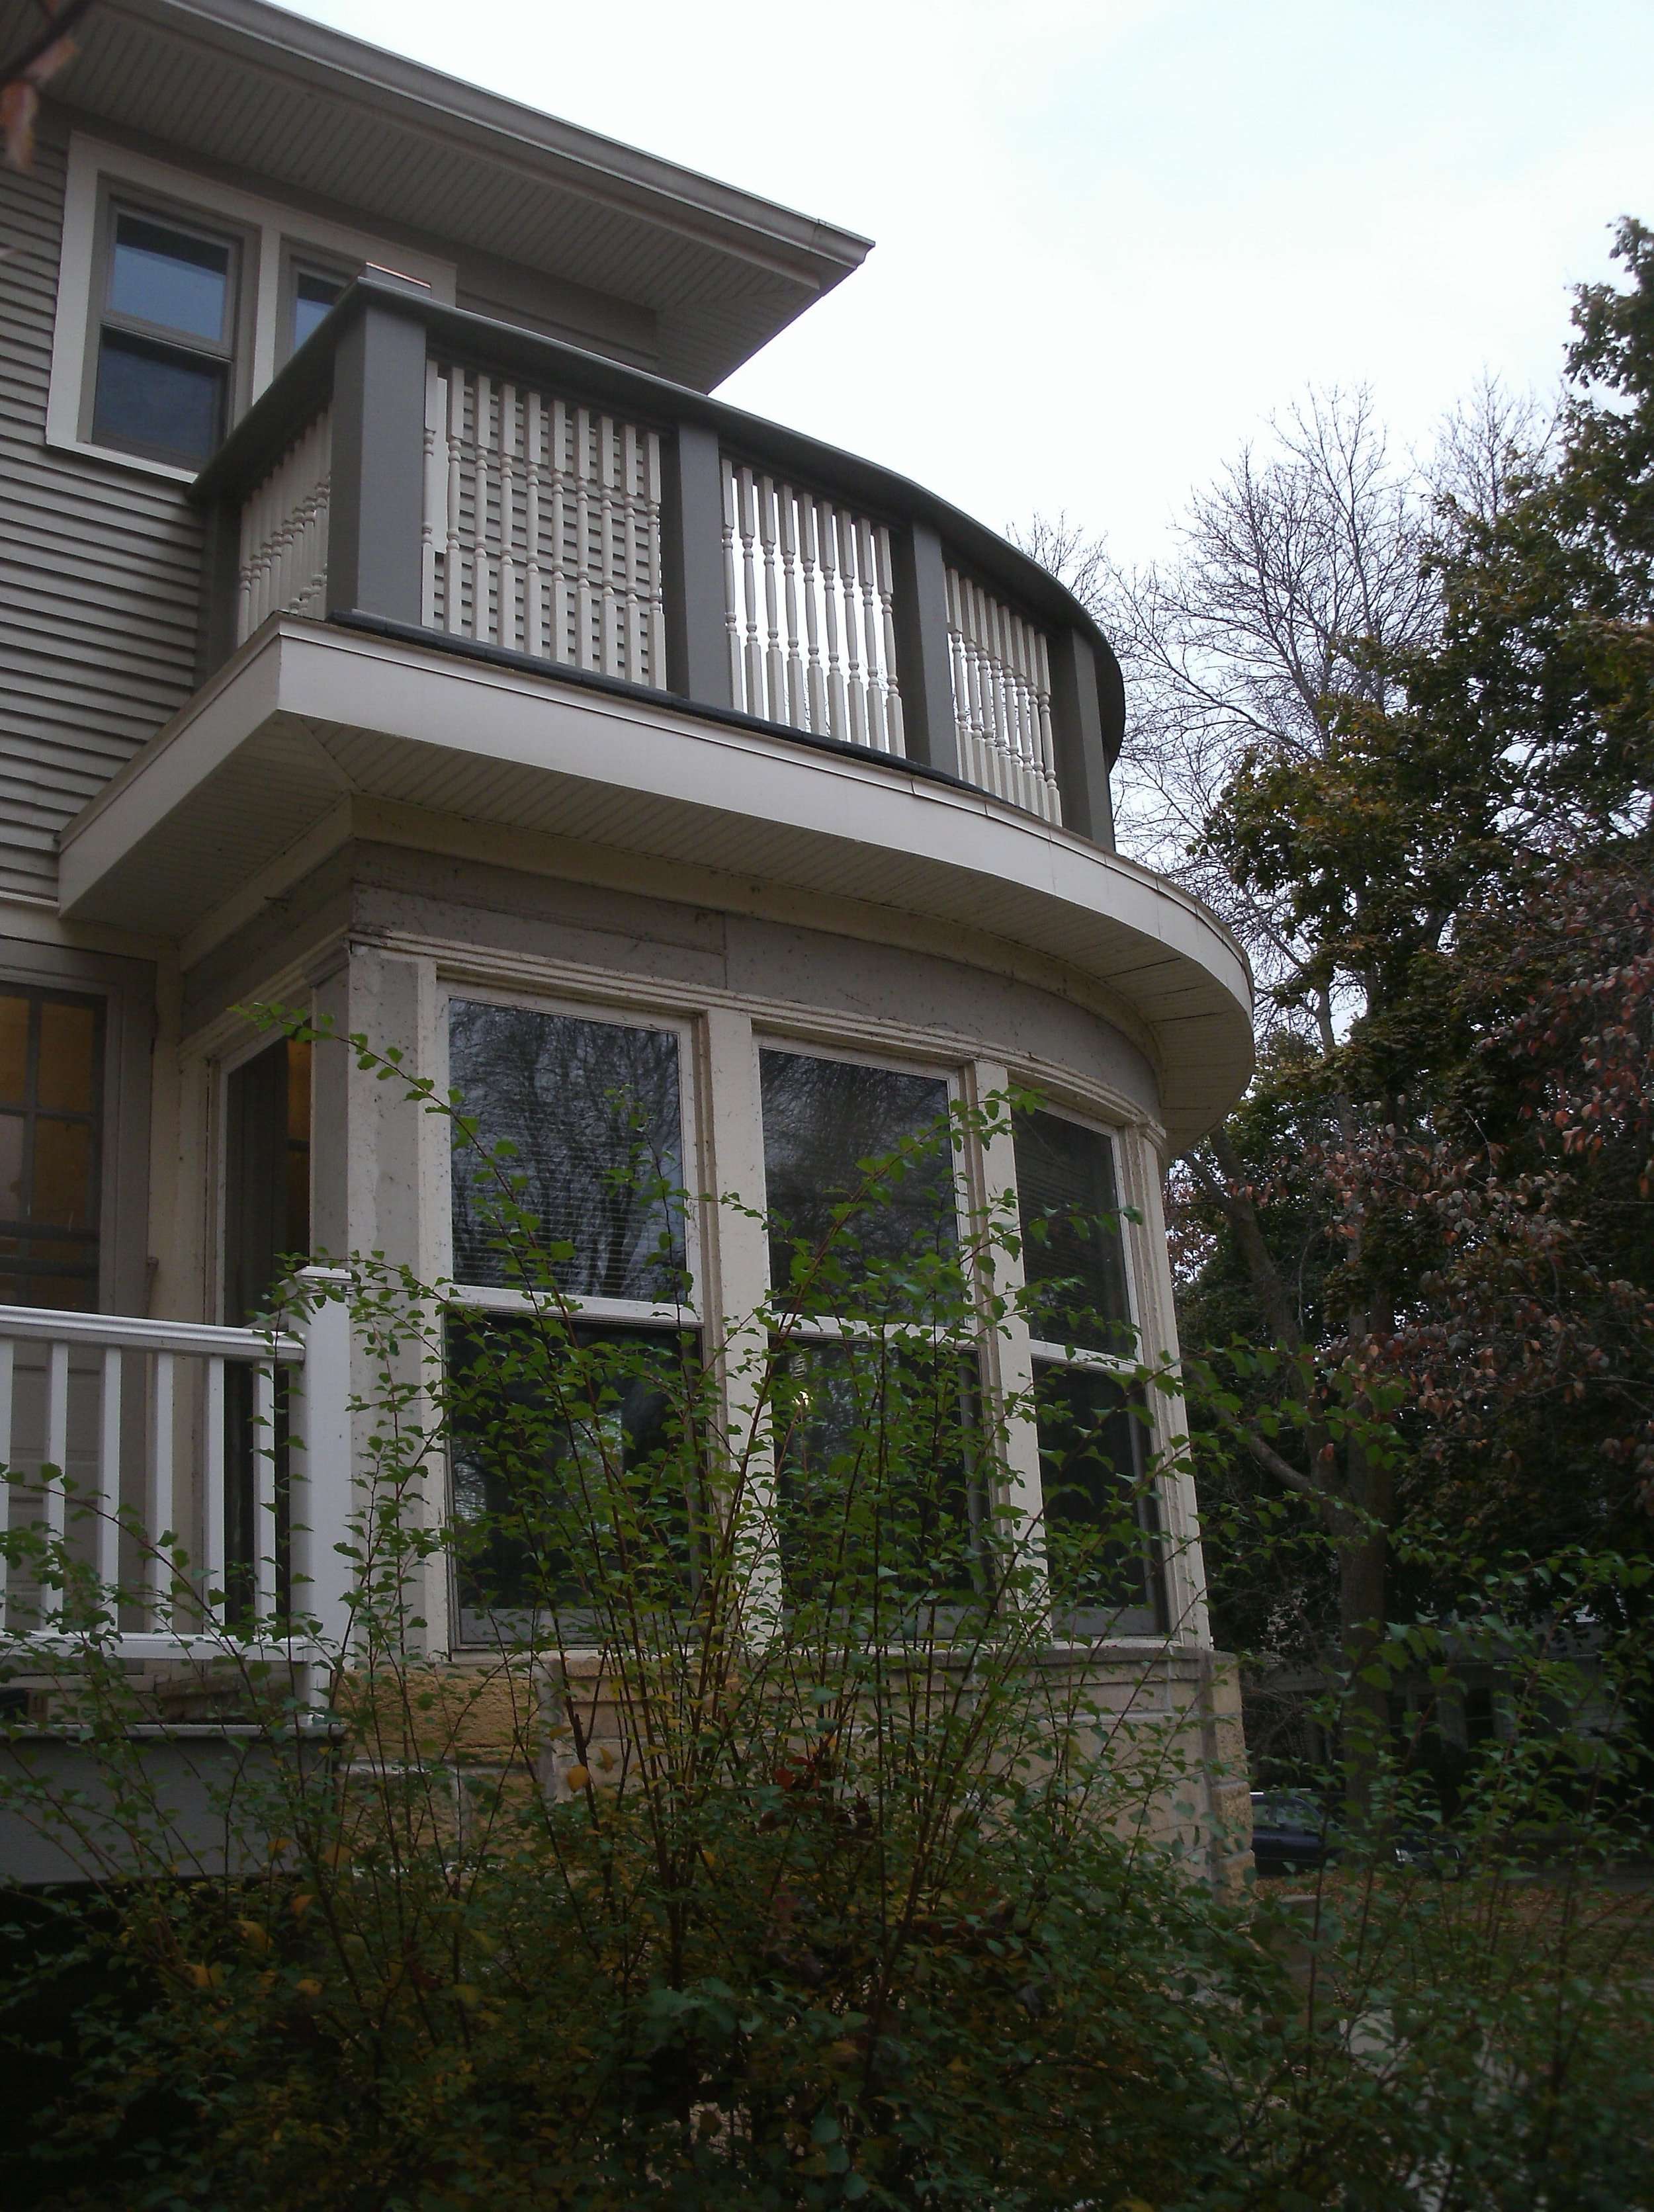
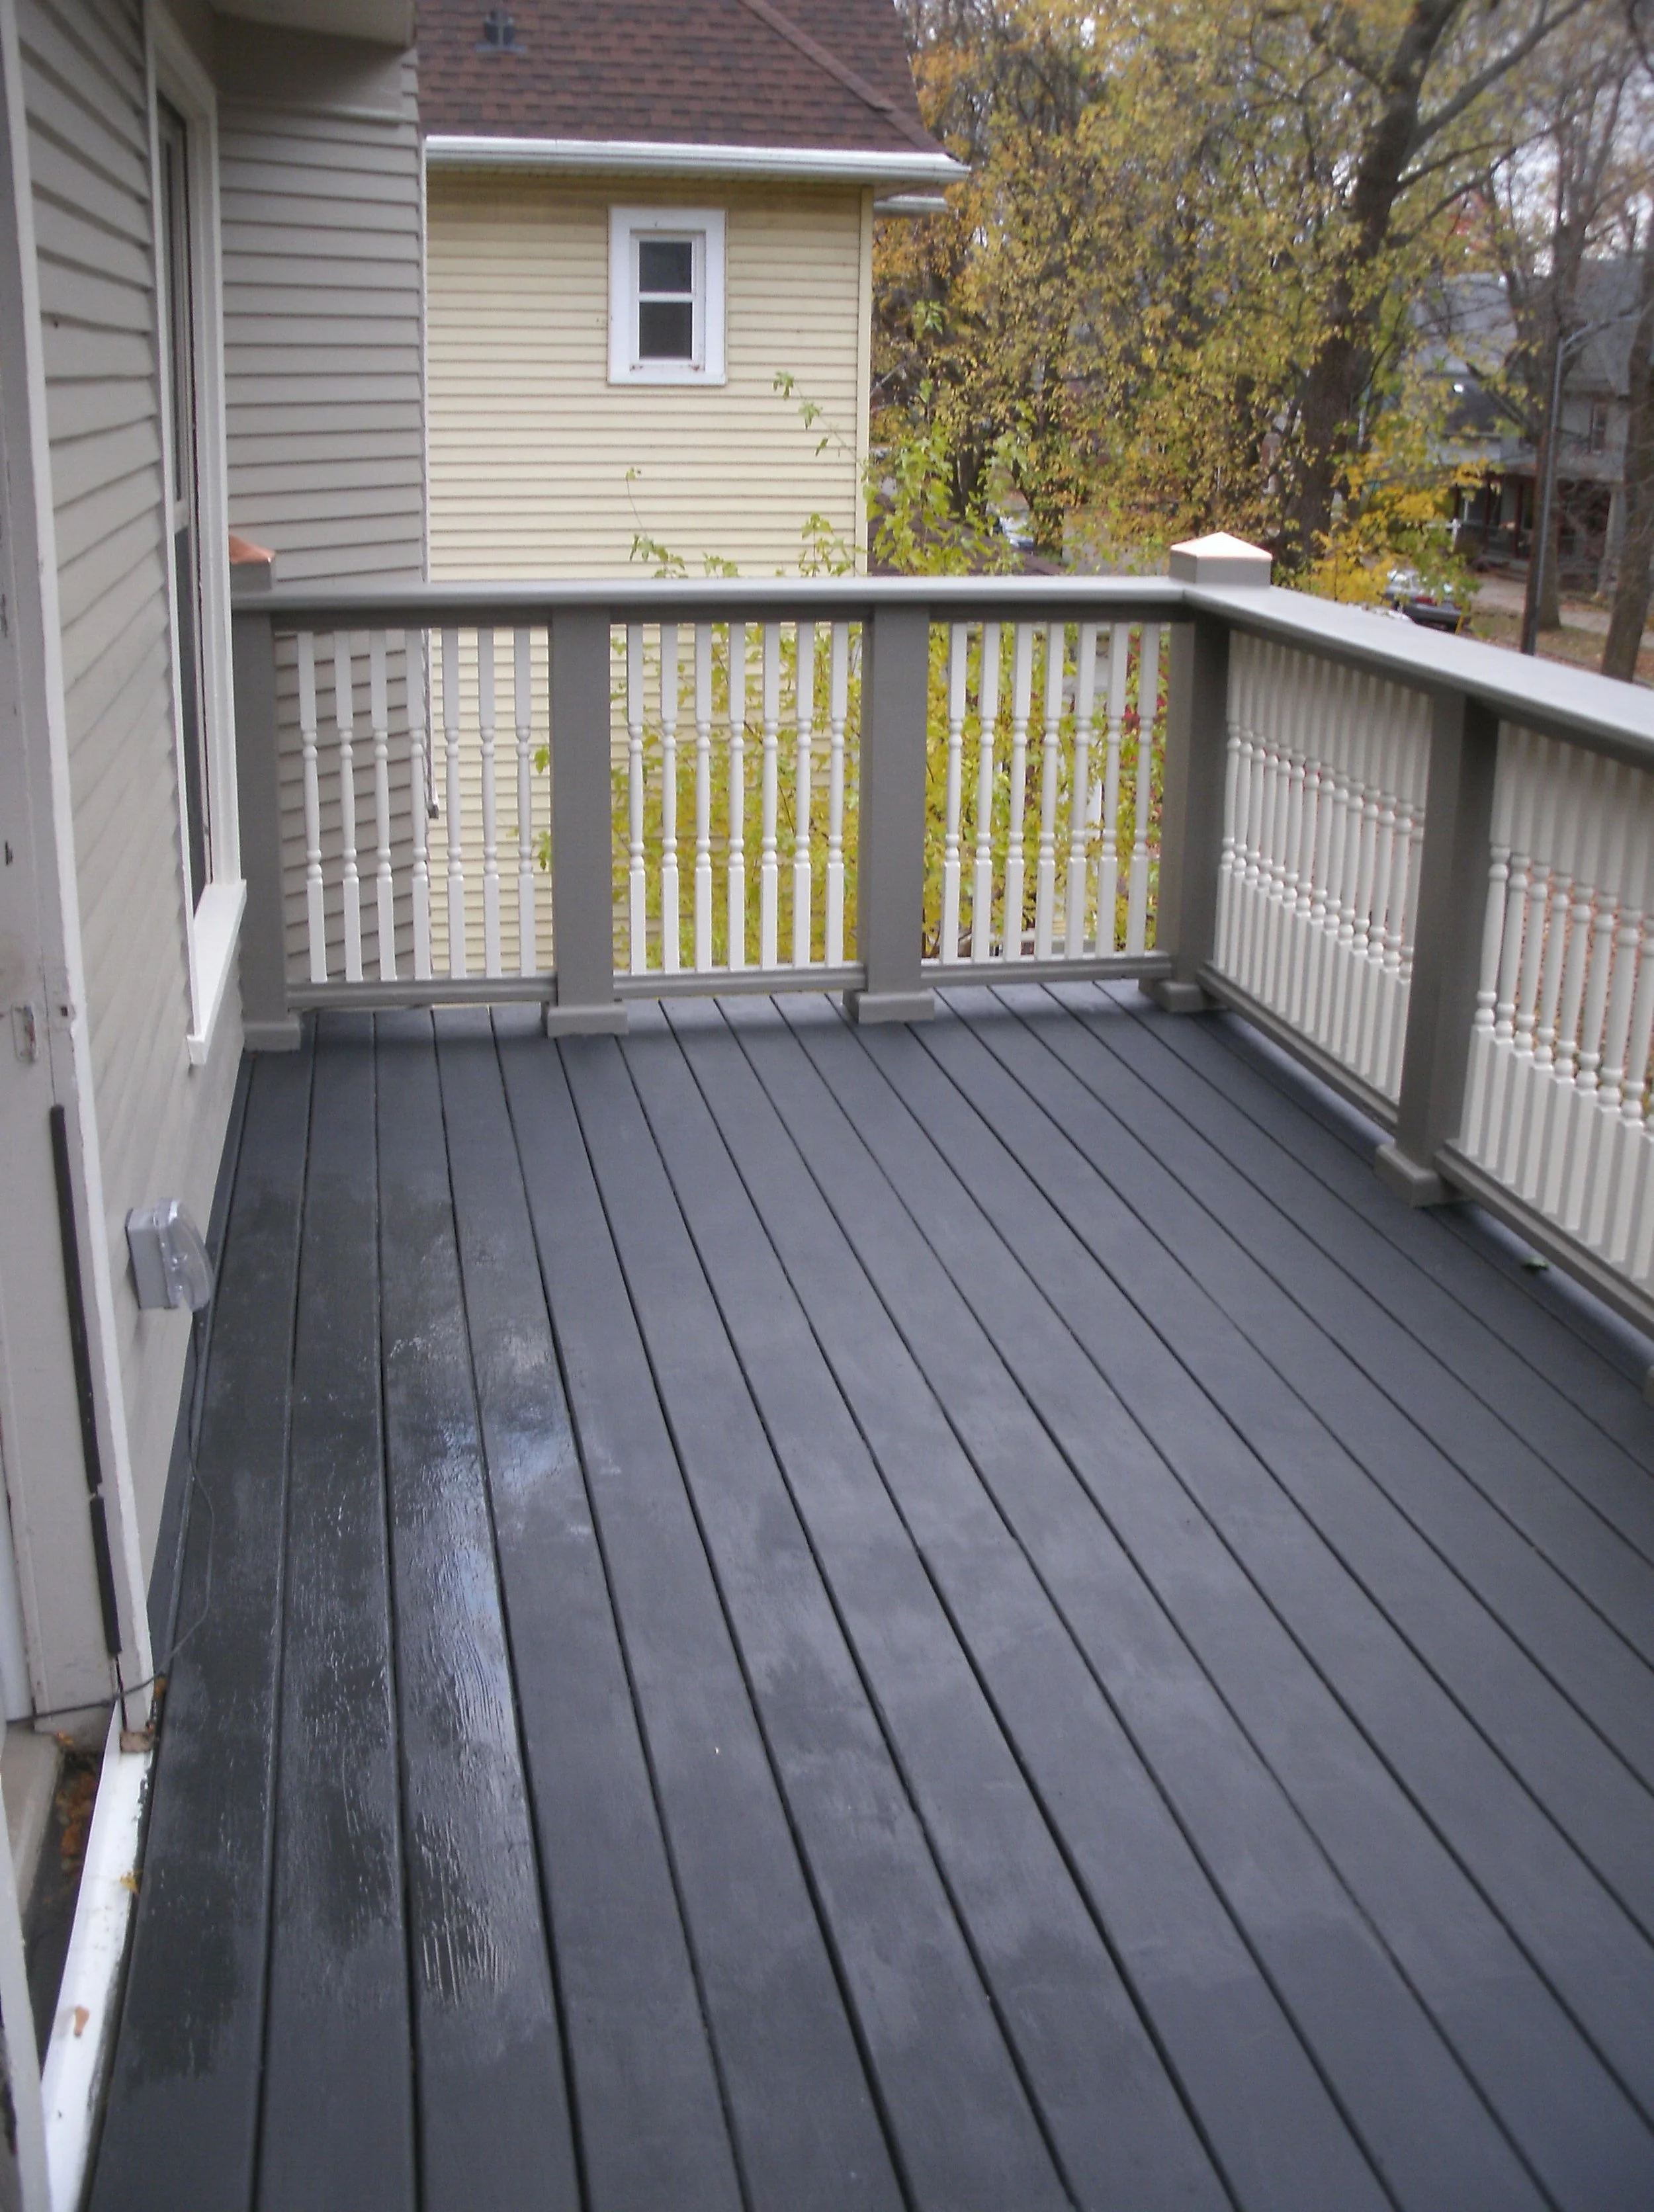
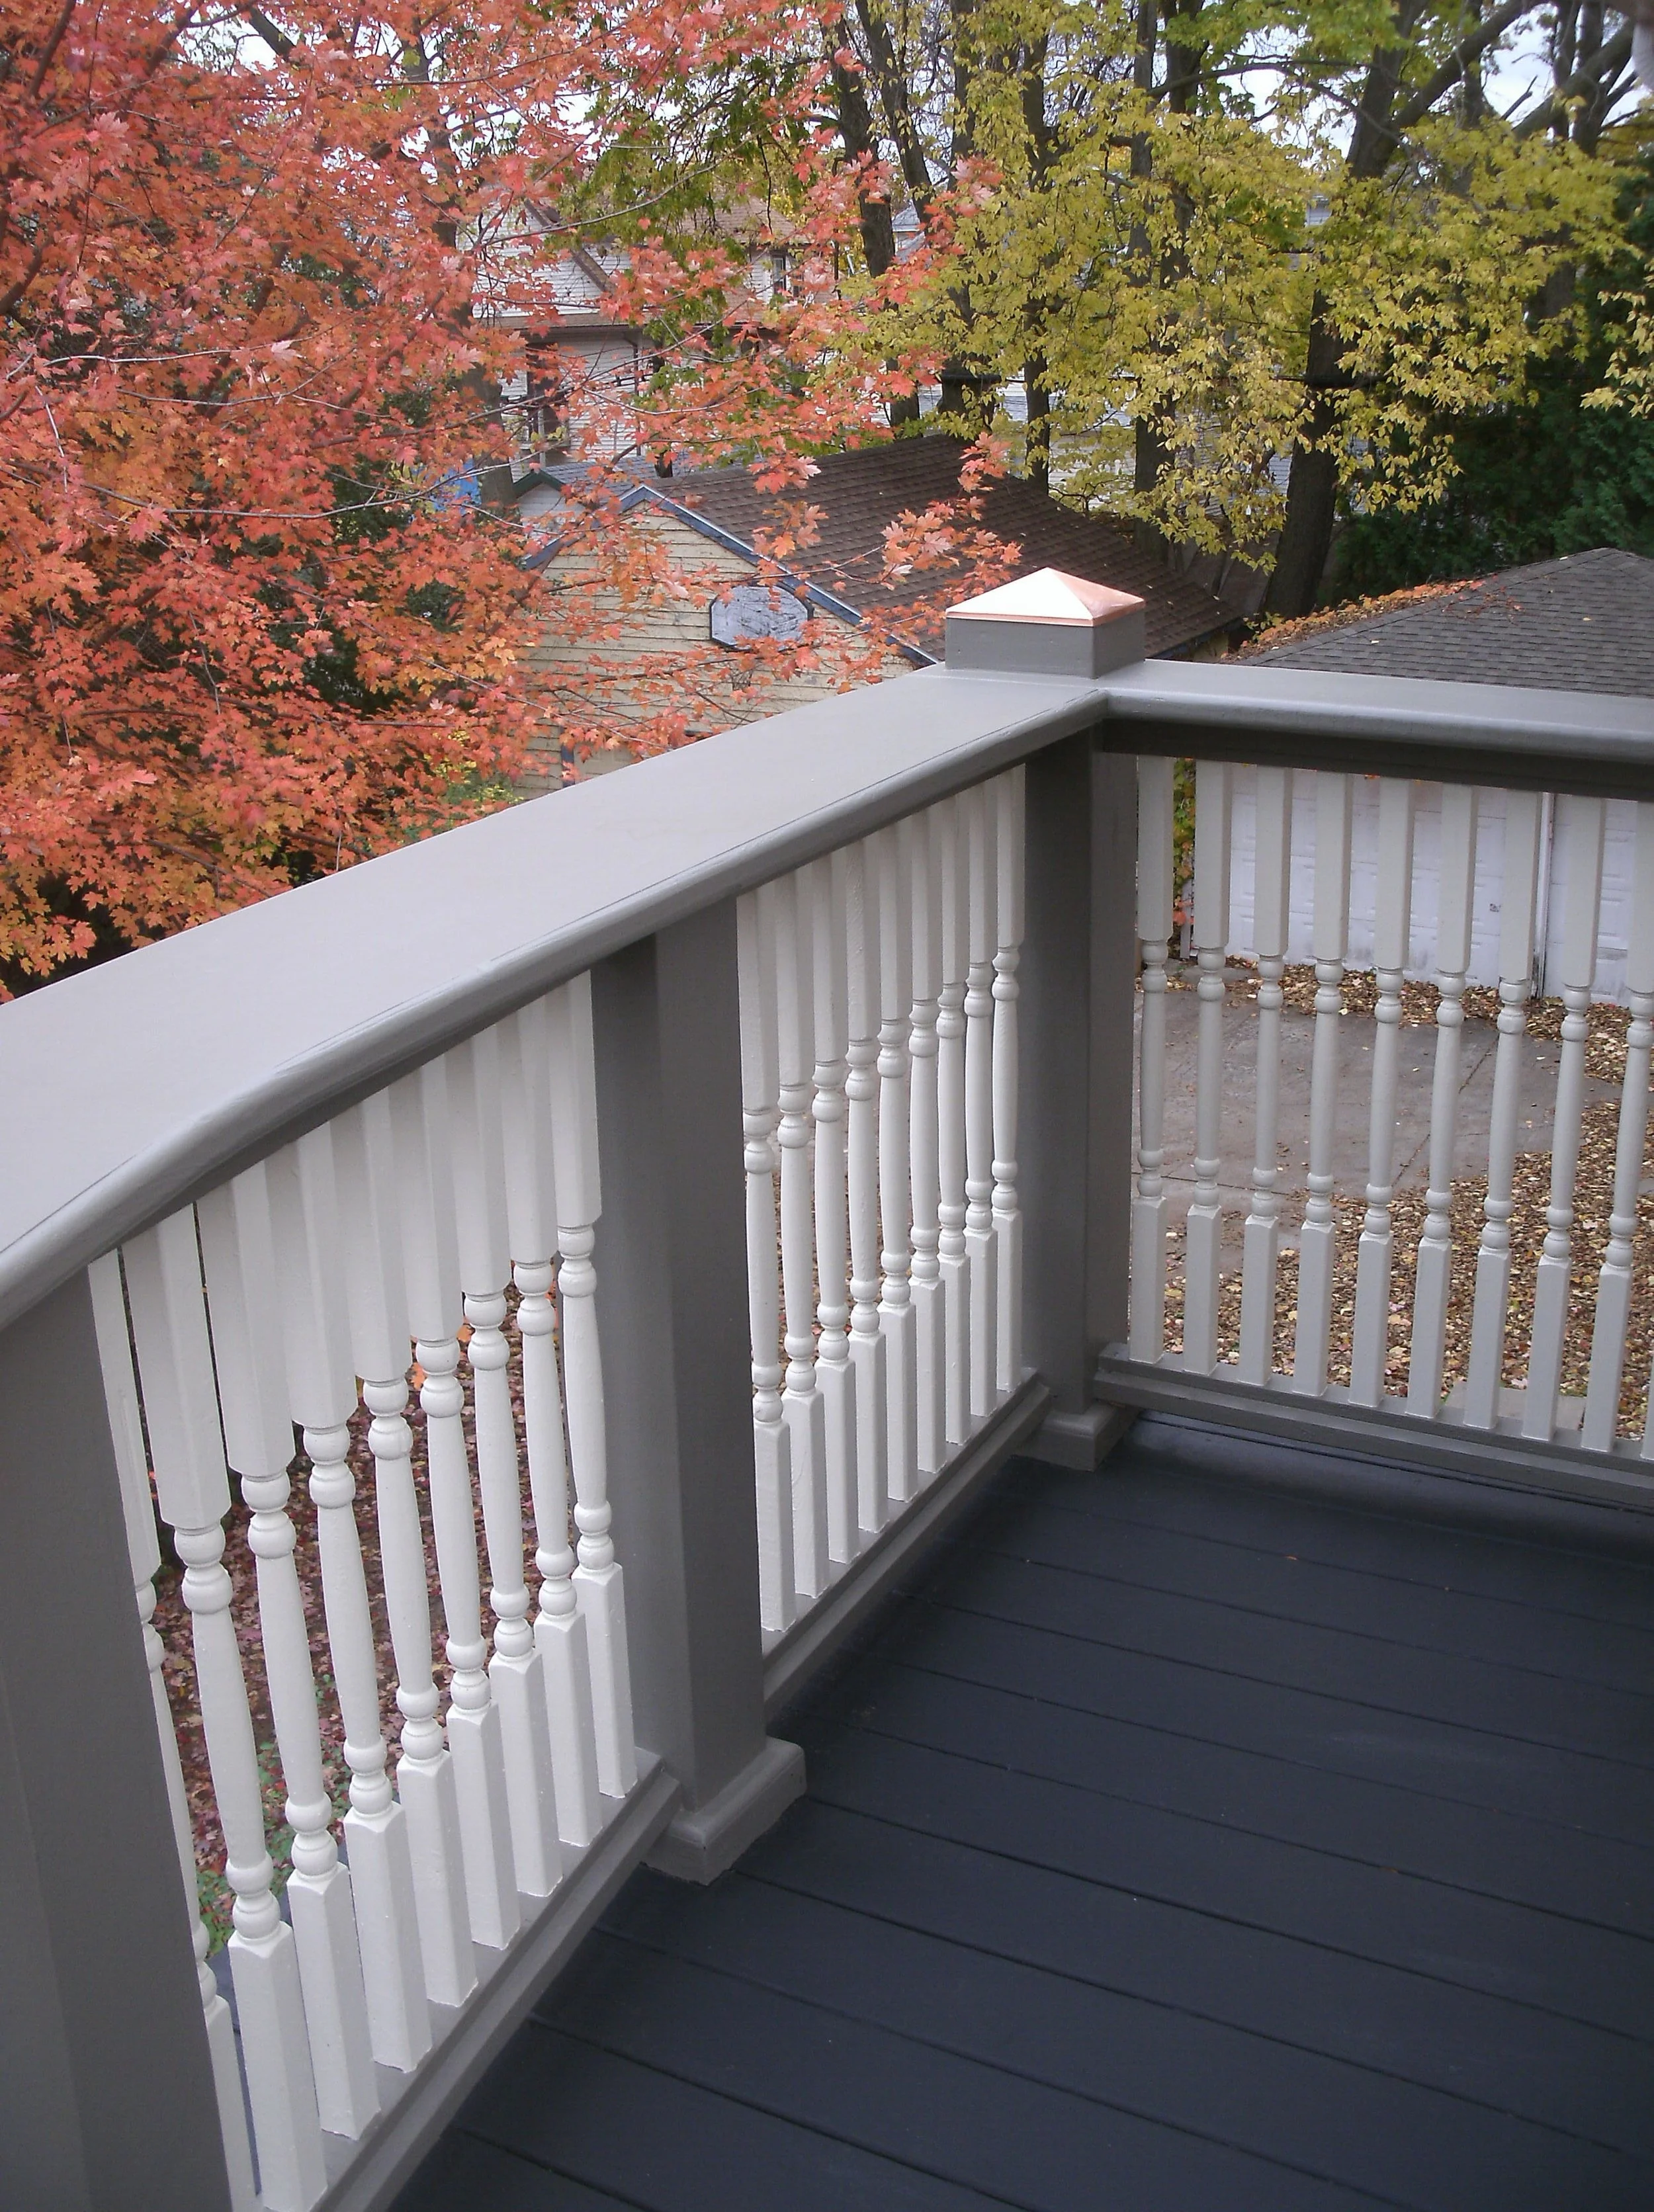
Rutledge Front Roof/Deck
This was a beautiful old Victorian house, which was tastefully divided into three units. I had done quite a bit of other work for the family in the past. There were some mystery brown spots in the ceiling of the front sunroom, and when I showed up, there were tea cups and saucers across the floor, catching the dripping water from the ceiling! While it revealed a much worse problem, the tea cups and saucers were a very cute, albeit temporary answer.
As I began to get an idea of how damaged the front roof was, I asked to see the the back room and ceiling above. More brown spots told me that it was leaking as well. We started in the front because it was worse. Because it was in a historic district we had to get the landmarks people involved. The railing in the front was way out of present day code. And because there were three units the City attention was justifiably more stringent. So instead of replacing the 2 foot tall handrail which poorly simulated the probable original quaint handrail, the rails needed to be 39 inches tall. The old rails, besides being screwed through the rubber roofing causing much of the leaks were a compromised, cheap replication of the old decorative 24 inch tall rails in the initial build. There was no plan for humans to go out onto the roofed areas, so the rafters which formed the support for the roofs were 2x4s toenailed into the wall sheathing, and just tacked to the roof edge. These were dramatically undersized, and were barely able to support themselves, the sheathing, and the old-school metal roof. At sometime probably 30 years before my rebuild, they had put rubber roofing over the rusting away metal roof. So I took the old structure down to the roof/ceiling joists. I prepared those as necessary, had 10 inches of fiberglass blown in insulation installed so that at least the ceiling of the room below was well insulated. I then put three-quarter inch plywood sheathing over the whole roof. I've always caulked the seams in the plywood and painted three coats of a mobile home roof coating paint to absolutely seal the plywood. When the roofer showed up to install his rubber roofing, he asked WTF about the white painted/sealed plywood. He wasn’t put out, he had just never seen anyone else do this. He asked me why. I said that I’m sure his rubber roofing was going to be extremely competent, but all it would take is one squirrel to nibble through it and it would leak. This way it was sealed against all but a tidal wave. He installed the rubber roofing. I then created the framing for the full-size deck. I used 2x8 joists 16” on center. With these joists hanging properly on the wall and sitting on top of the exterior wall of the back room, there was no way that the joists would rest upon and thus compromise the rubber roofing in any way. I framed up the posts, installed the decking, and fabricated, and installed all of the rails. I then painted everything. I painted the decking with Behr Deckover paint. This paint is intended to rescue old decking, but I have always used it on new wood. I also painted the rails with Behr paint.
Old Front railing
Side view of old rail
Old, cracked, funky 35 year-old rubber roof over 120 year-old rusty metal roof
All sheathing removed. There was a soffit repair 35 years ago. I tore it all out.
Old 2x4 joists. Rotting, undersized.
New 2x8 joists
Plywood roof sheathing installed. Seams caulked, 3 coats of roofing sealer applied.
Rounded end all joists and posts installed.
West end all joists and posts installed.
Post wraps fabricated, primed and painted.
Rounded end decking installed.
View from the ground West end railings installed and painted.
Front view from the ground of the installed and painted railings.
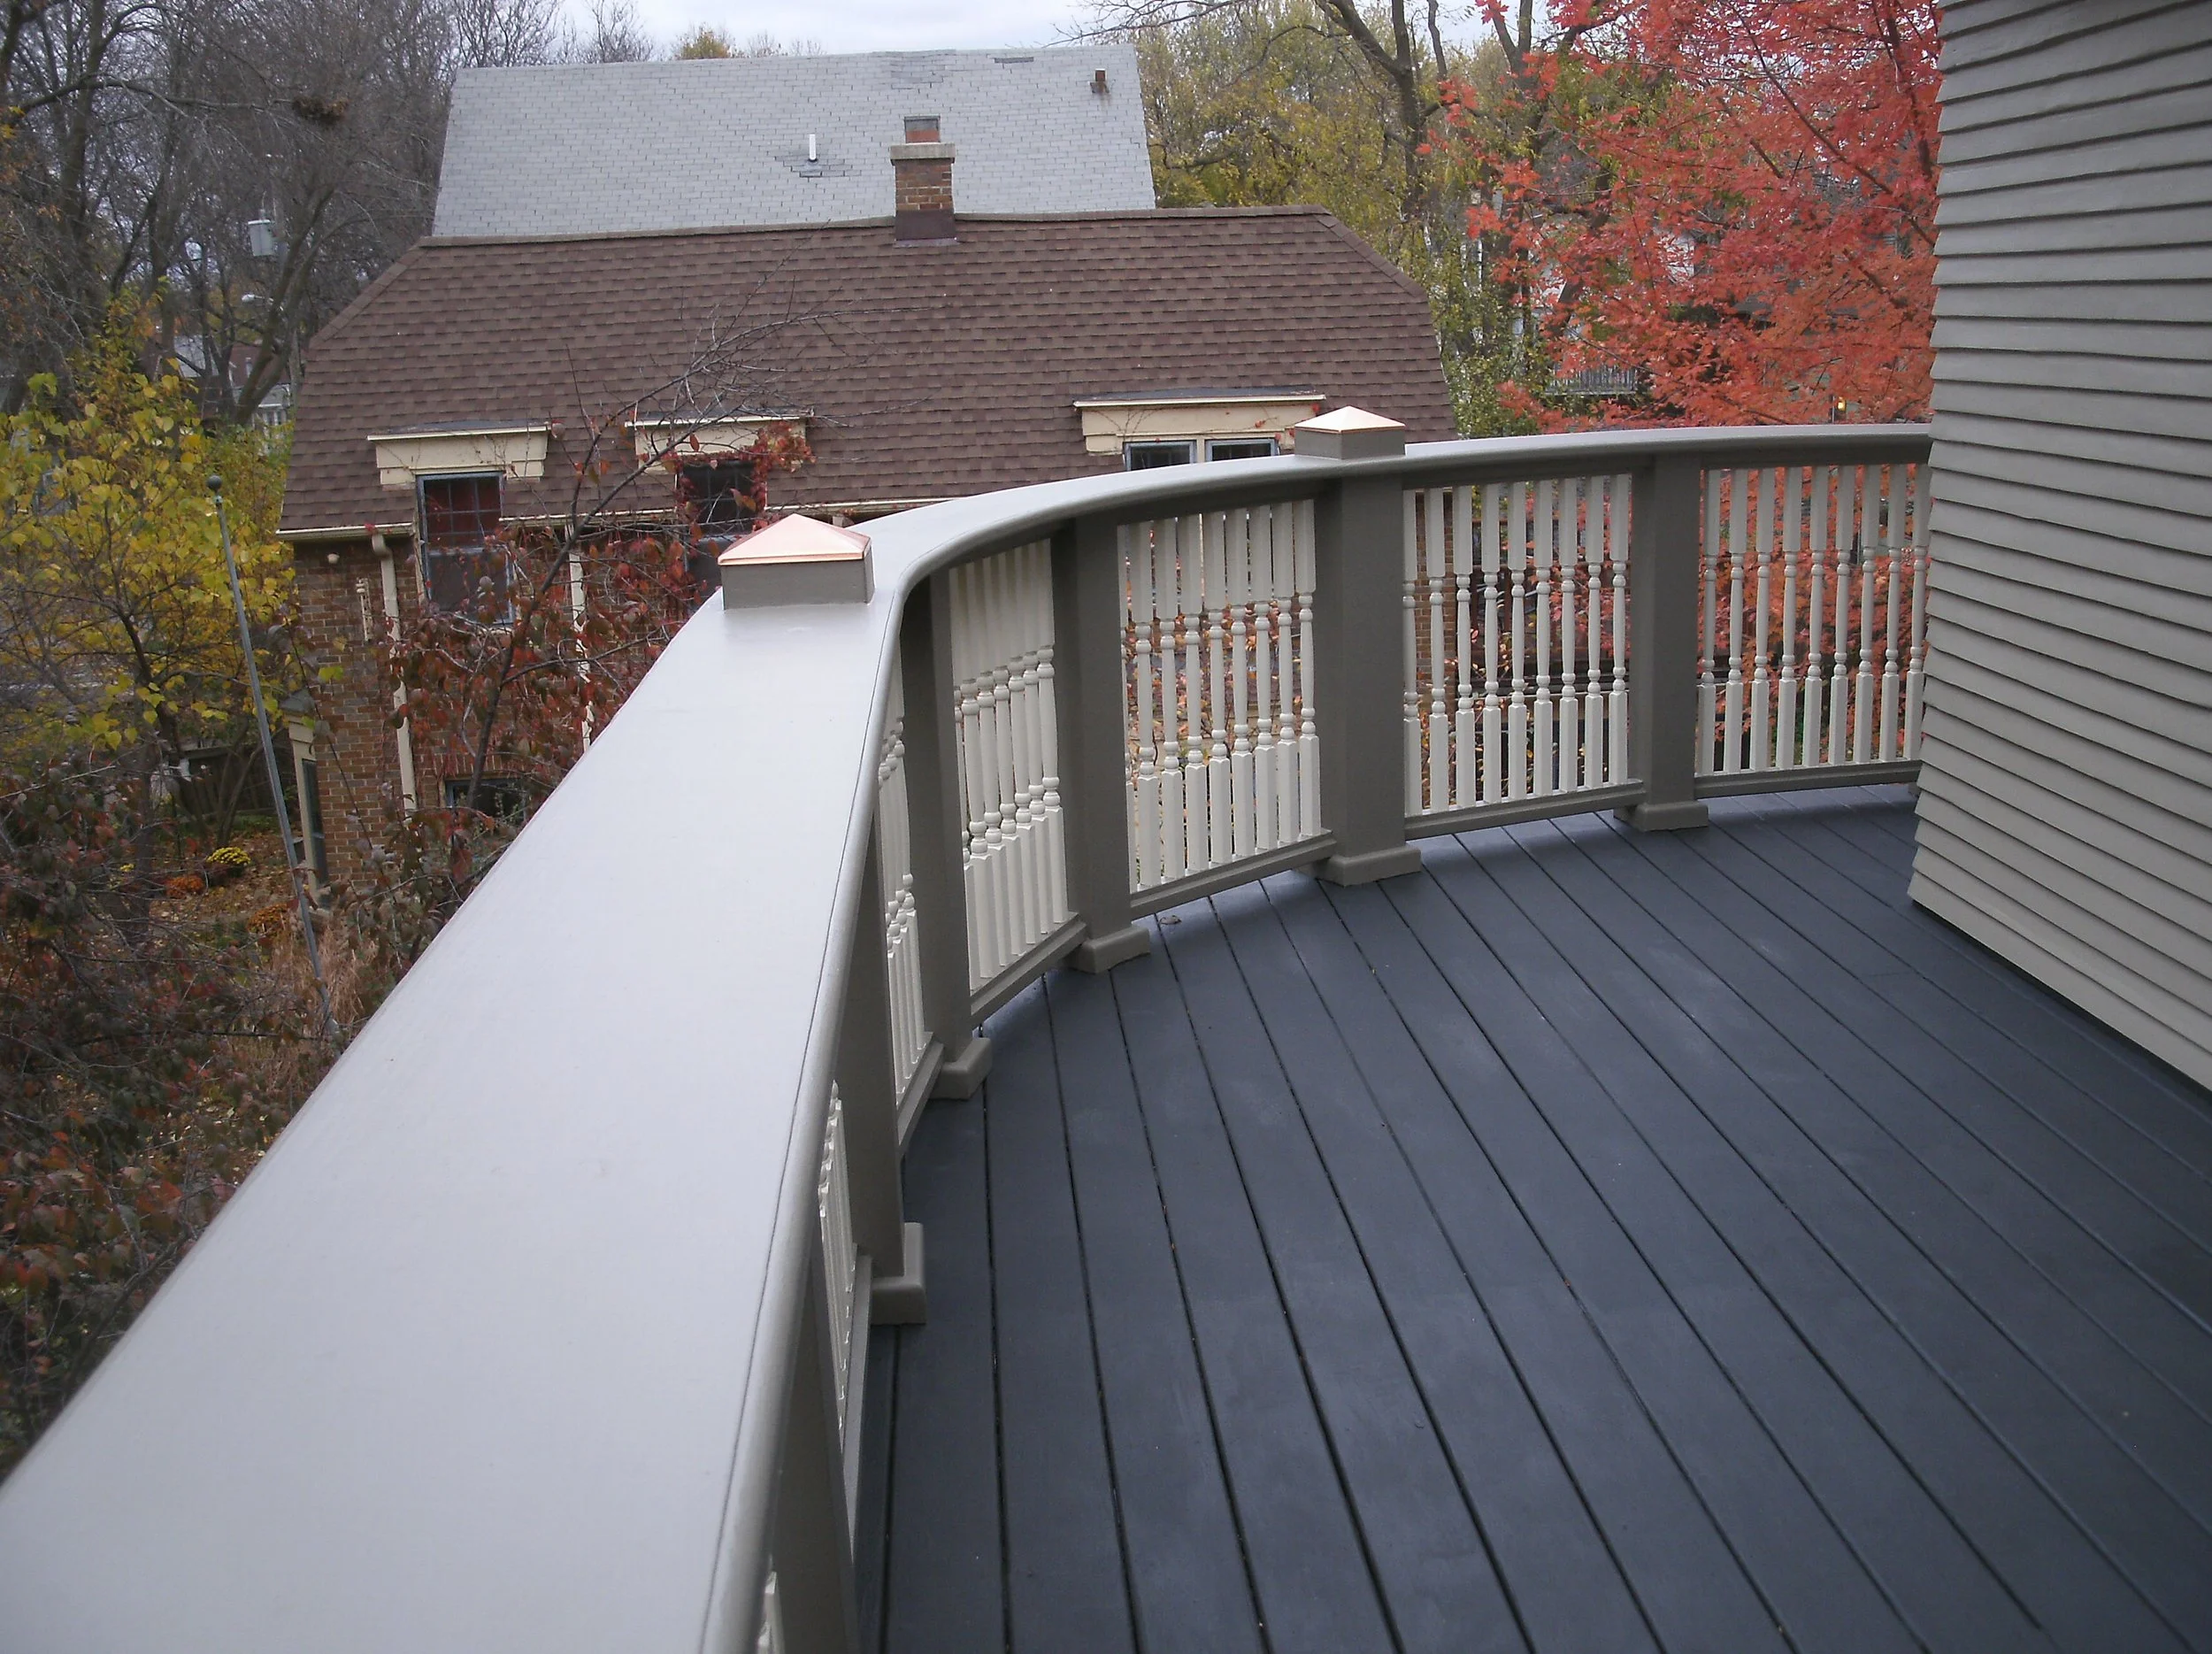
View from the ground of the beautiful curved railing top.
Another view from the ground of the driveway side of the beautiful curved railing top.
View of the West end of the railings and deck install installed and painted.
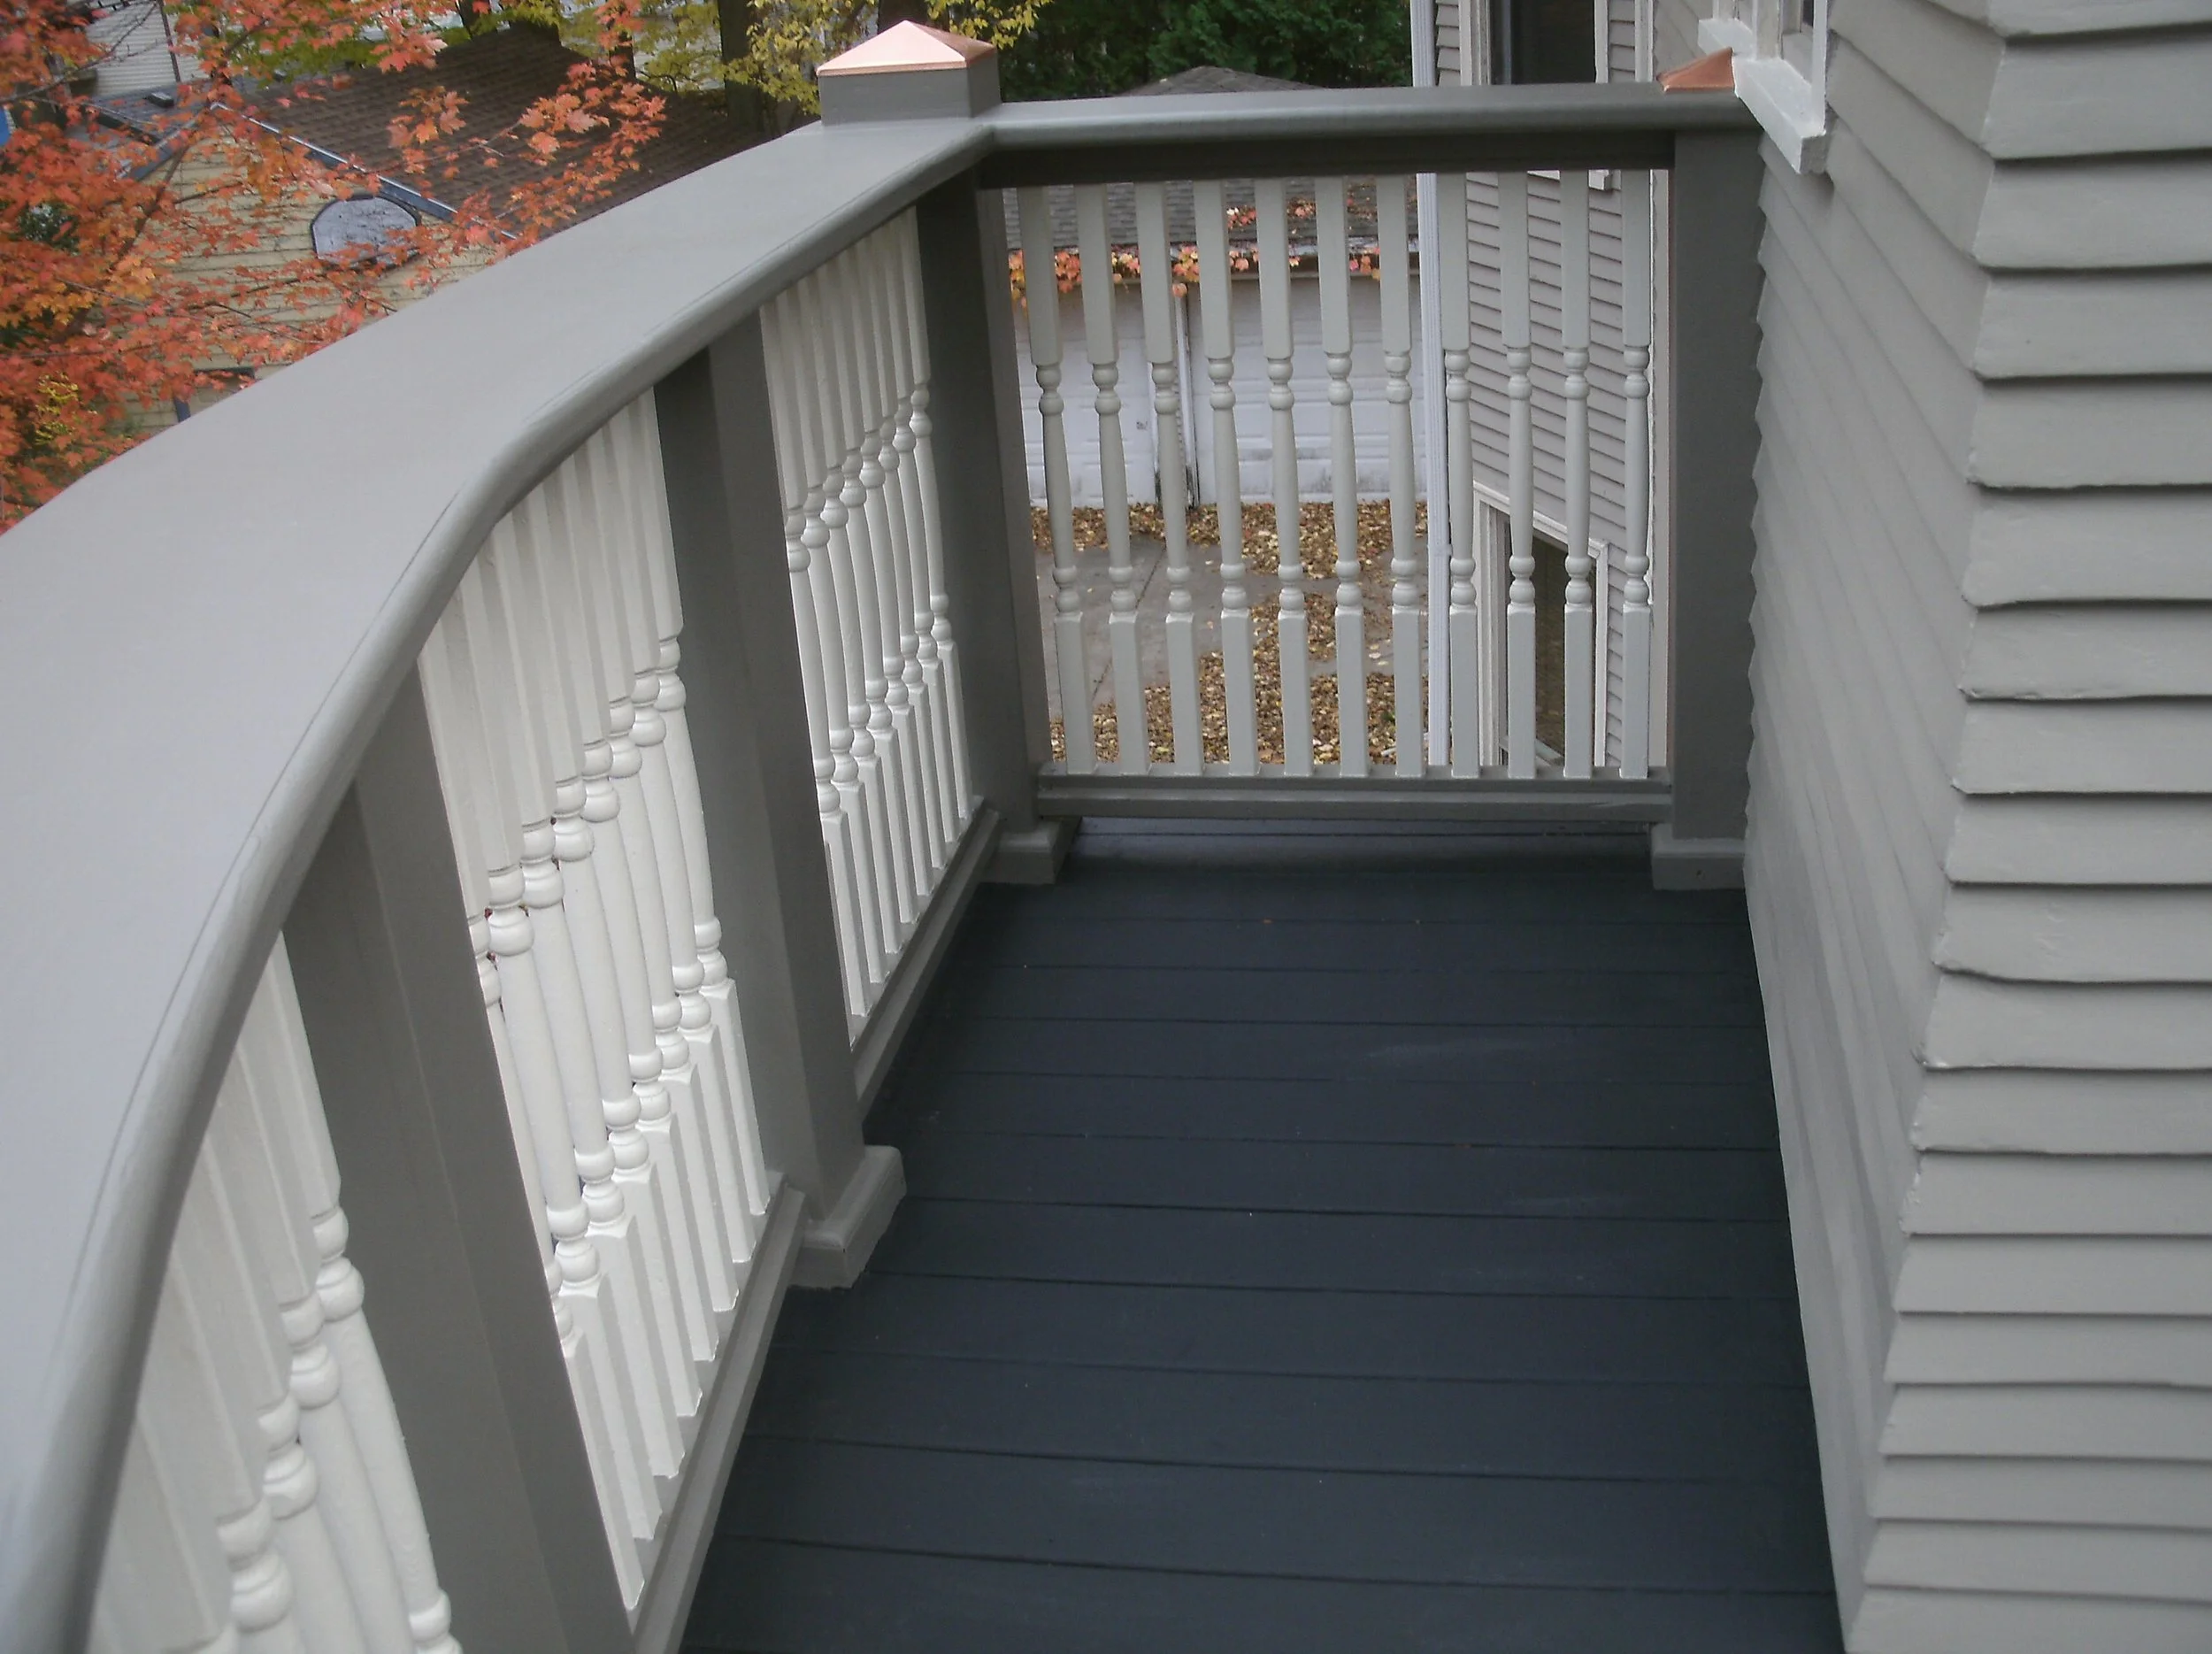
First view of the railing top installed and painted from on the deck.
Dramatic long view of the rounded rail top installed and painted.
Close up of the sexy, rounded railing top.
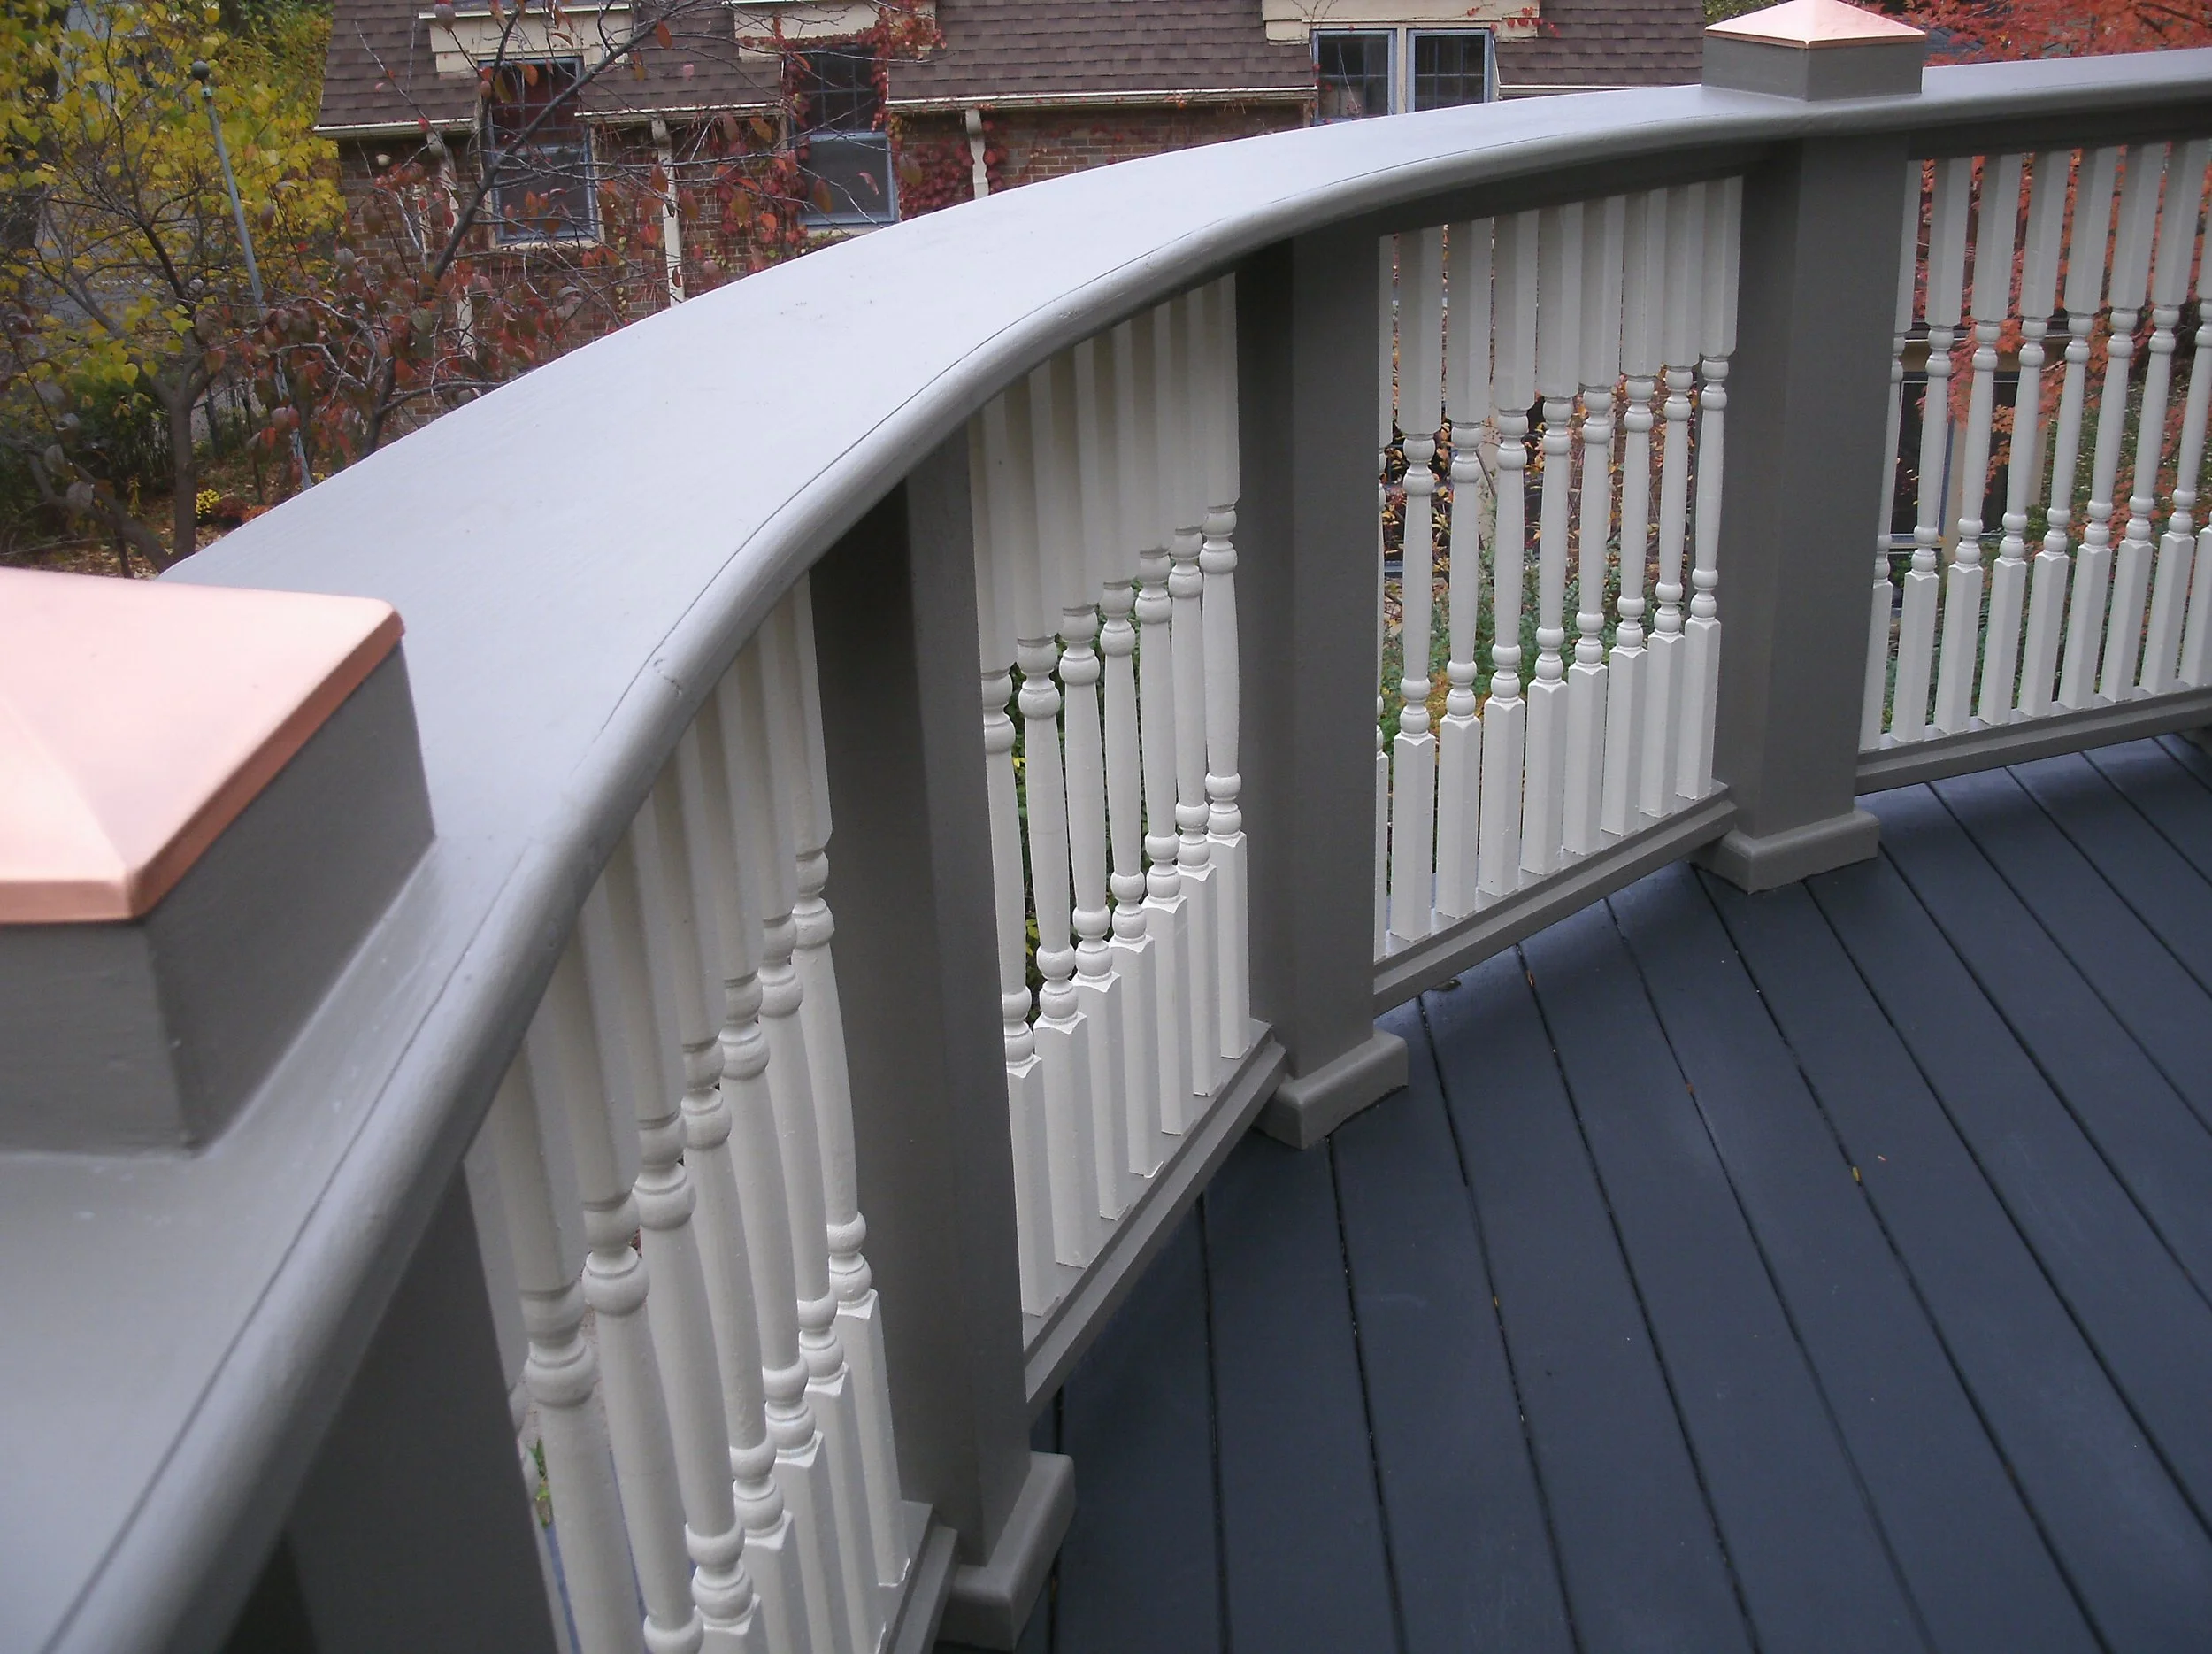
Another close-up of the rounded railing top.
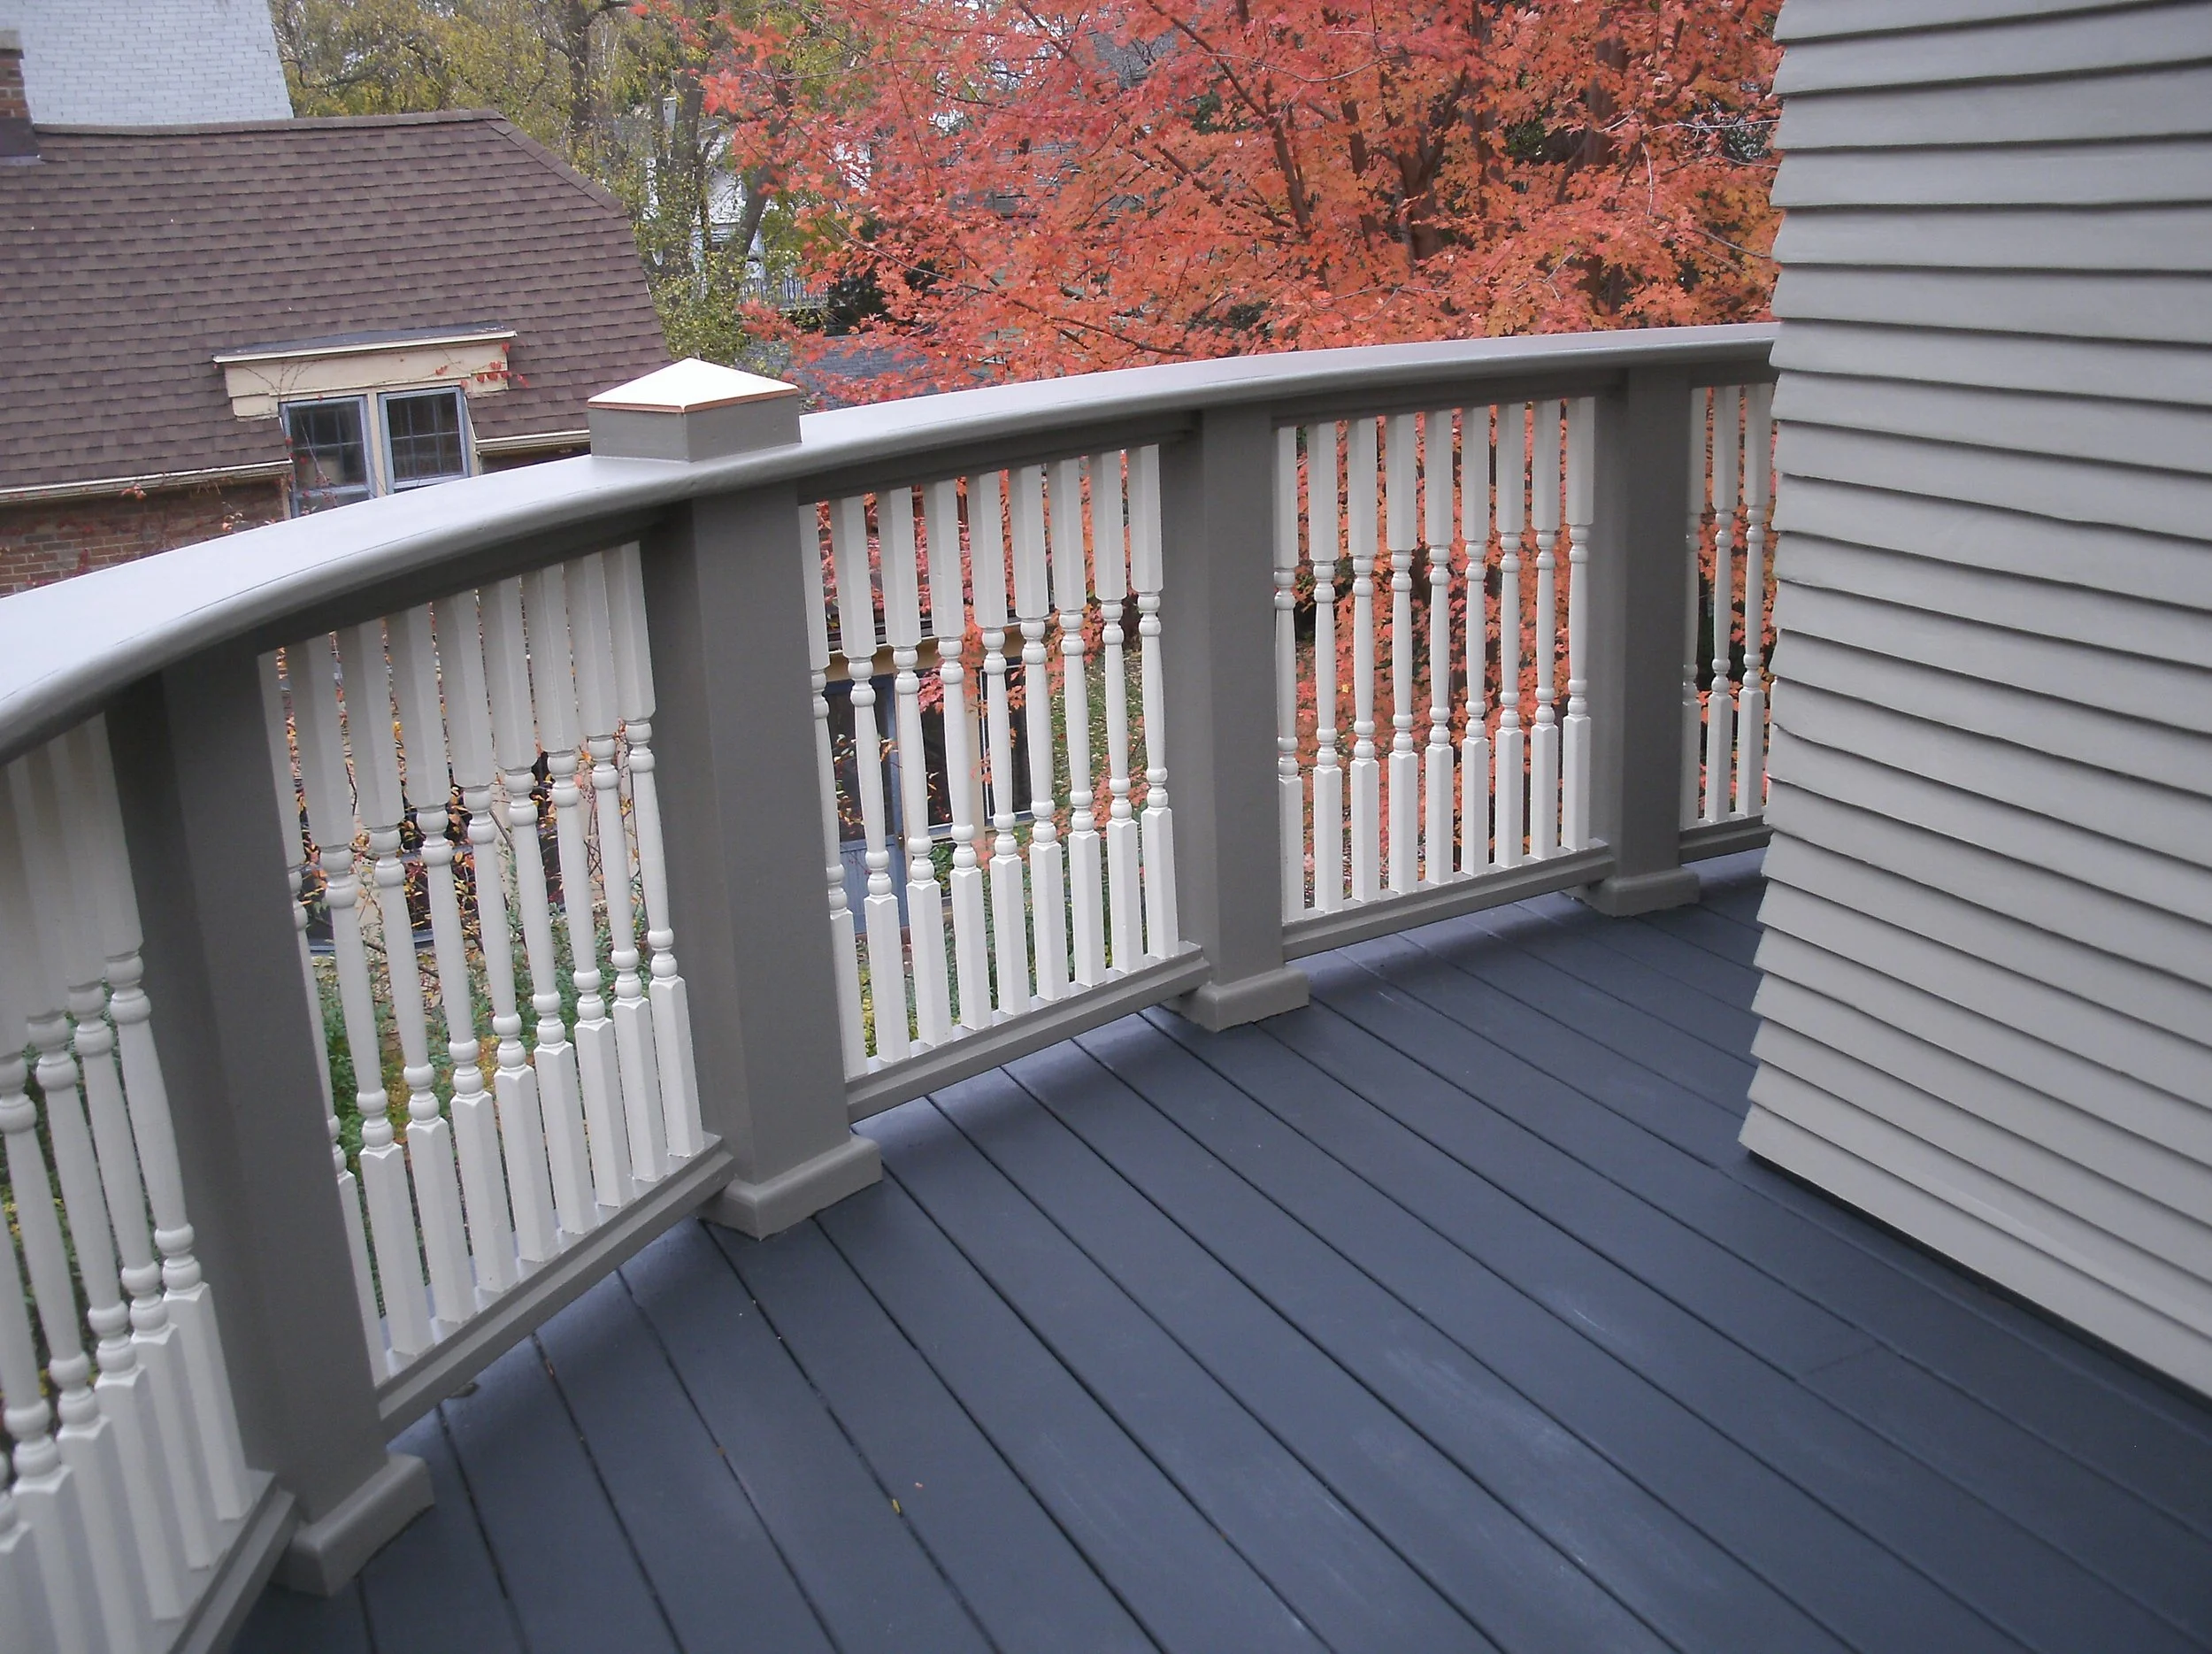
View of railing and repaired siding. Railing, decking, and siding painted.
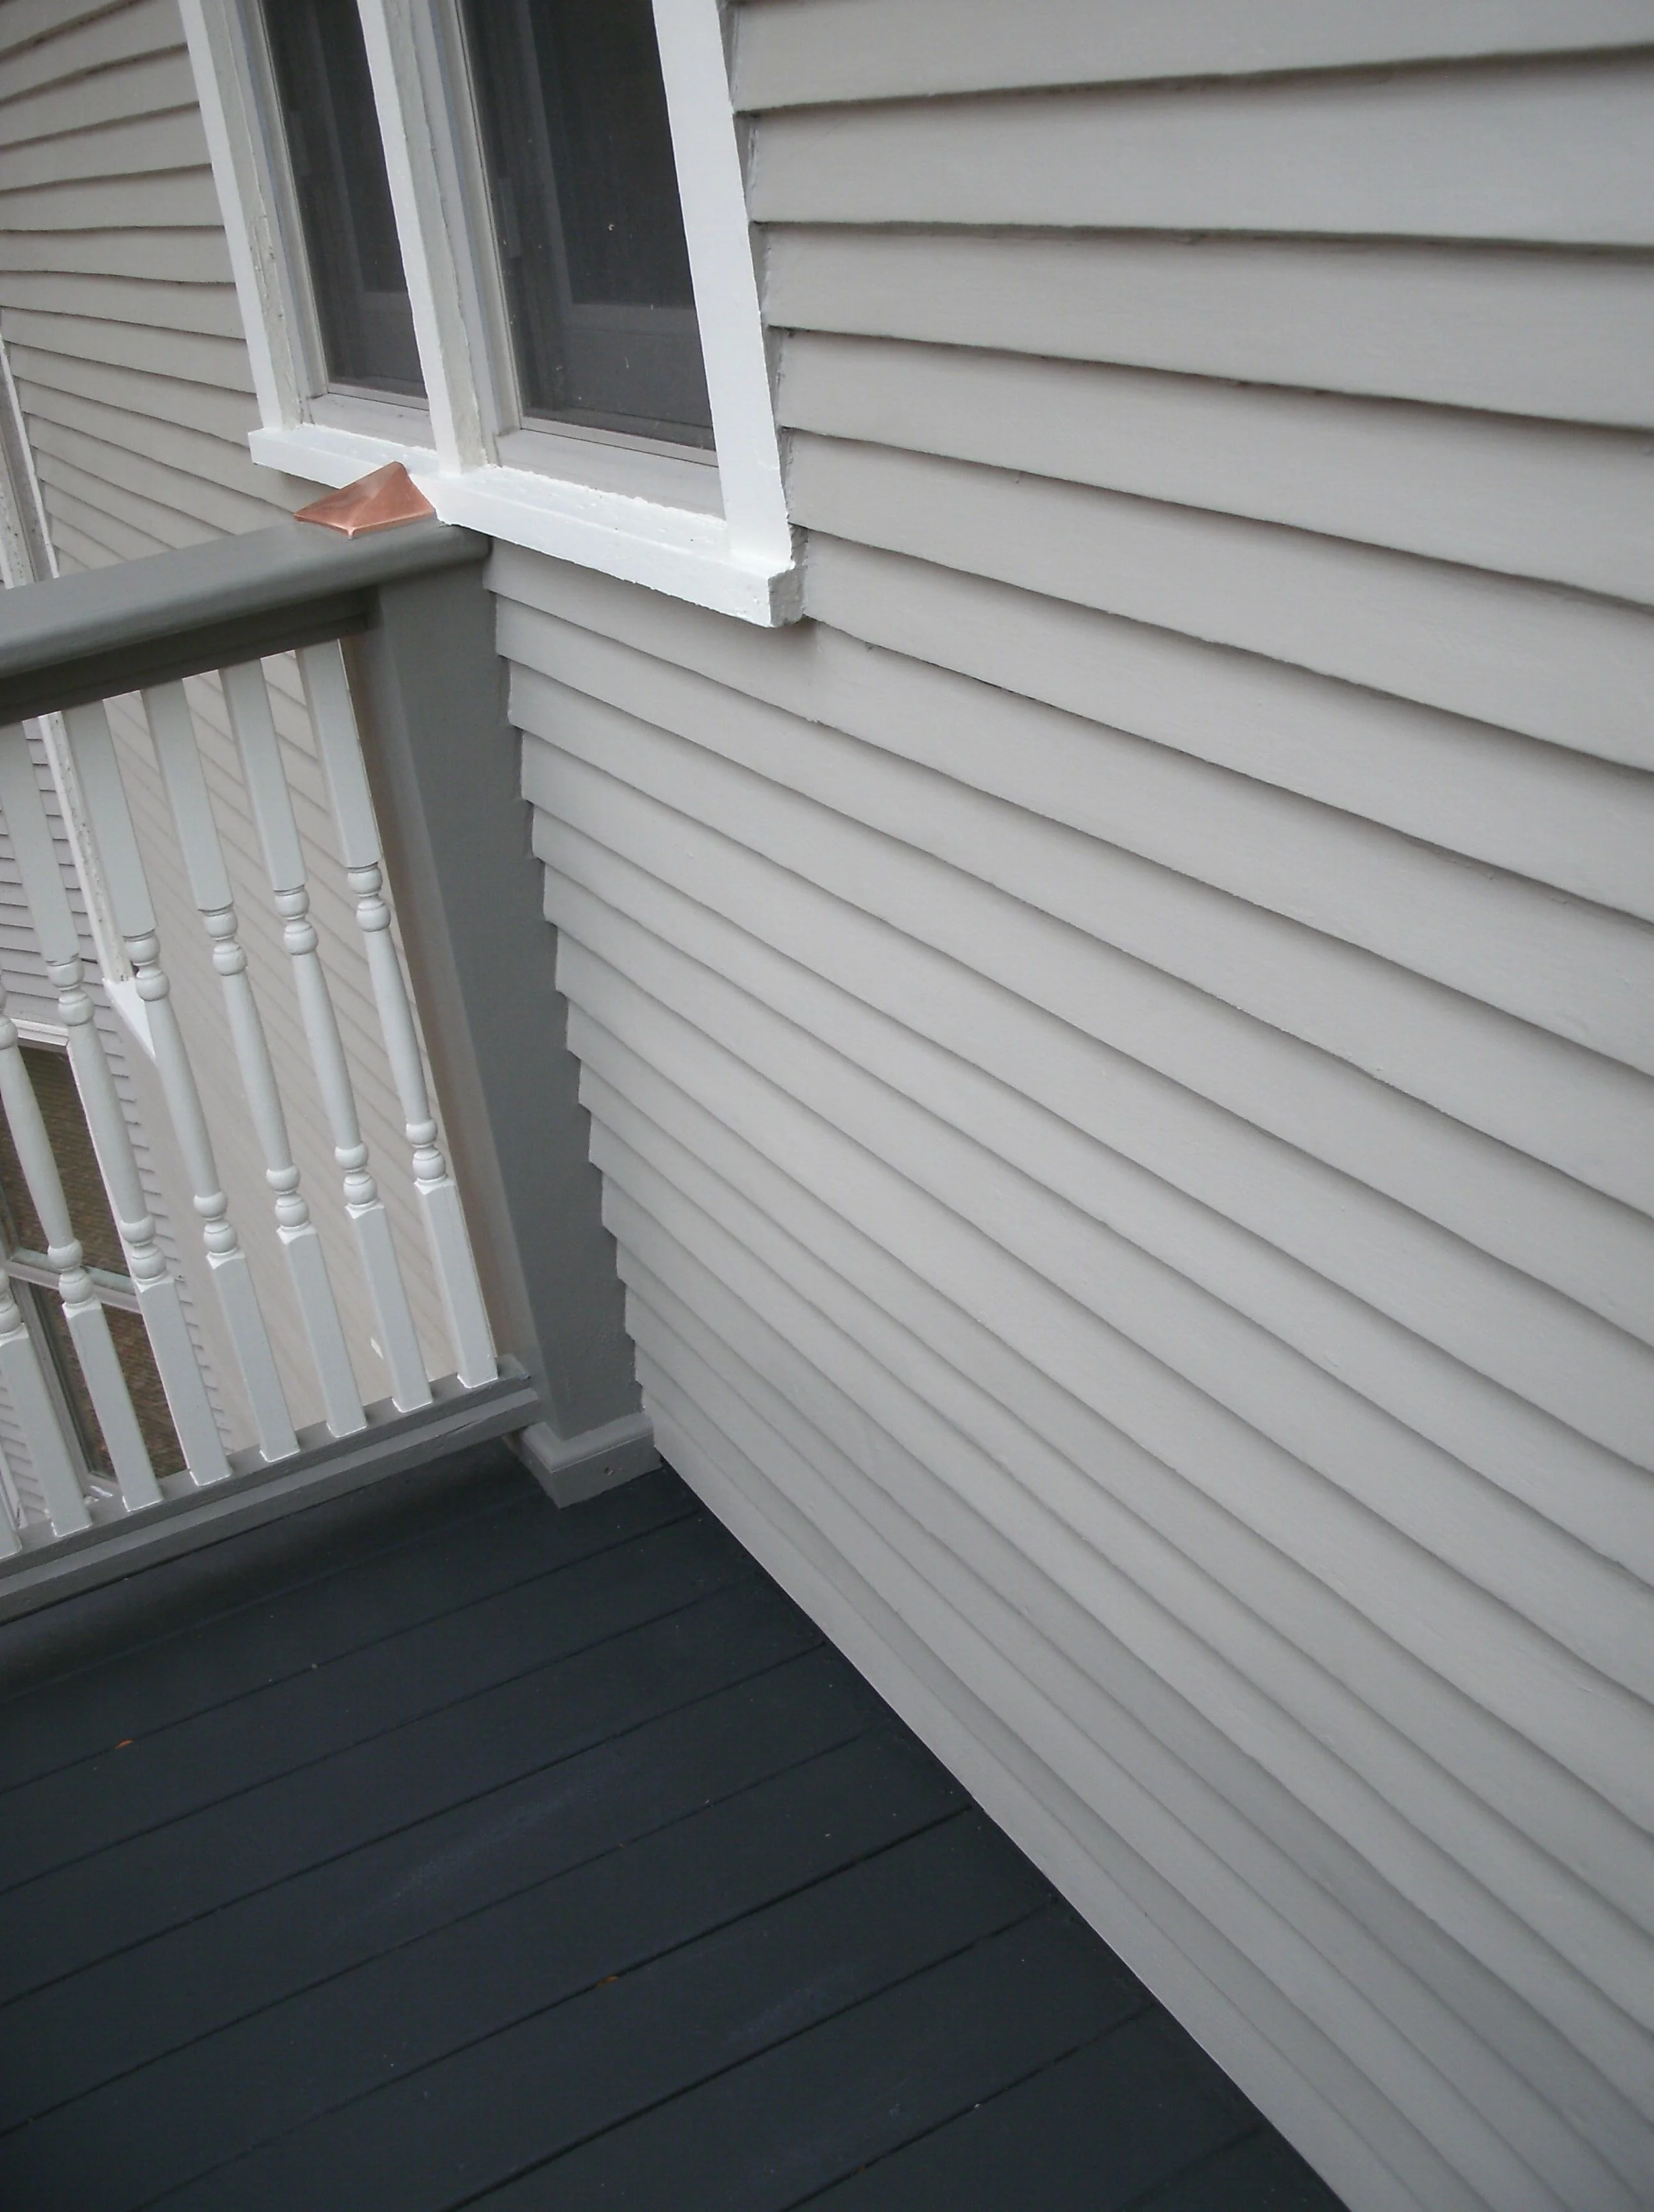
Another view of repaired siding.
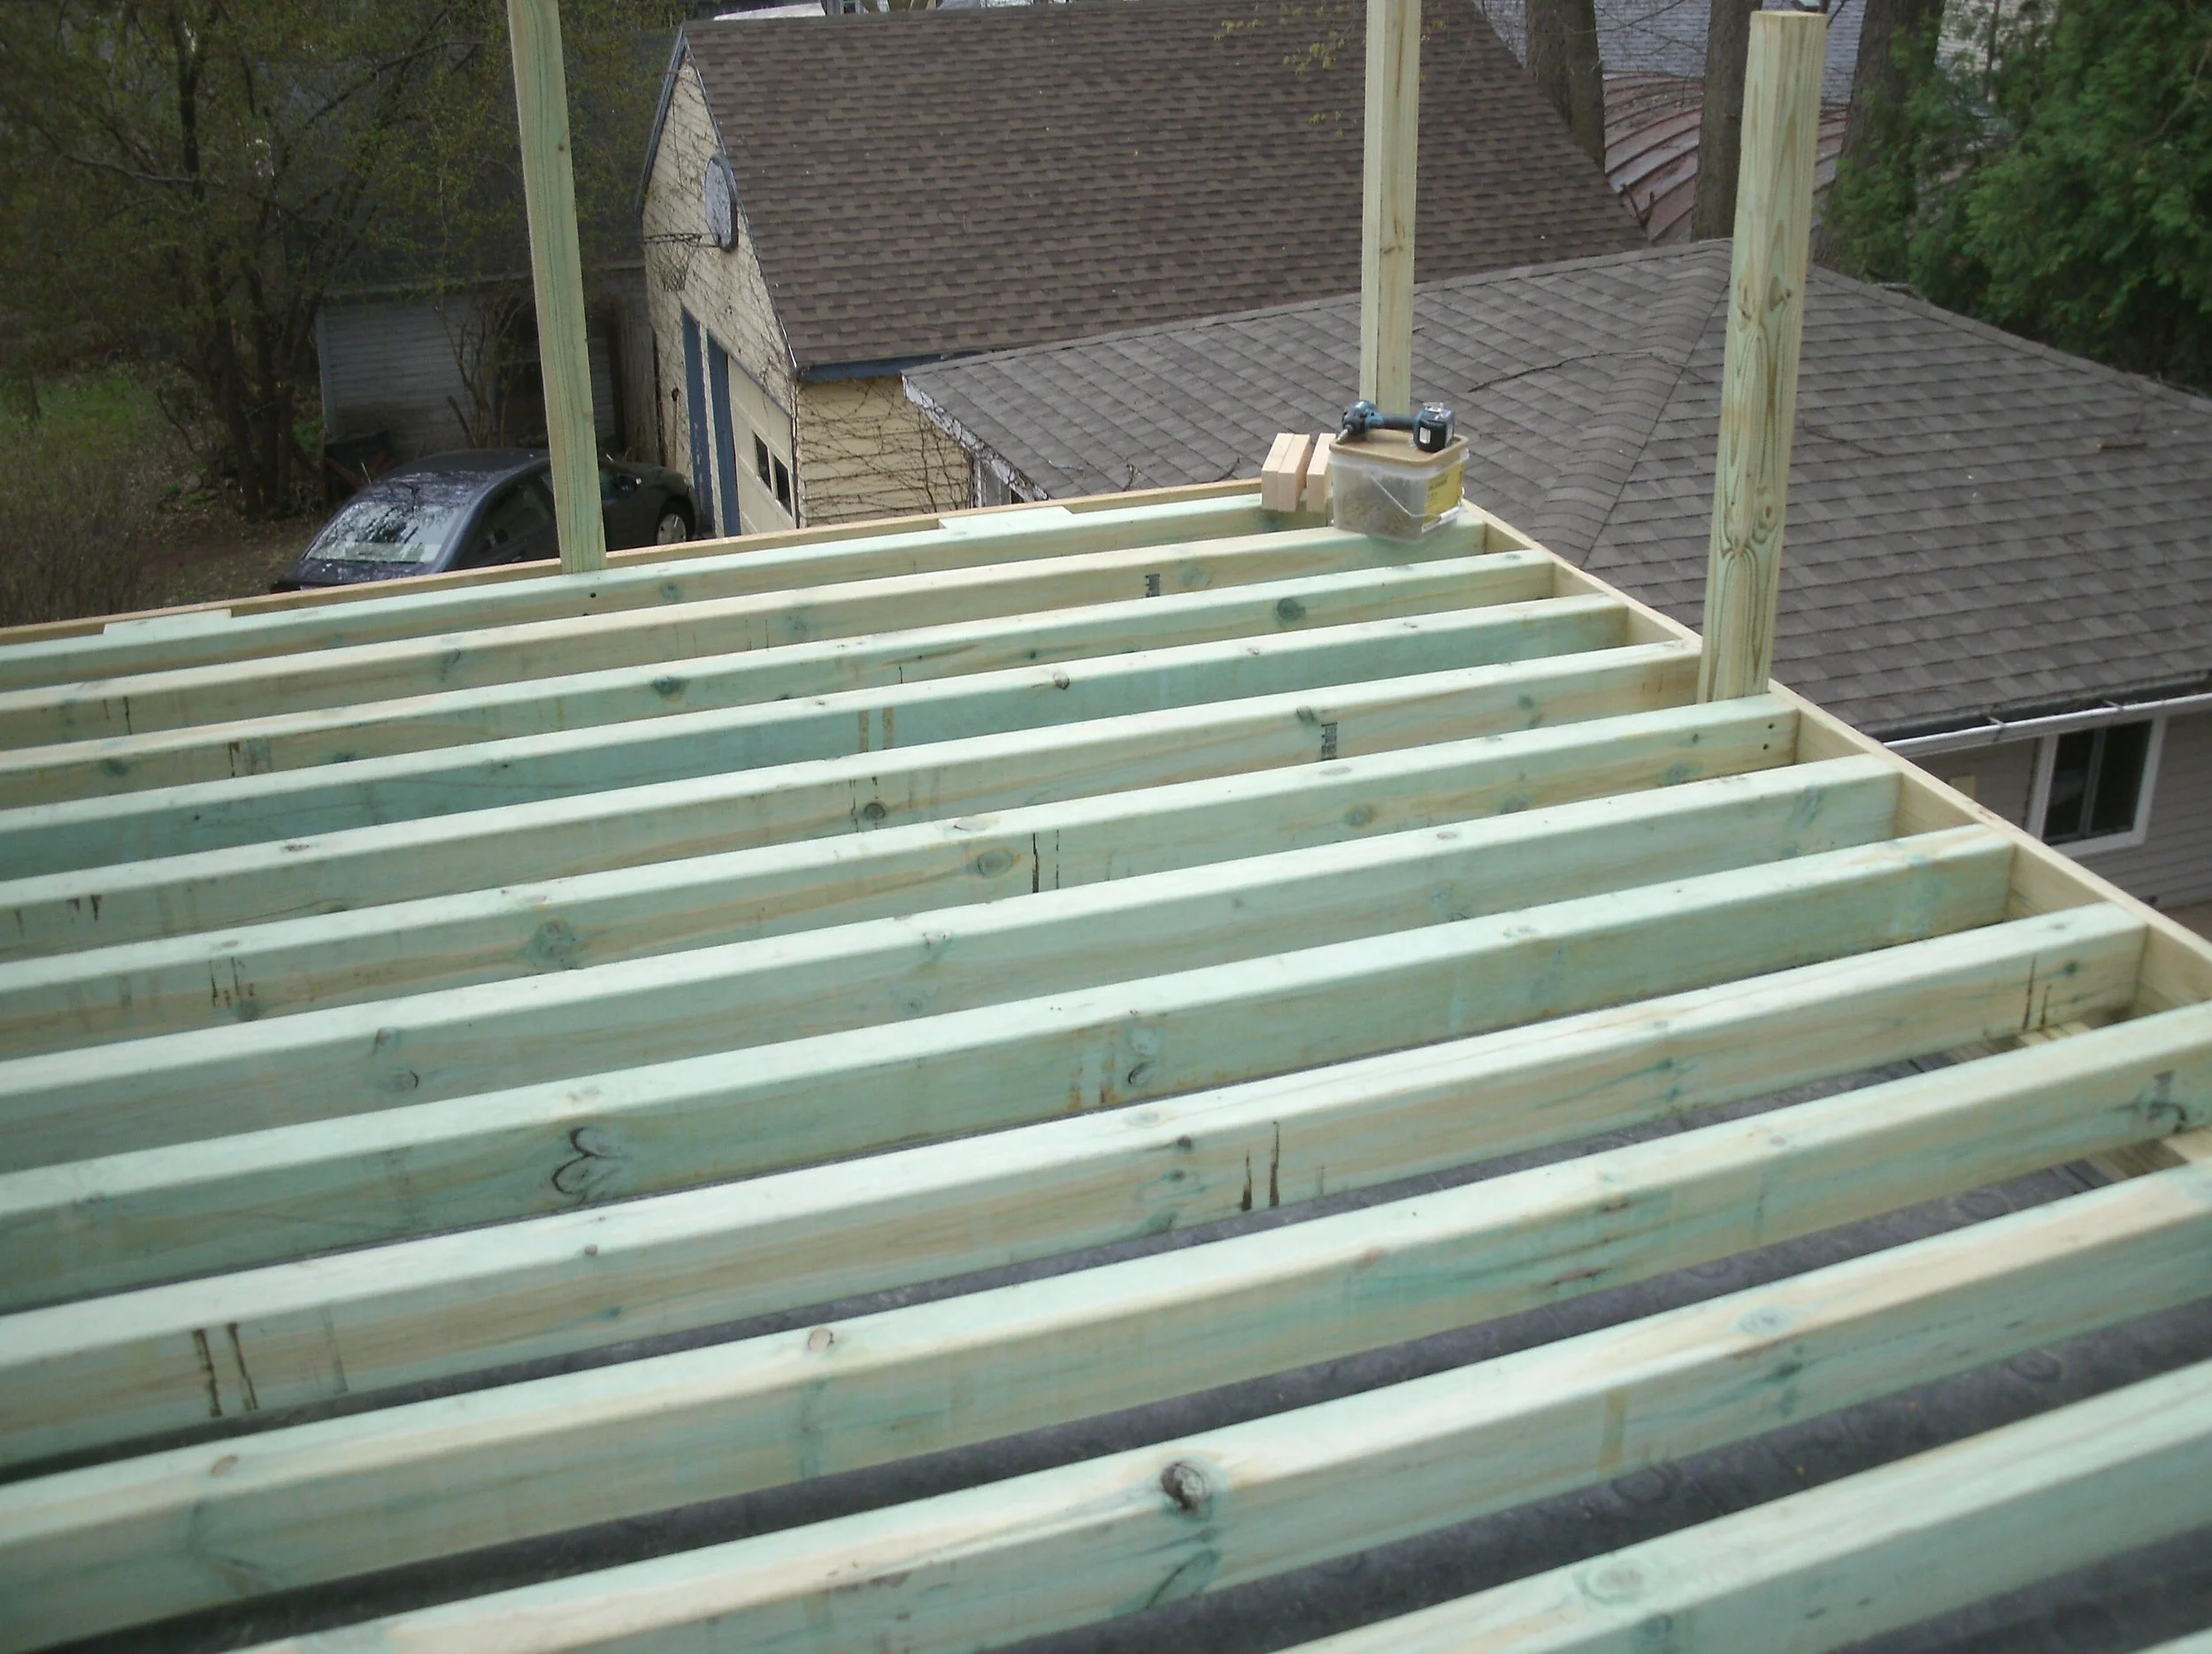
Rutledge Rear Roof/Deck
This was a beautiful old Victorian house, which was tastefully divided into three units. I had done quite a bit of other work for the family in the past. There were some mystery brown spots in the ceiling of the front sunroom, and when I showed up, there were tea cups and saucers across the floor, catching the dripping water from the ceiling! While it revealed a much worse problem, the tea cups and saucers were a very cute, albeit temporary answer. As I began to get an idea of how damaged the front roof was, I asked to see the the back room and ceiling above. More brown spots told me that this roof was leaking as well. We started in the front because it was worse.
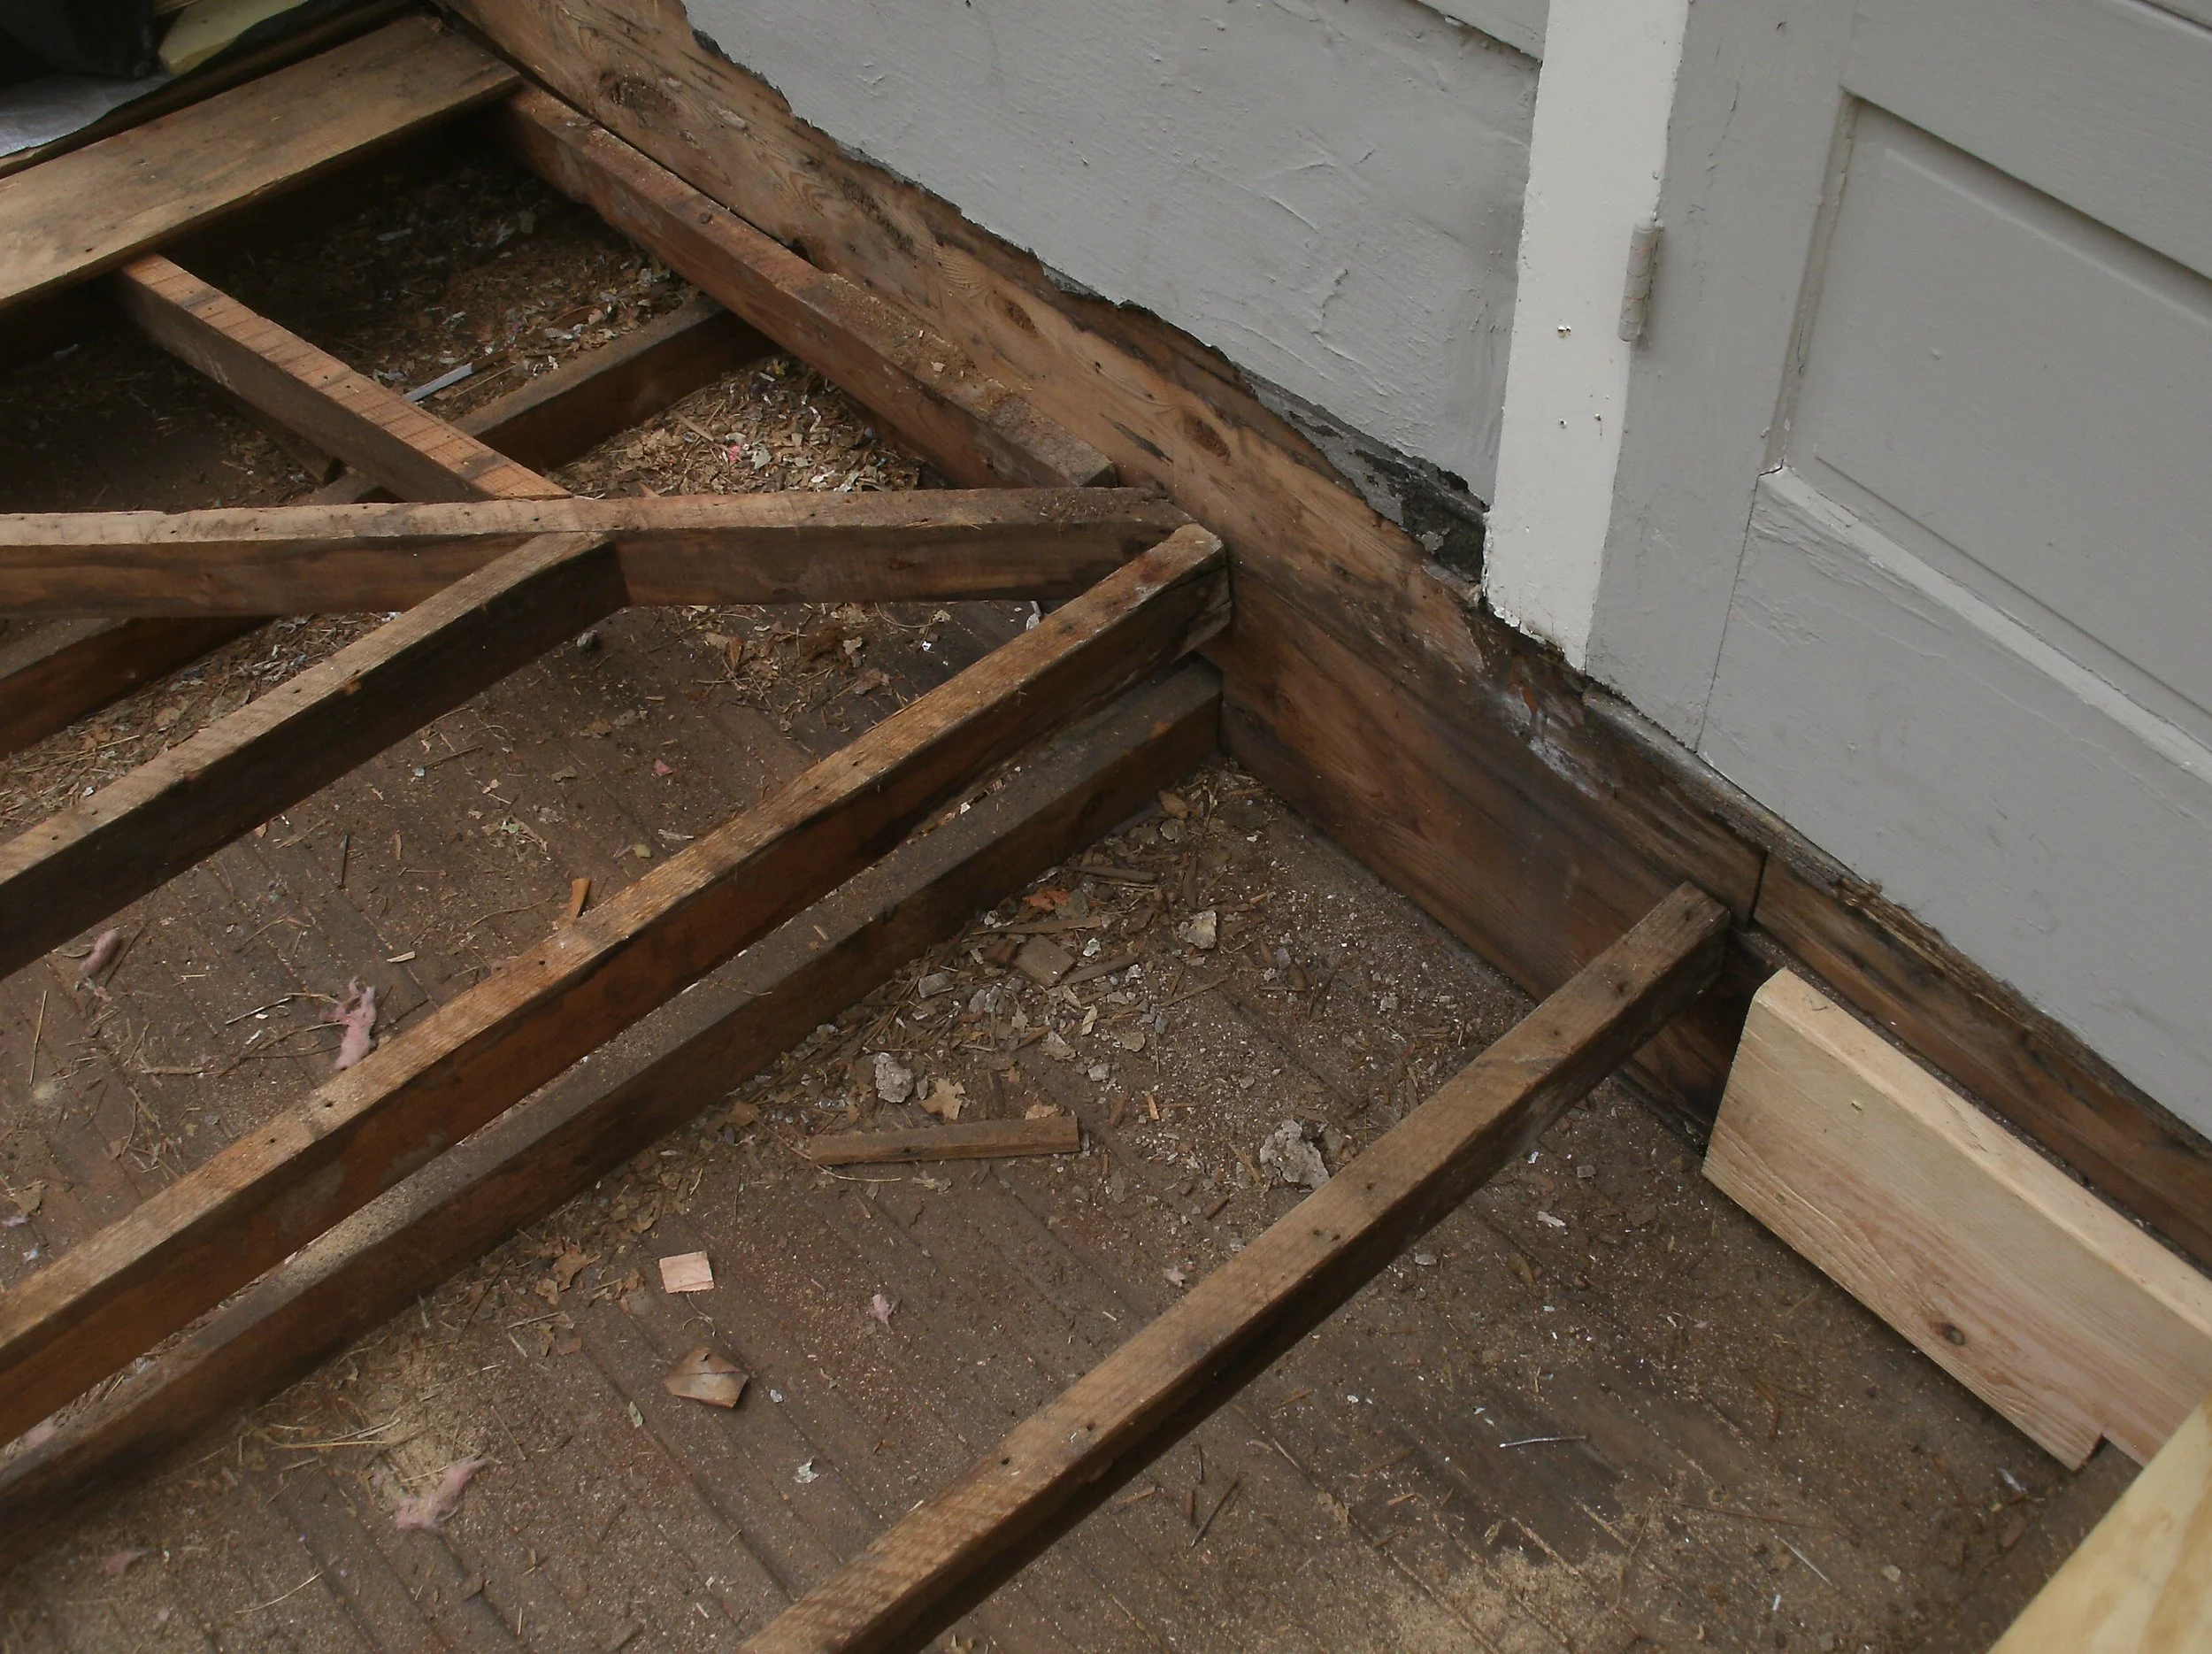
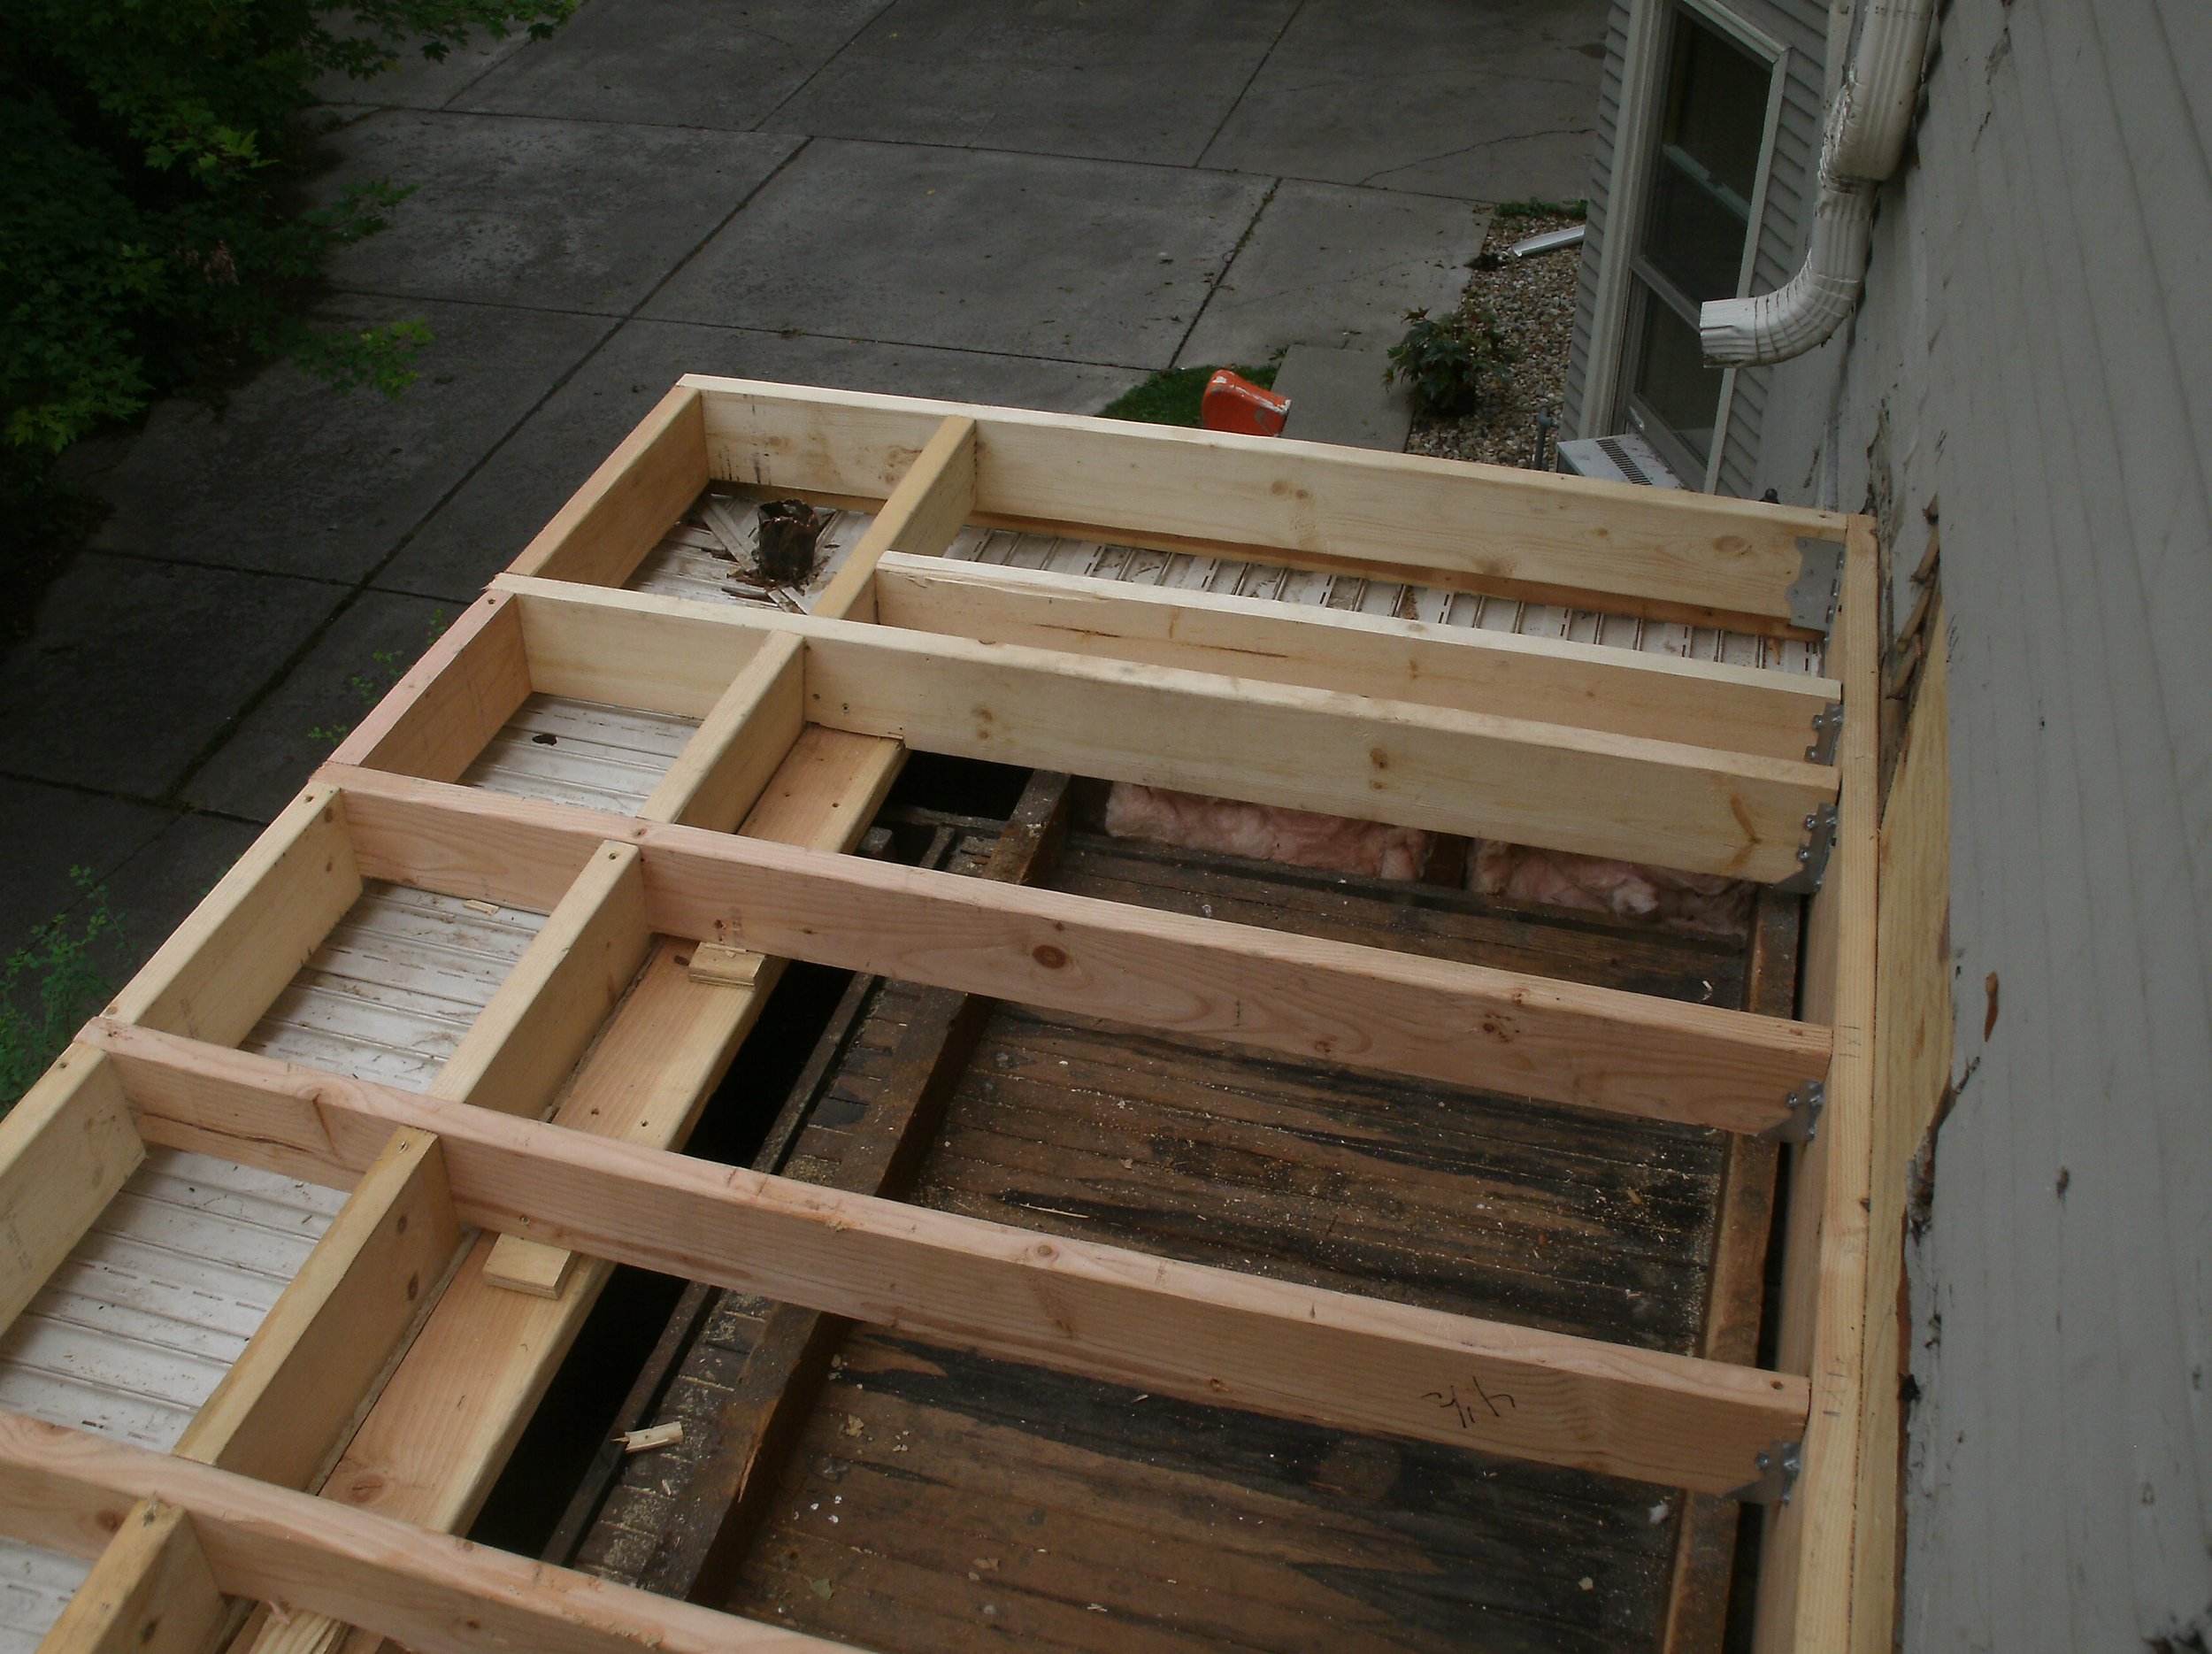
Because it was in a historic district we had to get the landmarks people involved. The railing in the front was way out of present day code. And because there were three units the City attention was justifiably more stringent. So instead of replacing the 2 foot tall handrail which poorly simulated the probable original quaint handrail, the rails needed to be 39 inches tall. The old rails, besides being screwed through the rubber roofing causing much of the leaks were a compromised, cheap replication of the old decorative 24 inch tall rails in the initial build. There was no plan for humans to go out onto the roofed areas, so the rafters which formed the support for the roofs were 2x4s toenailed into the wall sheathing, and just tacked to the roof edge. These were dramatically undersized, and and were barely able to support themselves, the sheathing, and the old-school metal roof. At sometime probably 30 years before my complete down to the ceiling joists rebuild, they had put rubber roofing over the rusting away metal roof. They then built a small idiotic deck which they attached with screws through the rubber roof.
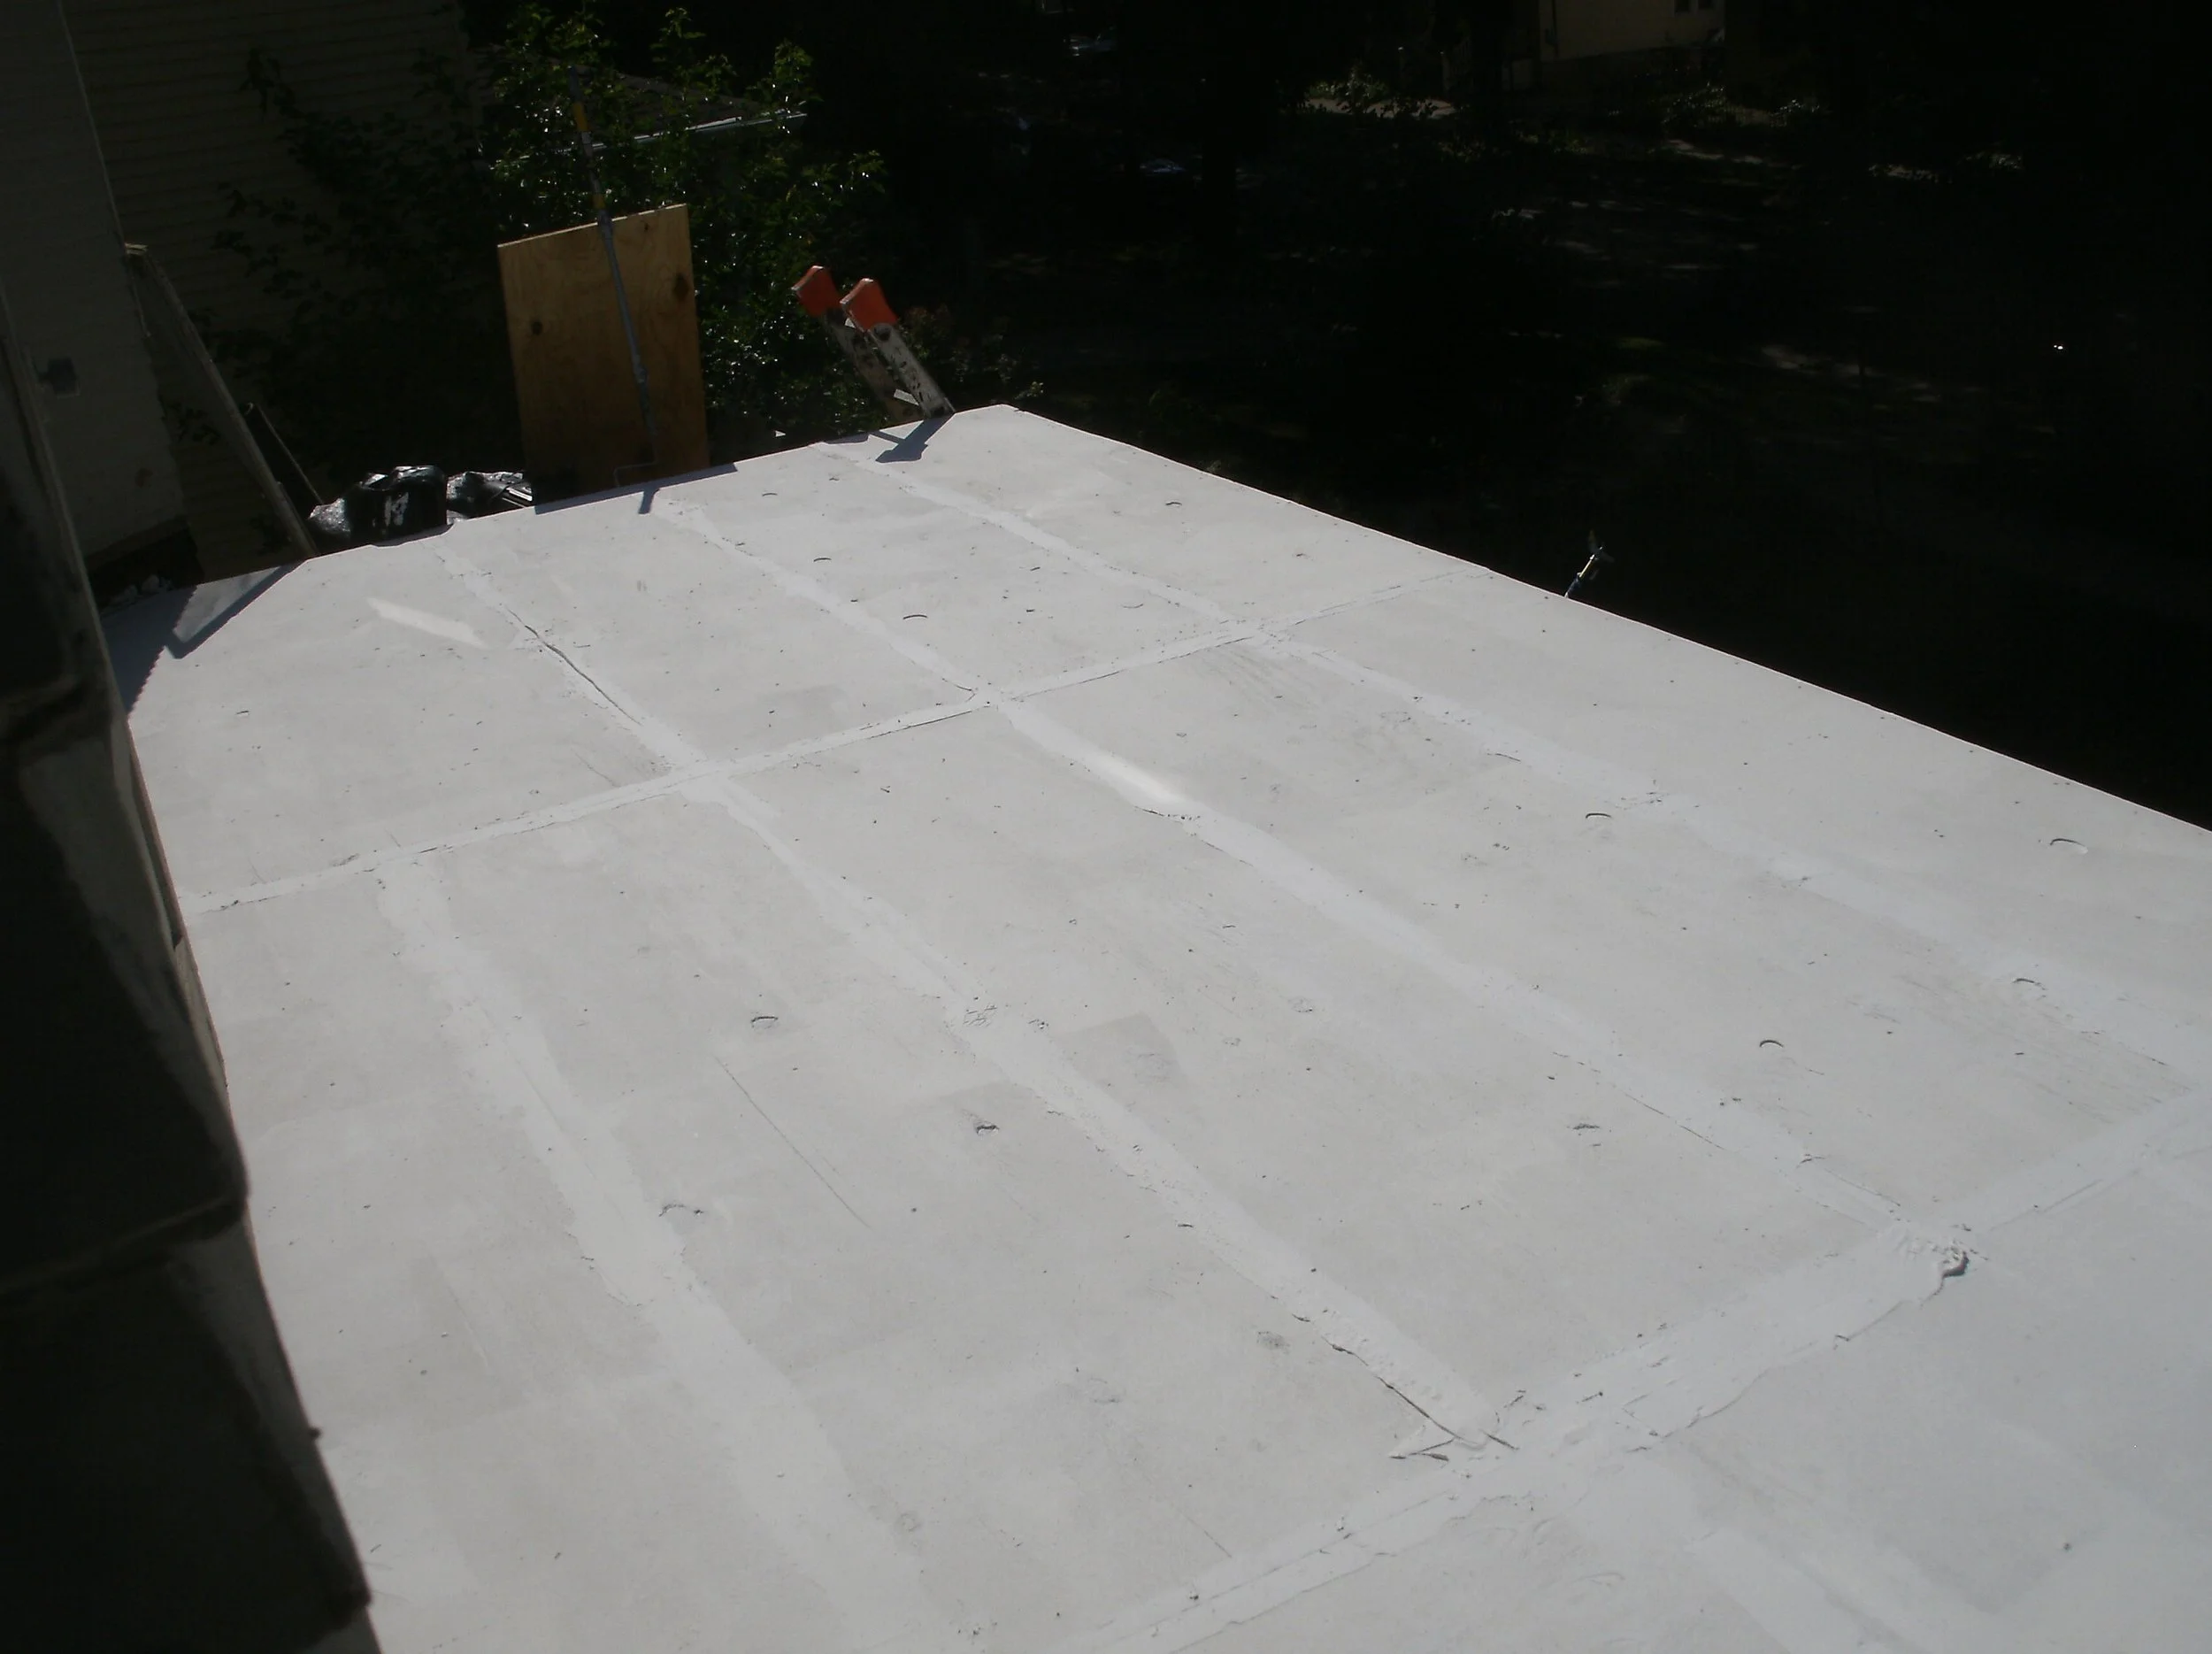
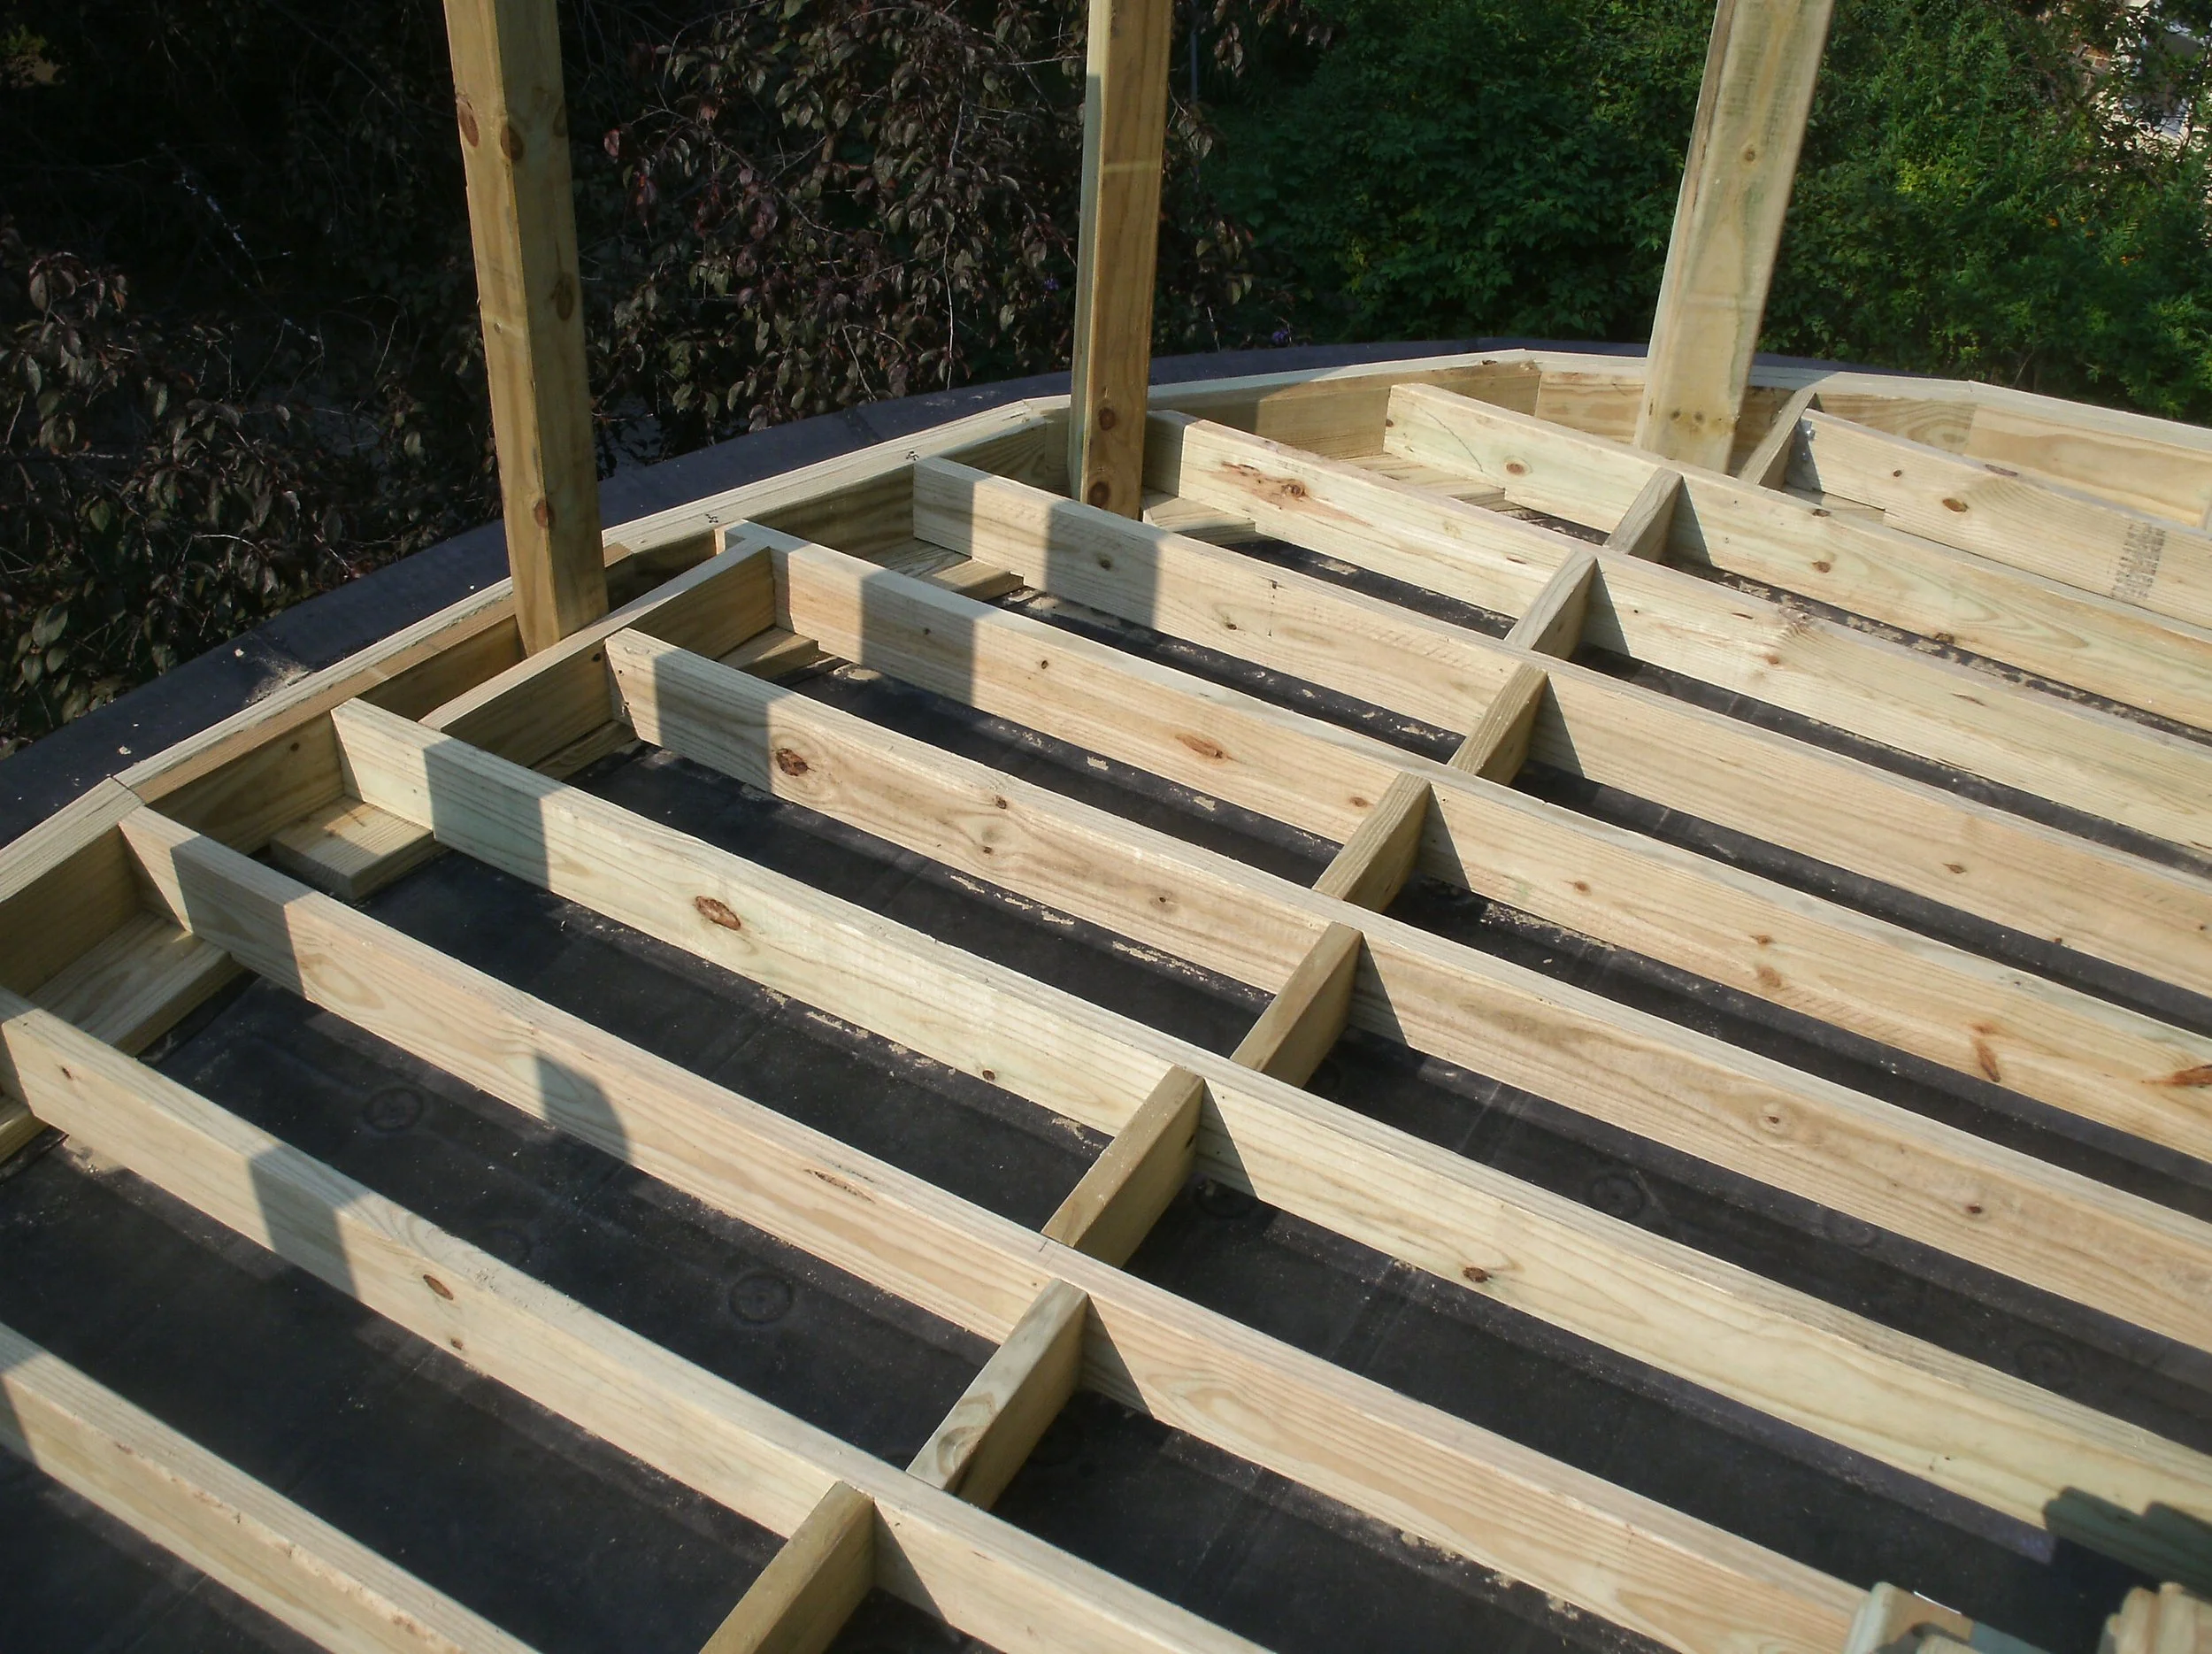
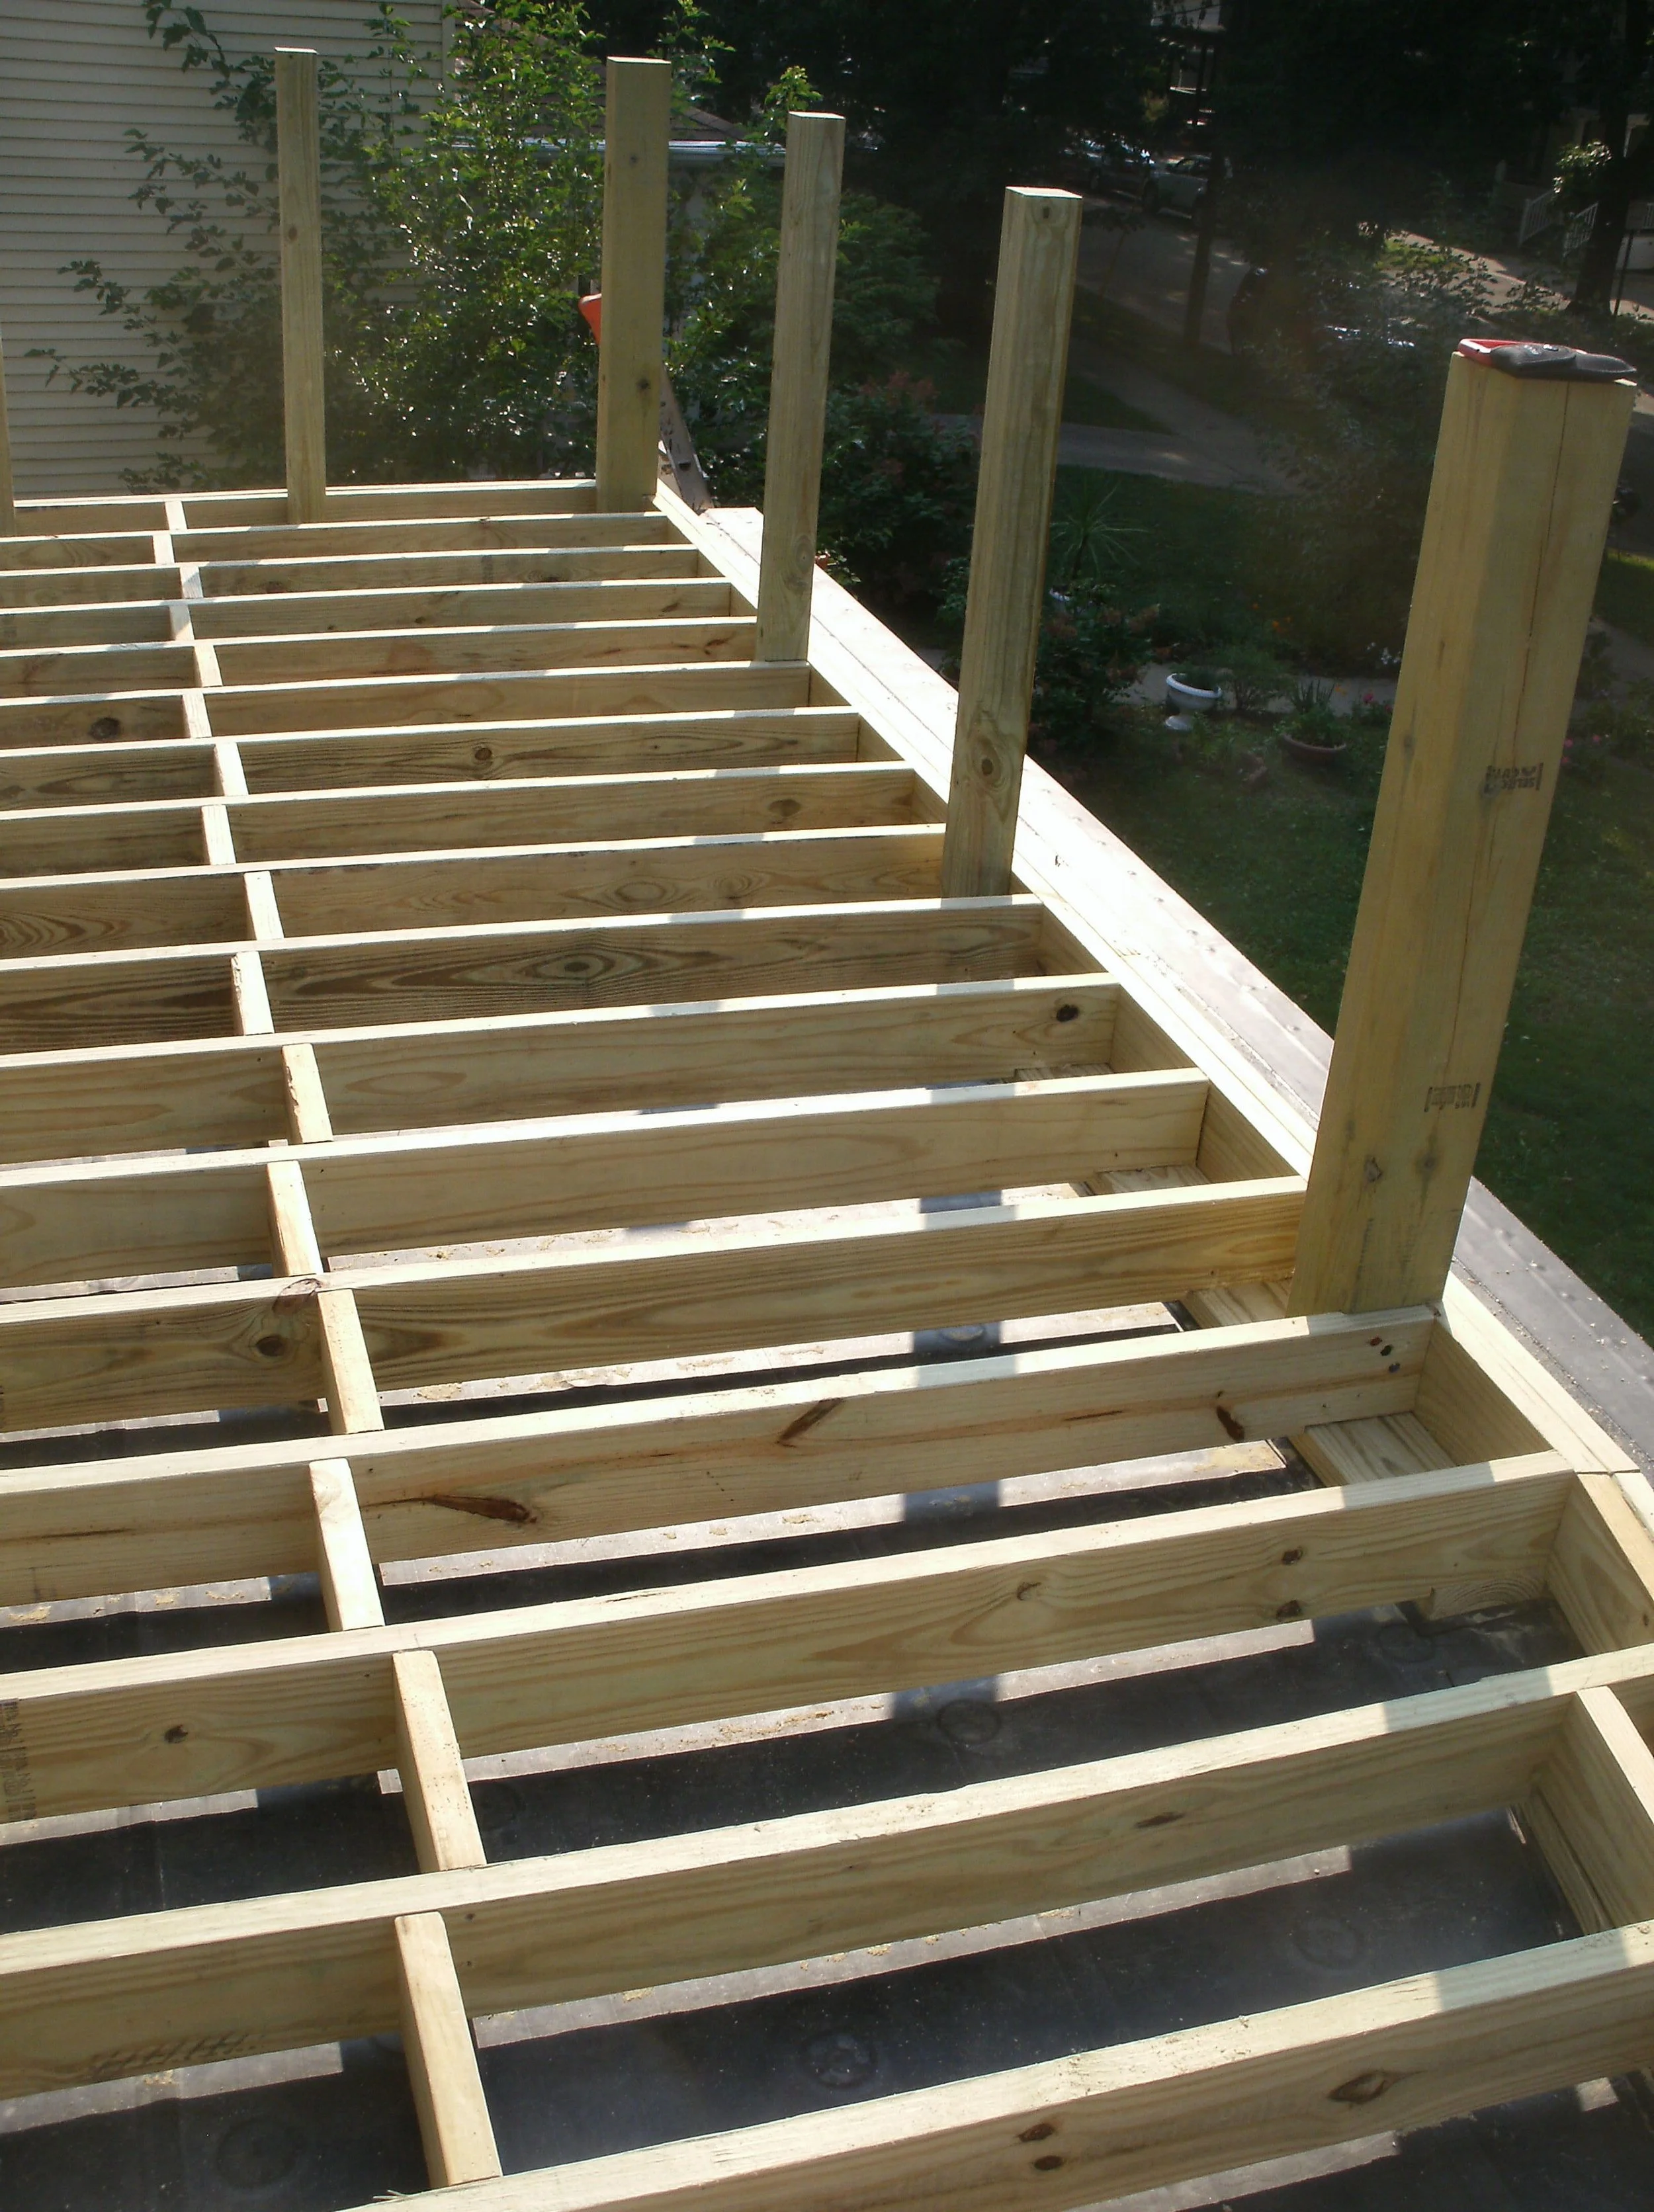
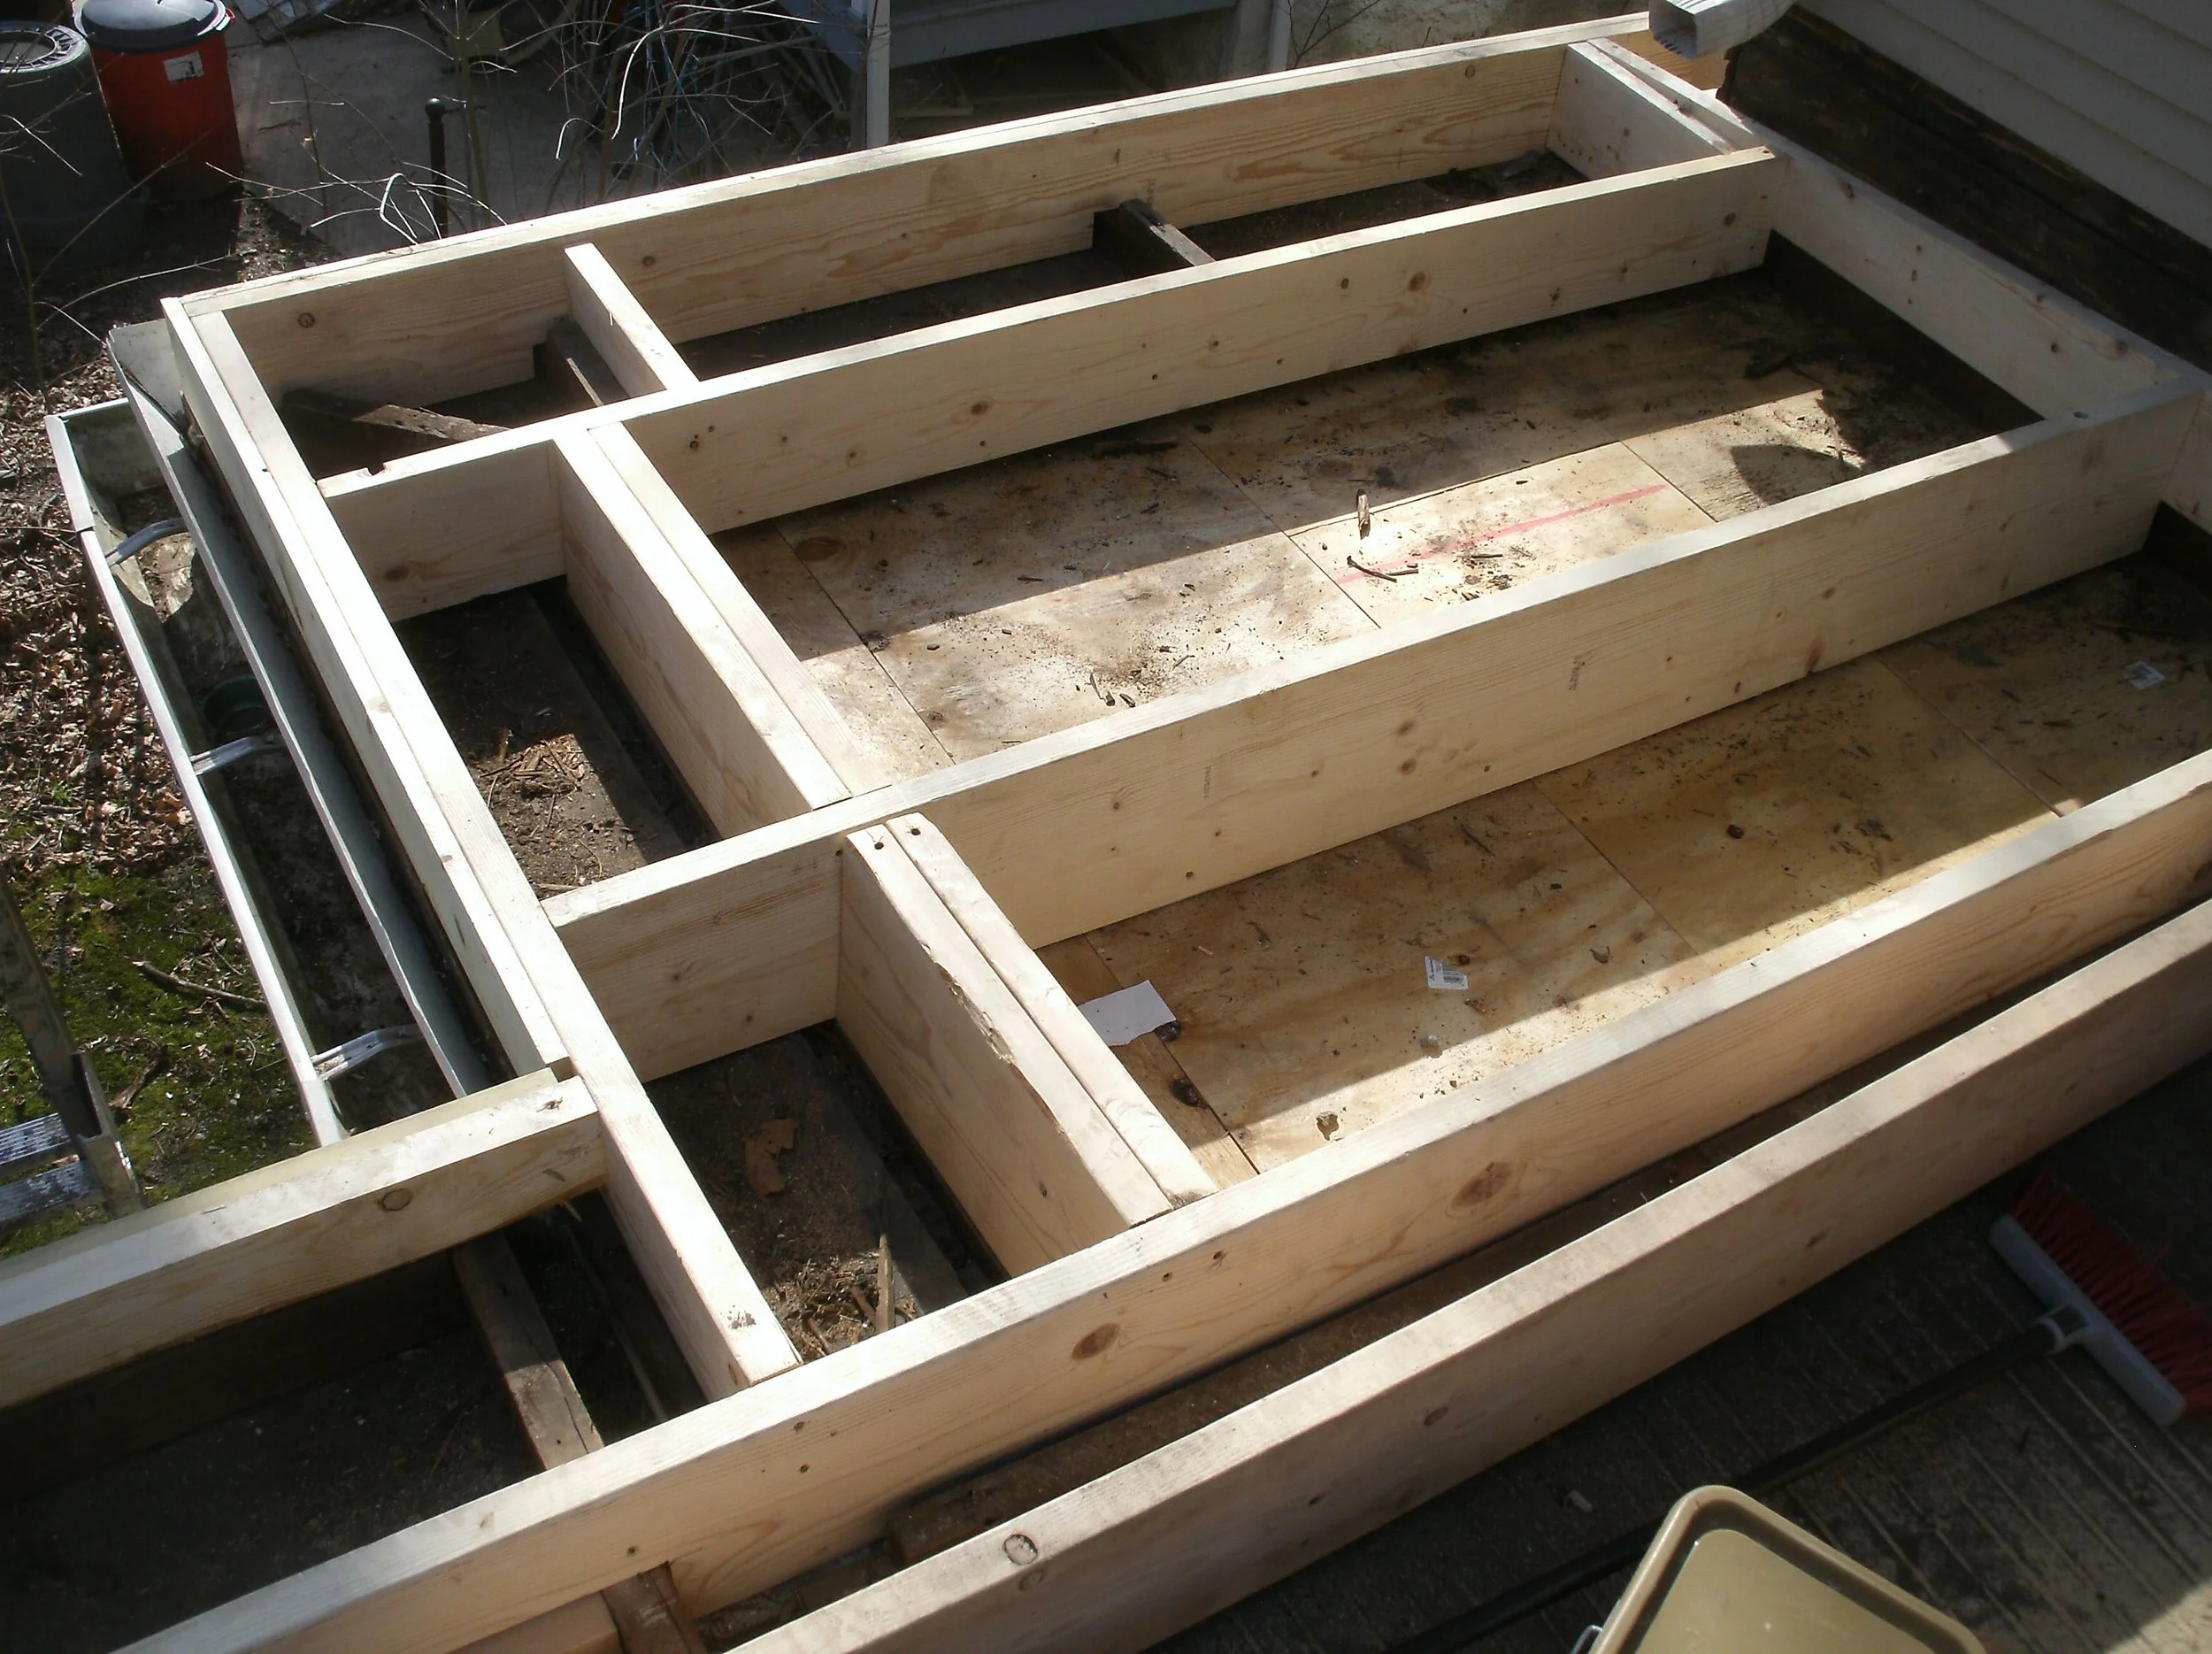
So I took the old structure down to the roof/ceiling joists. I prepared those as necessary, had 10 inches of fiberglass insulation blown in so that at least the ceiling of the room below was well insulated. I then put 3/4” plywood sheathing over the whole roof. I’ve always caulked the seams in the plywood and painted three coats of a mobile home roof coating paint to absolutely seal the plywood. When the roofer showed up to install his rubber roofing, he asked WTF about the white painted/sealed plywood. He wasn't put out, he had just never seen anyone else do this. He asked me why. I said that I’m sure his rubber roofing was going to be extremely competent, but all it would take is one squirrel to nibble through it and it would leak. This way it was sealed against all but a tidal wave. He installed the rubber roofing. I then created the framing for the full-size deck. To span the 20 feet I needed treated 4x6s 12 inches on center. With these joists hanging properly on a ledger lag bolted to the house wall and sitting on top of the exterior wall of the back room, there was no way that the joists would rest upon and compromise the rubber roofing in any way. I framed up the posts, installed the decking, and fabricated and installed all of the rails. I then painted everything. I painted the decking with Behr Deckover paint. This paint is intended to be used to rescue old decking, but I have always used it on new wood. I also painted the rails with Behr paint.
These new joists replaced rotted out original joists.
I first had to replace rotted ceiling sheathing over the basement stairs.
You can see the eventual hump of the roof to shed water
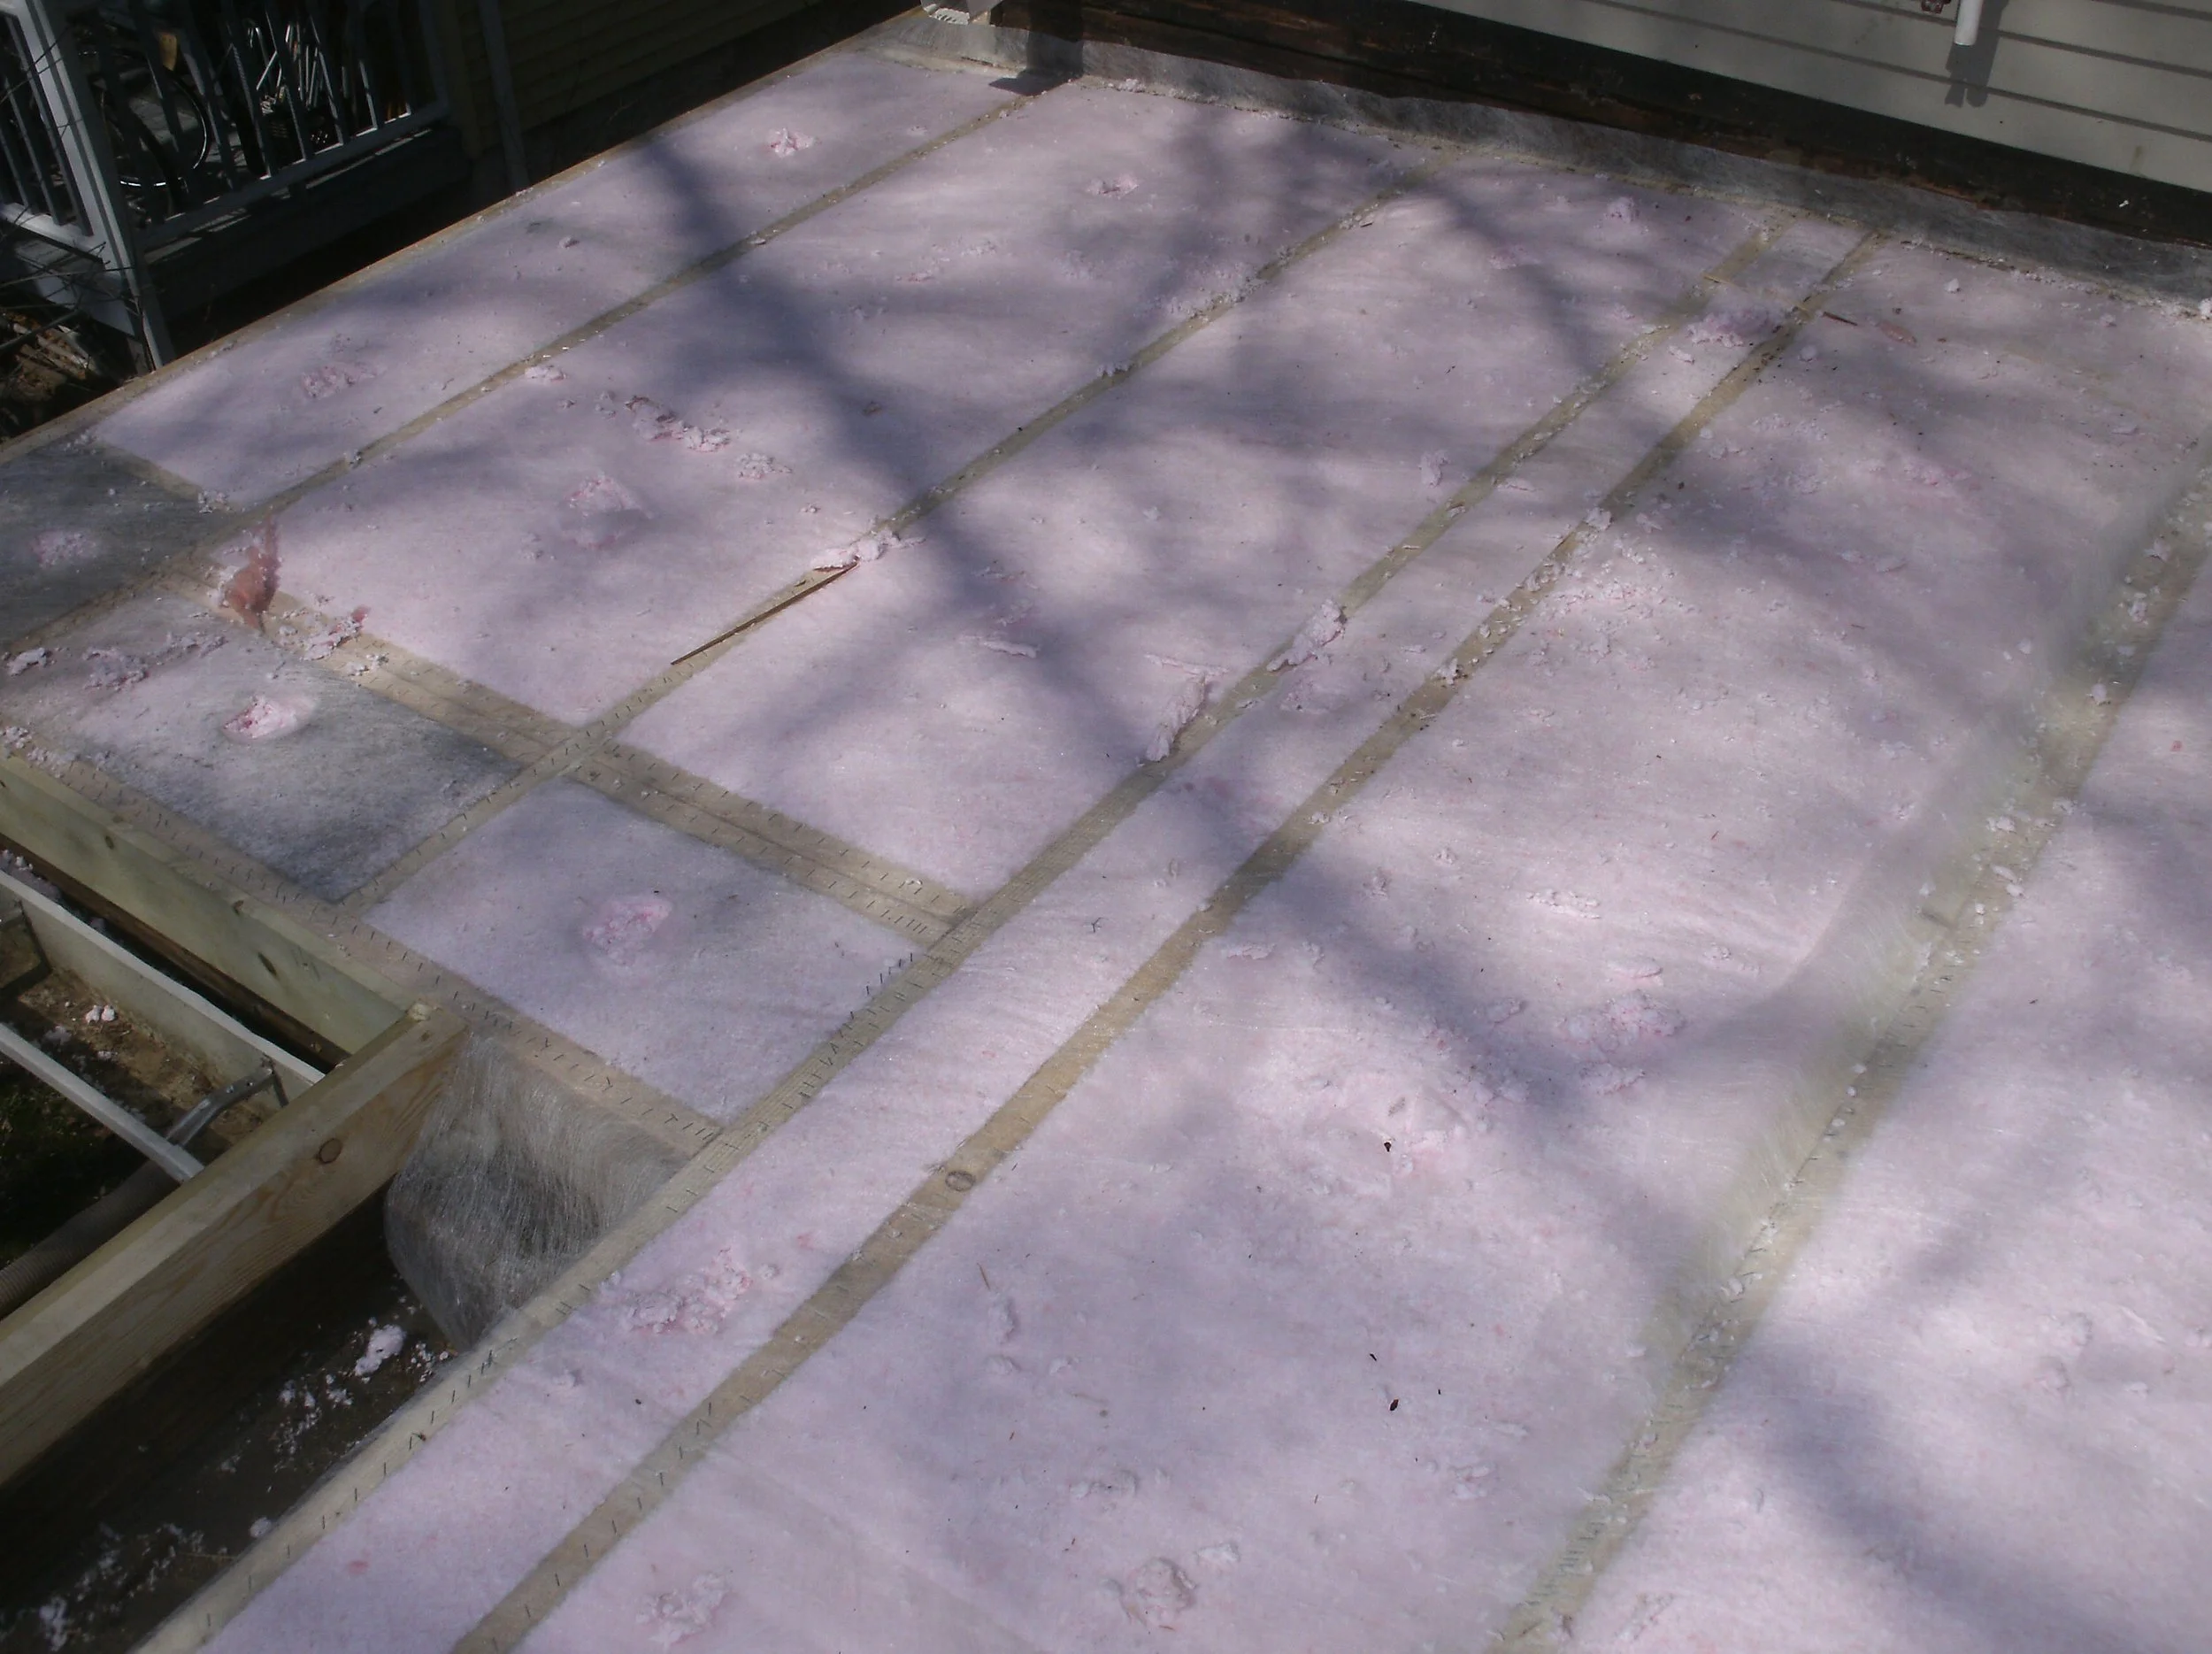
You can see the BIBS blown in insulation between all the joists
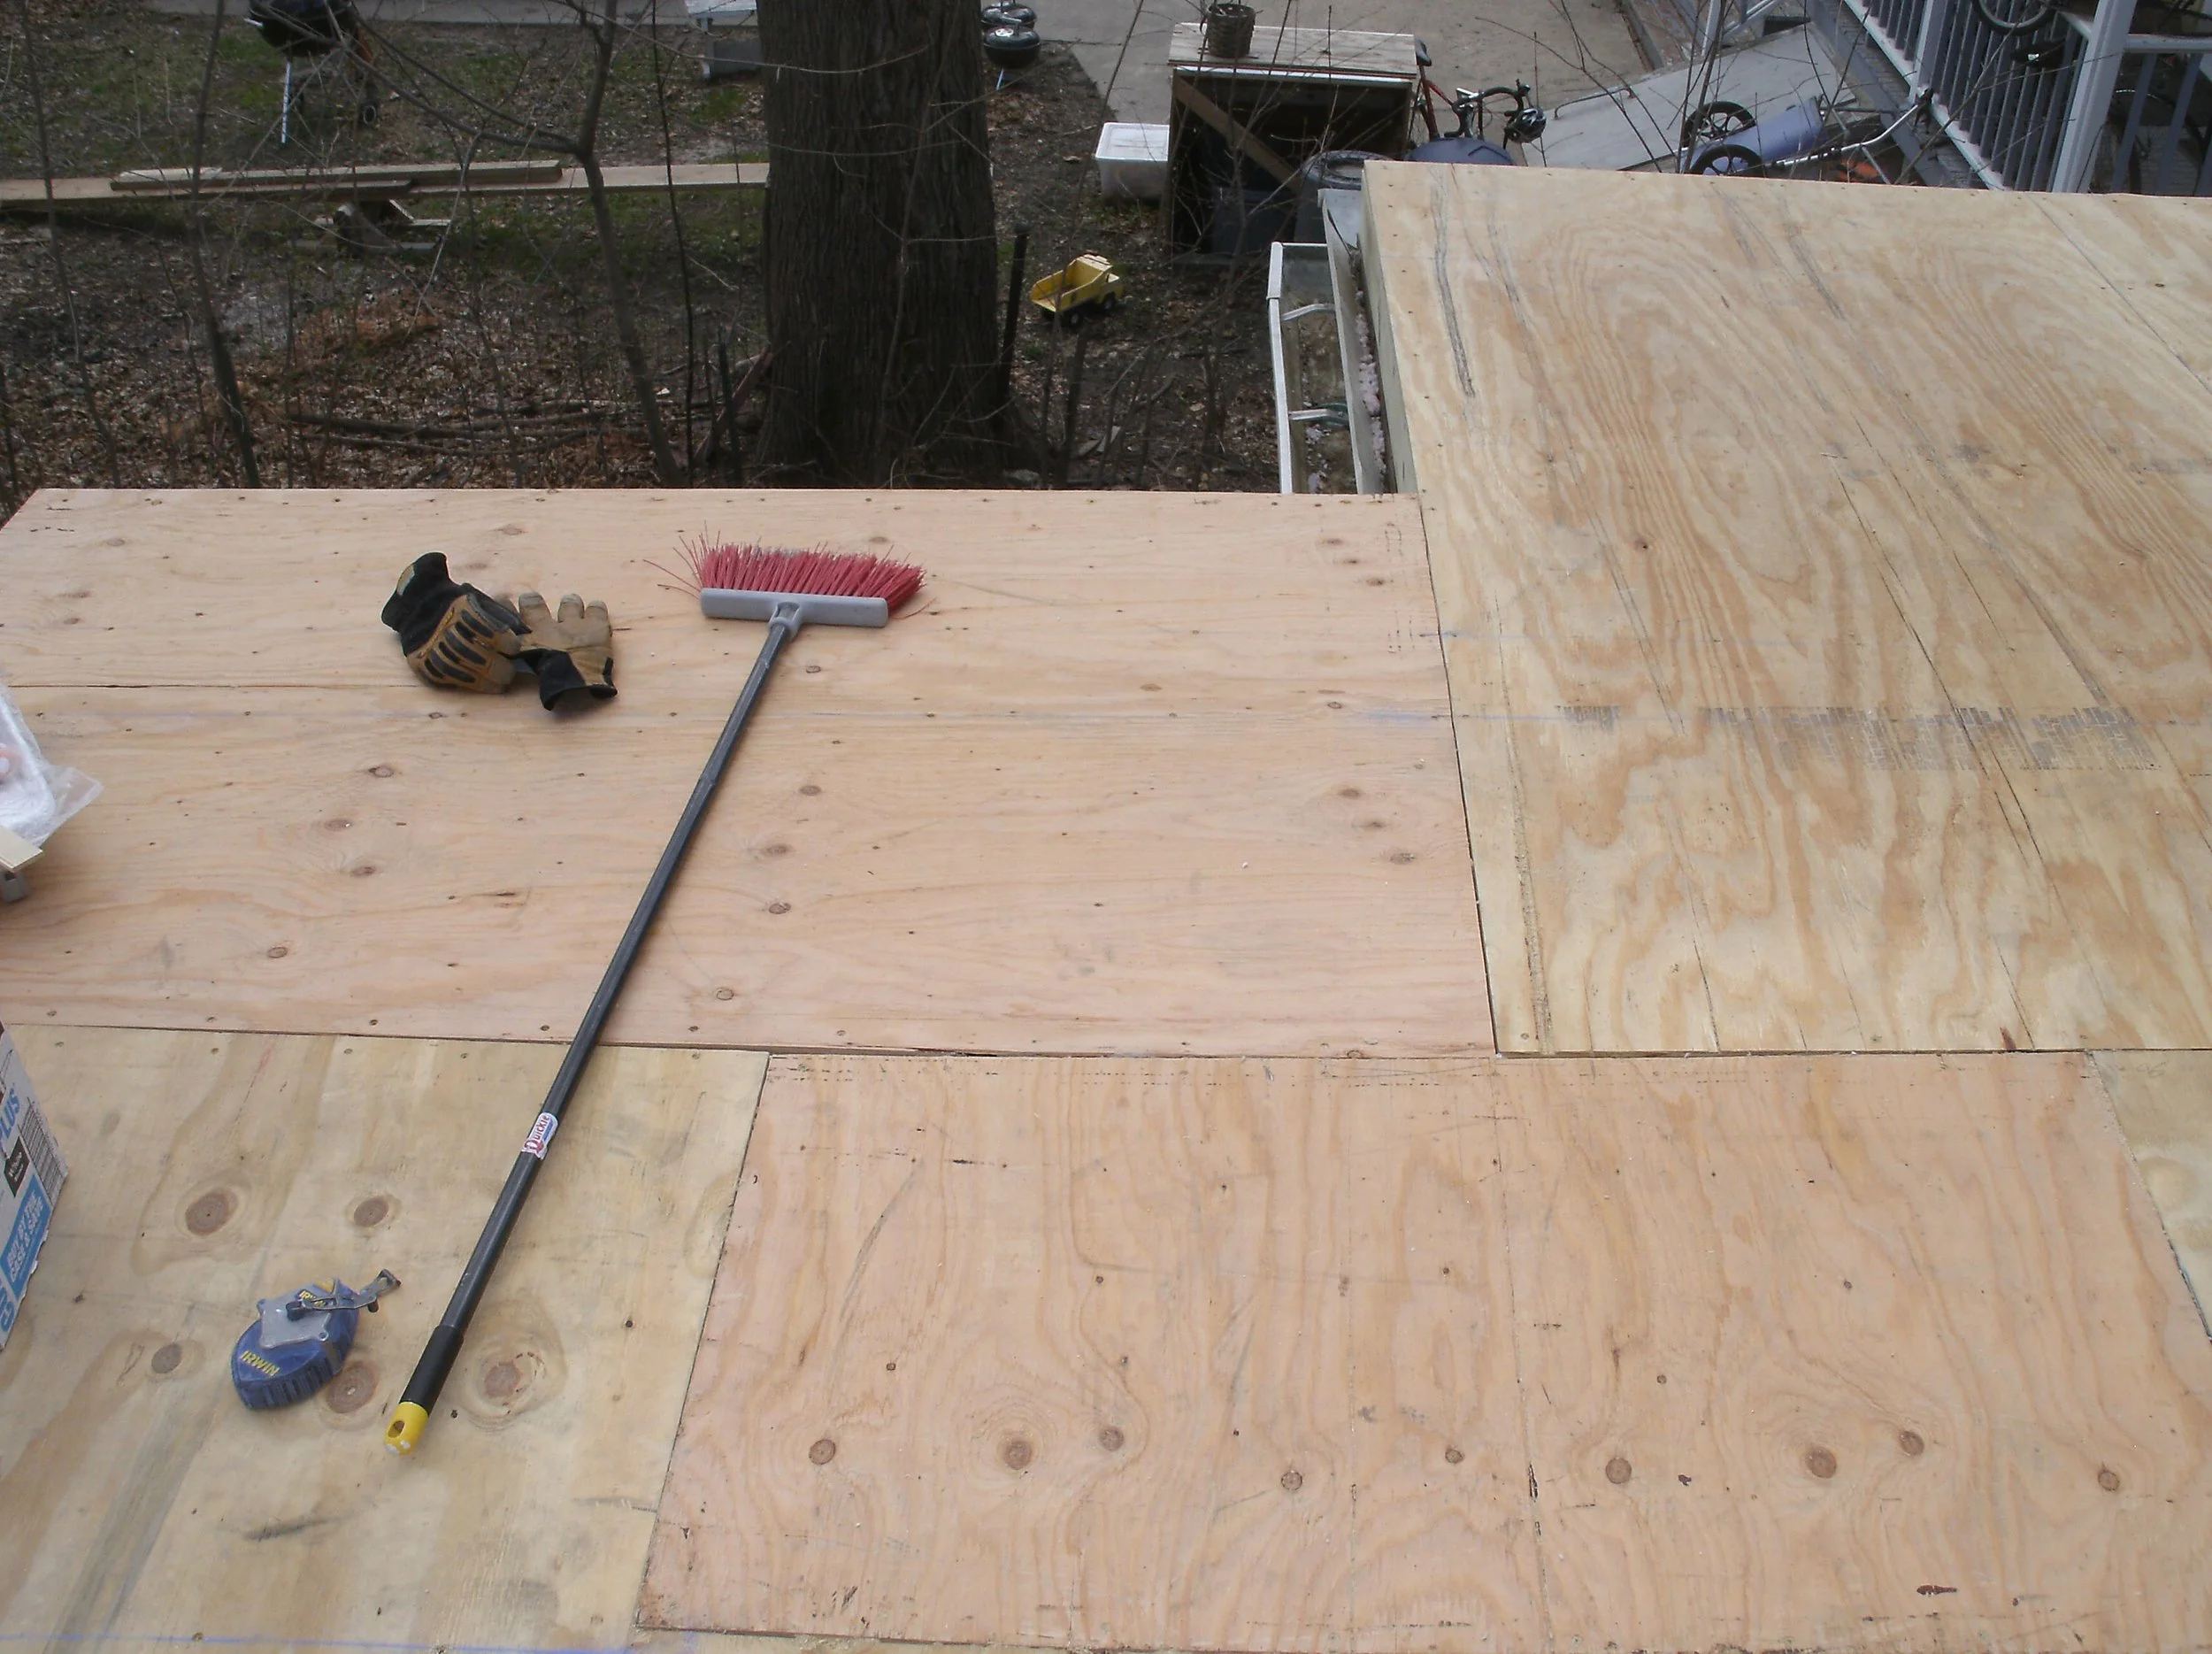
Plywood roof sheathing in. I’ll never ever use OSB oriented strand board.
Plywood with seams caulked and sealed and 3 coats of mobile home roof coating paint

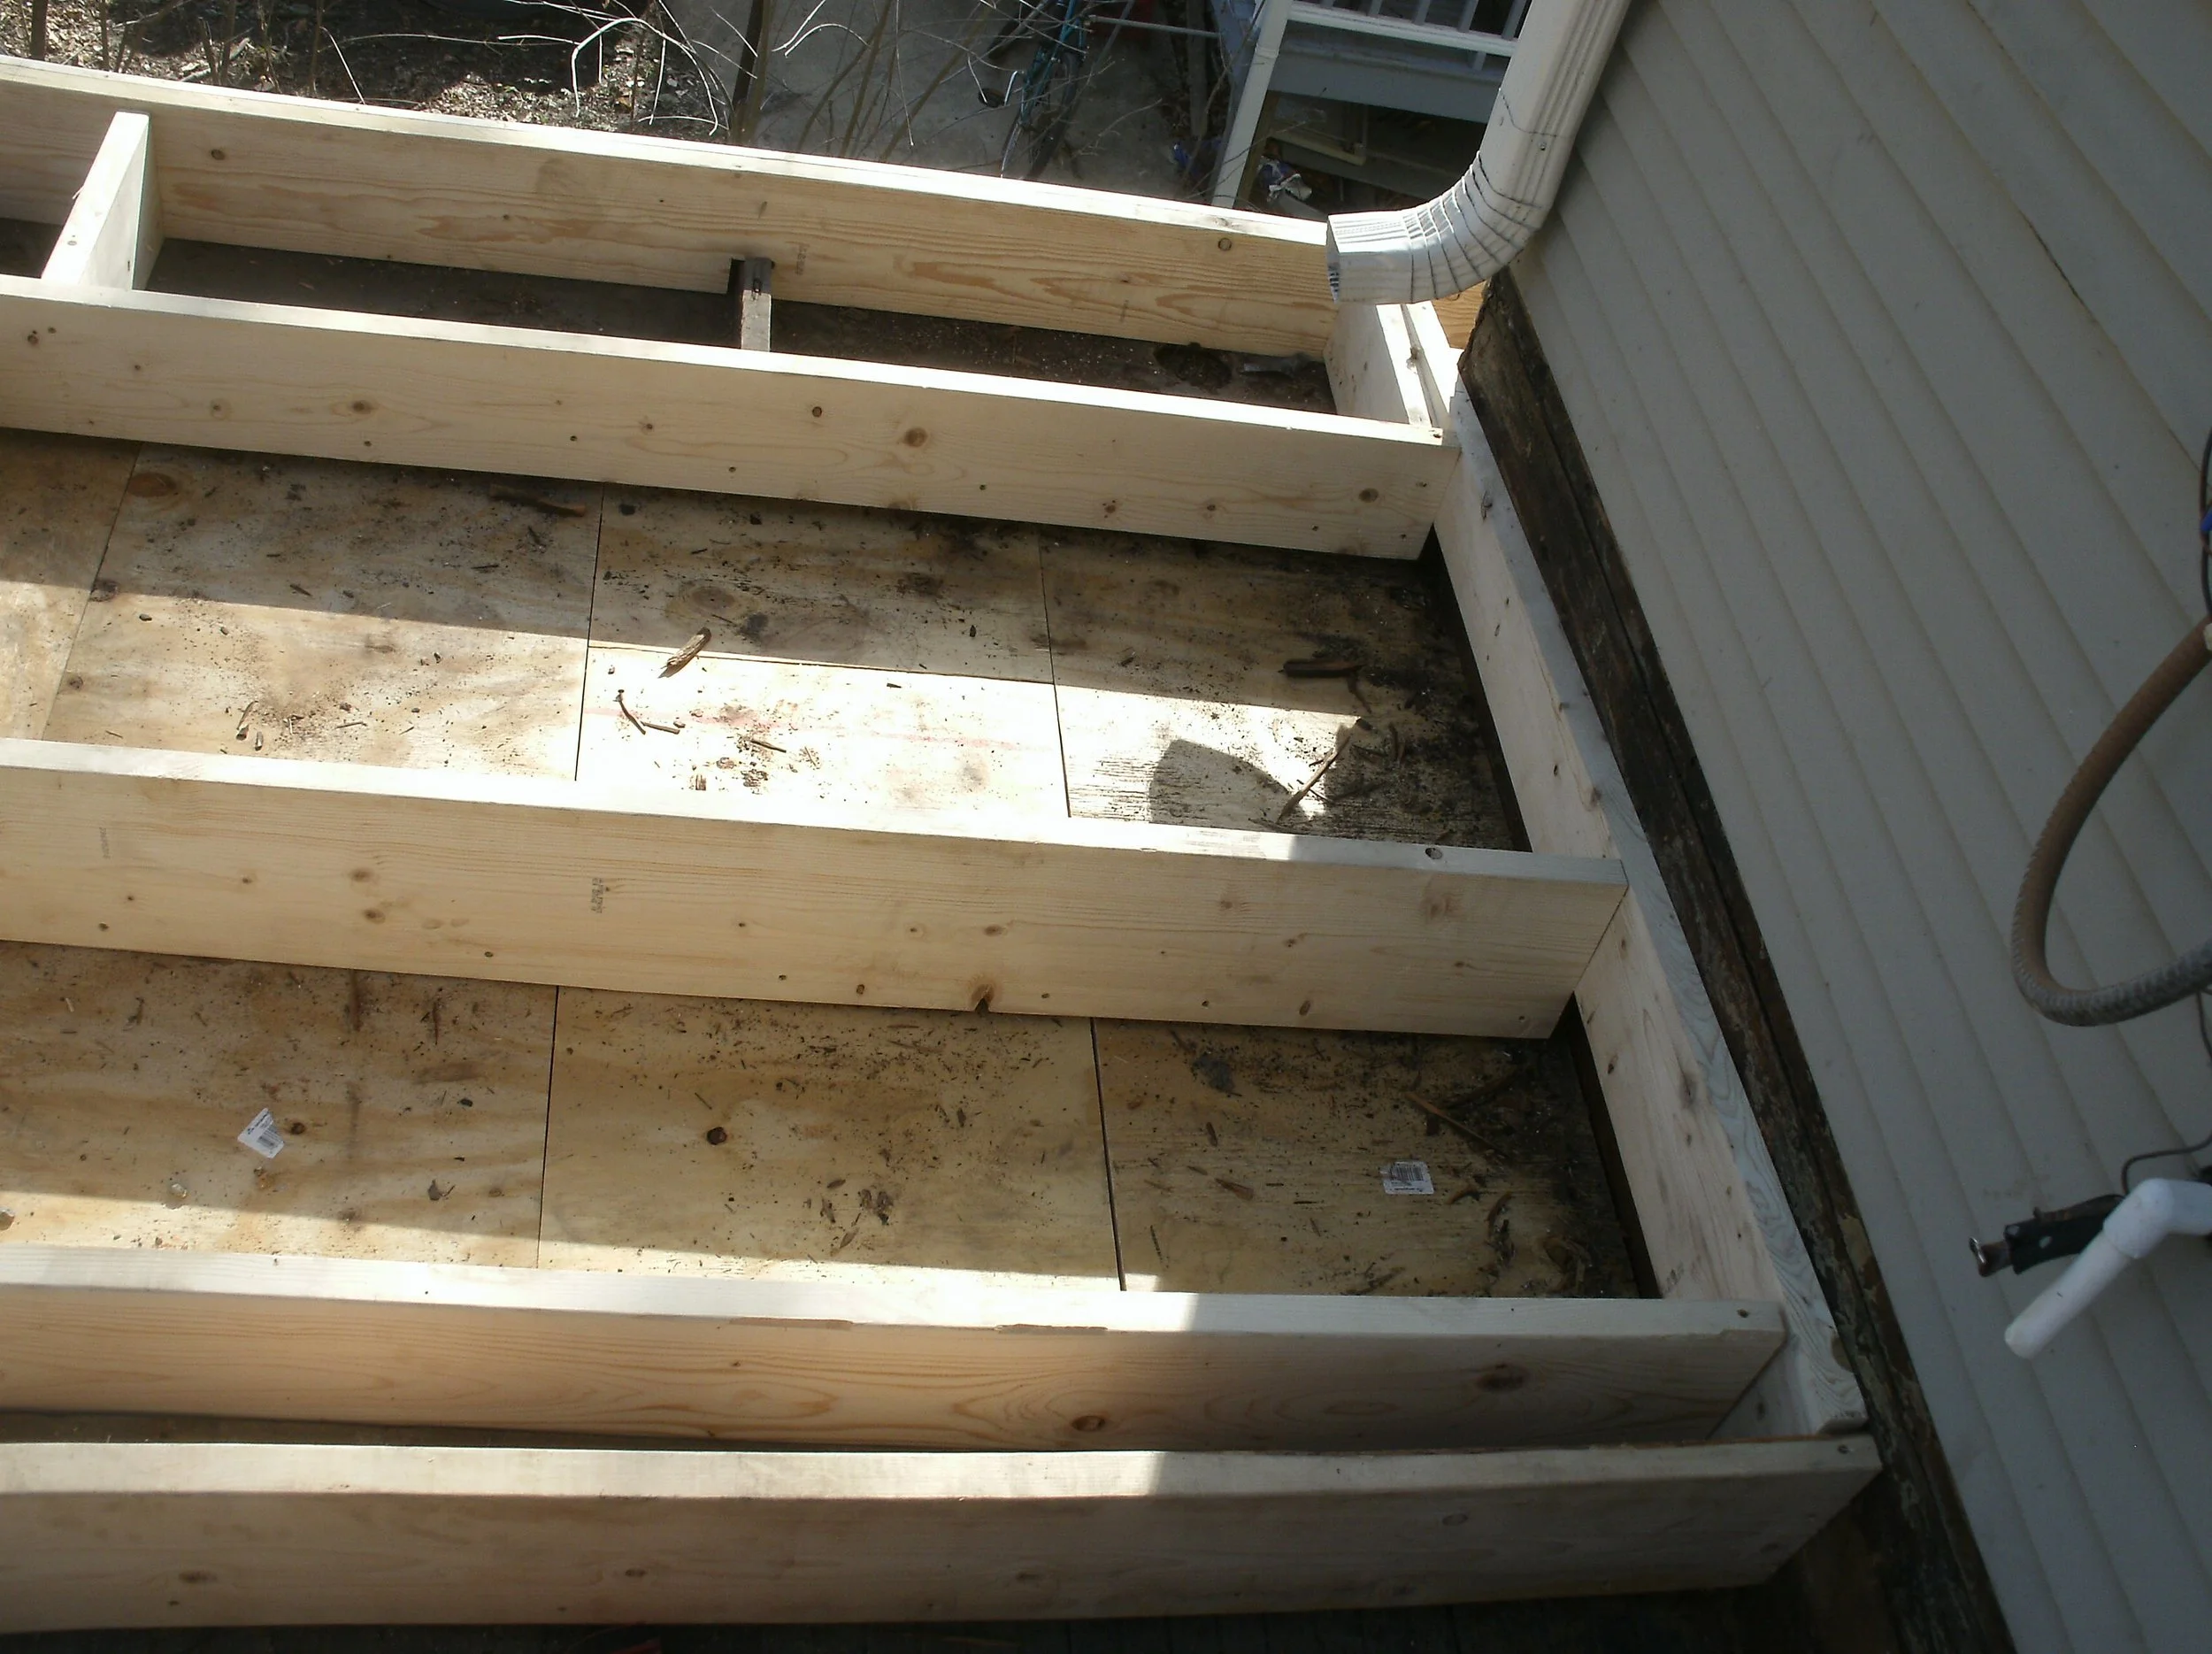
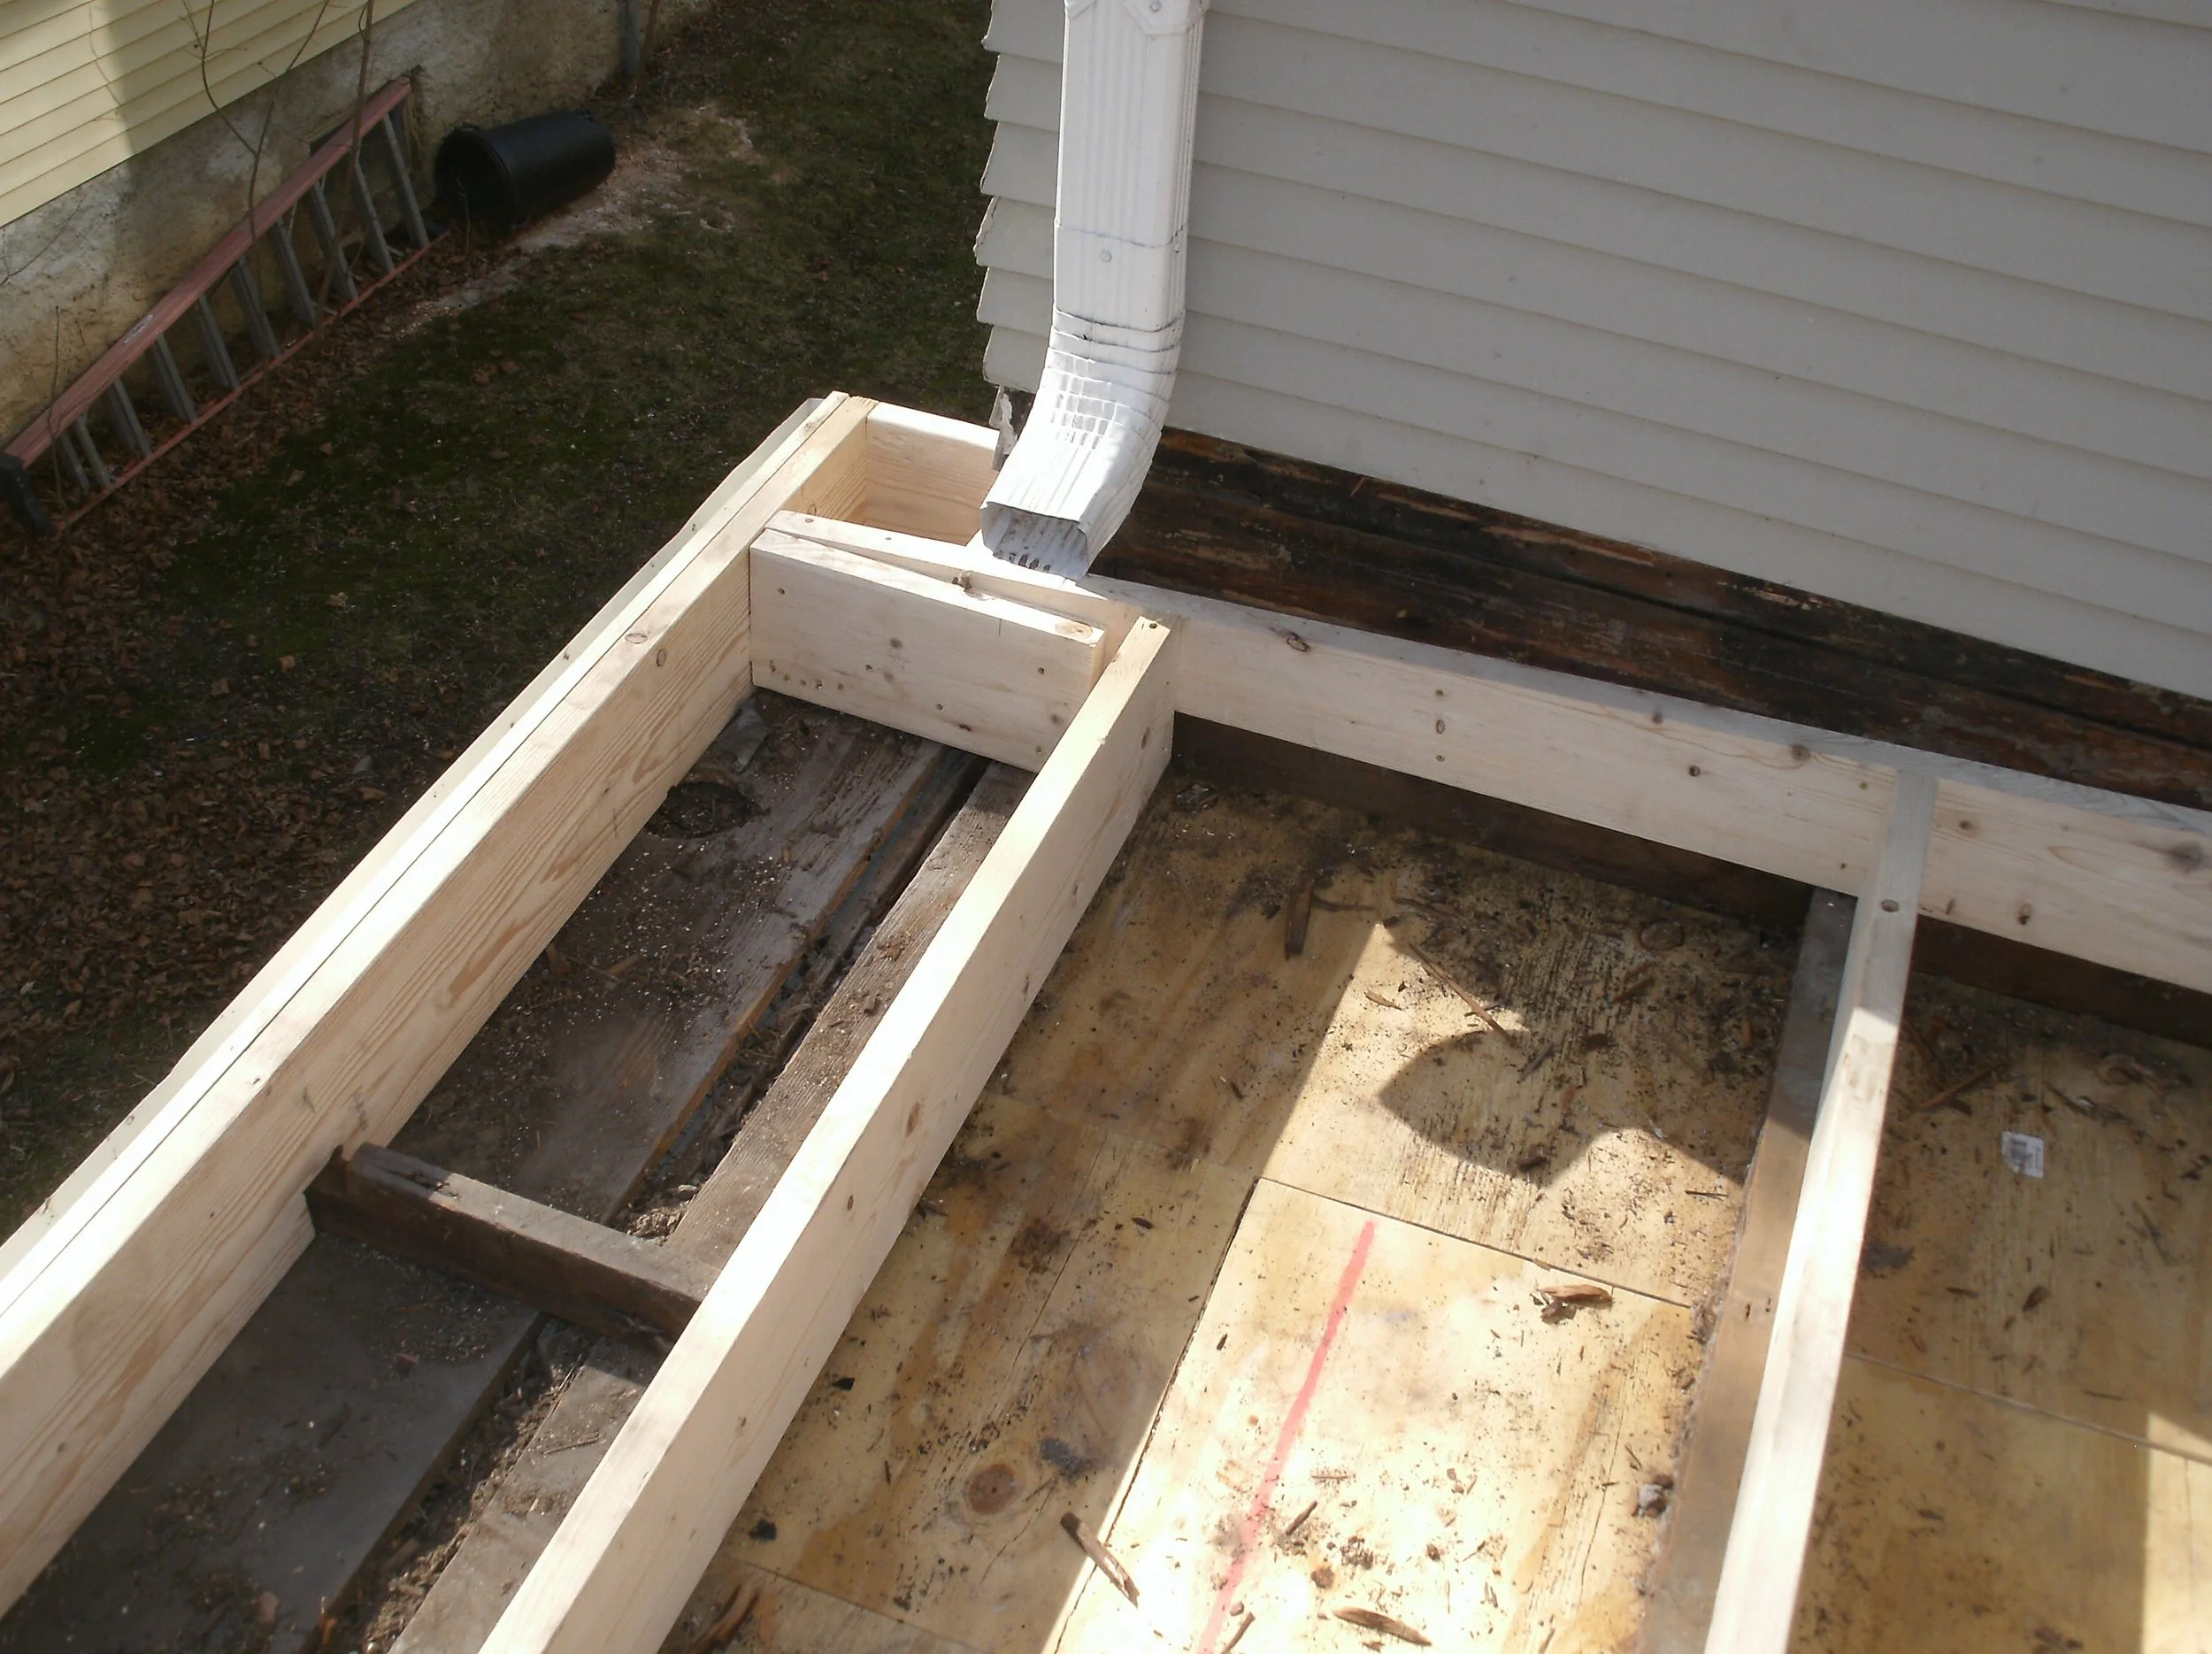
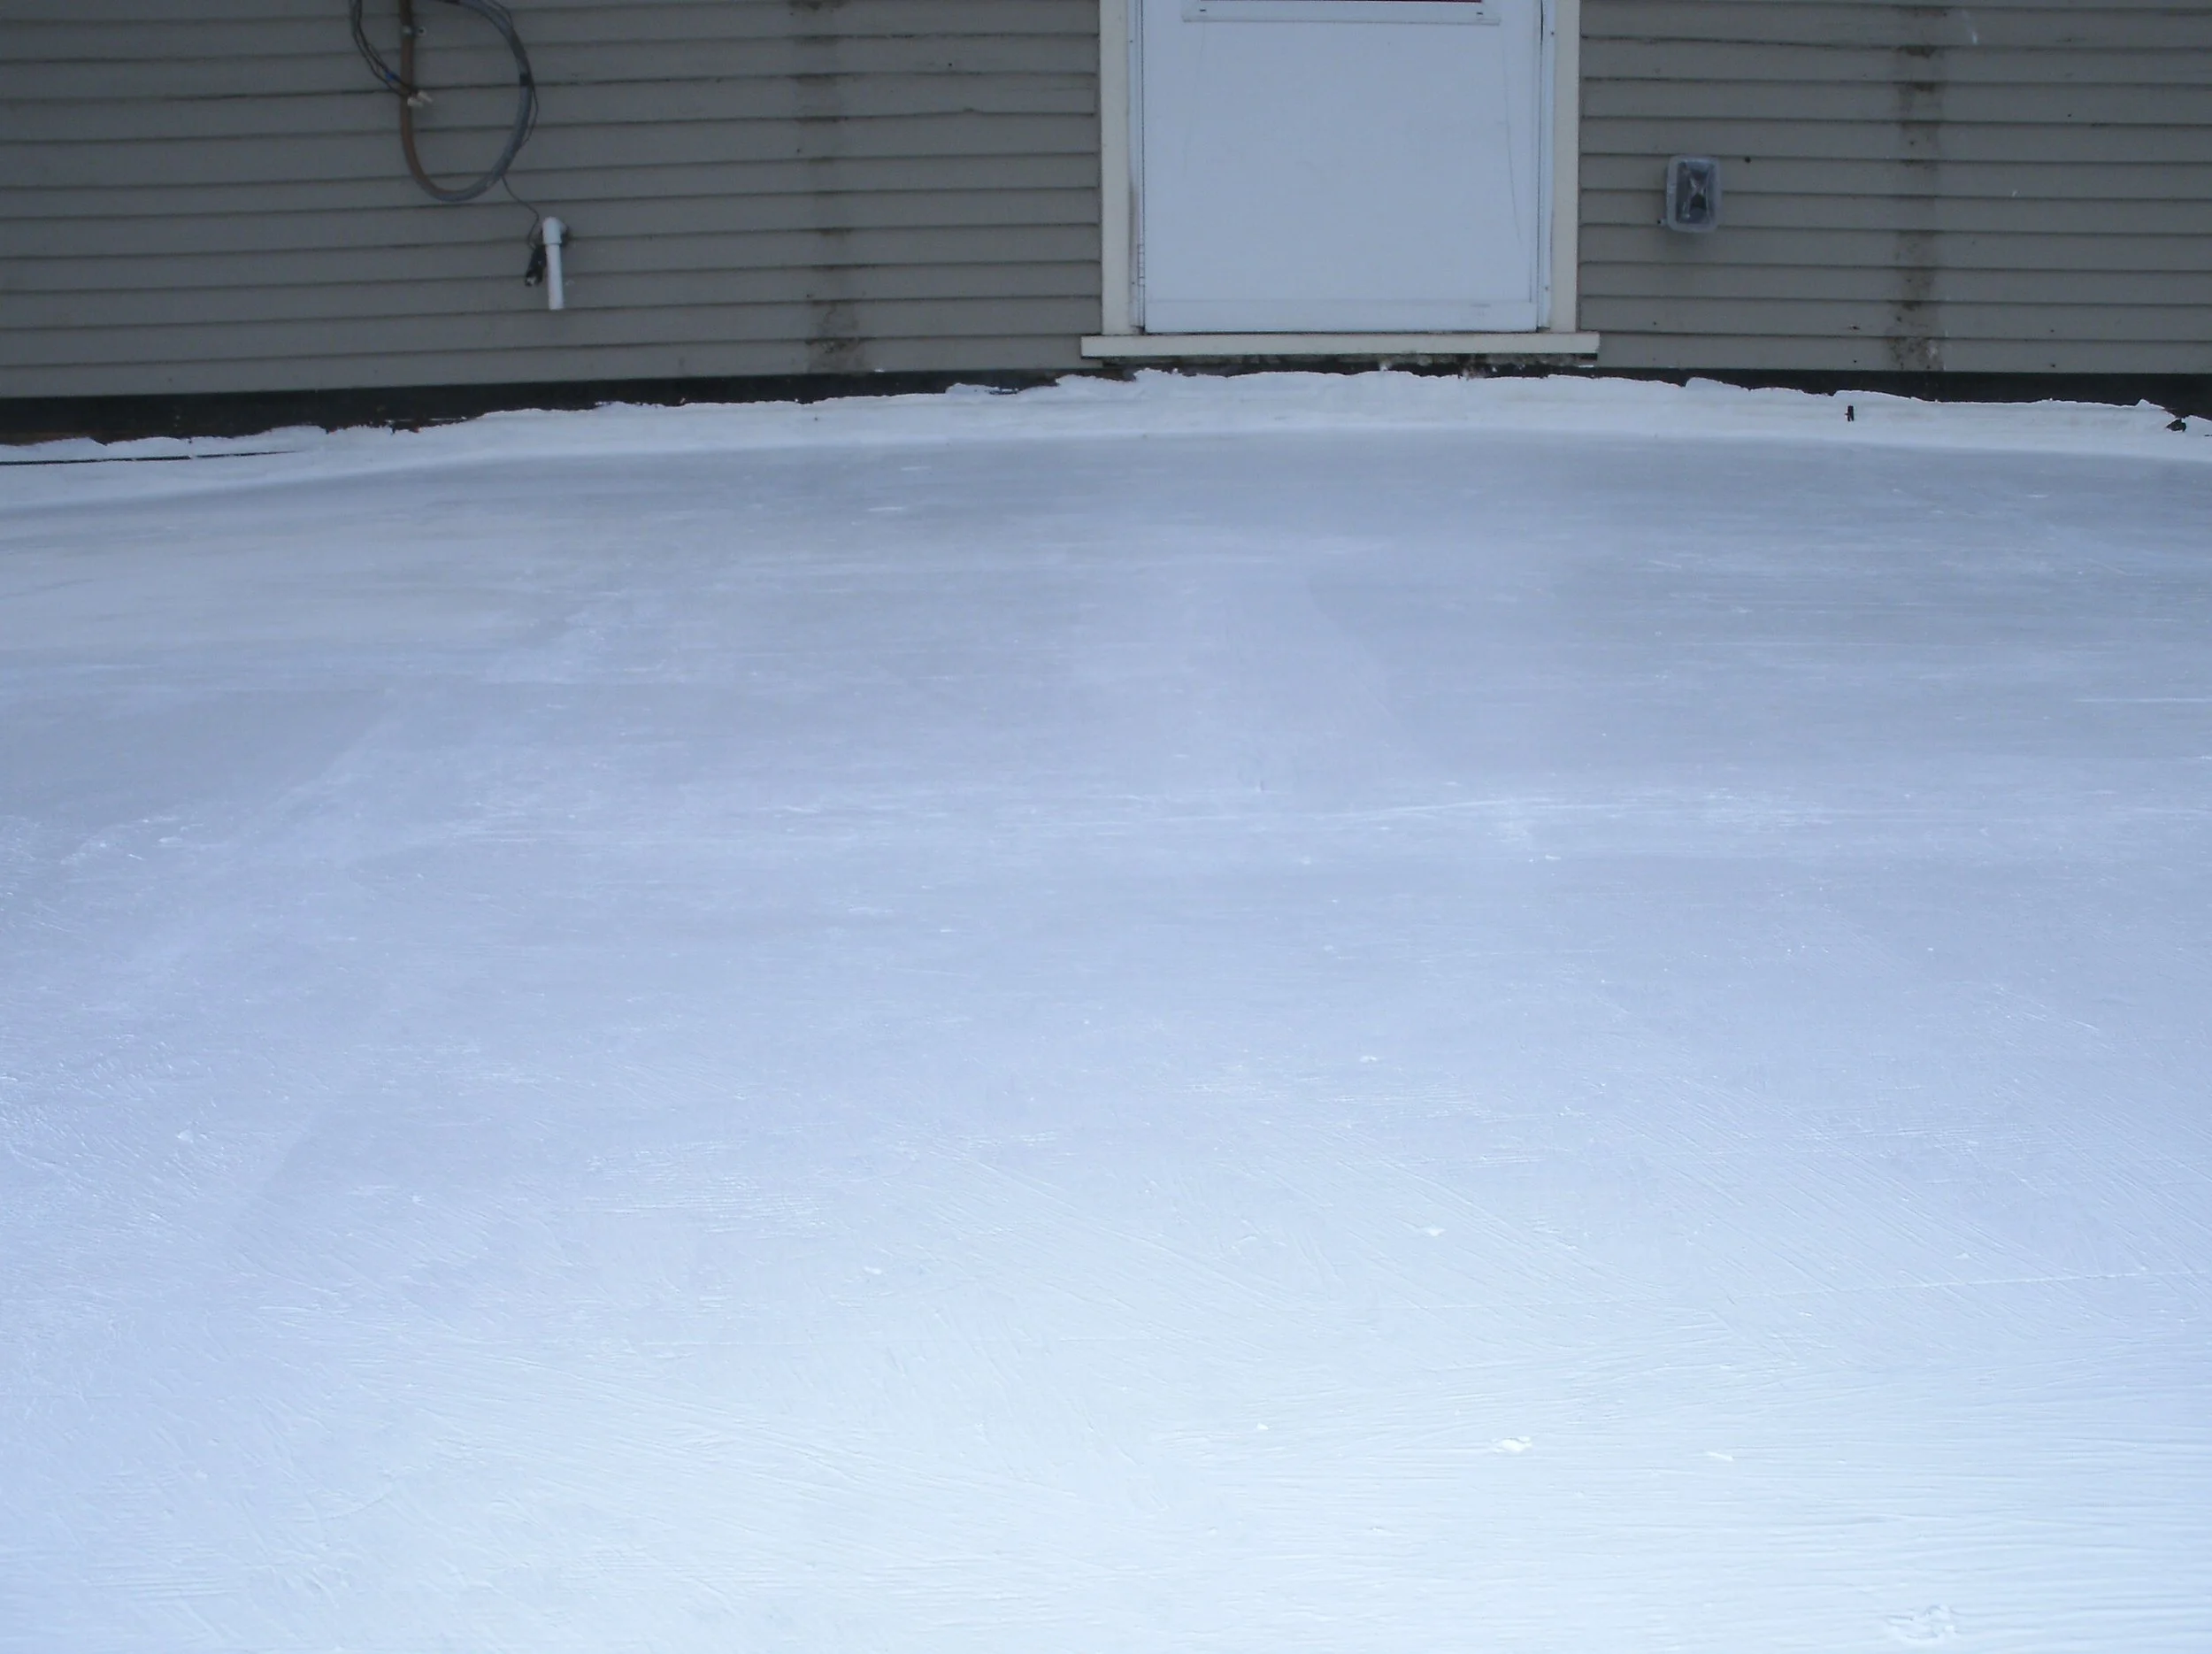
After the rubber roof was installed I then installed the 4x6 deck supporting joists
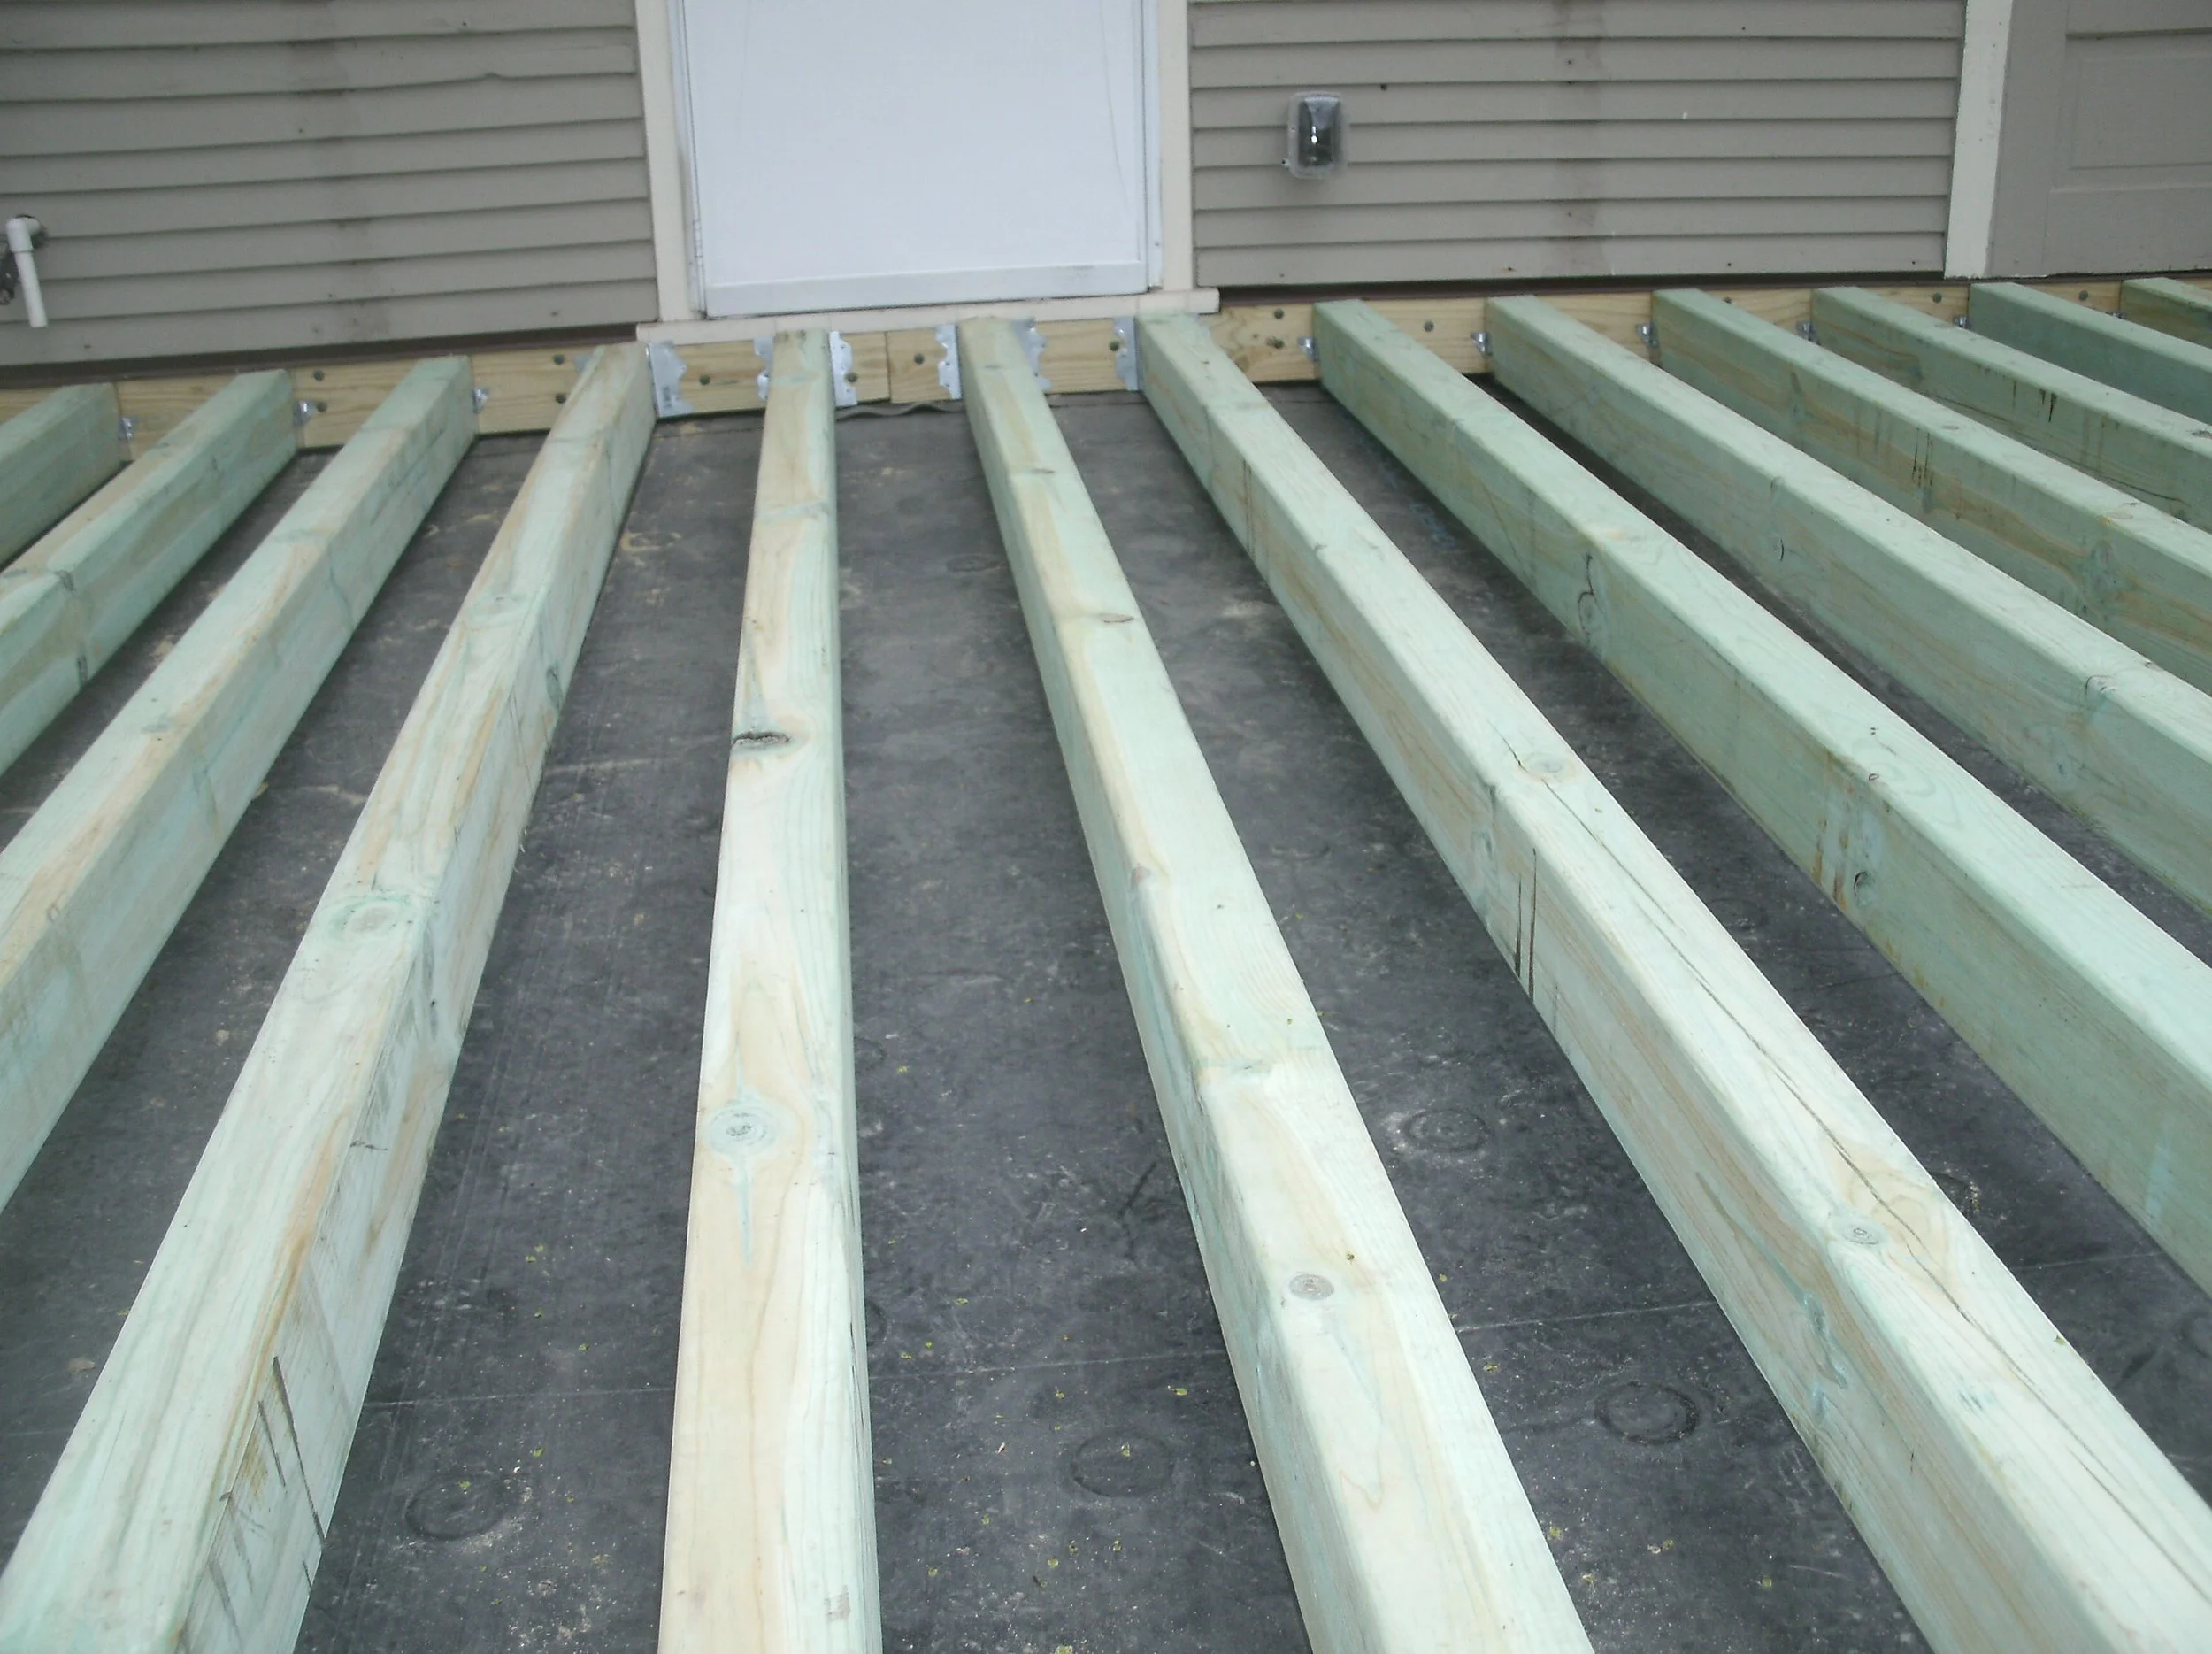
Rubber roof visible beneath joists. Joist suspended over roof, not touching the roof.
Joists in and posts starting to be installed.
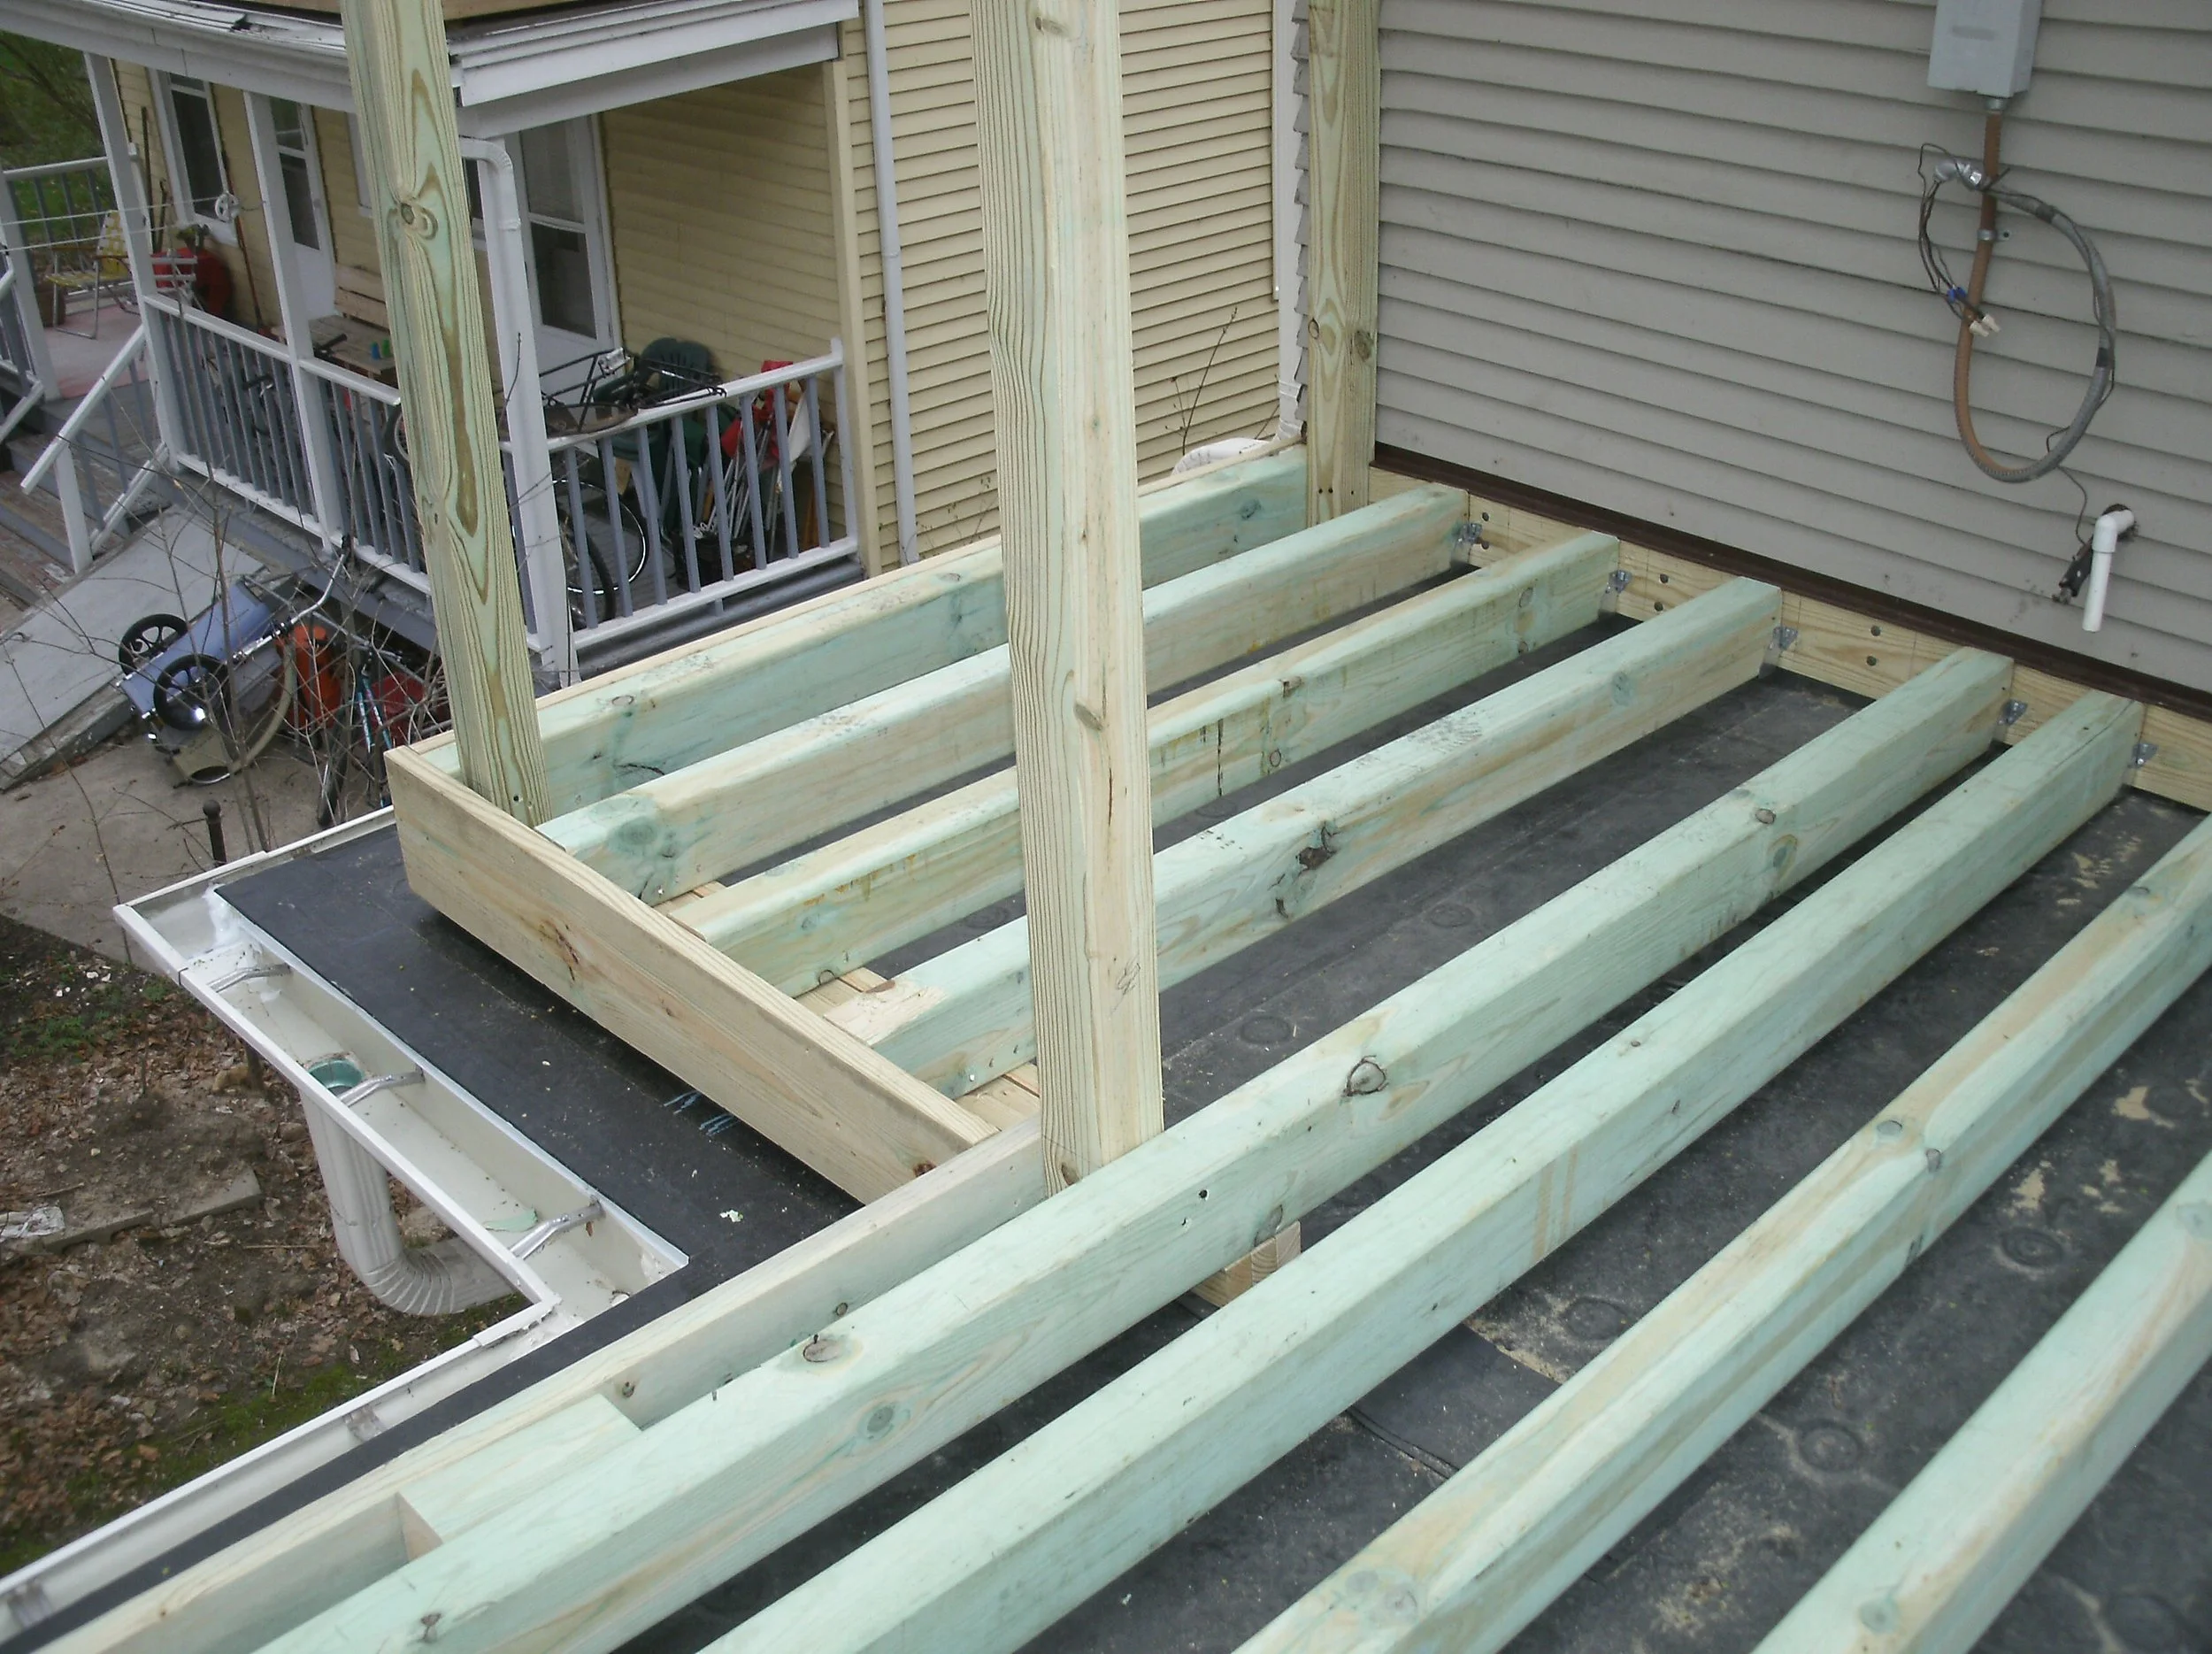
Handrail posts installed. The roof below had a pitch to shed water. Deck was level.
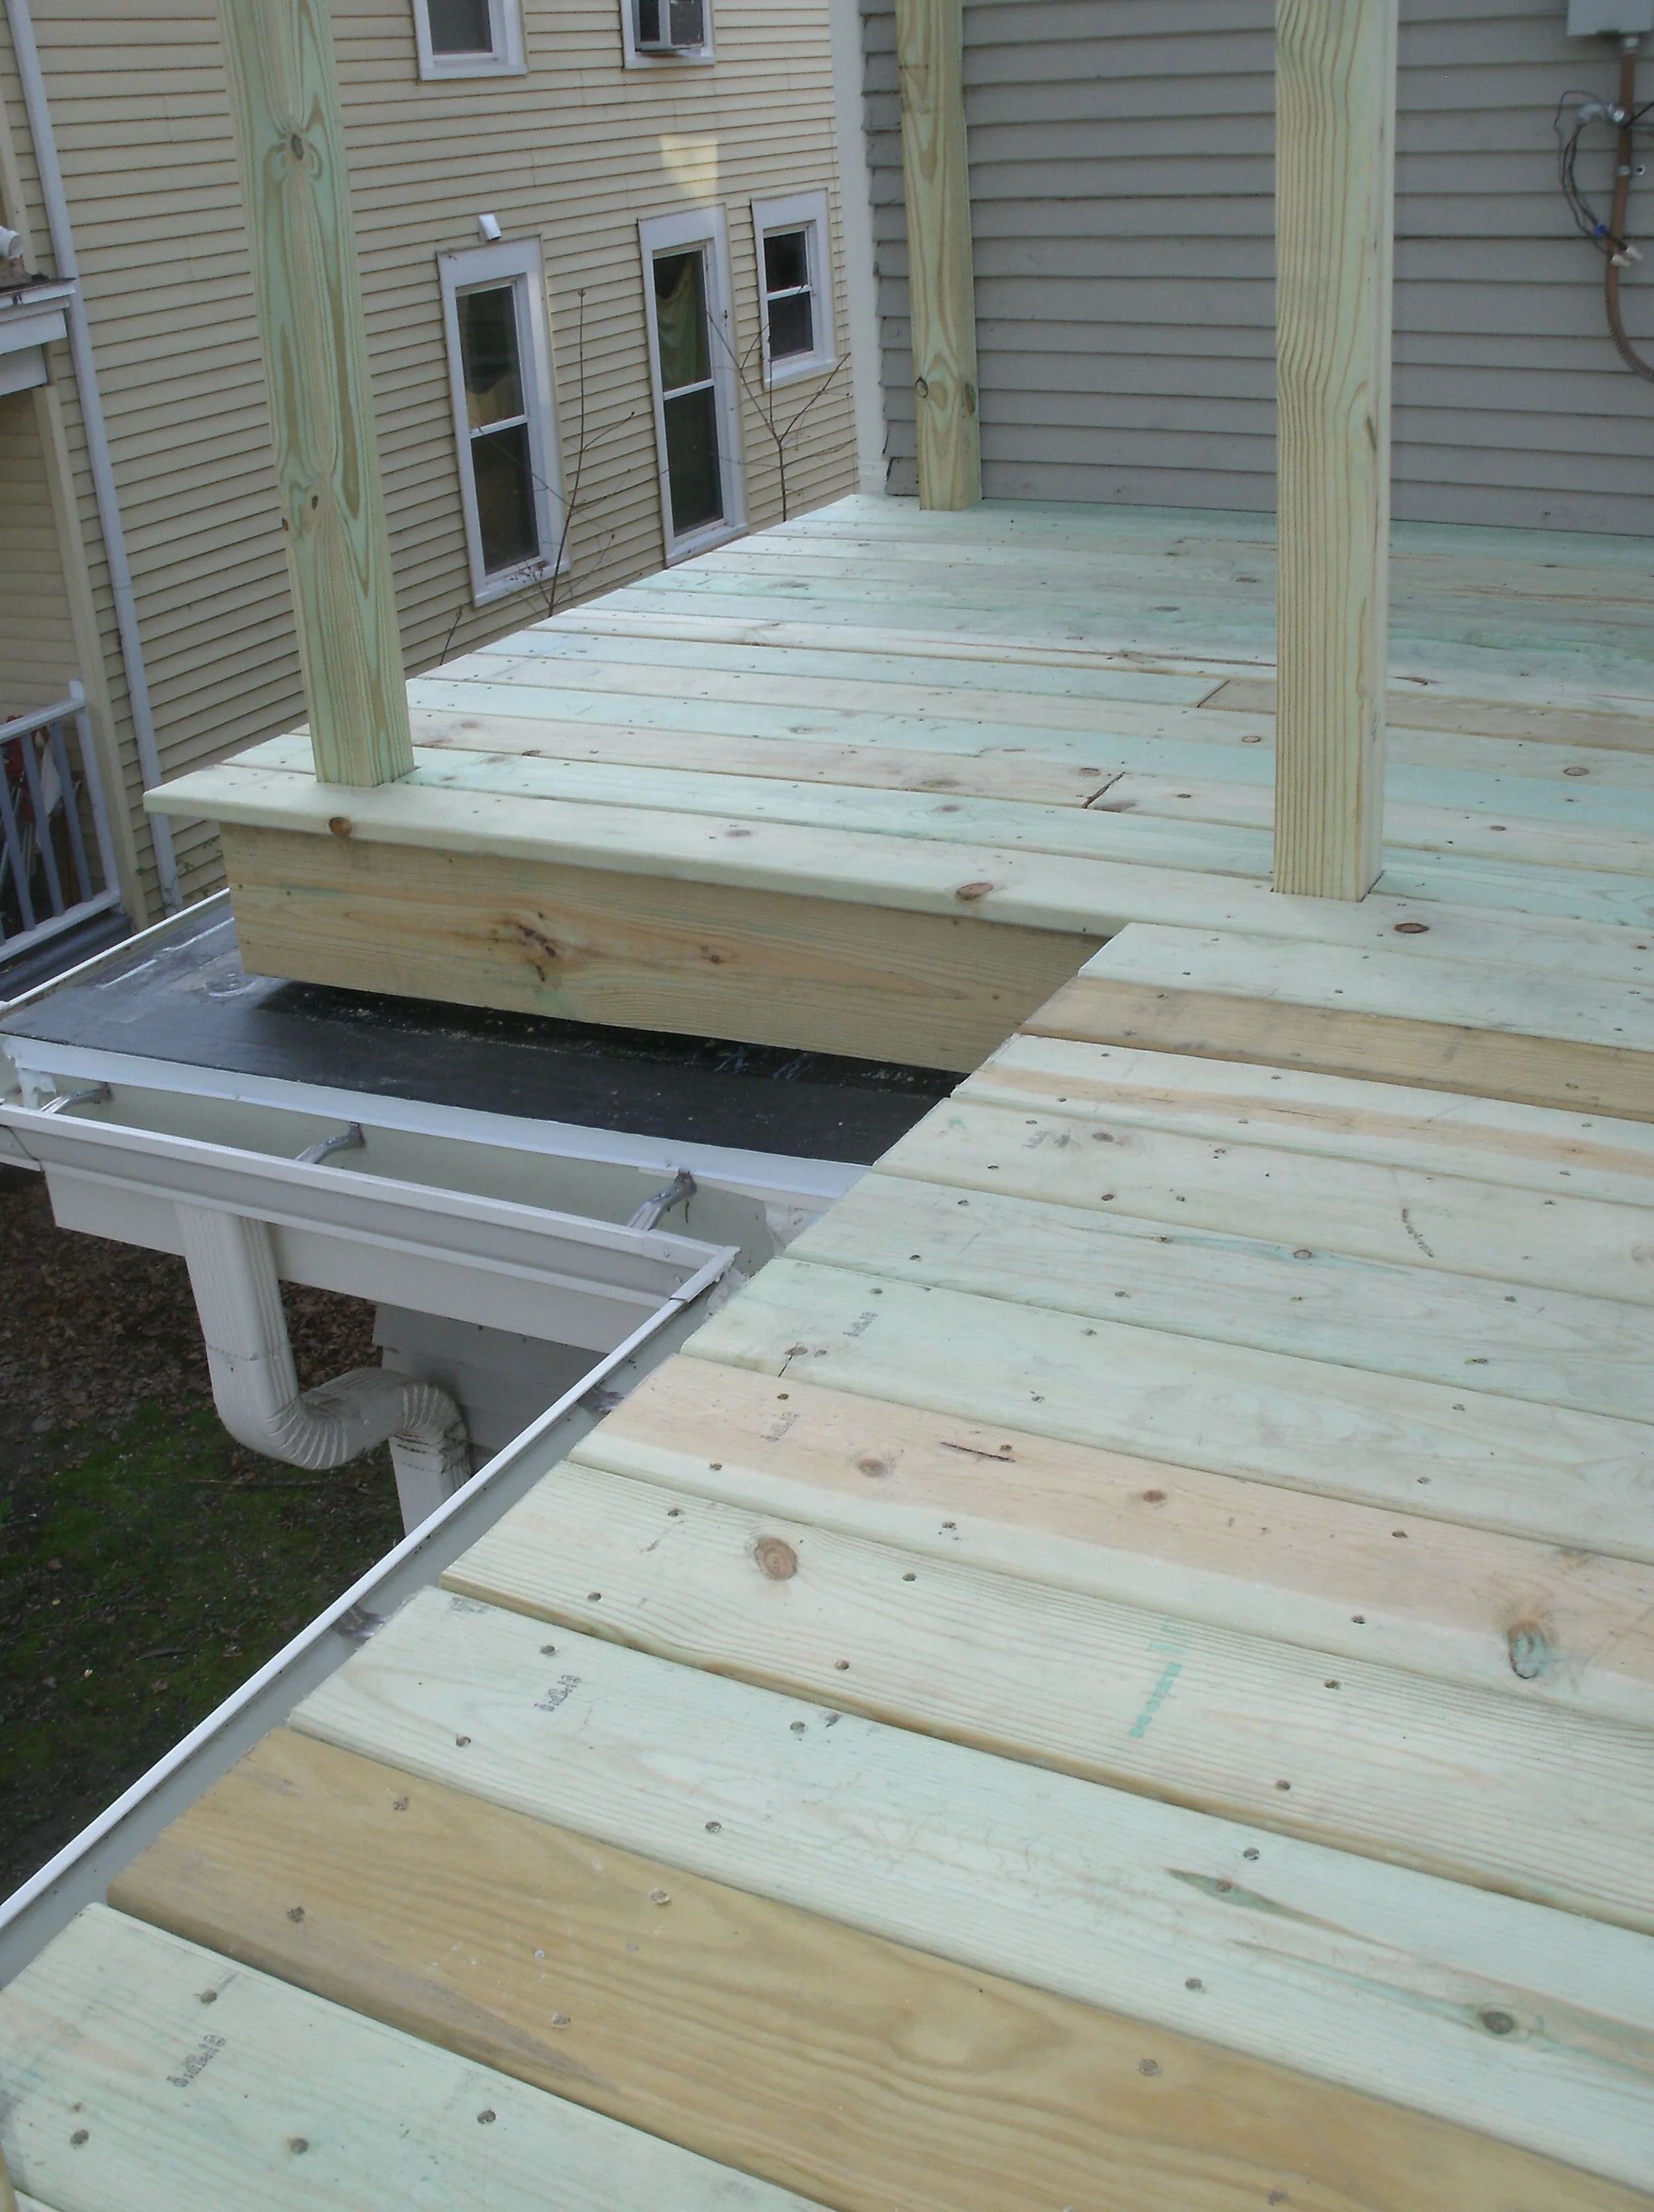
Decking installed. All joists, posts, post wraps, decking, and rail components are treated

Rails installed. Correction: the balusters are cedar.
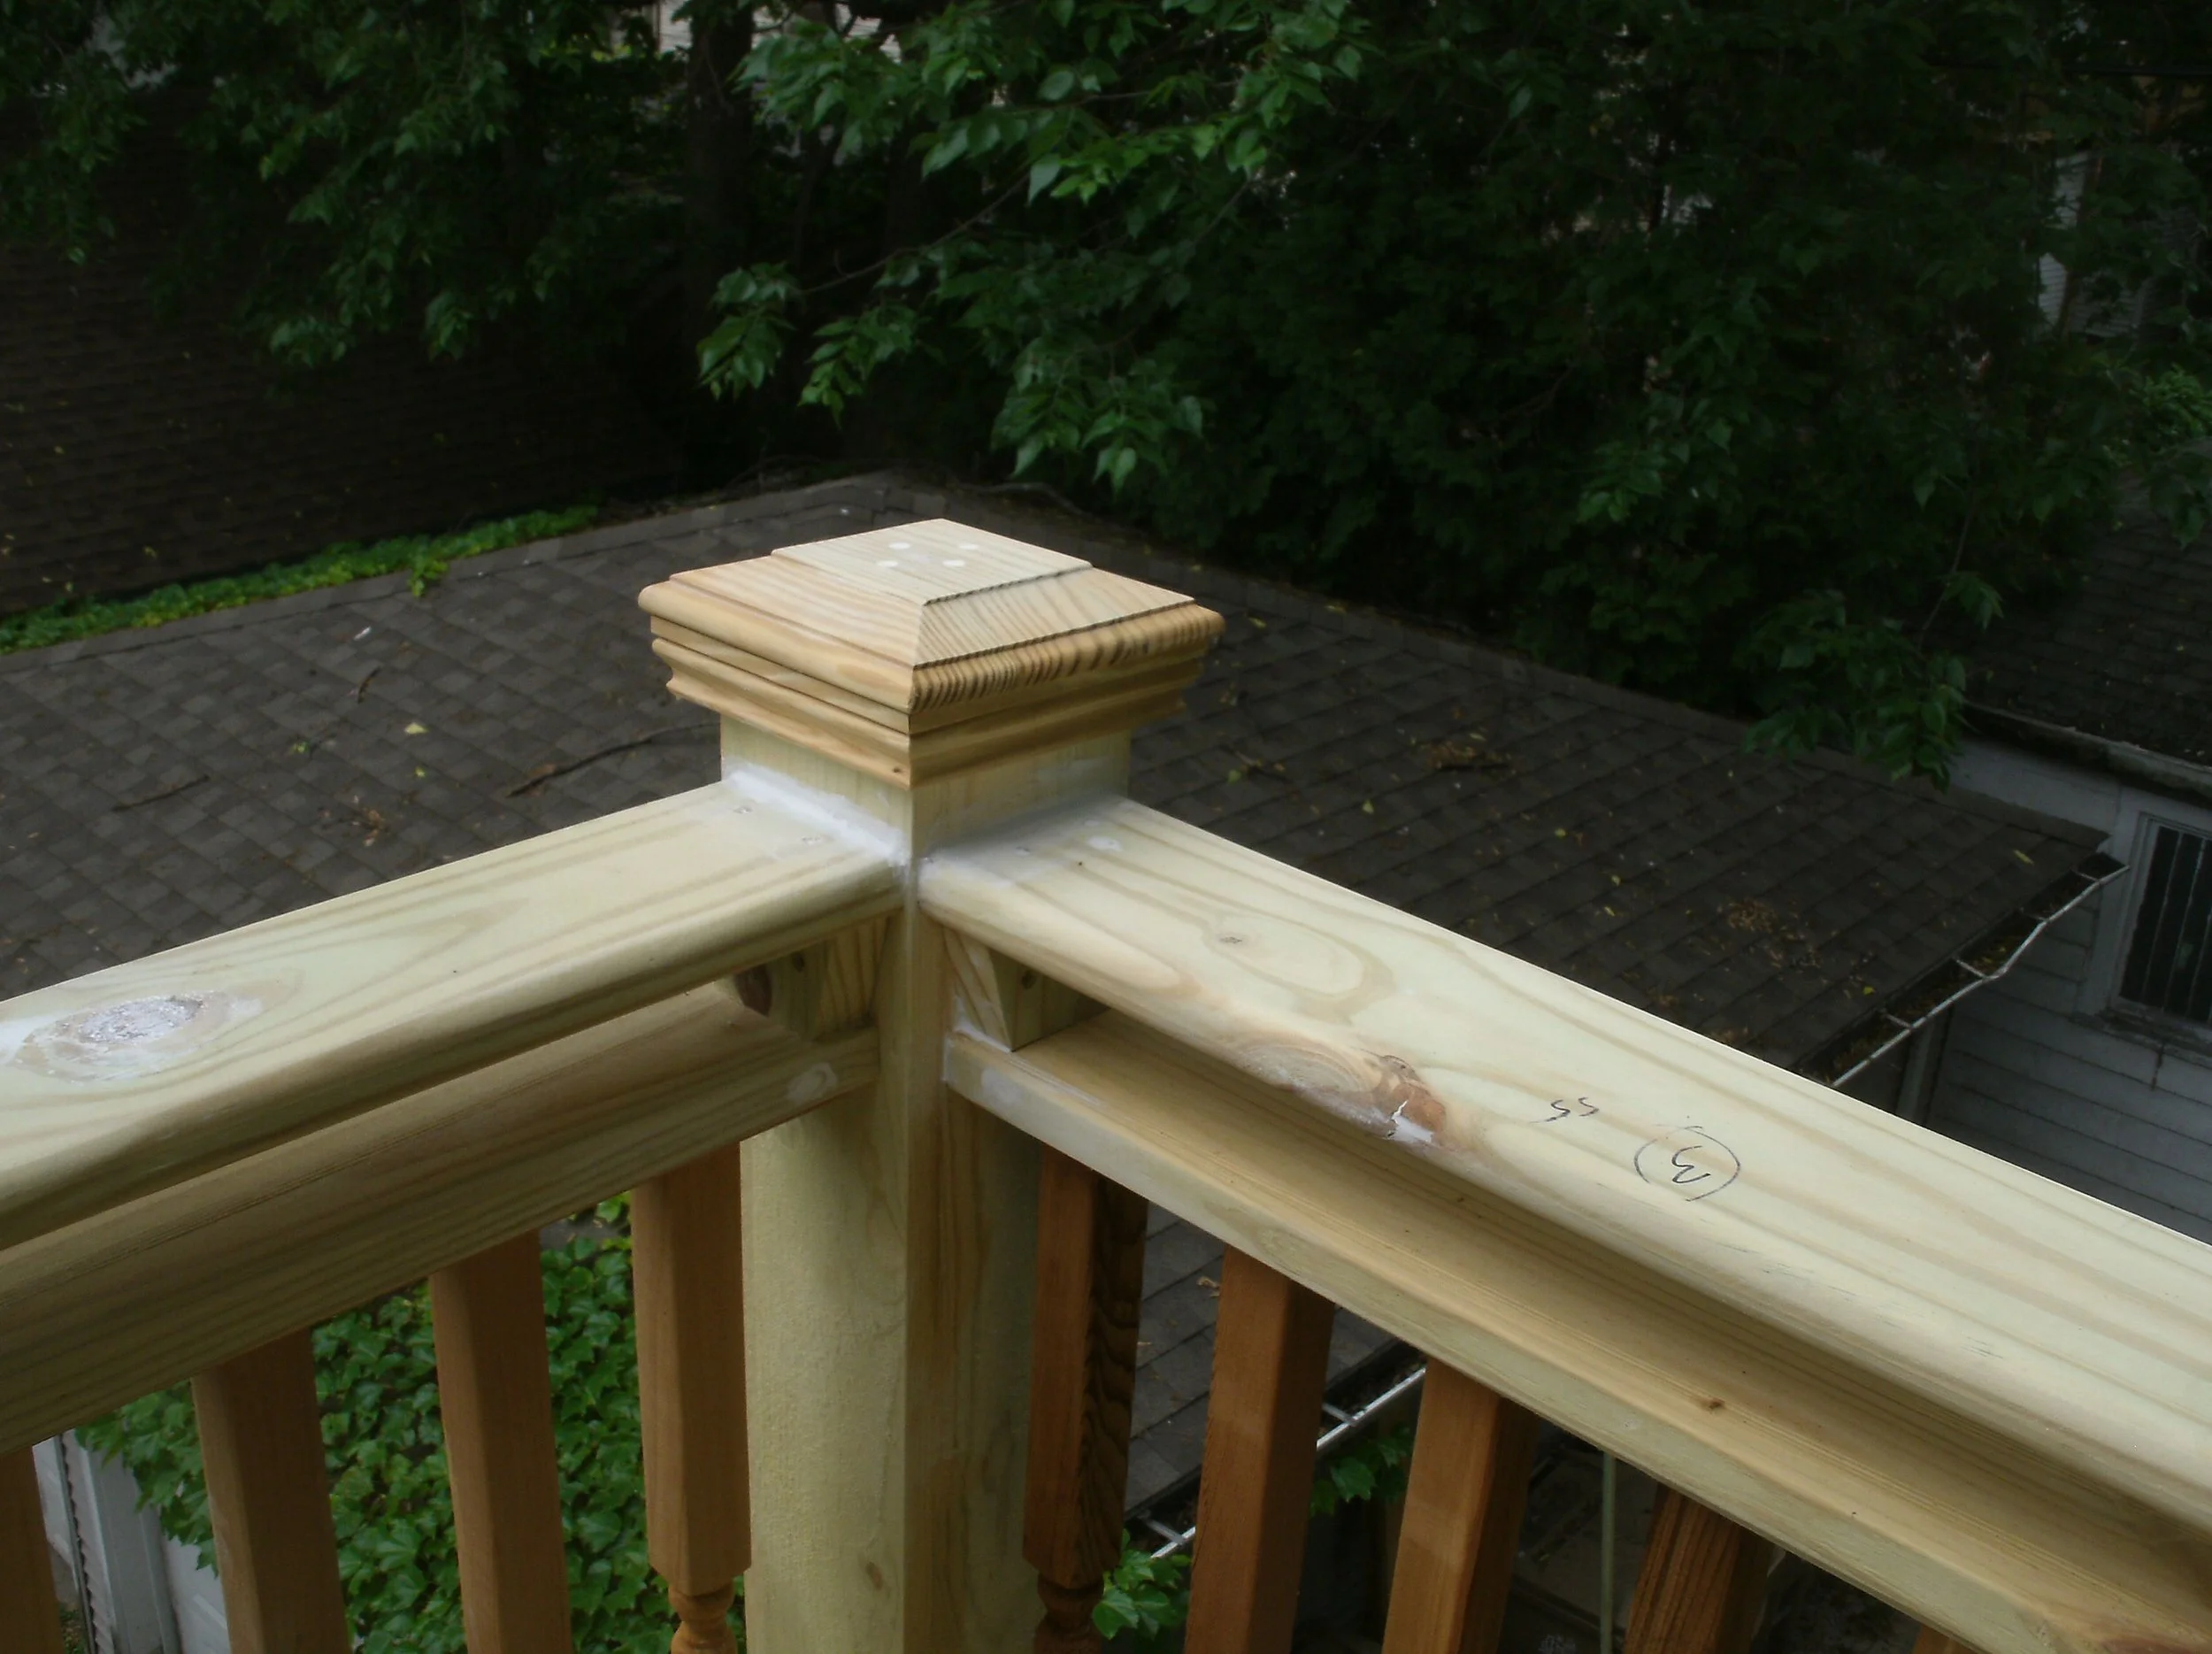
Post detail unpainted.
Another view of the unpainted rails.
Another view of the unpainted rails with air-conditioning unit reinstalled.
Another view of the unpainted rails.
A view of the painted rails
Another view of the painted rails and the painted decking.
Another view of the painted rails and the painted decking.
Another view of the painted rails and the painted decking.
A view from the ground.
Livingston Porches
This was quite a nice job. Mostly rebuilding and restoring the period appropriate front porch and side porch. I also replaced the decking, rails, and stairs on a third back porch. That was done competently but no Victorian flourishes. I also replaced about 8 feet of rotted basement/1st floor rim joist, and joist ends which attach onto the rim joist. I also replaced about 30 feet of the drip edge: the trim at the bottom of the siding. I also did many small exterior repairs. The customer wanted the original front porch replicated. I could find or fabricate most of the necessary parts, except for the four turned posts which a skilled friend provided using his lathe. The side porch was in very rough condition and most of the original Victorian details were long gone so I had a little design leeway. I painted everything. Approximately 10 years later, I returned to do some repairs and other tasks for new owners. They then had the house painted so it looks perfectly finished presently. I do not include pictures of the painted house.
On the front porch, all new treated and cedar wood was not yet painted.
Another view of the front porch.
New front porch. All unpainted wood was later painted.
I painted all the new wood.
Side view of new front porch.
New stair railings and stairs painted.

Porch railings detail especially turned corner post.
Another side view of stairs and railings.
View of side porch stringers ready for treads and risers
One view of the side porch inside the fenced/gated side/back yard.
Full front view of the stairs, landing, rails and rebuilt drip edge-siding bottom

Another full view of the side porch.
Full front view of the stairs, landing, rails and rebuilt drip edge-siding bottom
Yet another view of the side porch.
More drip edge and trim beneath. Drip edge-siding bottom
Another view of drip edge and trim beneath. I replaced joists behind drip edge.
East Stairs
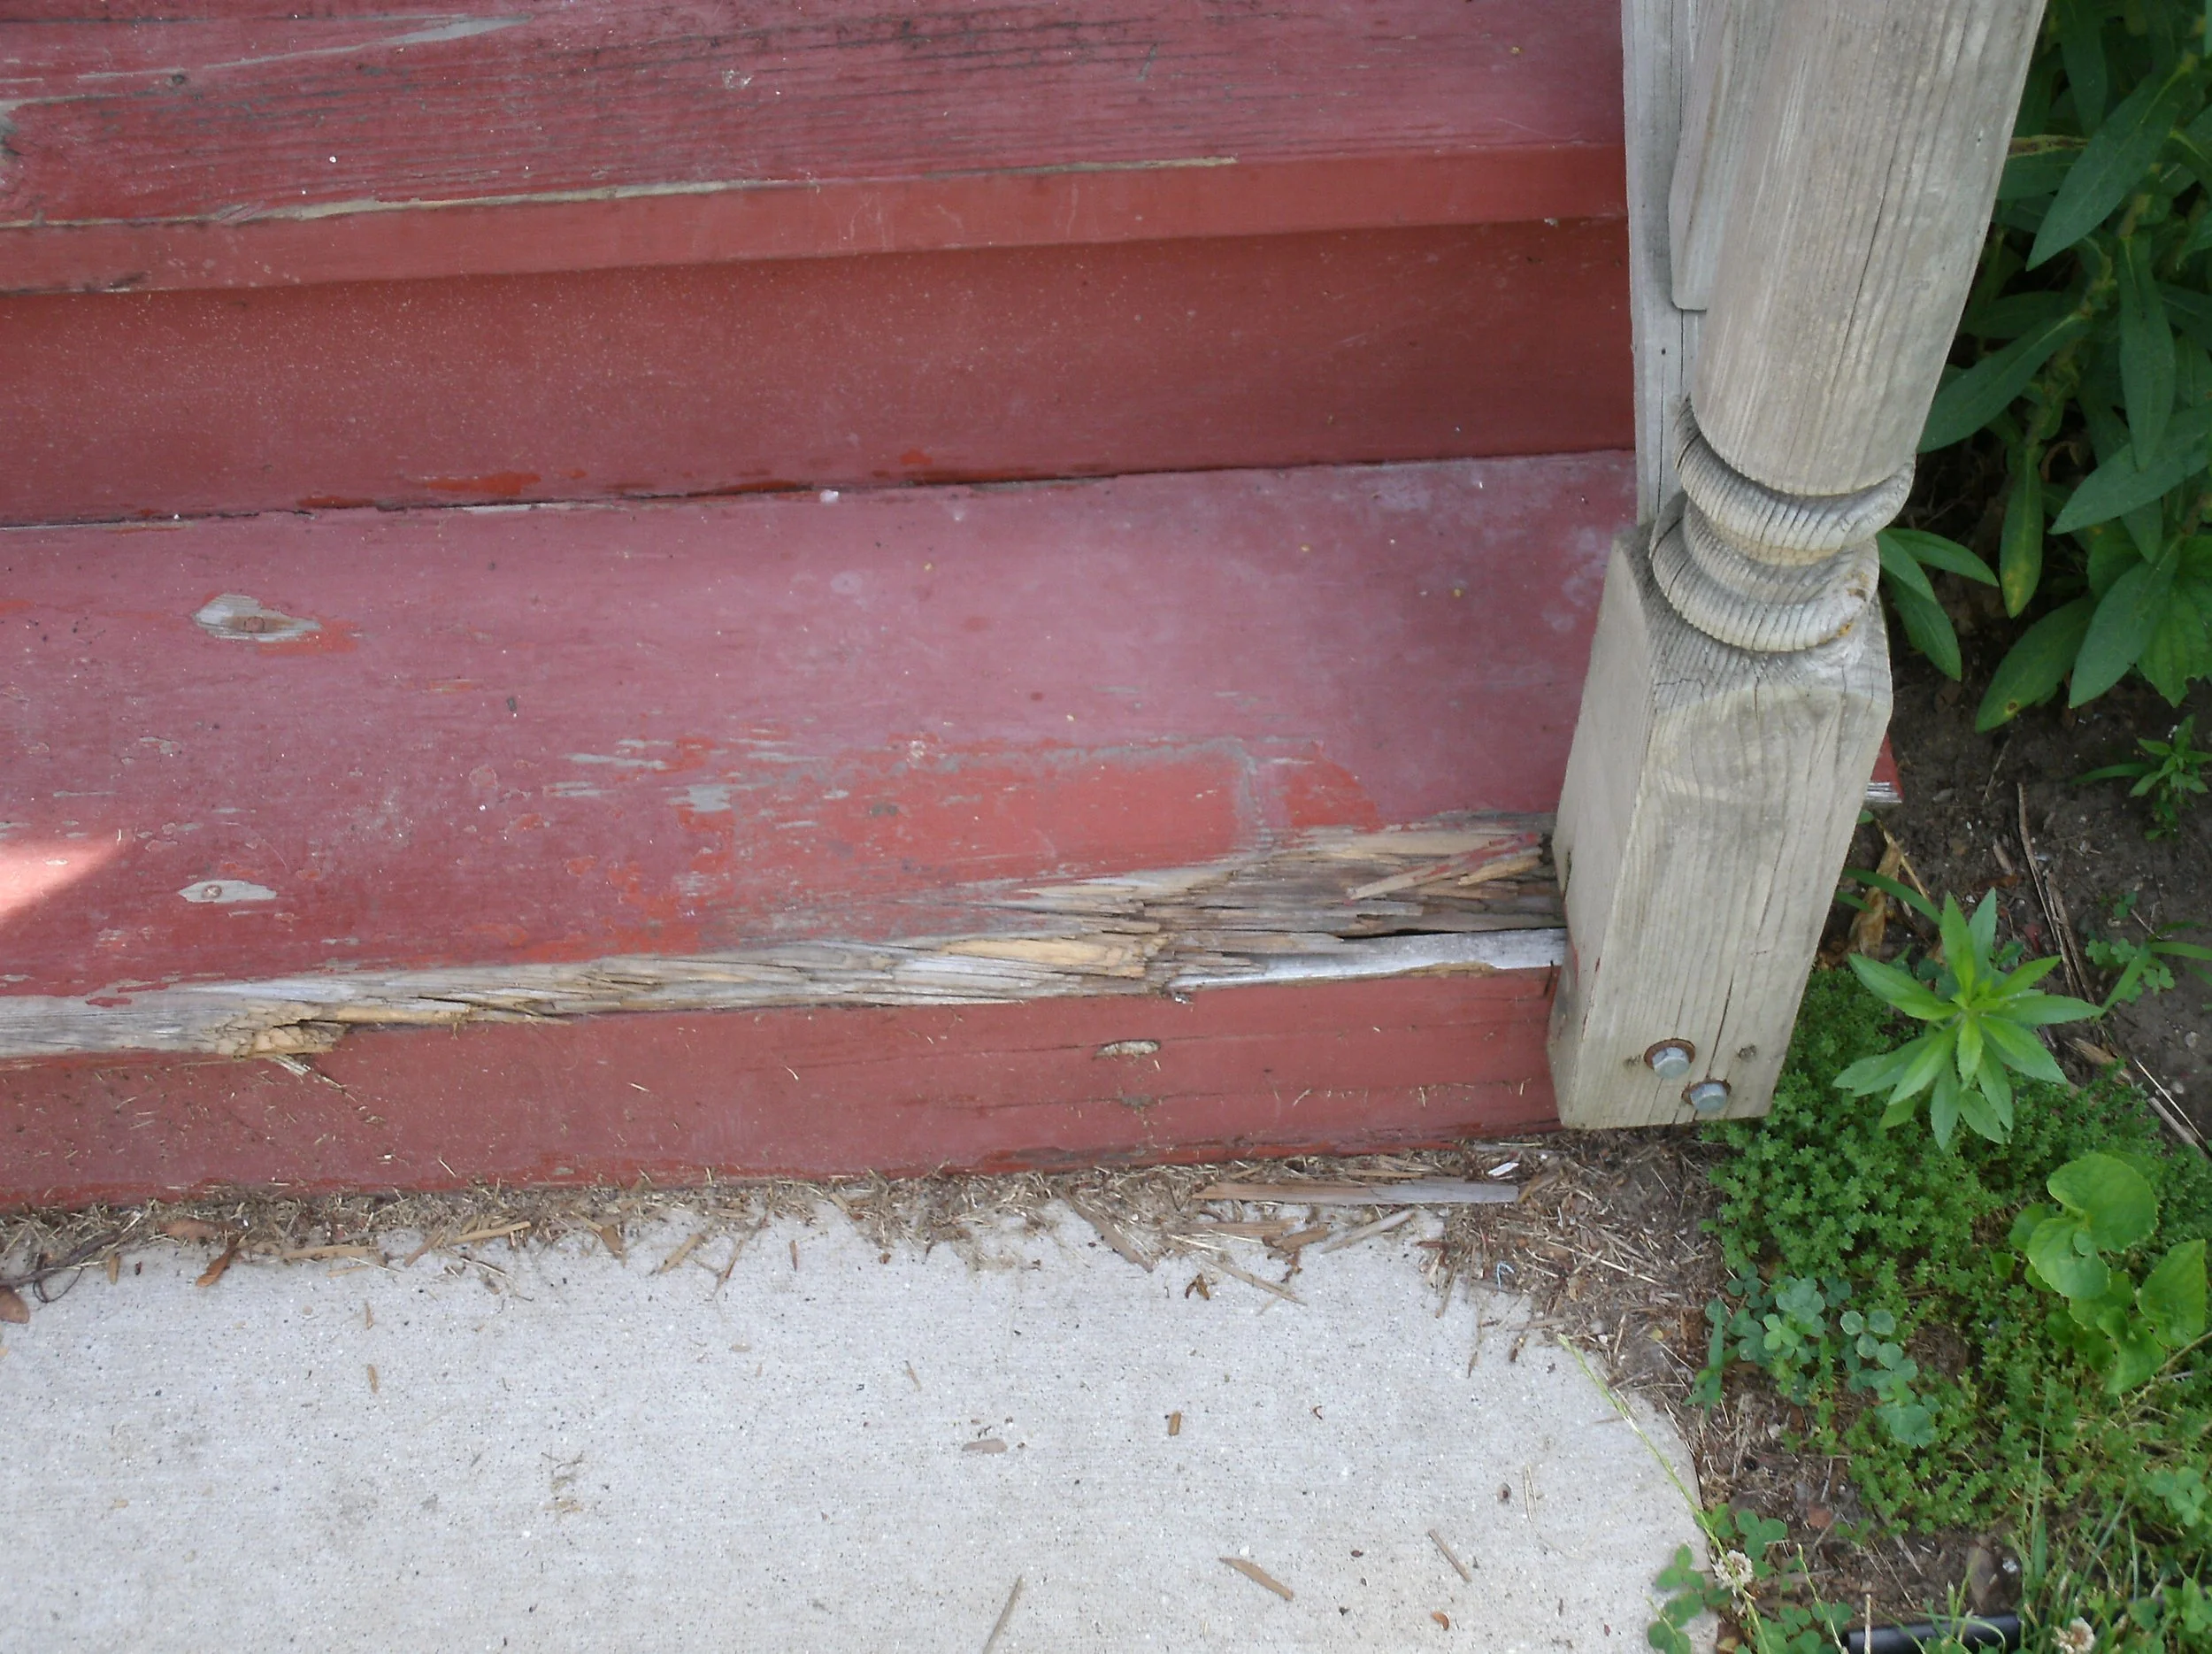
This job involved completely rebuilding the front stairs, fabricating and installing an extensive one-piece cap piece for the front knee wall, fabricating and installing a massive decorative front support post, and completely rebuilding the back stairs. The building inspector had only required that the bottom tread in the front stairs be replaced. My initial examination found much more extensive damage front and back. My insurance and my sense of thoroughness and ethics would not allow me to just replace a tread, considering that the stringers were damaged and I would be putting screws into silly putty wood. The customer concurred. In two of the photo captions, I referred to the decorative modification I made on the simple 4 x 4 treated newell posts. One of the two original turned cedar posts was in sufficiently good condition to use. I ripped it in half and screwed it to the front of the two newell posts. I am still tickled at how well it turned out.
Rotted front stairs tread. Examination uncovered extensive damage.
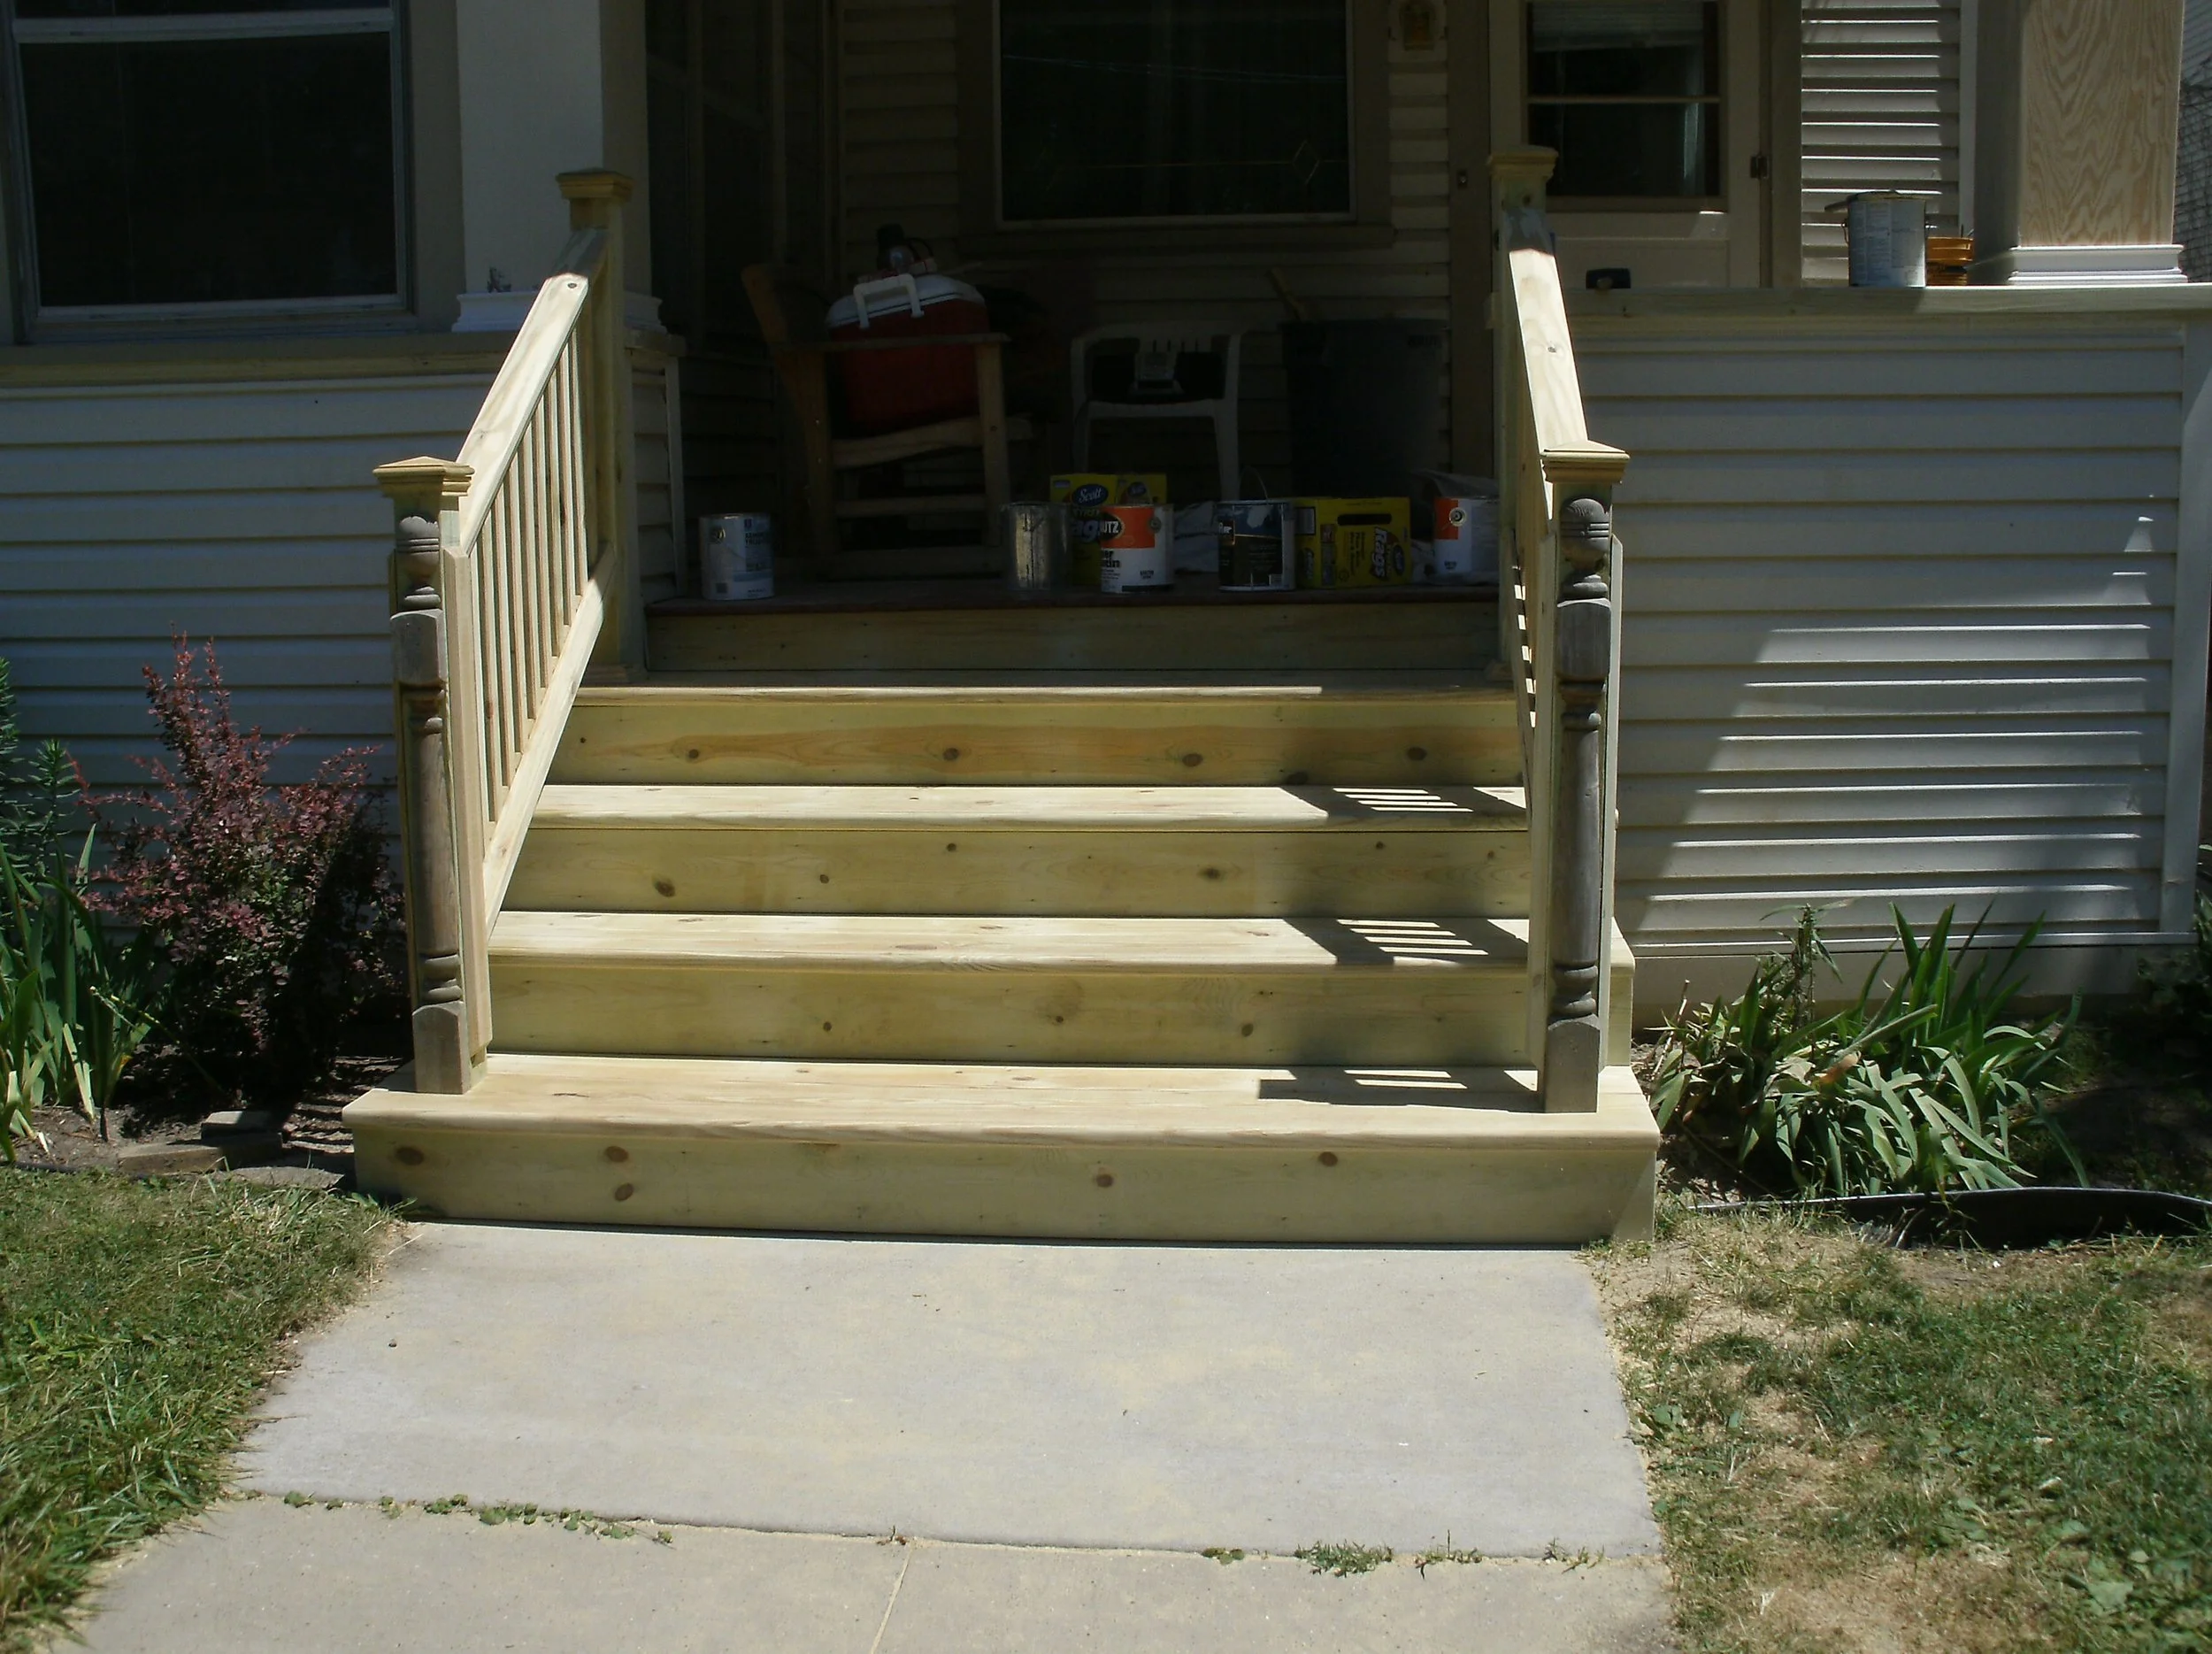
New strong front stairs completely rebuilt.
New front stairs. Note decorative post ripped in half and applied to front of newell posts
View of new porch, knee wall cap and bottom of new massive support post.
Full view of new stairs and new support post.
Detail of new support post.
Another view of the knee wall cap piece, and bottom of support post.
Close-up of massive support, post bottom, and knee wall cap.
Close up of myself, touching up painted front stairs.
Fully painted front stairs. Note decorative half post attached to newell posts.
Another full view of the new stairs, post, knee wall cap.
Funky, damaged back stairs. Note: minimal rails way out of code.
Beautiful new back stairs. Strong, generously sized treads, ultra strong rails.
Side view of the new back stairs.

Front view of the new back stairs painted.

Side view of the new back stairs painted.

Another side view of the new back stairs painted.
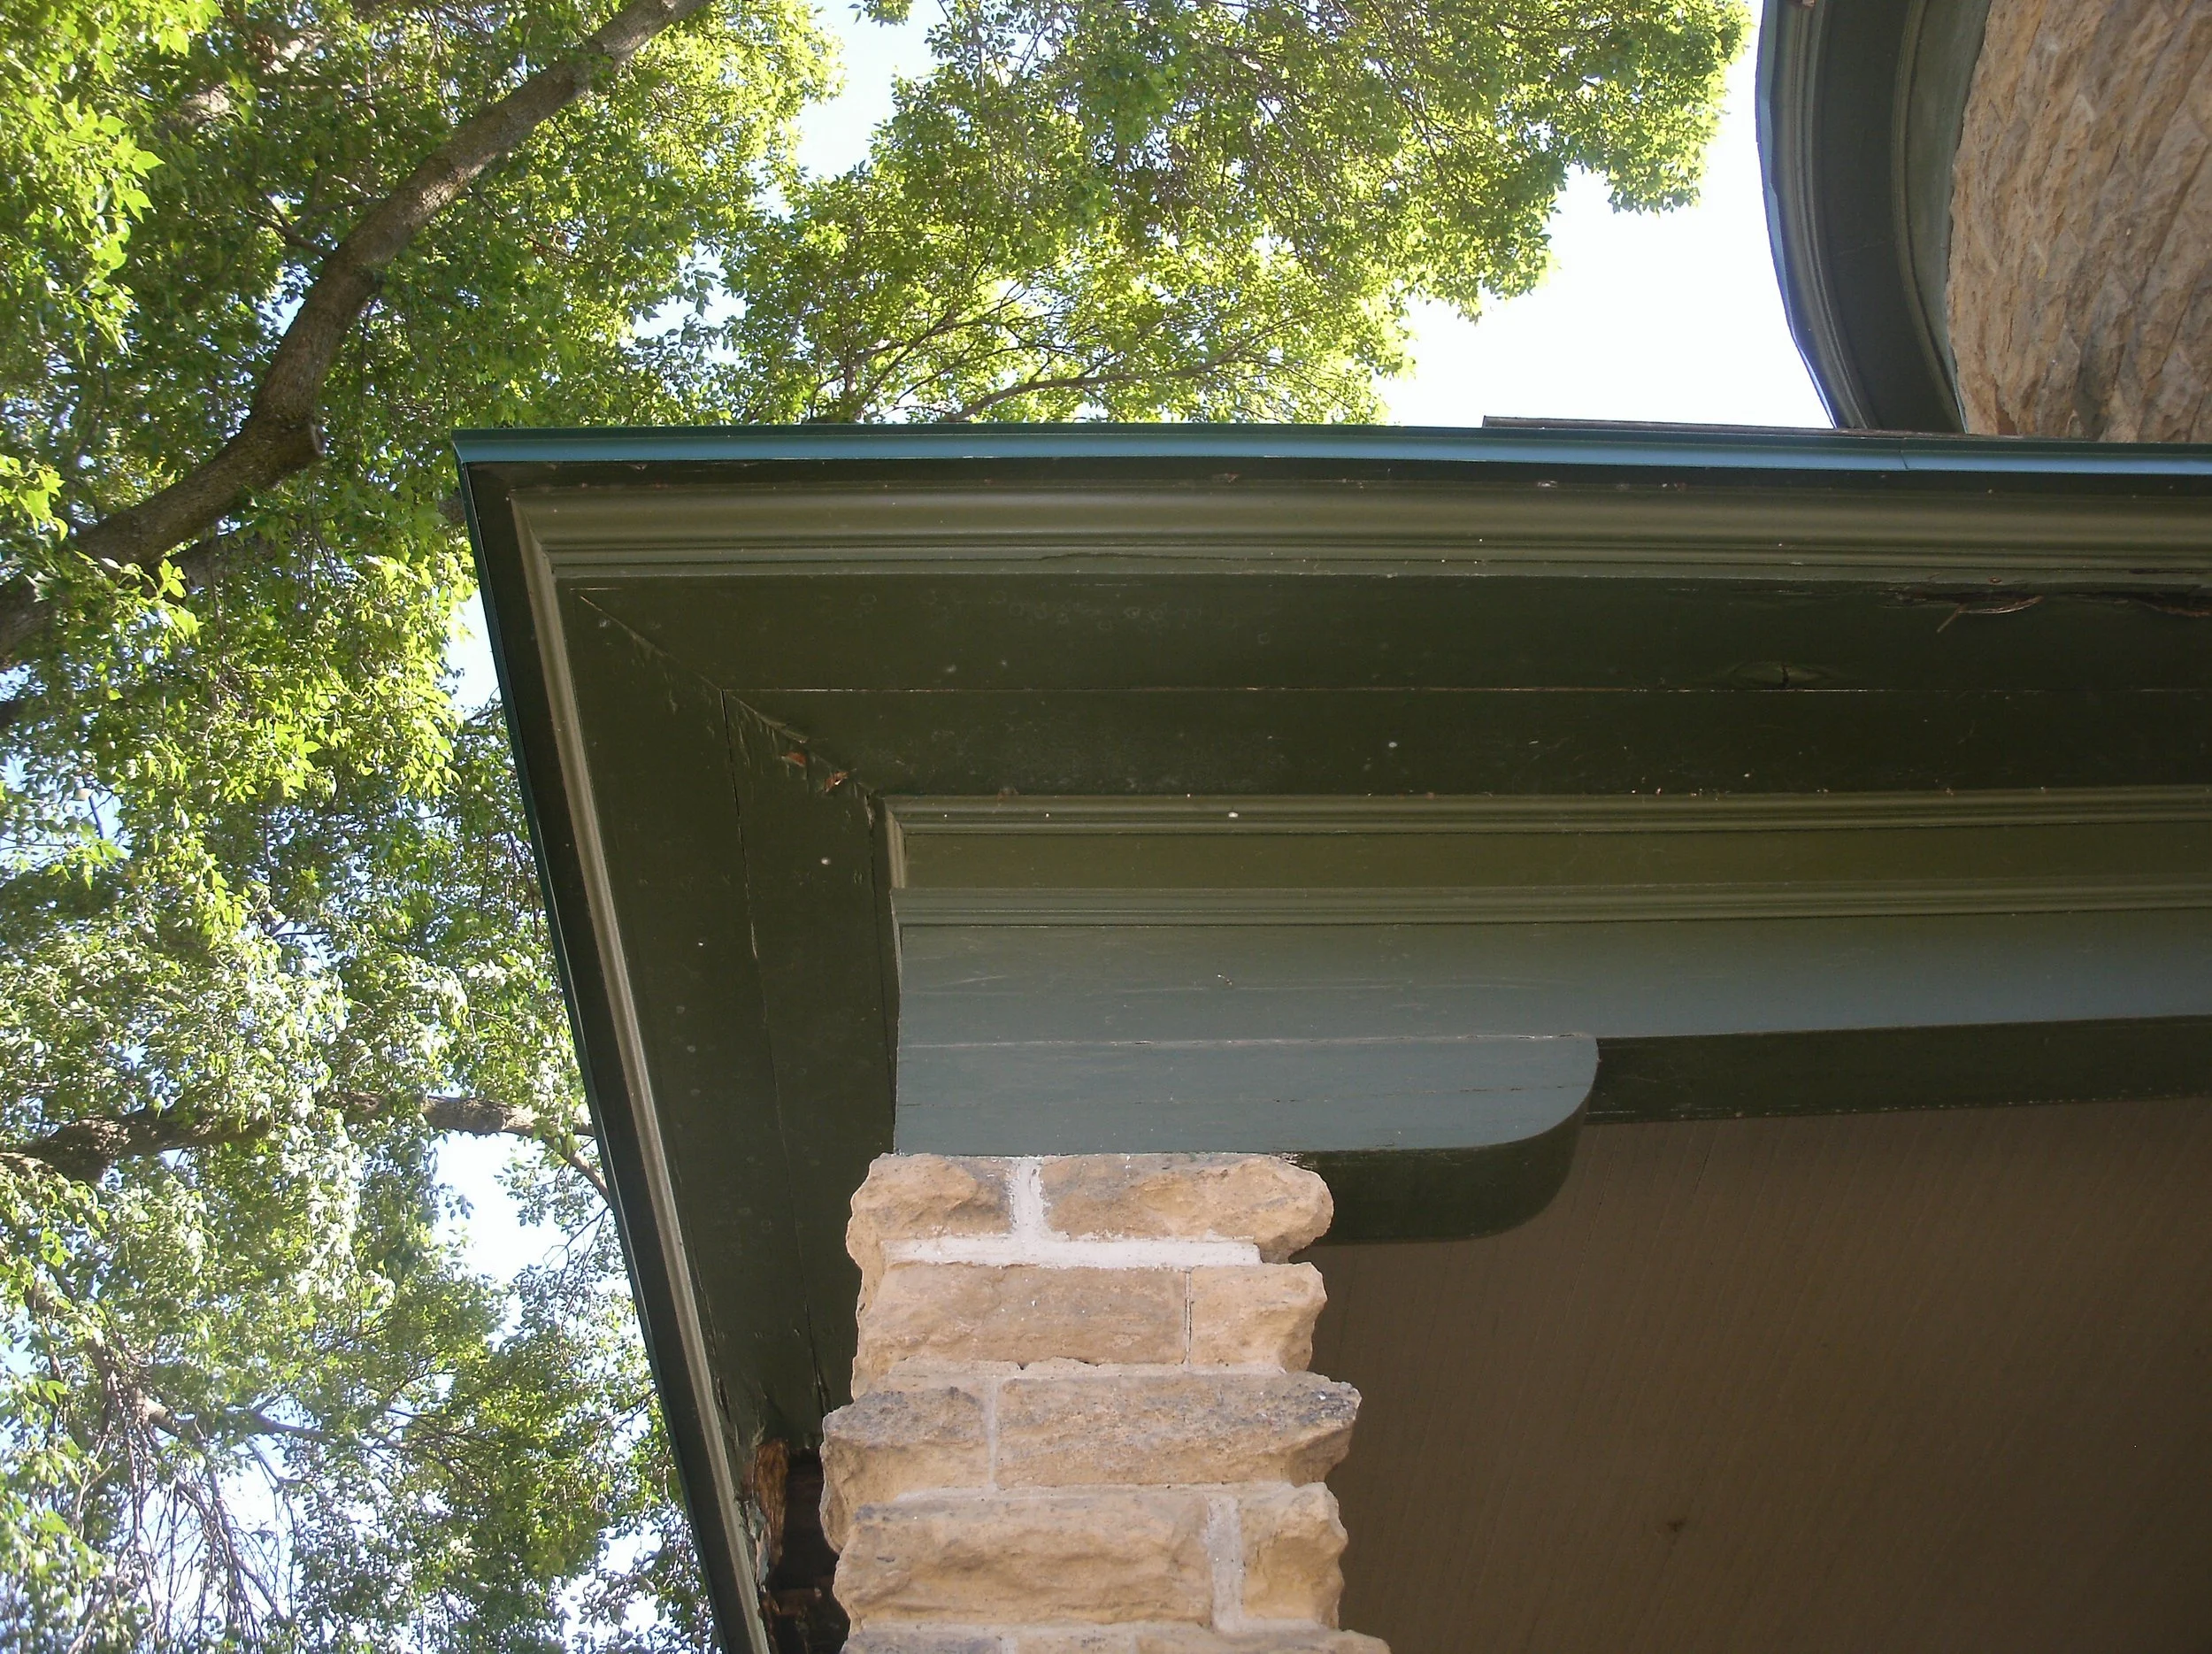
Gorham Castle Porch
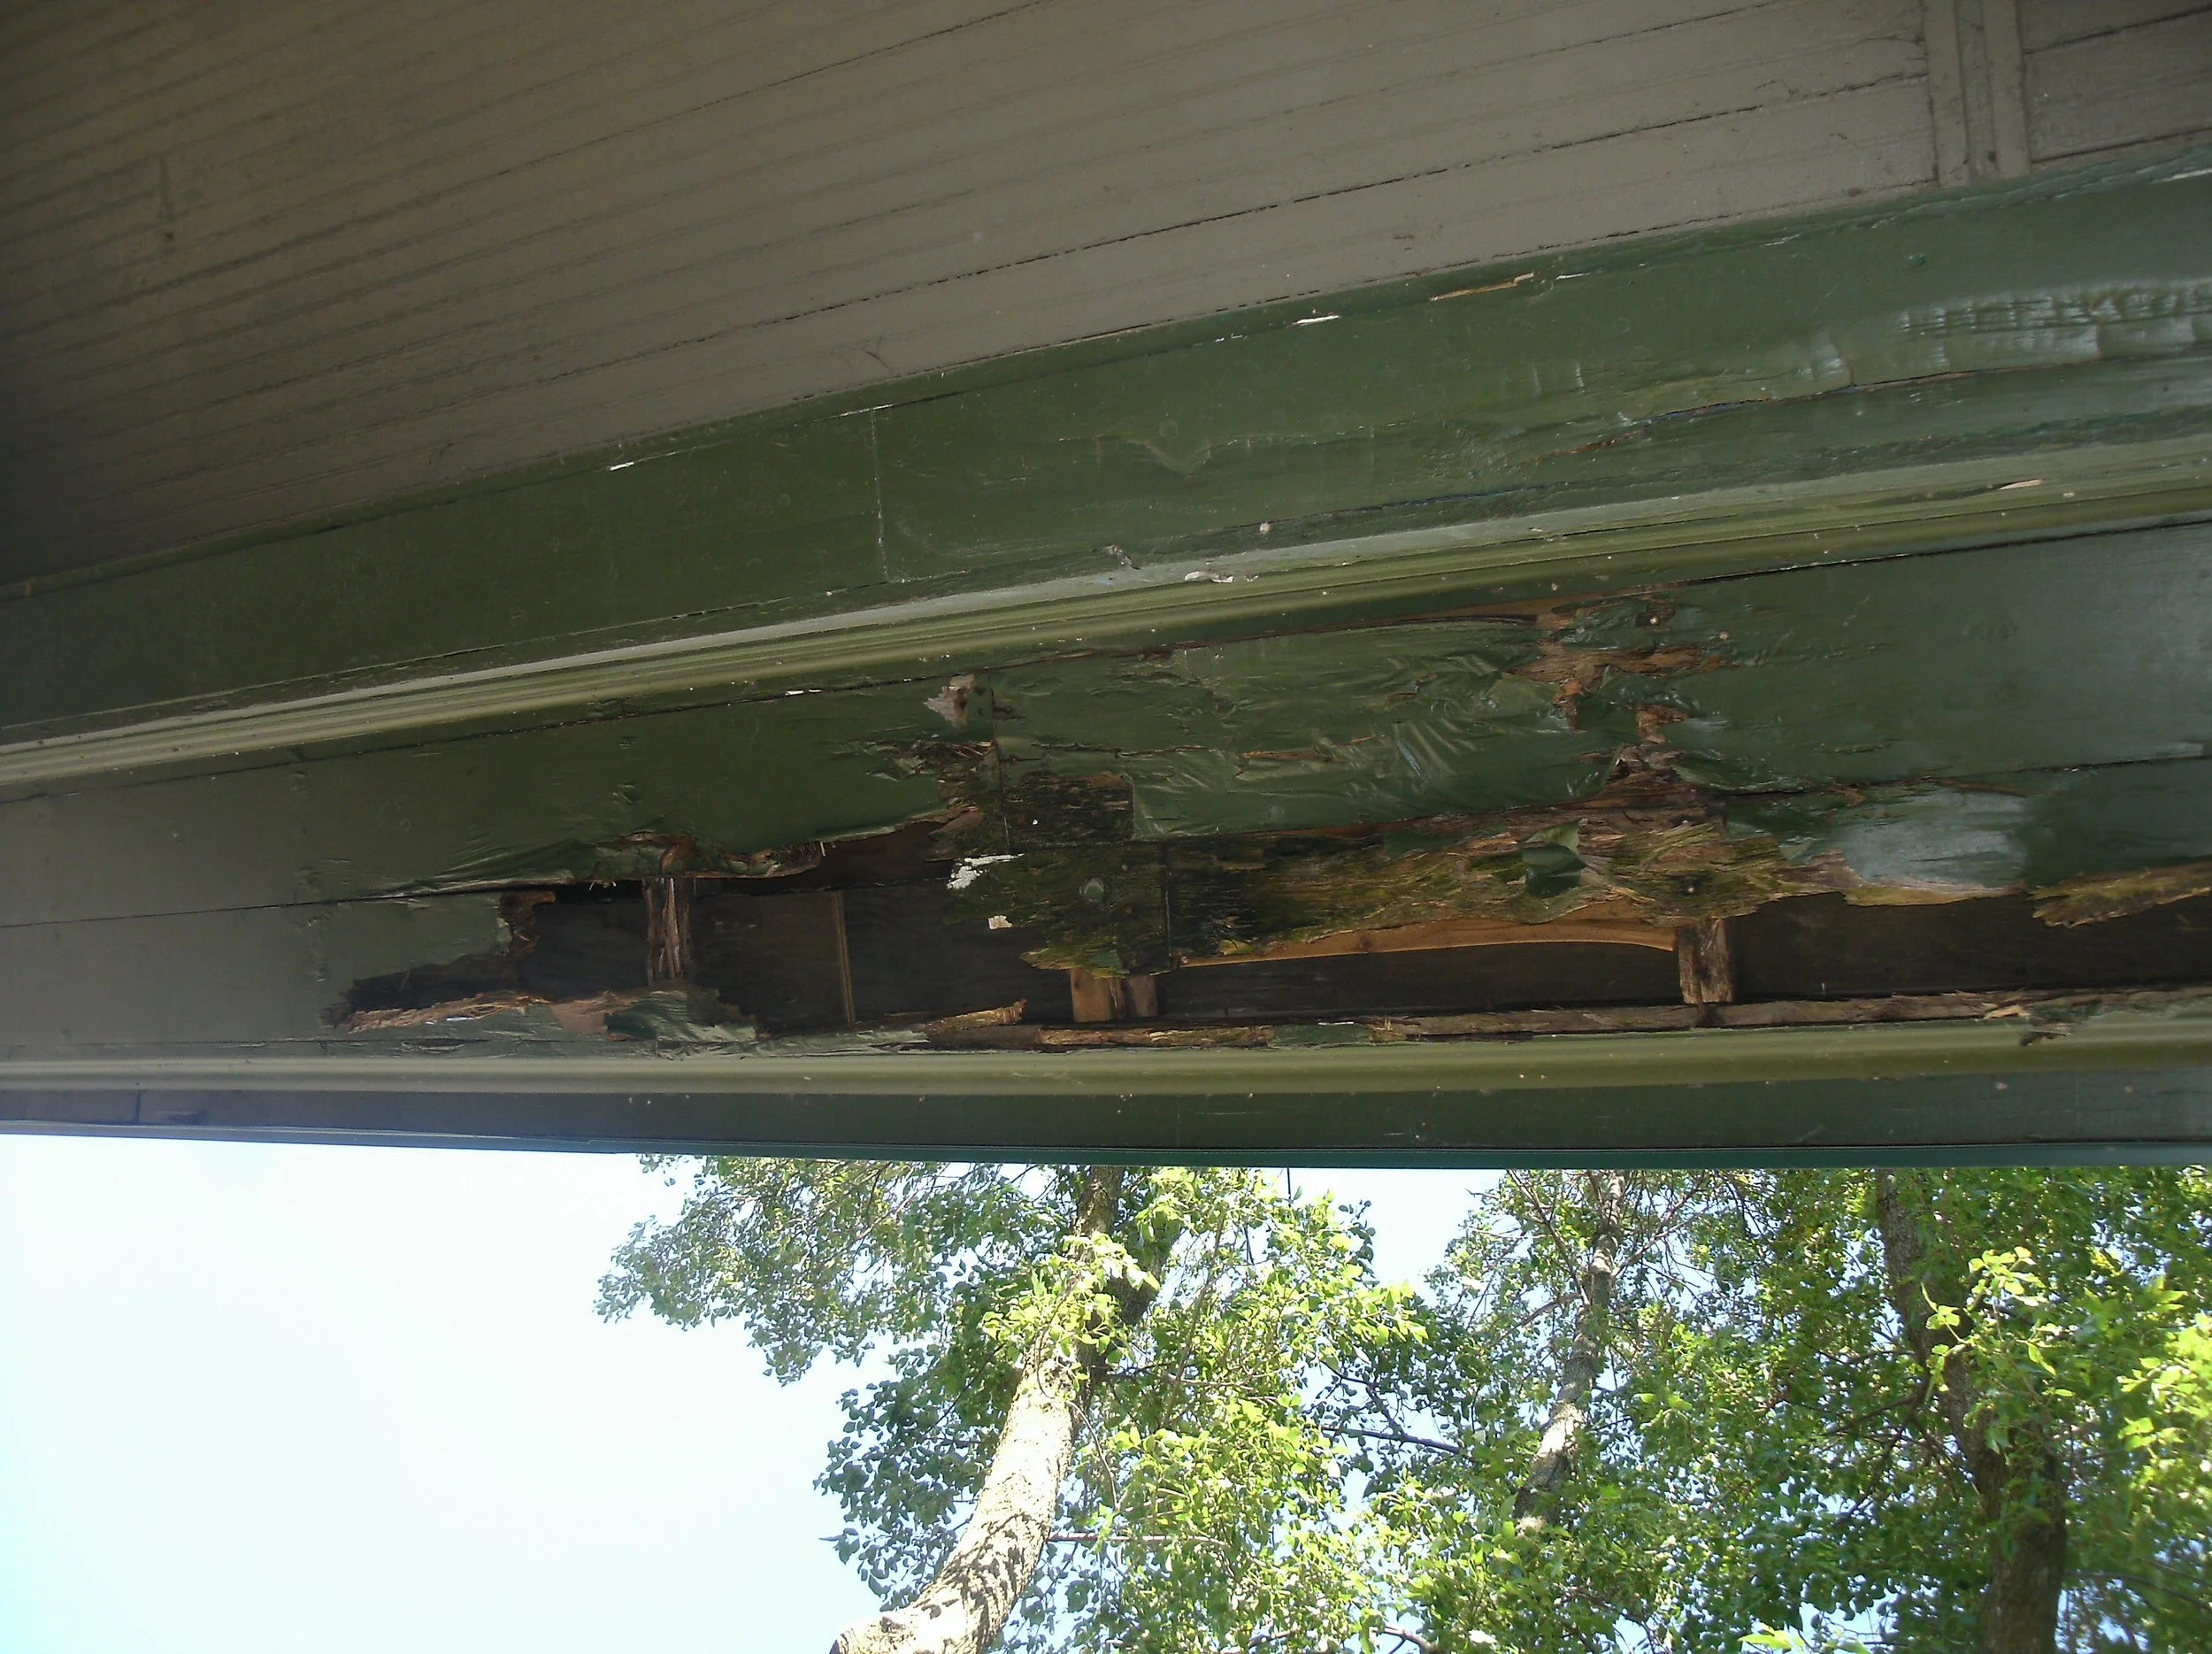
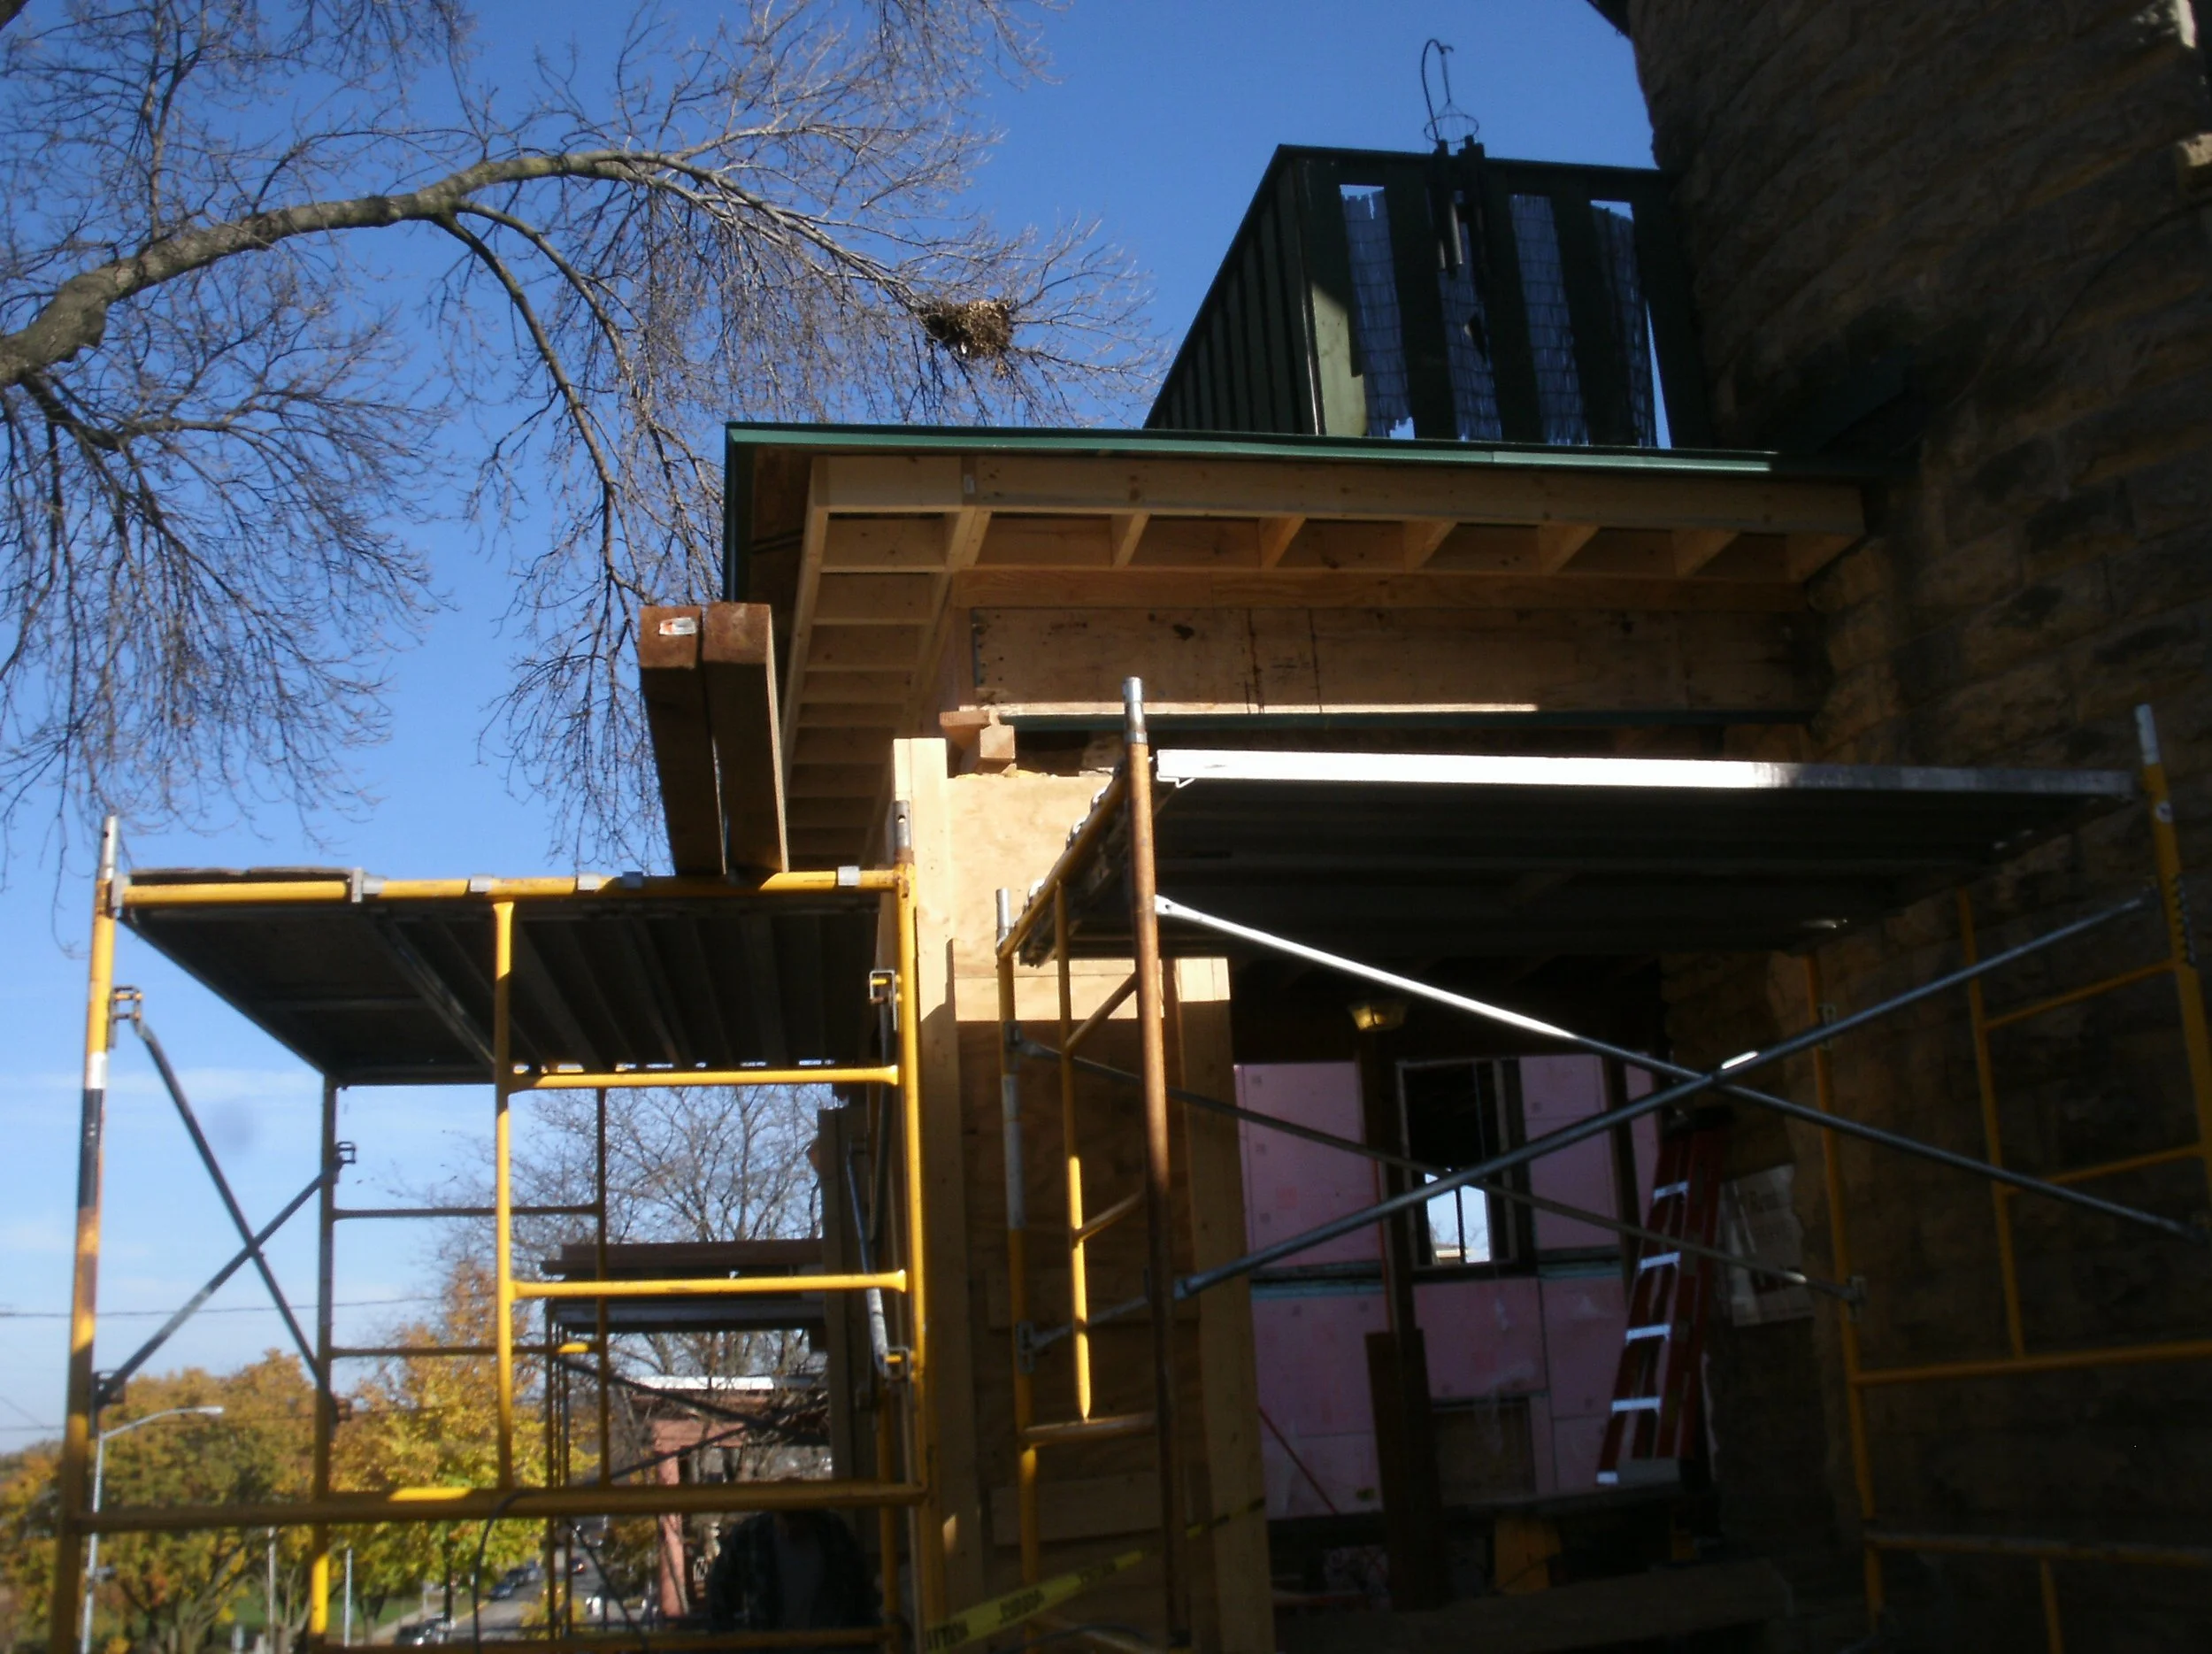
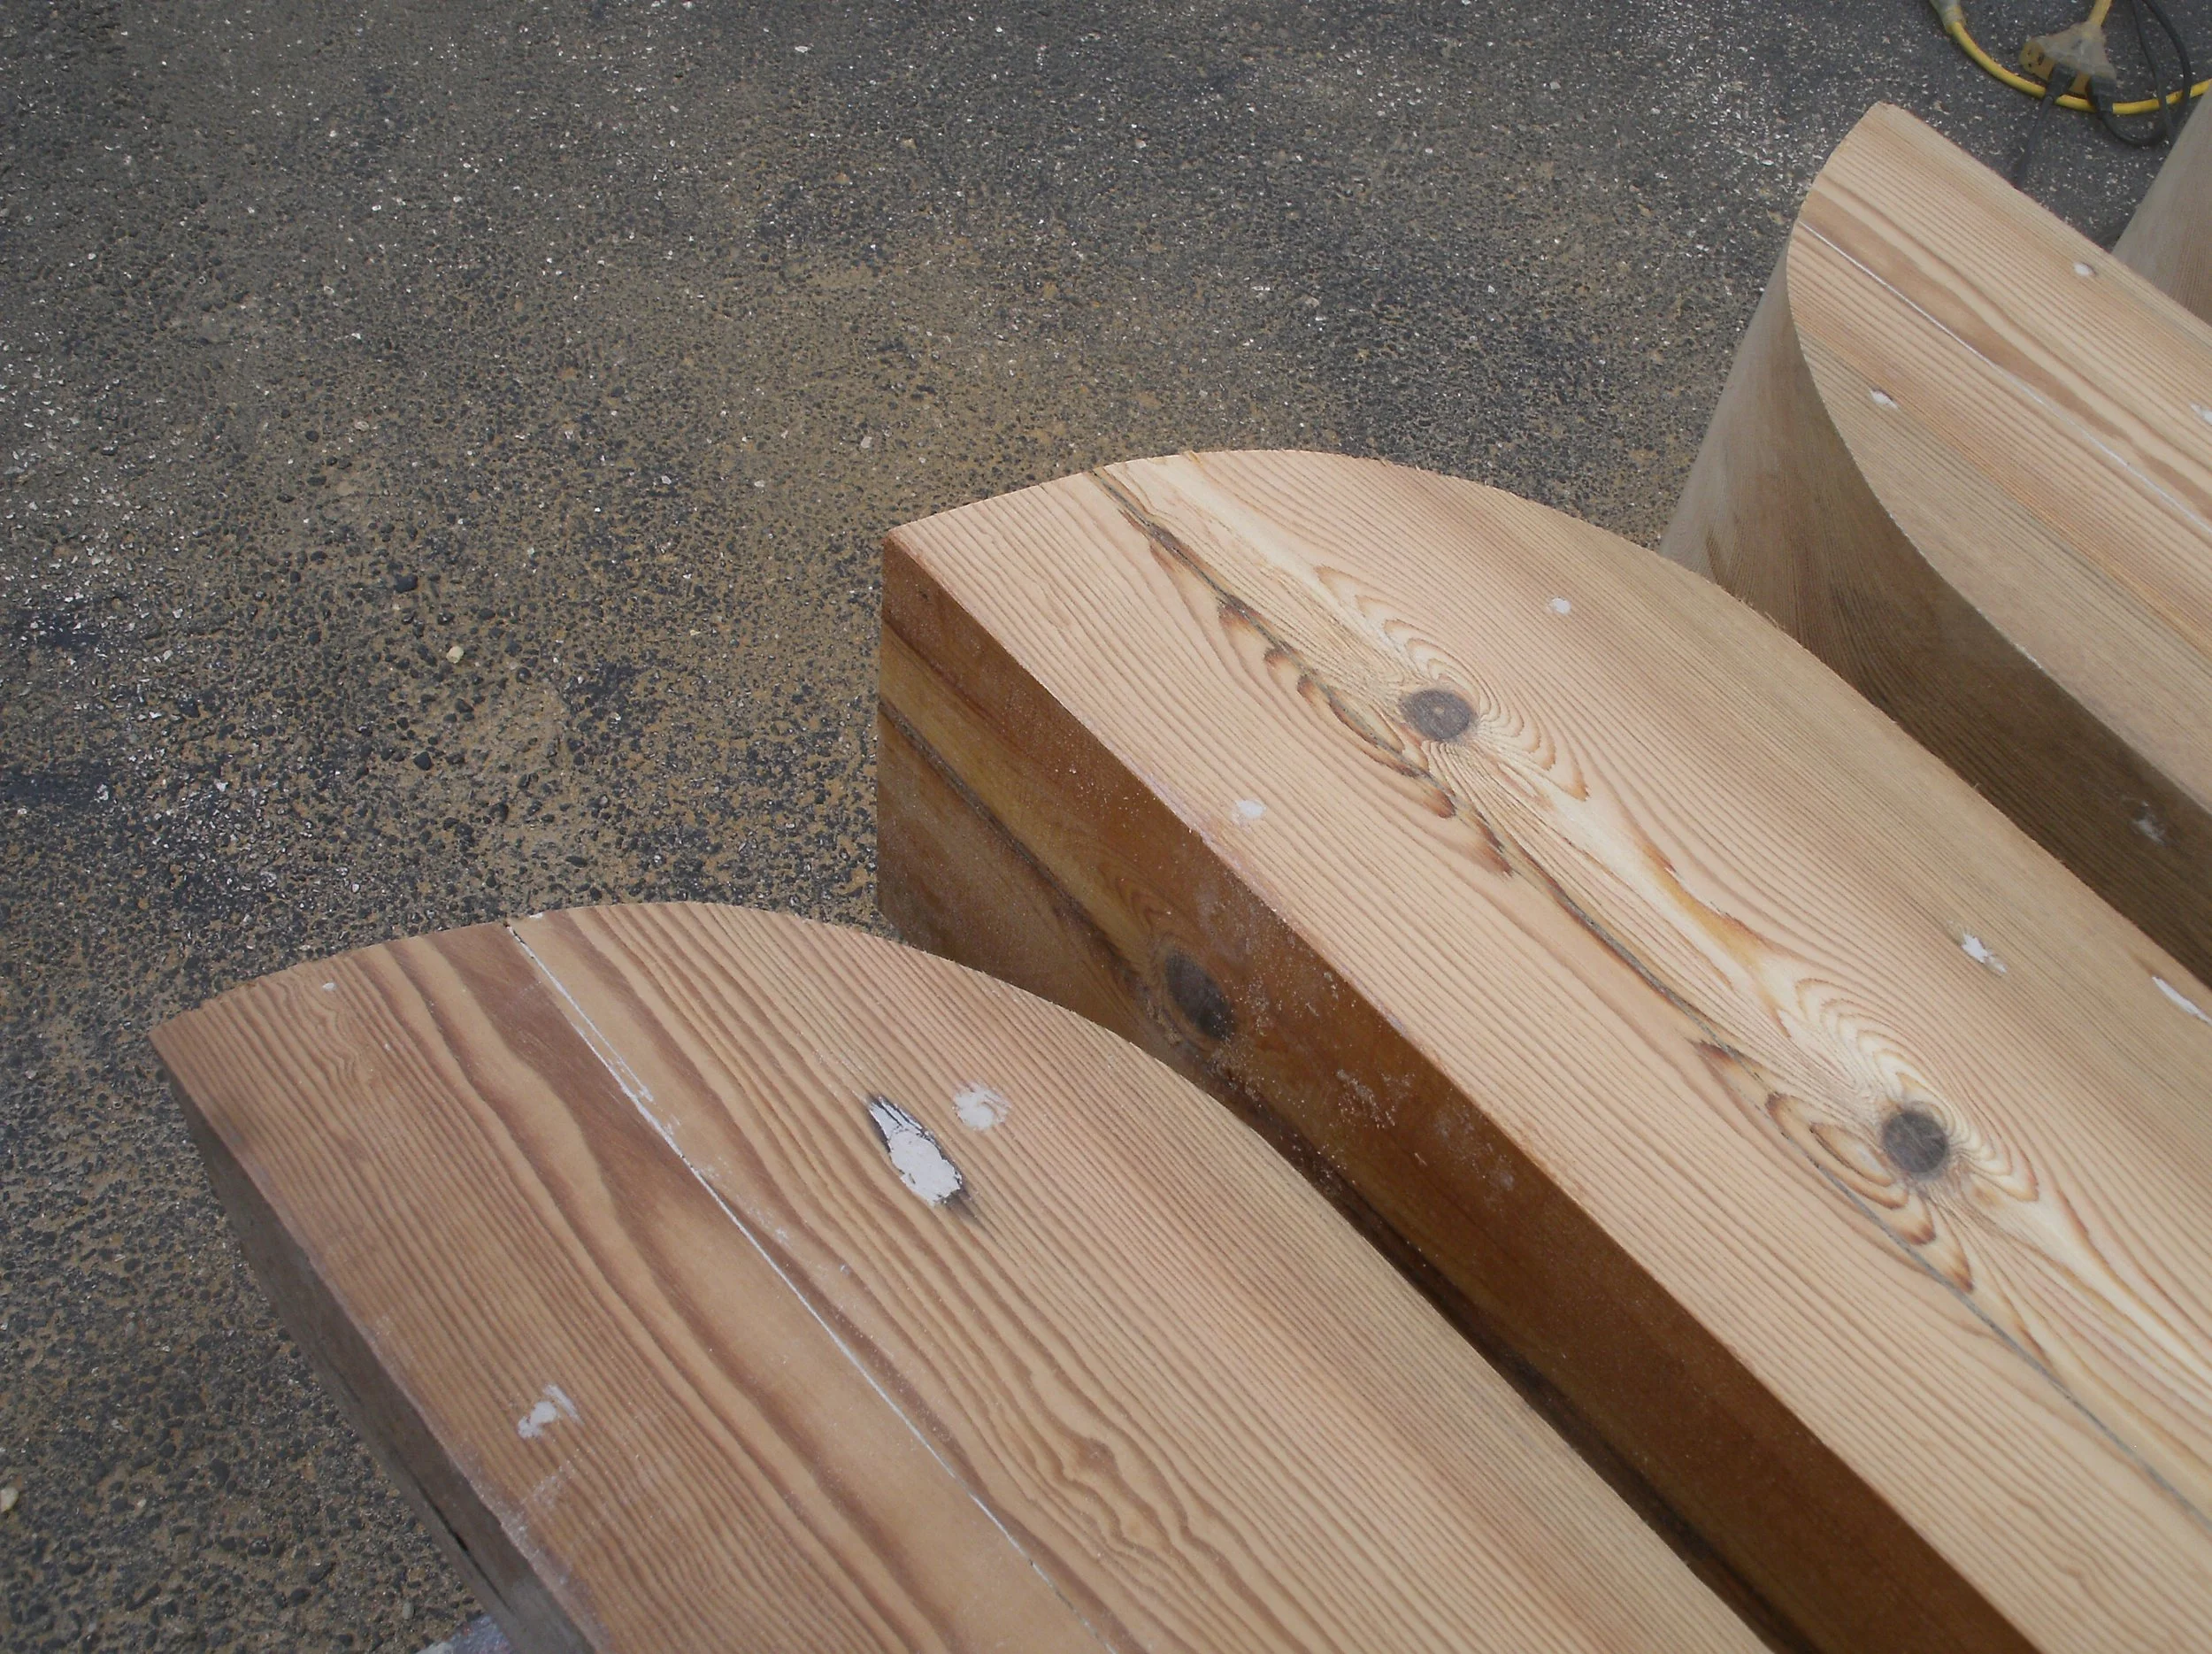
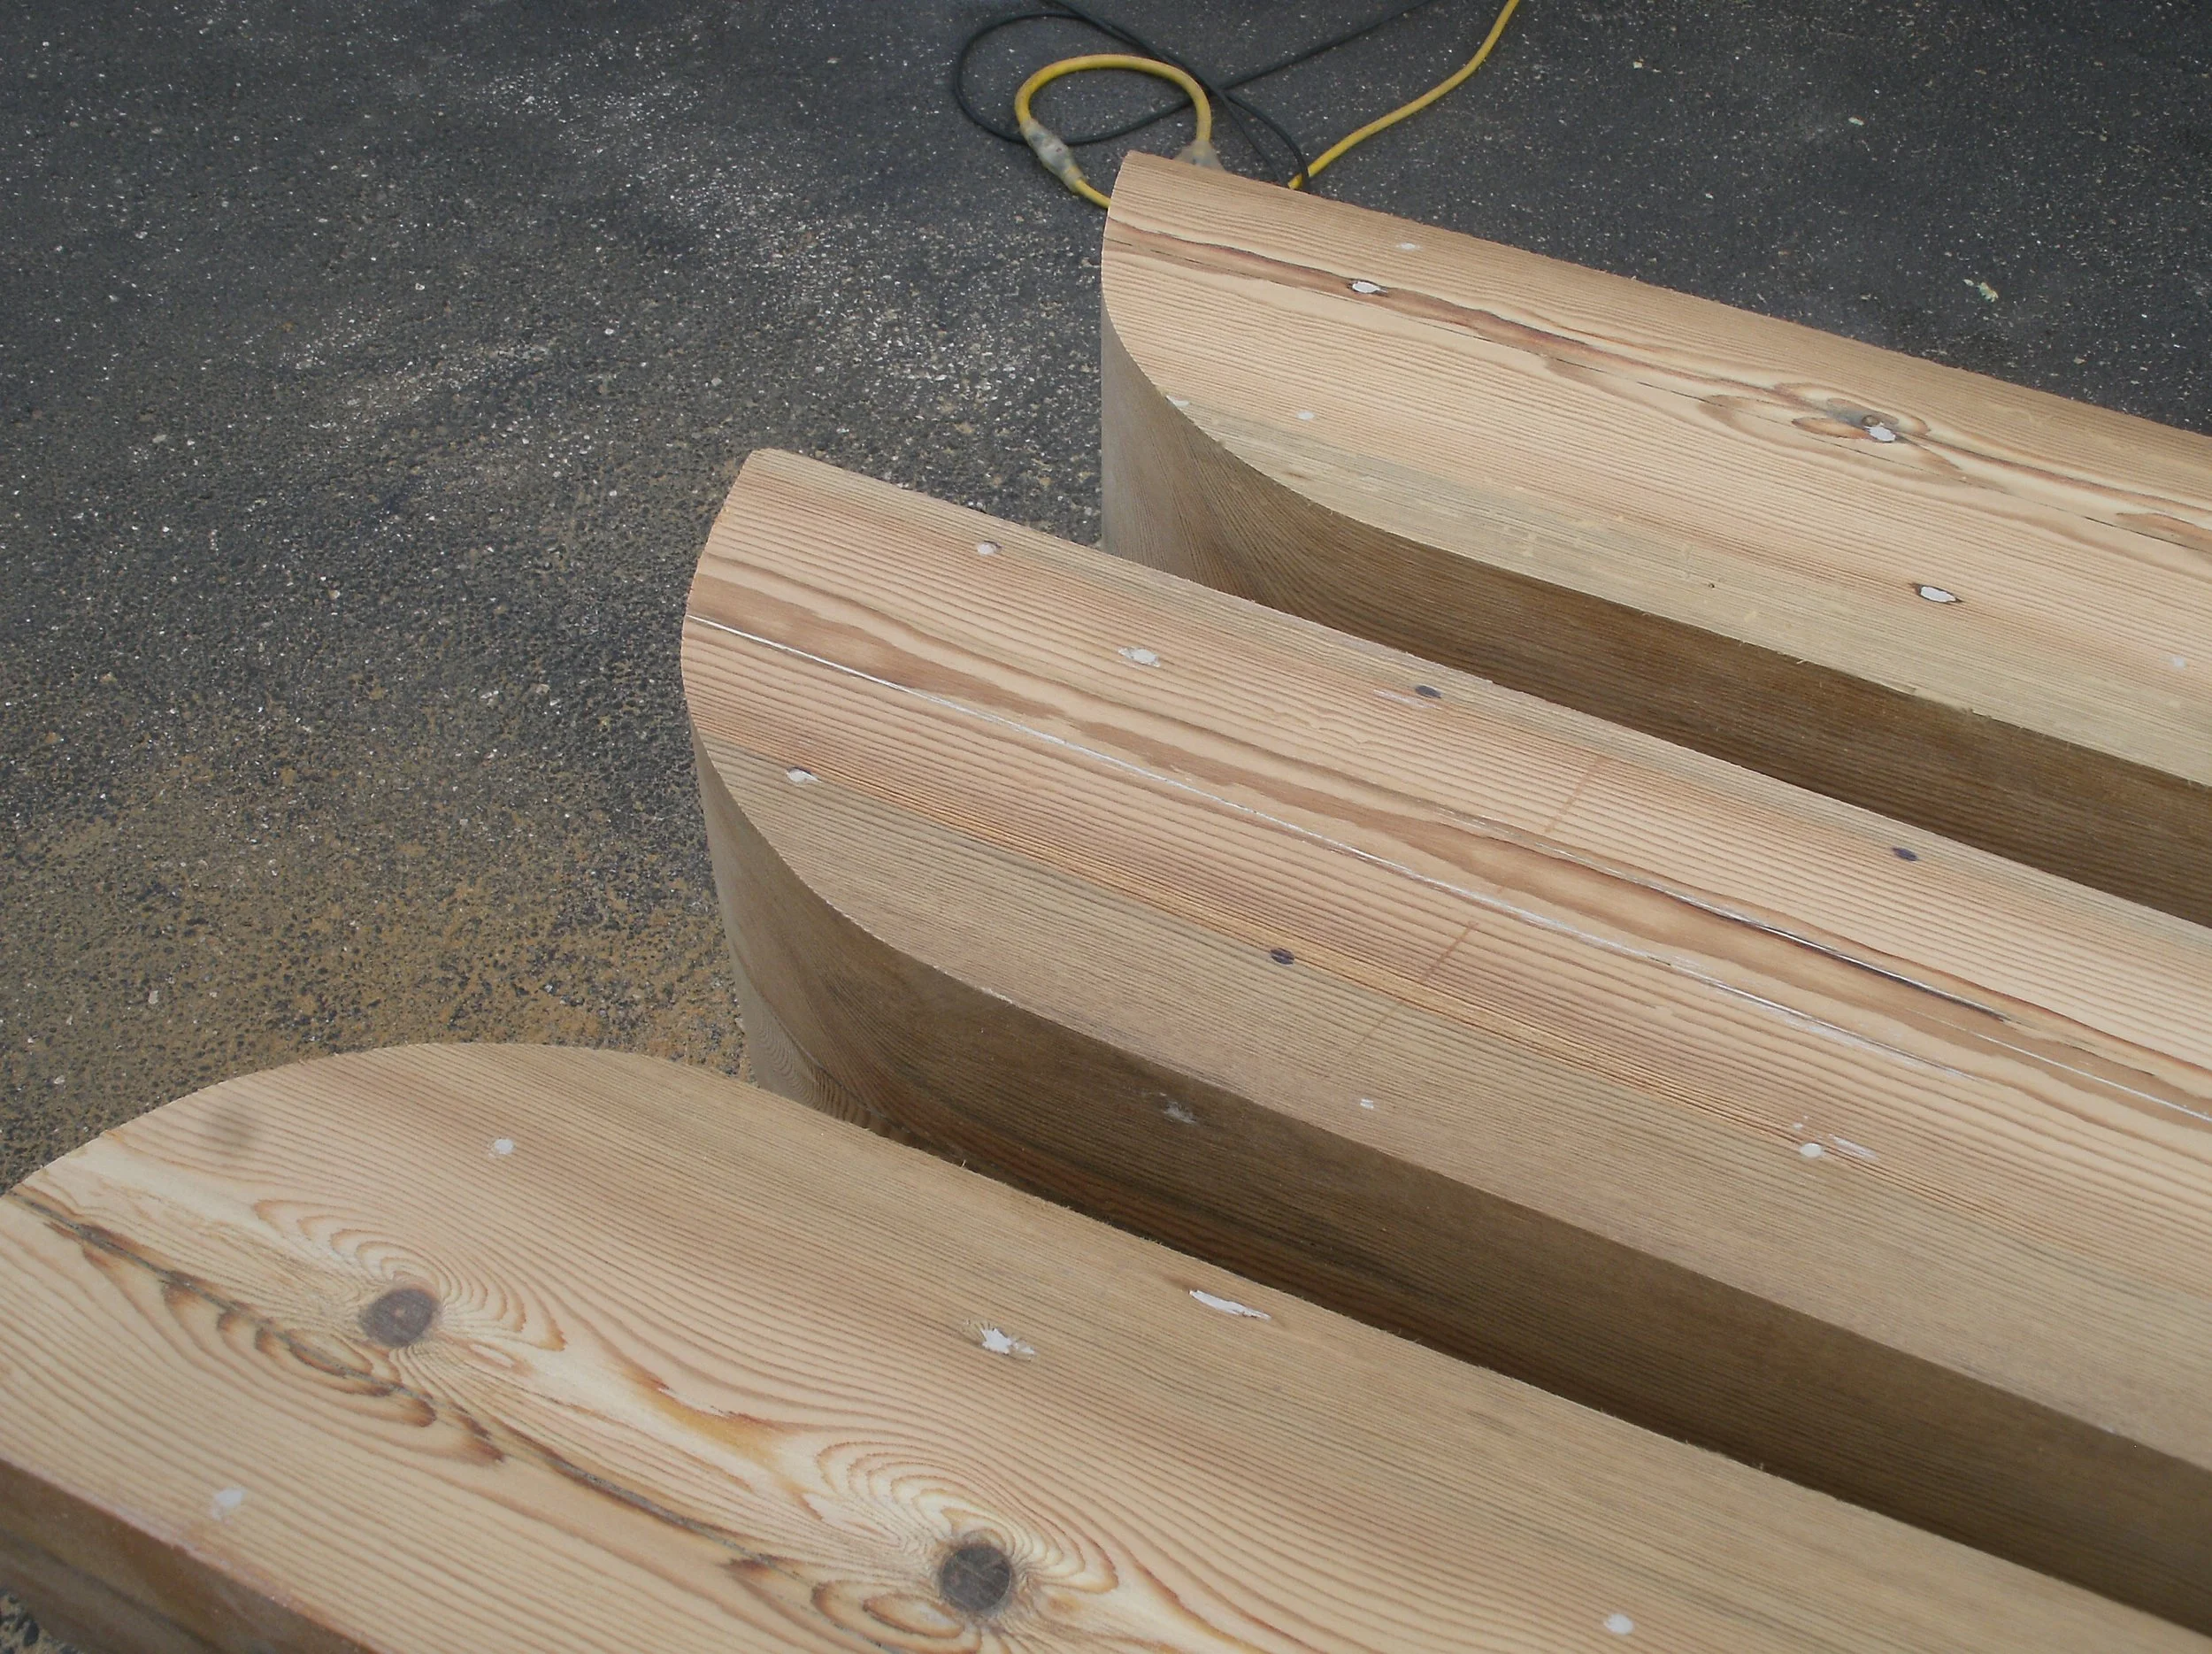
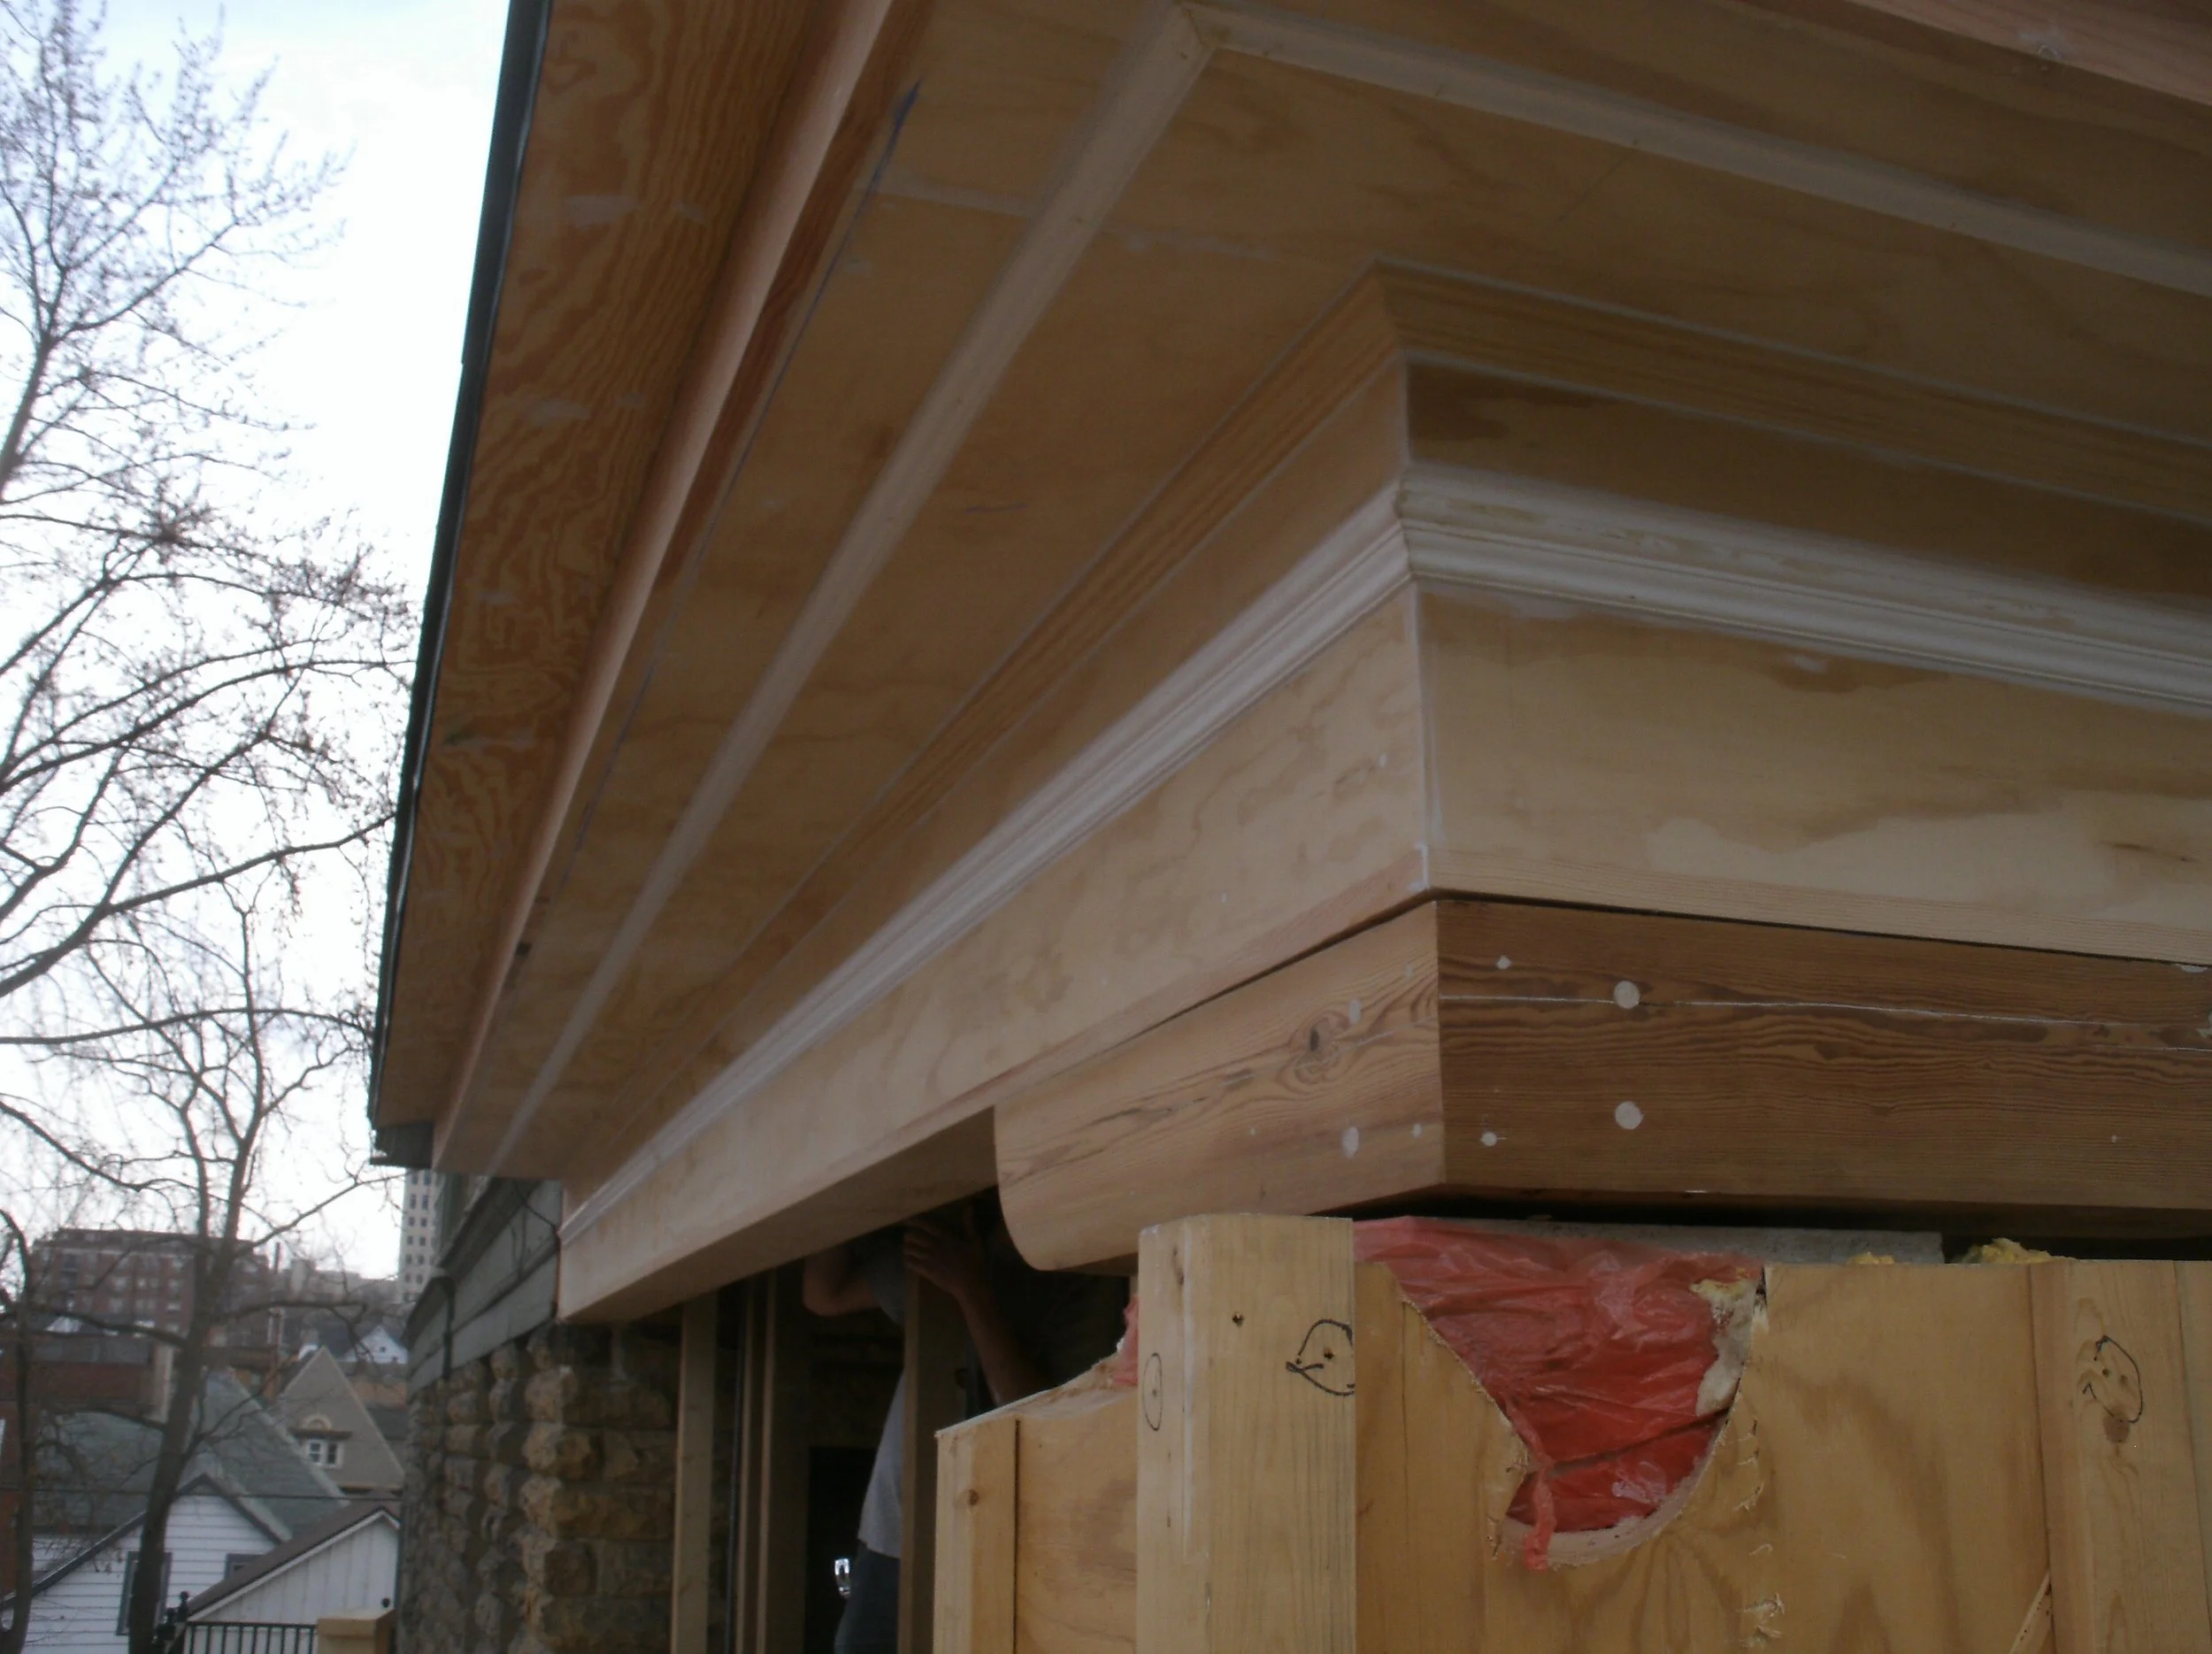
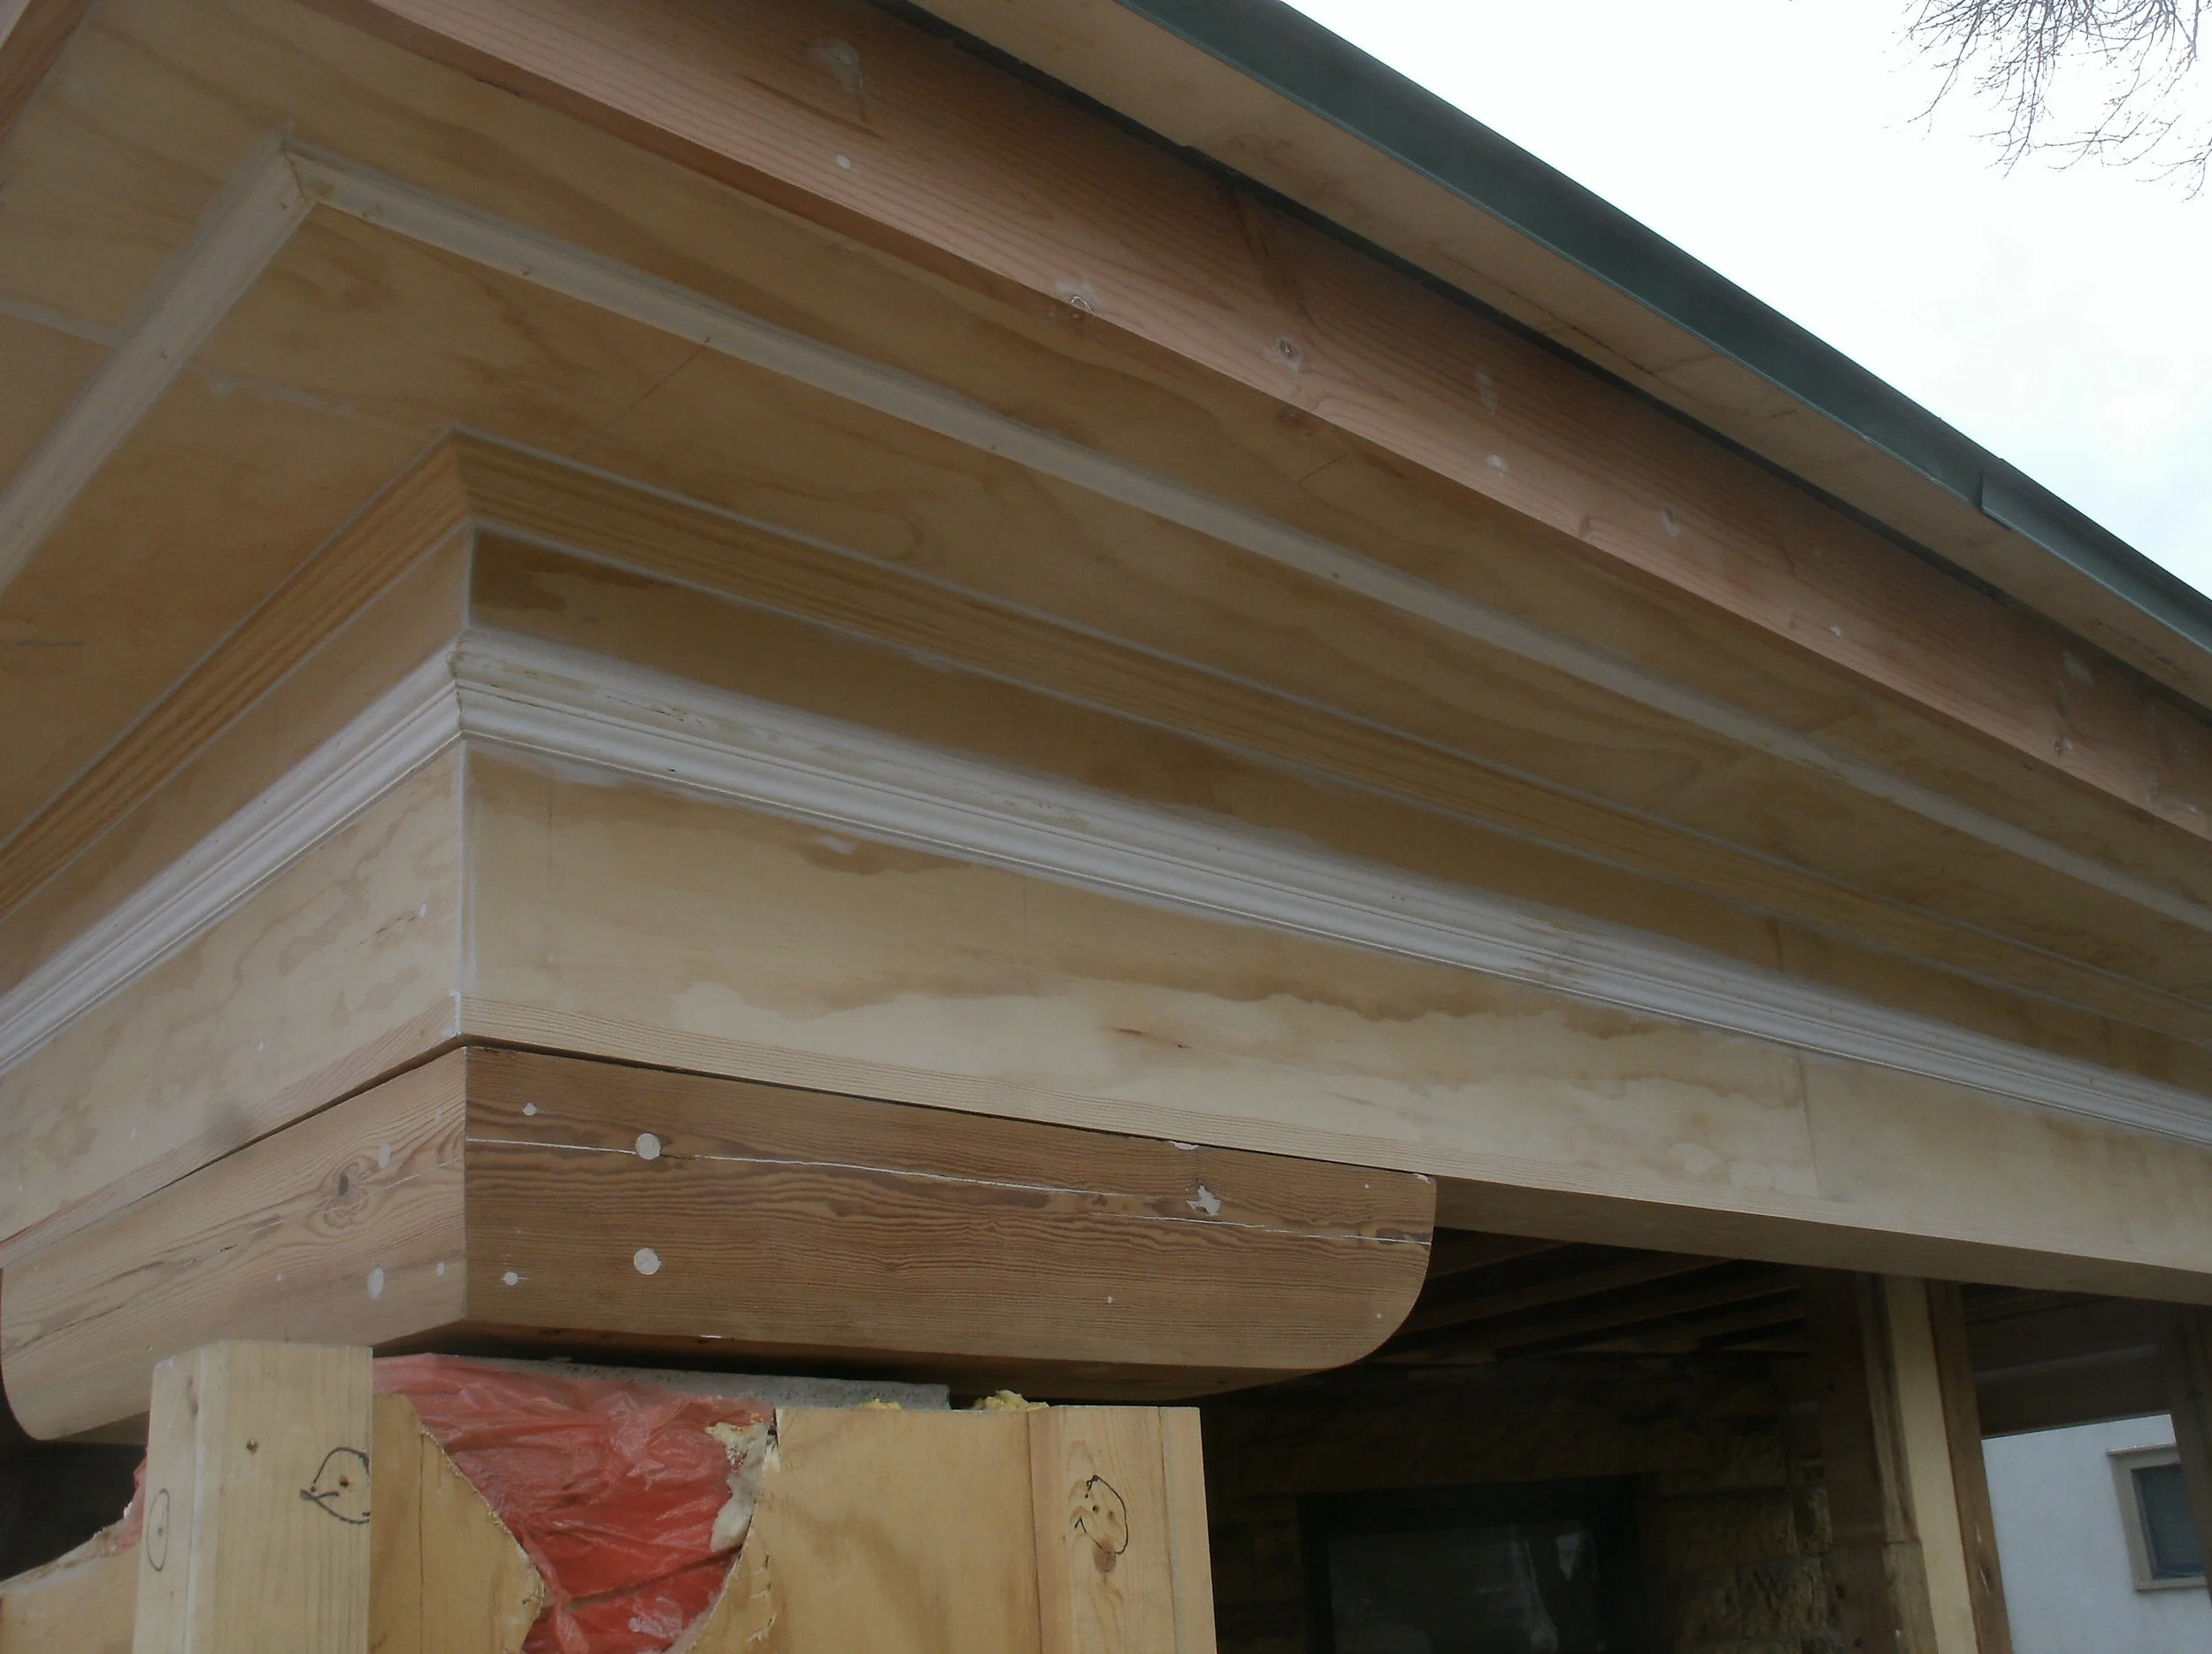
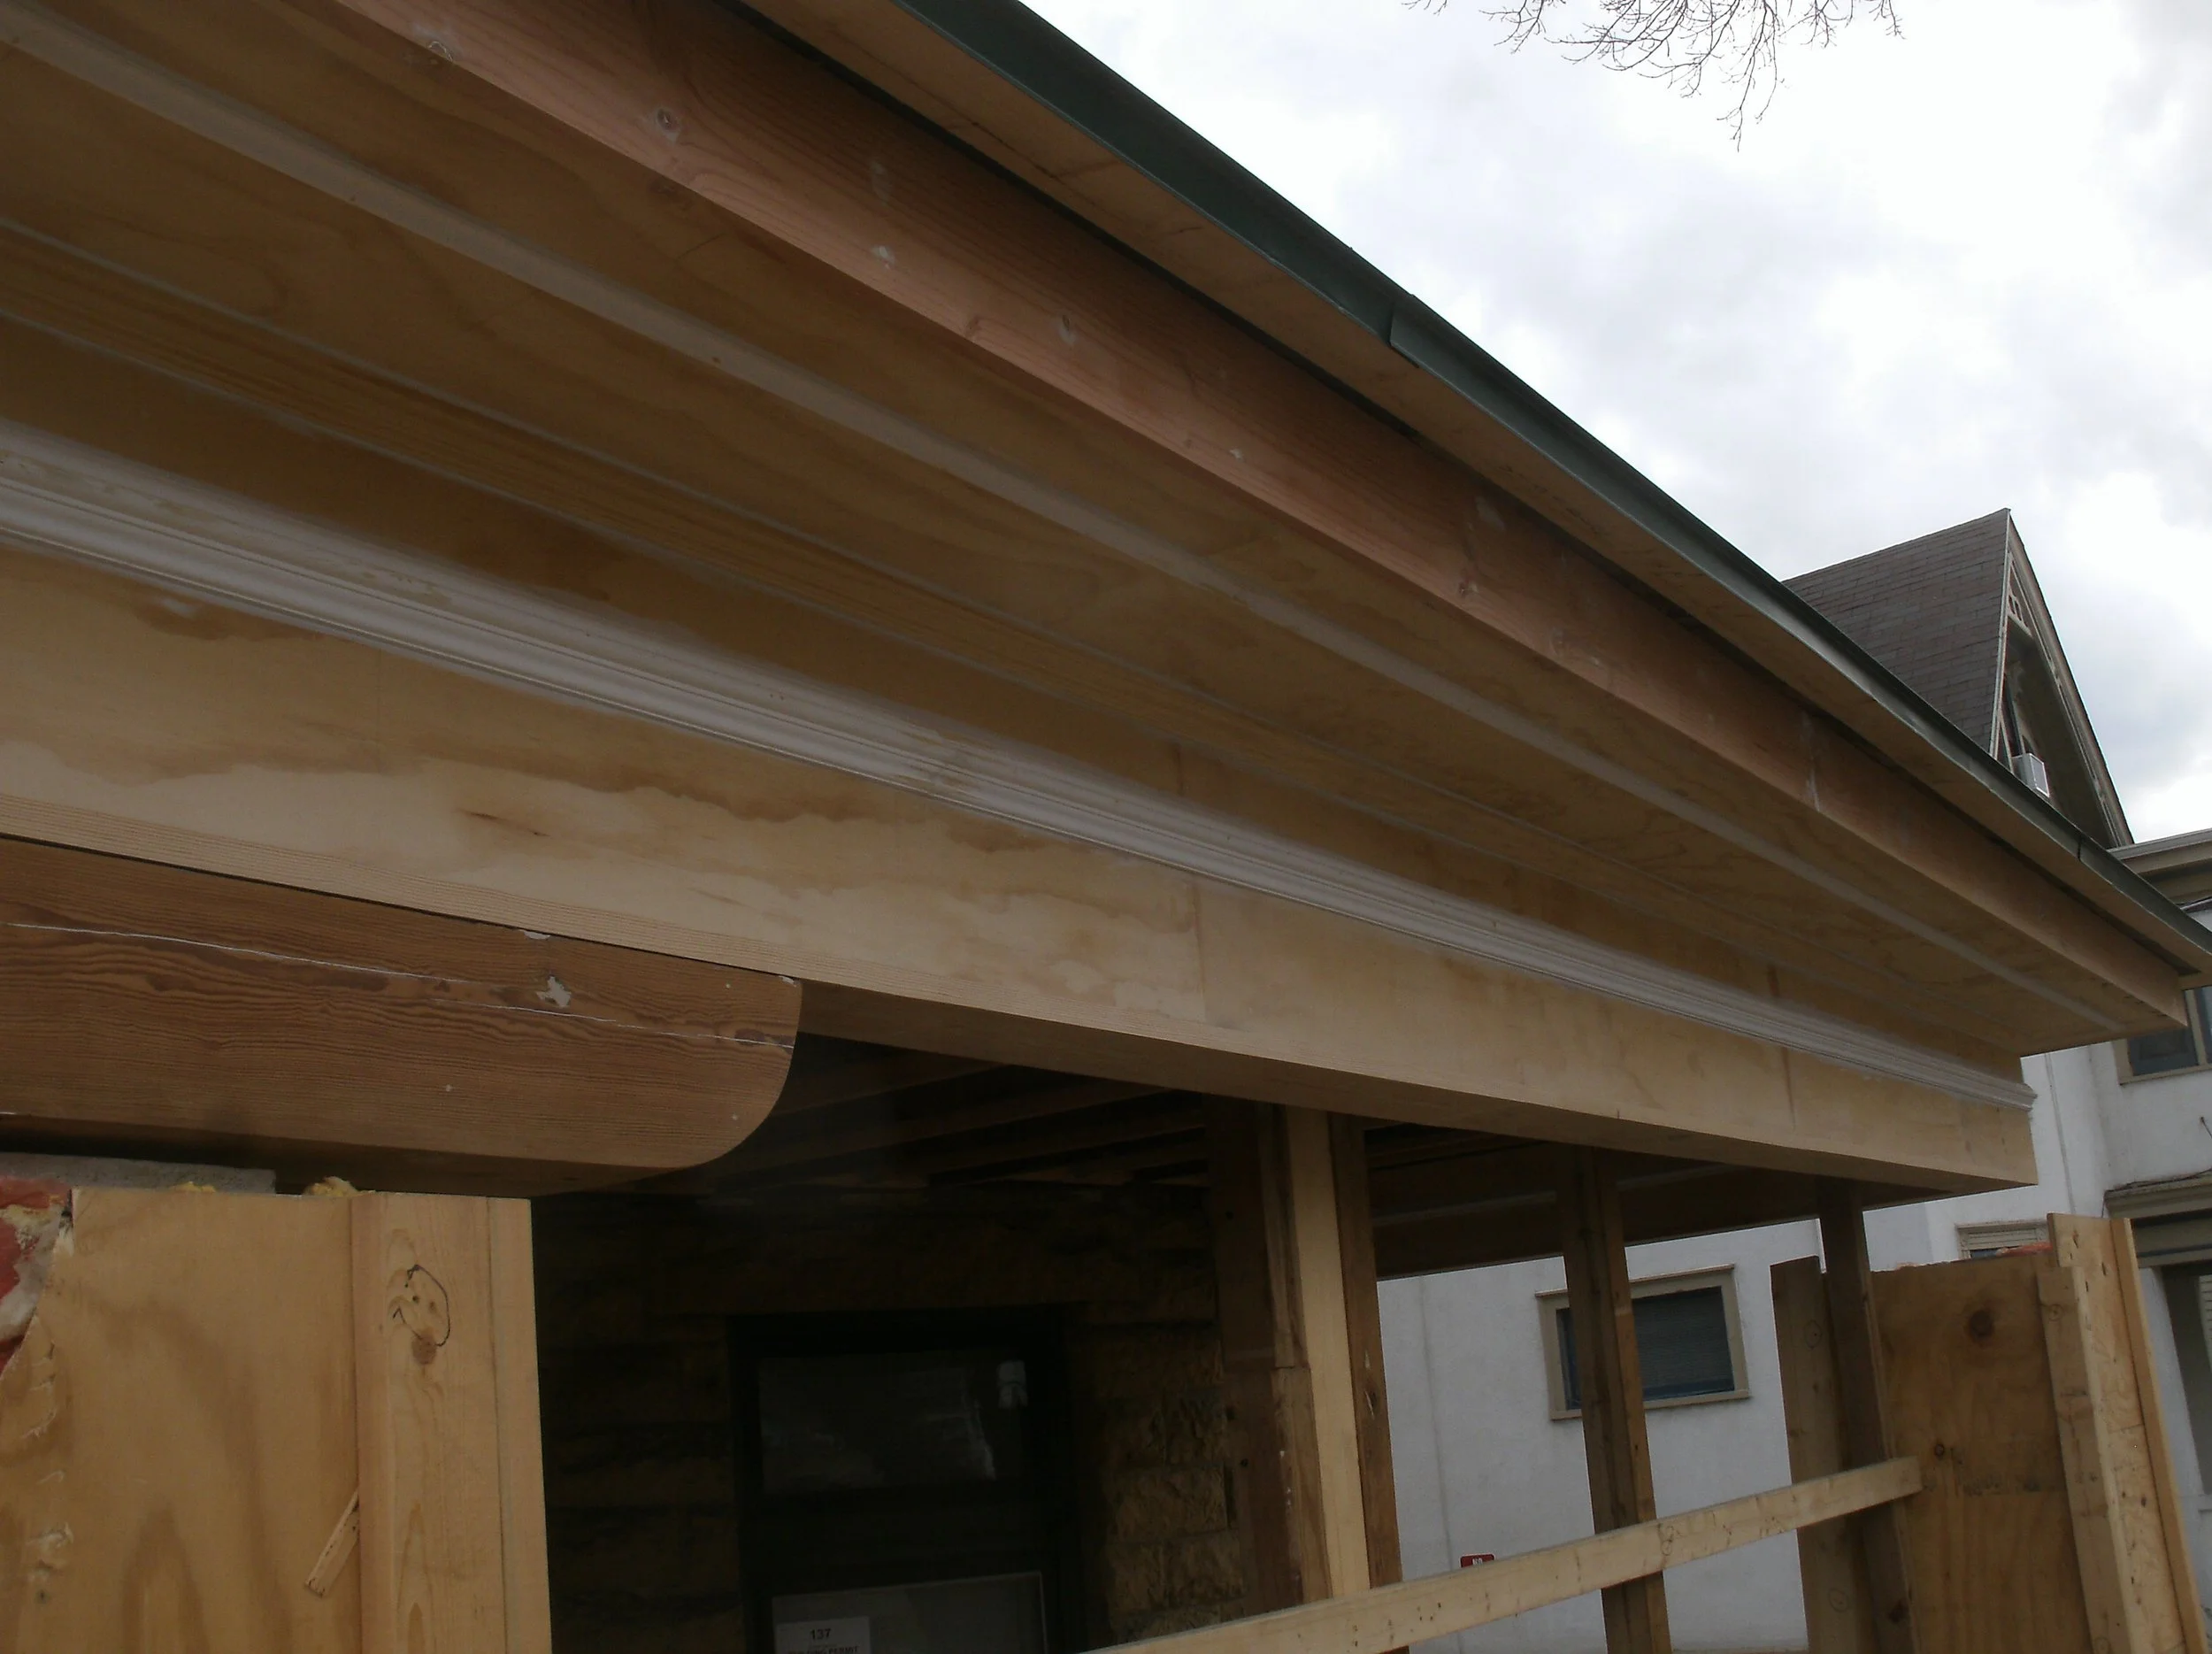
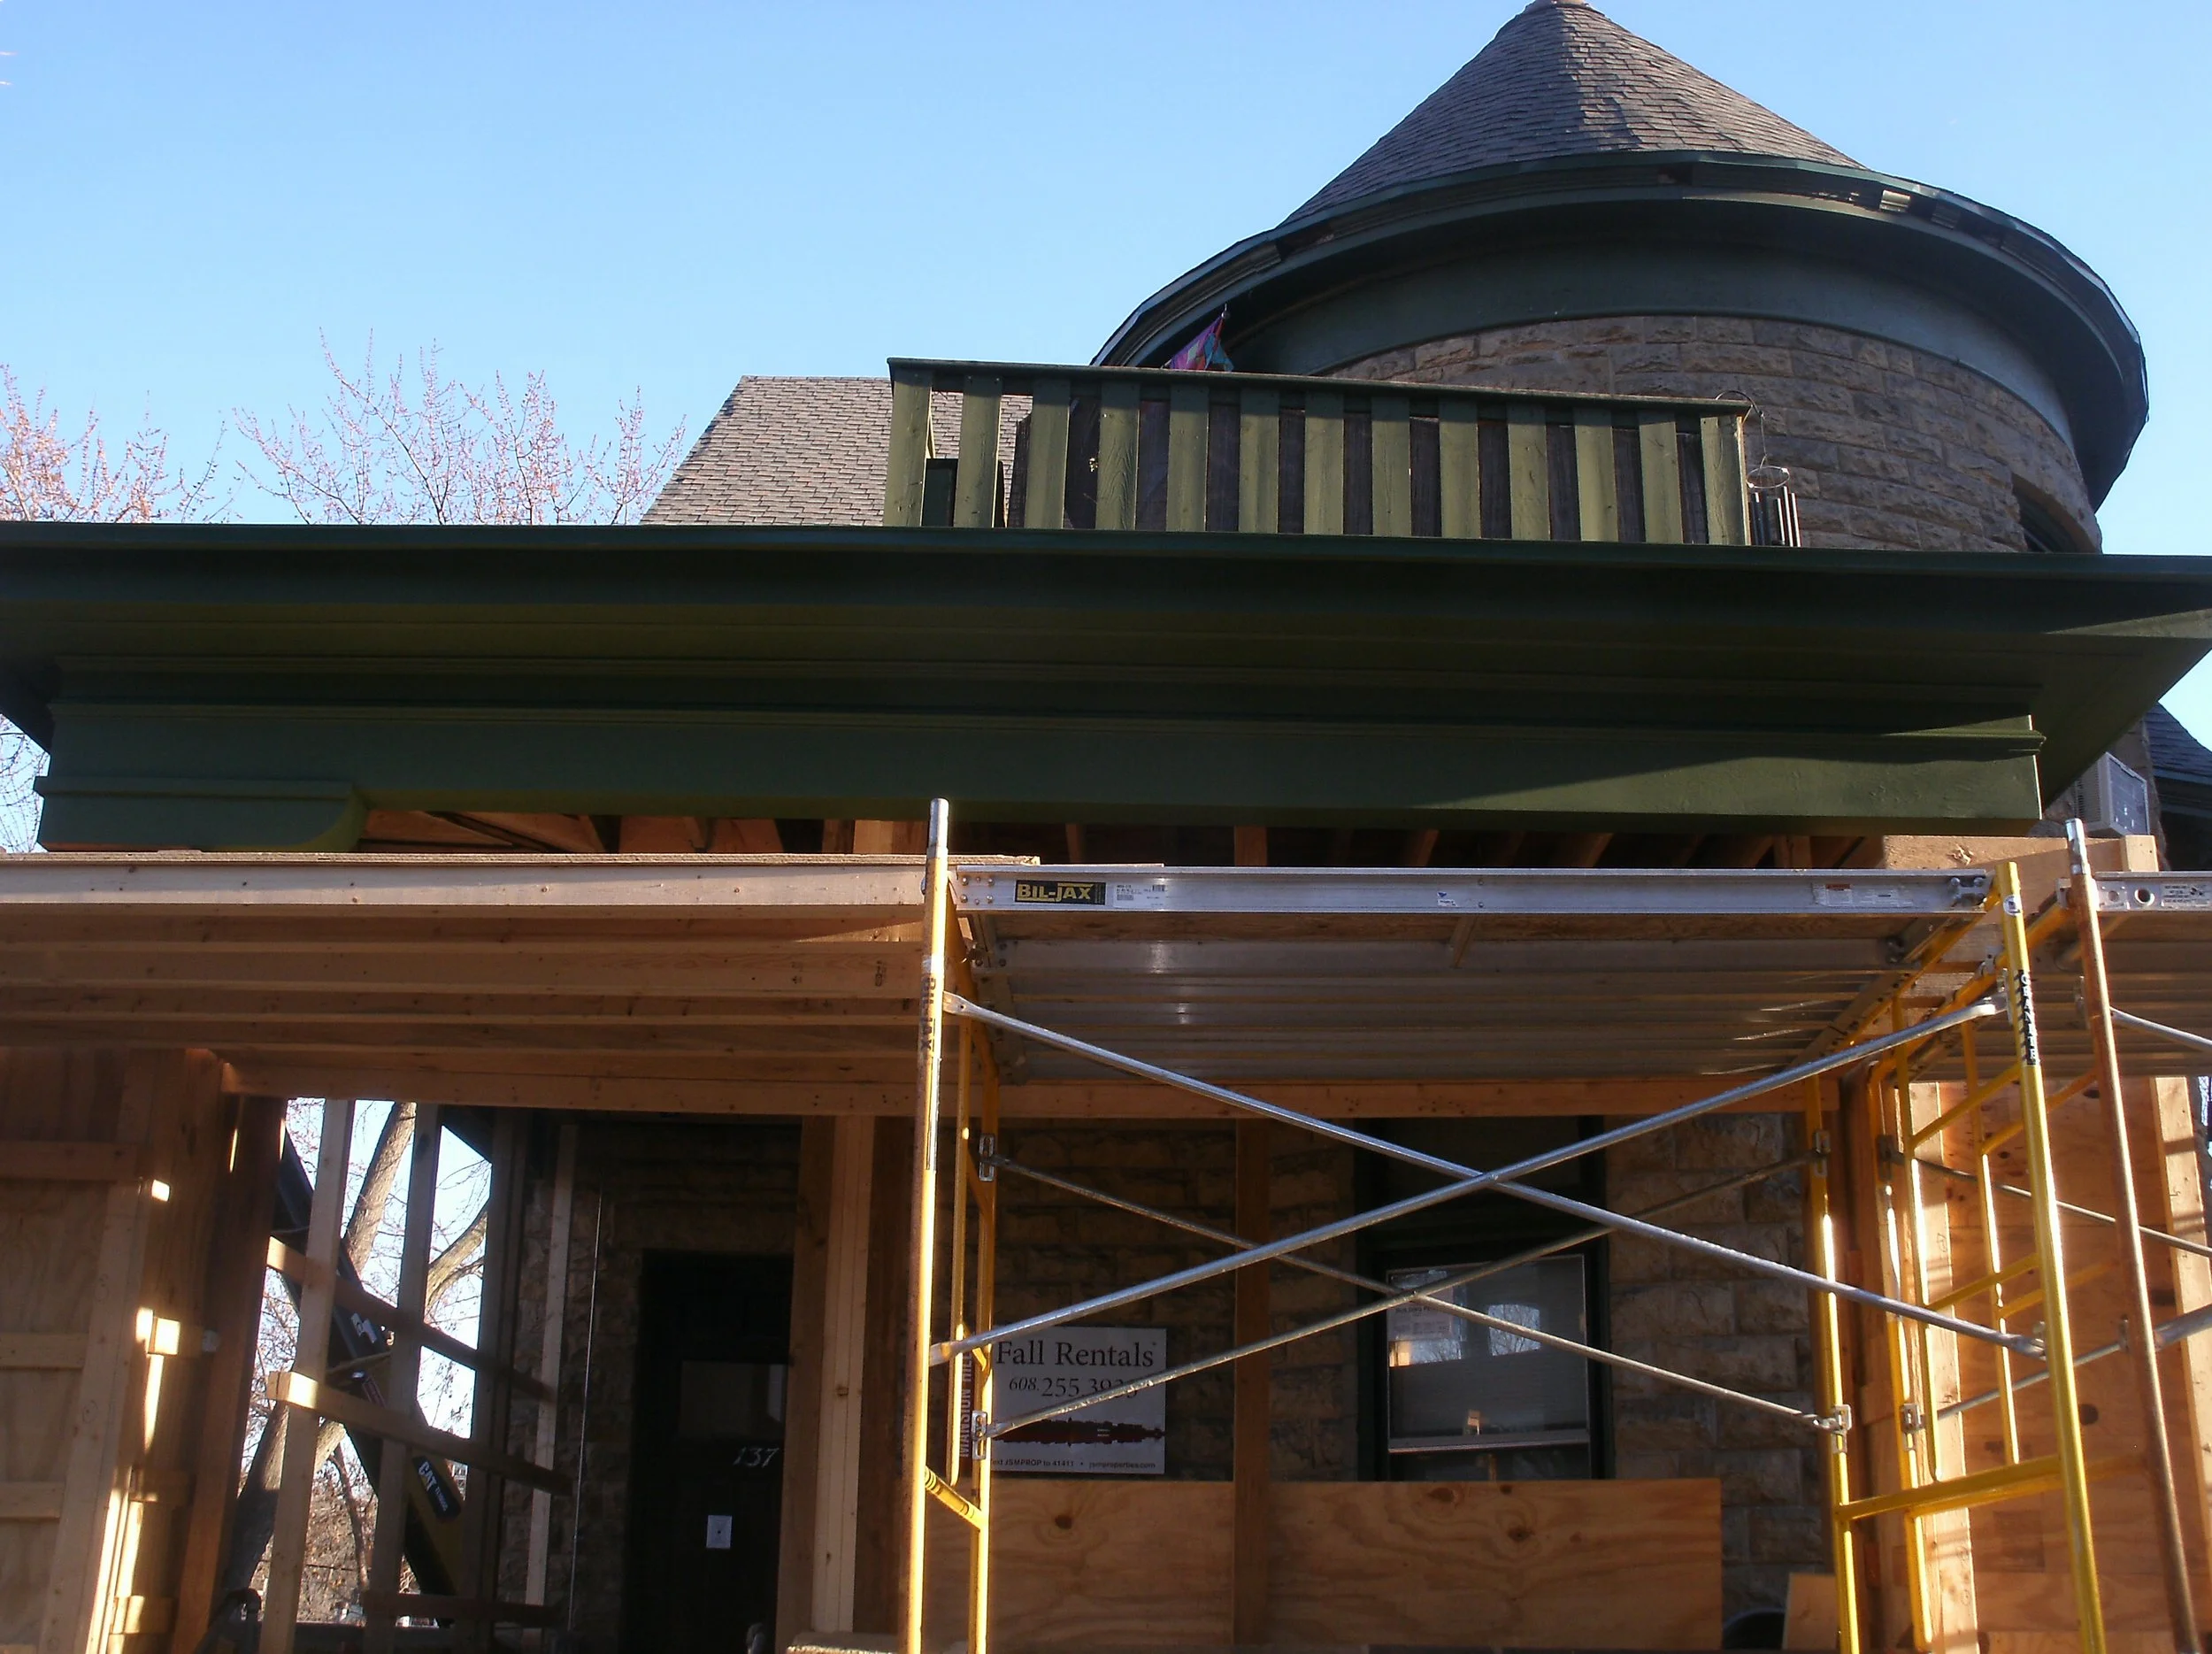
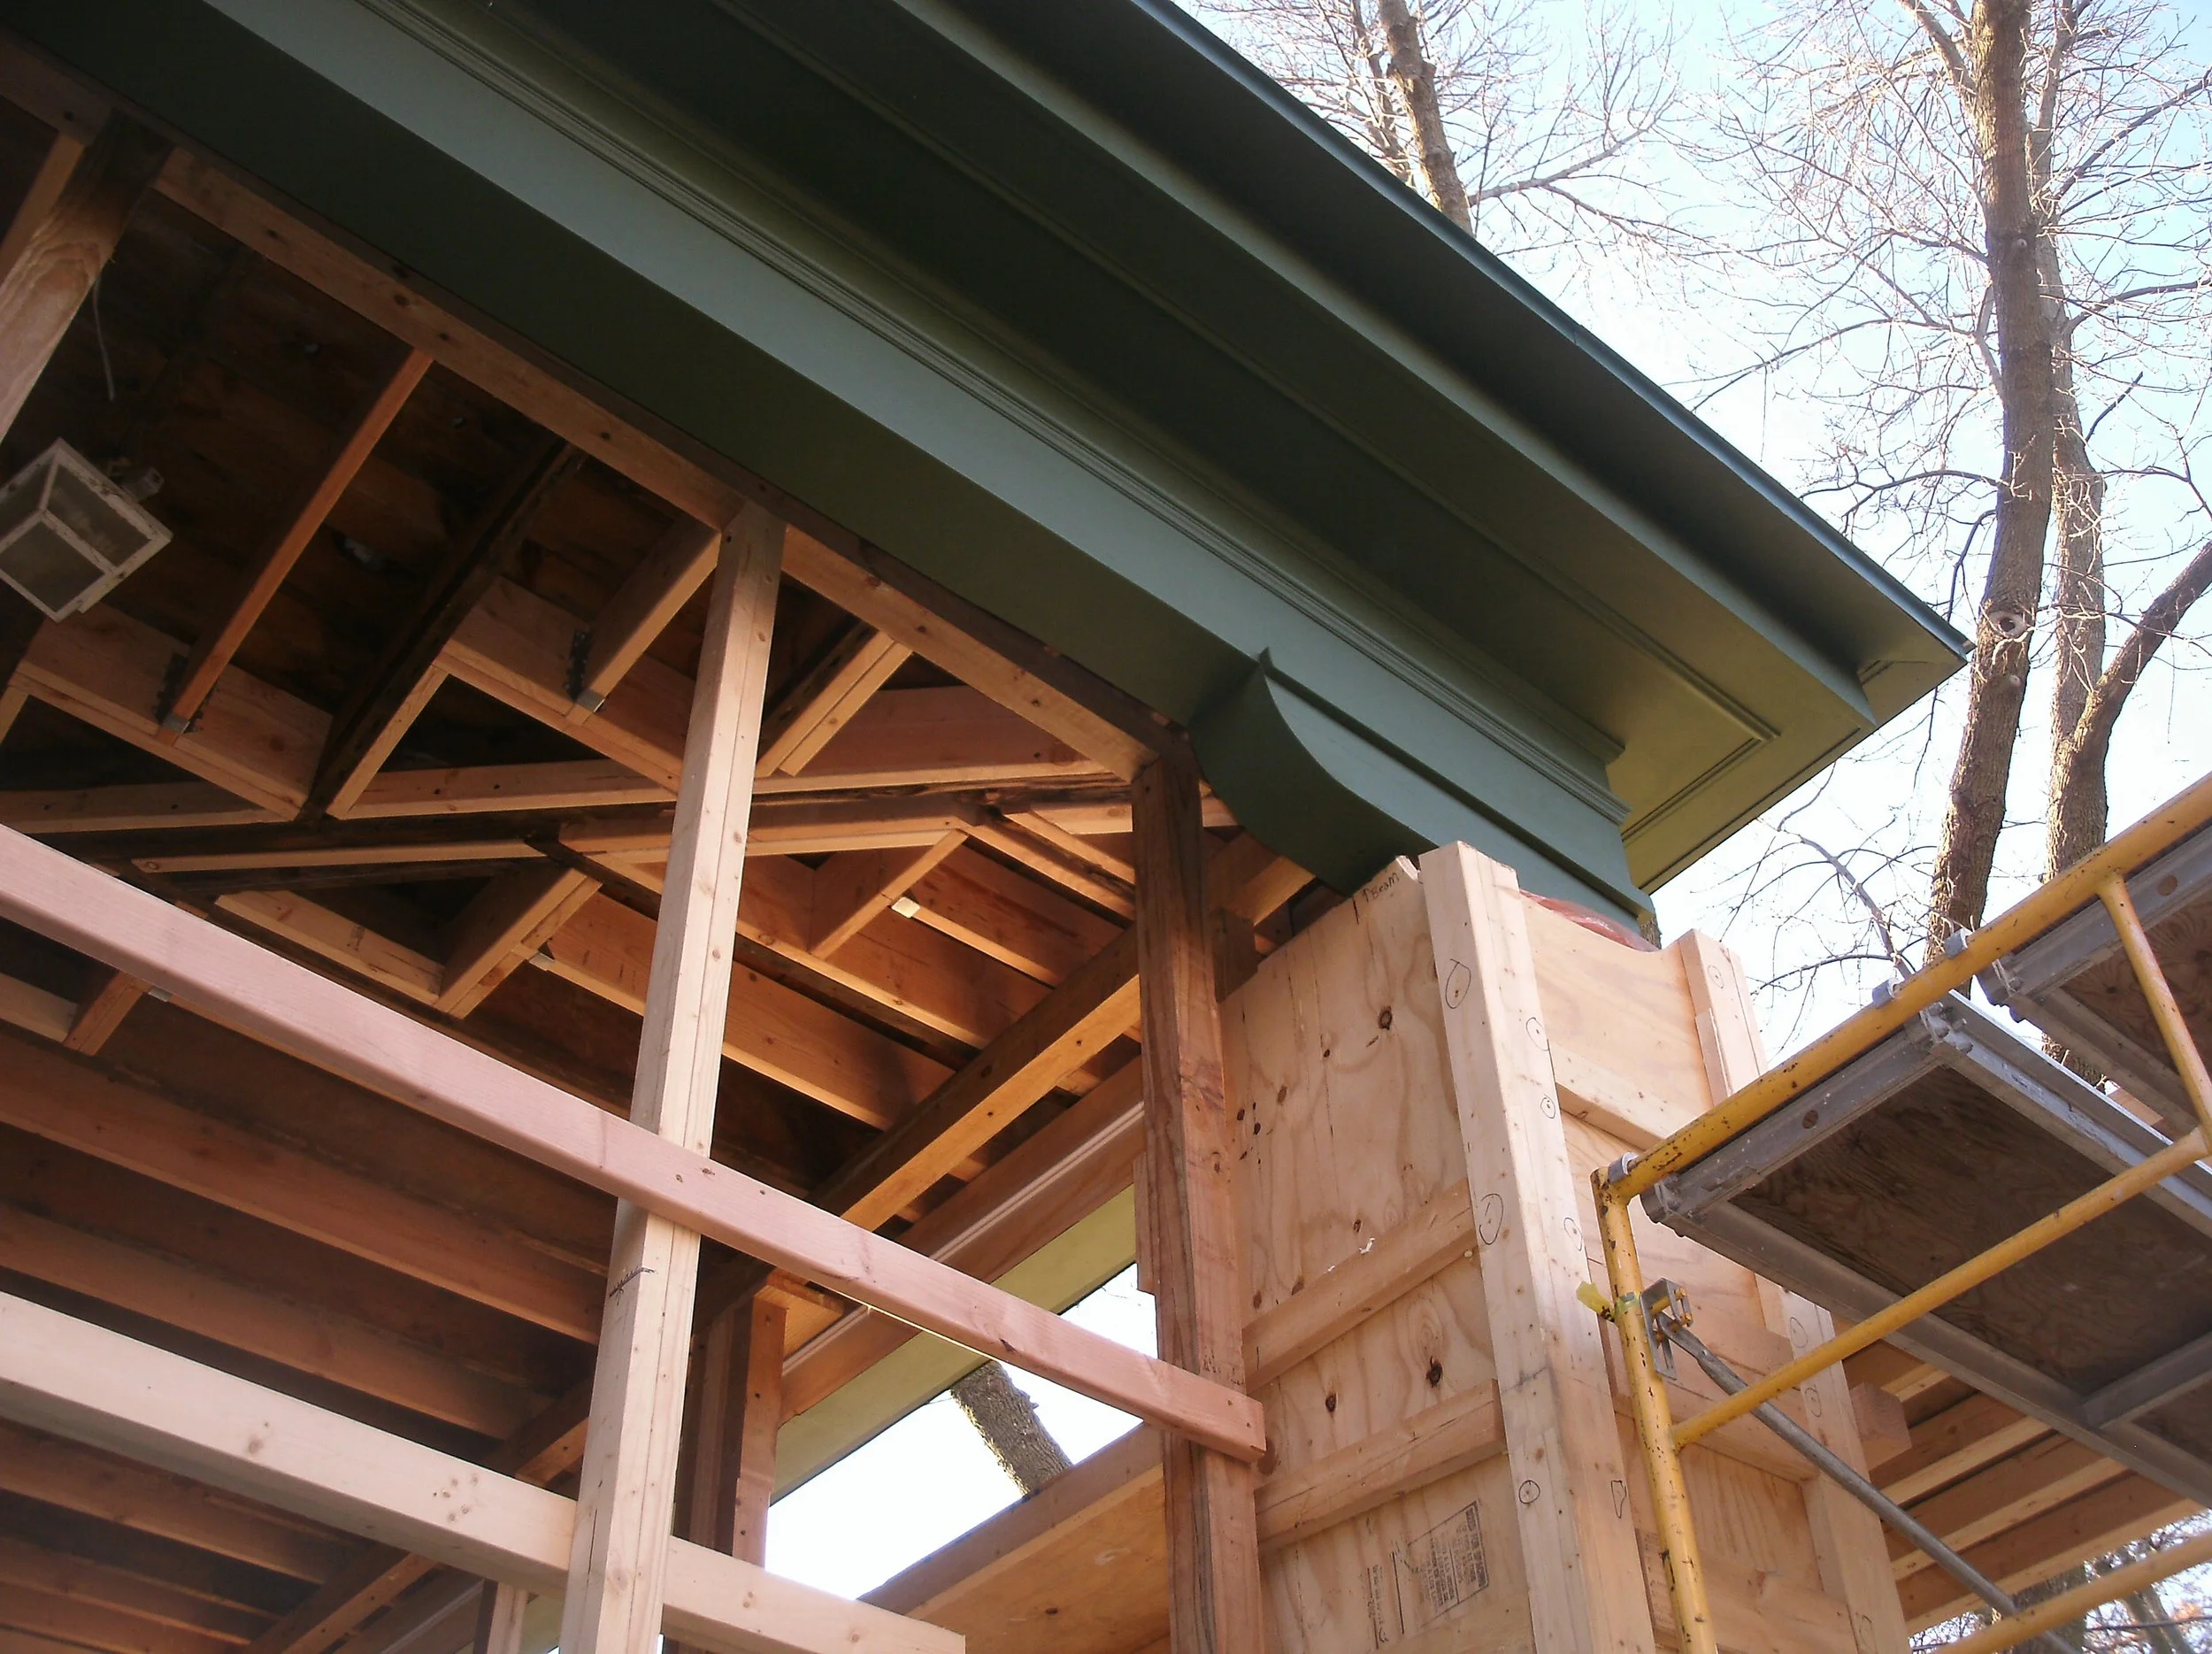
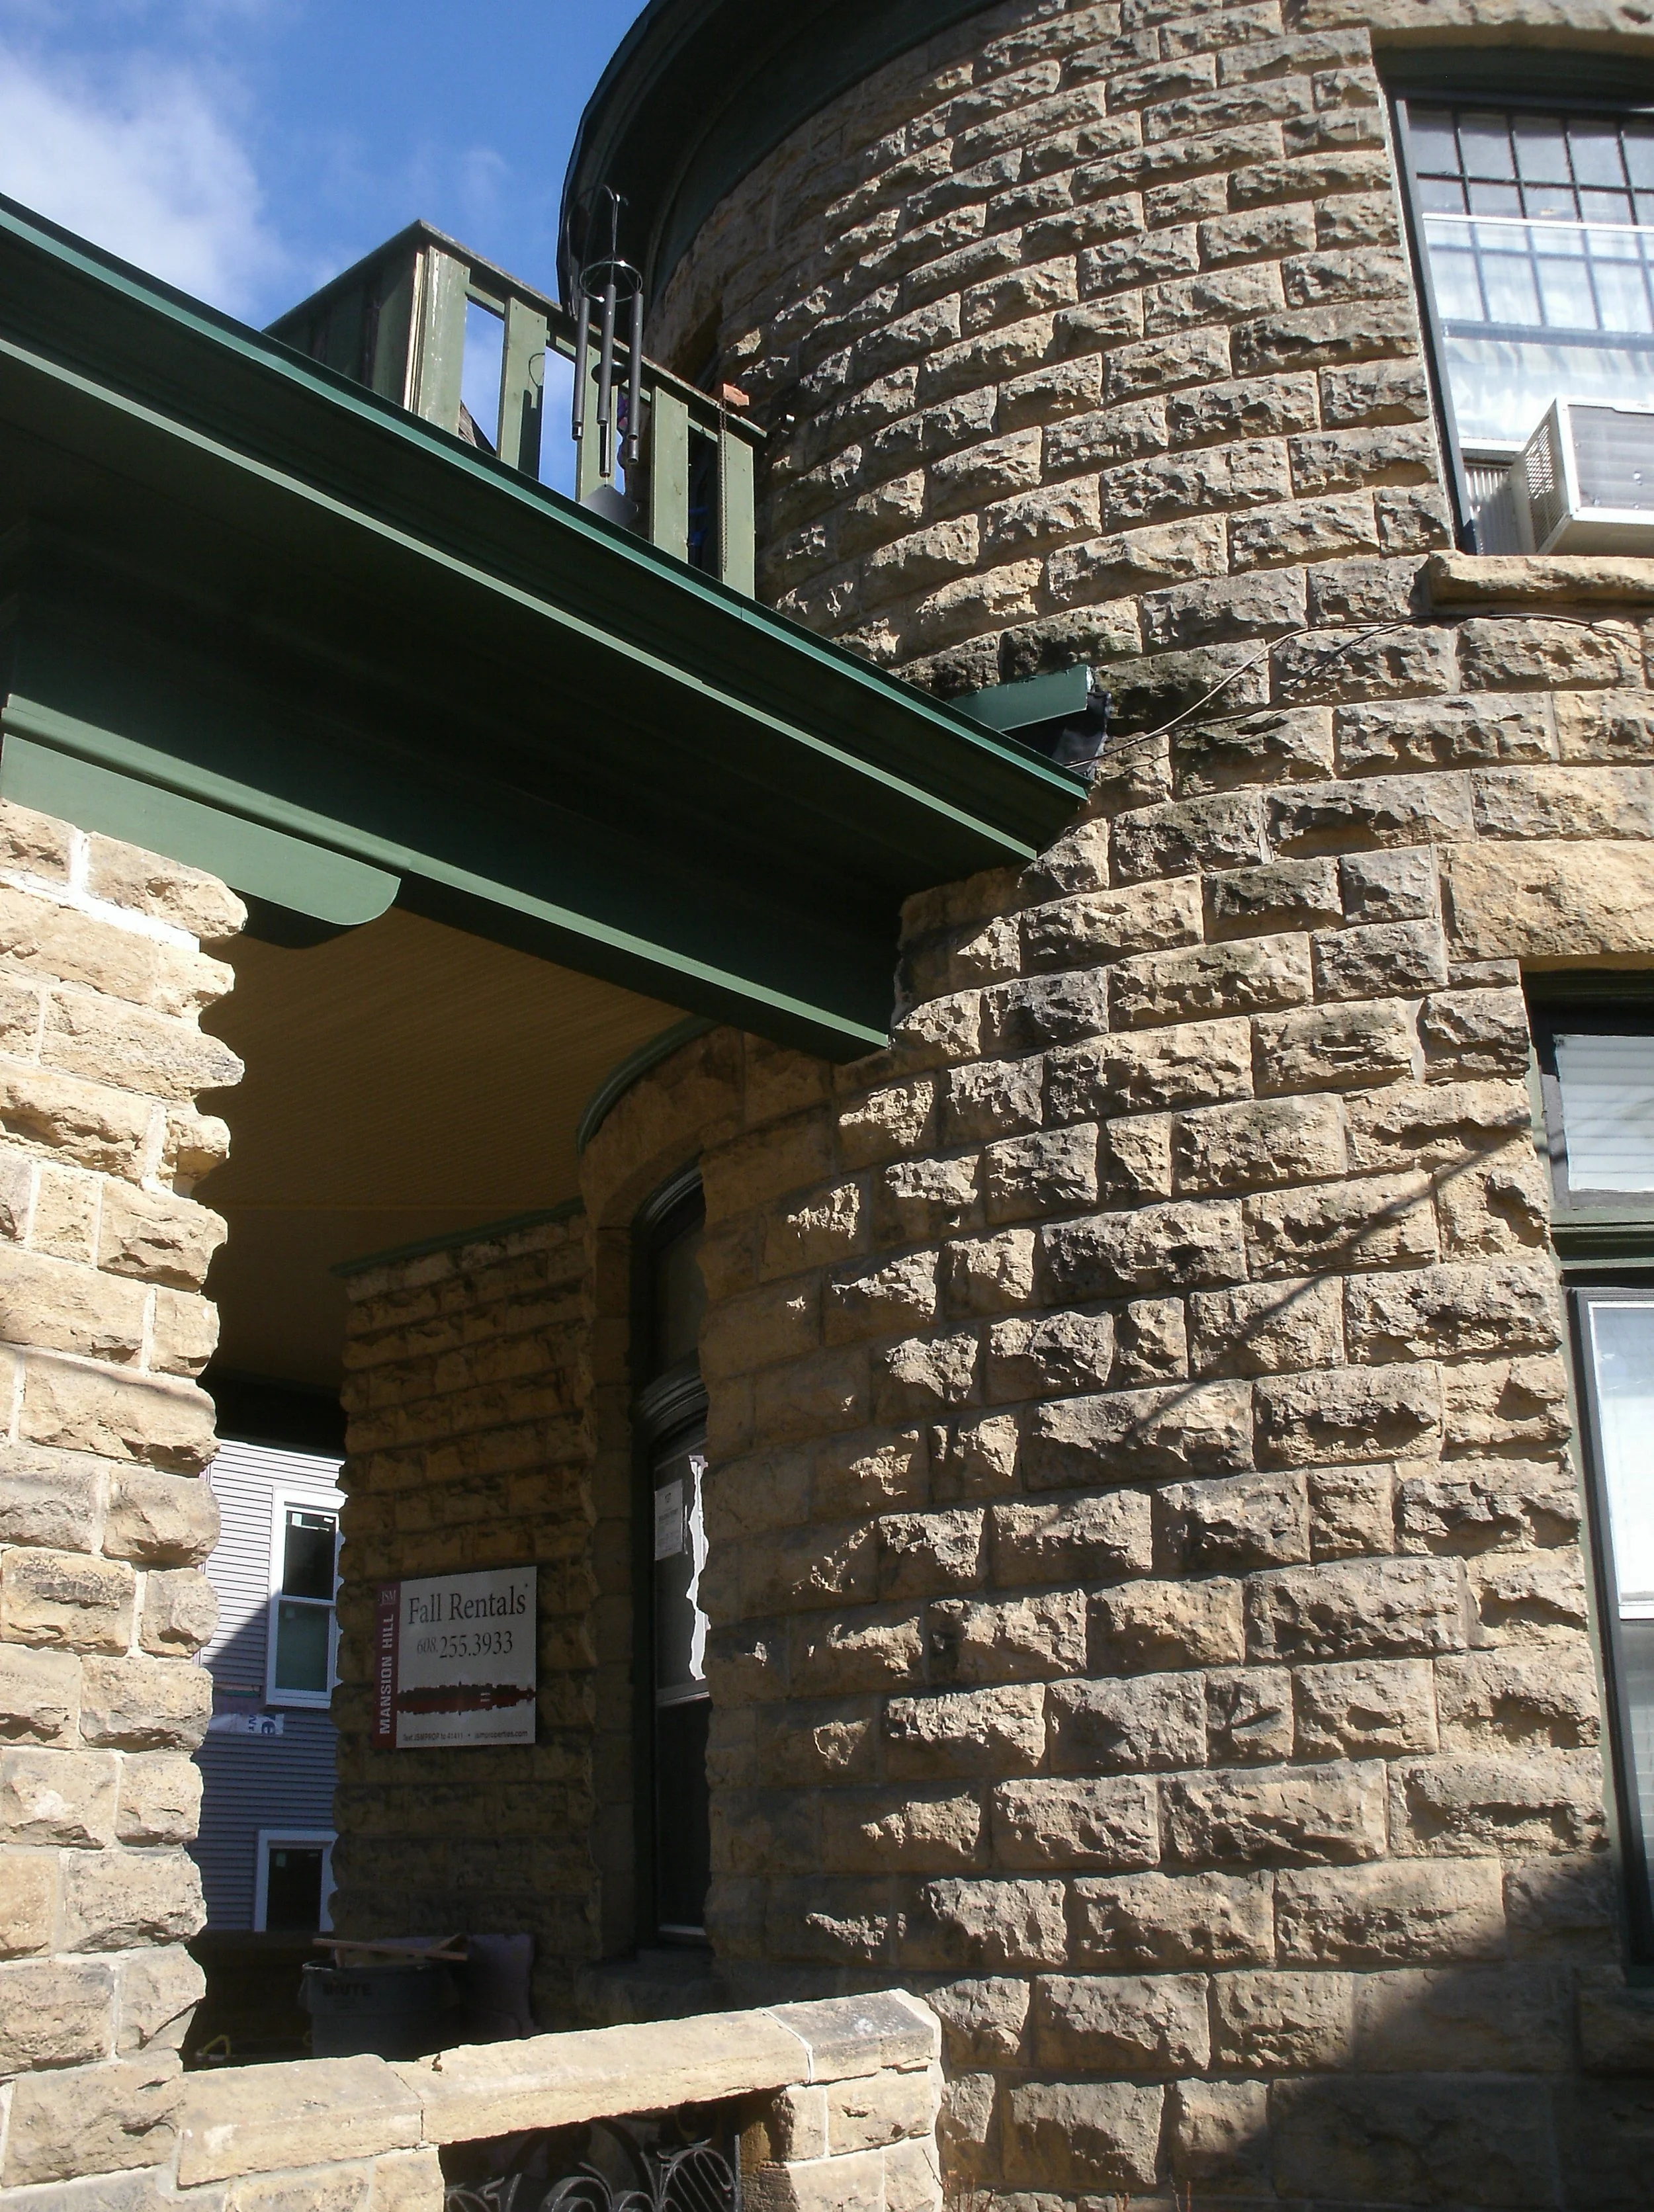
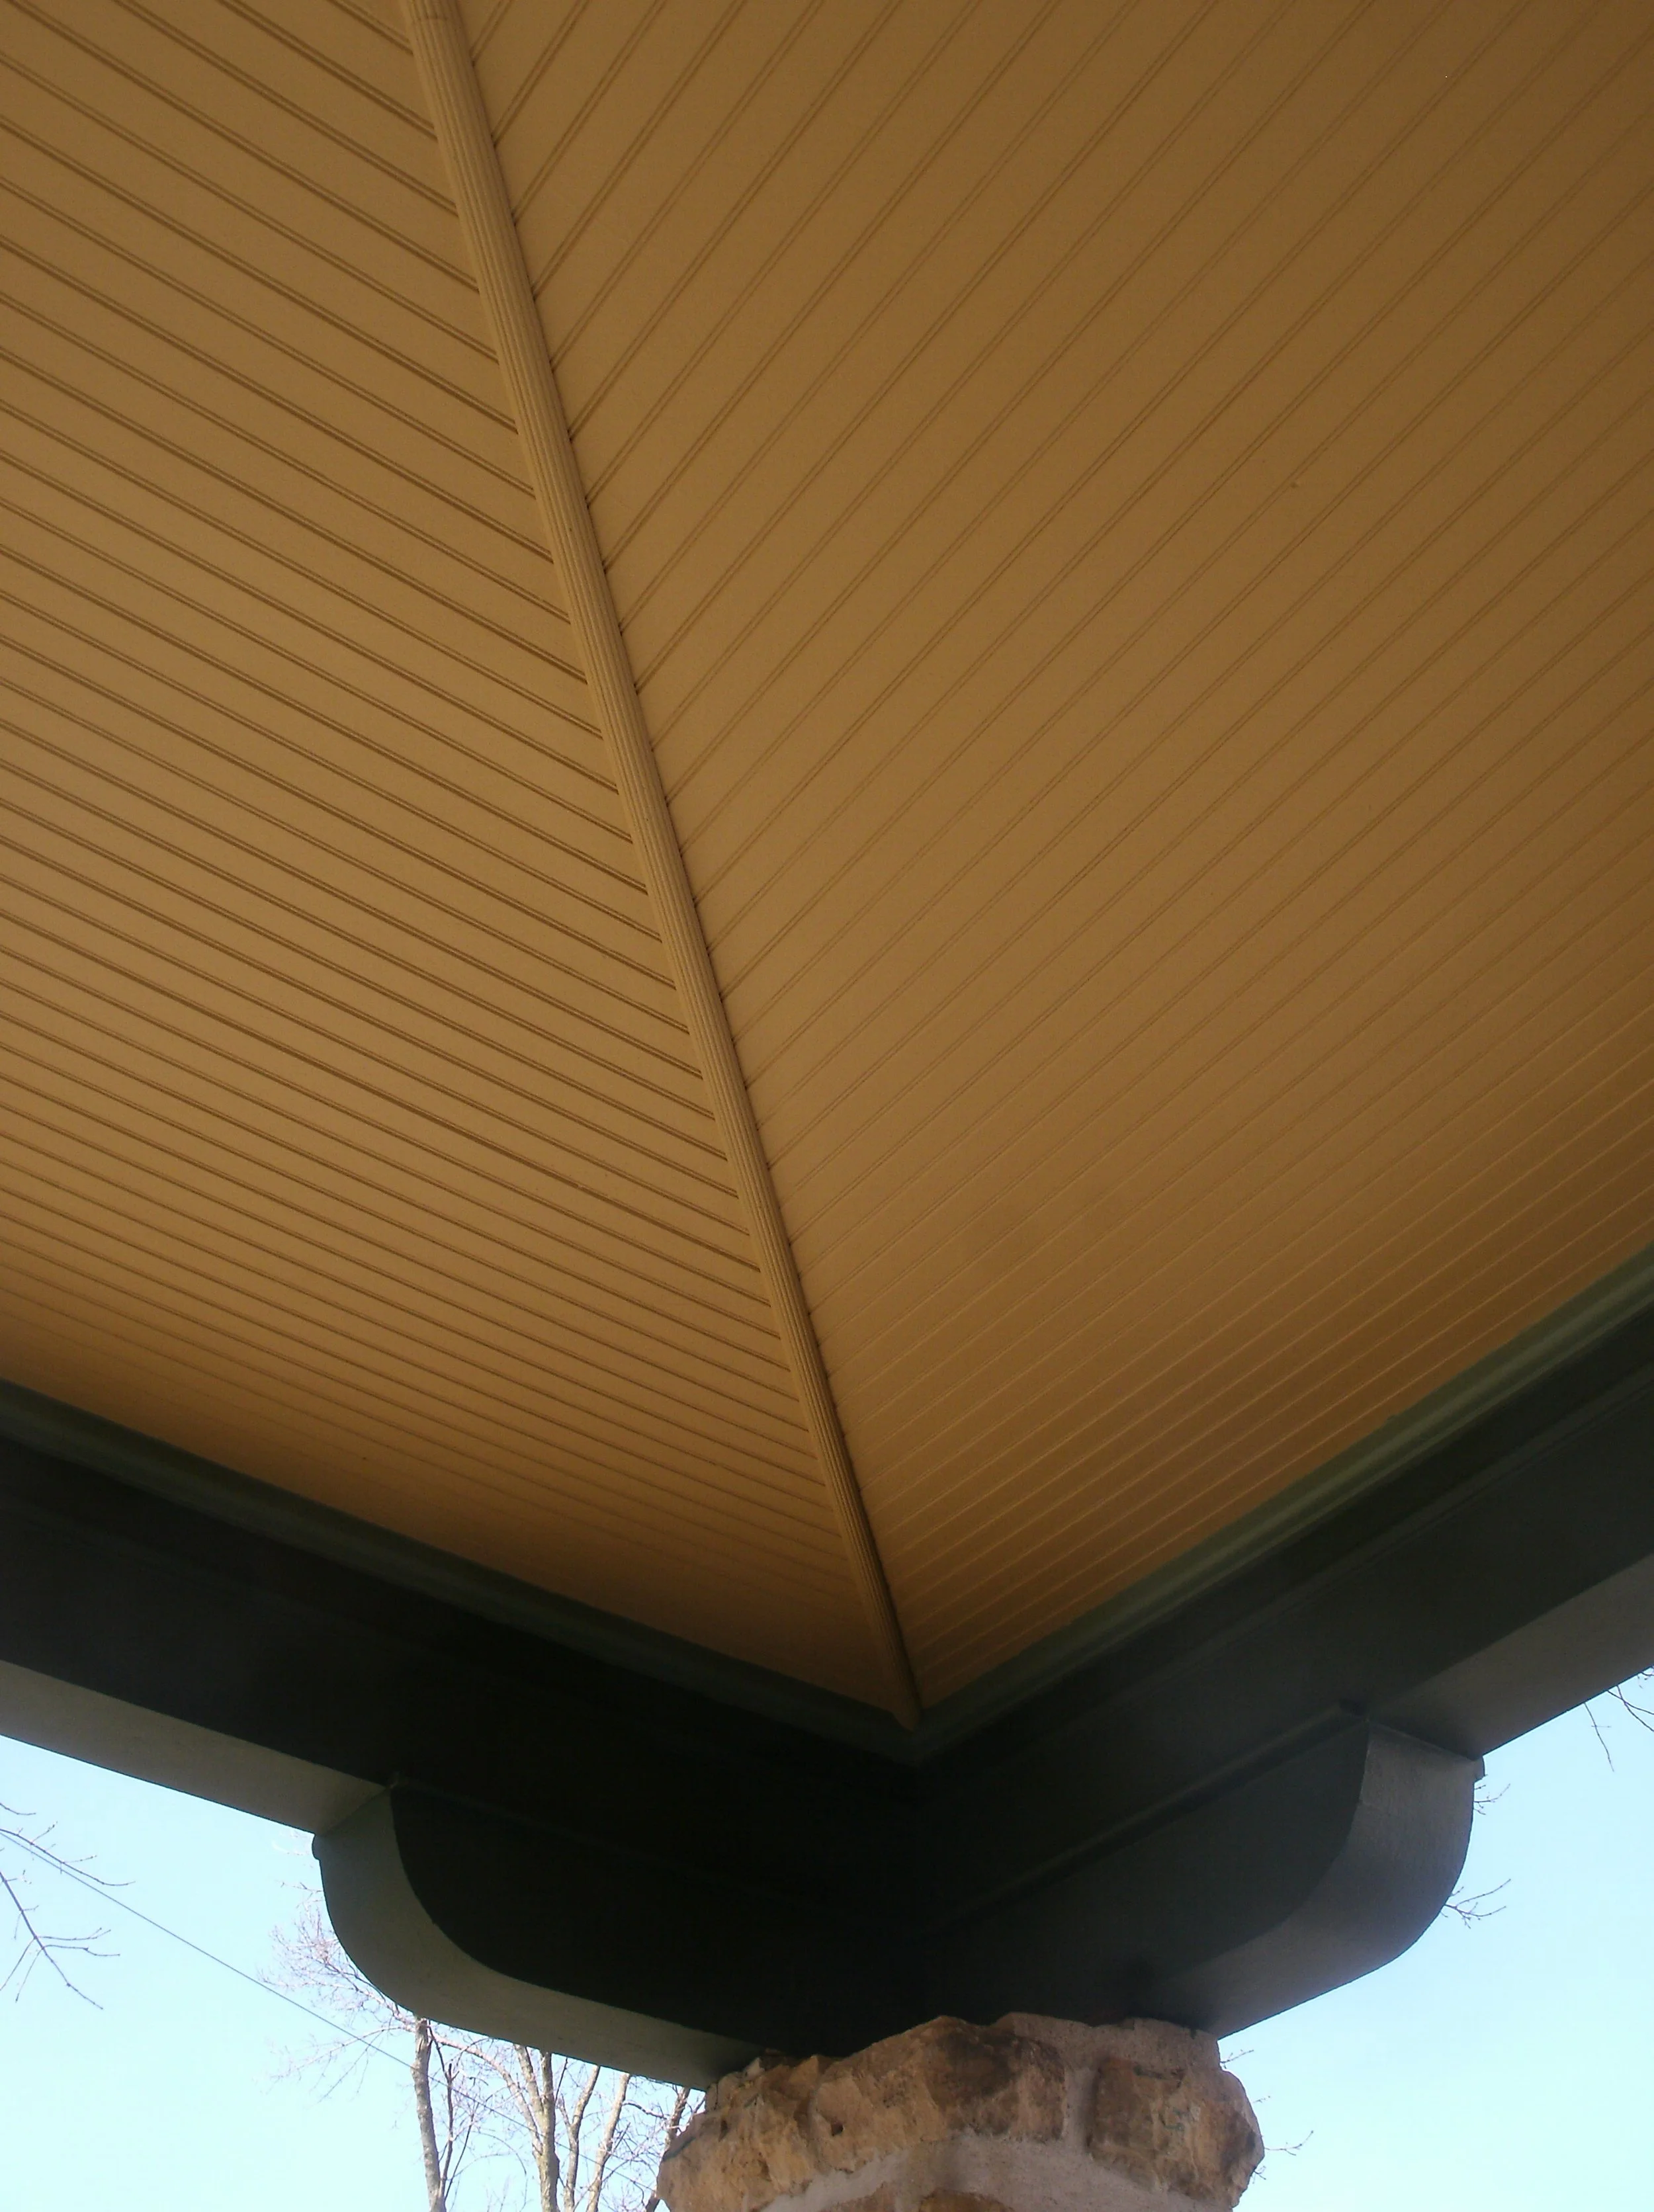
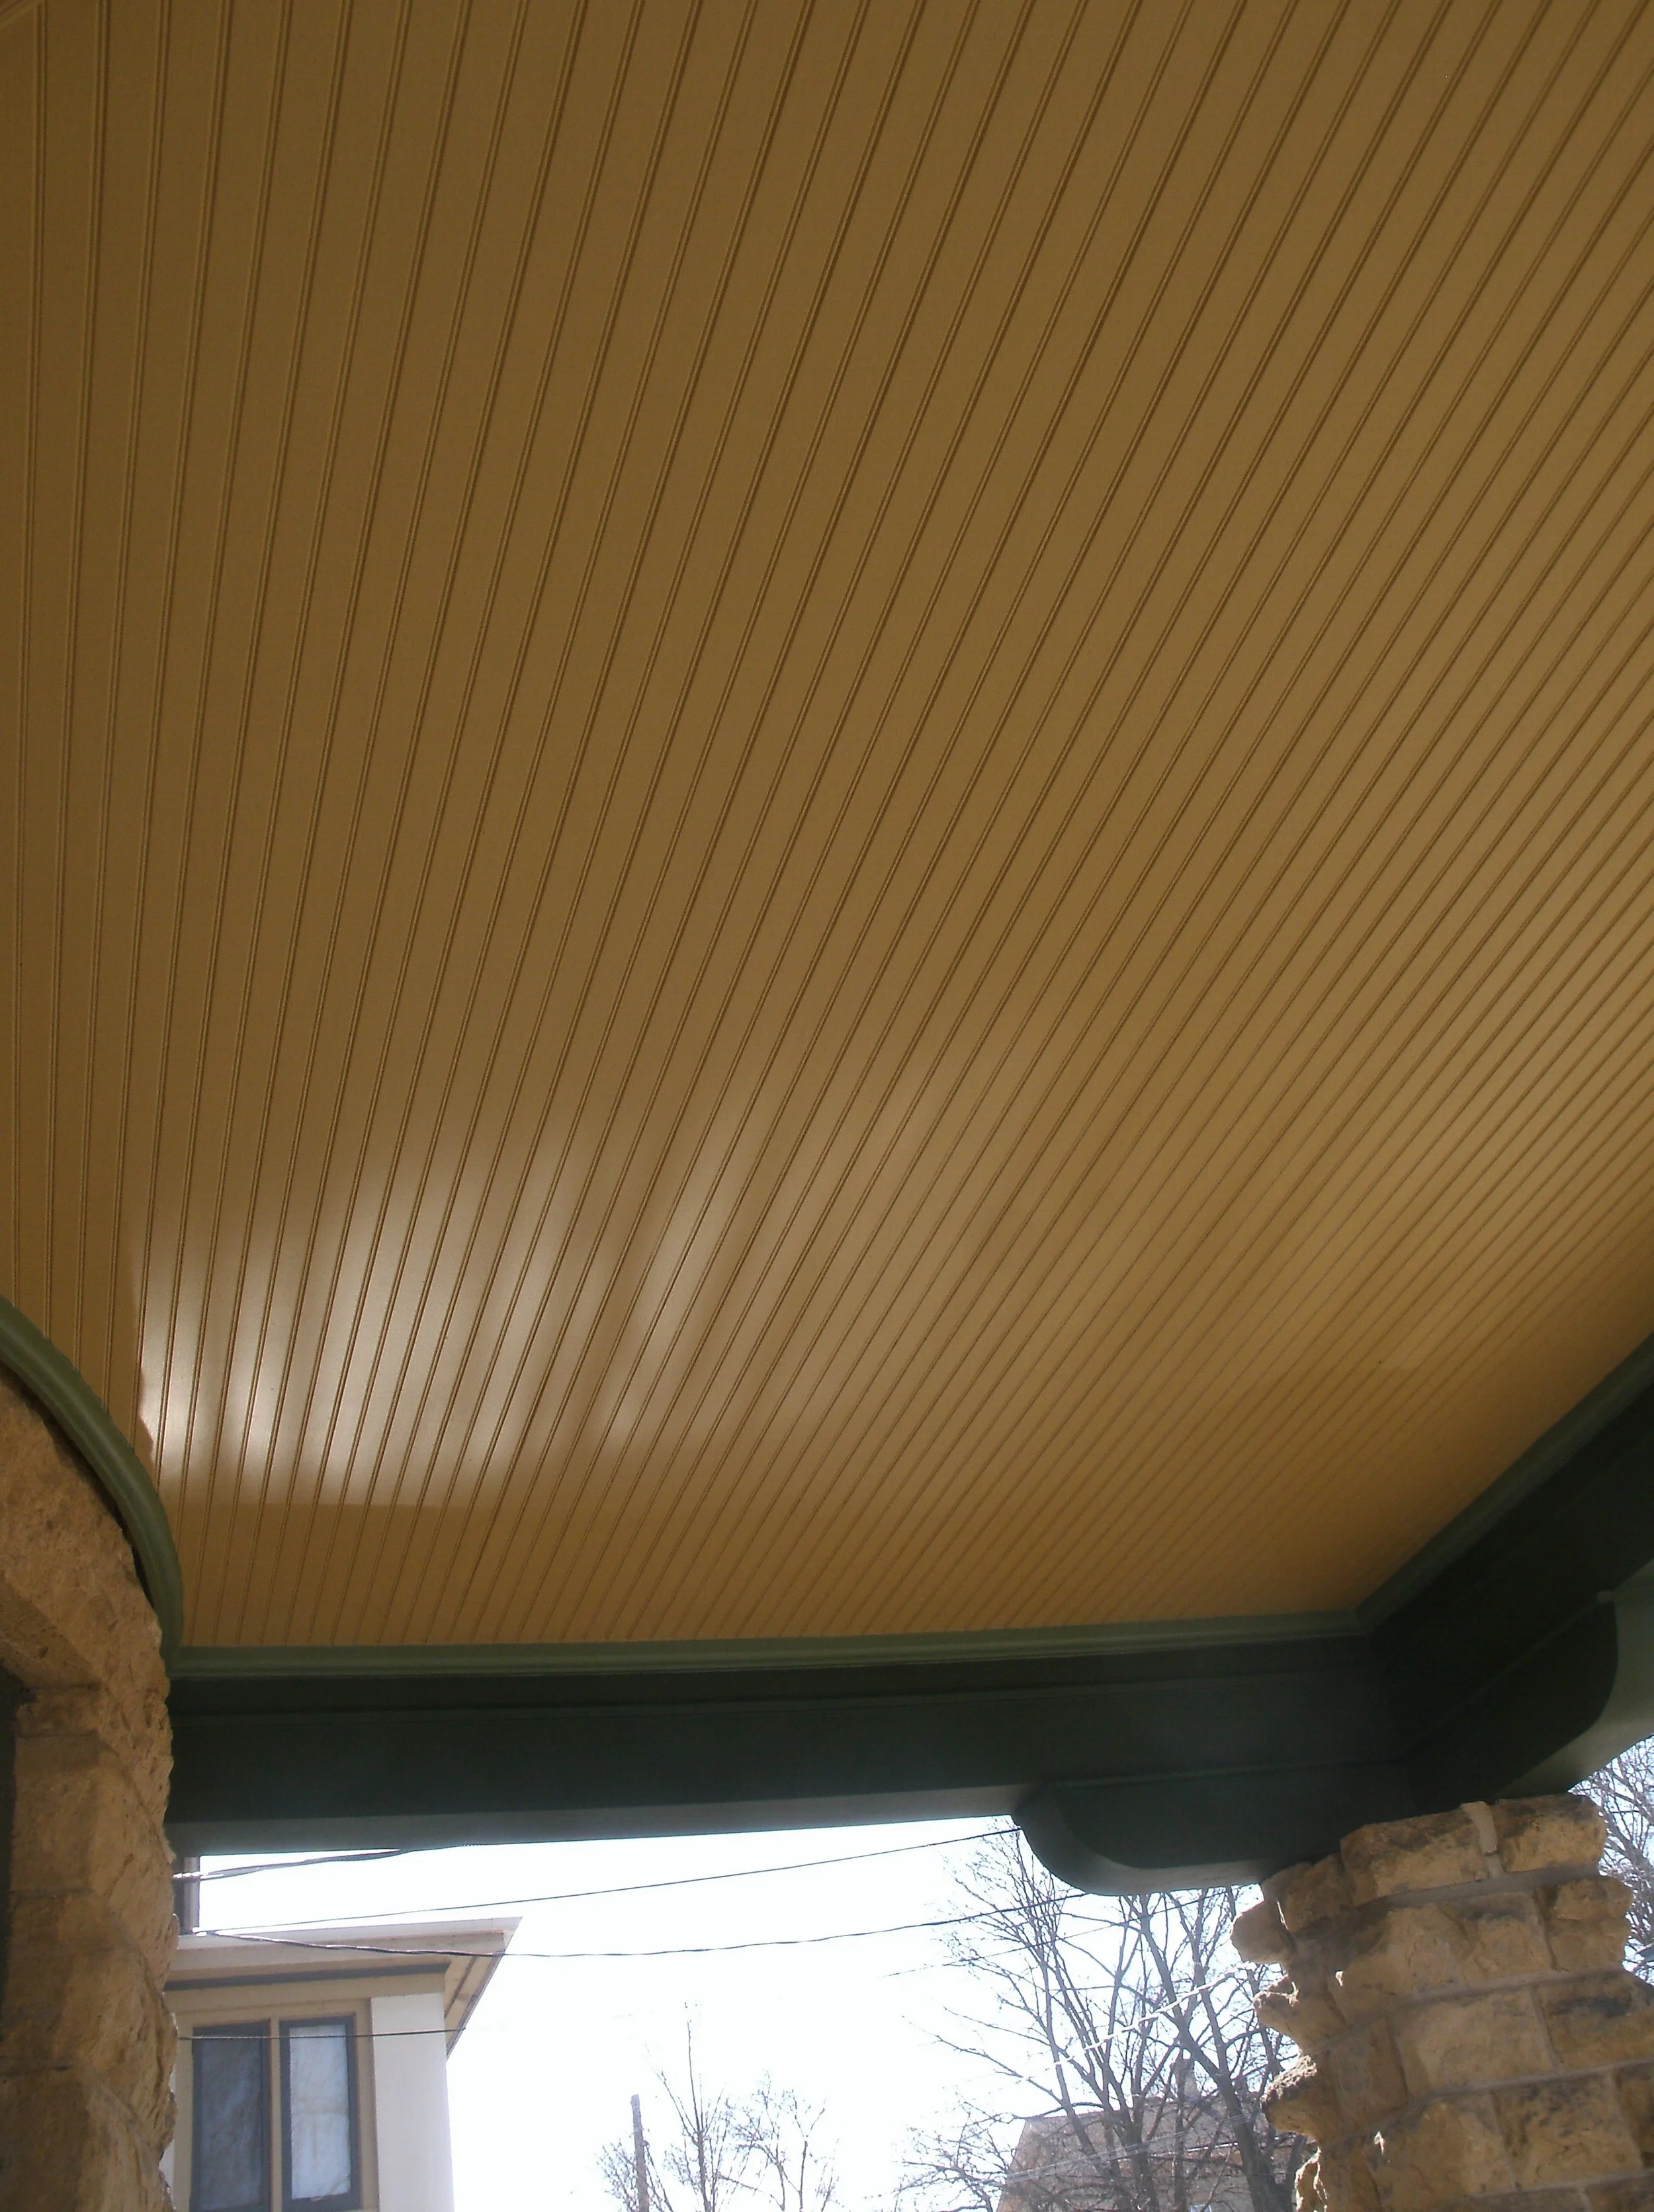
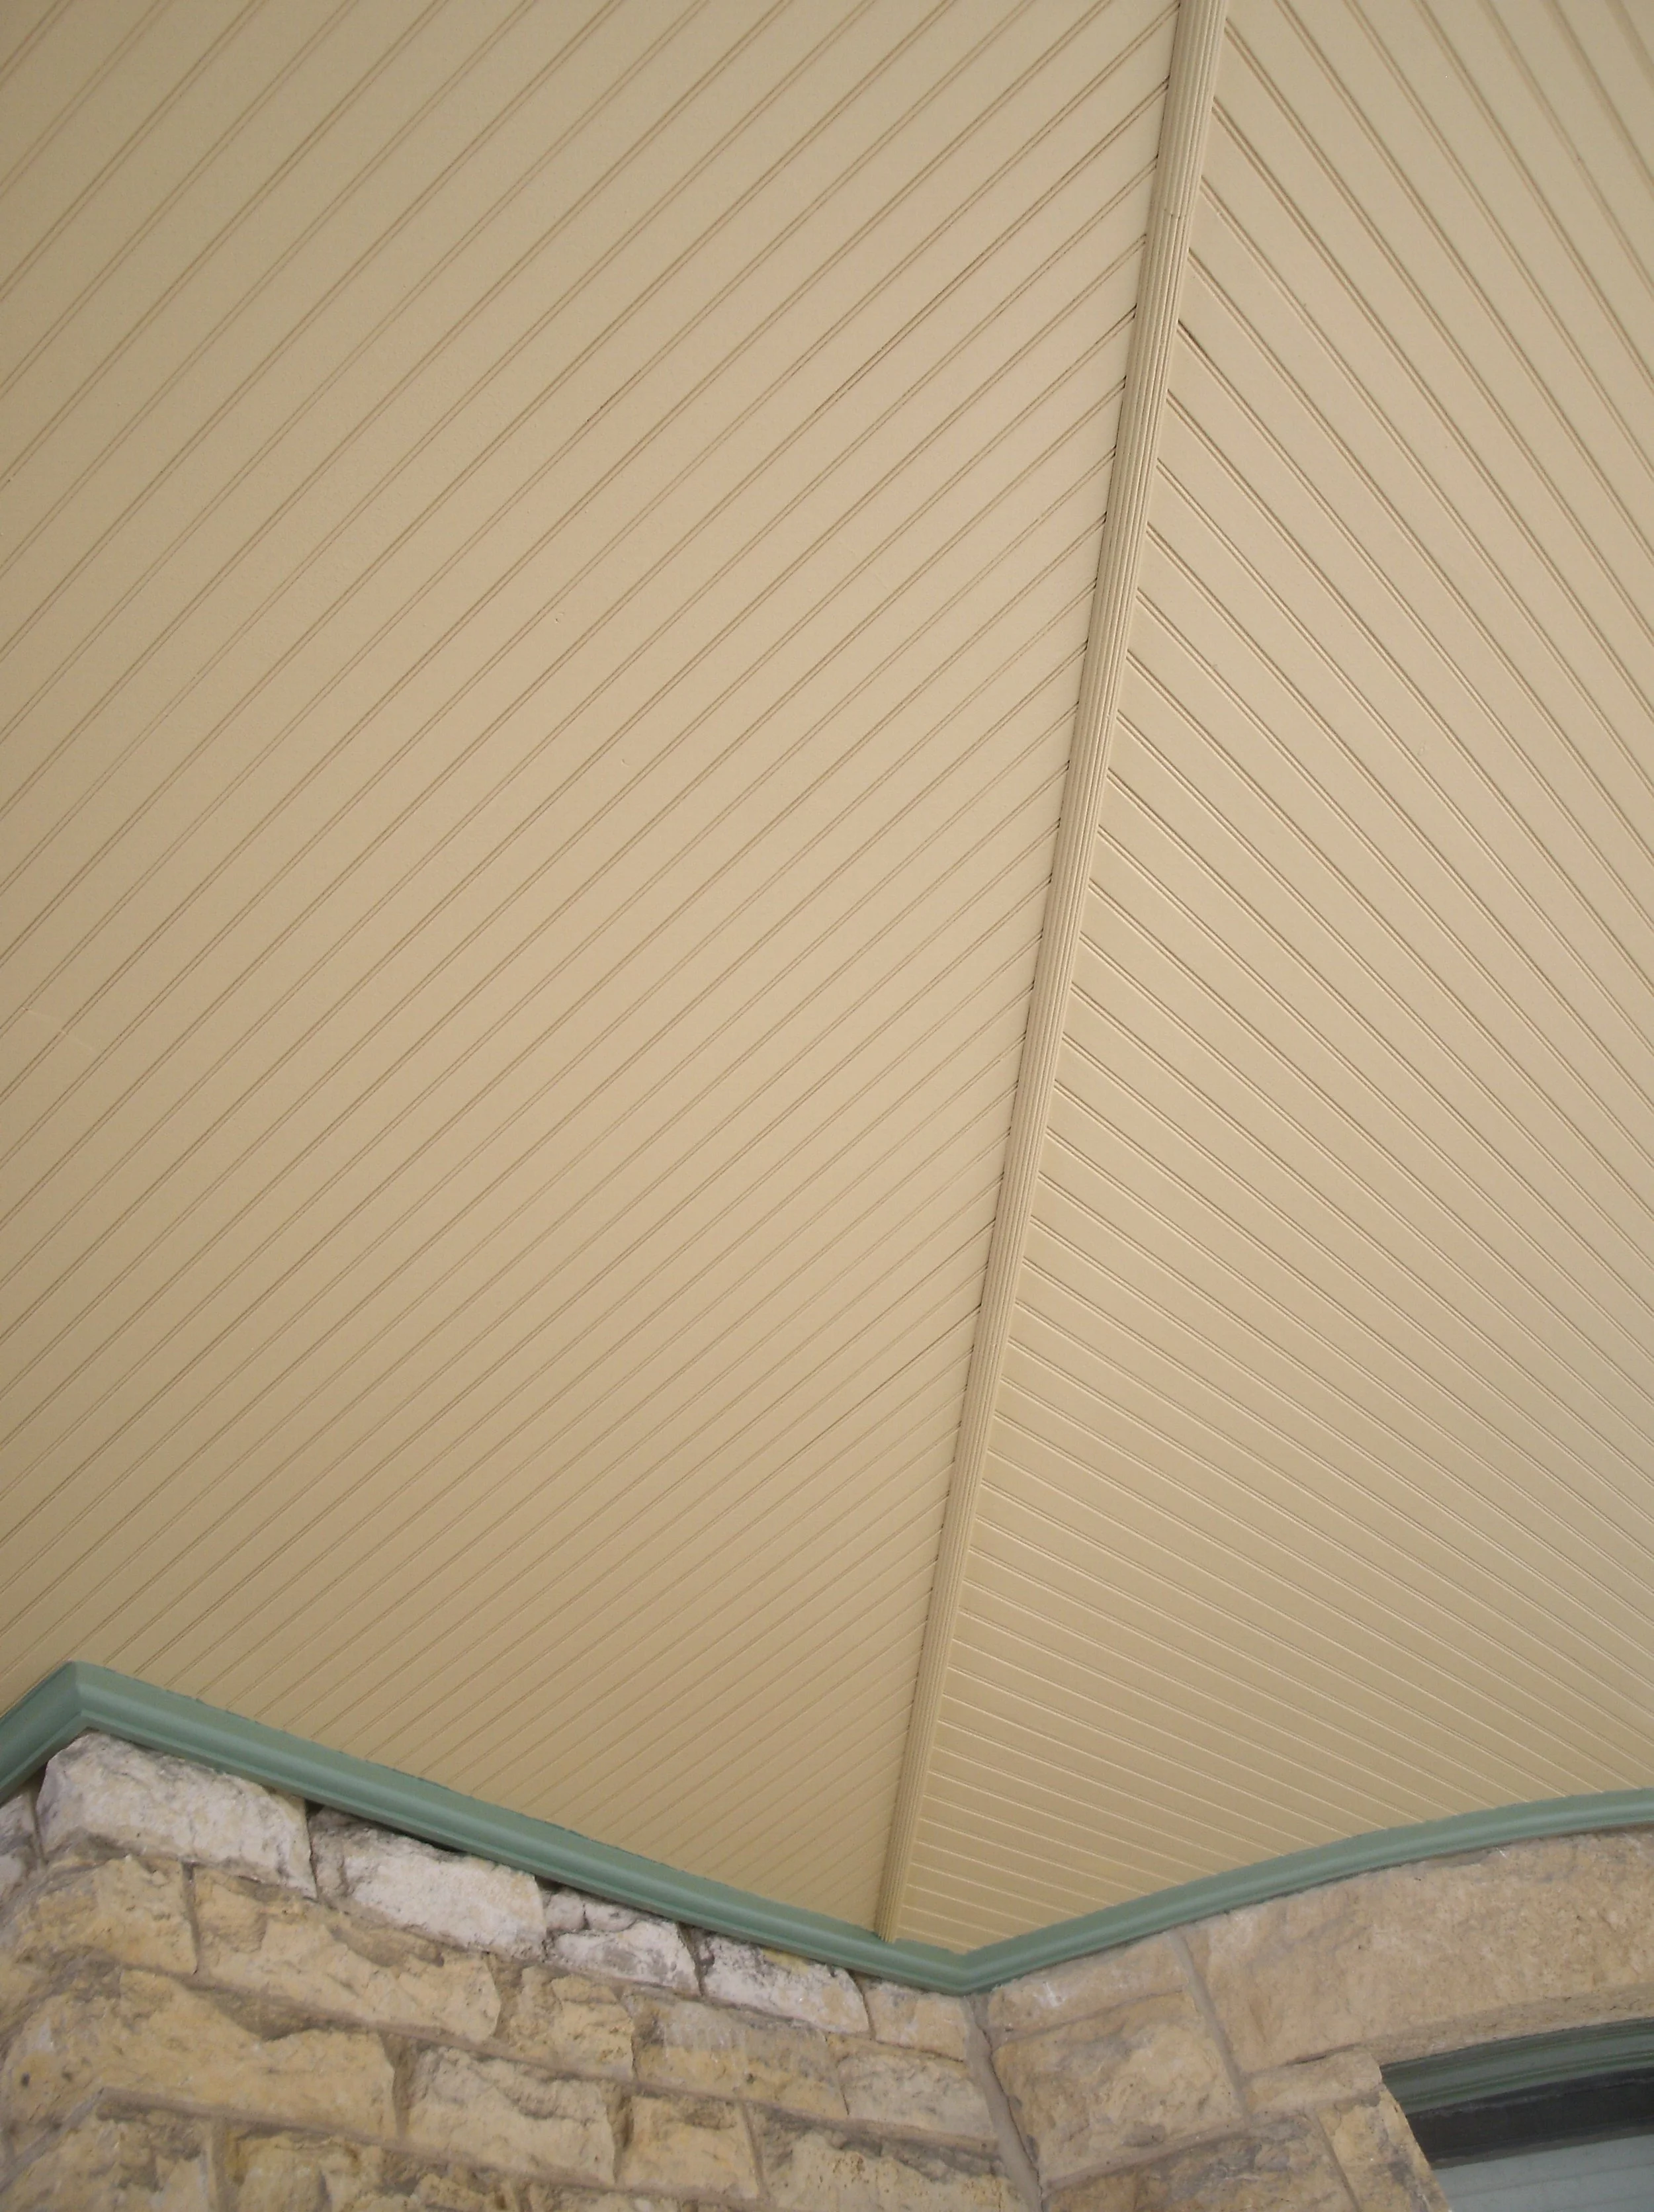
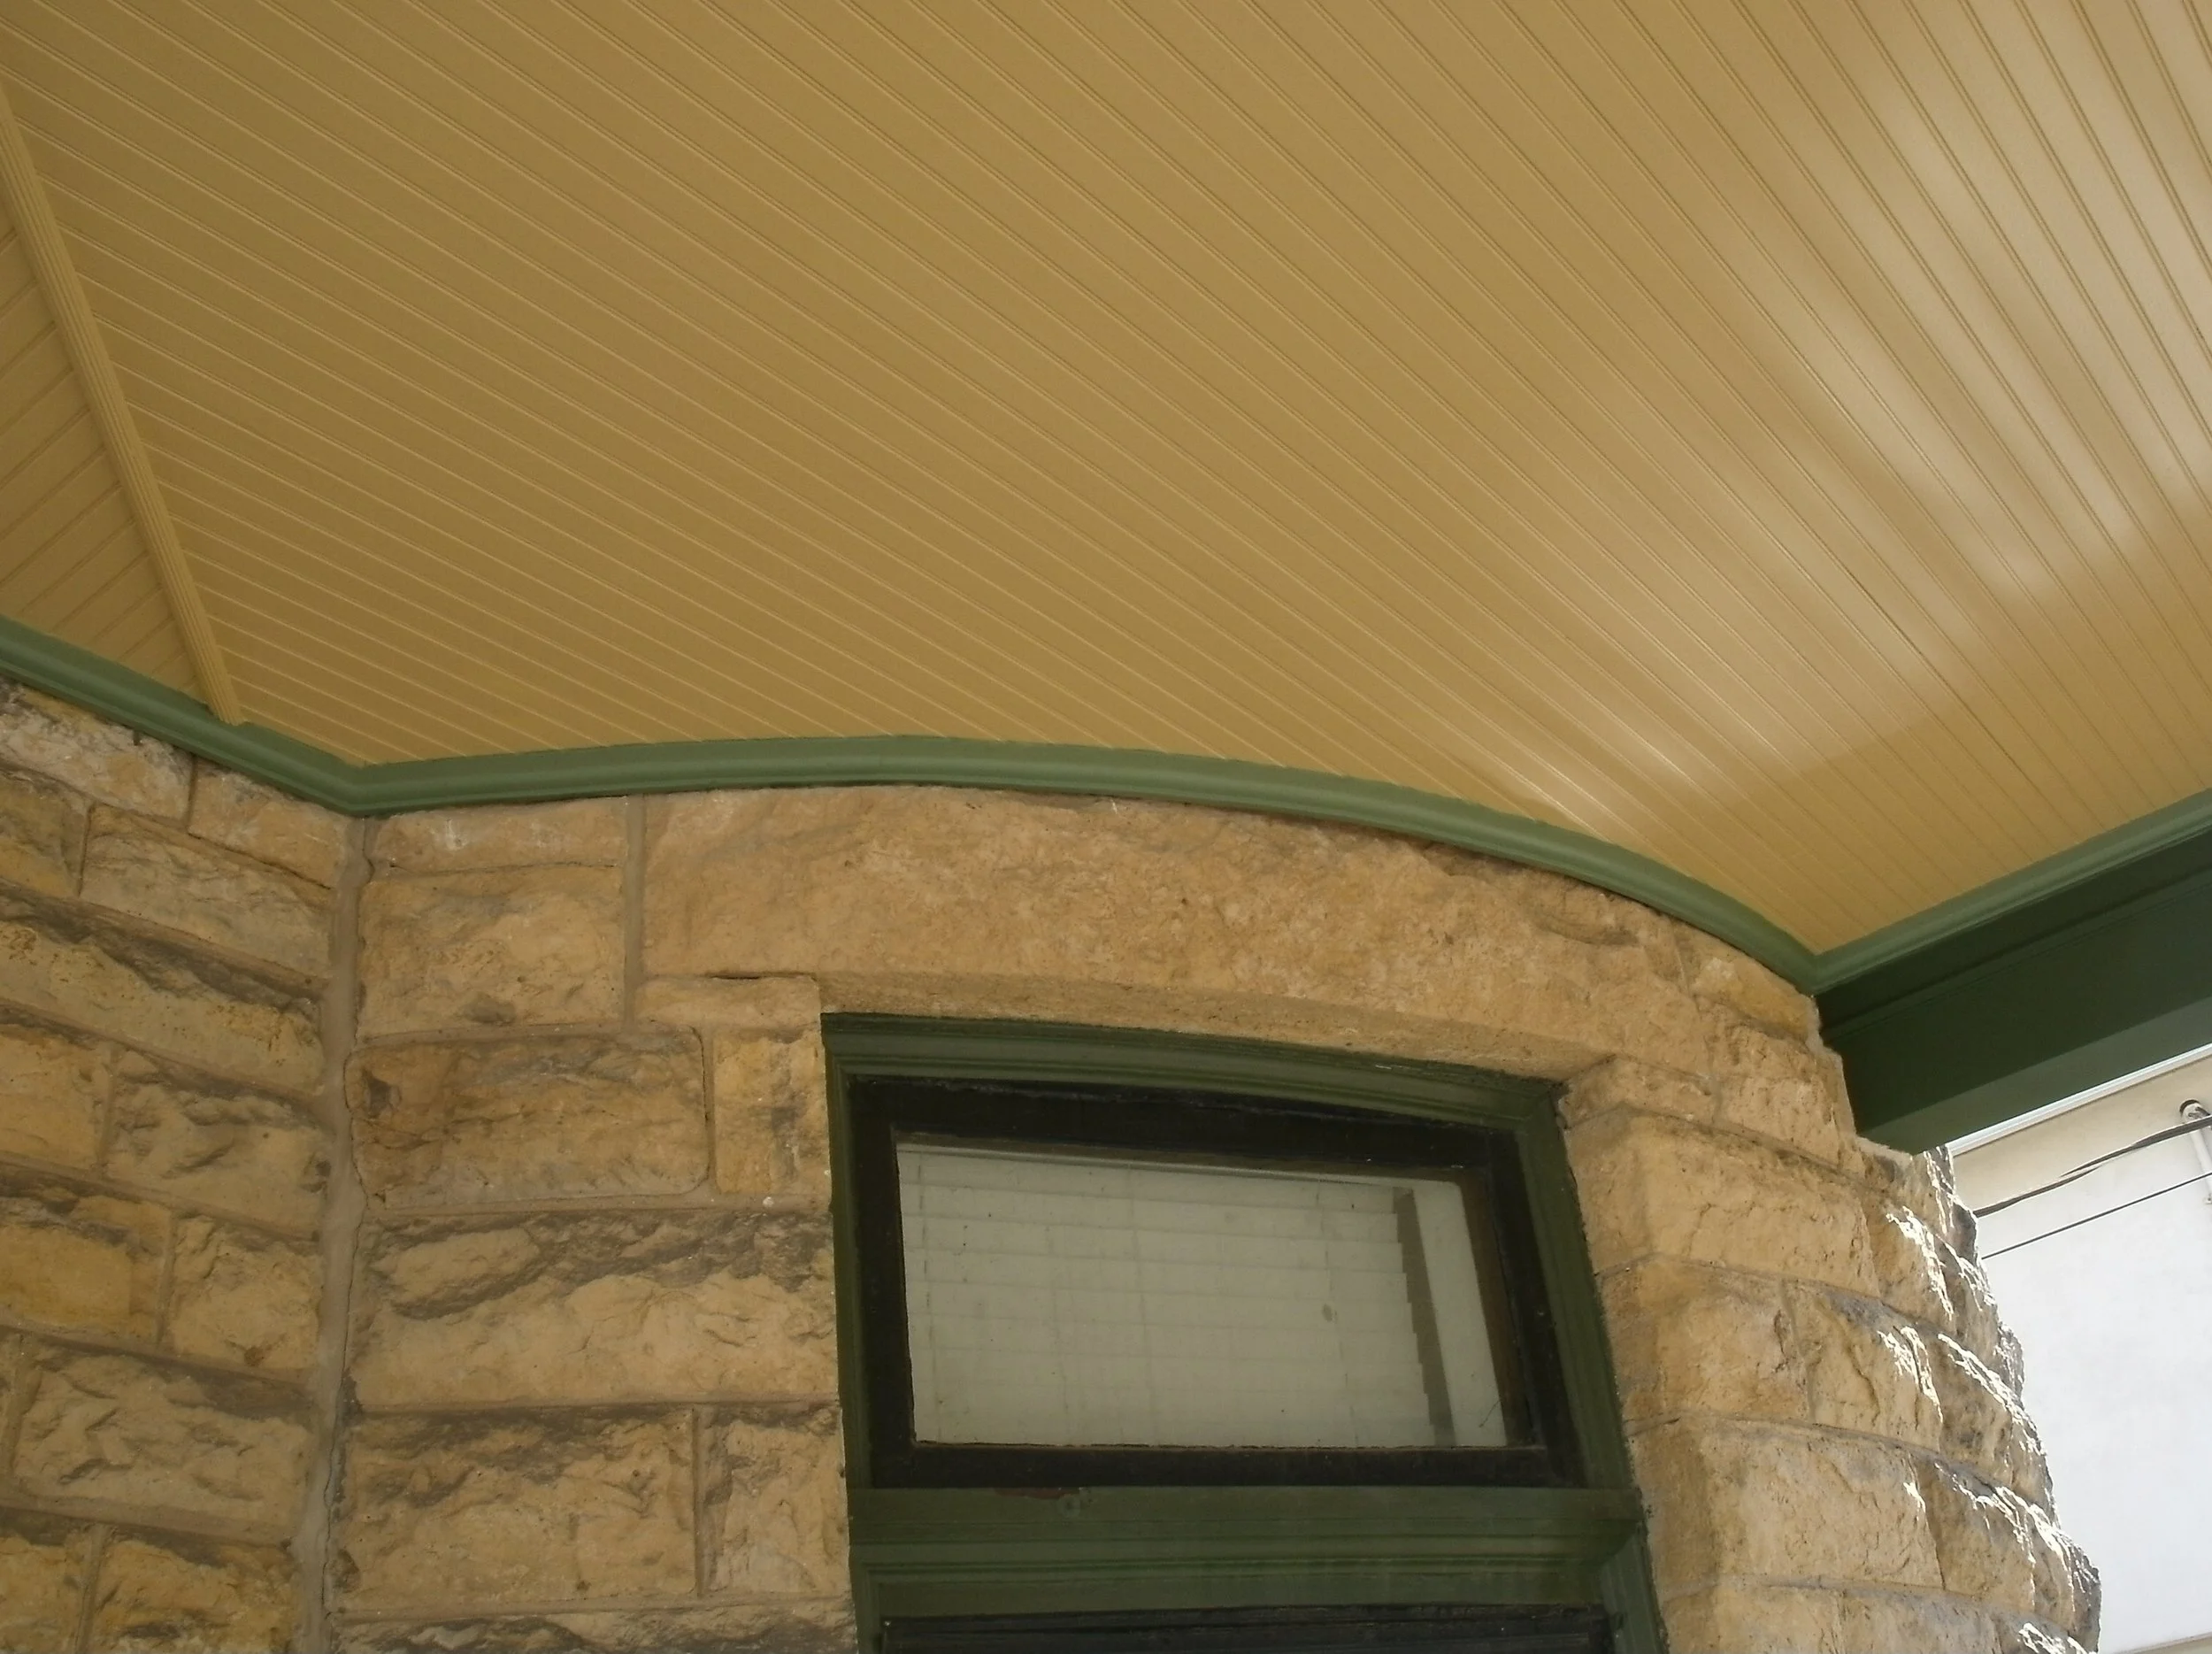
This wonderful structure was originally built by an English family in the mid to late 1800s. I believe it was built originally near Tenny Park. They built it and never lived in it. It finally was either dismantled and rebuilt on its present site or was actually lifted and moved to the present site. Years of neglect led to the front porch upper structure below the roof to be extremely water damaged. Since I was going to jack up the roof and replace the massive beams, which spanned the front and sides, I first wanted to stabilize the two massive stone piers. I wrapped them with a clinging orange plastic. Then I wrapped them in plywood with two by fours at the corner. I demoed the entire ceiling of the porch and the massive beams. I built the front beam from three 1 3/4” LVLs carriage bolted together in place. LVL stands for Laminated veneer lumber. I sourced the LVLs from Marling Lumber in Madison Wisconsin where I have been a customer for over 40 years. I augmented most of the rafters in the porch and the rafter extensions outside of the beam. There was almost no rescuable wood outside of adjacent to the rotted support beam. Since none of the type and dimension of wood are used in the original construction are available presently outside of museums, the inspector allowed me to carefully and respectfully substitute wood. For example, I clad the beam and the massive soffit with 3/4” birch plywood. This gave me the widths I needed. The rest of the facia and other trim were Douglas fir (more commonly referred to as Doug fir) planed to the right thickness. The crown molding and chair rail molding in mid fascia were sourced from Brunsell Lumber in Madison, Wisconsin. They are a wonderful source for replicating old house trim.
The two part massive curved end trim immediately on top of the stone piers were a challenge. They were larger than 6x6s. I found a source in Albany Wisconsin that specialized in selling barn beams from barns they had dismantled. I bought a beam, de-nailed it and brought it to a Amish builder in the Albany area who had a great, old school sawmill. He ripped the beam to the right thickness and width leaving an extra quarter inch for my finish planing and sanding. I cut the dramatic curve on each end, mitered the corners and lag bolted them together. They were lovely and heavy, but worth it to keep the historic look.
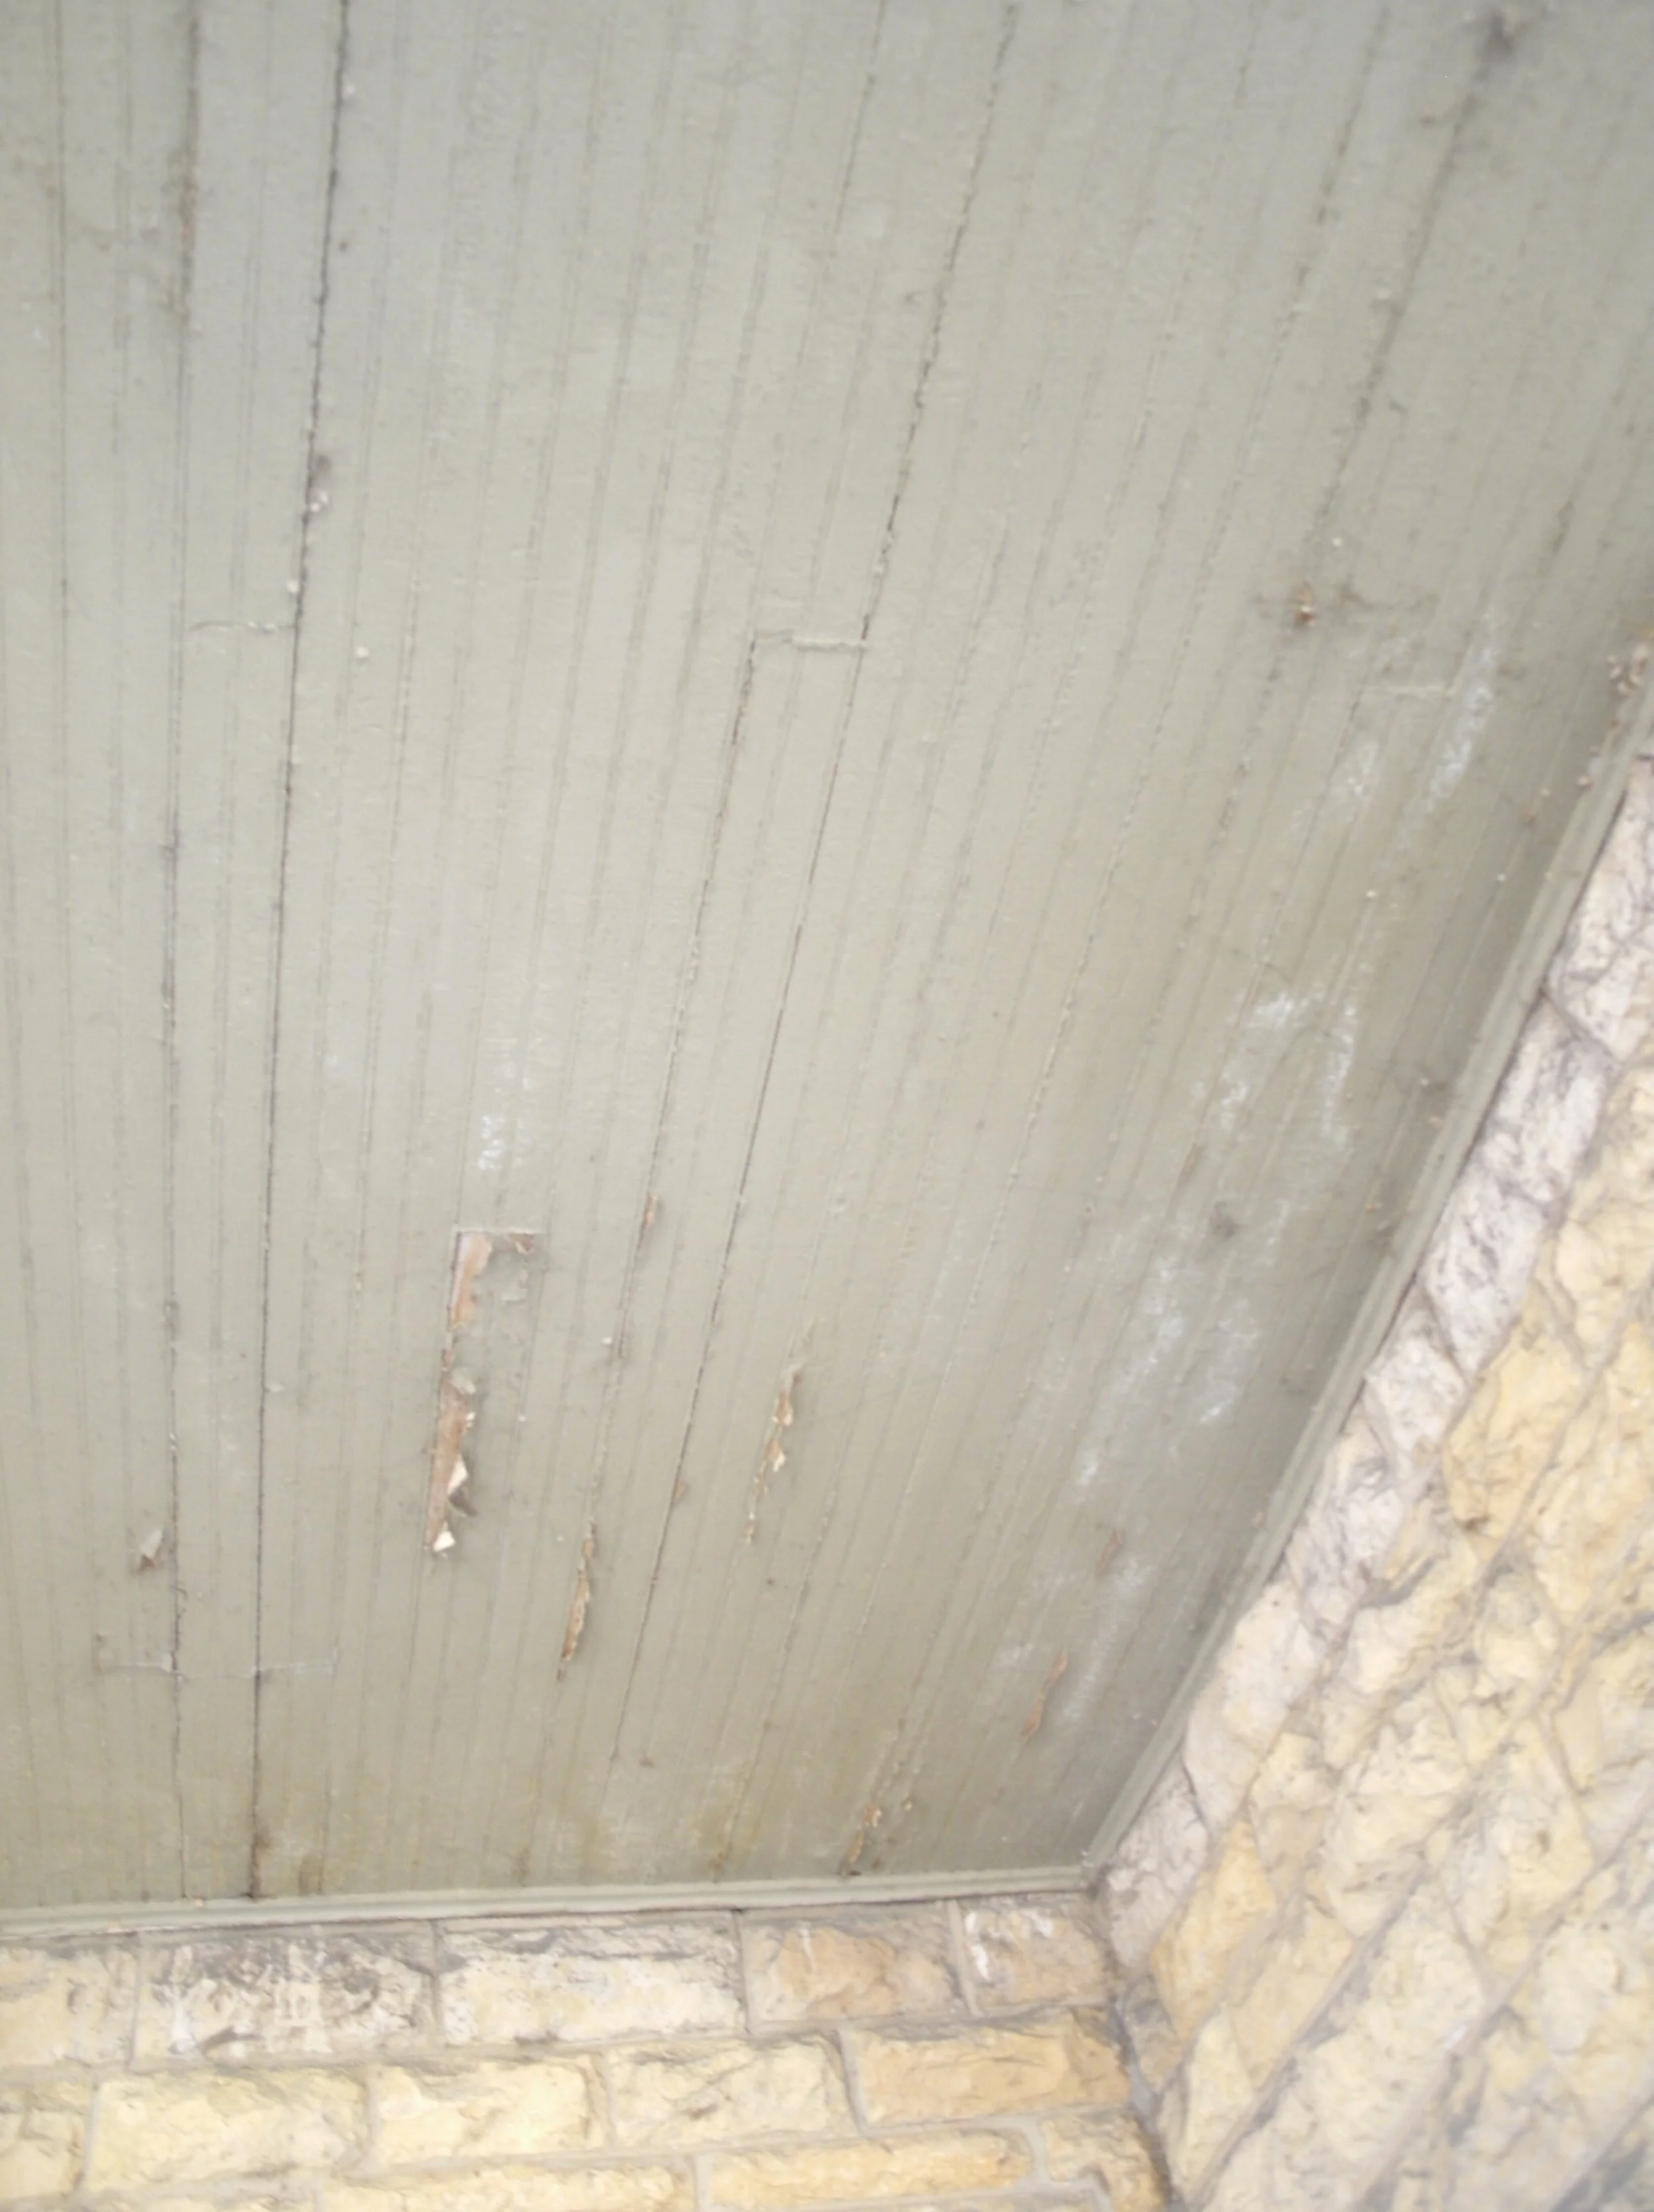
I installed beaded tongue and groove ceiling material, which was what was originally on the ceiling of the porch. I finished the edges with more trim from Brunsell.
I then painted the ceiling, the trim, and the entire beam, soffit and facias. The rest of the structure was restored several years later by a different contractor. Their work was spectacular. I am honored to have been part of the rescuing of this amazing, historic structure.
Damaged west end of front porch
Water damaged beaded porch ceiling.
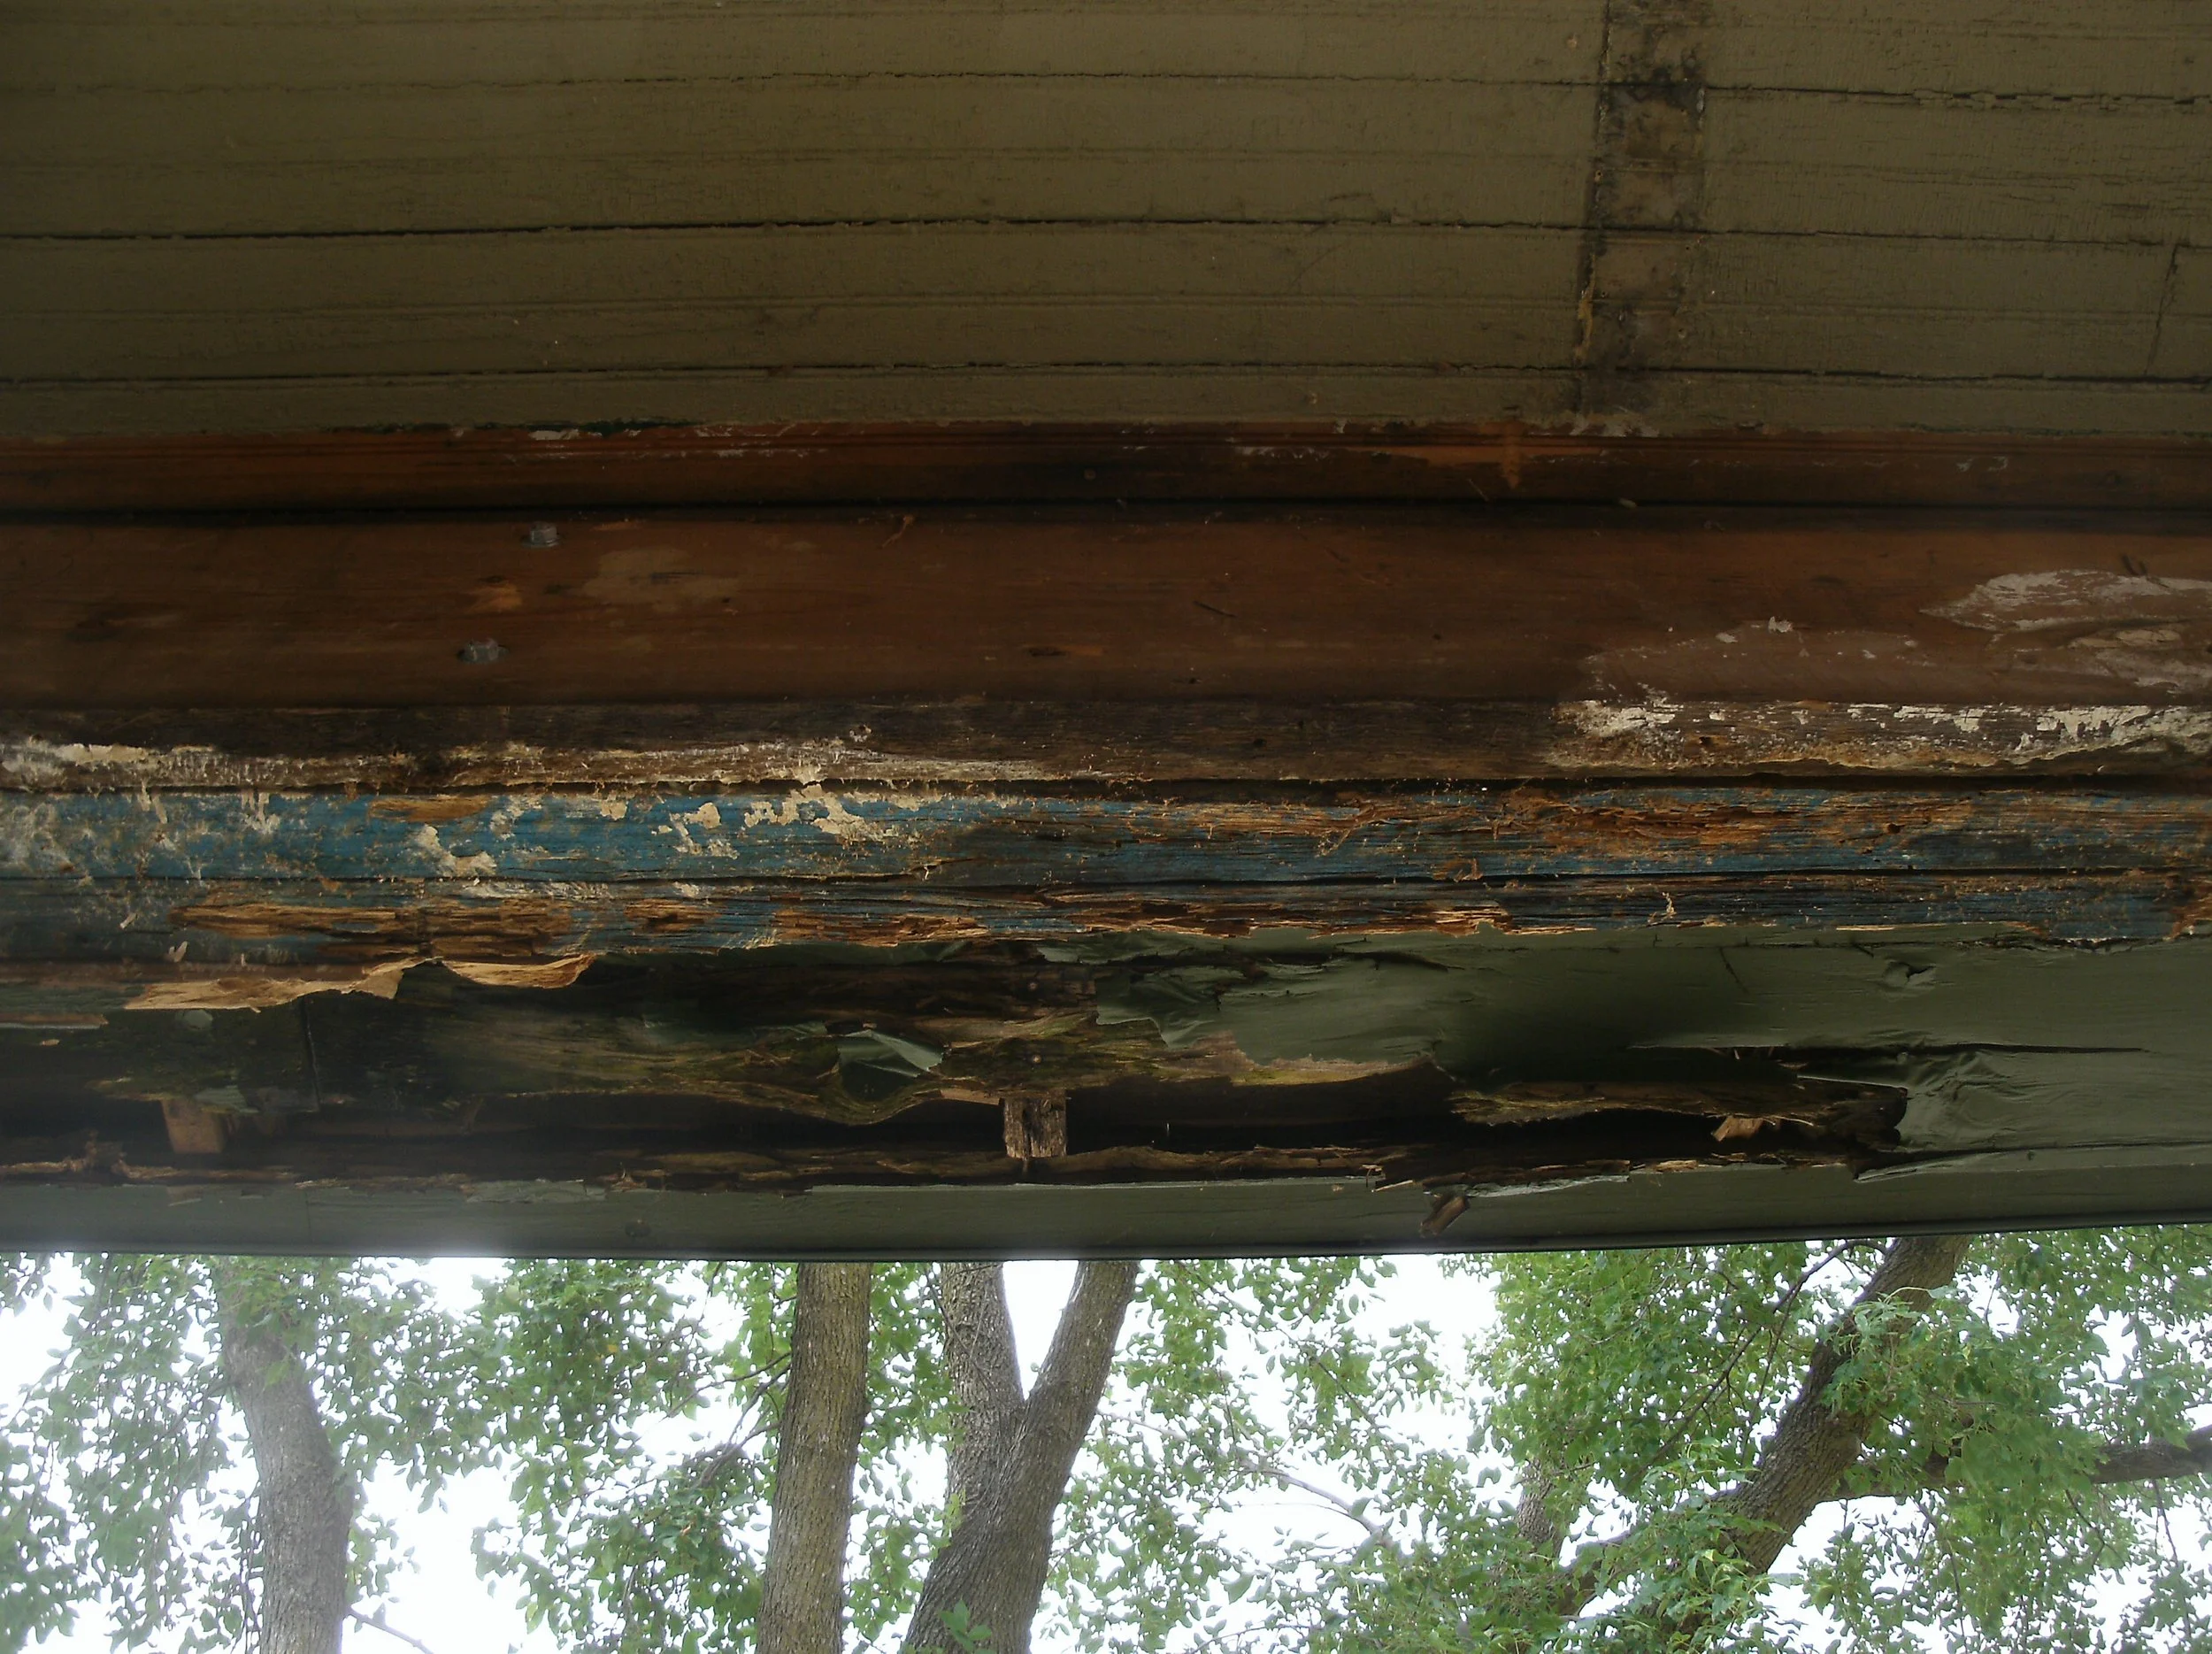
Extreme water damaged east end beam of front porch.
More extreme beam and soffit water damage on the front face of the porch.
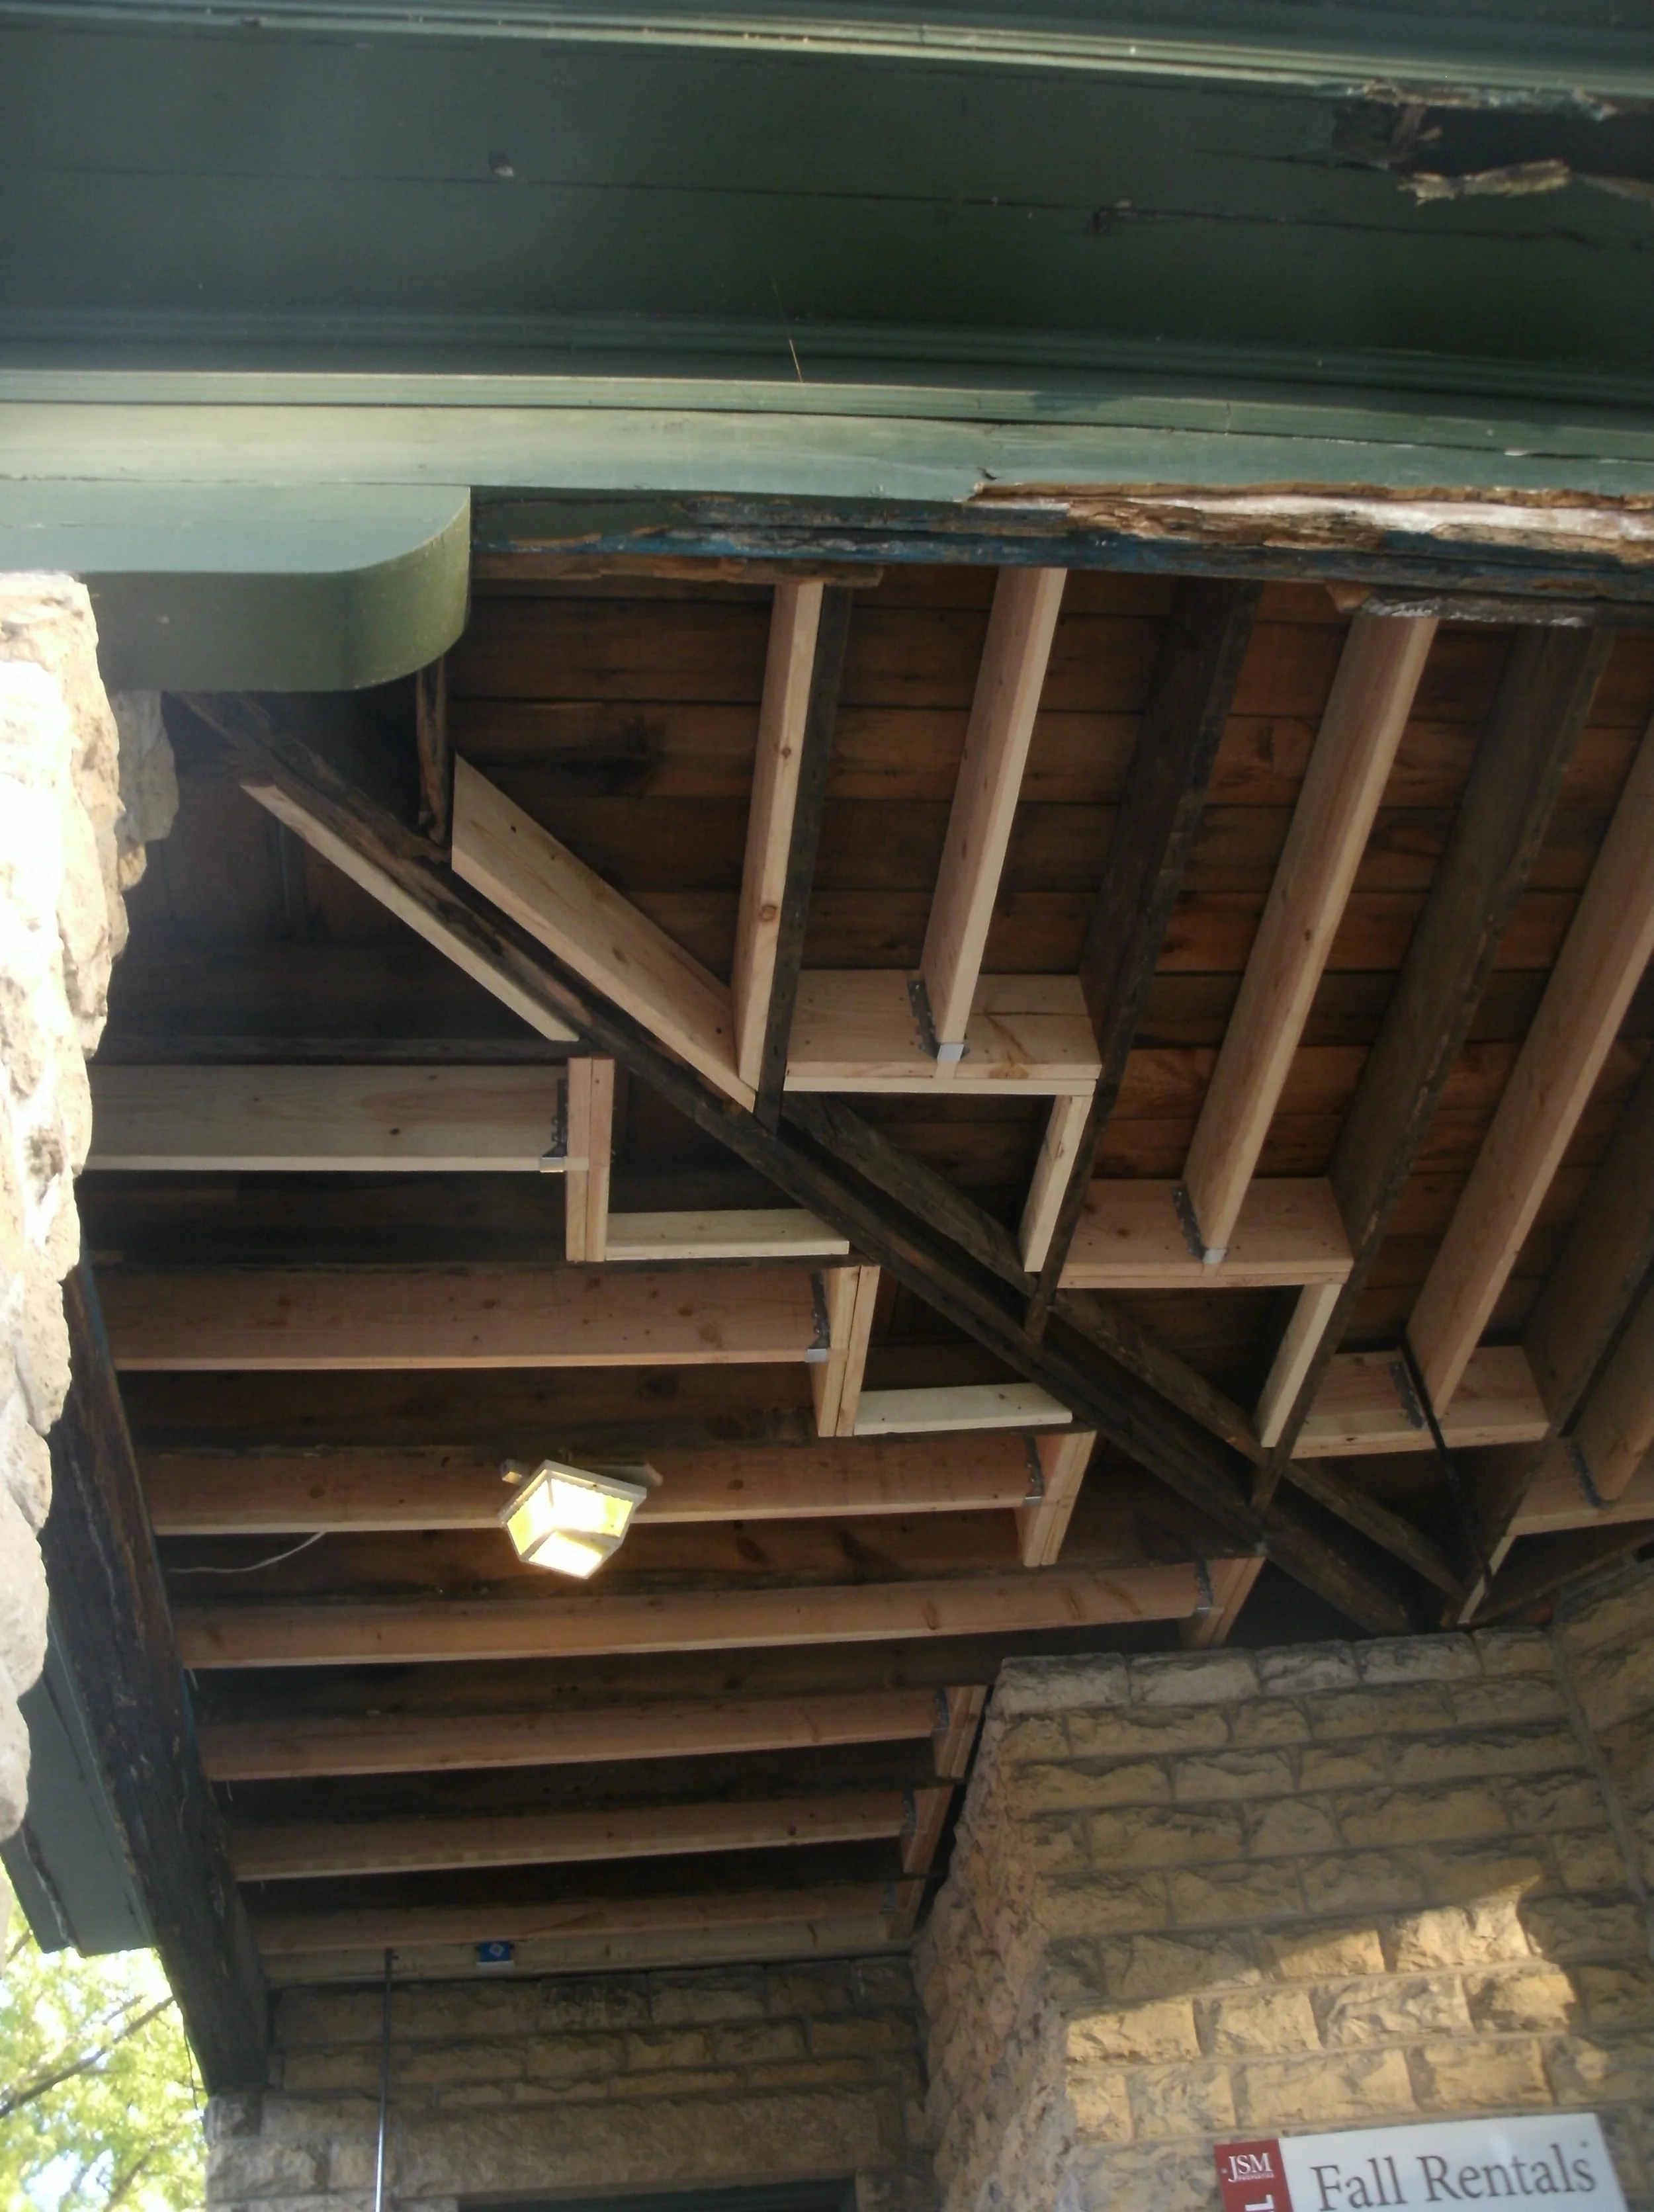
New 2x10 joists for proper 16” on center and augment other joists.
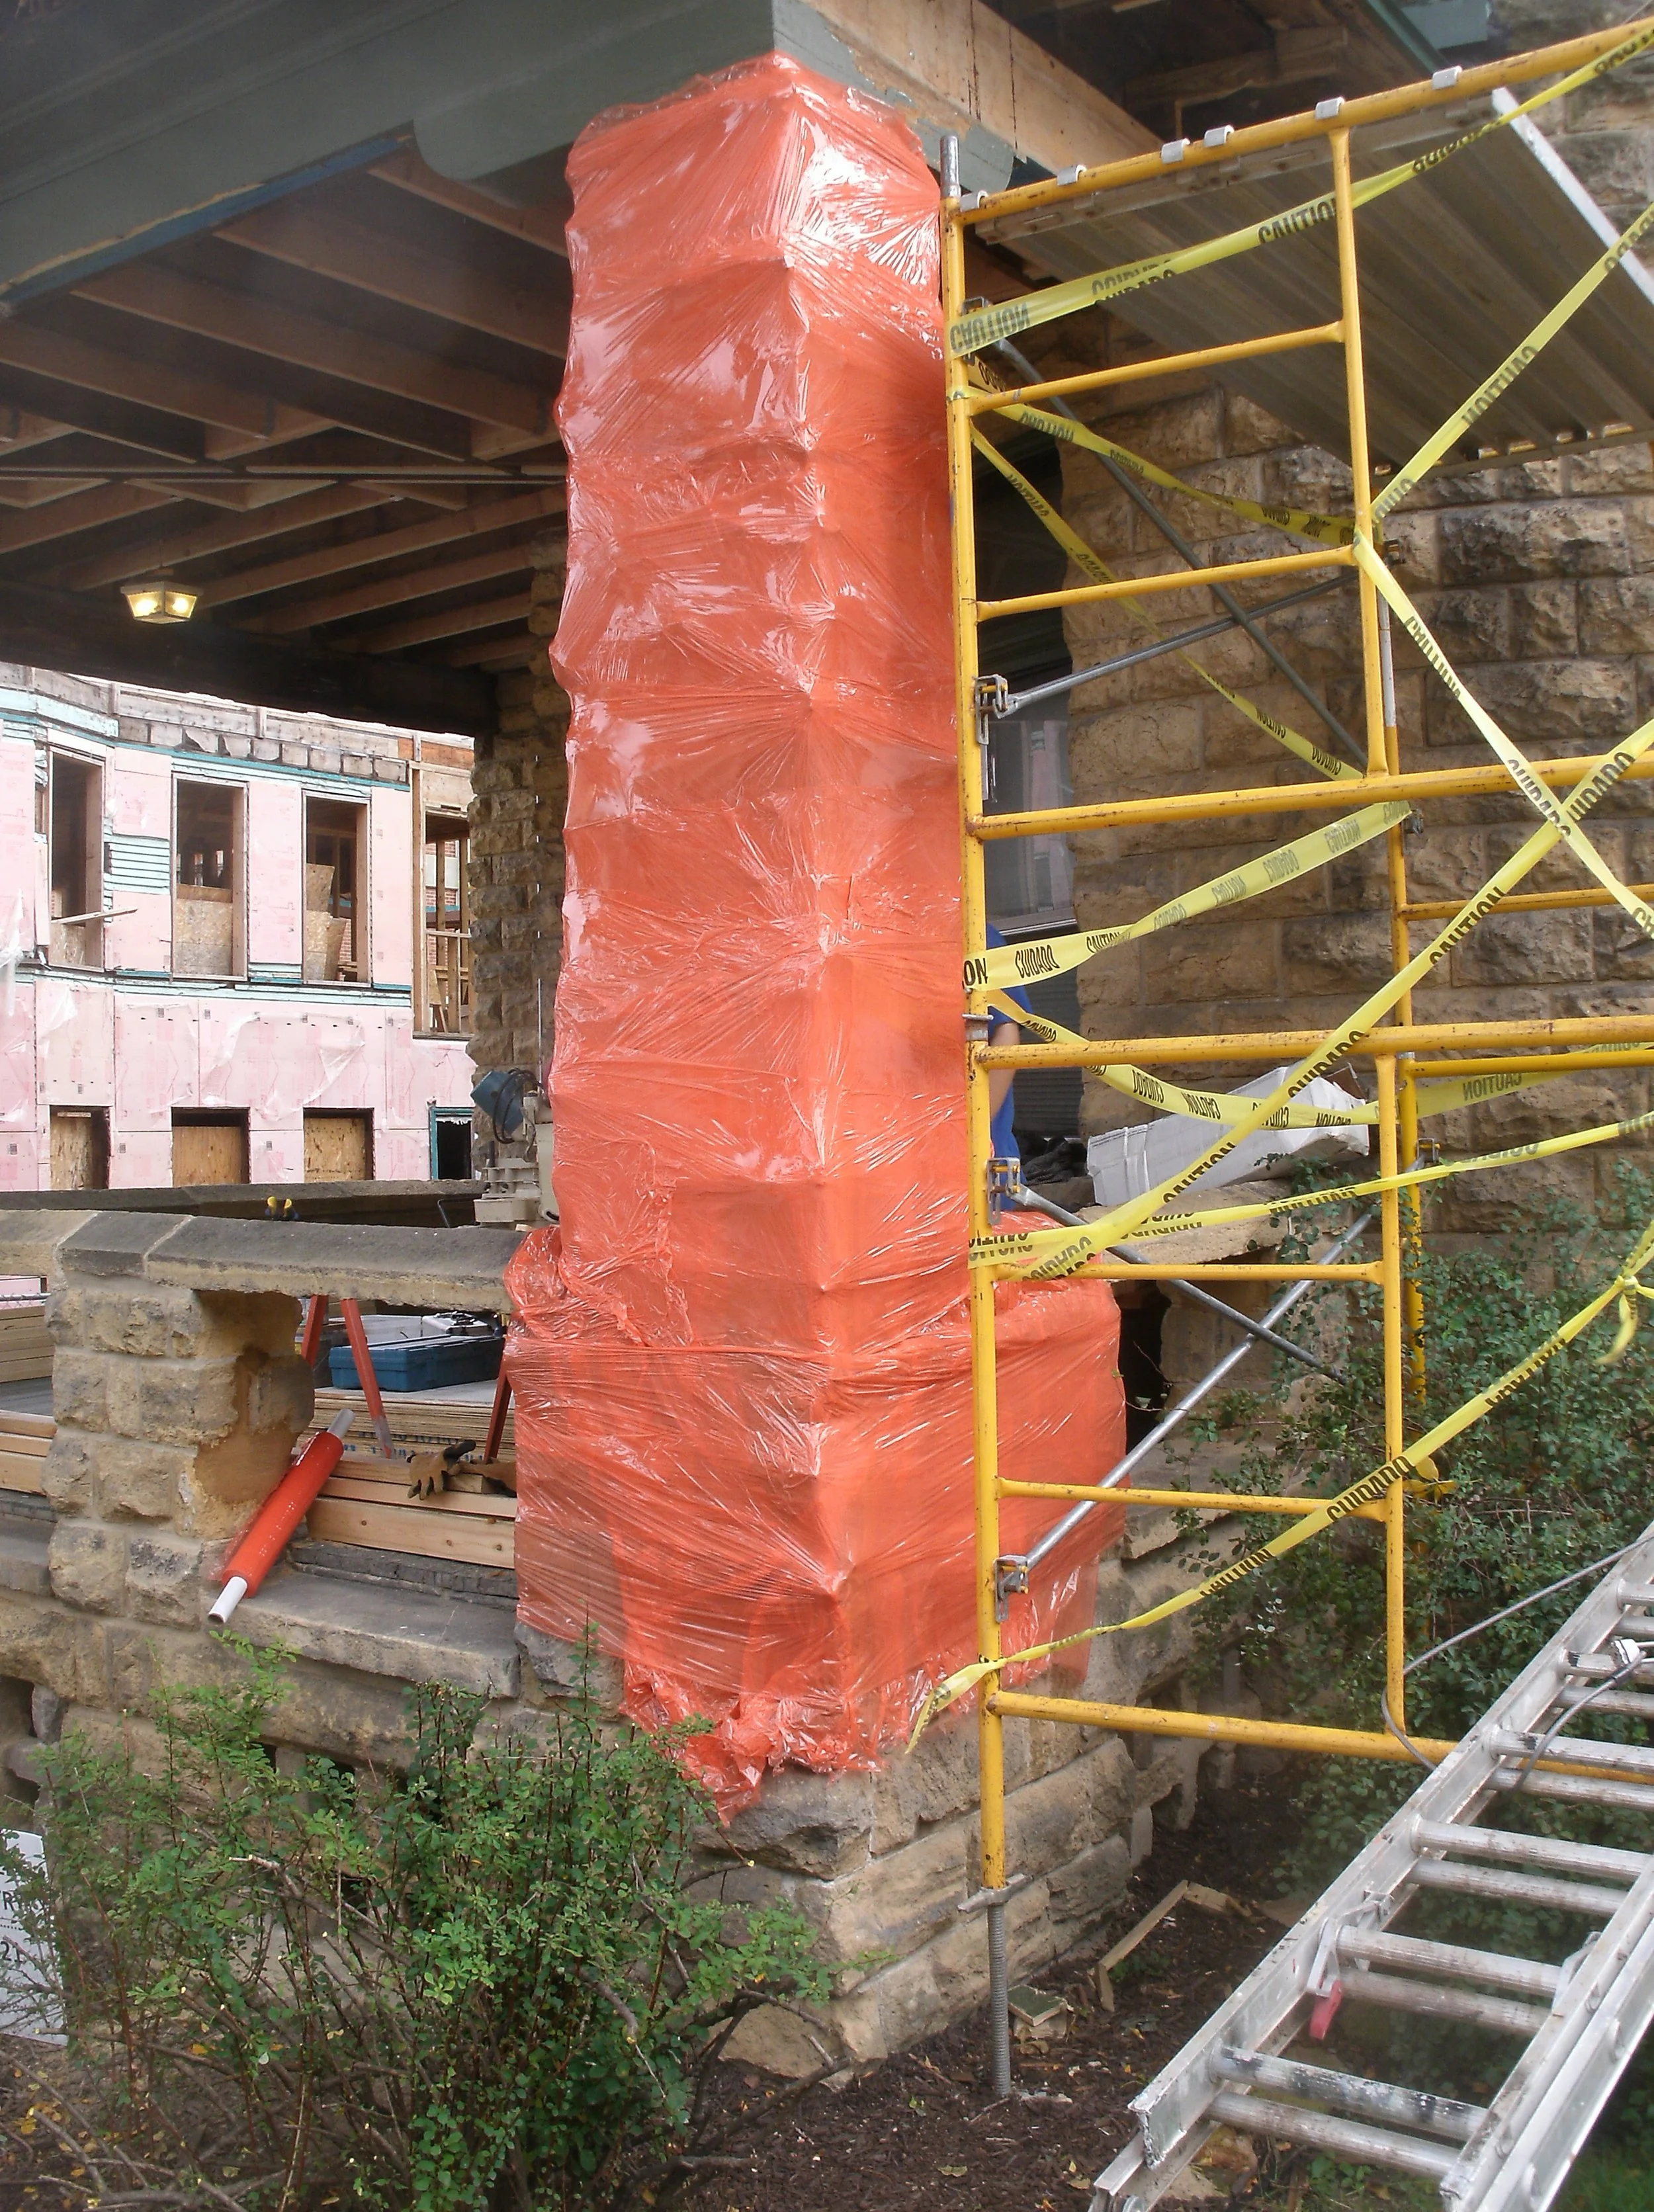
Stone pier wrapped with multiple thicknesses of cling wrap for partial protection.
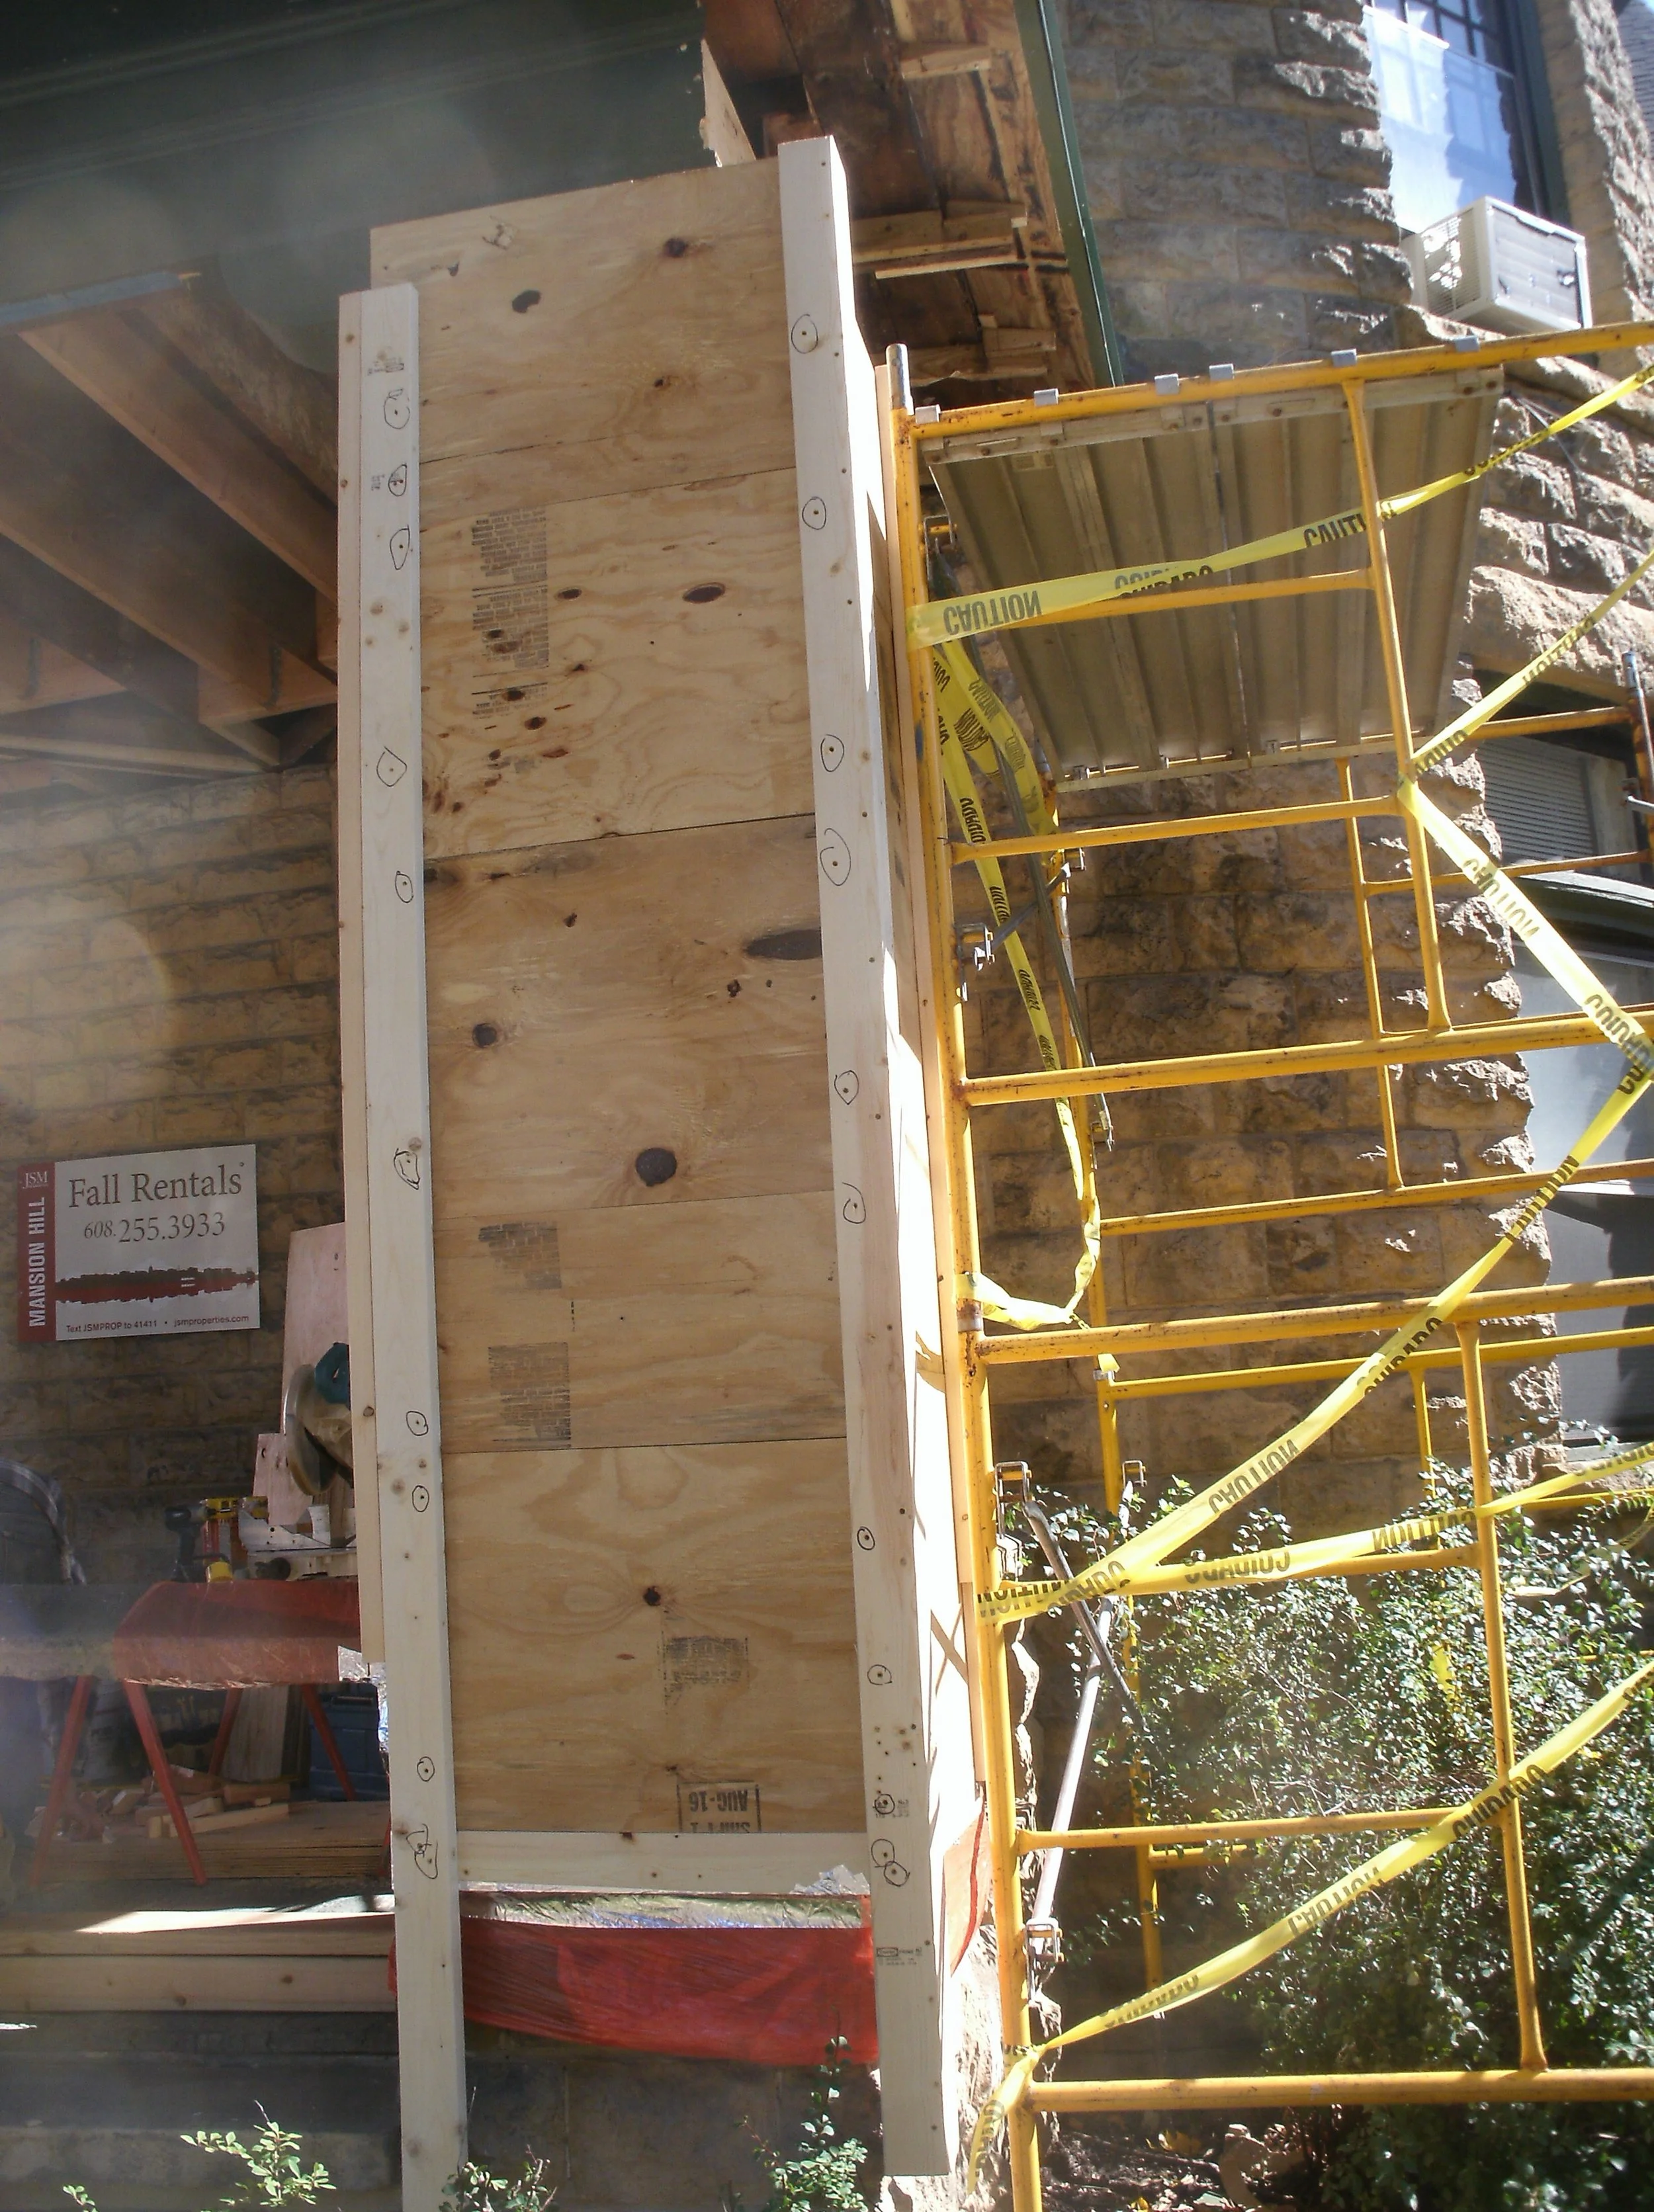
Stone pier clad in plywood, and 2x4 corners to protect the piers.
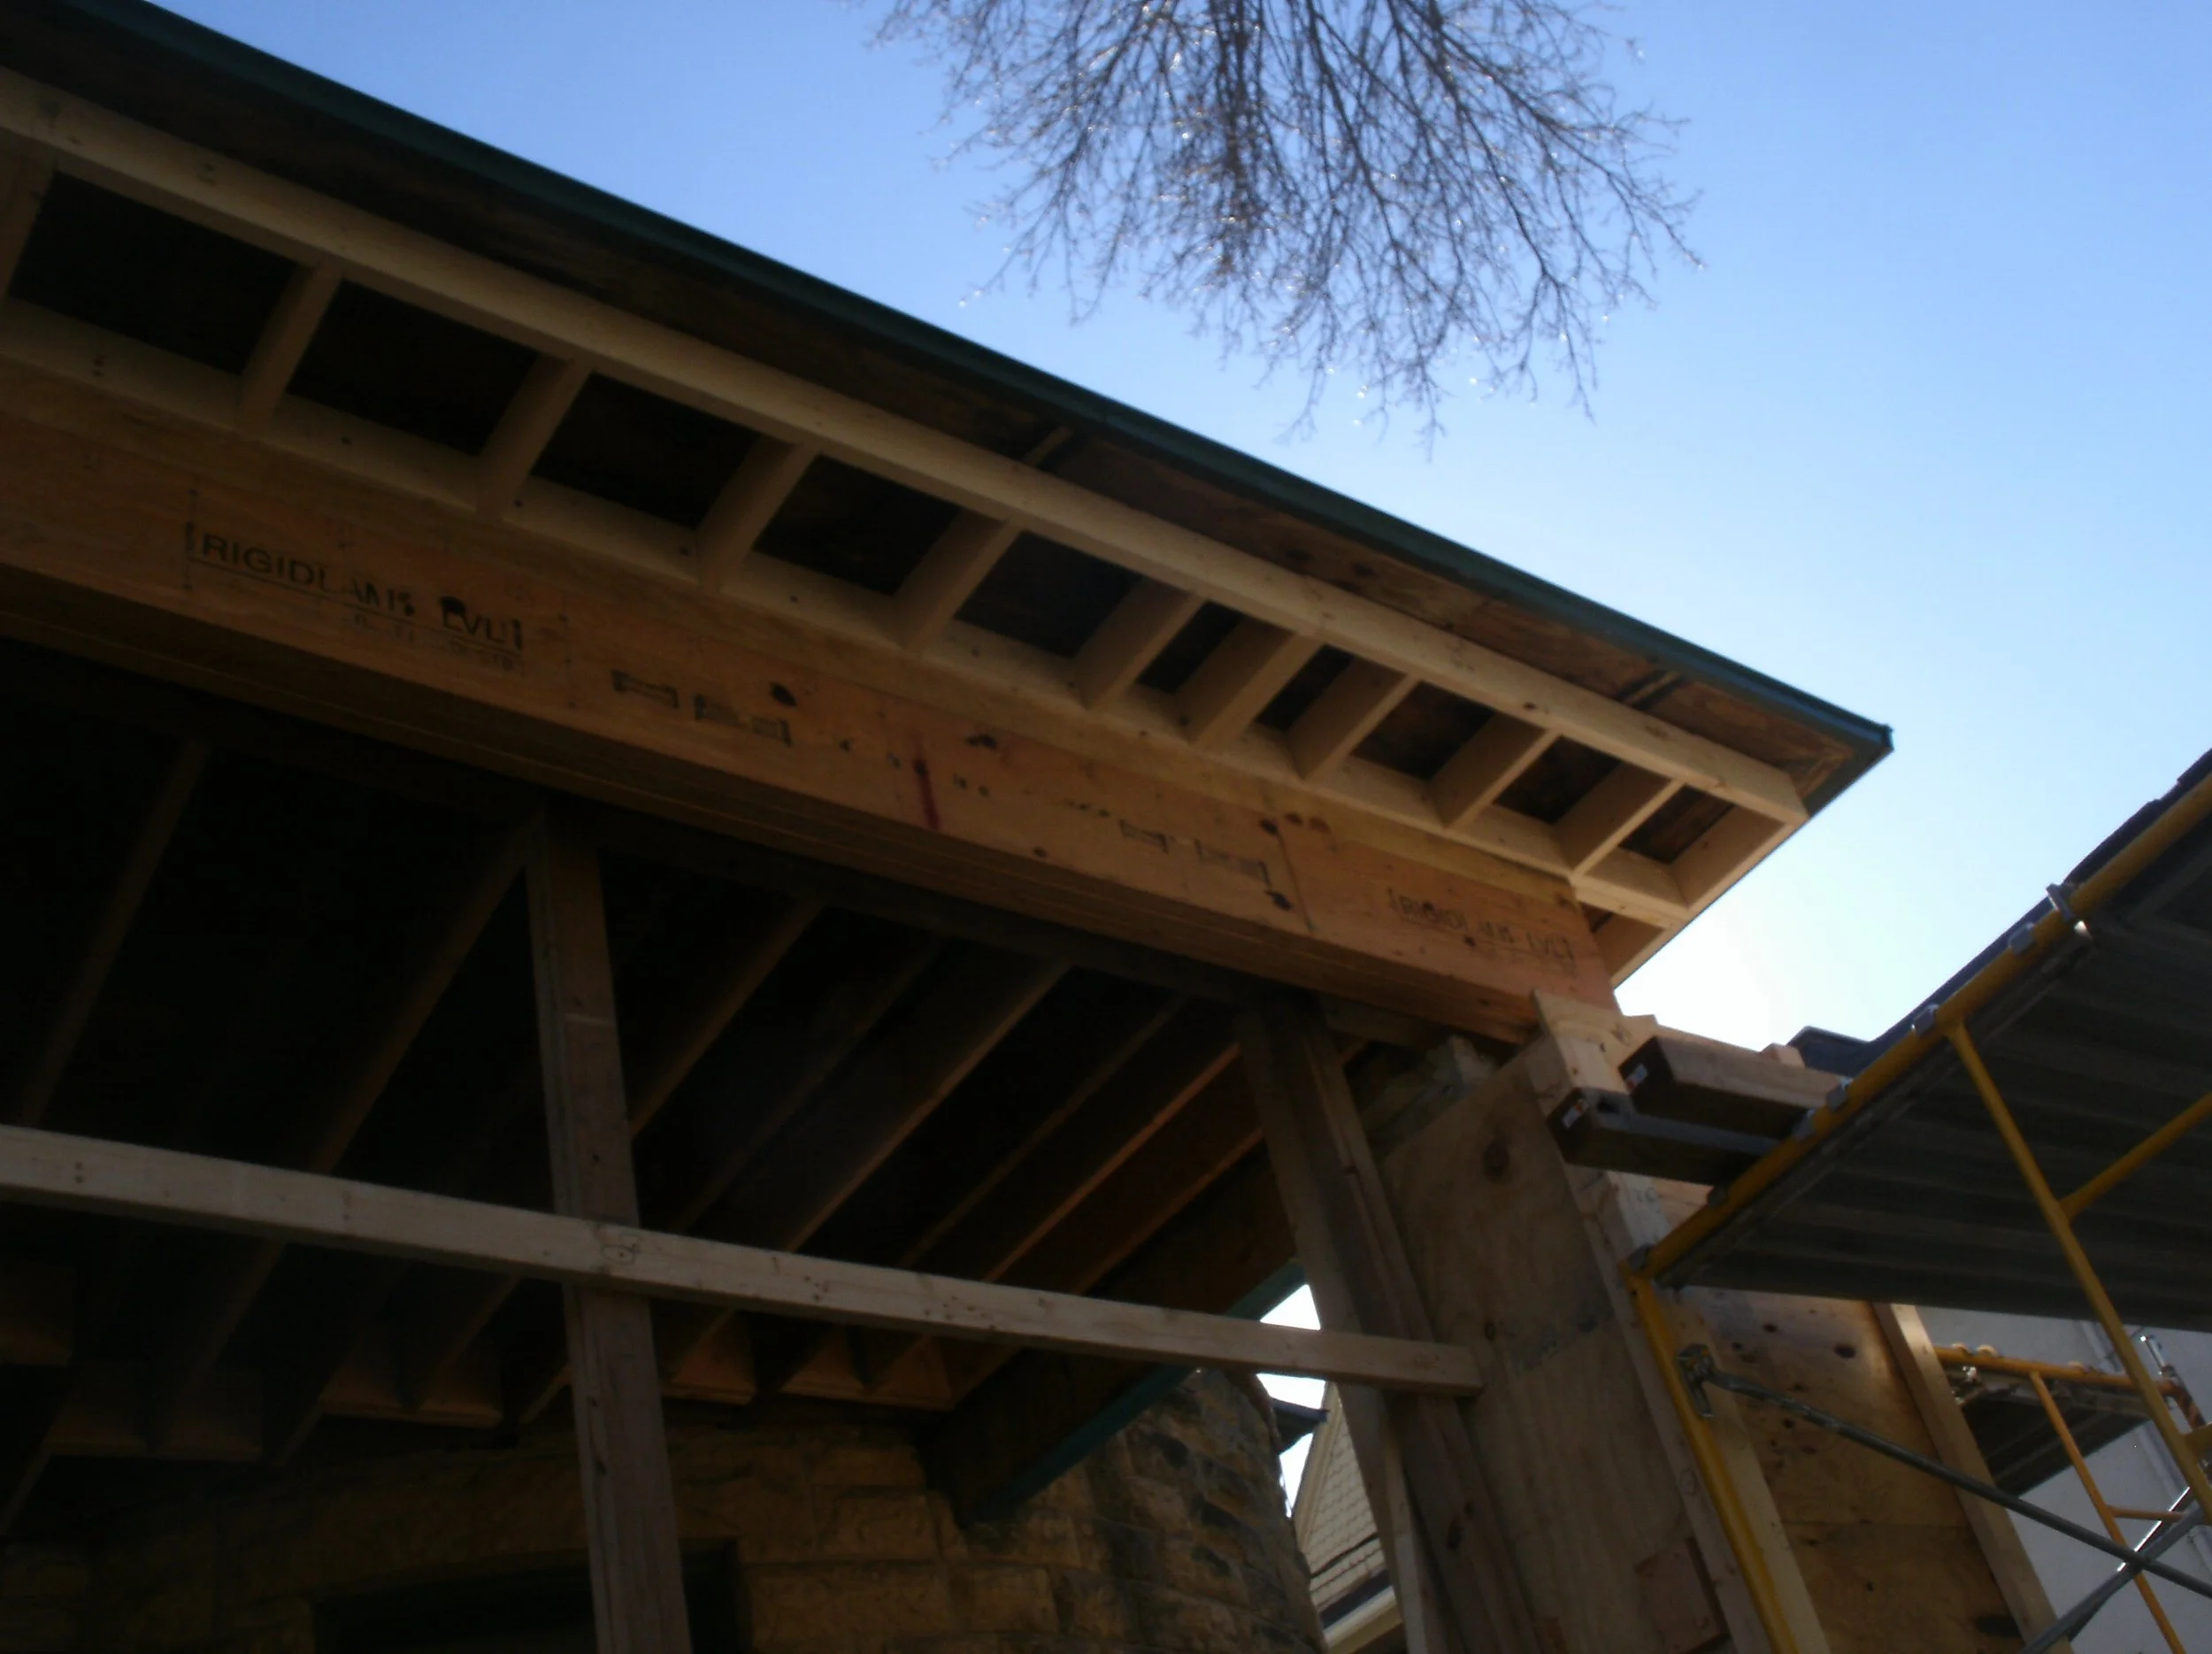
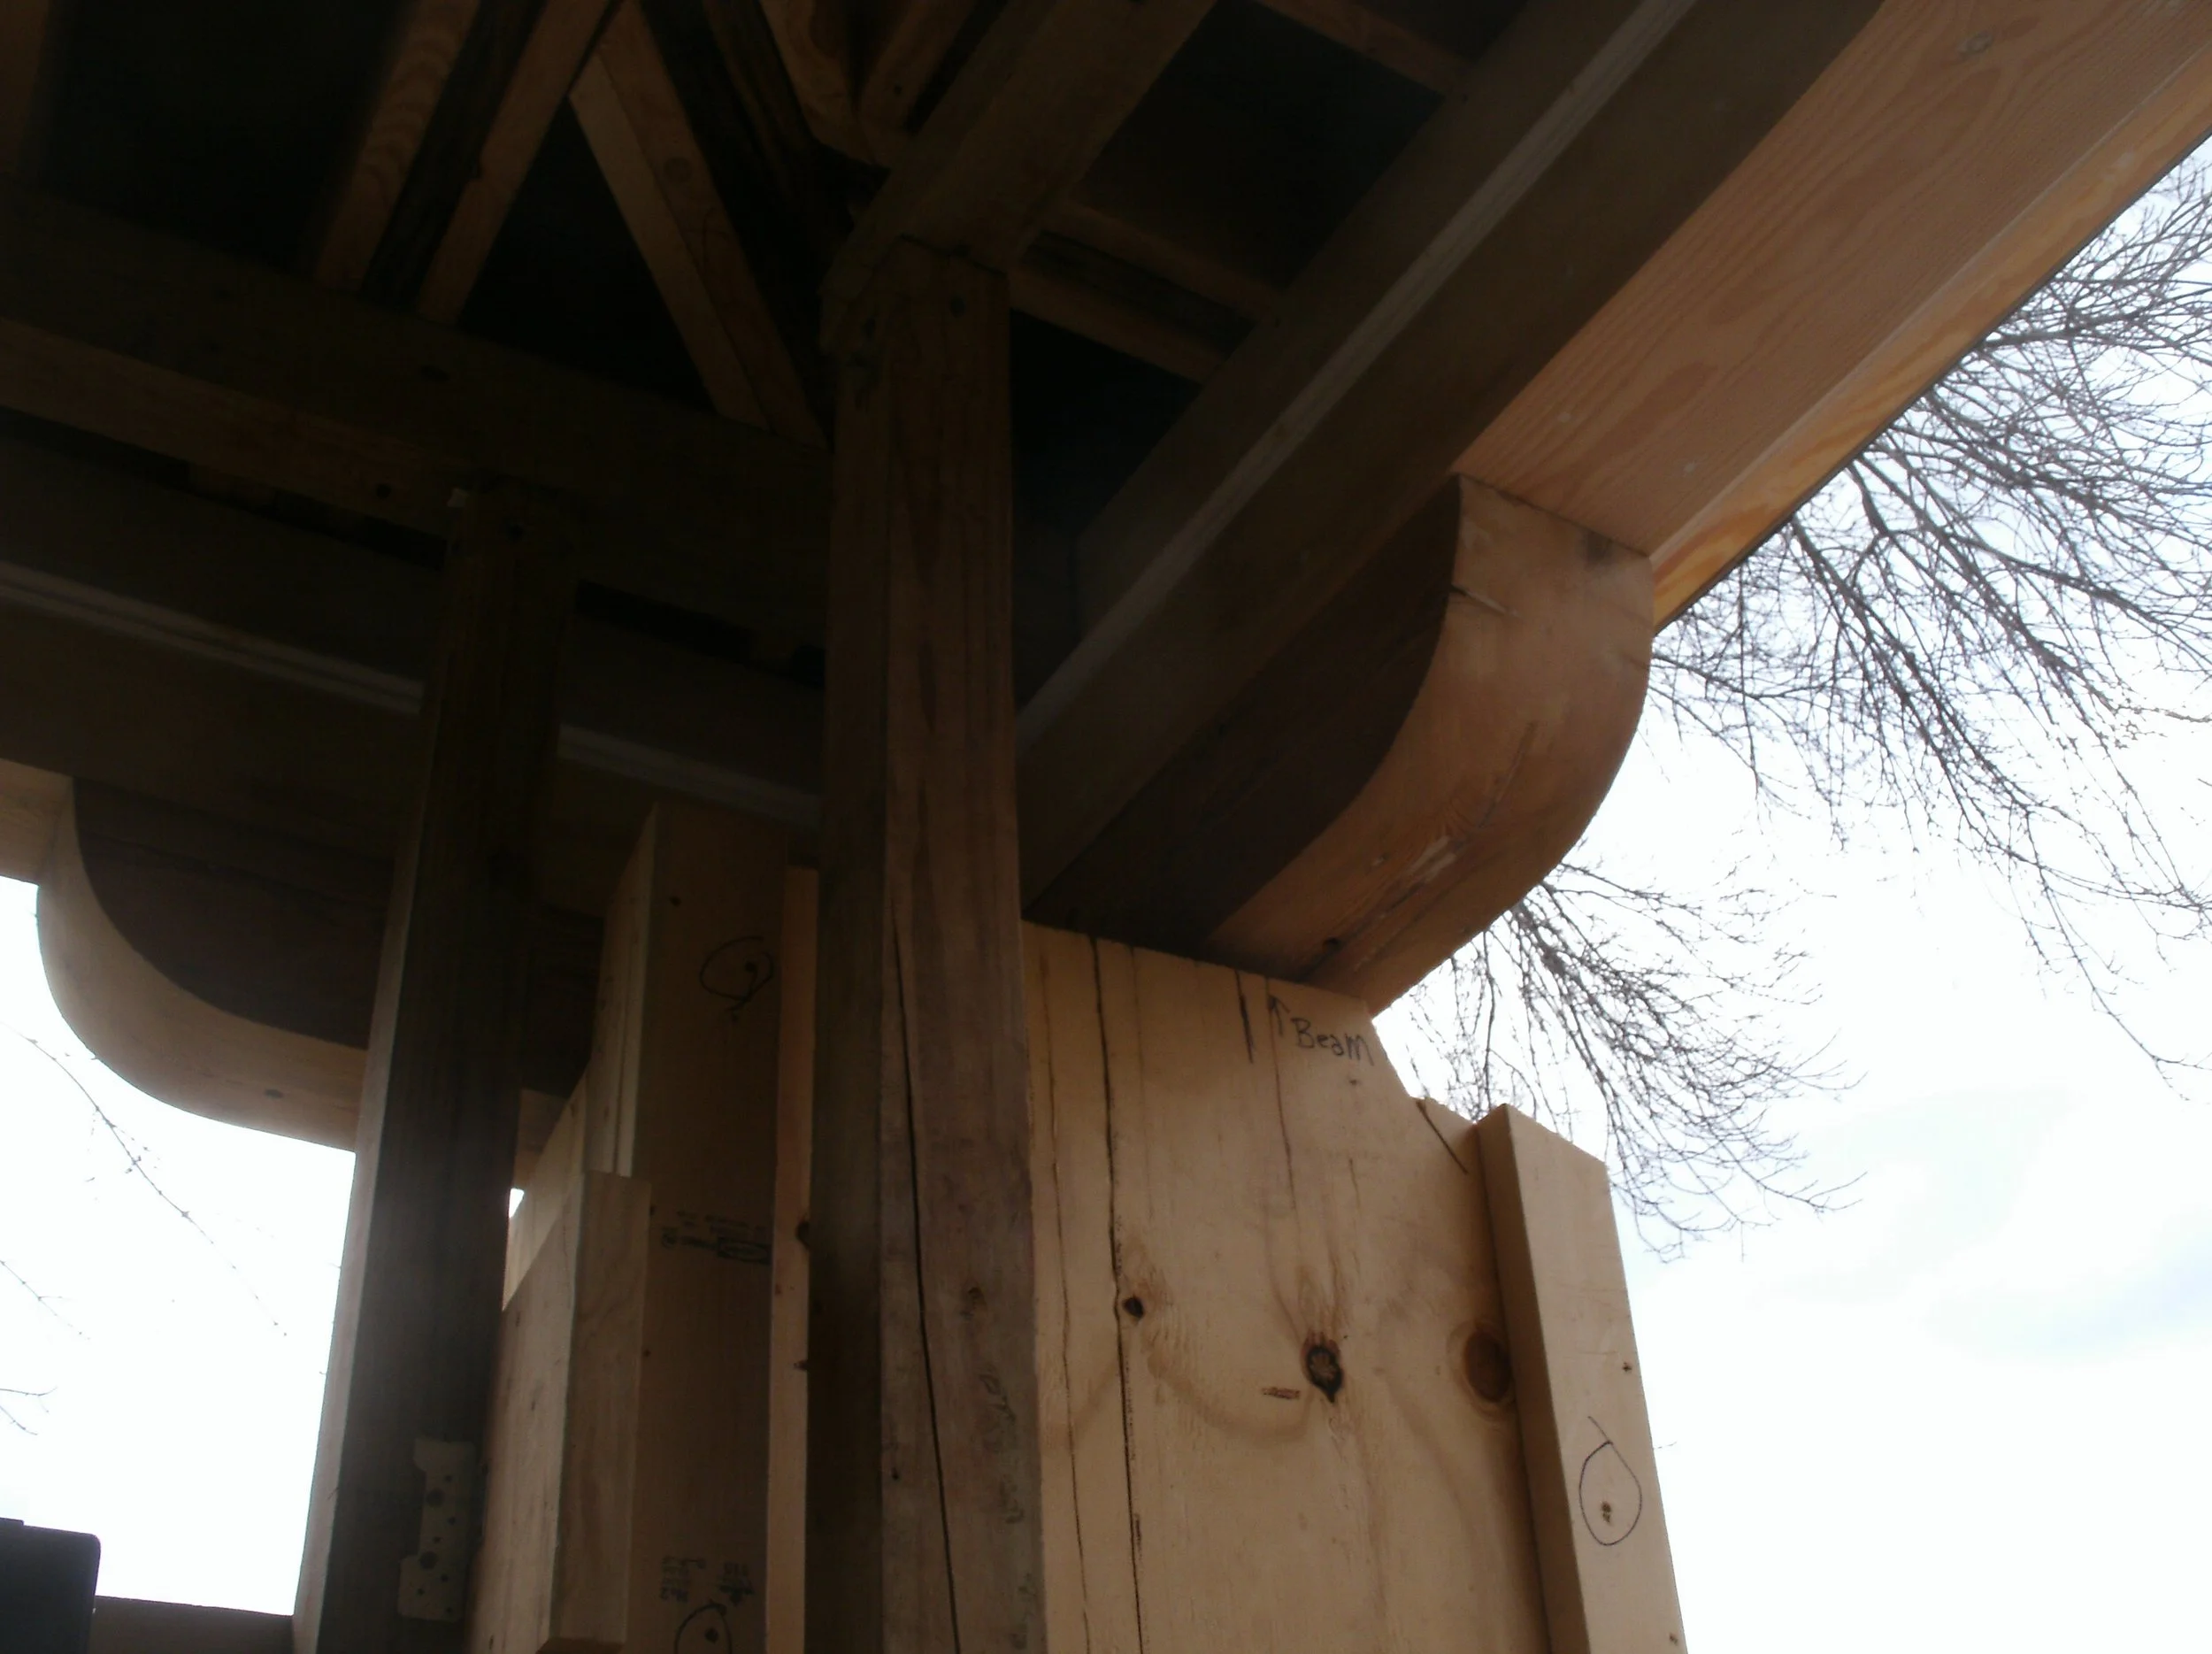
Giant three part LVL beam in place. New rafter extensions outside of beam.
A second few of the beam and the rafter extensions in place.
Curved end trim pieces cut and ready to fabricate.
Another view of the curved end trim pieces.
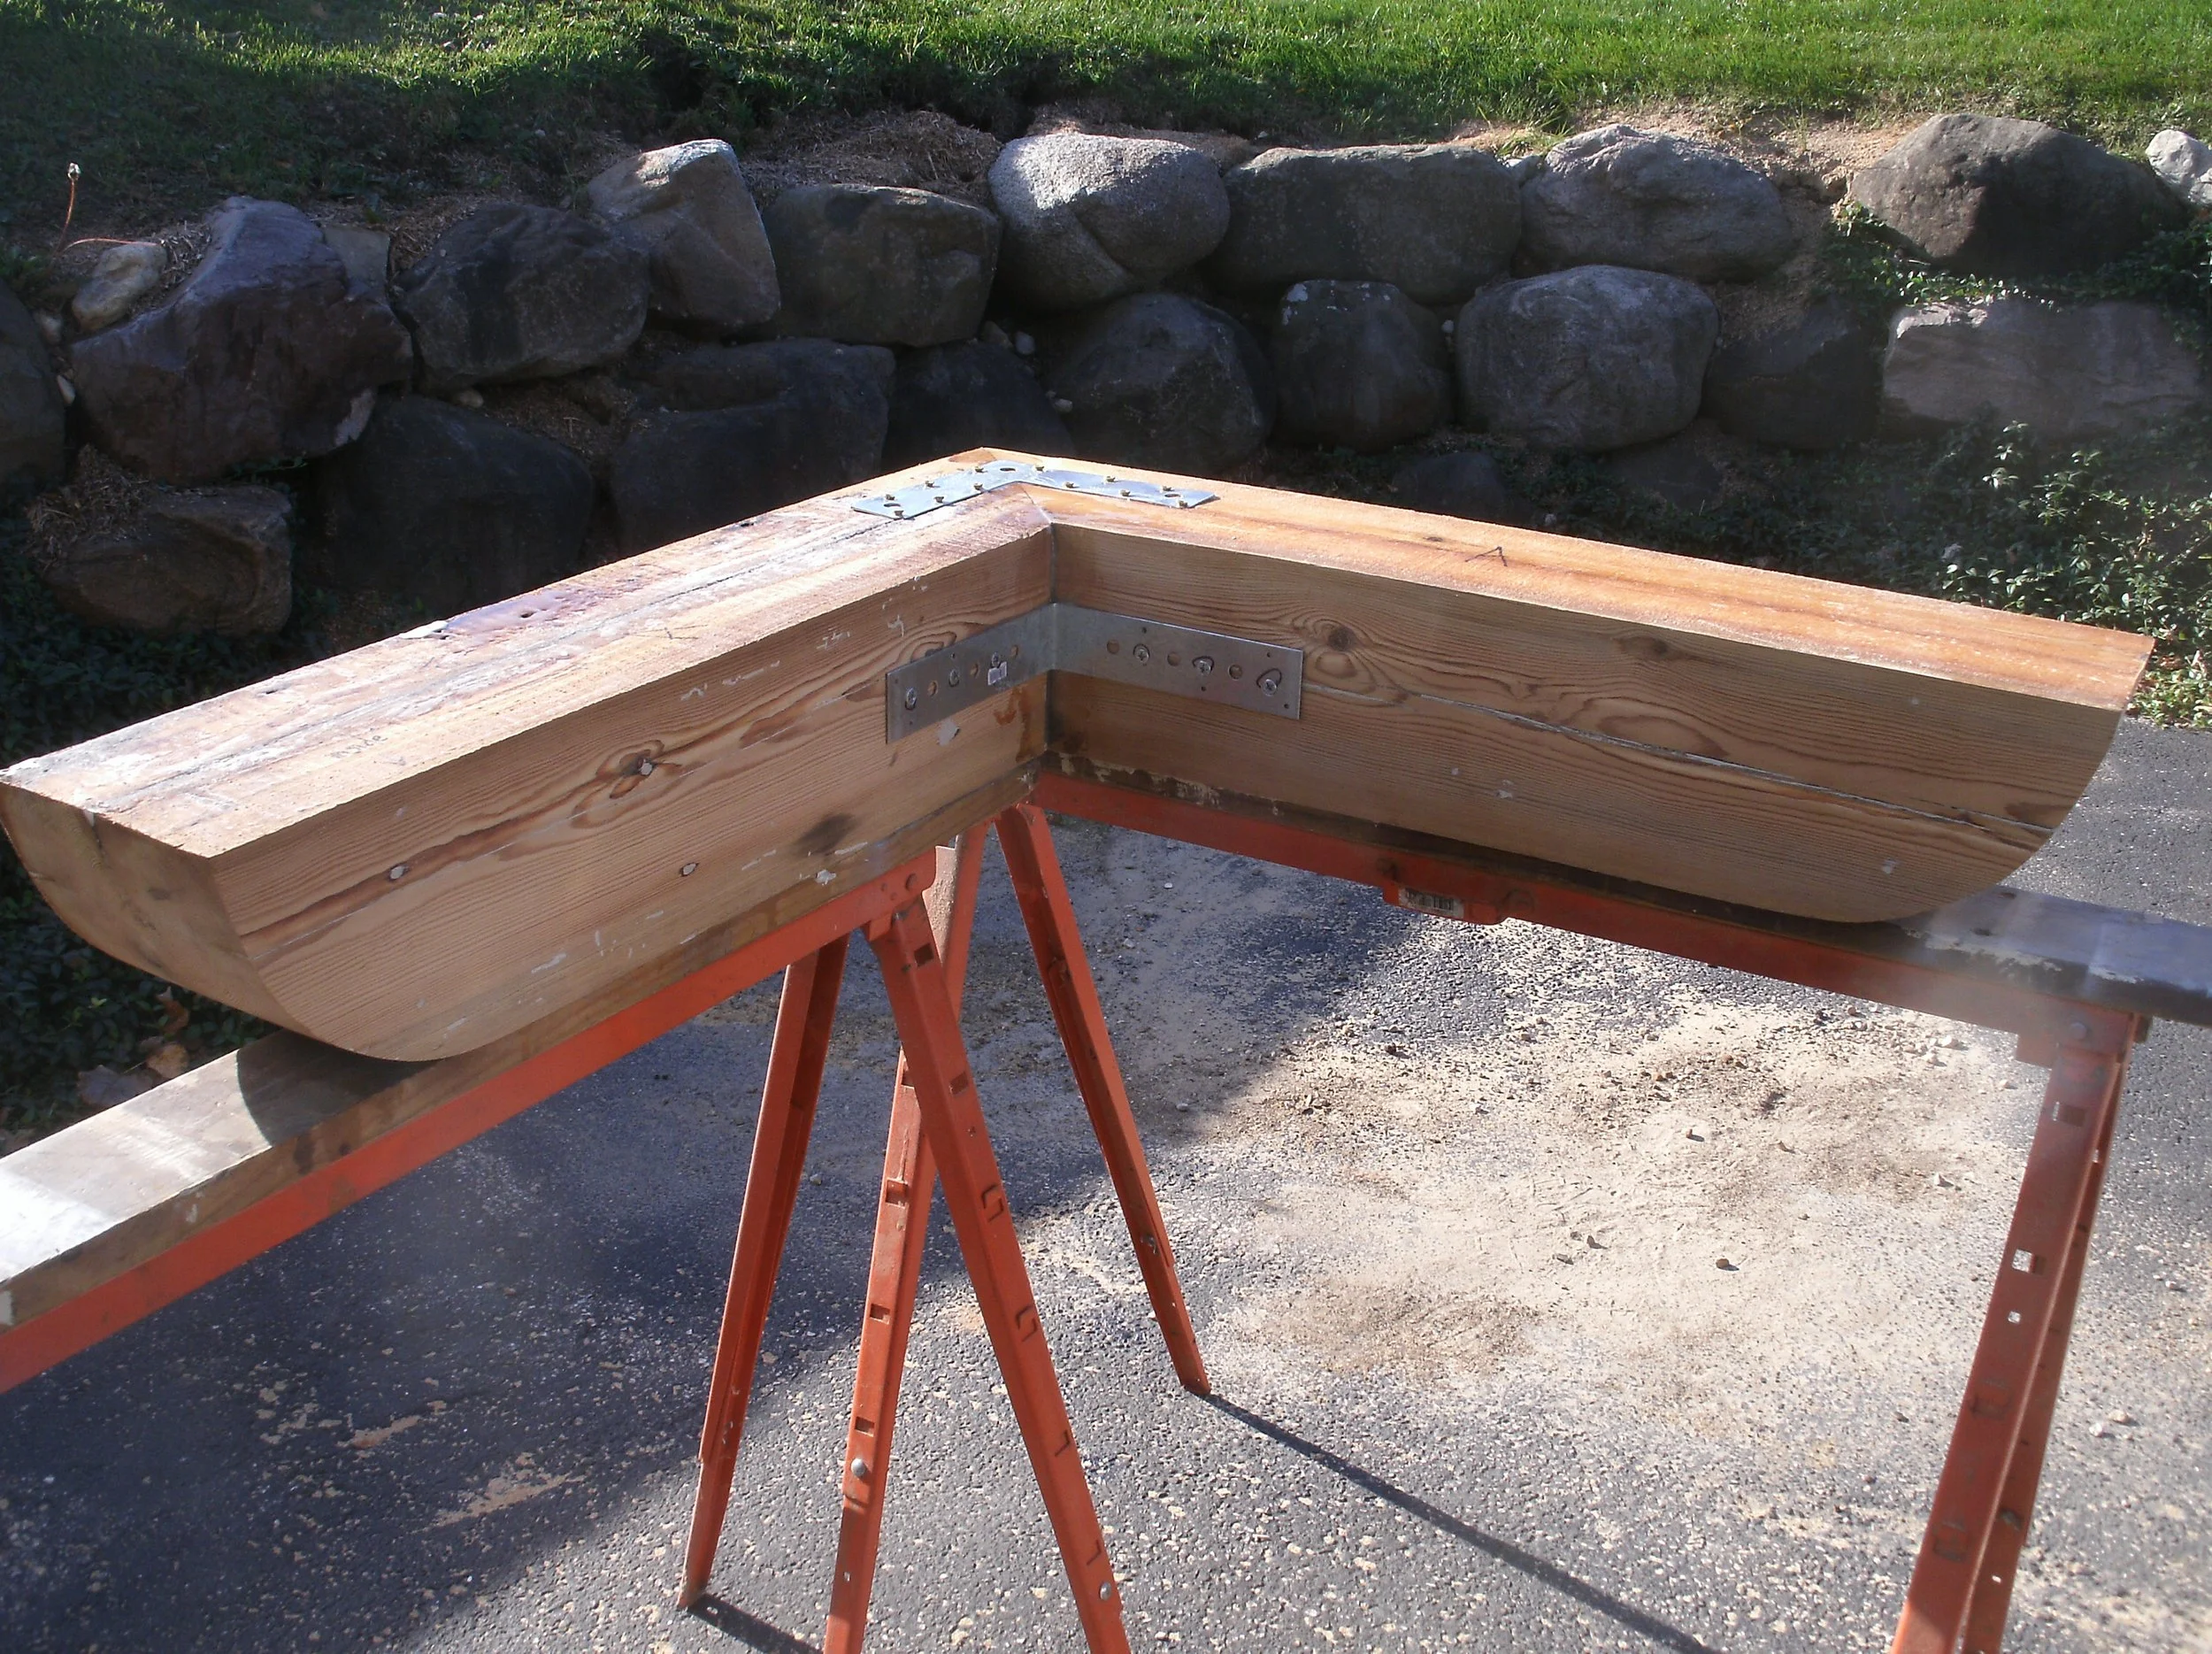
The first of the two part curved end, trim pieces attached together.
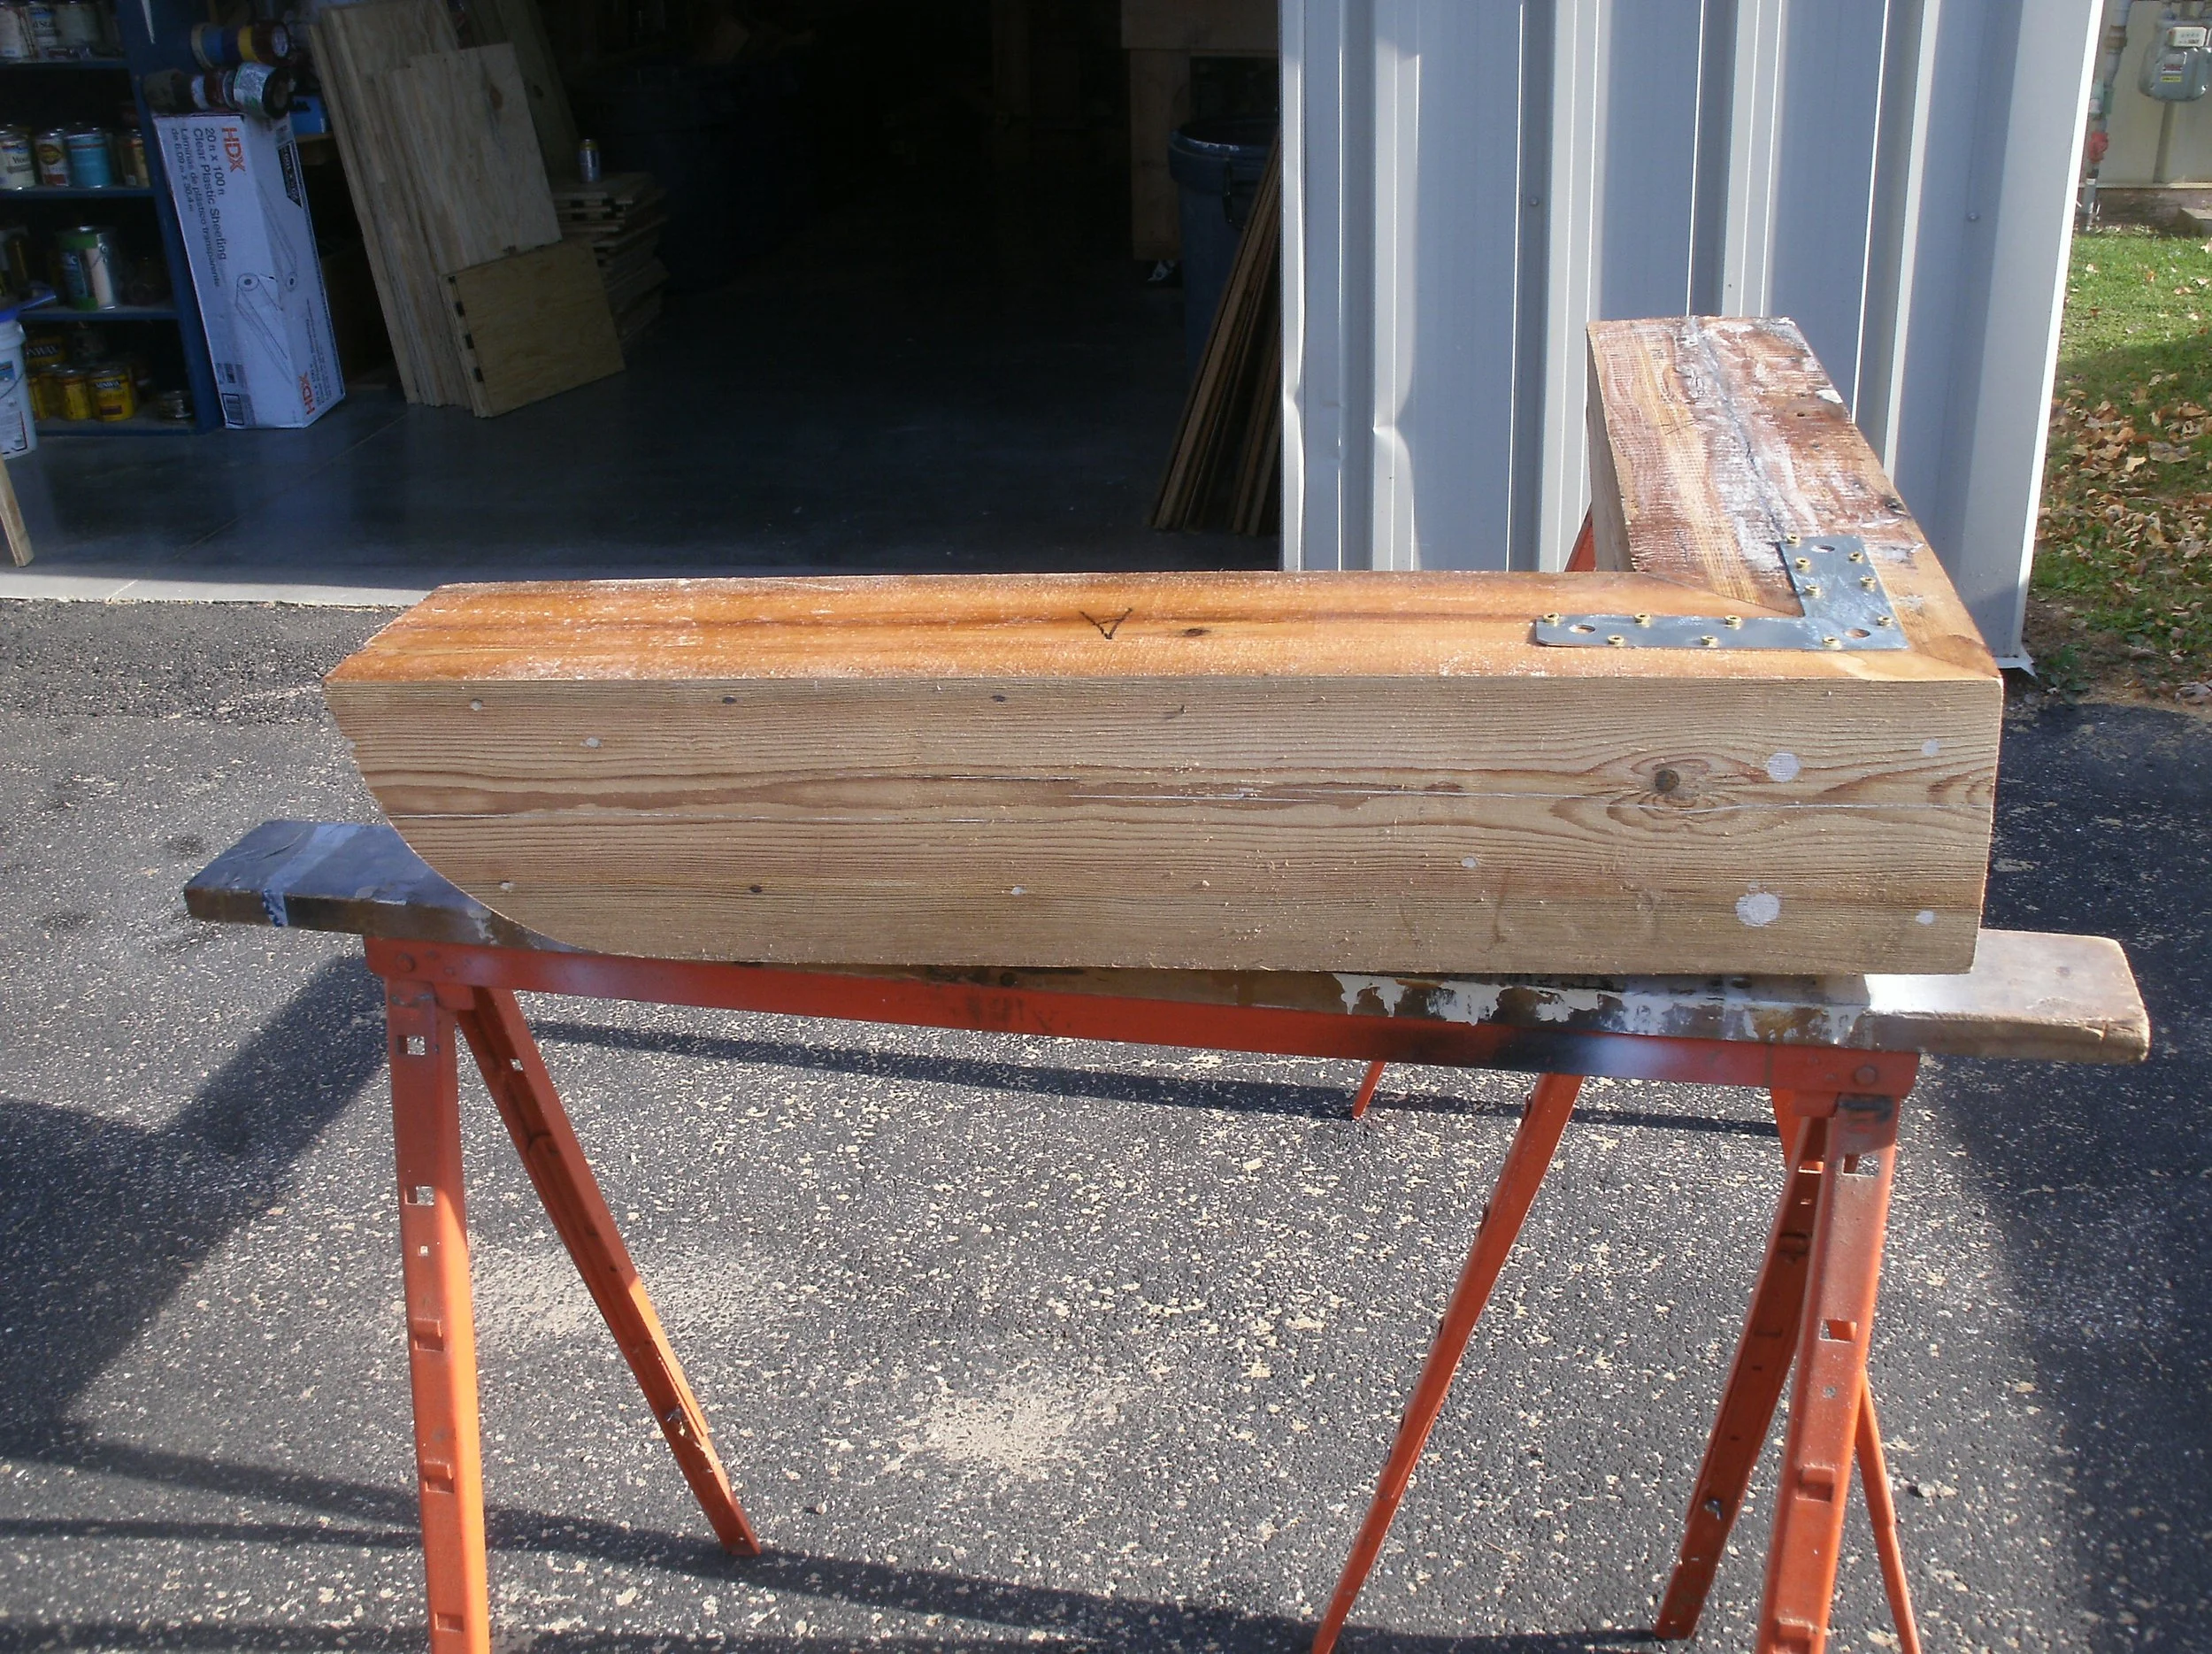
Another view of the curved end trim piece, ready to be installed.
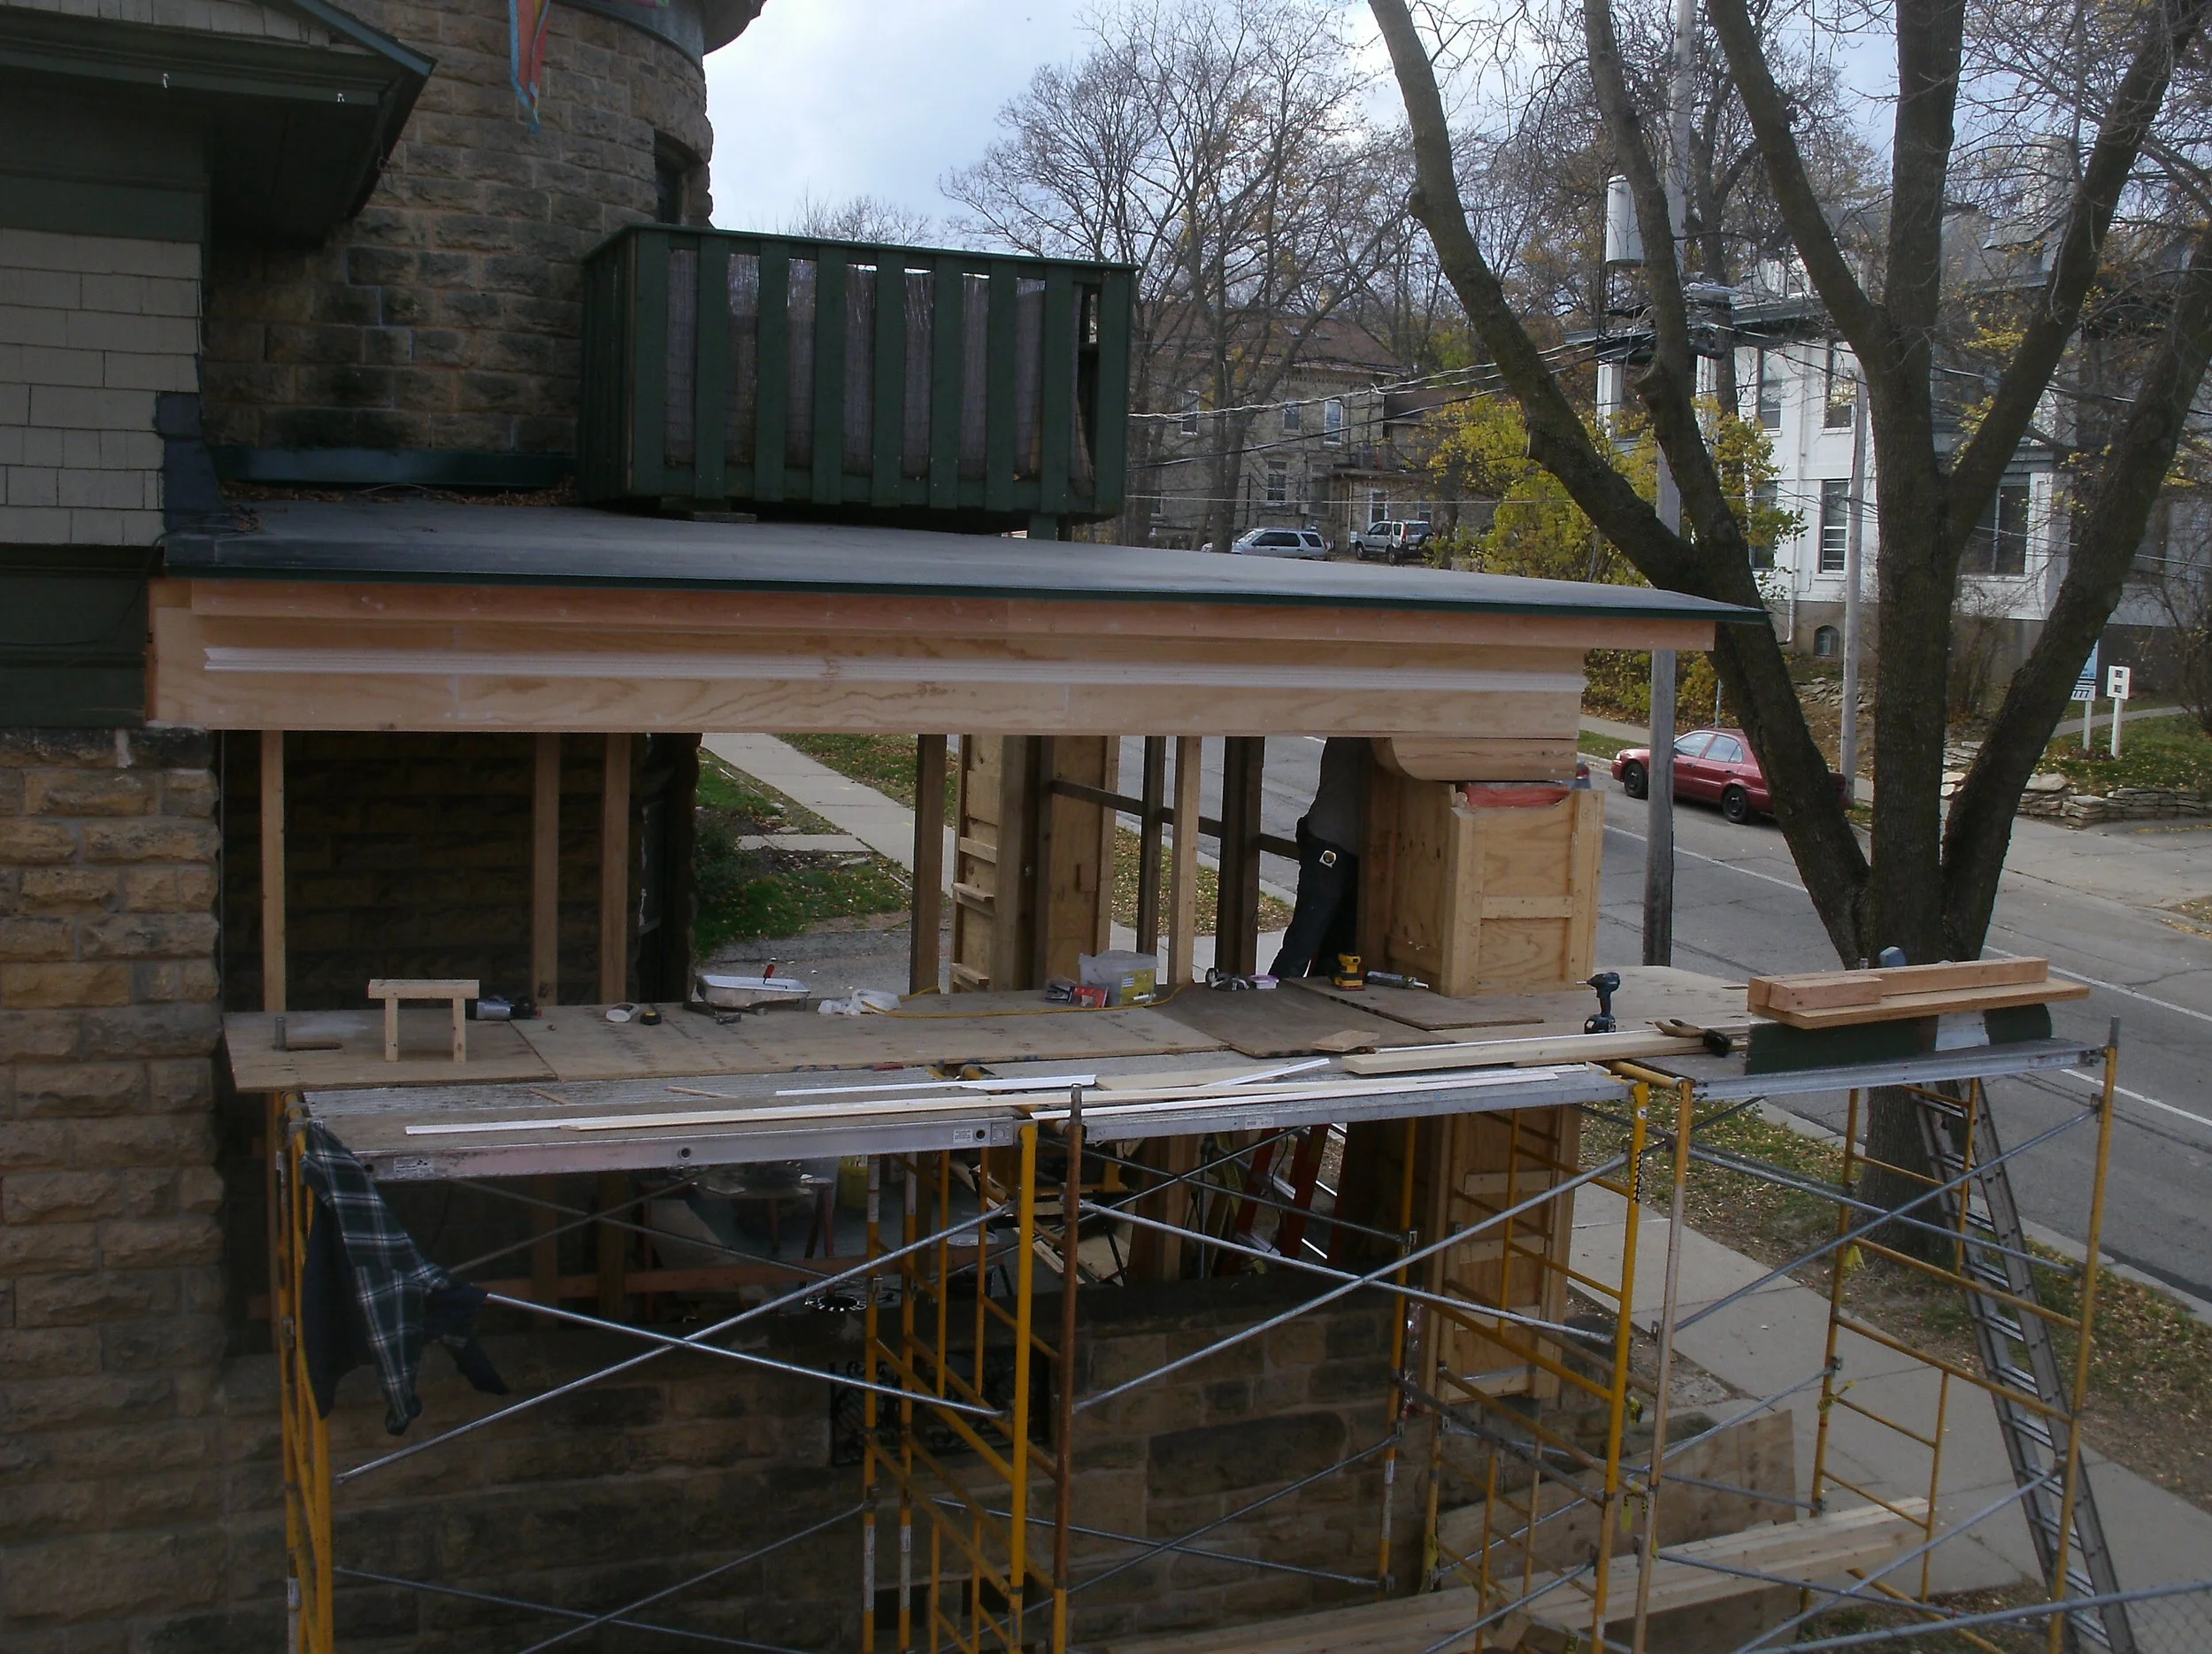
The cladding and trimming and finishing in progress.
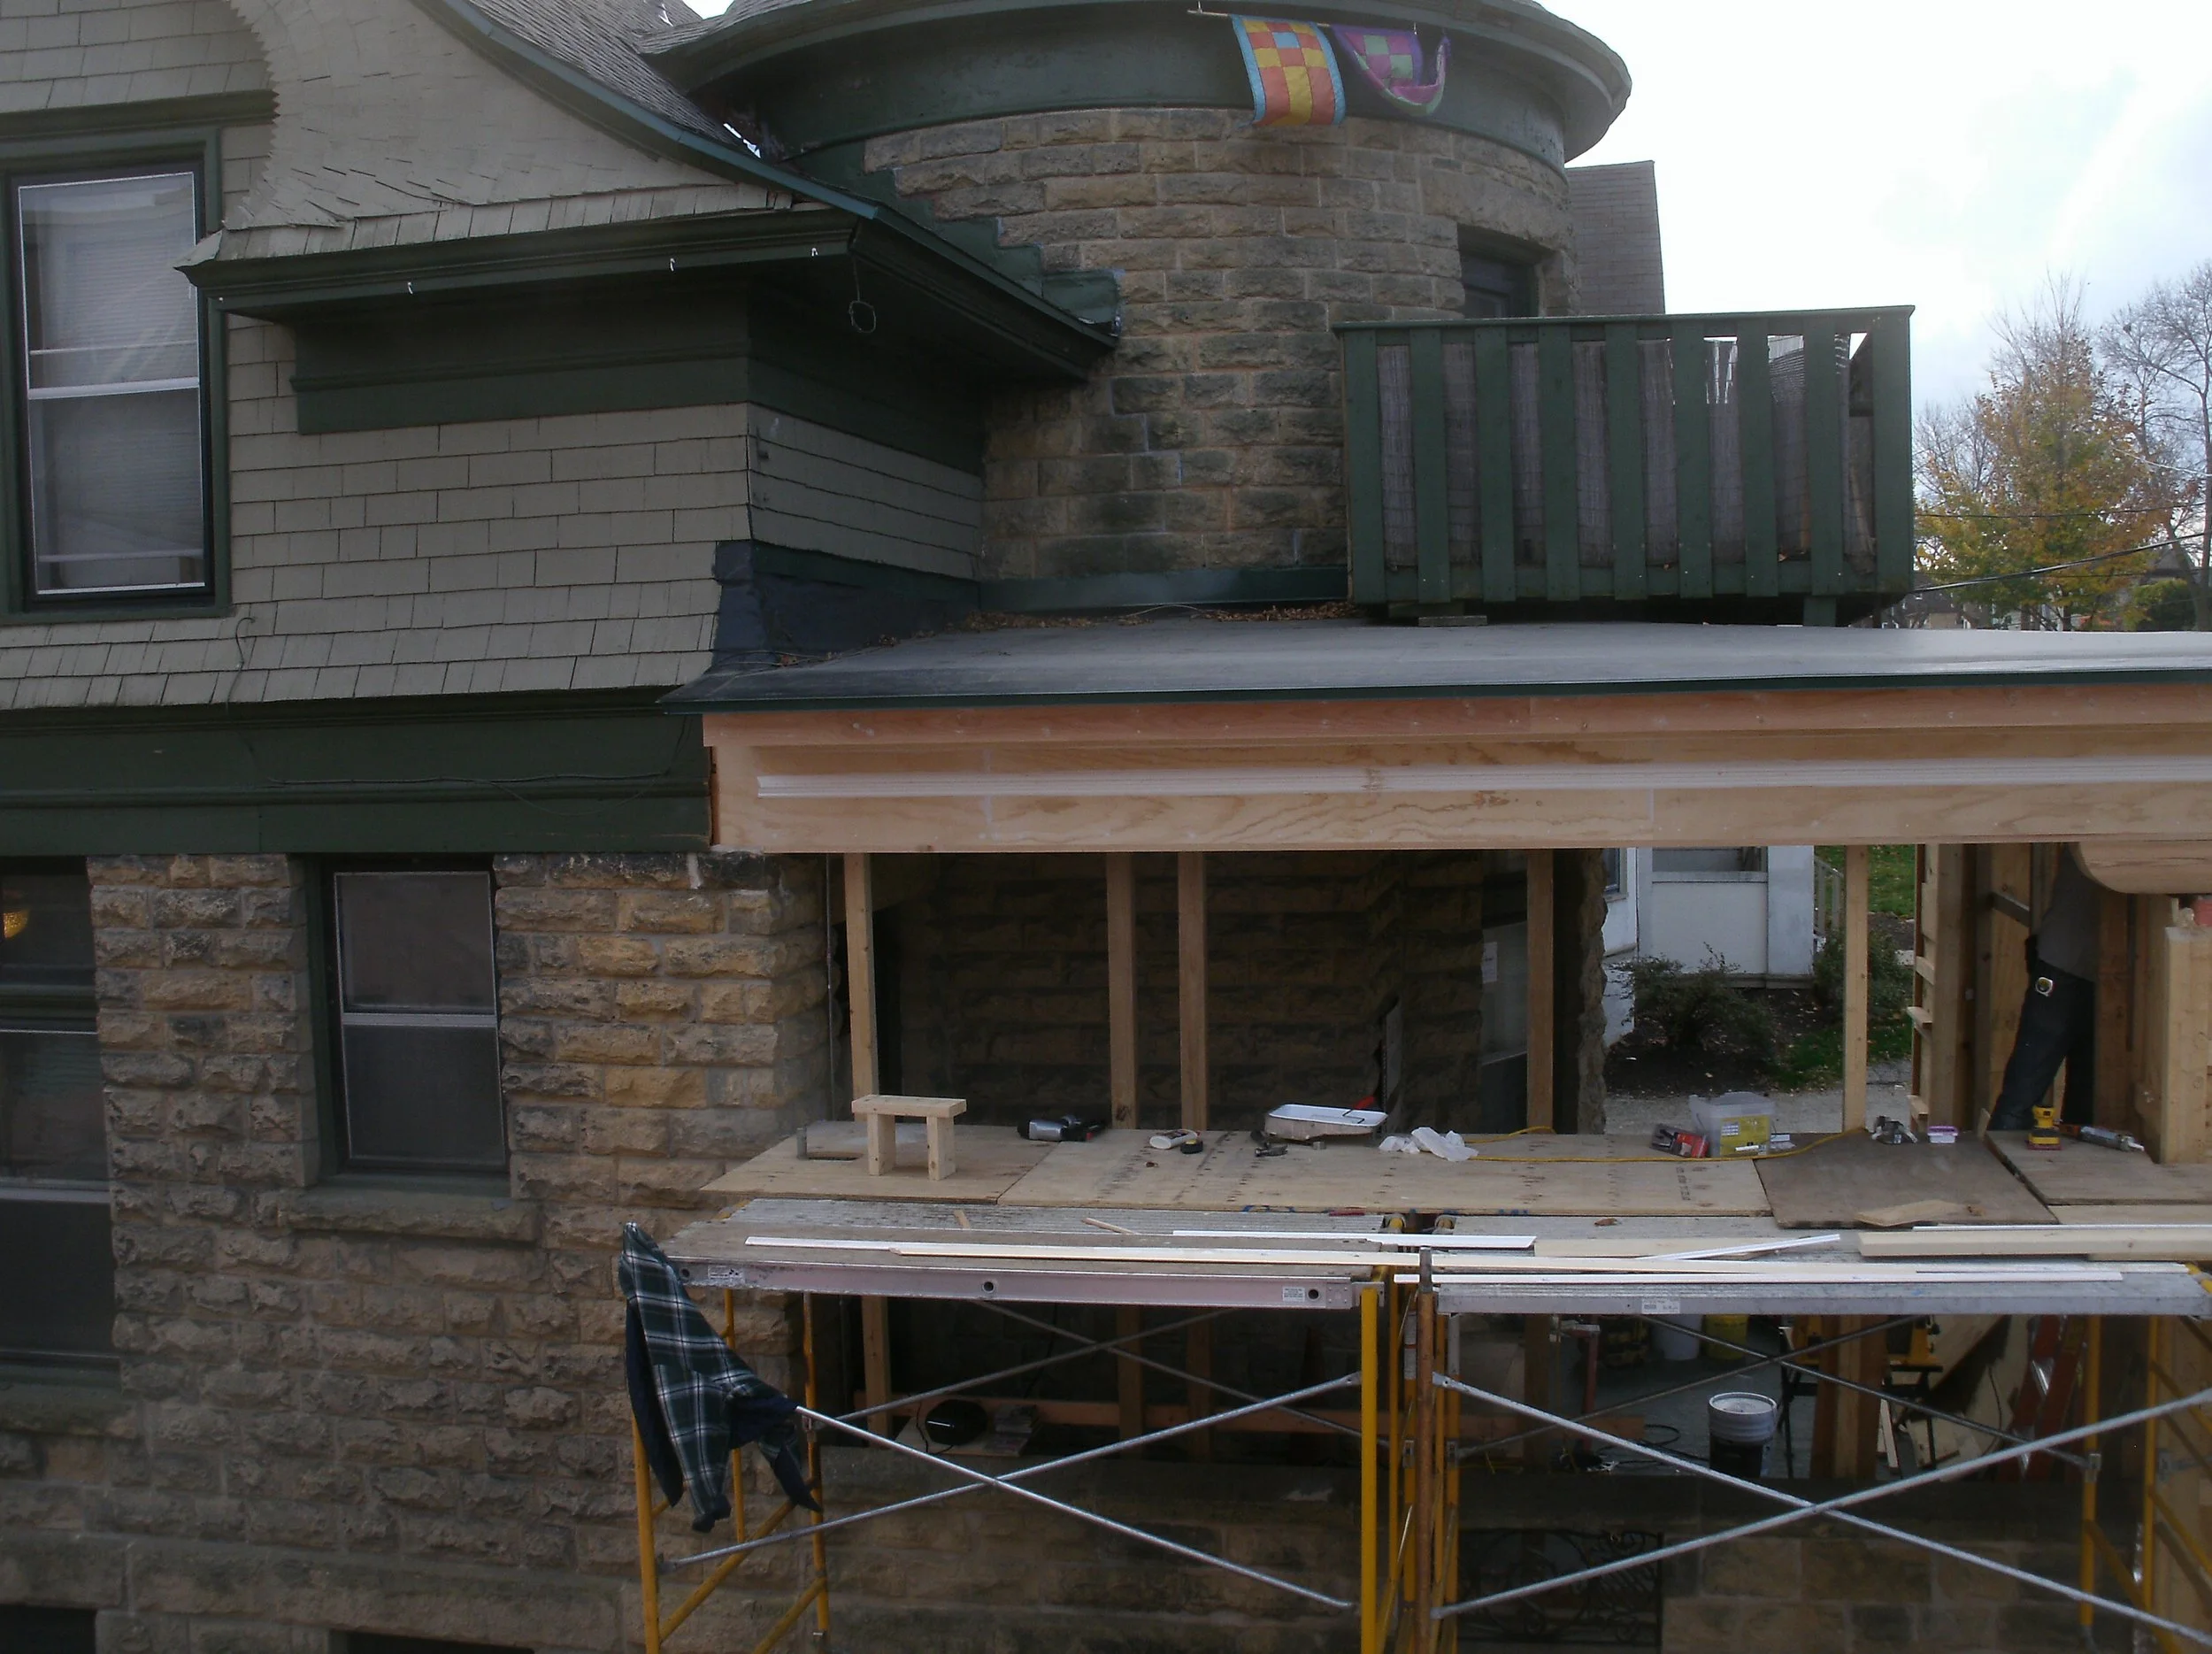
Cladding and trimming terminating at the main house, phase 2 of the restoration.
Mood lit view of the progress.
View from the east end of most of the components installed.
View from the east end of most of the components installed.
Another view from the east end.
Priming three coats and painting begun.
Painting done.
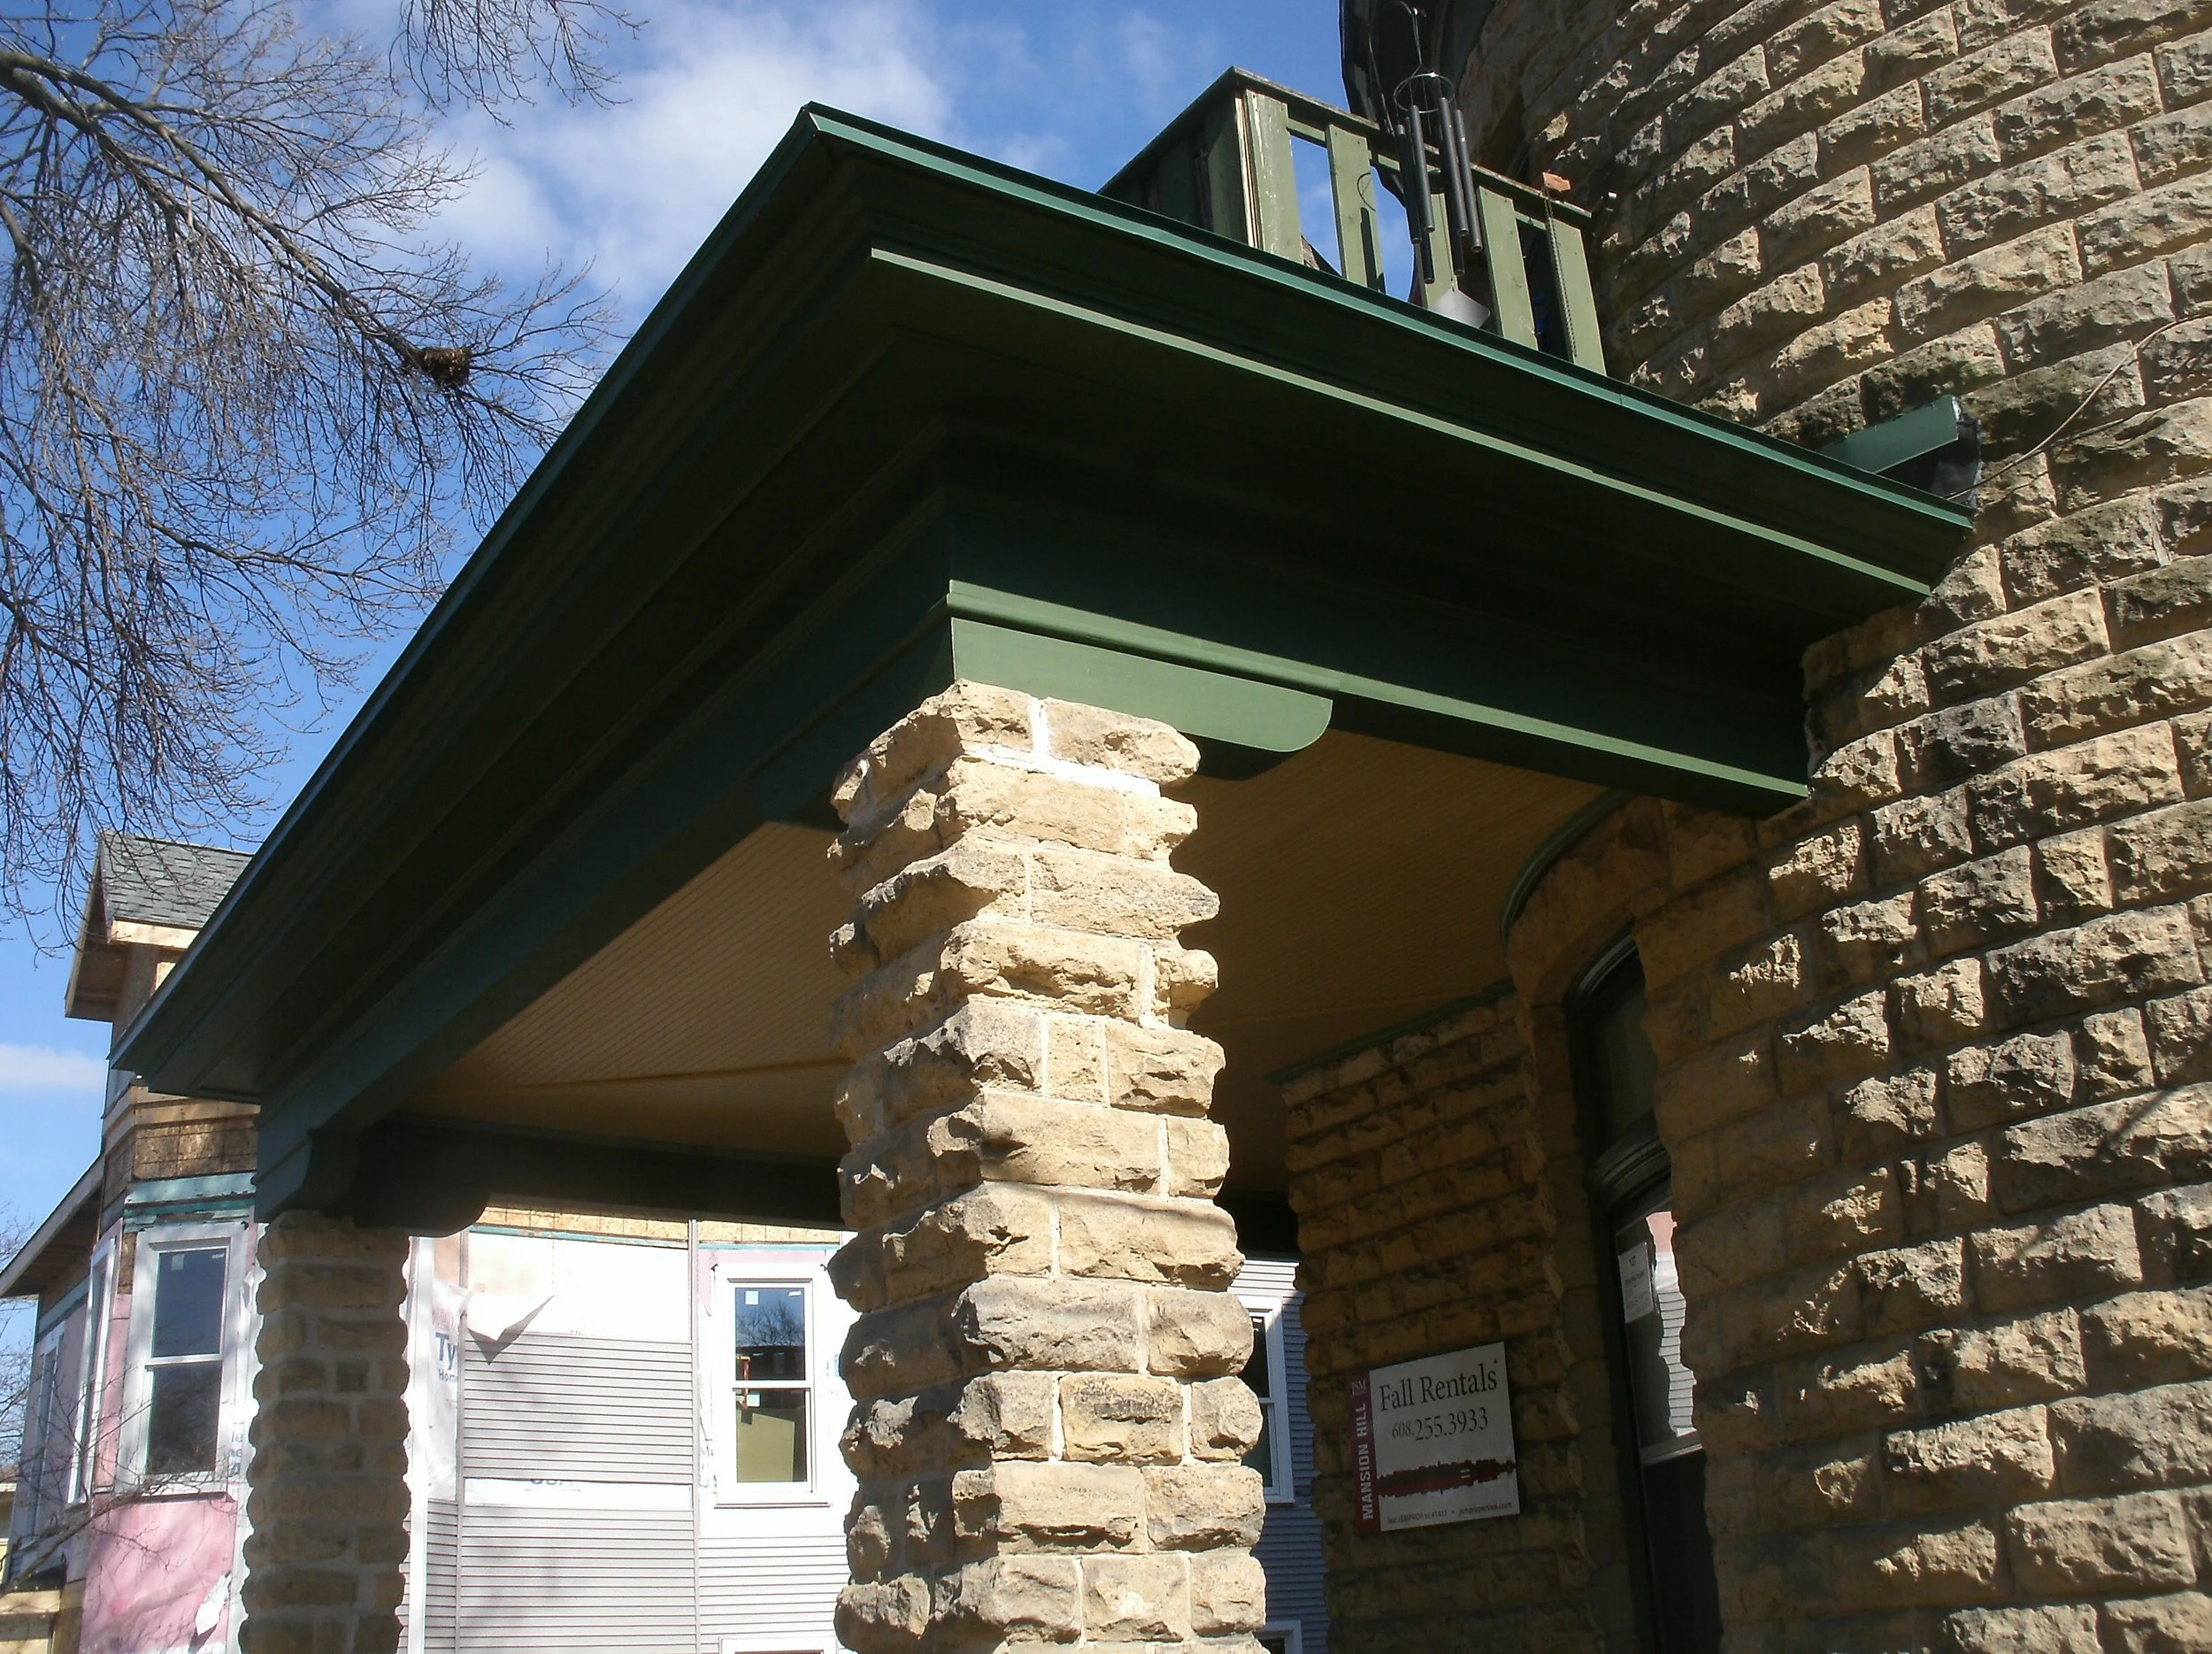
View of west end and front painted.
West end painted. I love the scale and grandeur of the porch components.
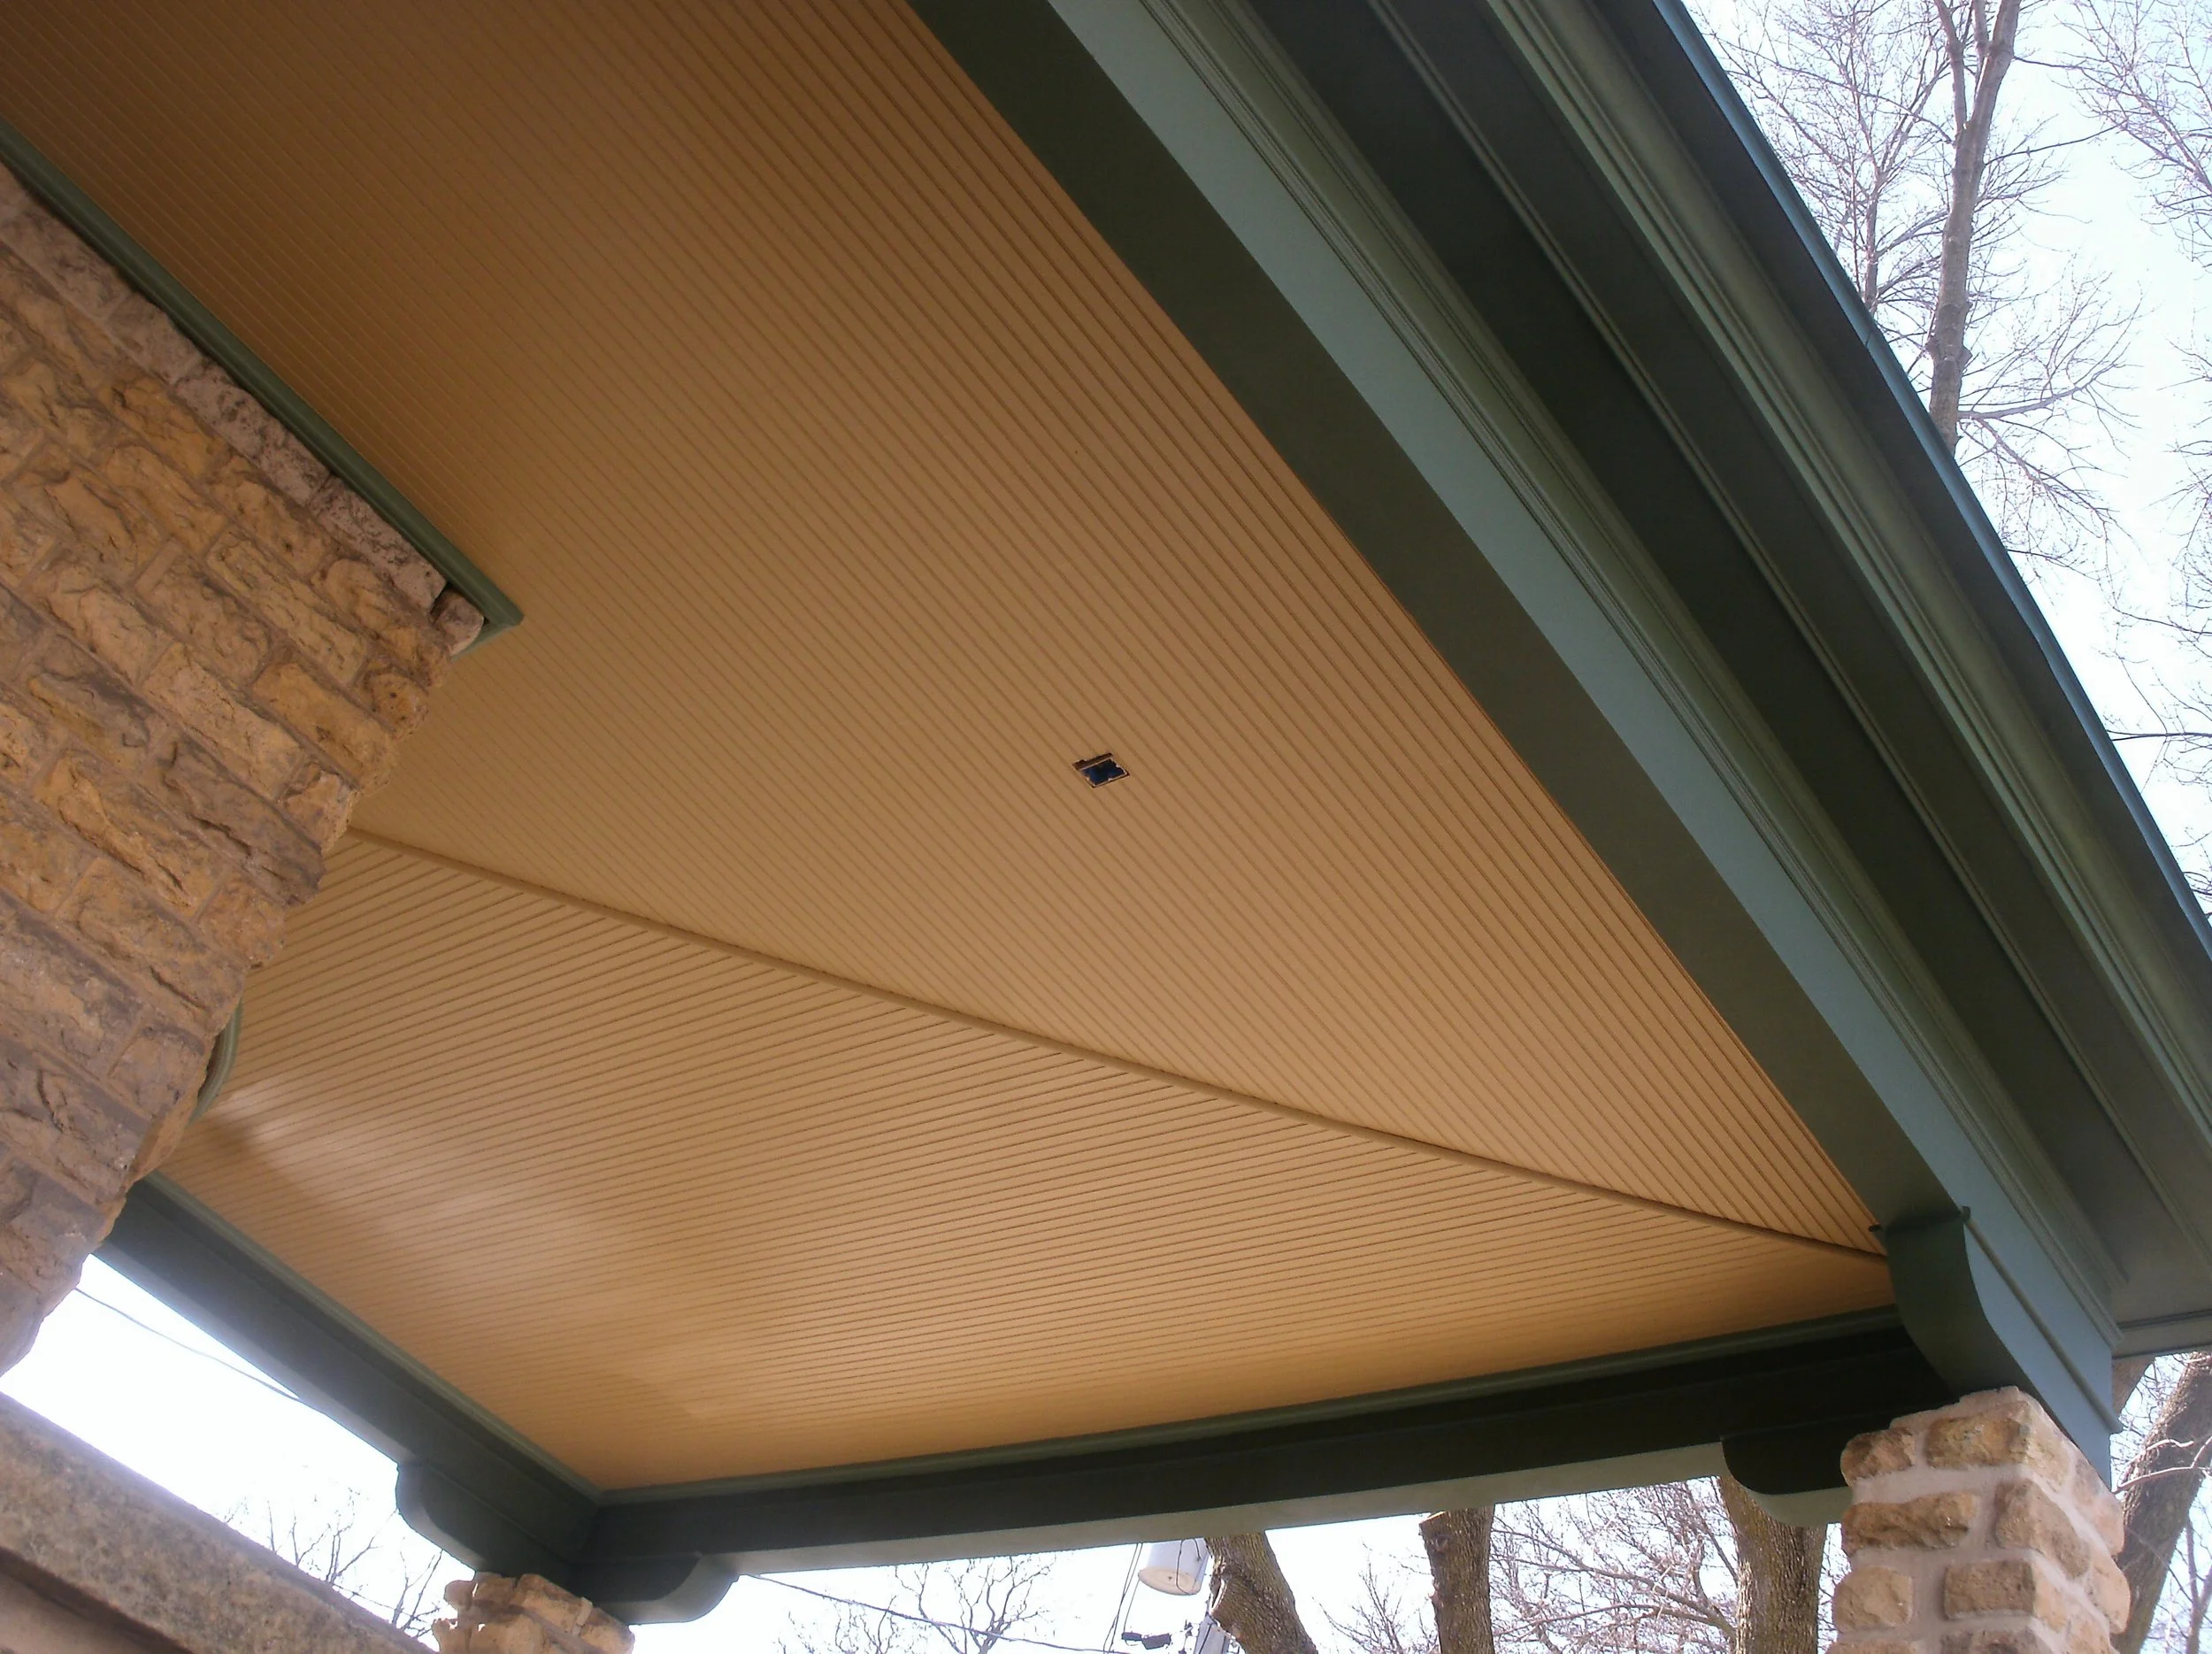
Porch ceiling composed of beaded ceiling tongue and groove individual pieces.
Another ceiling view painted.
Another ceiling view painted.
Another view with the curved trim which I fabricated installed and painted.
Full view of the curved trim installed and painted.